

Deconstructing a Quilt Panel: Part 2
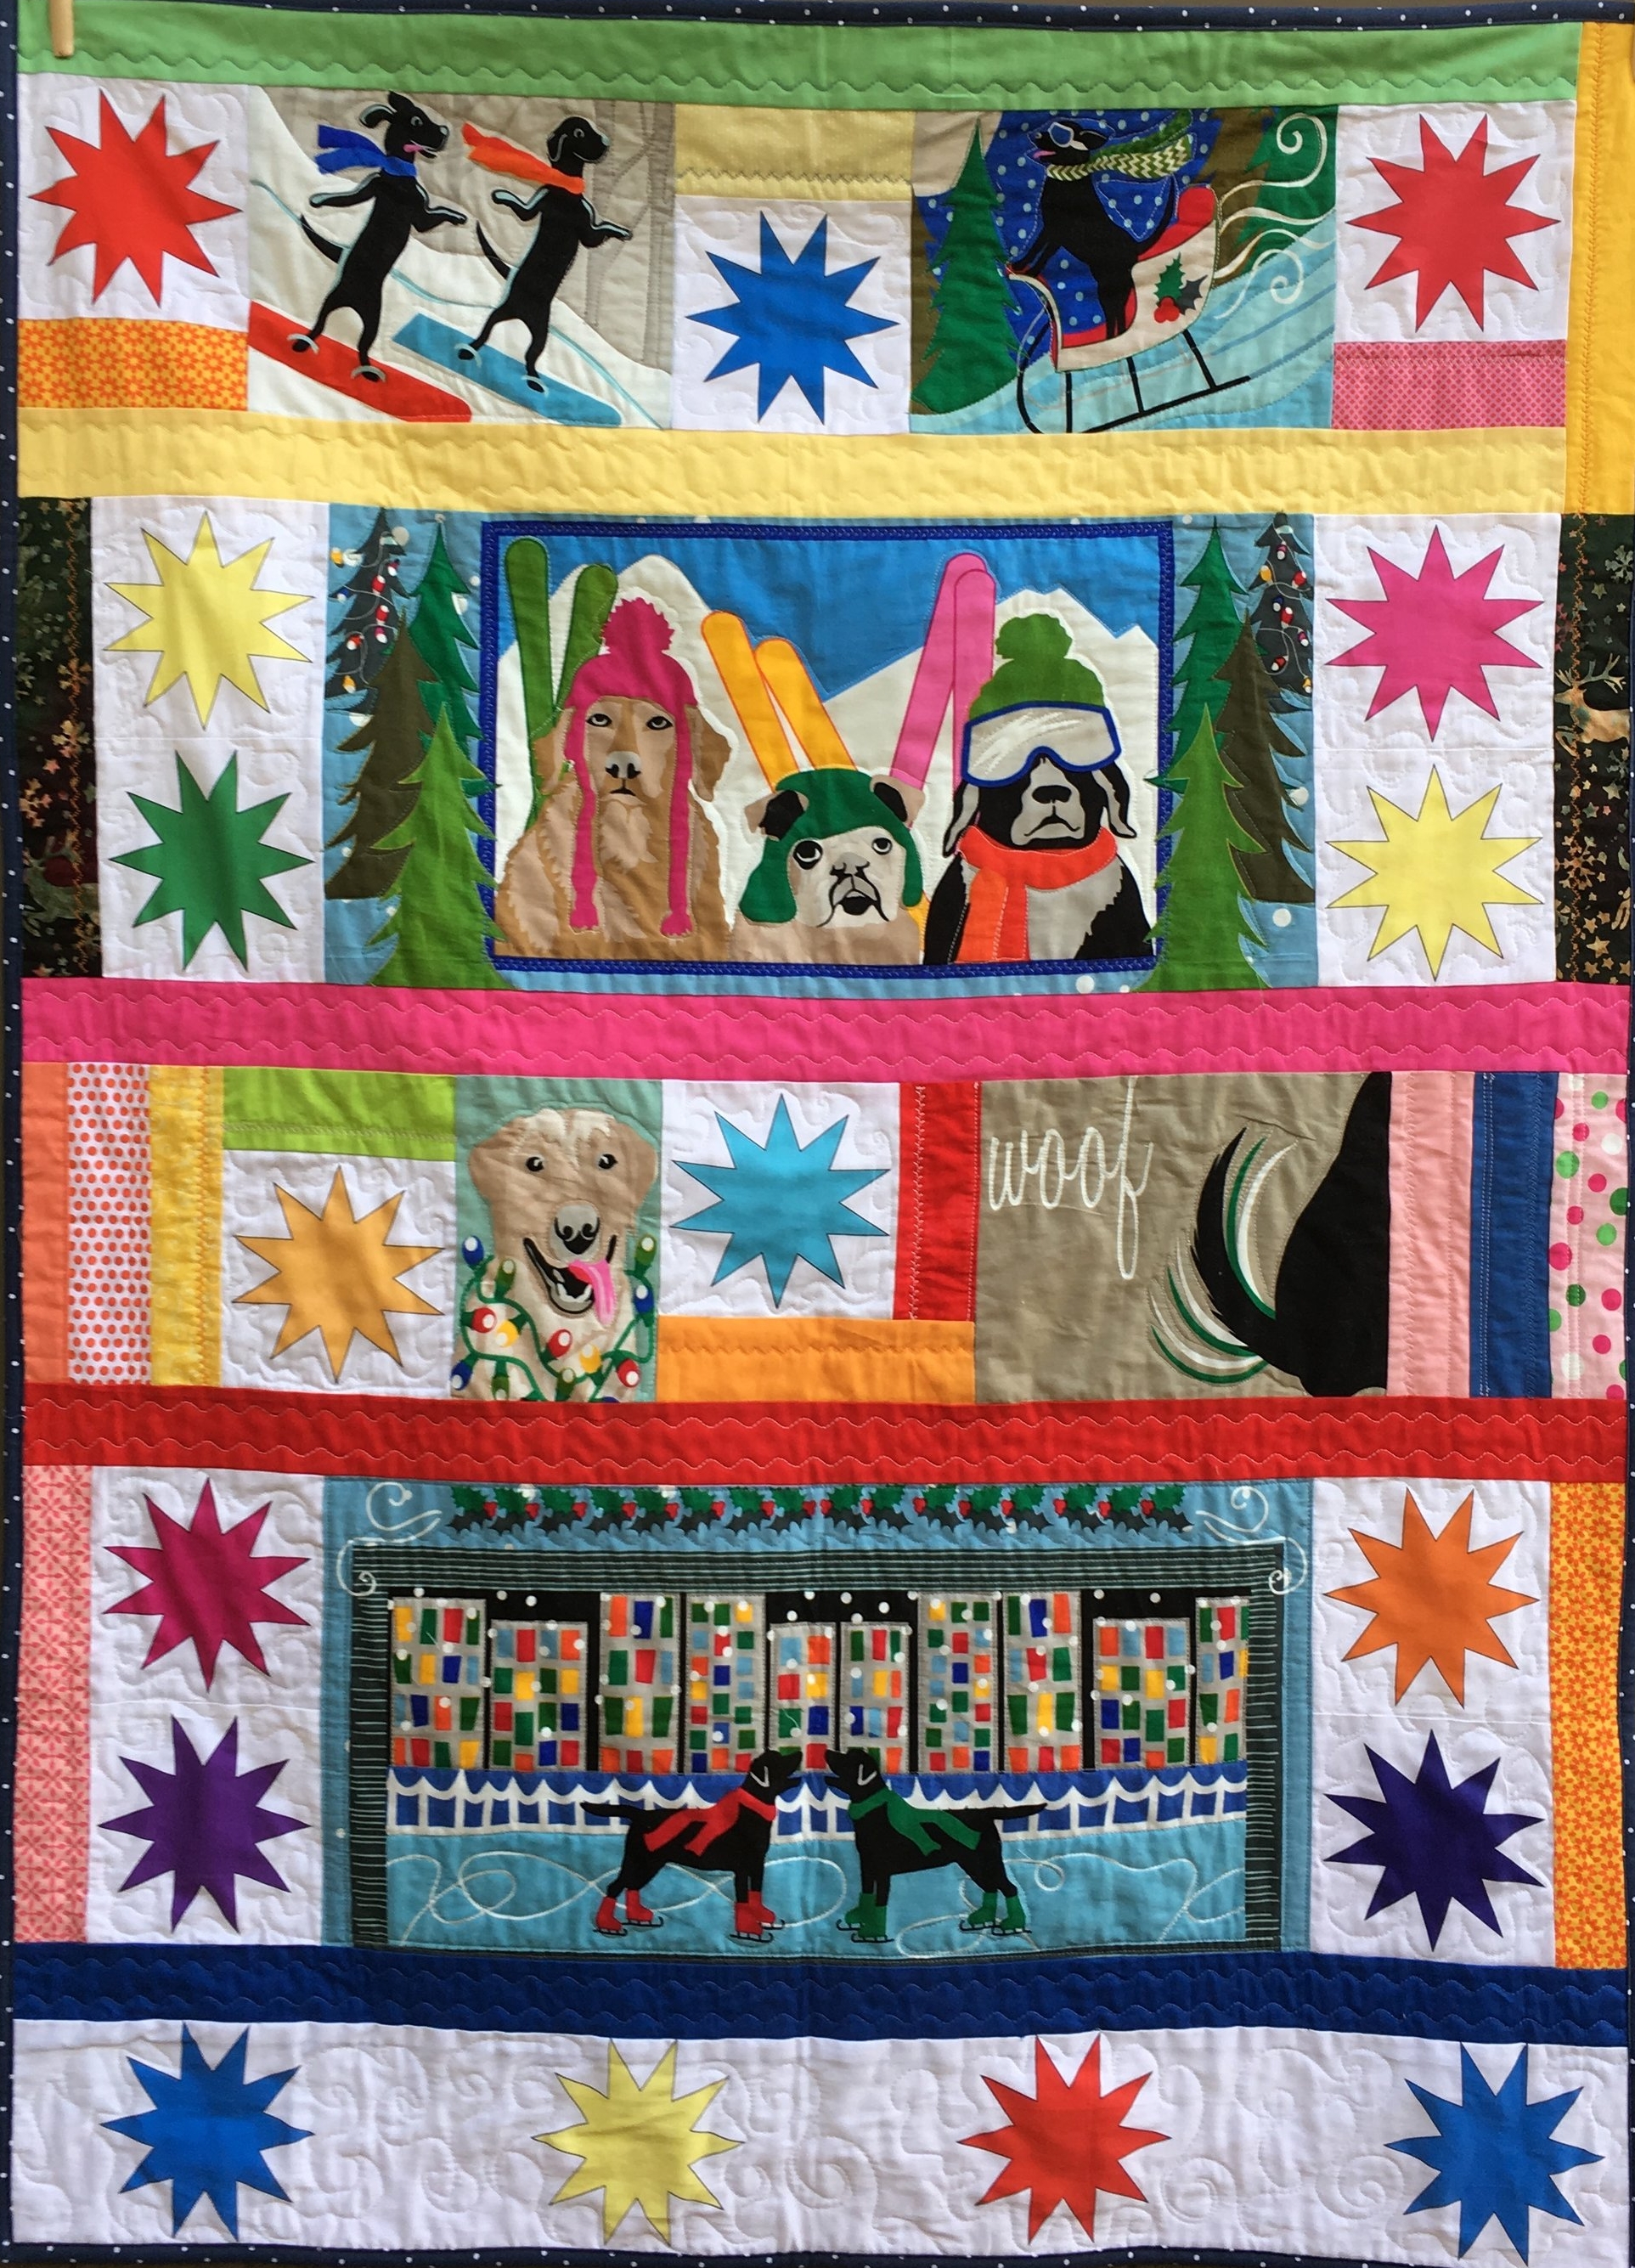
"Winter Pups" Lap quilt 37 x50 inches
"Winter Pups" Lap quilt 37 x50 inches
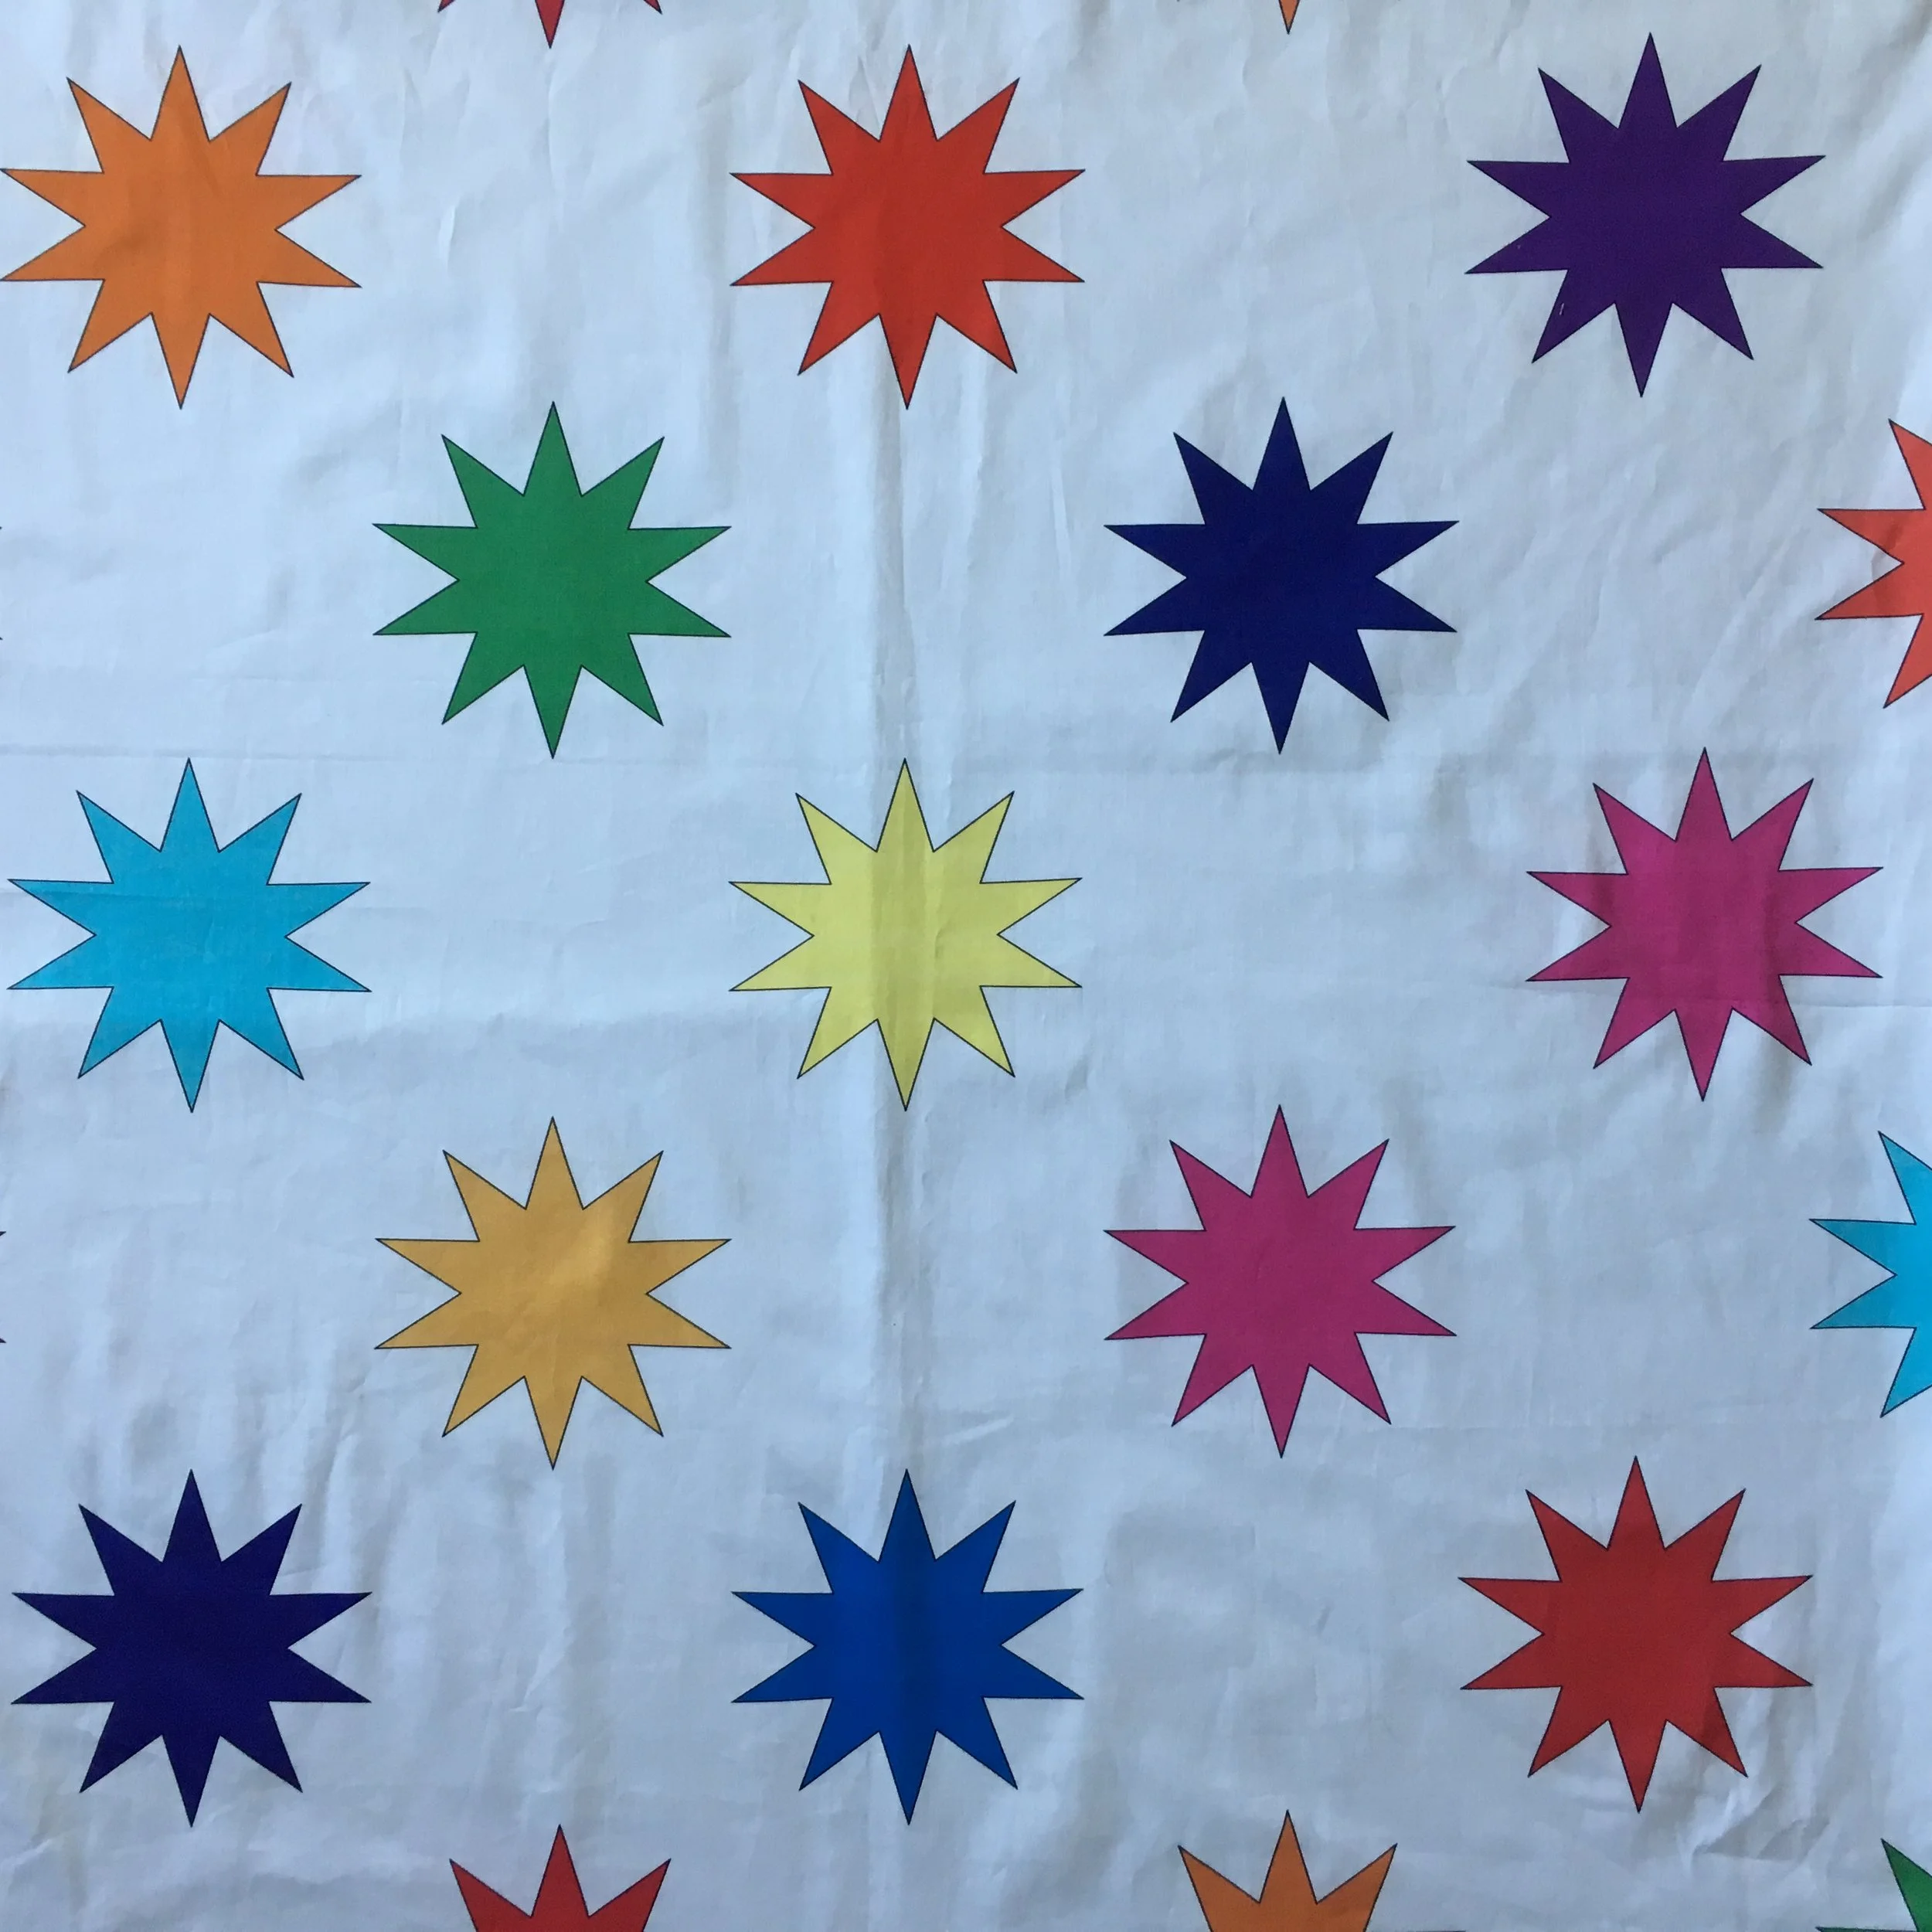
In my last post, I showed a commercial quilt panel with a winter dog motif and yardage from my Spoonflower.com site, "StarPower" and talked about deconstructing the quilt panel and creating something new.
Here's the finished quilt, "Winter Pups".
I added fussy cut stars, strips from my stash of of left over 2 1/2 inch strips, removed printed words I didn't want, and rearranged the sections of the printed quilt panel. Here's a photo of the original panel for comparison.
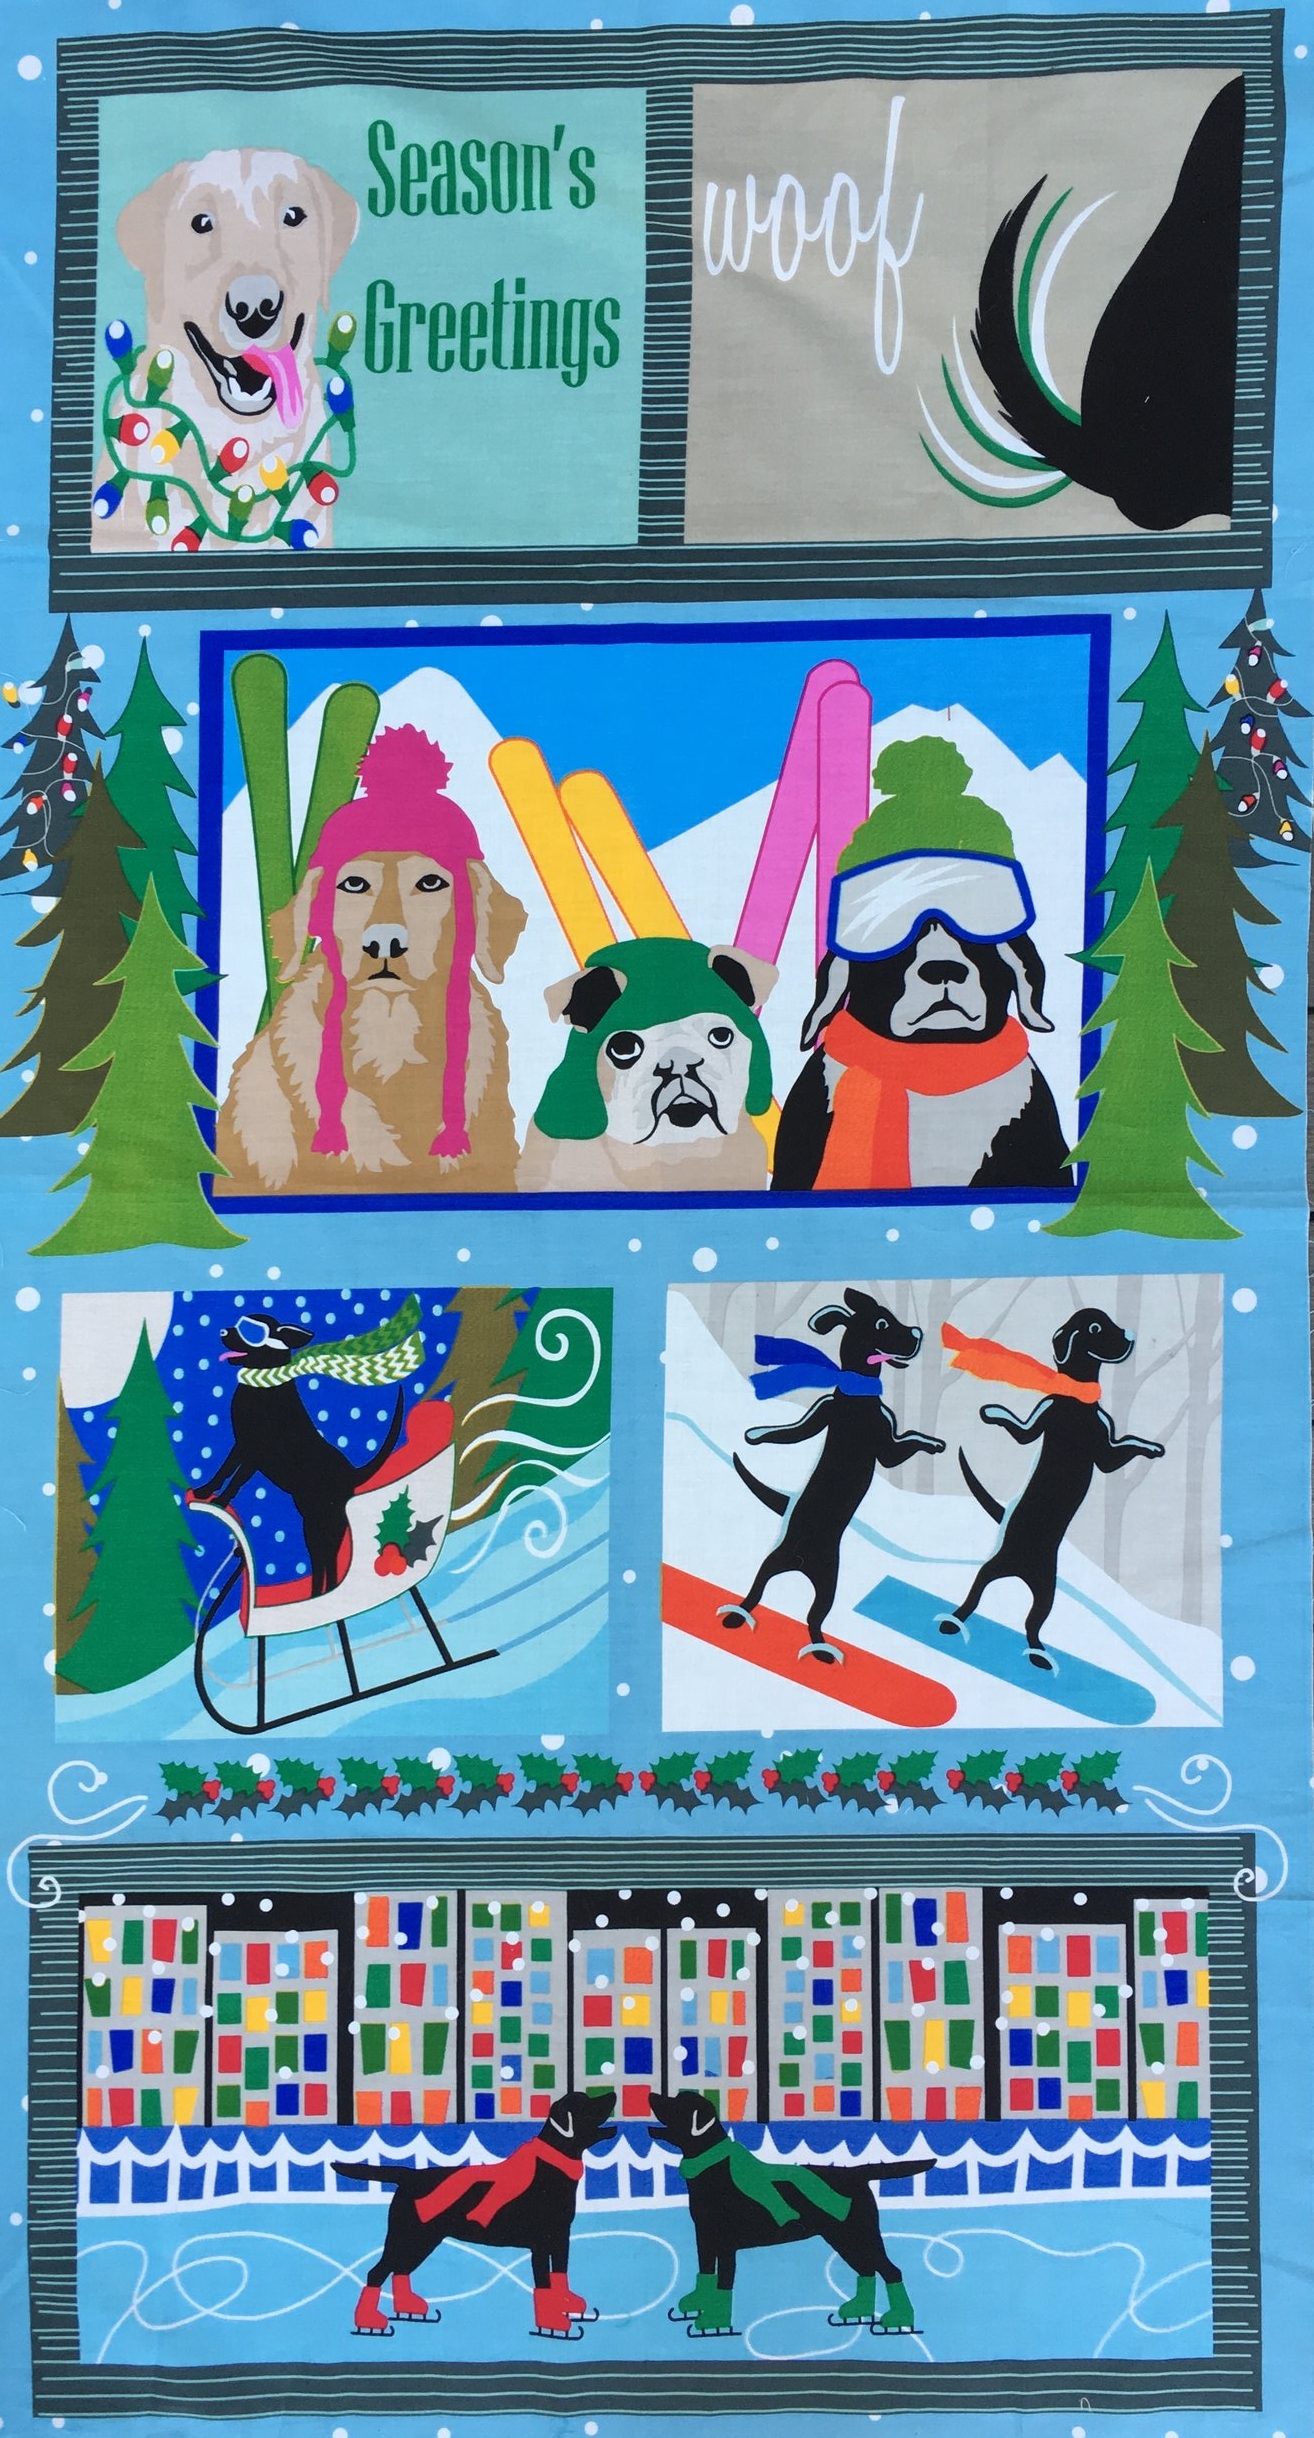
The original quilt panel
The quilting was lots of fun. I did some echo quilting around the designs from the quilt panel, some straight walking foot quilting and swirls around the 8 pointed stars. The back is the "StarPower" fabric.
The finished quilt is a bit larger than the original panel, brighter, just happy and lots of fun!
Decontructing a Quilt Panel: Part 1

A friend recently gave me a Christmas quilt panel commenting, "This panel just says "Judy." It does! It's the dog thing! Black Labs are dear to my heart and that the Golden retrievers in the panel are pretty cute too! I especially like the Golden wearing that pink ski hat!
On the right is a photo of one of my fabric surface designs "StarPower" that I had printed at Spoonflower.com. I had intended to use this fabric to make a whole cloth quilt, but don't the colors and the stars look perfect with this panel?
Since I don't love all the graphics in the Christmas dog panel, so I'm going to deconstruct it and add some fussy cut 8 pointed stars to make a little Christmas quilt! Next week I'll show what I've done!
The Boys! Waldorf Type Dolls
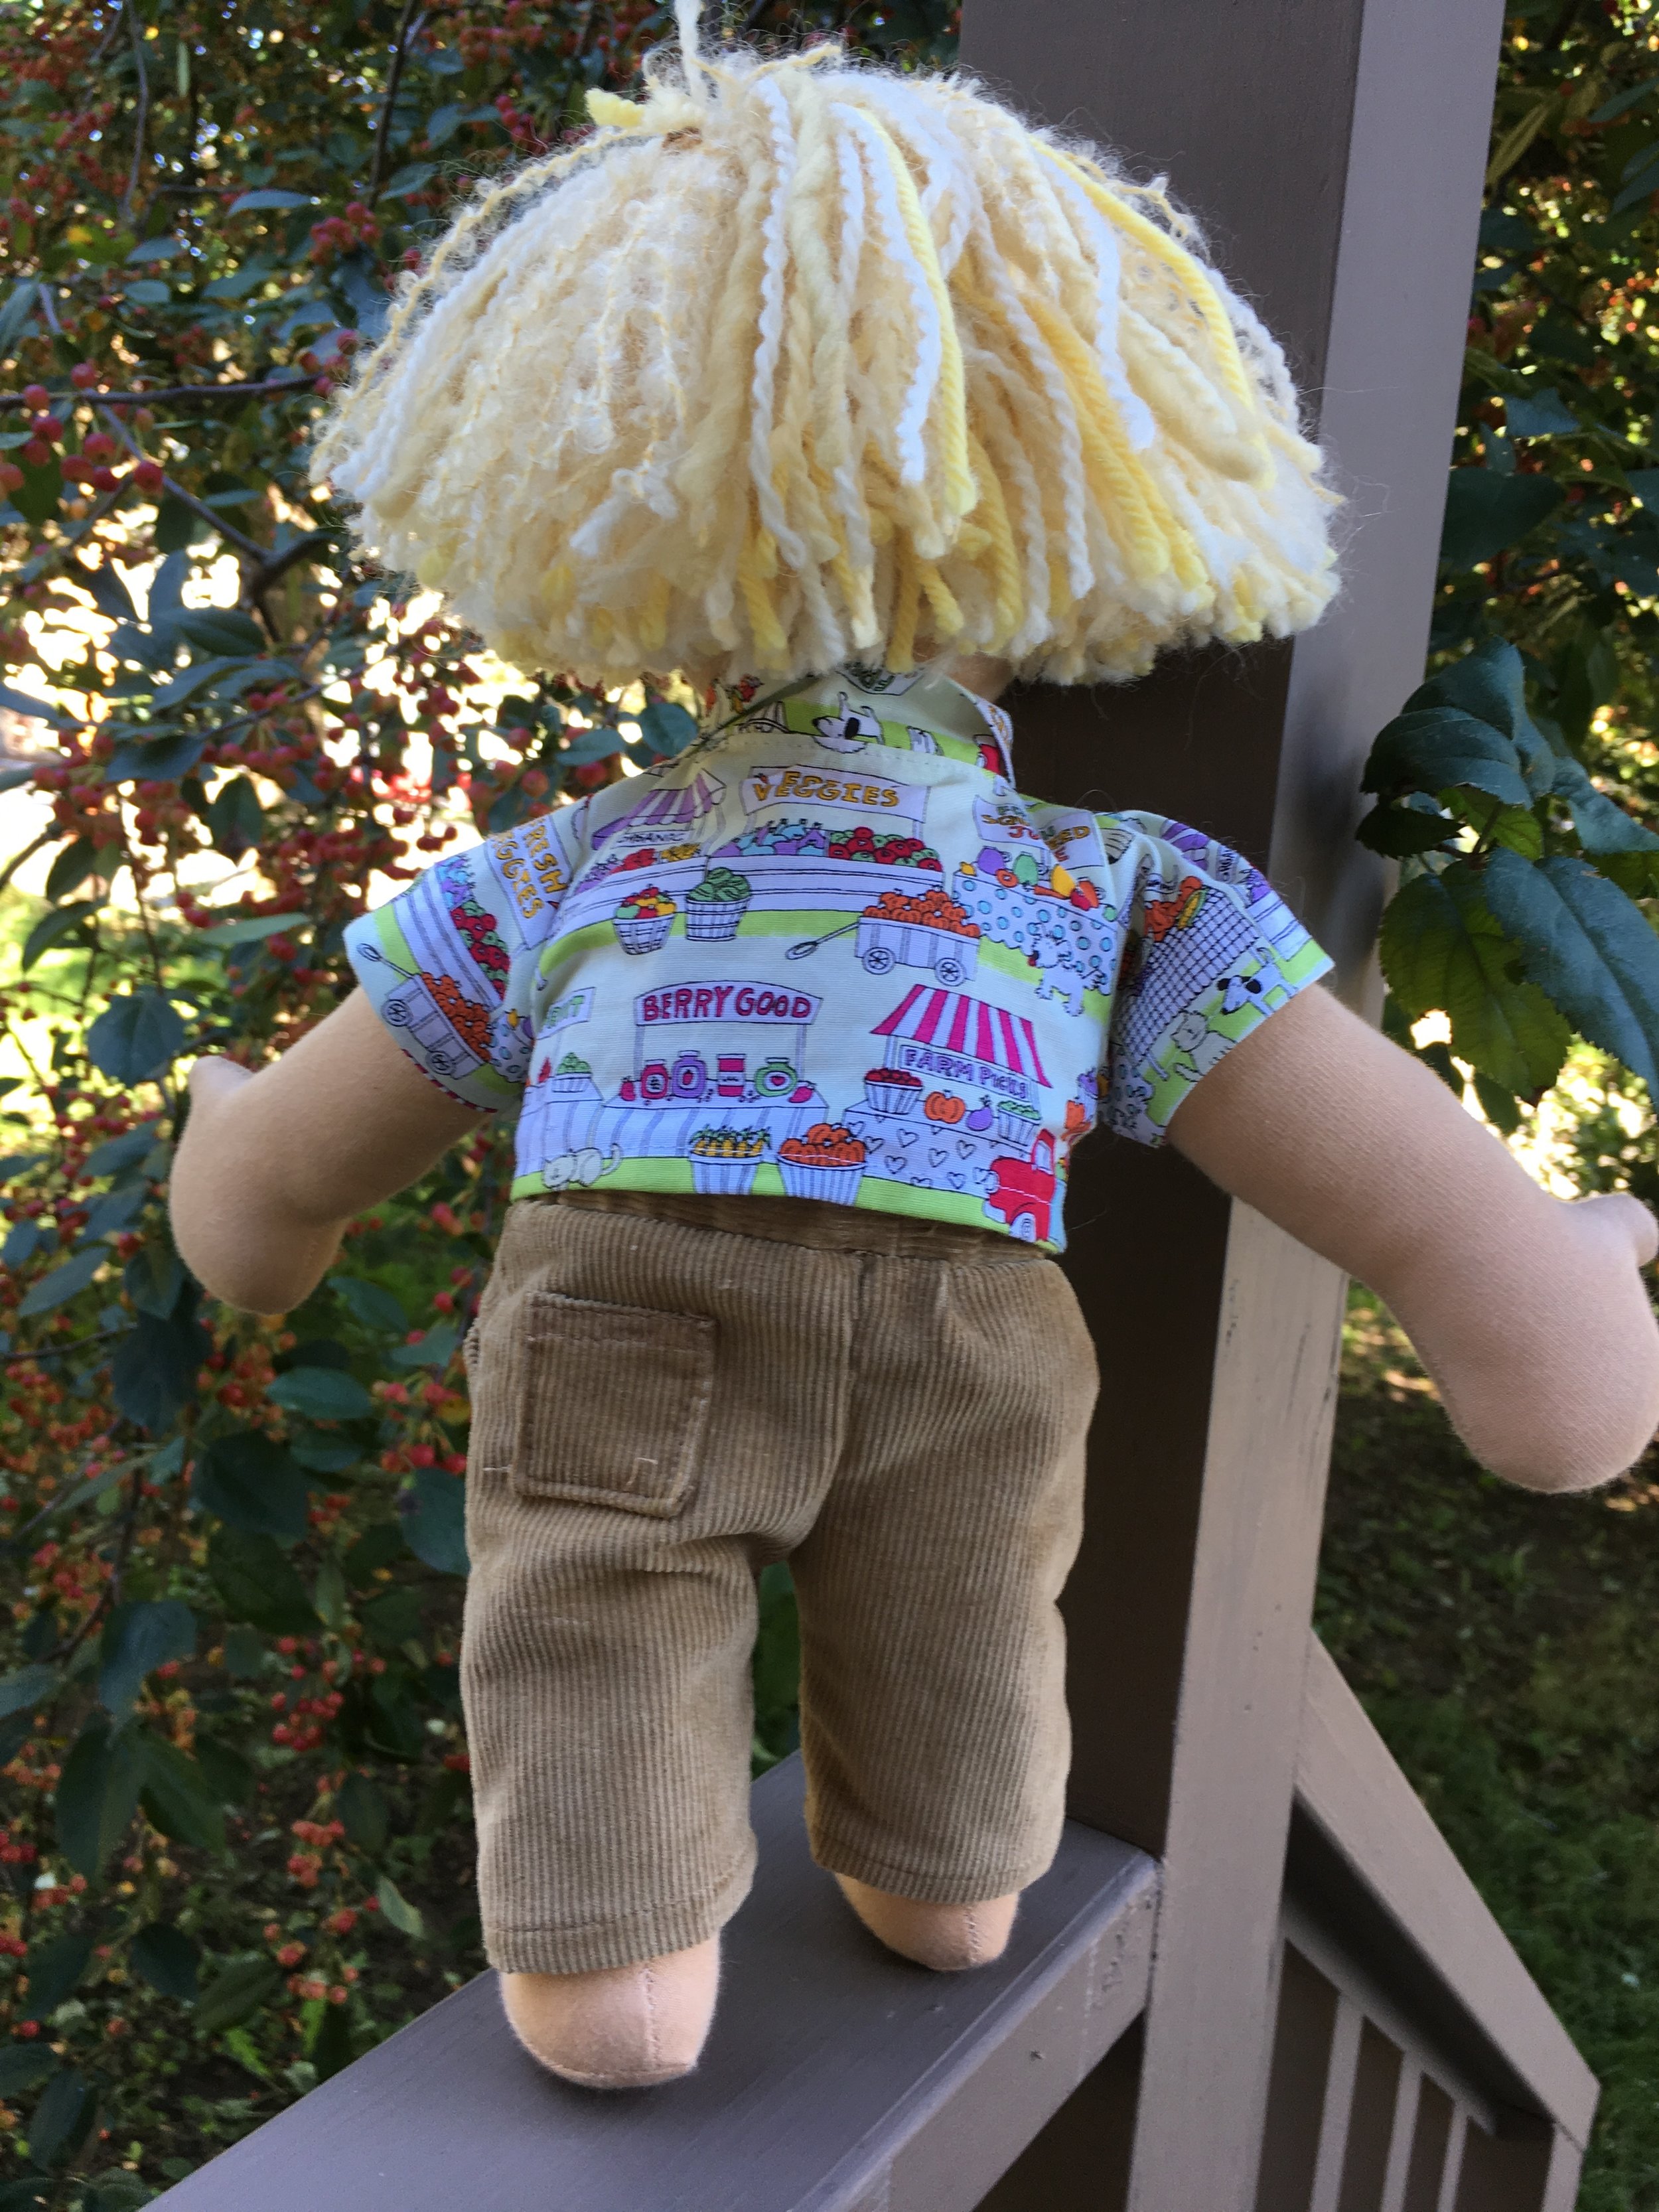
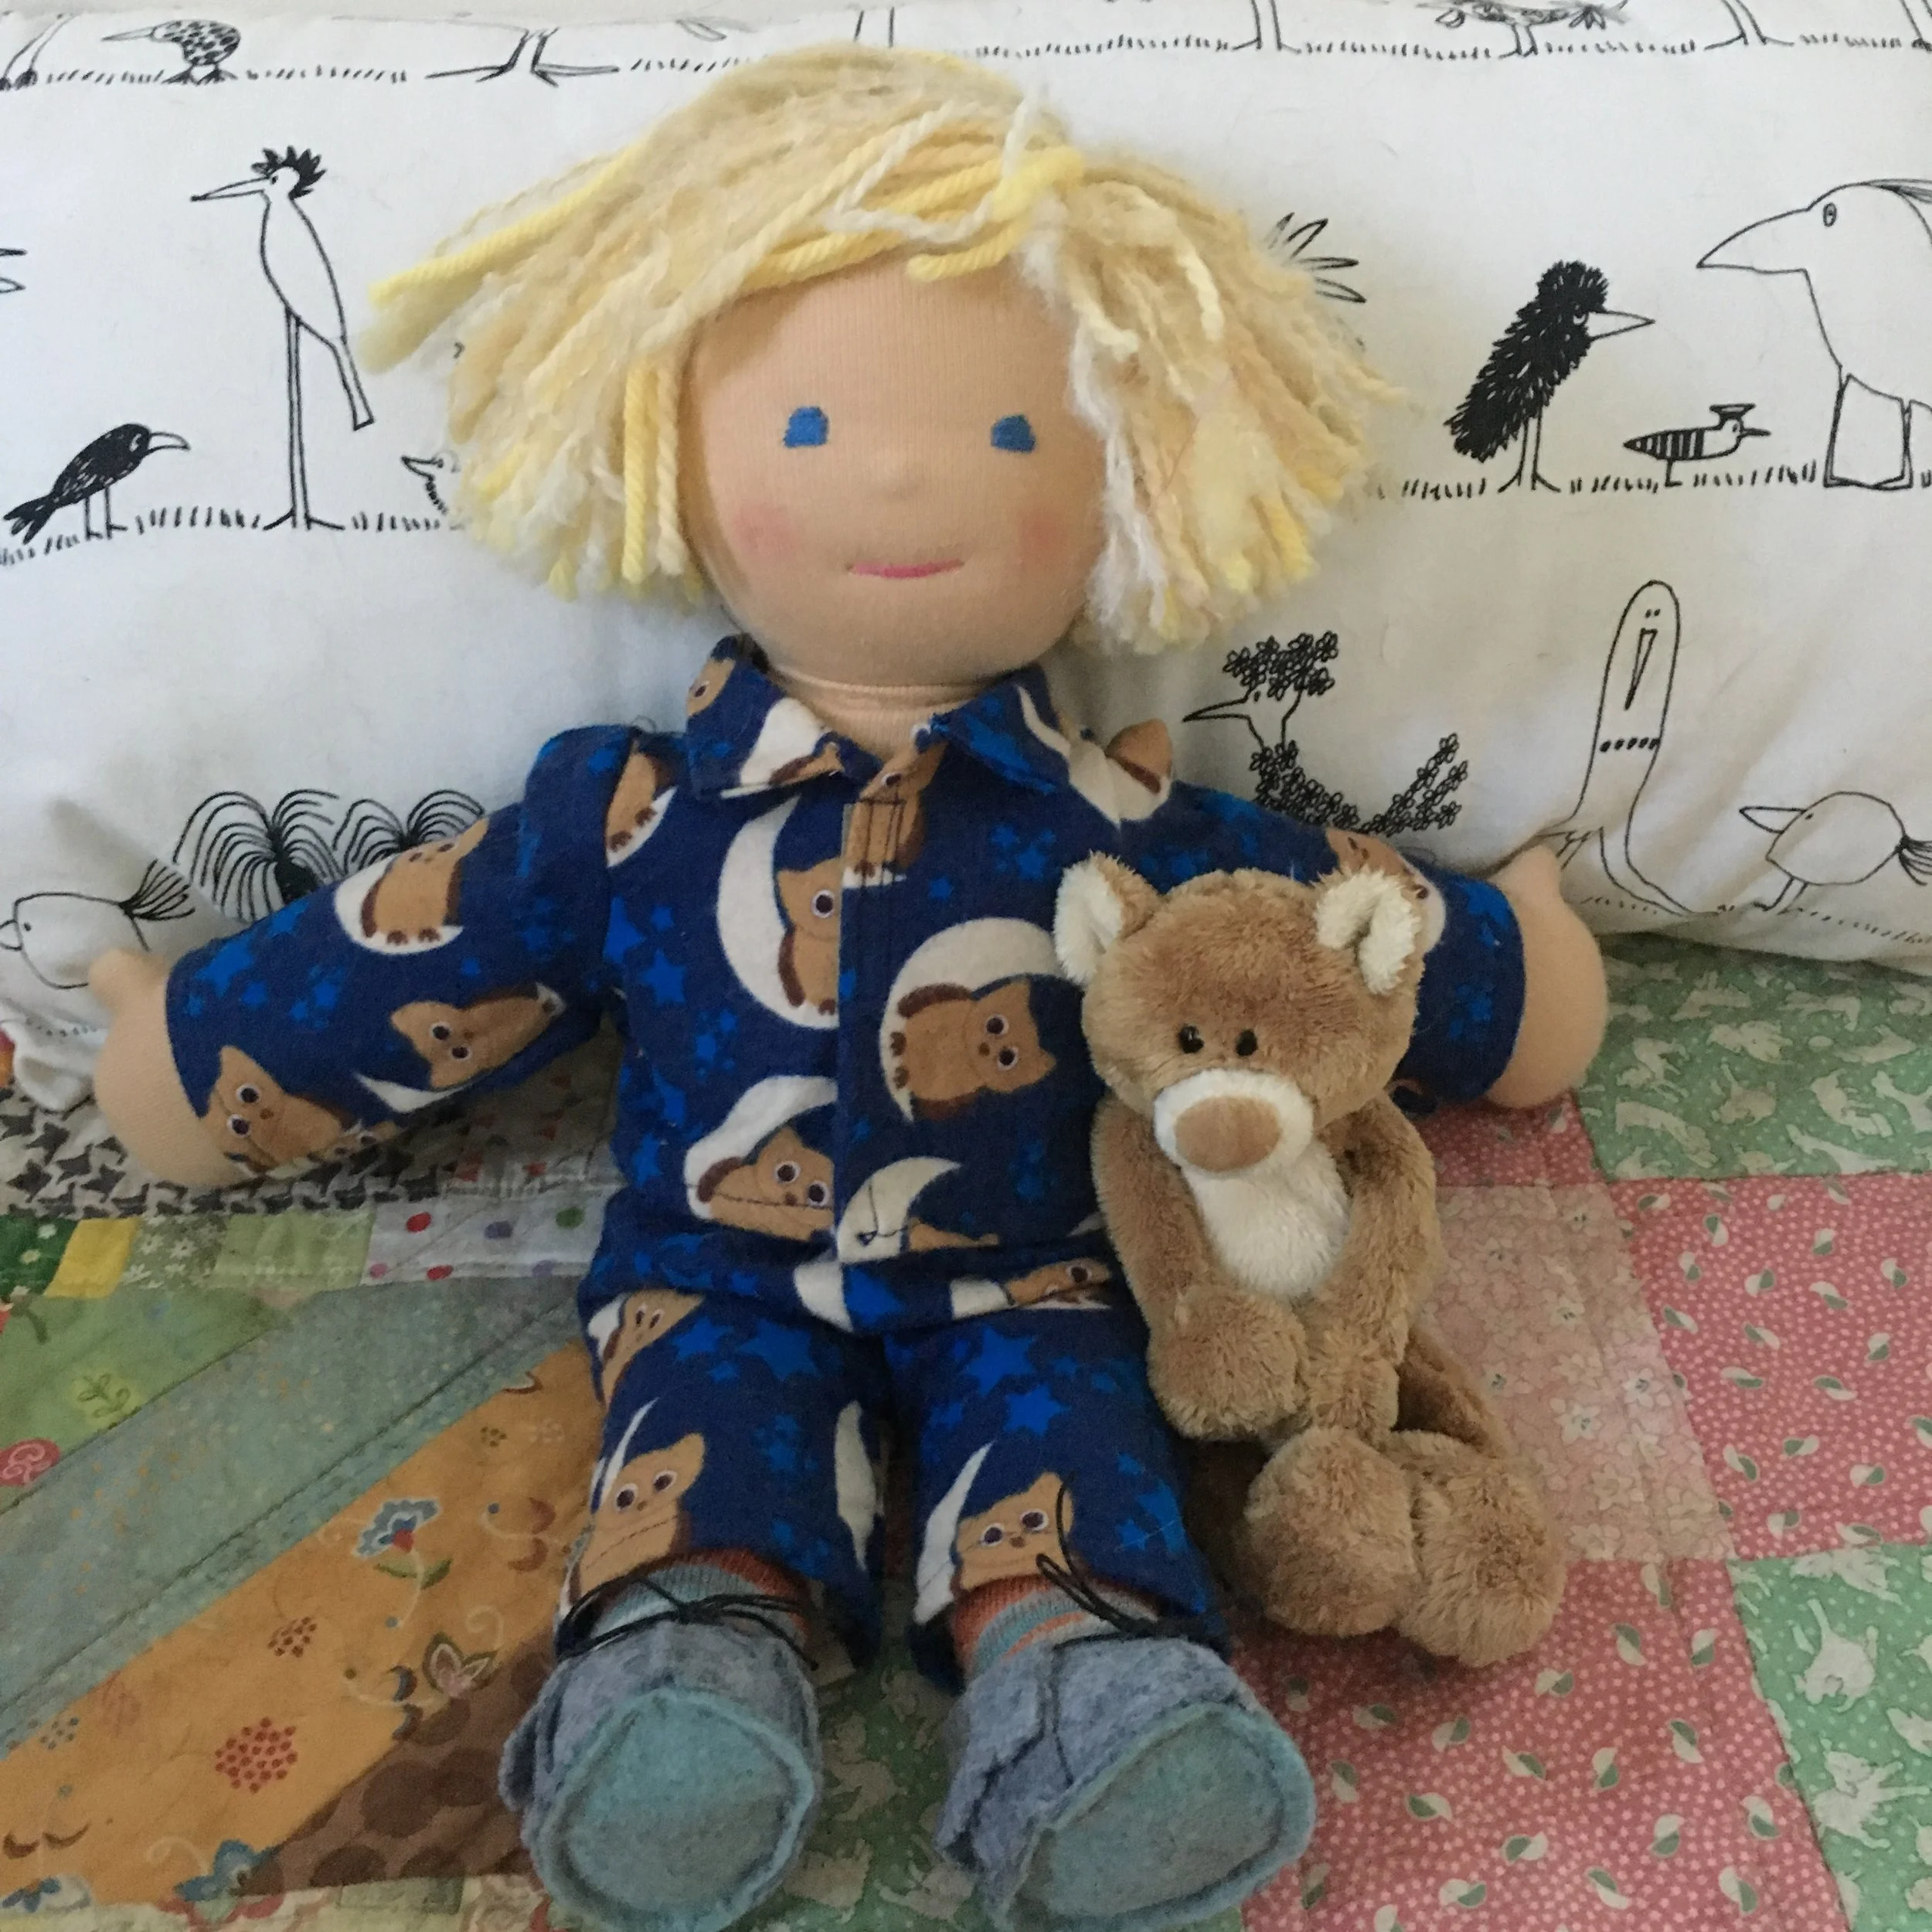
Happy November! Today's post is a picture gallery of boy dolls. I'd been thinking about a Waldorf type boy doll that had a mix of blonde curls and straight hair. I only make a few Waldorf Type dolls* a year. As the weather changed from summer to fall and making a doll with wool hair that is has wool stuffing seemed more doable, I made a pair of Waldorf type boys.
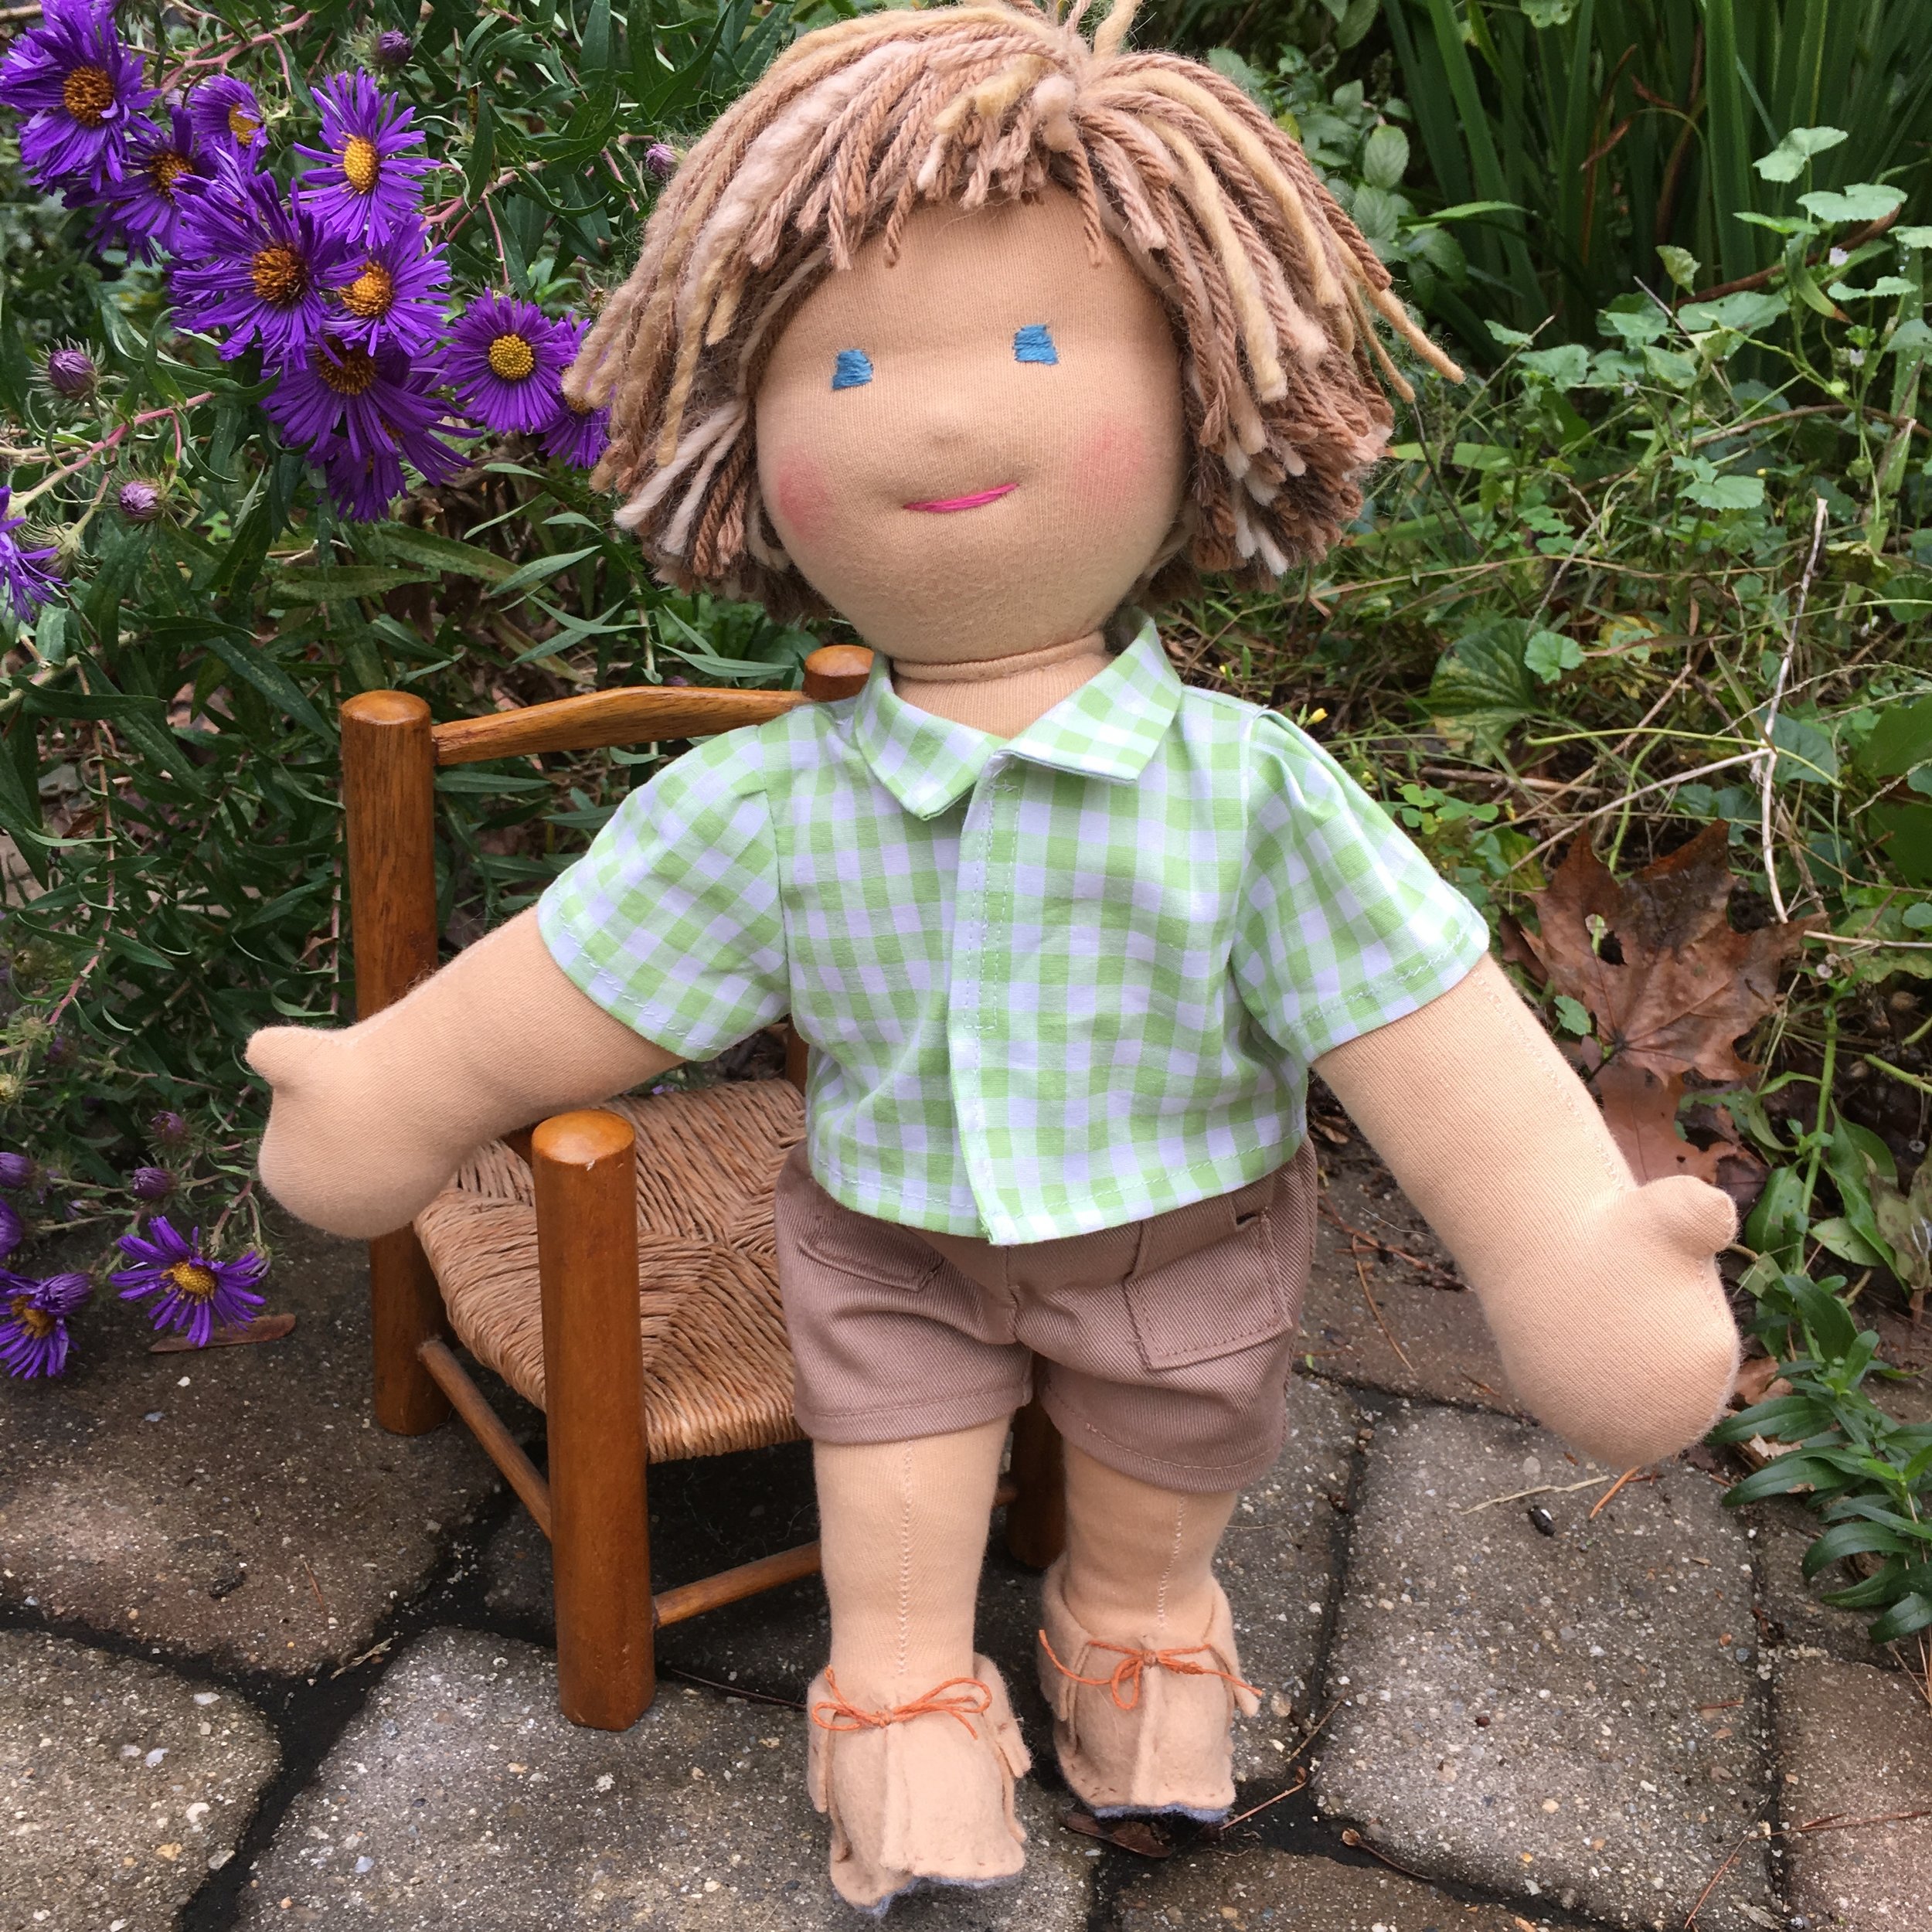
Here's Davey, the blonde boy. I love the Farmer's Market design in the fabric I used for his shirt! That's a crab apple tree, loaded with fruit, in the background.

Davey, a Waldorf Type Doll
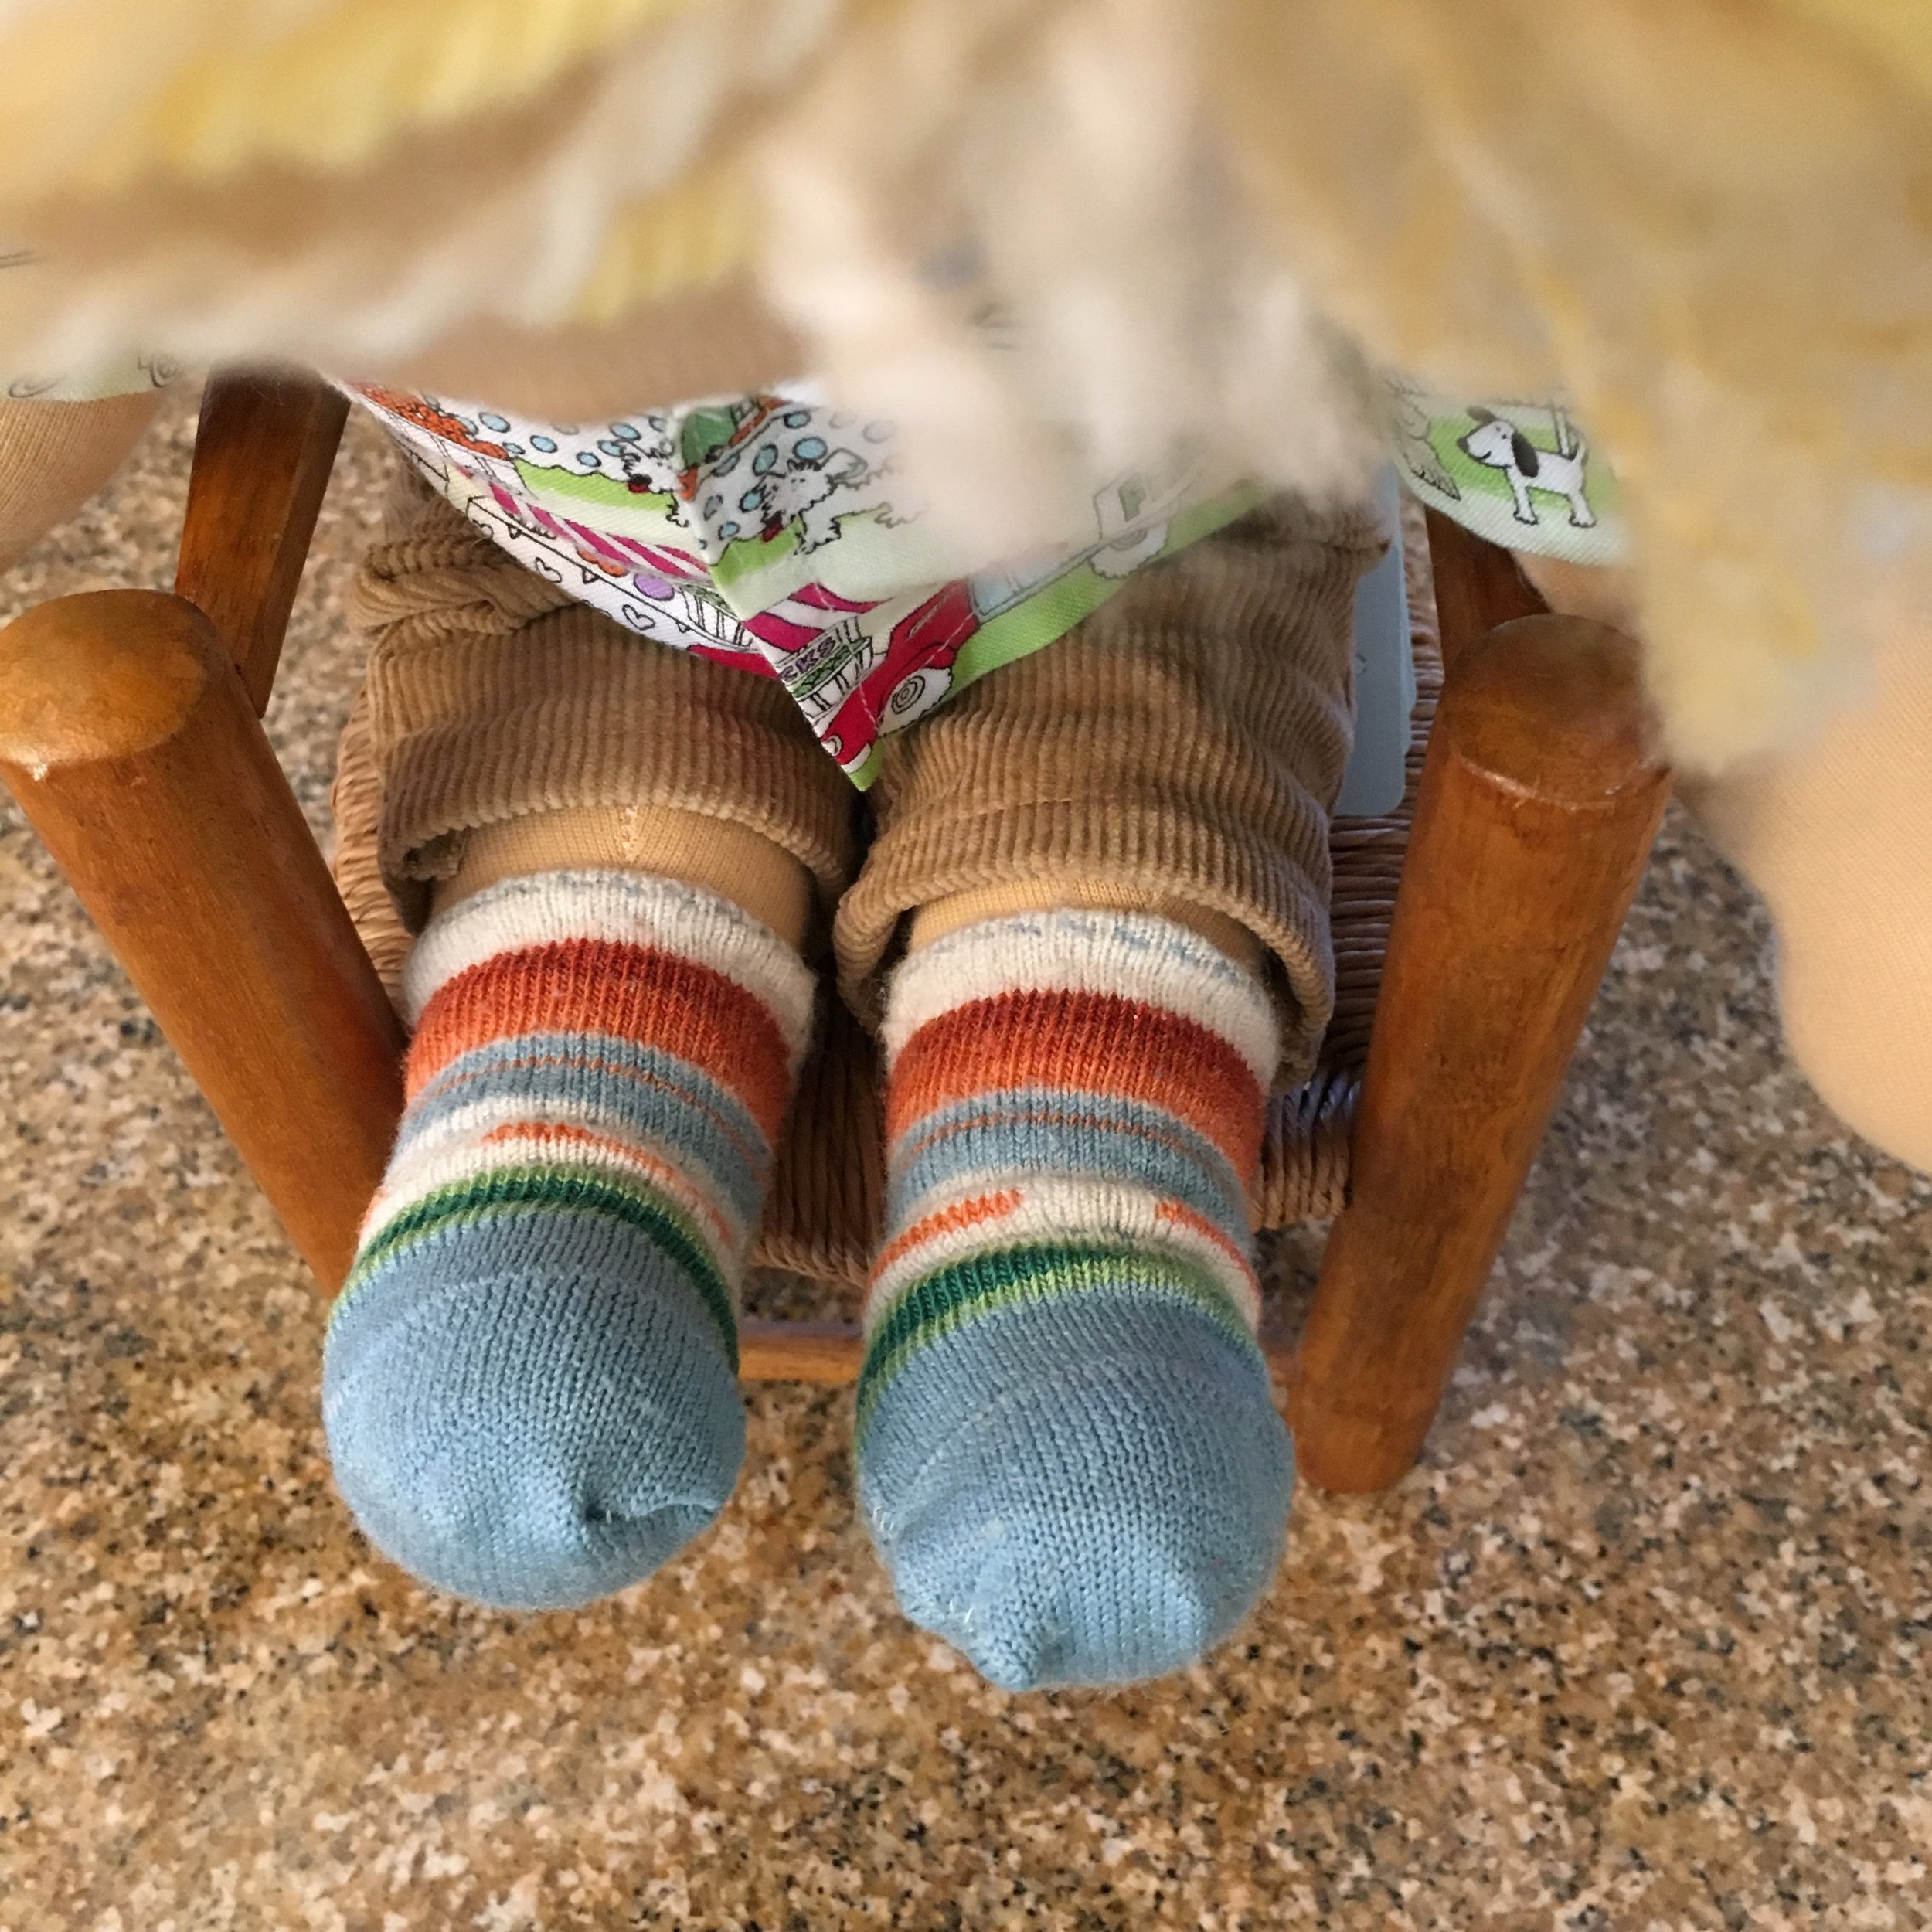
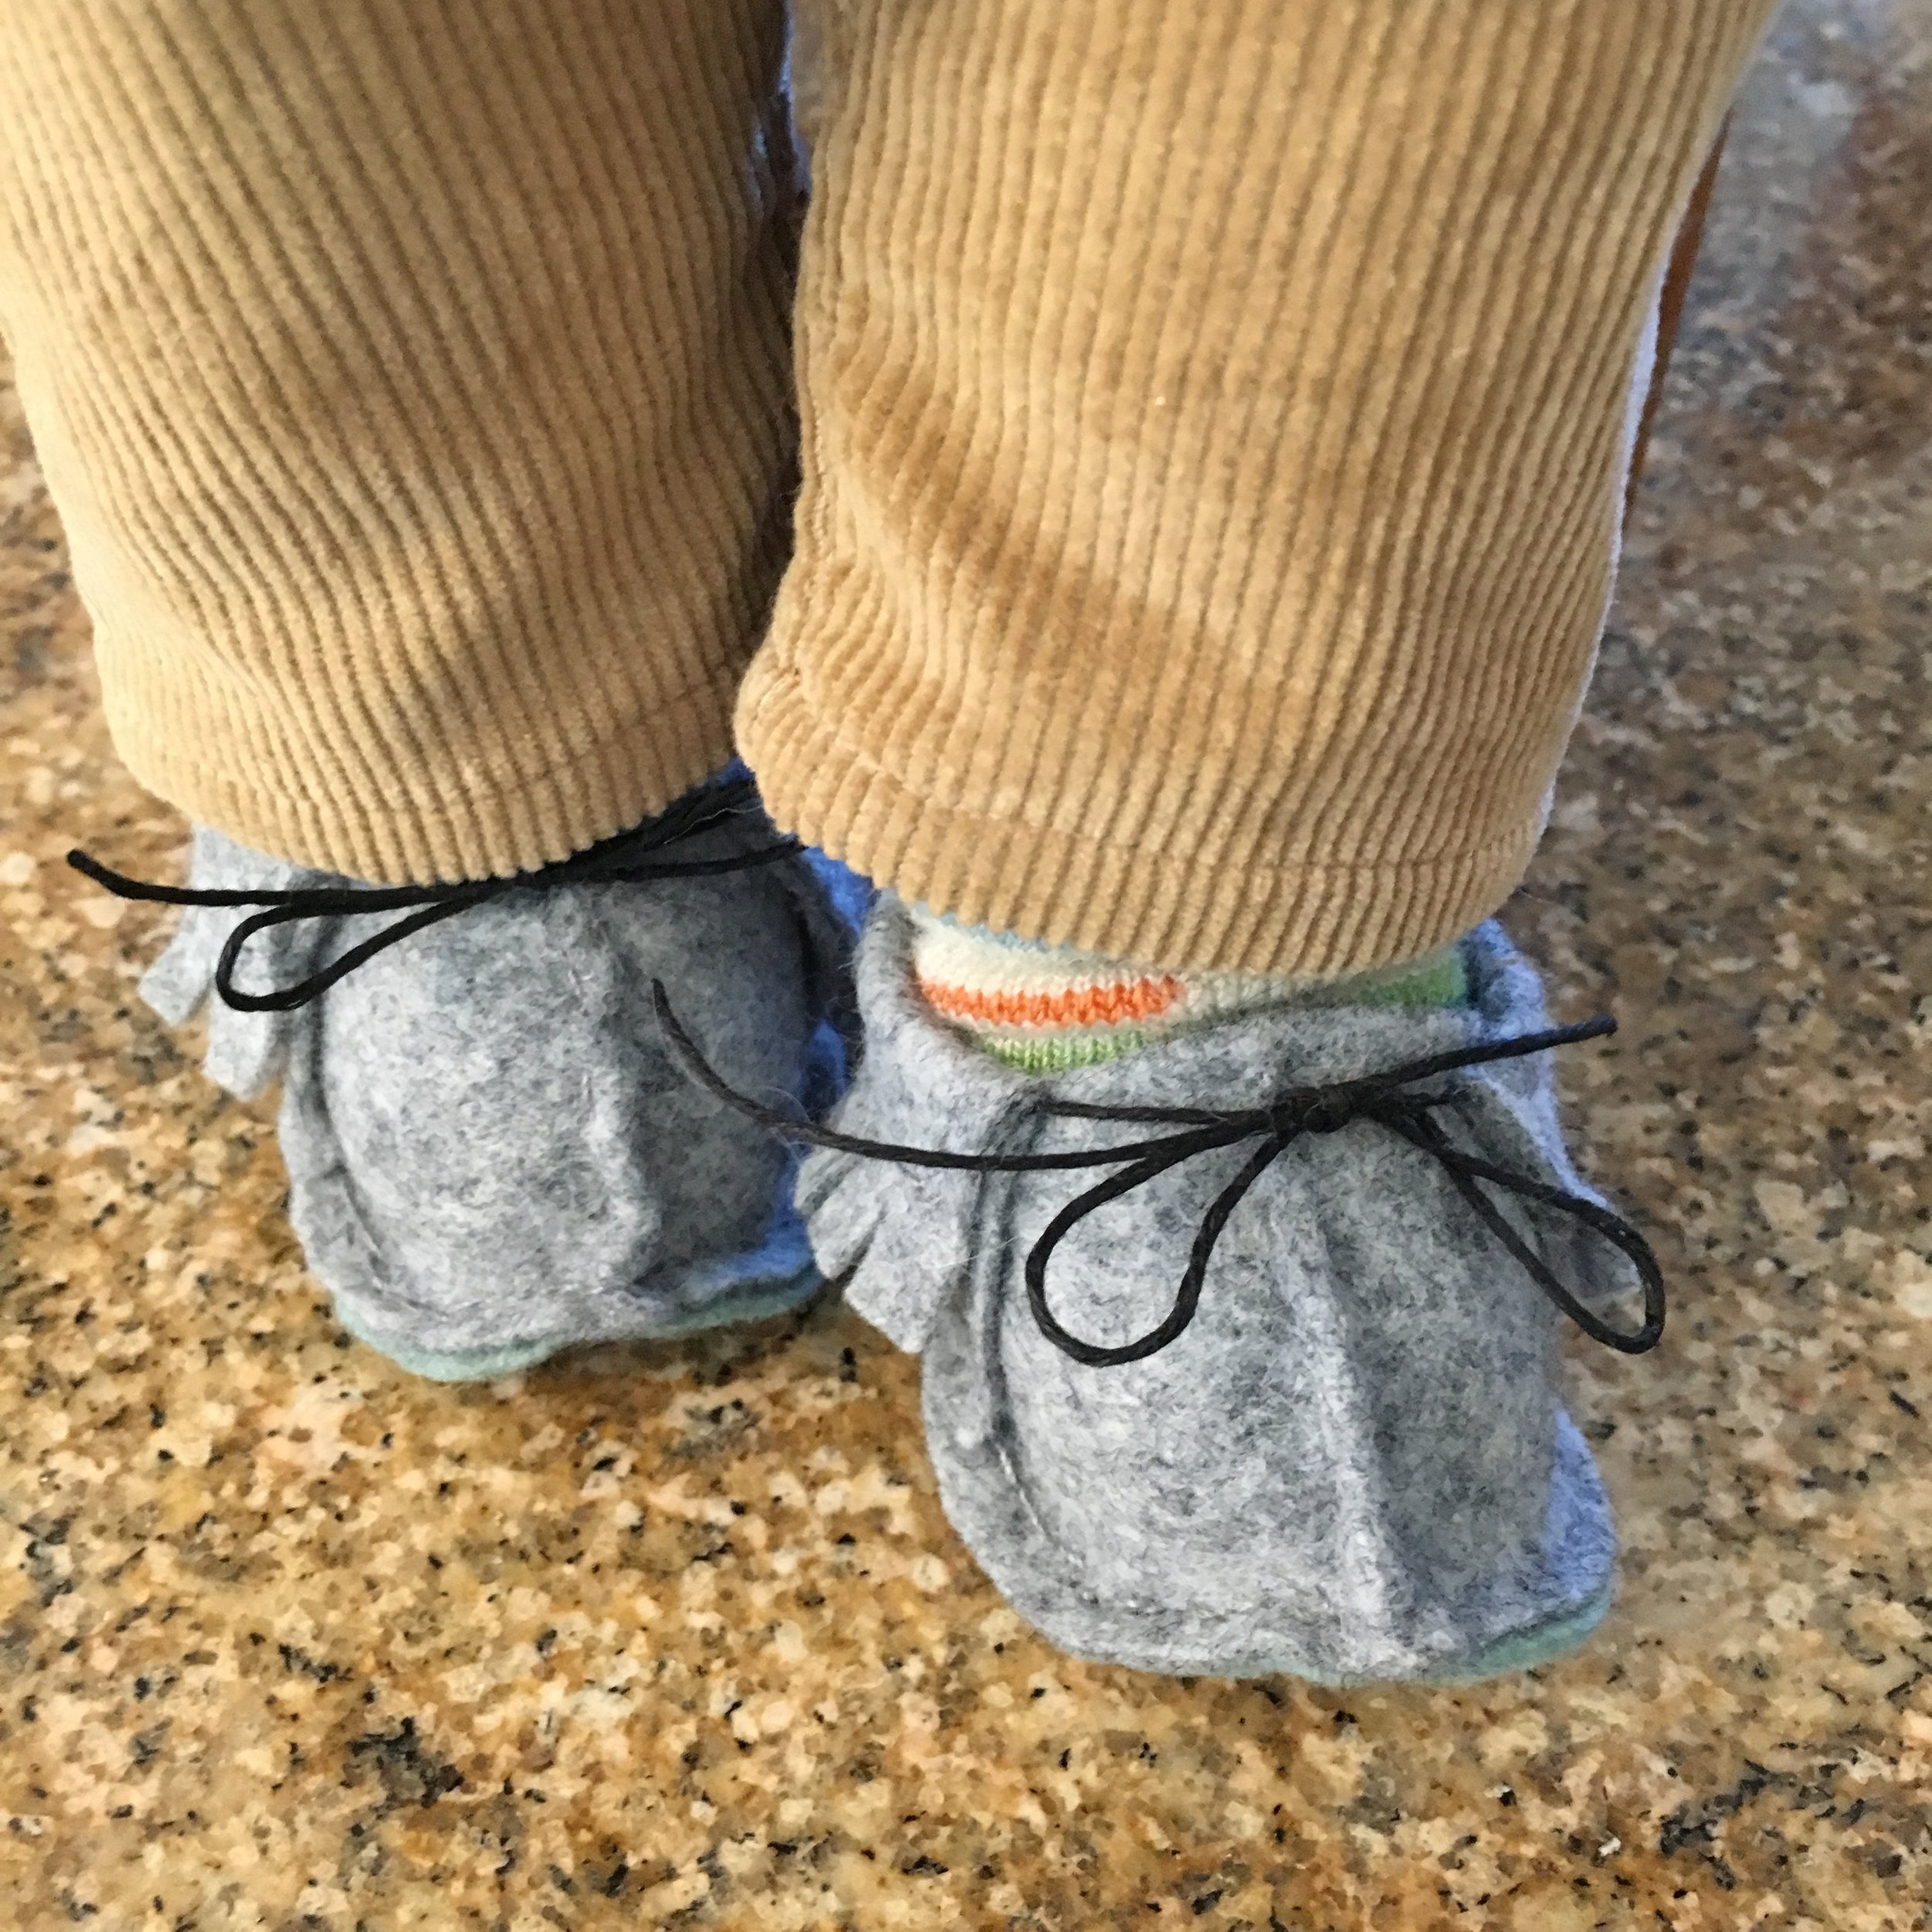
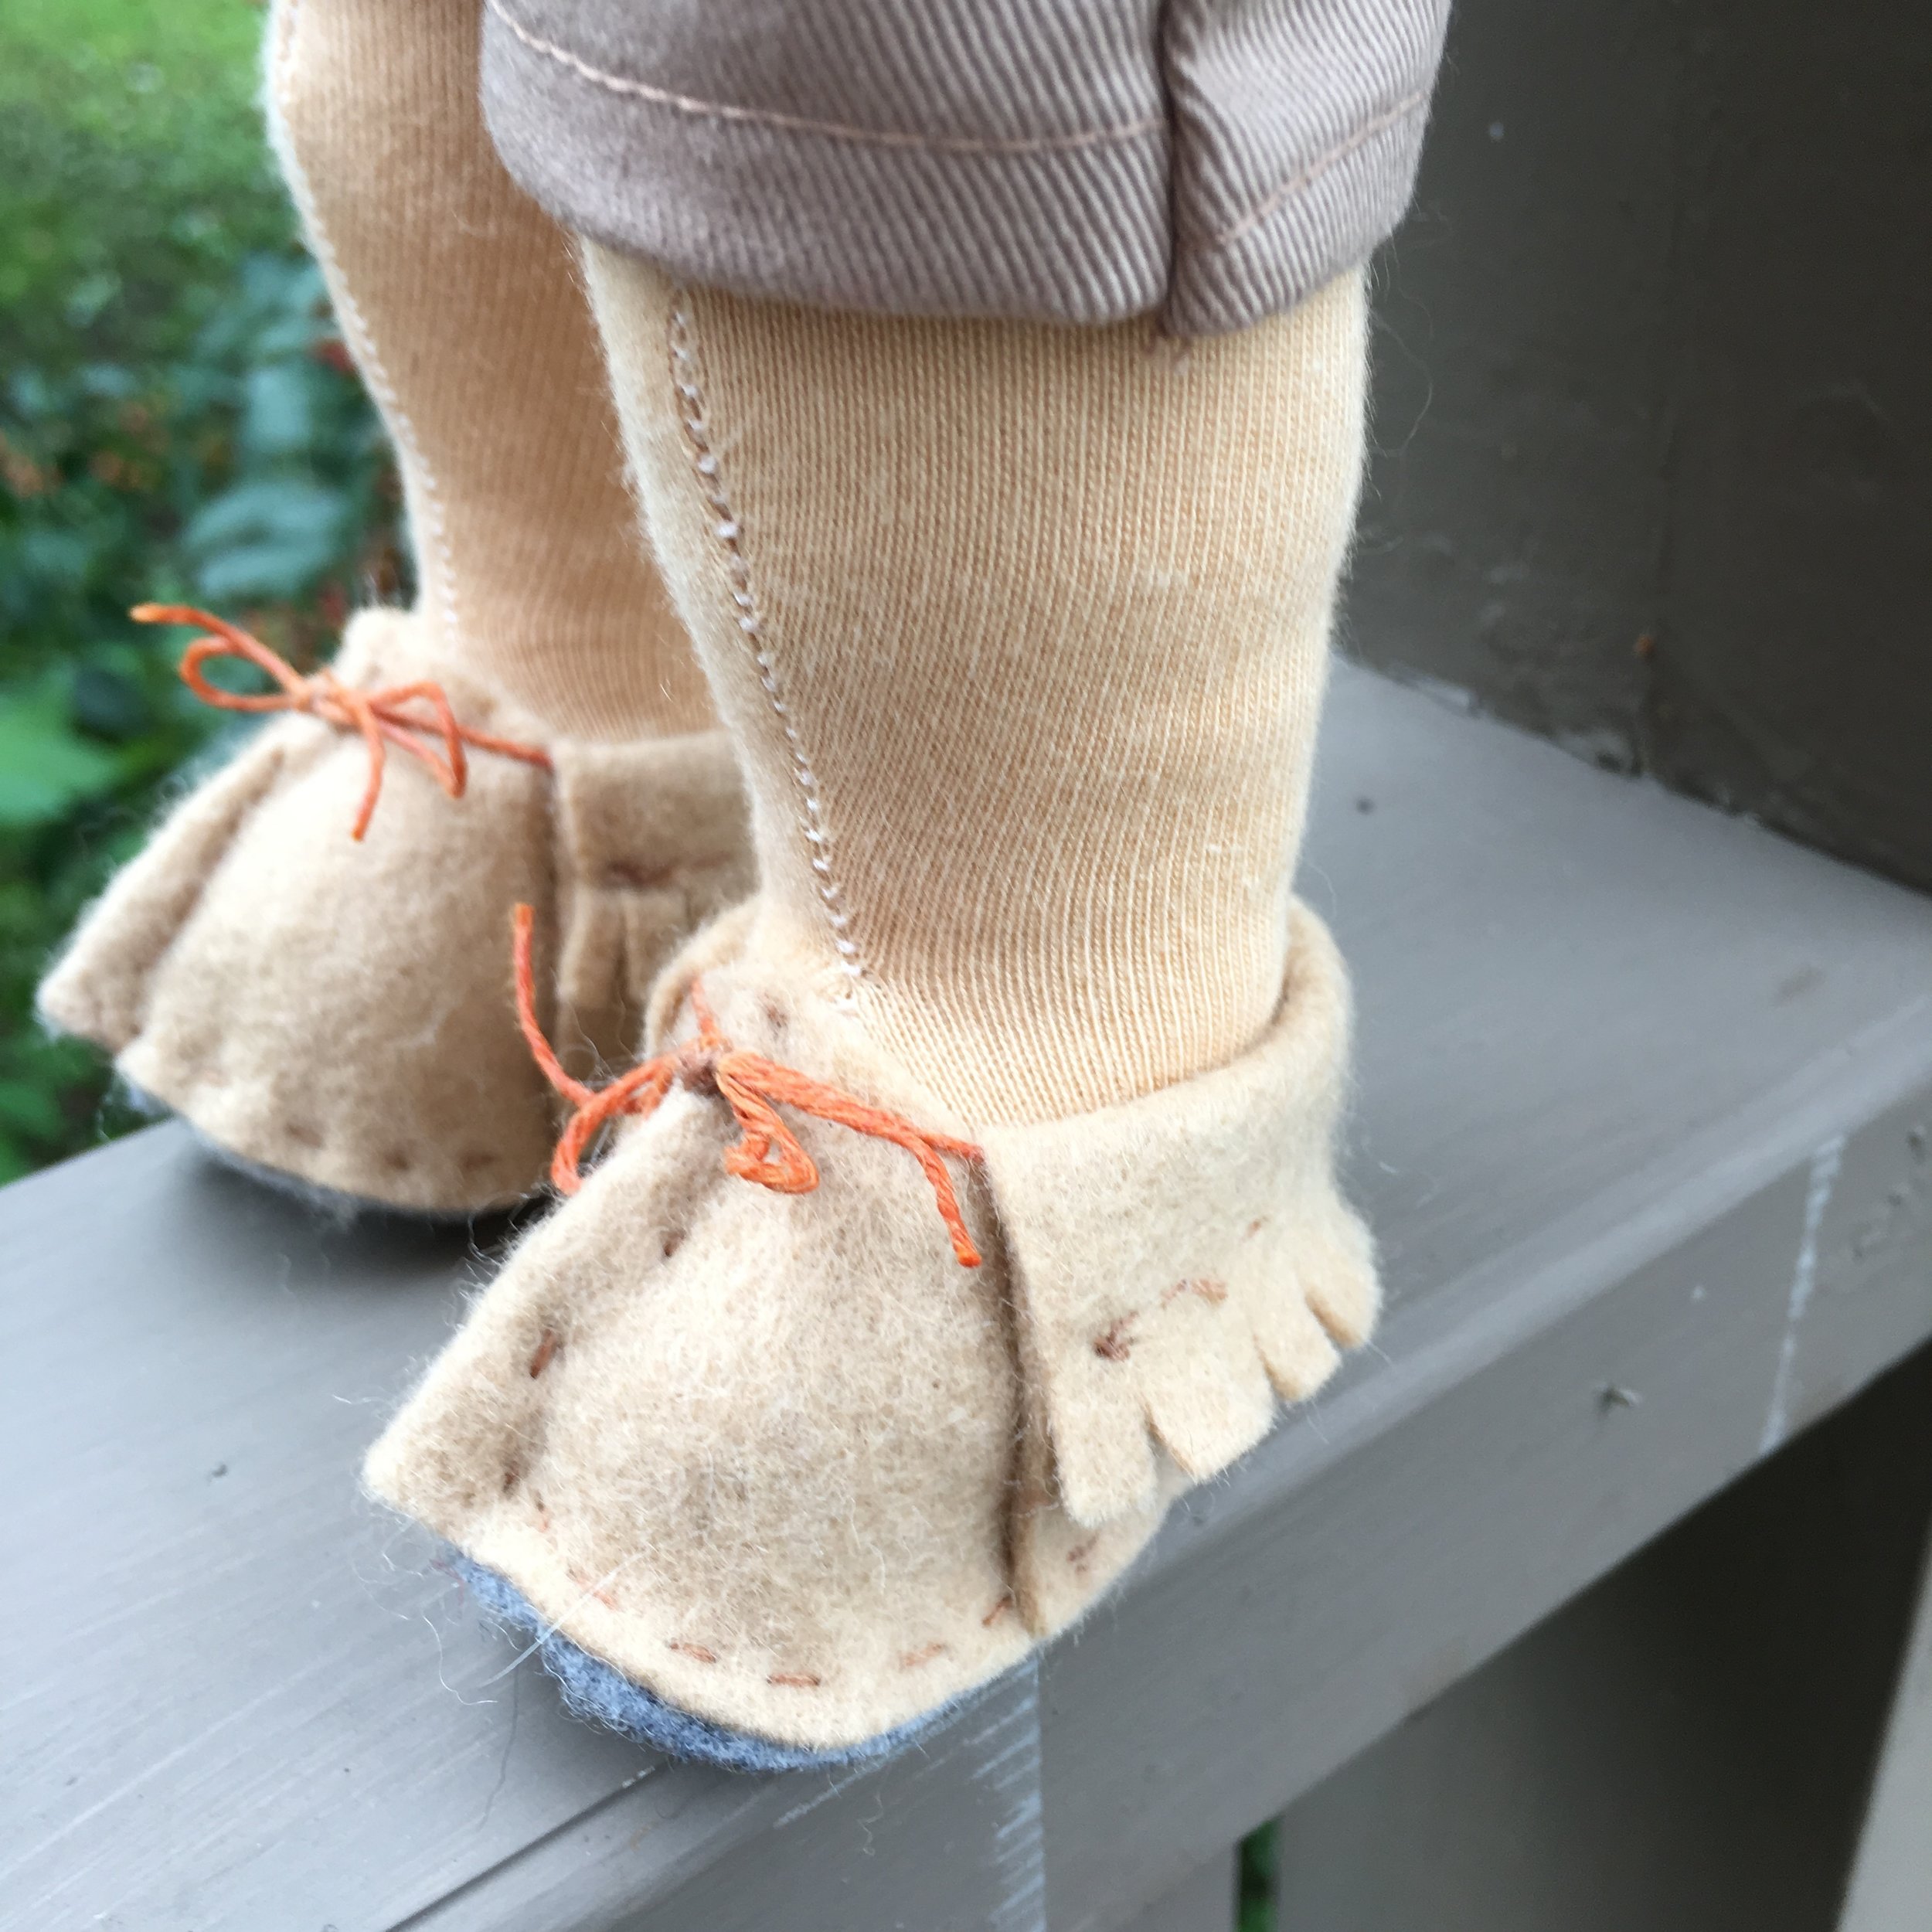
Here are a few more pictures. The pocket on the back of his cords is a new addition to my pants pattern. I had fun up-cycling a old SmartWool® sock to make a pair him a pair of striped wool socks! The felt moccasins and the flannel PJs are two new patterns I designed for these boys.
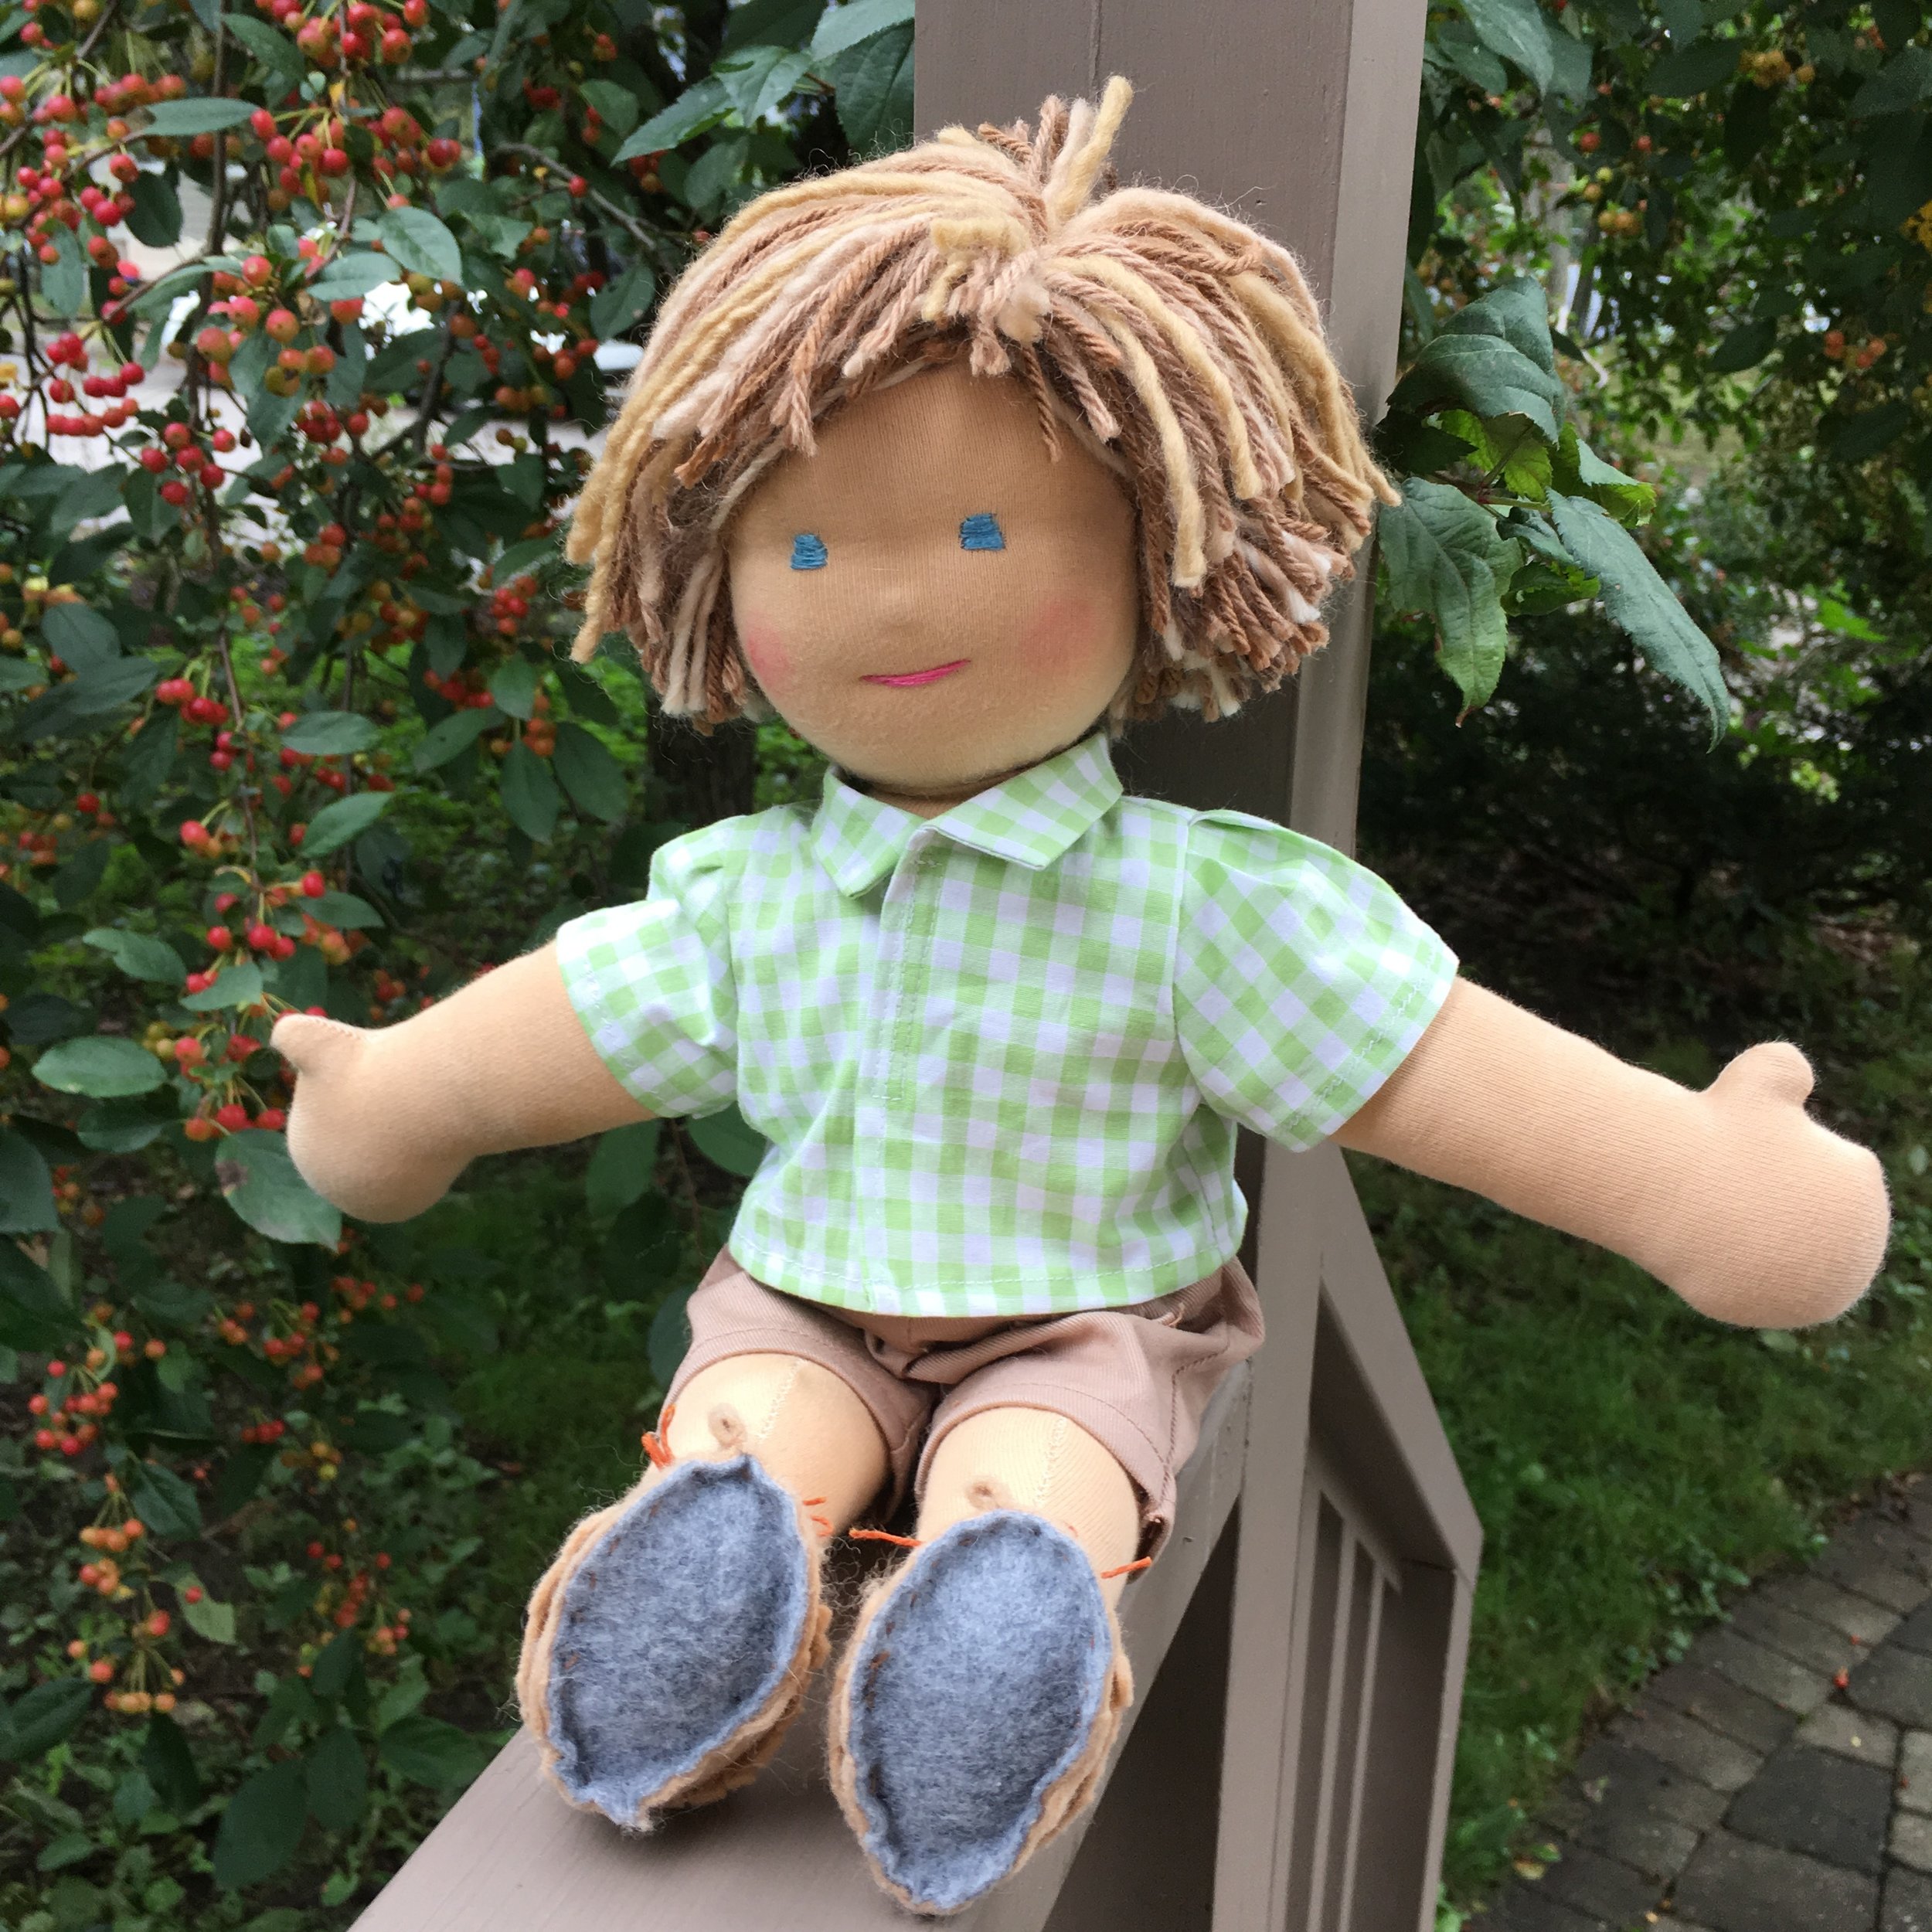
Here's the brunette boy I made at the same time.
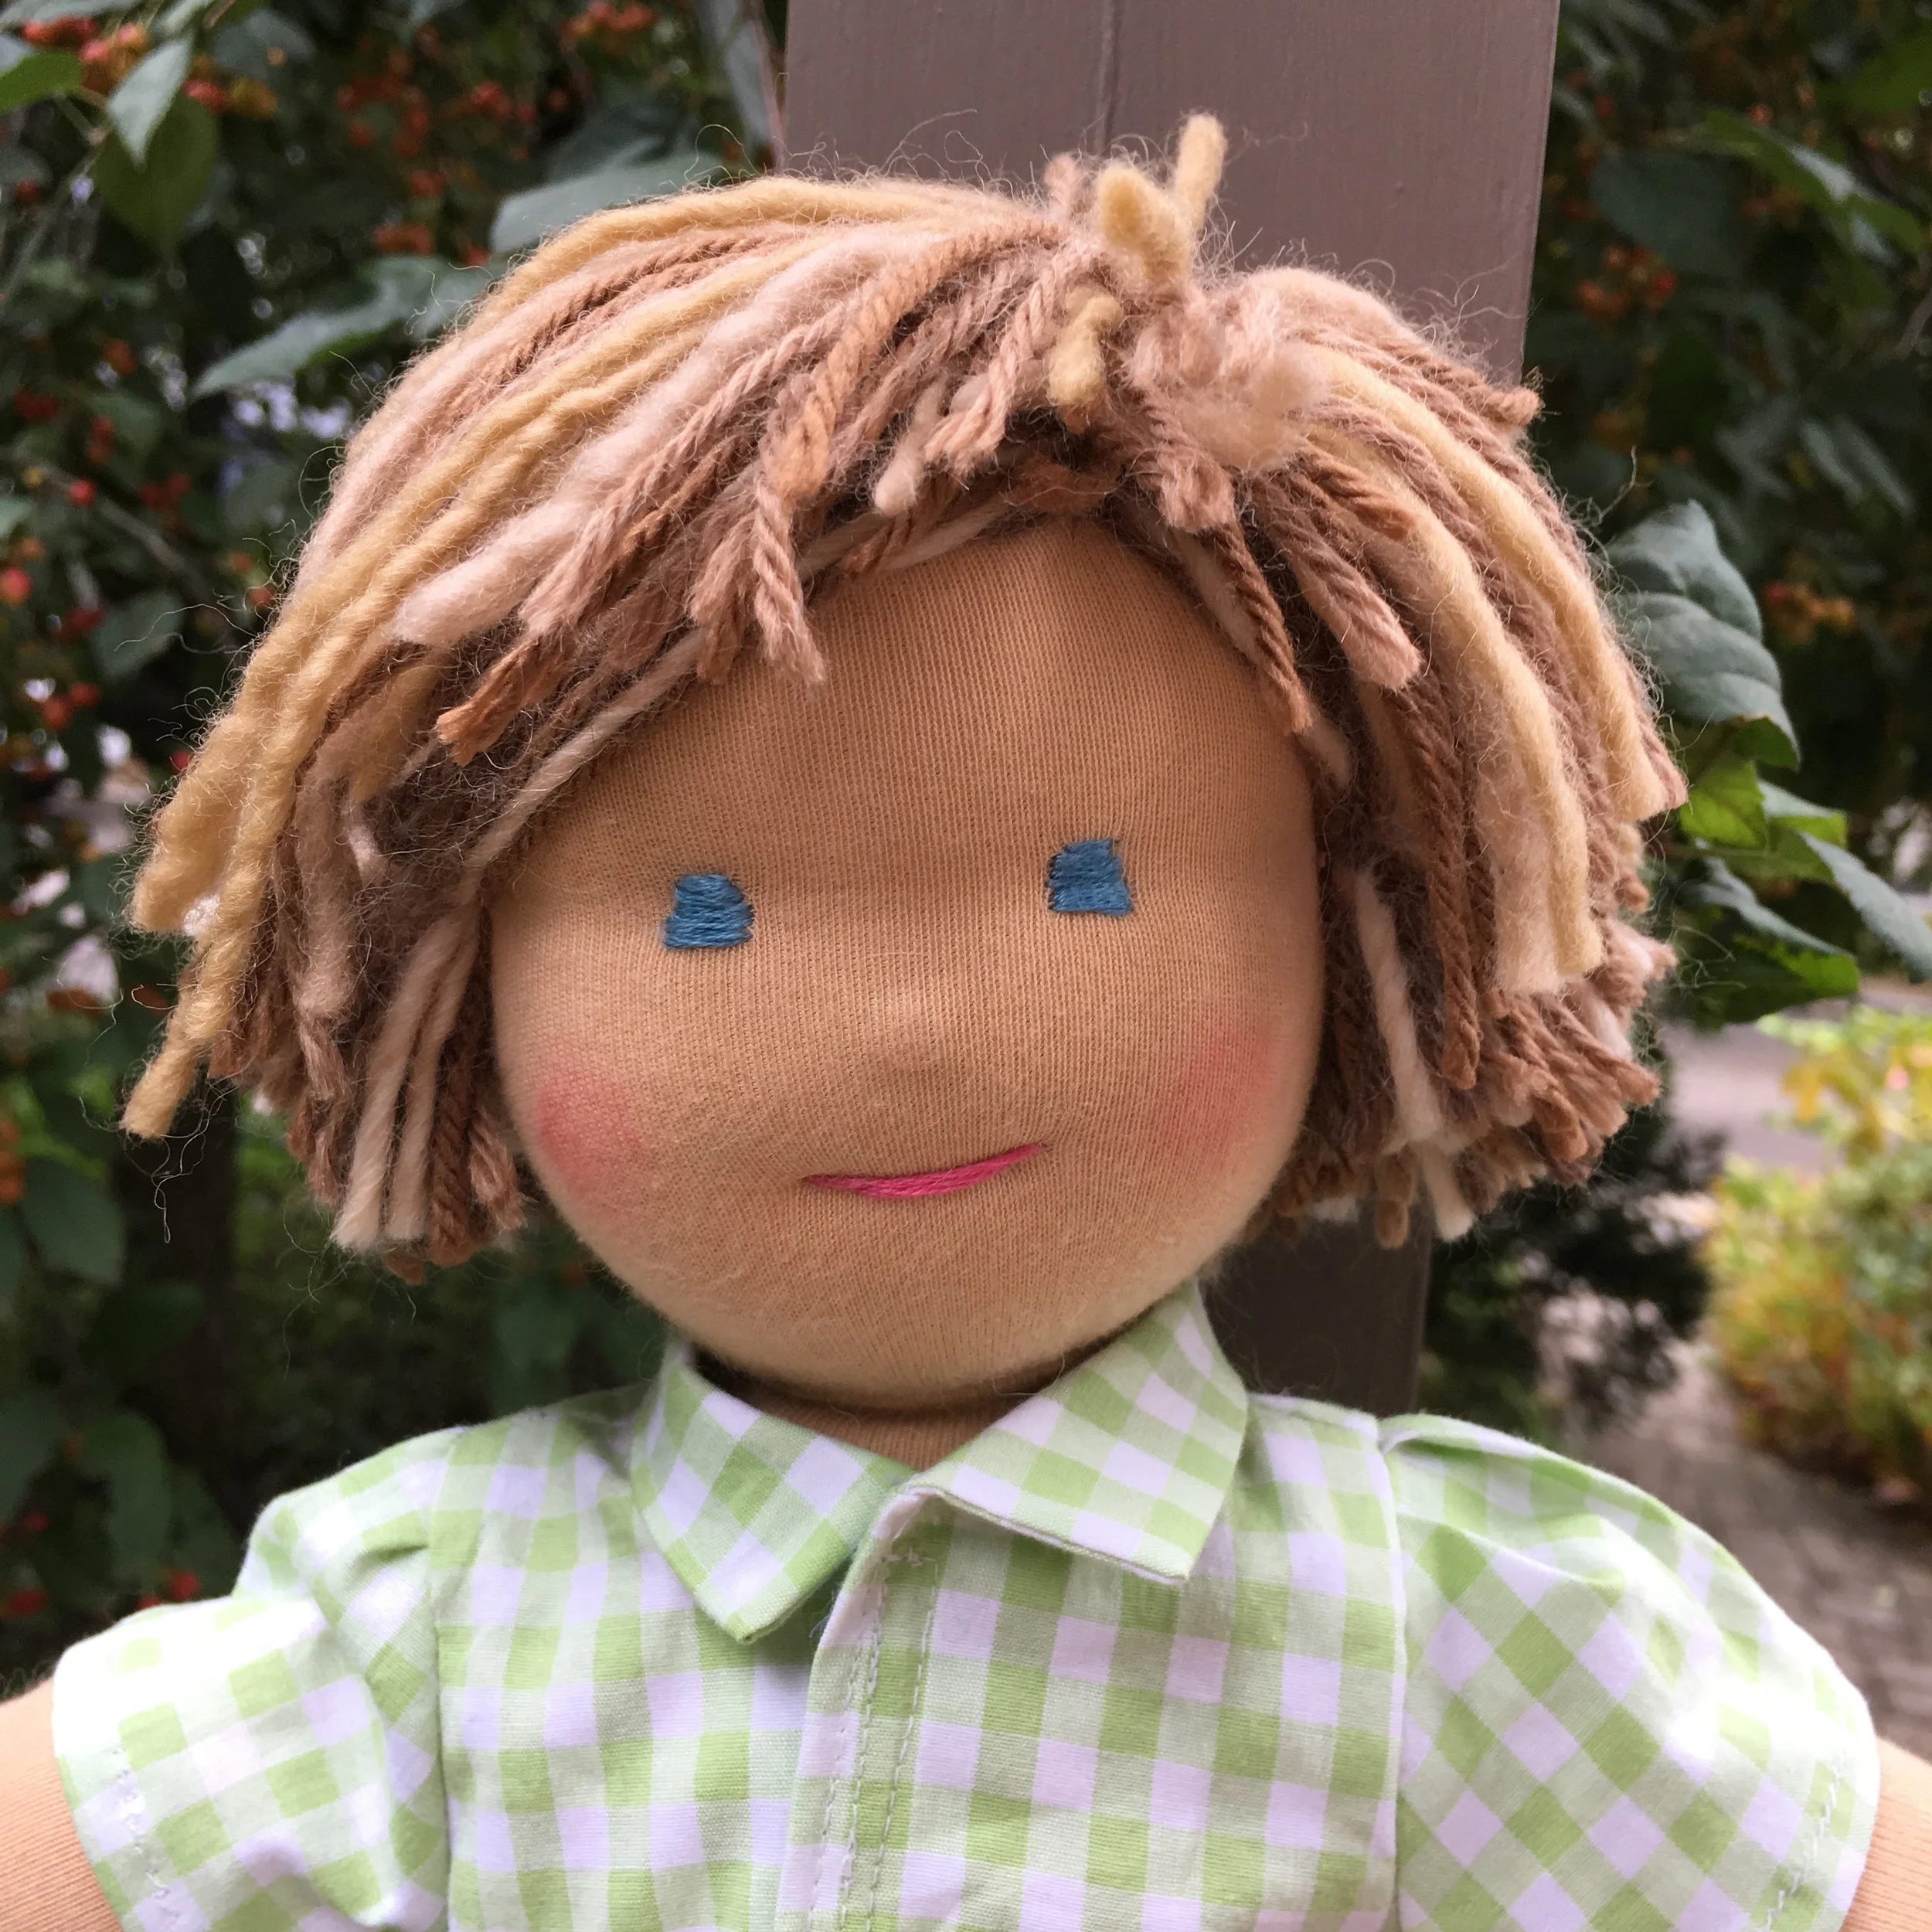
The Brunette boy
The side part is something new I tried. The hair might be a bit too long and floppy, but it is cute!
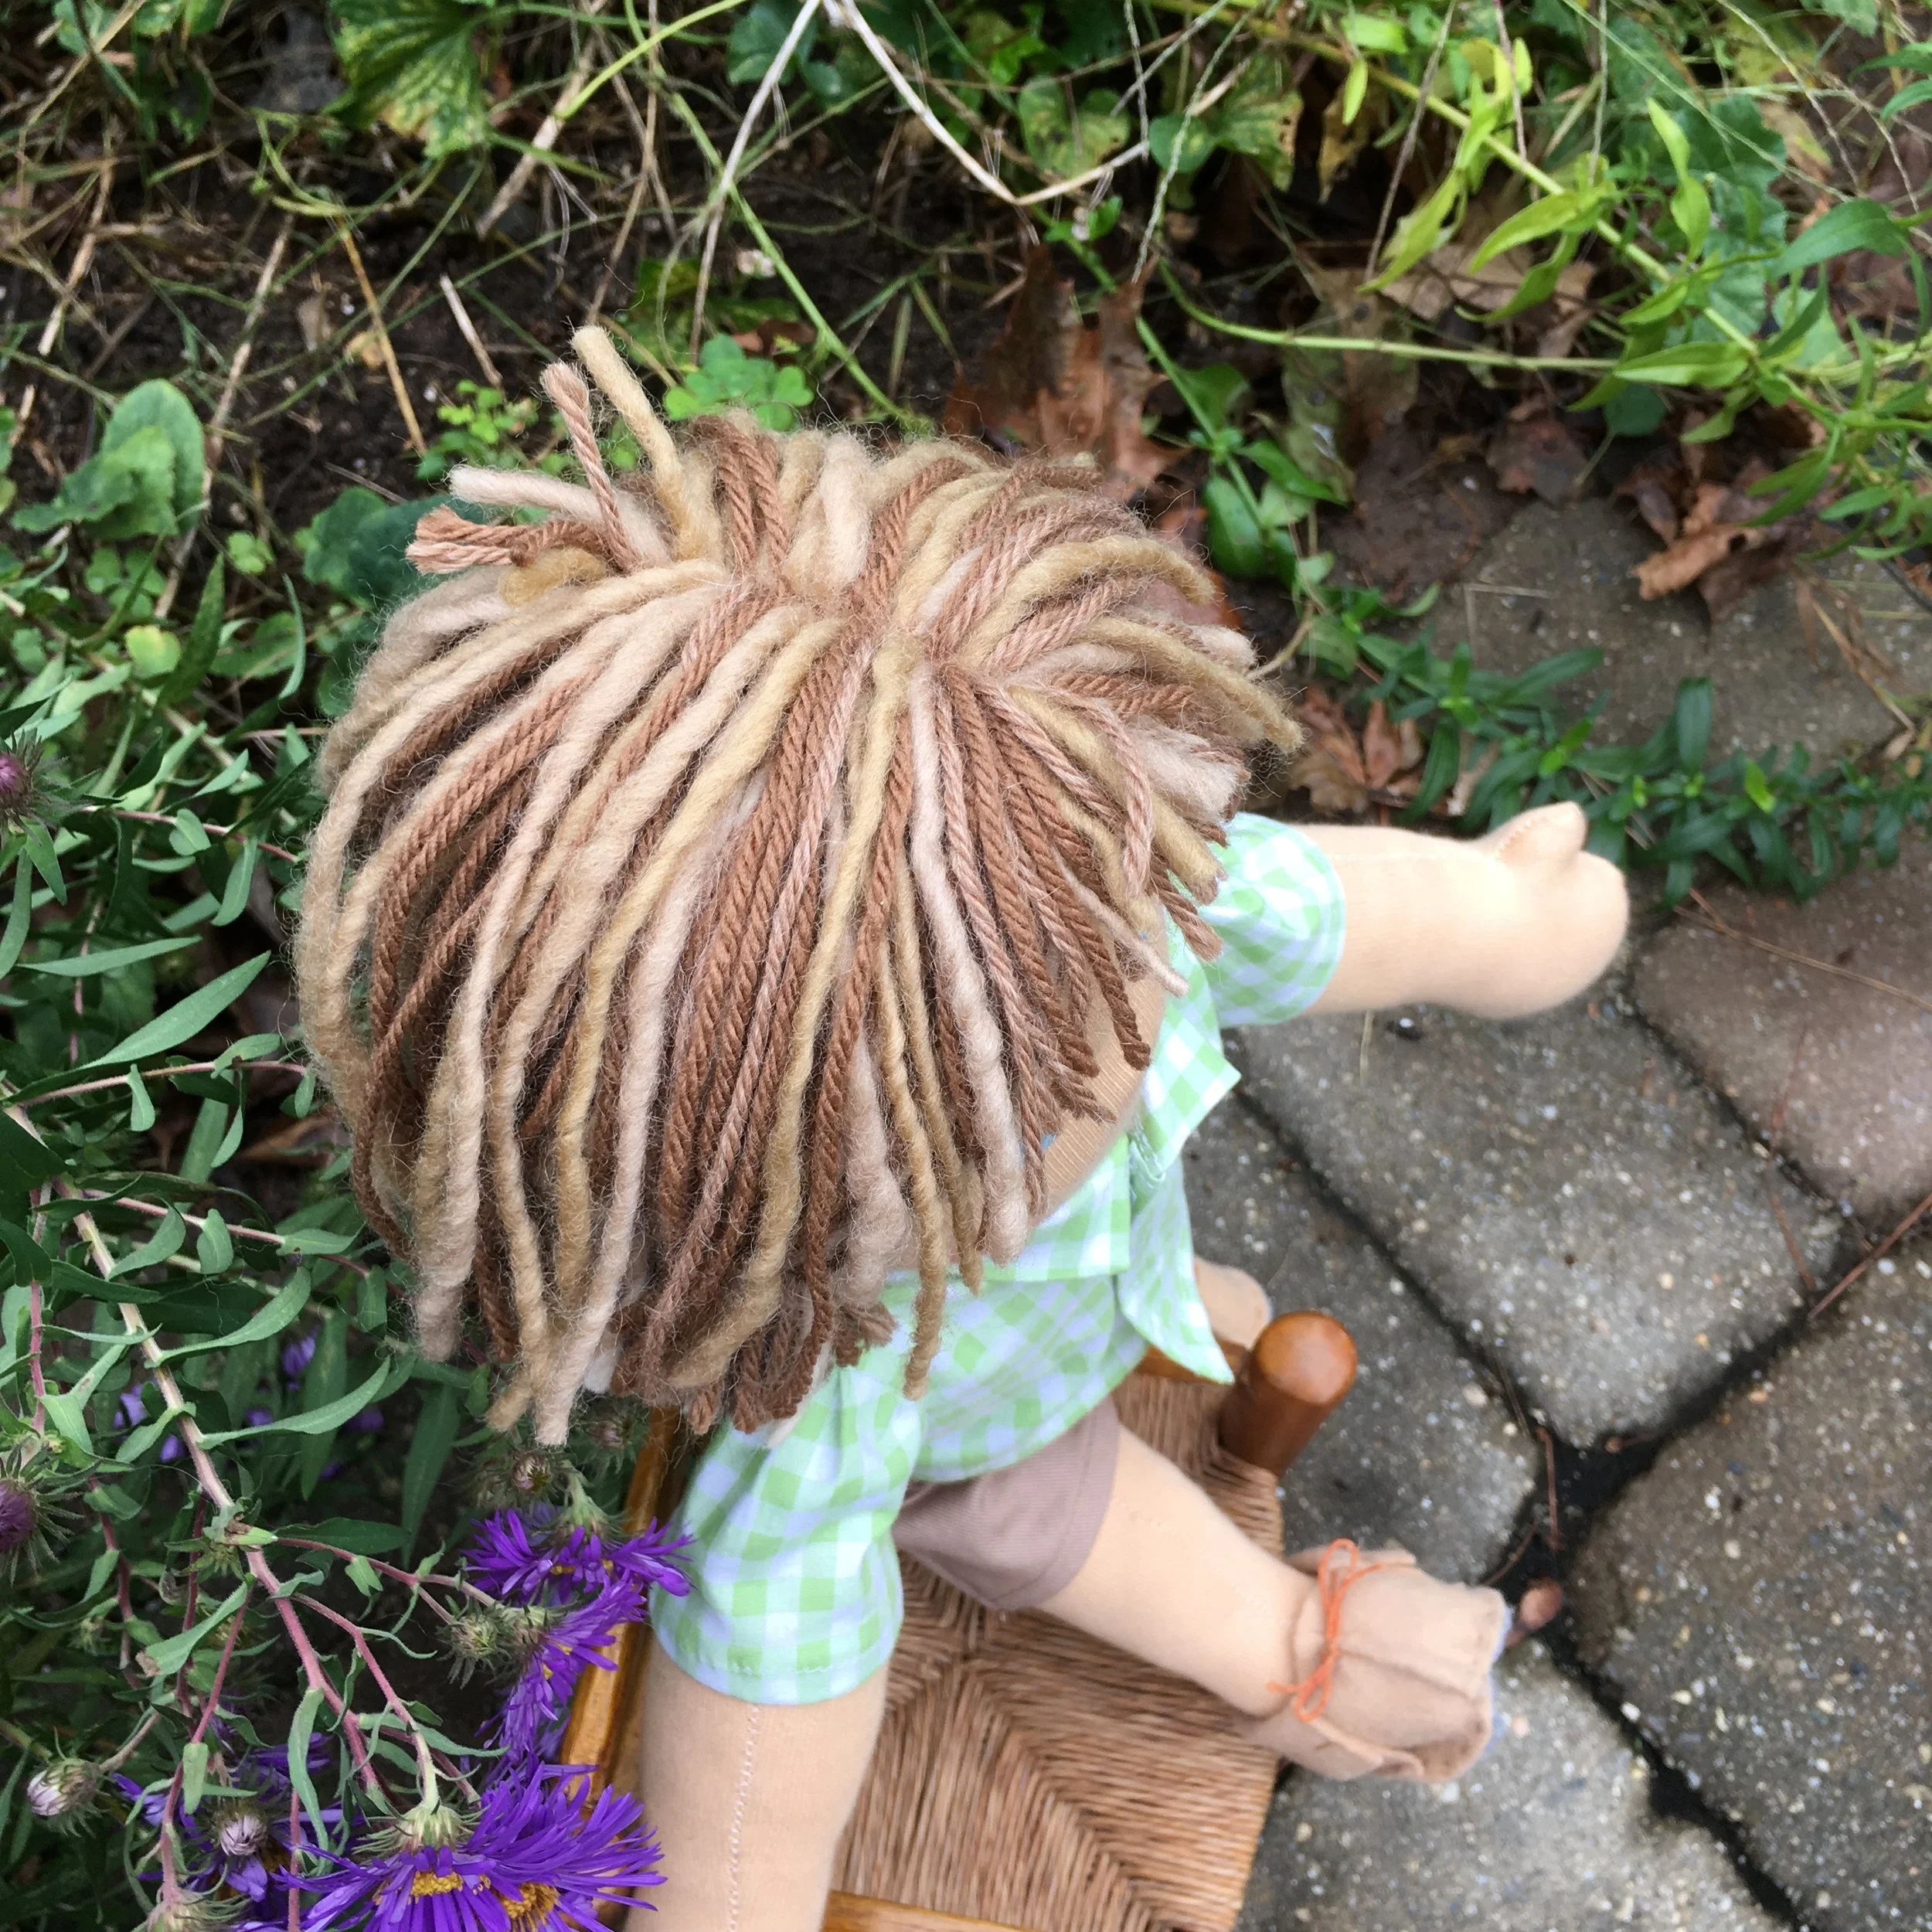
I drawn all the patterns for my dolls as well as drafting patterns for their clothes. This boy pattern seems to work particularly well. These two little Dudes just make me smile!!
* Waldorf Type dolls are made with knit cotton fabric for skin and have wool roving or batting for stuffing. Their round heads are make of wool rolled into a ball and shaped with a covering of knit stockinette and string before being finally getting covered with the knit cotton skin. They can be very simple or elaborately detailed. All the dolls are handmade and one-of-a-kind.
Fussy Cut Medallion Quilt Step-by-Step: Polar Medallion Quilt Completed, Medallion Quilt Books
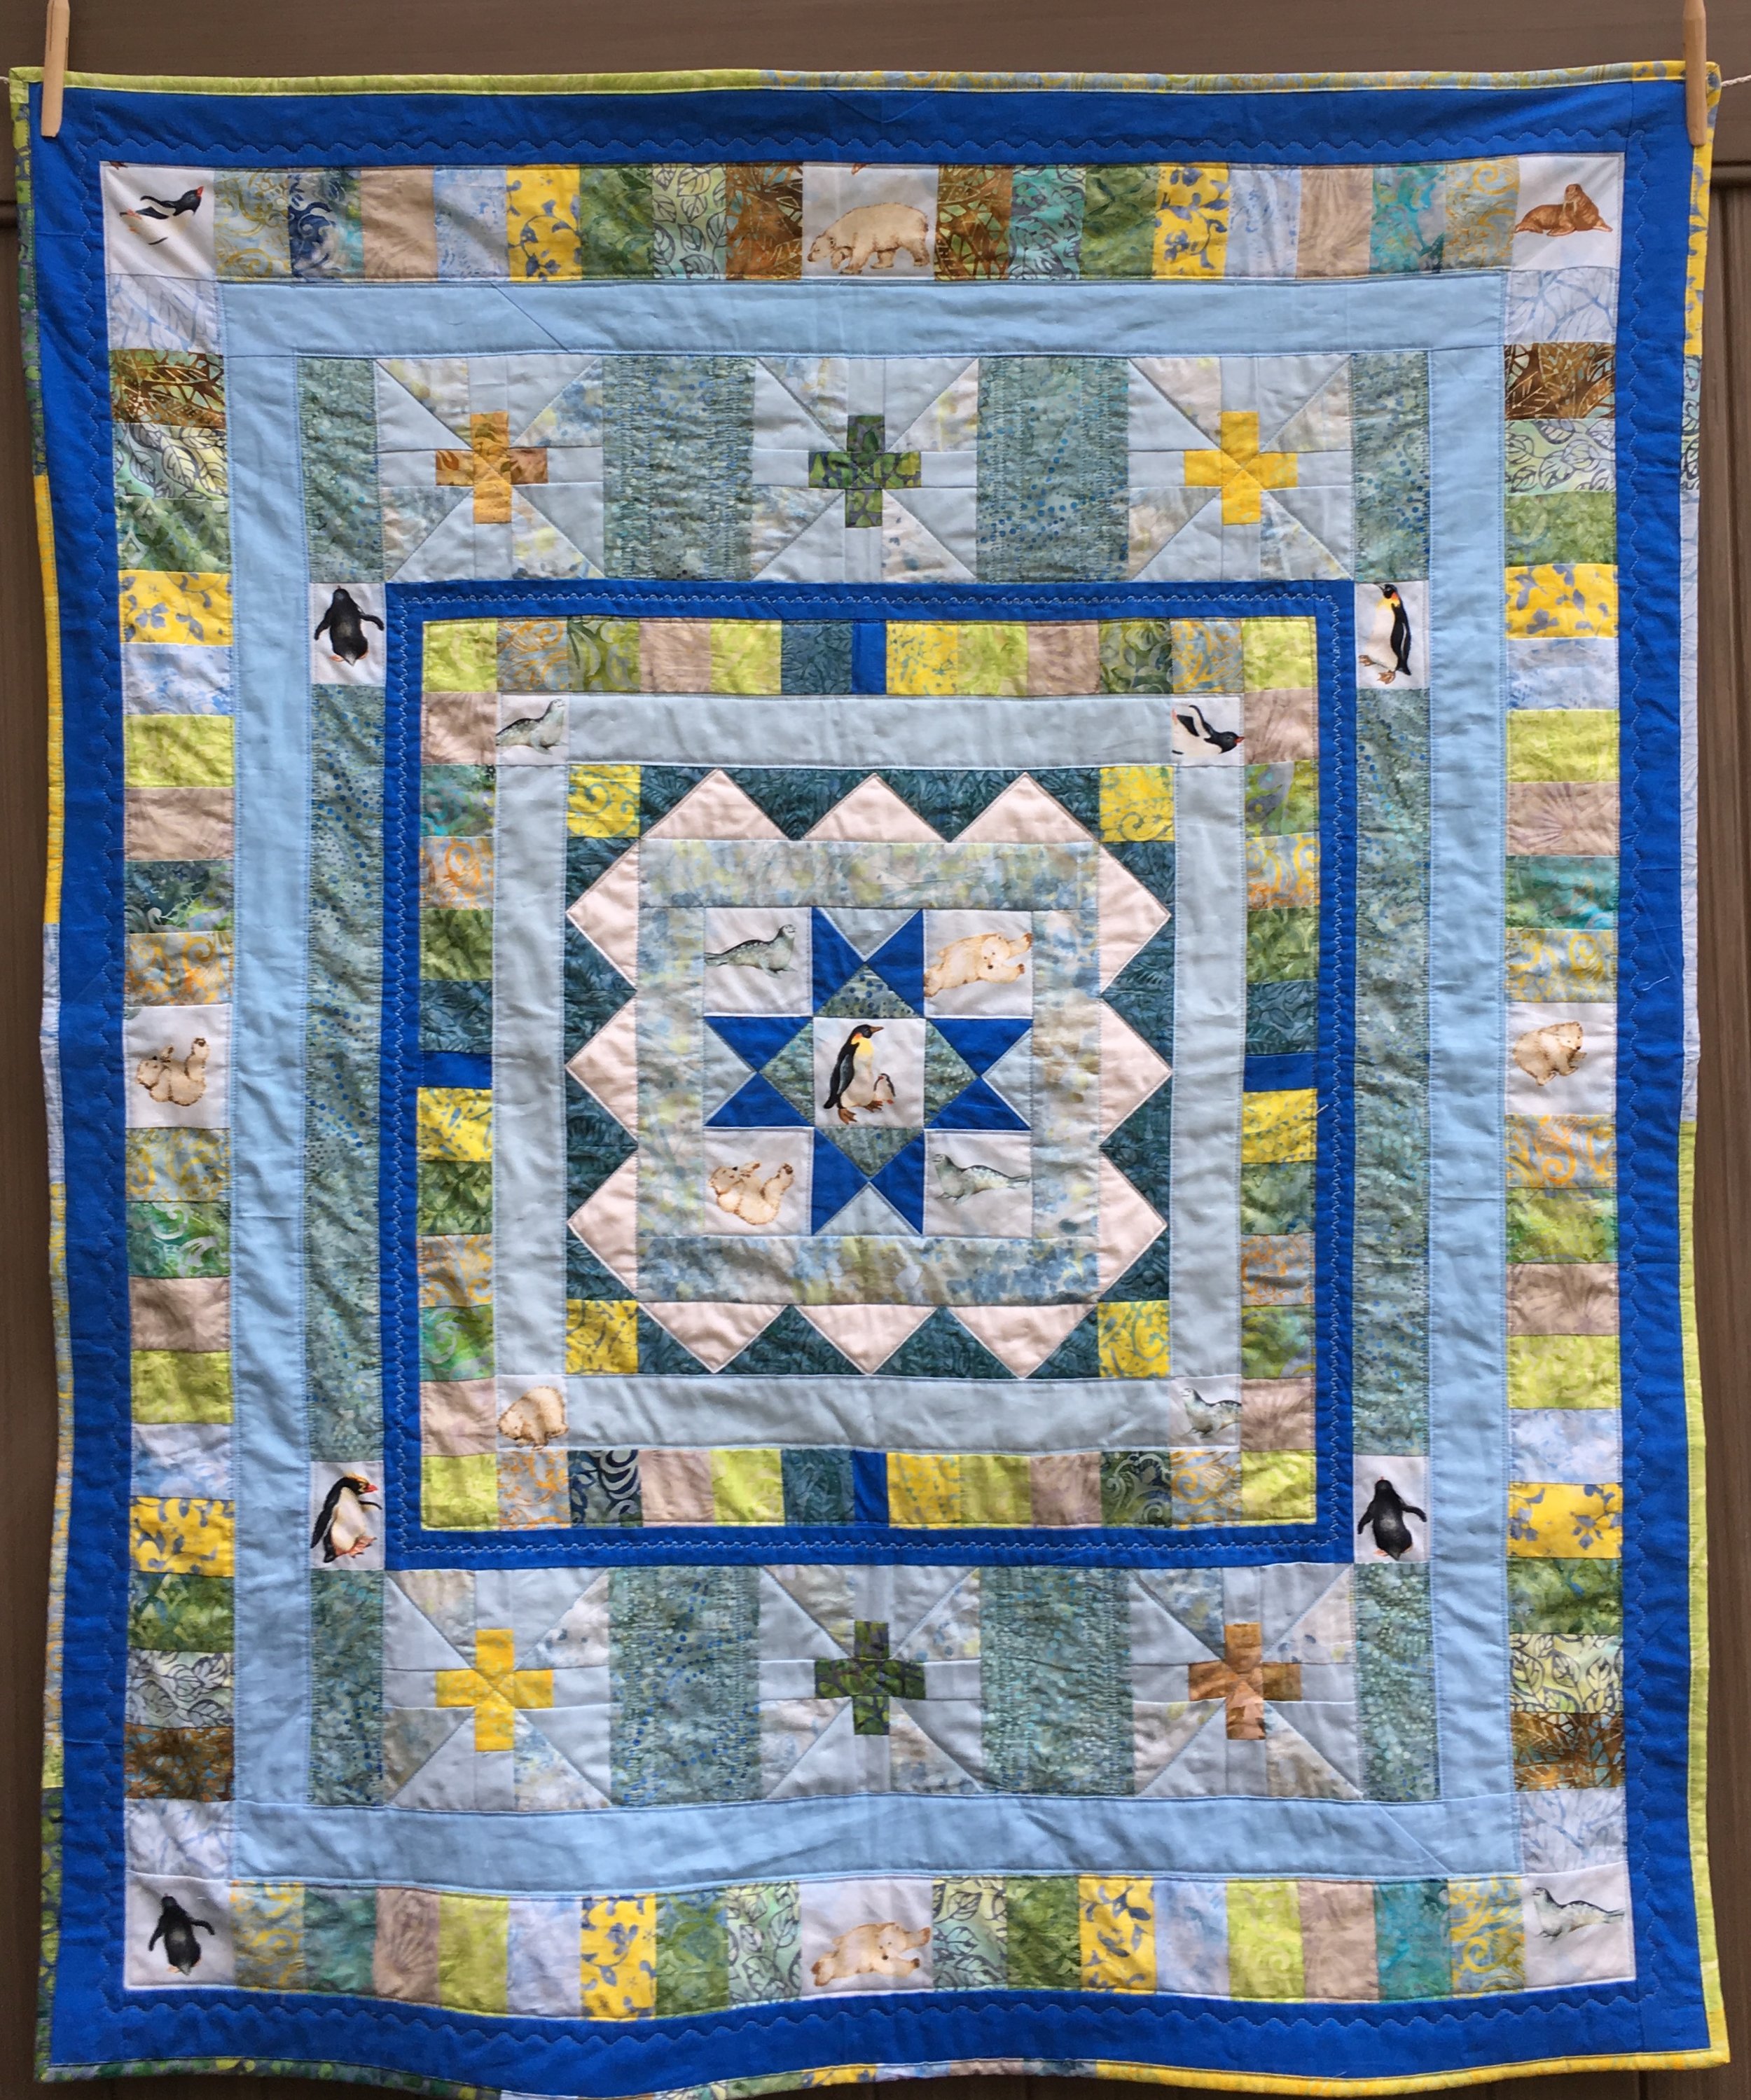
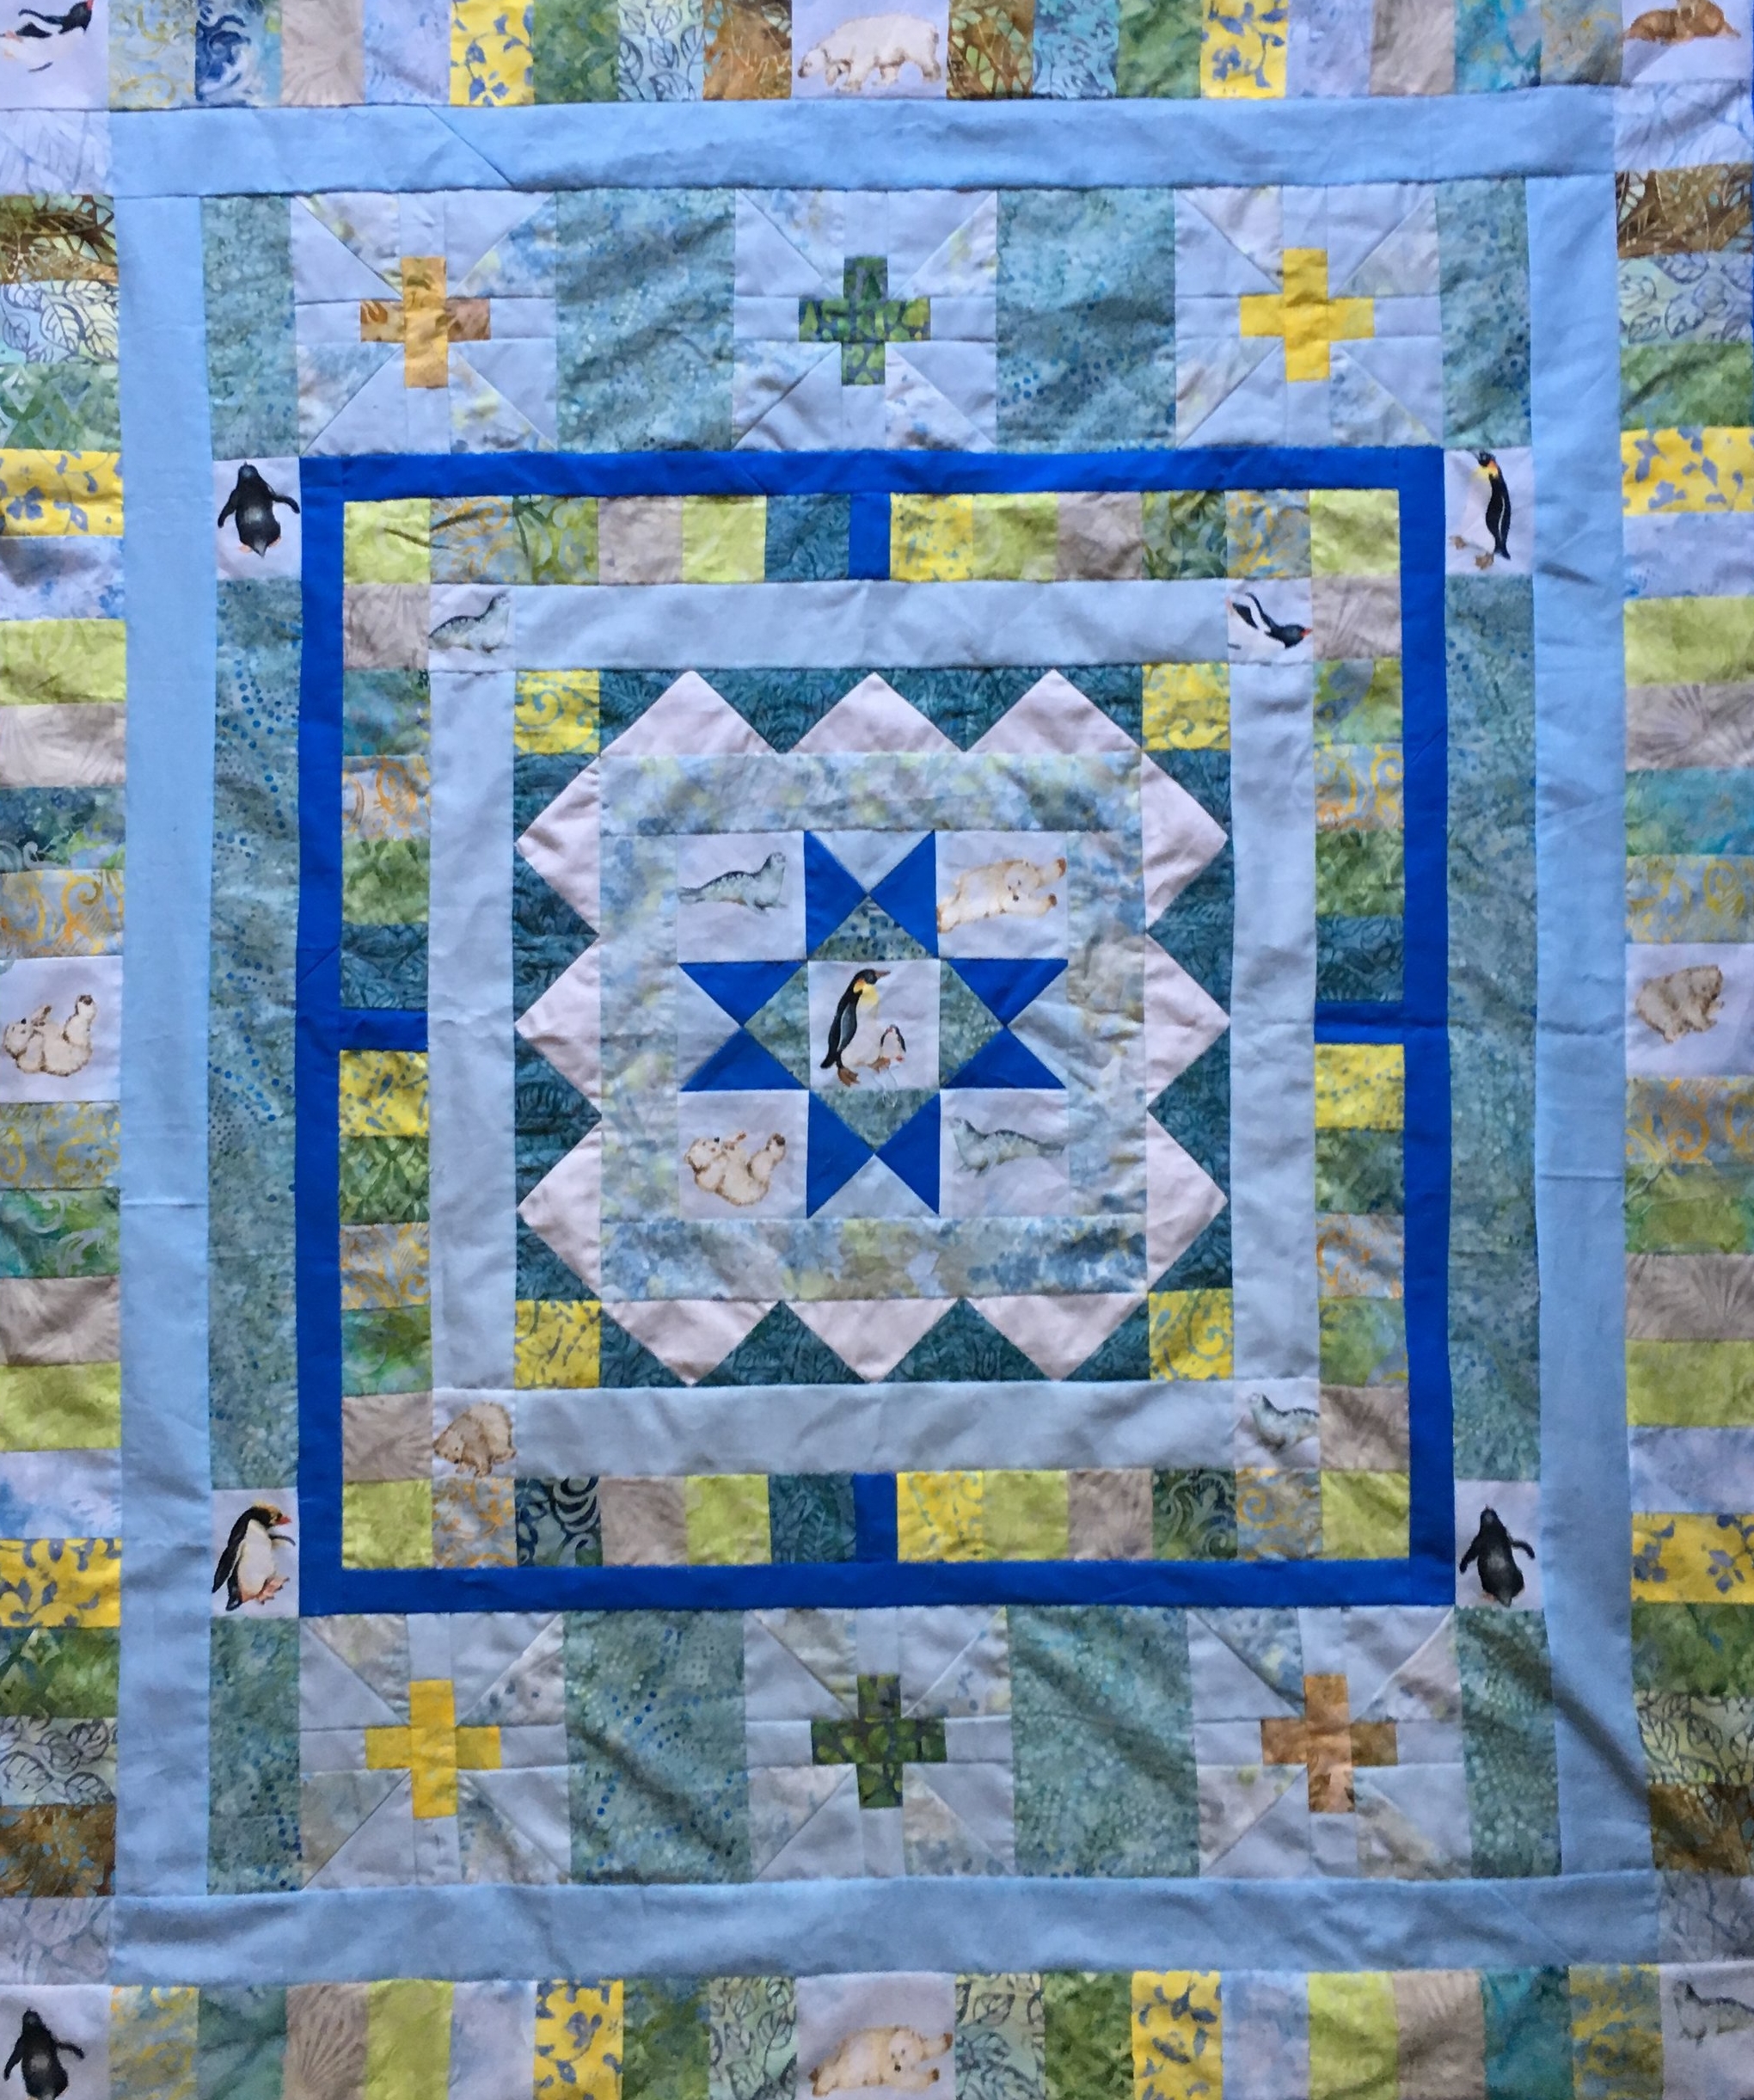
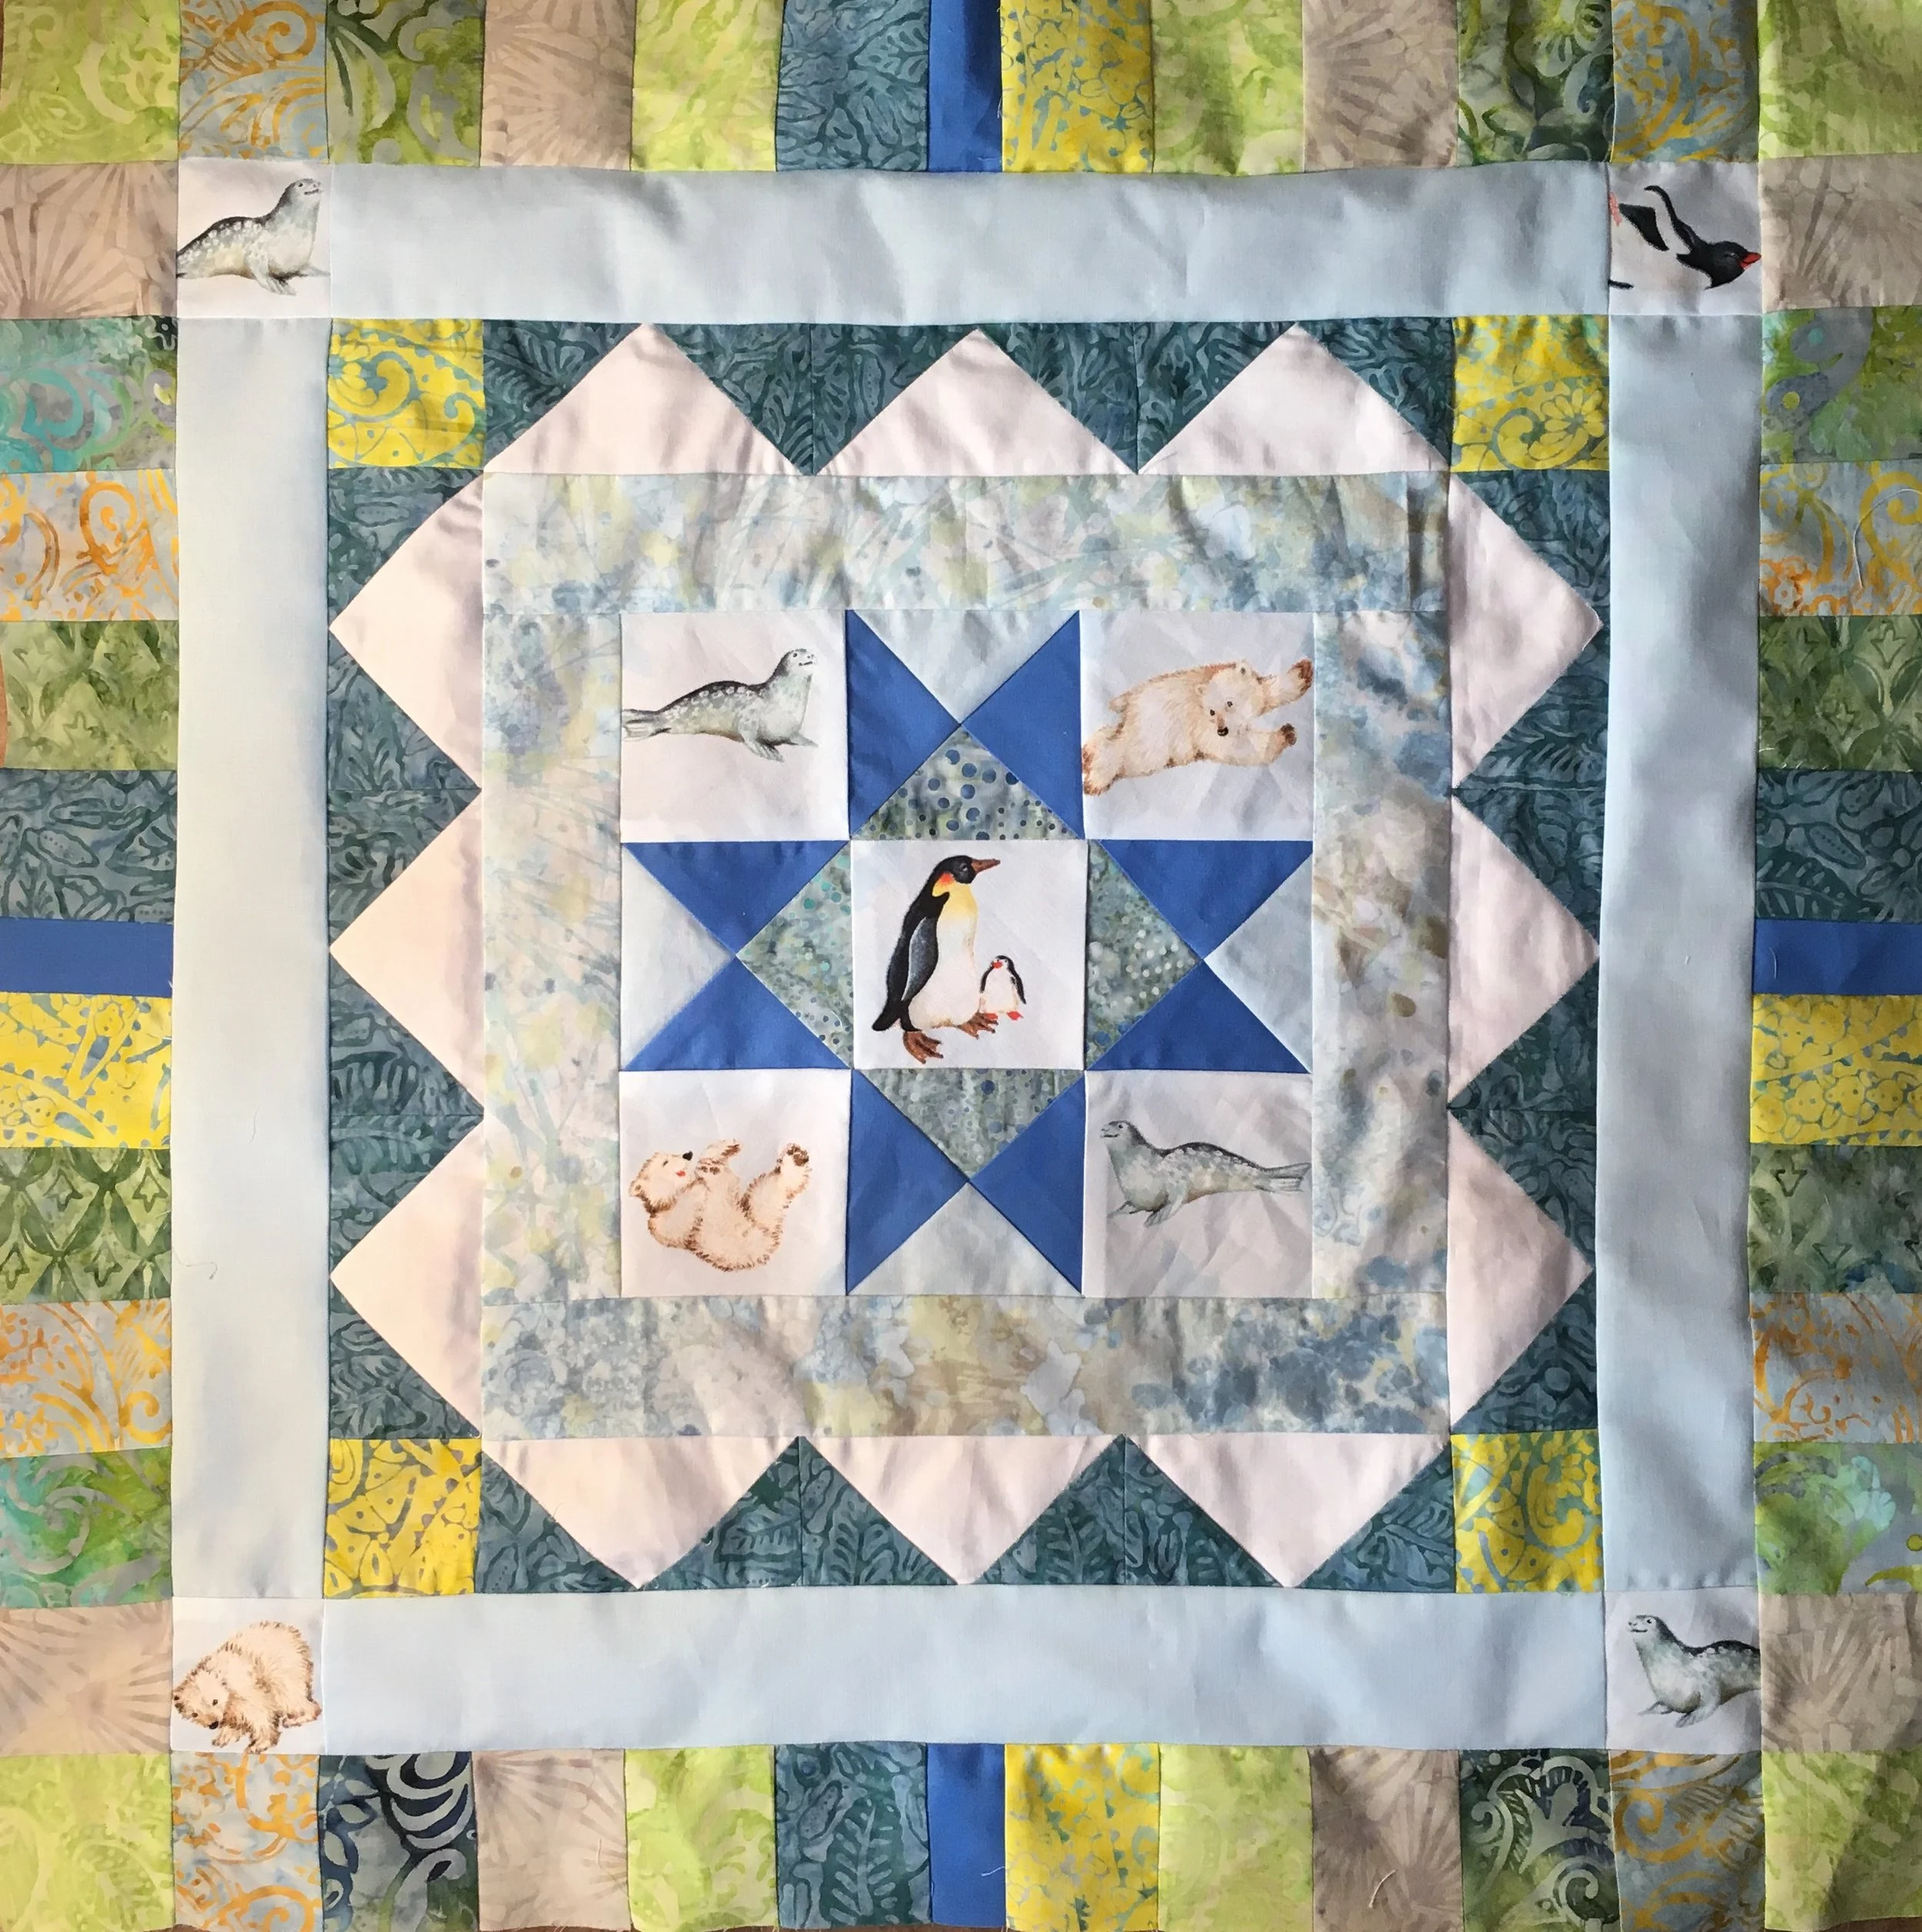
Polar Medallion Quilt44 x 50 inches
Polar Medallion Quilt44 x 50 inches
Here it is! The completed "Polar Medallion Quilt". I love all the colors so I particularly enjoyed working on this quilt!
And it was a joy to quilt. I did some straight line quilting, some echo quilting, a bit of embroidery on one of the solid concentric inner borders and I used my favorite Bernina #4 stitch in the last border.
Here's the back of this quilt. You can see the quilting much more clearly on this side as well as the structure of the medallion.
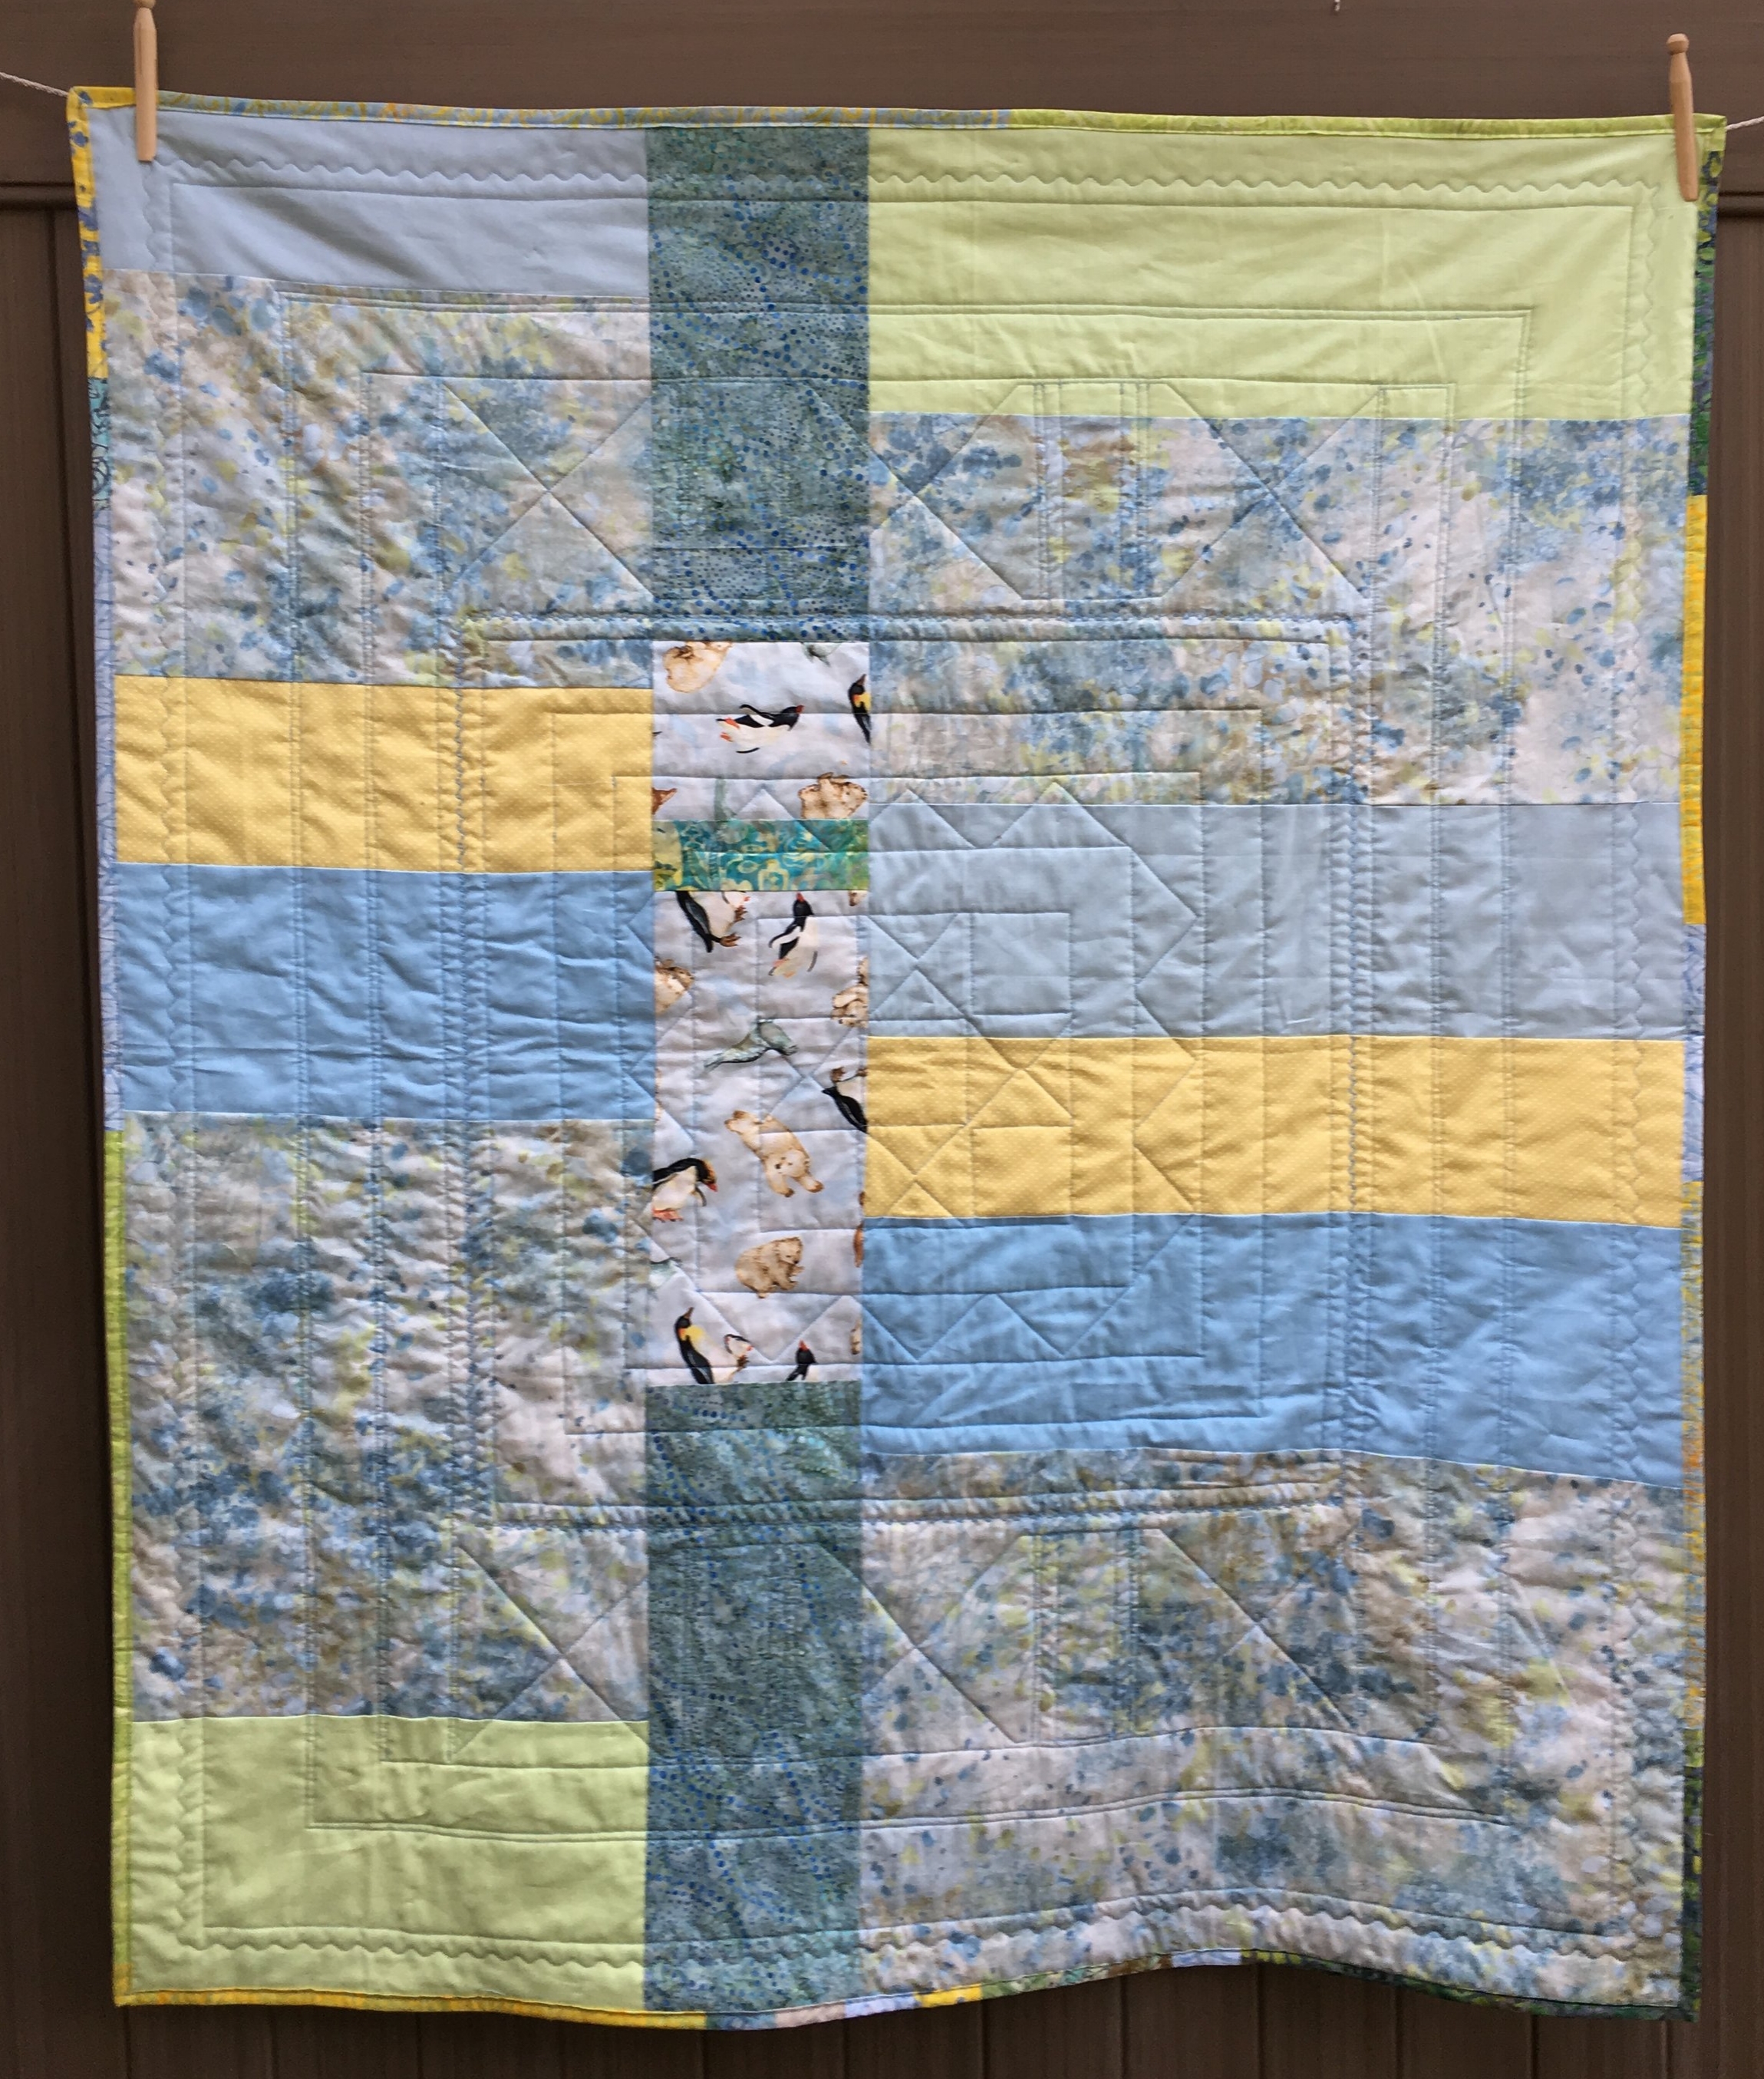
Polar Medallion Quilt--back side
I hope you enjoyed following along with the making of this quilt. If you make one for yourself, please let me know!
In my last post, I mentioned that I would tell you about two medallion quilt books. One is available now, the other is scheduled for release 12/26/2017.
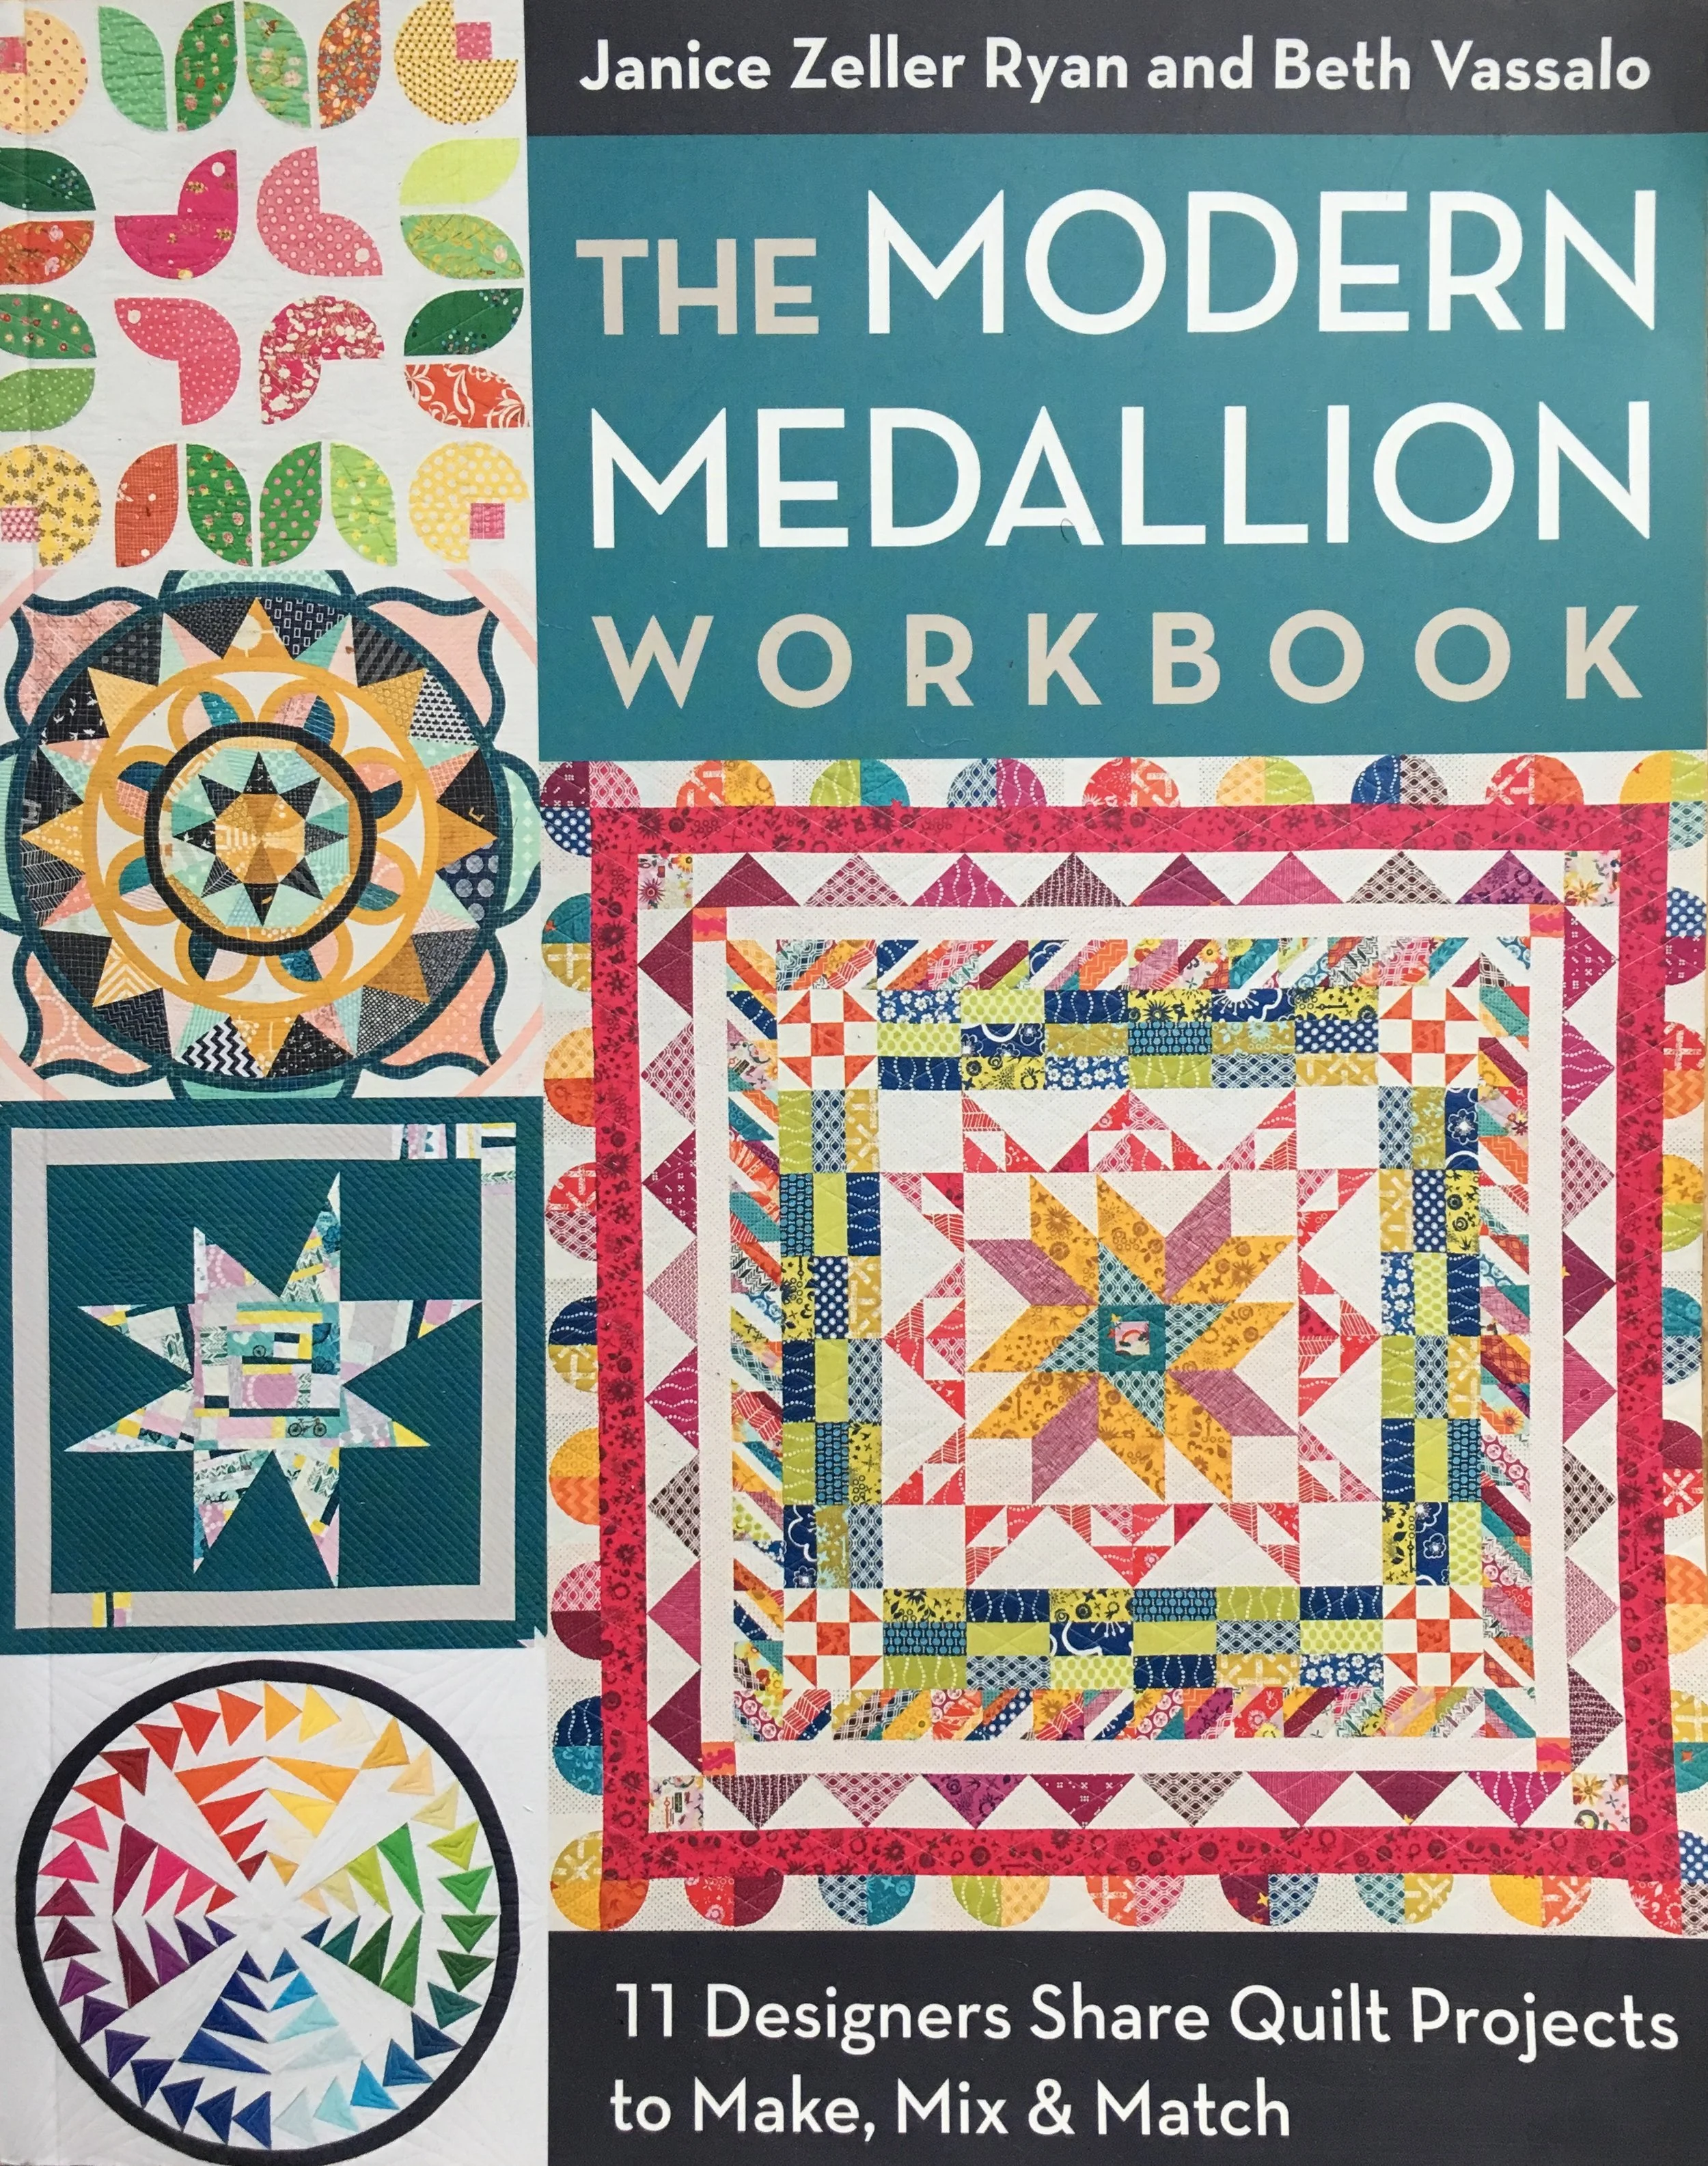
The Modern Medallion Workbook by Janice Zeller Ryan and Beth Vassalo was published by Stash Books in 2015. The book has a couple relatively simple medallion quilts but most of the quilts are complex, visually very exciting and look fairly challenging to make. I really like the quilt shown on the right side of the book's cover shown above. It looks like a party! The round flying geese medallion shown in the lower left corner above is incredible. It's the center medallion of a bright, fun quilt. It's an amazing book, but not one for a beginner quilter.
The book coming out in December is being published by Lucky Spool. Make Your Own Medallion: Mix + Match Block and Borders to Build Your Quilt From the Center Out was written by Erin Burke Harris. The preview states she has created a variety of borders that can be made in 3 widths, as well as 6 center medallions that are ready for use. She has done all the math for the borders! Quilt Math is what makes designing a medallion quilt challenging. Here is a link to some page spreads photos from the book on the Lucky Spool website. I'm so intrigued. I can't wait to see this book!
I hope I've sparked your interest in medallion quilts and that you'll try making one at some point. They are fun to sew and make beautiful and interesting quilts.
Fussy Cut Medallion Quilt Step-by-Step: Finishing the Quilt Top
Polar Medallion Quilt, Step 9
Polar Medallion Quilt, Step 9
In the previous 3 posts there are instructions for building this crib/lap size medallion quilt. In today's post, the quilt top as I've made it, will be finished. But feel free to continue adding to the quilt if you want to make it bigger!
Step 9: Adding plain border strips
I add plain borders every couple rounds as accents or to give the eye a place to rest since this is a busy pattern.
- Cut (2) 34 x 2 1/2 inch strips from a solid color
- Cut (2) 38 x 2 1/2 inch strips from the same color
- Sew 38 1/2 x 2 1/2 inch strips to the sides of the quilt. Press.
- Sew the 34 x 2 1/2 inch strips to the top and bottom of the quilt.
Step 10: Narrow Piano Key borders
Use a variety of the jelly roll strips for this step
- For the side strips, Cut (40) 3 1/2 x 2 1/2 rectangles from the jelly roll strips
- Cut (2) 3 1/2 tall x 3 3/4 wide spacer blocks from the sidestrip sets. I used fussy cut patches for these spacer blocks.
- For the top and bottom strip Cut (32) 3 1/2 x 2 1/2 rectangles
- Cut (2) 3 1/2 tall x 4 inches wide spacer blocks. As for the sides, I fussy cut these patches from the novelty fabric
- Fussy cut 4 corner blocks, 3 1/2 x 3 1/2 inches from the novelty fabric.
- For the sides, sew together (4) strip sets of 10 3 1/2 x 2 1/2 inch patches. Note: Sew the patches together on the longer 3 1/2 inch sides.
- Sew one 10 patch strip to the side spacer block, 3 1/2 x 3 3/4. Then attach a second 10 patch strip
- For the top and bottom strips, sew together (8) 3 1/2 x 2 1/2 inch patches. Make (4) of these 8 patch strips.
- For the top strip, Sew a 3 1/2 x 3 1/2 inch fussy cut corner block to an 8 patch strip. Attach the 3 1/2 x 4 inch spacer block. Attach another 8 patch strip and a final 3 1/2 x 3 1/2 inch corner fussy cut patch.
Repeat for the bottom strip. If your fussy cut patches have directional designs make sure you check to make sure the design will be upright in the strips.
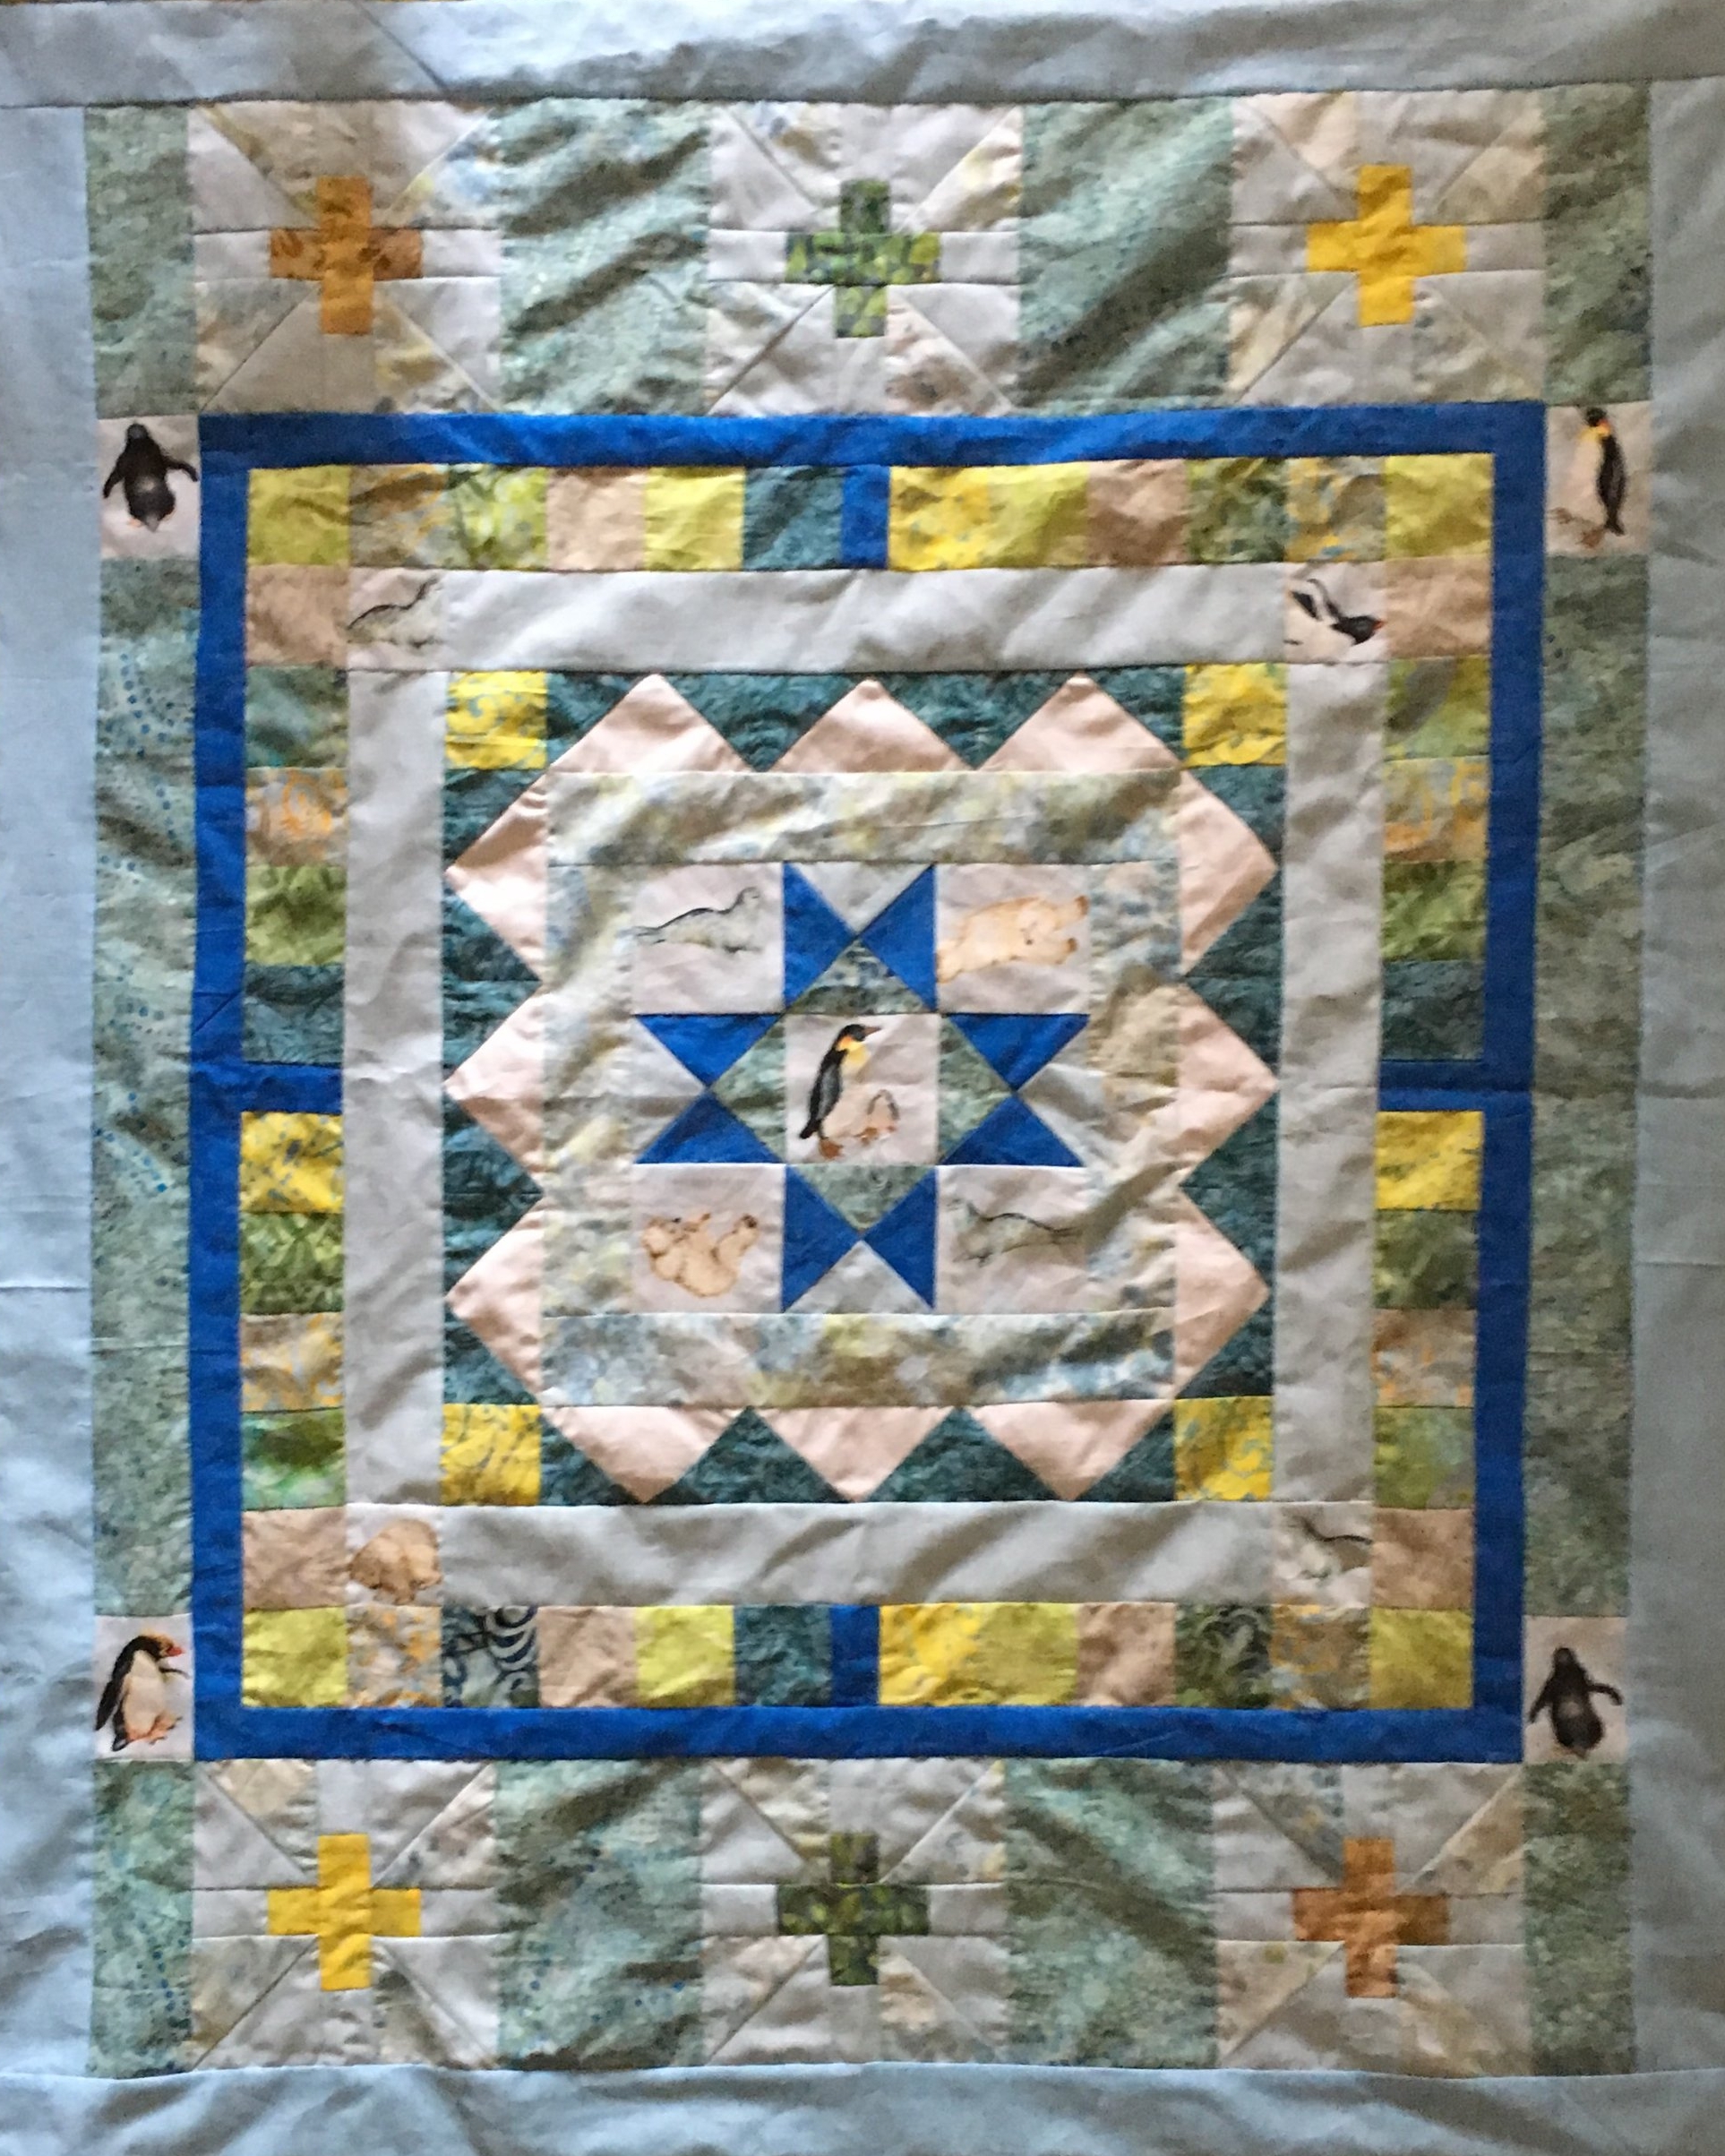
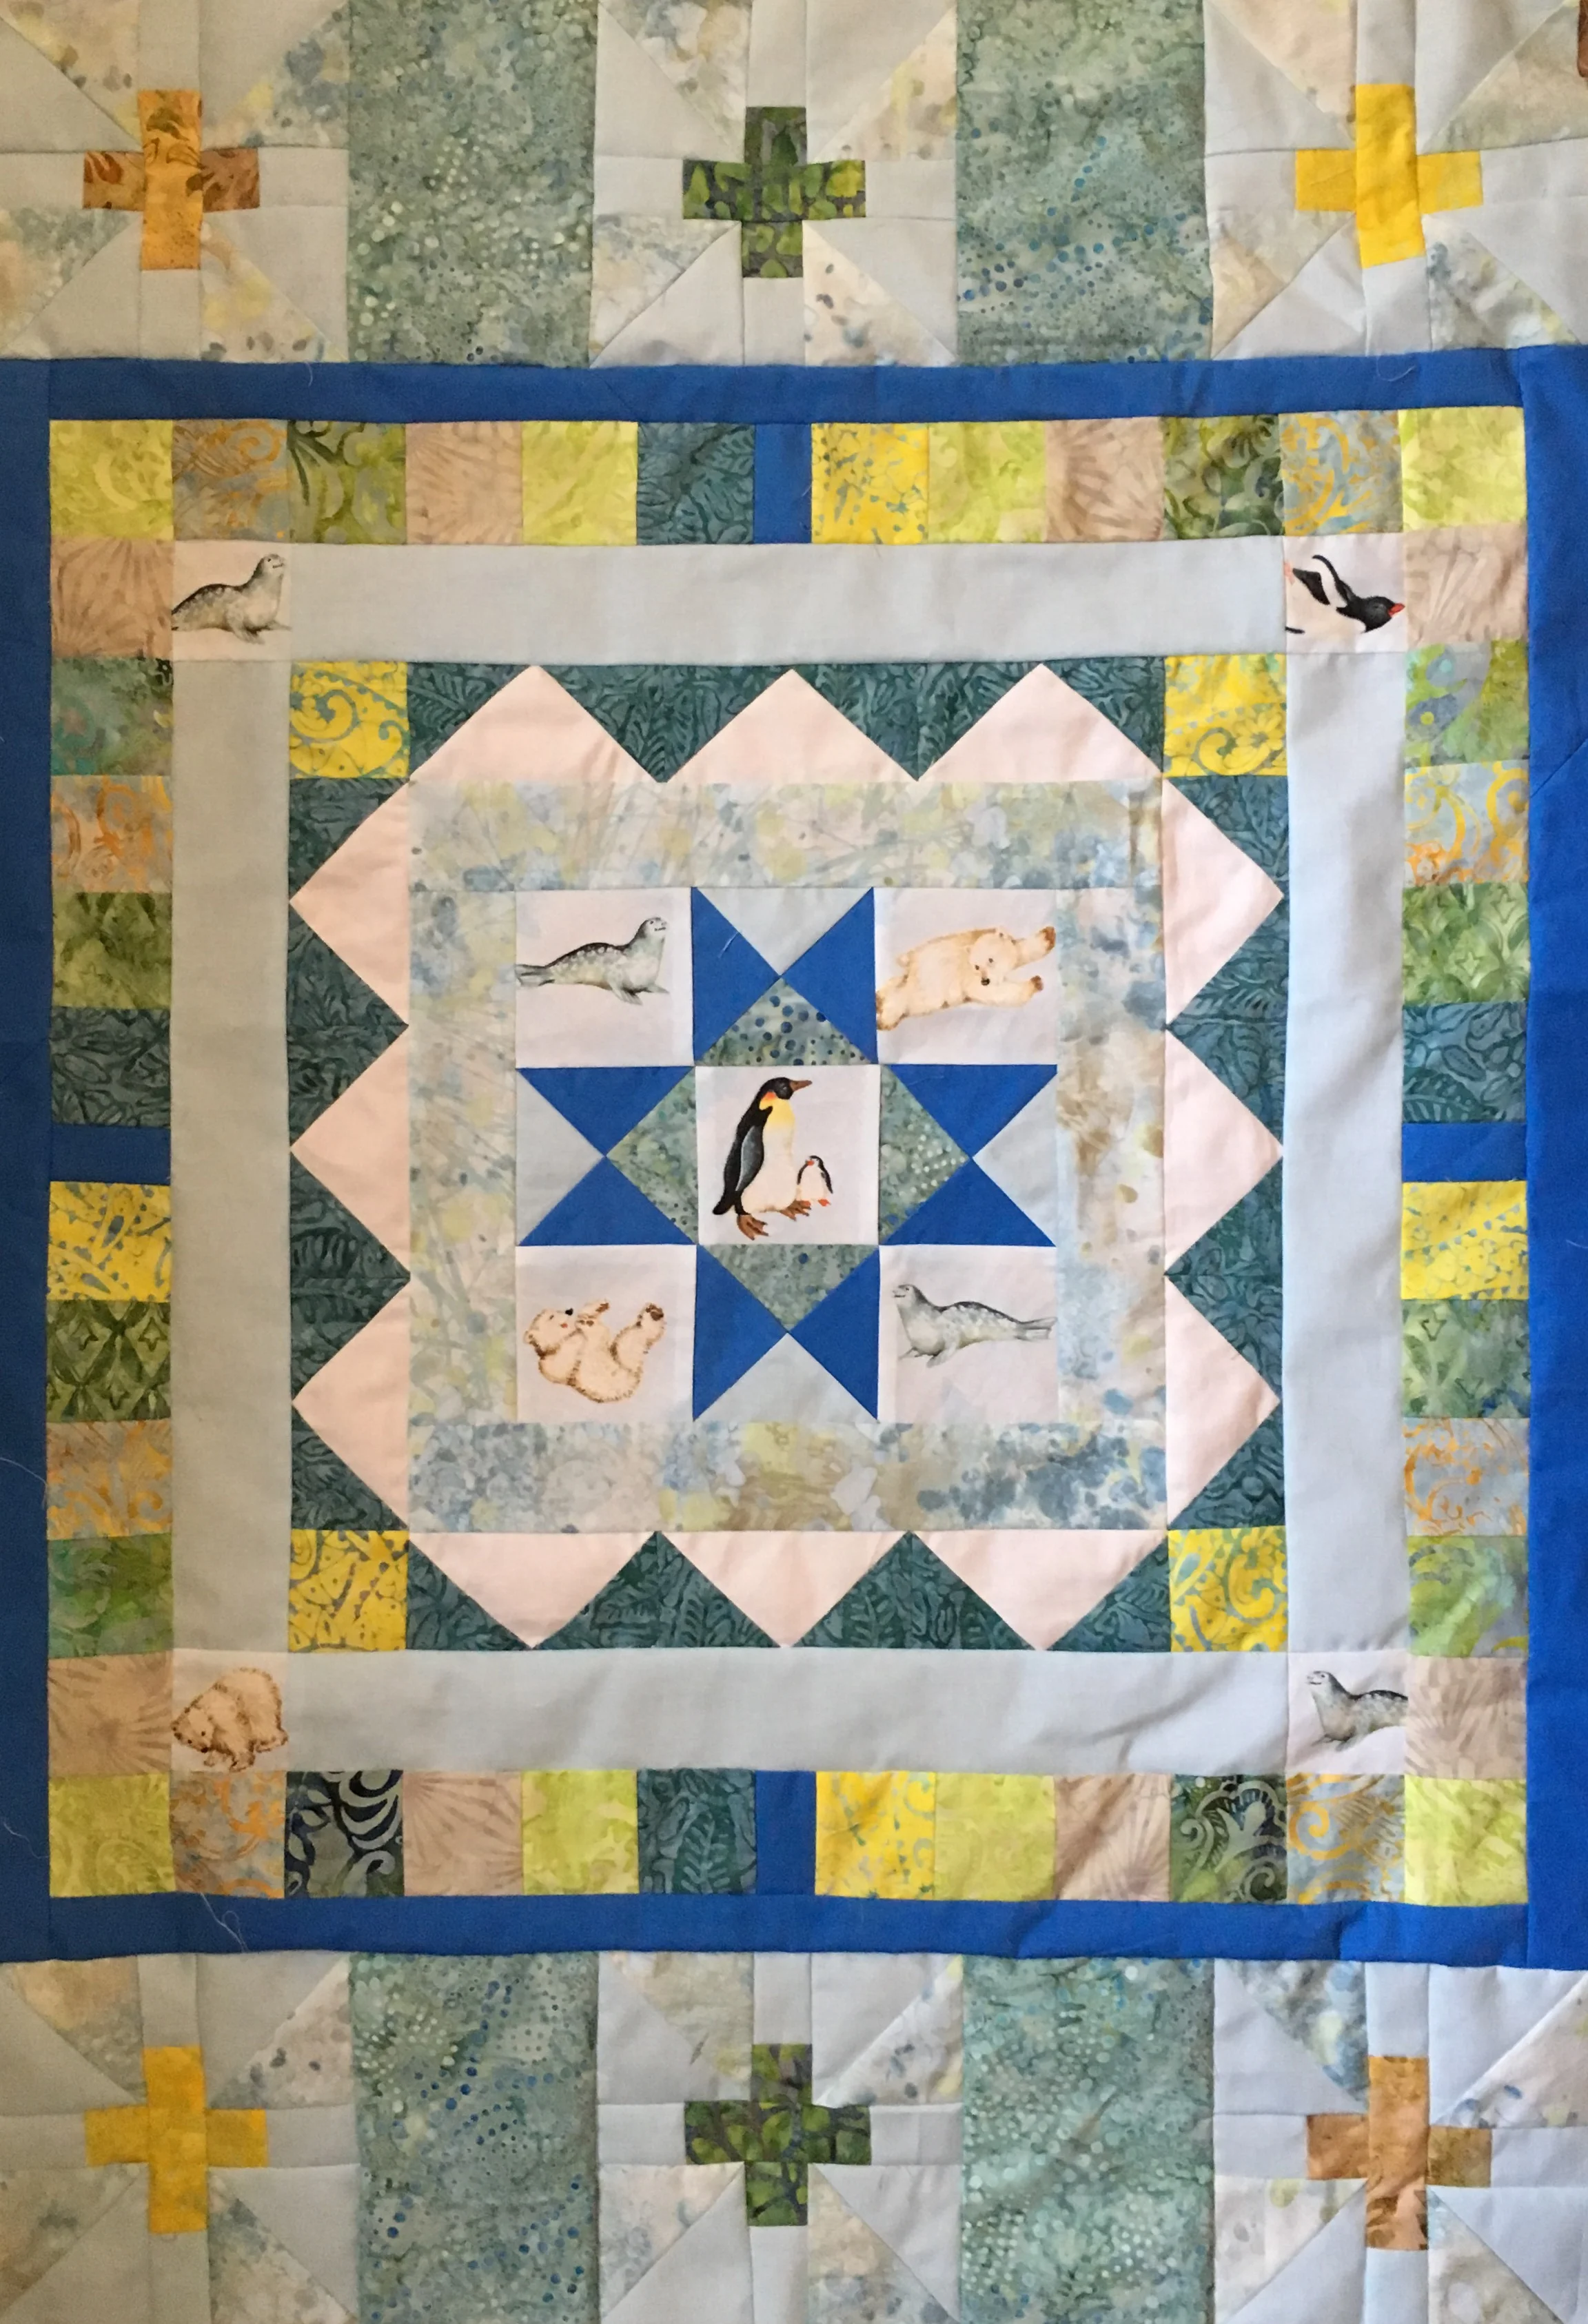
The finished Polar Medallion Quilt Top
Step 11: Final Solid Border Strips
- Cut (2) 2 1/2 x width of fabric from contrasting solid fabric.
- Sew one to the top of the quilt and one to the bottom.
- Cut (3) 2 1/2 x width of fabric from the contrasting solid. Sew these 3 strips together either straight or on the diagonal. Sew to one side of the quilt. Then cut and sew the left over strip to the other side of the quilt.
- For greater accuracy in cutting, measure the length and width of the quilt in the center of quilt rather from the ends or sides. Use those measurements from the middle of the quilt side and top to cut the last border strips.
That's the completed Polar Medallion Quilt top! If you've been using these directions to make a similar quilt, I hope you had fun. Please let me know if you find errors in the instructions.
In my final Polar Post, next week, I'll show my finished quilt and give some recommendations for books about Medallion quilts.
Fussy Cut Medallion Quilt Step-by-Step: From Square to Rectangular

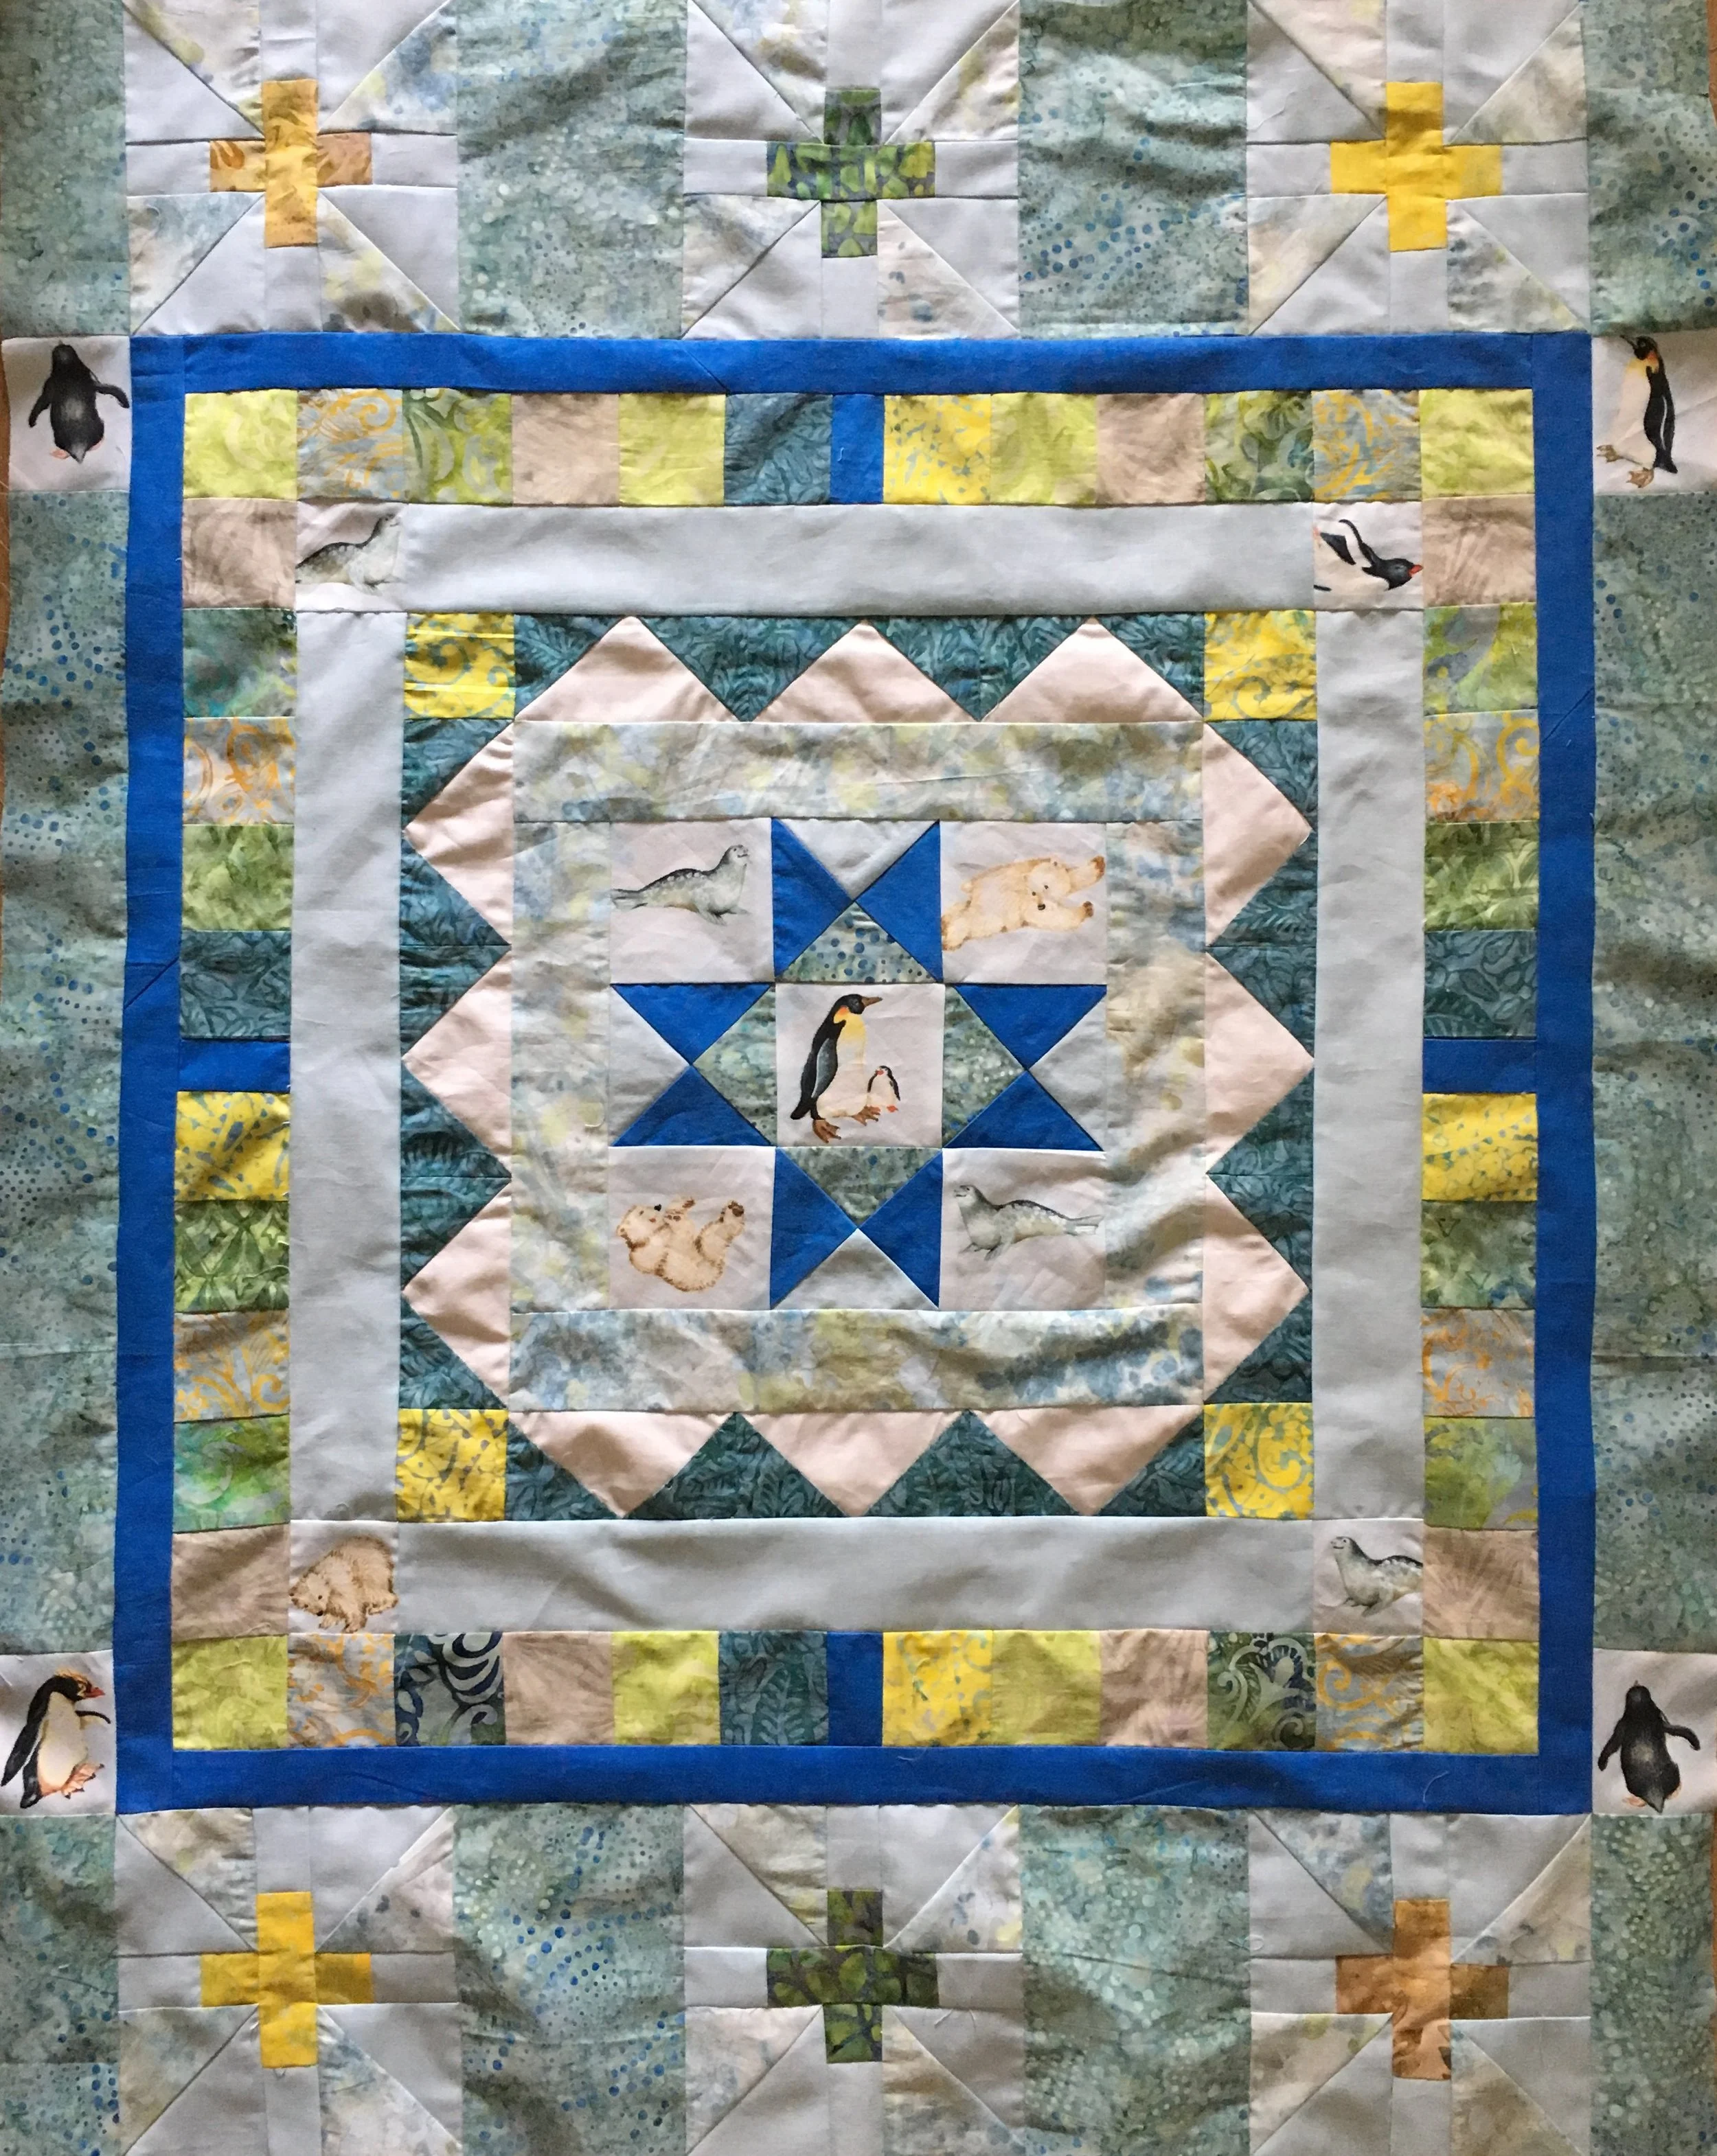
Polar Medallion Quilt Step 6, the last step working in the round
Polar Medallion Quilt Step 6, the last step working in the round
Two weeks ago I started posting step-by-step instructions for making a fussy cut medallion quilt. Up until now, the same strips sets were added to each side of the quilt. There is one more border to add, working in the round. Then the quilt will morph from the traditional square quilt to a rectangular quilt.
Step 6: Strips, last step where the same strip sets are added to all 4 sides.
- Cut (2) 24 1/2 x 1 1/2 inch strips from a solid color with good contrast
- Cut (2) 26 1/2 x 1 1/2 inch strips from a solid color with good contrast
- Sew the 24 1/2 inch strips to the 2 sides of the quilt.
- Sew the 26 1/2 inch strips to the top and bottom of the quilt.
- The quilt should now measure 26 1/2 x 26 1/2 inches square. THIS IS THE LAST SQUARE STEP.
Quilt with strip sets added only to top and bottom changing the quilt to a rectangle.
Step 7: Adding blocks to top and bottom of the quilt
- Choose a quilt block that you like and that will be 6 1/2 inches UNFINISHED. (I found the pattern for this block, "Vintage Propellers" at ConnectingThreads.com).
- Make (6) 6 1/2 x 6 1/2 (unfinished) blocks
- Cut (4) 4 1/2 x 8 1/2 spacer blocks from one of the patterned fabrics
- Sew two strips sets: 1 quilt block, one spacer block, 1 quilt block, one spacer block, 1 quilt block.
- Sew one strip set to the top of the quilt and one to the bottom of the quilt.
- The quilt is now 26 x 38 inches.
Adding skinny side strips with fussy cut patches
Step 8: Adding just side strips with embedded fussy cut patches
- Cut (4) 6 x 2 1/2 inch strips from a patterned fabric
- Fussy cut (4) patches 2 1/2 inches wide and as tall as needed for the design.
- Because my fussy cut patches were a variety of heights, you'll need to do a bit of your own quilt math to cut this strip. From the patternedfabric, cut (2) 2 1/2 inch x length needed to make a completed 26 inch strip set when a fussy cut patch is attached to the top and bottom of this strip. Make sure to allow for the quarter inch seam allowances when cutting this spacer strip.
- Sew one fussy cut patch set to each end of the spacer cut in the previous step.
- Sew one 6 1/2 x 2 1/2 inch strip cut from patterned fabric to the top and bottom of each of these fussy cut strip sets.
- The quilt should now measure 30 x 38 inches.
In the final post next week, the quilt top will be completed.
Fussy Cut Medallion Quilt Step-by-Step: Working in the Round

Polar Medallion Quilt, first 2 rounds
Polar Medallion Quilt, first 2 rounds
In the last post I started the directions for making a Crib/lap size Medallion Quilt.
Step 1 was creating the 9 1/2 x 9 1/2 inch central focal block for the medallion quilt. This post will include the steps for the concentric strip sets, working in Round, keeping the quilt square. Step 2 and Step 3 can be seen with the central medallion in the picture above.
Step 2: patterned strips
- Cut 2 strips 9 1/2 x 2 1/2 inches from your jelly roll strips
- Cut 2 strips 12 1/2 x 2 1/2 inches from your jelly roll strips
- Sew the 9 1/2 inch strips to the 2 sides of the central block. Press
- Sew the 12 1/2 inch strips to the top and bottom of the central blocks. Press
- Trim to 12 1/2 inches square
Step 3: Flying geese strips
- Cut (12) 4 1/2 x 2 1/2 inch strips from a solid fabric
- Cut (24) 2 1/2 x 2 1/2 inch squares from 1 jelly roll strip
- Cut 2 corner blocks 2 1/2 x 2 1/2 inch squares from a jelly roll strip which contrasts with the jelly roll strip used for the flying geese
- Draw a diagonal line down across each of the (24) 2 1/2 inch squares. Place a square on the right side of the solid rectangle and sew just to the inside (closer the the corner) of the drawn line. Press. Trim seam to 1/4 inch. Repeat on the left side of the rectangle to complete the flying geese block.
- Sew 3 flying geese blocks together on the short ends of the rectangle. Sew 2 of these units to the sides of the quilt
- Sew 1 2 1/2 inch square corner block to each end of the other 2 flying geese units. Press. Sew to the top and bottom of the quilt
- The quilt should now measure 16 1/2 inches square

Round 4 of the Polar Medallion Quilt
Step 4: Strips with Fussy Cut Corner Blocks
- Cut (4) 16 1/2 x 2 1/2 inch strips from a solid color
- Fussy cut (4) 2 1/2 x 2 1/2 corner blocks from the novelty fabric
- Sew two solid strips to each side of the quilt.
- Sew a corner block to each end of the remaining 2 solid color strips. PressBe careful of the orientation of the design in your fussy cut block if there is a right way up in the pattern.
- Sew the strips with the corner blocks to the quilt. Press.
- The quilt should now measure 20 1/2 inches x 20 1/2 inches
Polar Medallion Quilt Step 5
Step 5: Squares with center-strip spacer units
- Cut (44) 2 1/2 x 2 1/2 inch squares from an assortment of the jelly roll strips
- Cut (4) 1 1/4 x 2 1/2 inch spacer blocks from a coordinating solid fabric (good use of scraps)
- Sew four units of (5) 2 1/2 square blocks
- Sew (1) 1 1/4 x 2 1/2 inch spacer blocks to 1 strip of 5 blocks. Then sew another 5 block strip to the other side of the spacer. Make one more unit this way.
- Sew four units of (6) 2 1/2 inch square blocks
- Sew (1) 1 1/4 x 2 1/2 inch spacer block to 1 strip of 6 blocks. Then sew another 6 block strip to the other side of the spacer block. Make one more unit this way.
- Attach the shorter strips to the sides of the quilt
- Attach the longer strips to the top and bottom of the quilt
- The quilt should measure 24 1/2 x 24 1/2 inches square
Next week working in the round will be finished and the quilt will be changed into a rectangle.
Fussy Cut Medallion Quilt Step-by-Step: Introduction

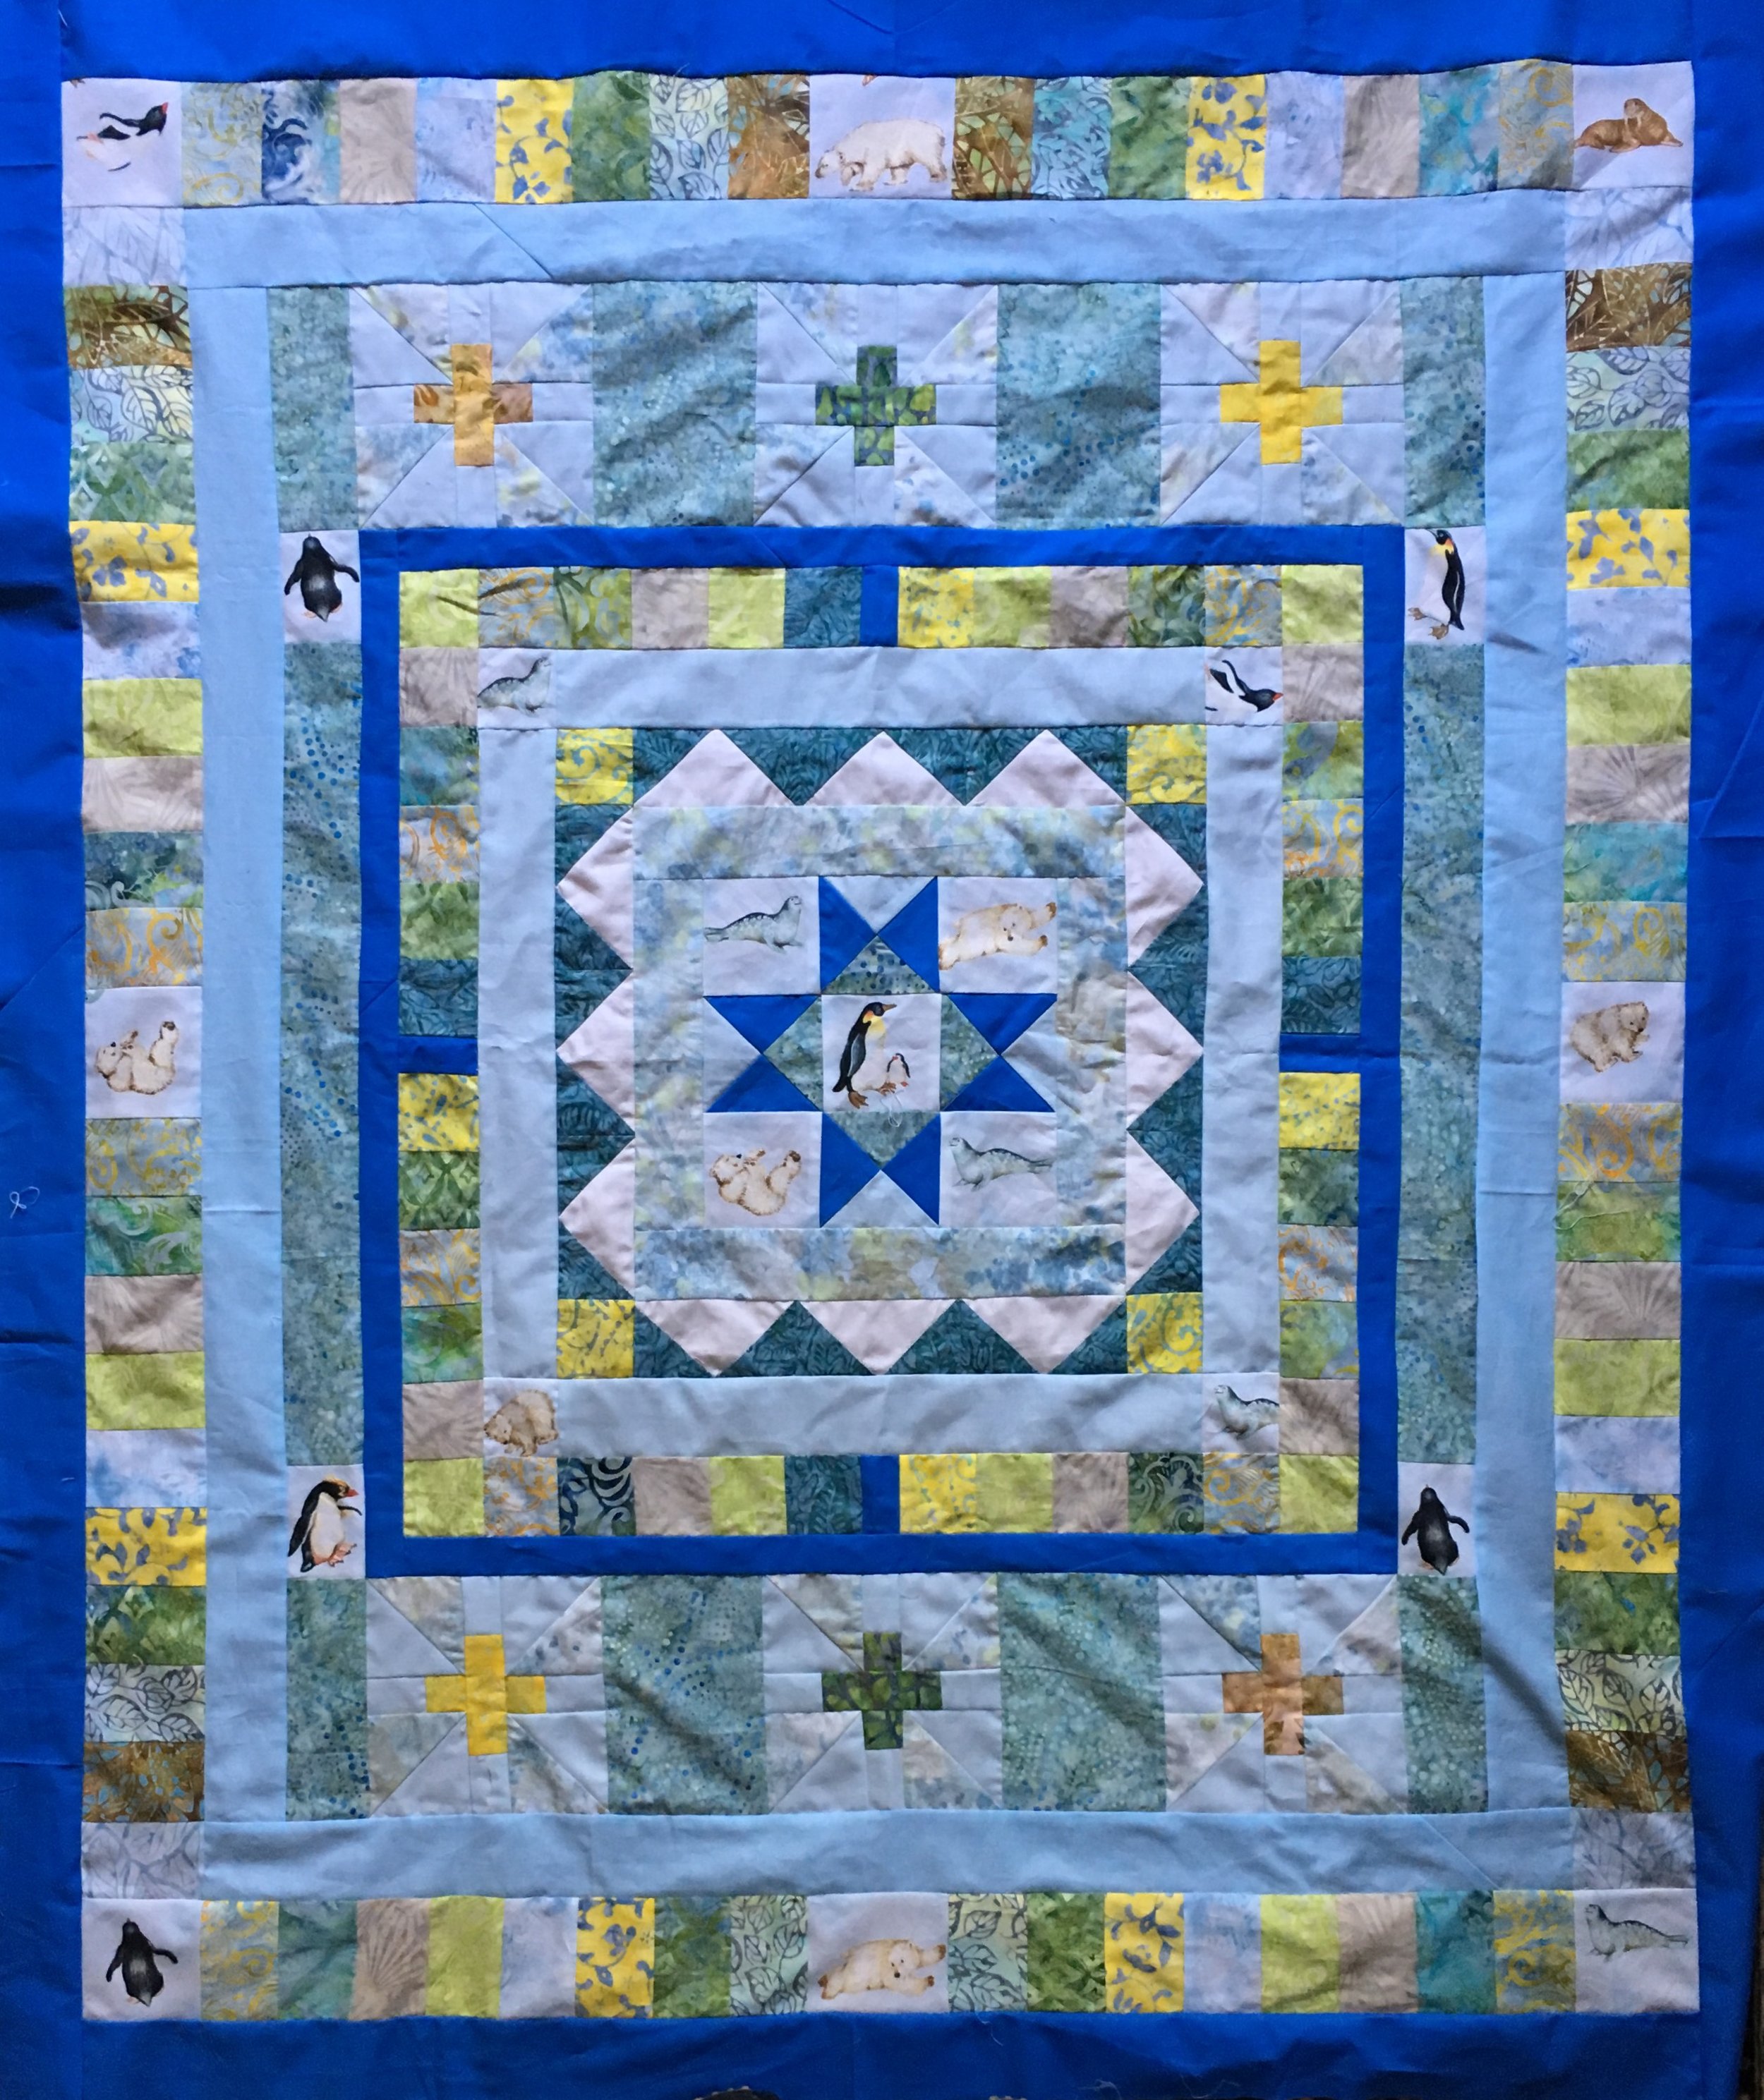
Unquilted top: "Polar Medallion Quilt", 44 x 52 inches
Unquilted top: "Polar Medallion Quilt", 44 x 52 inches
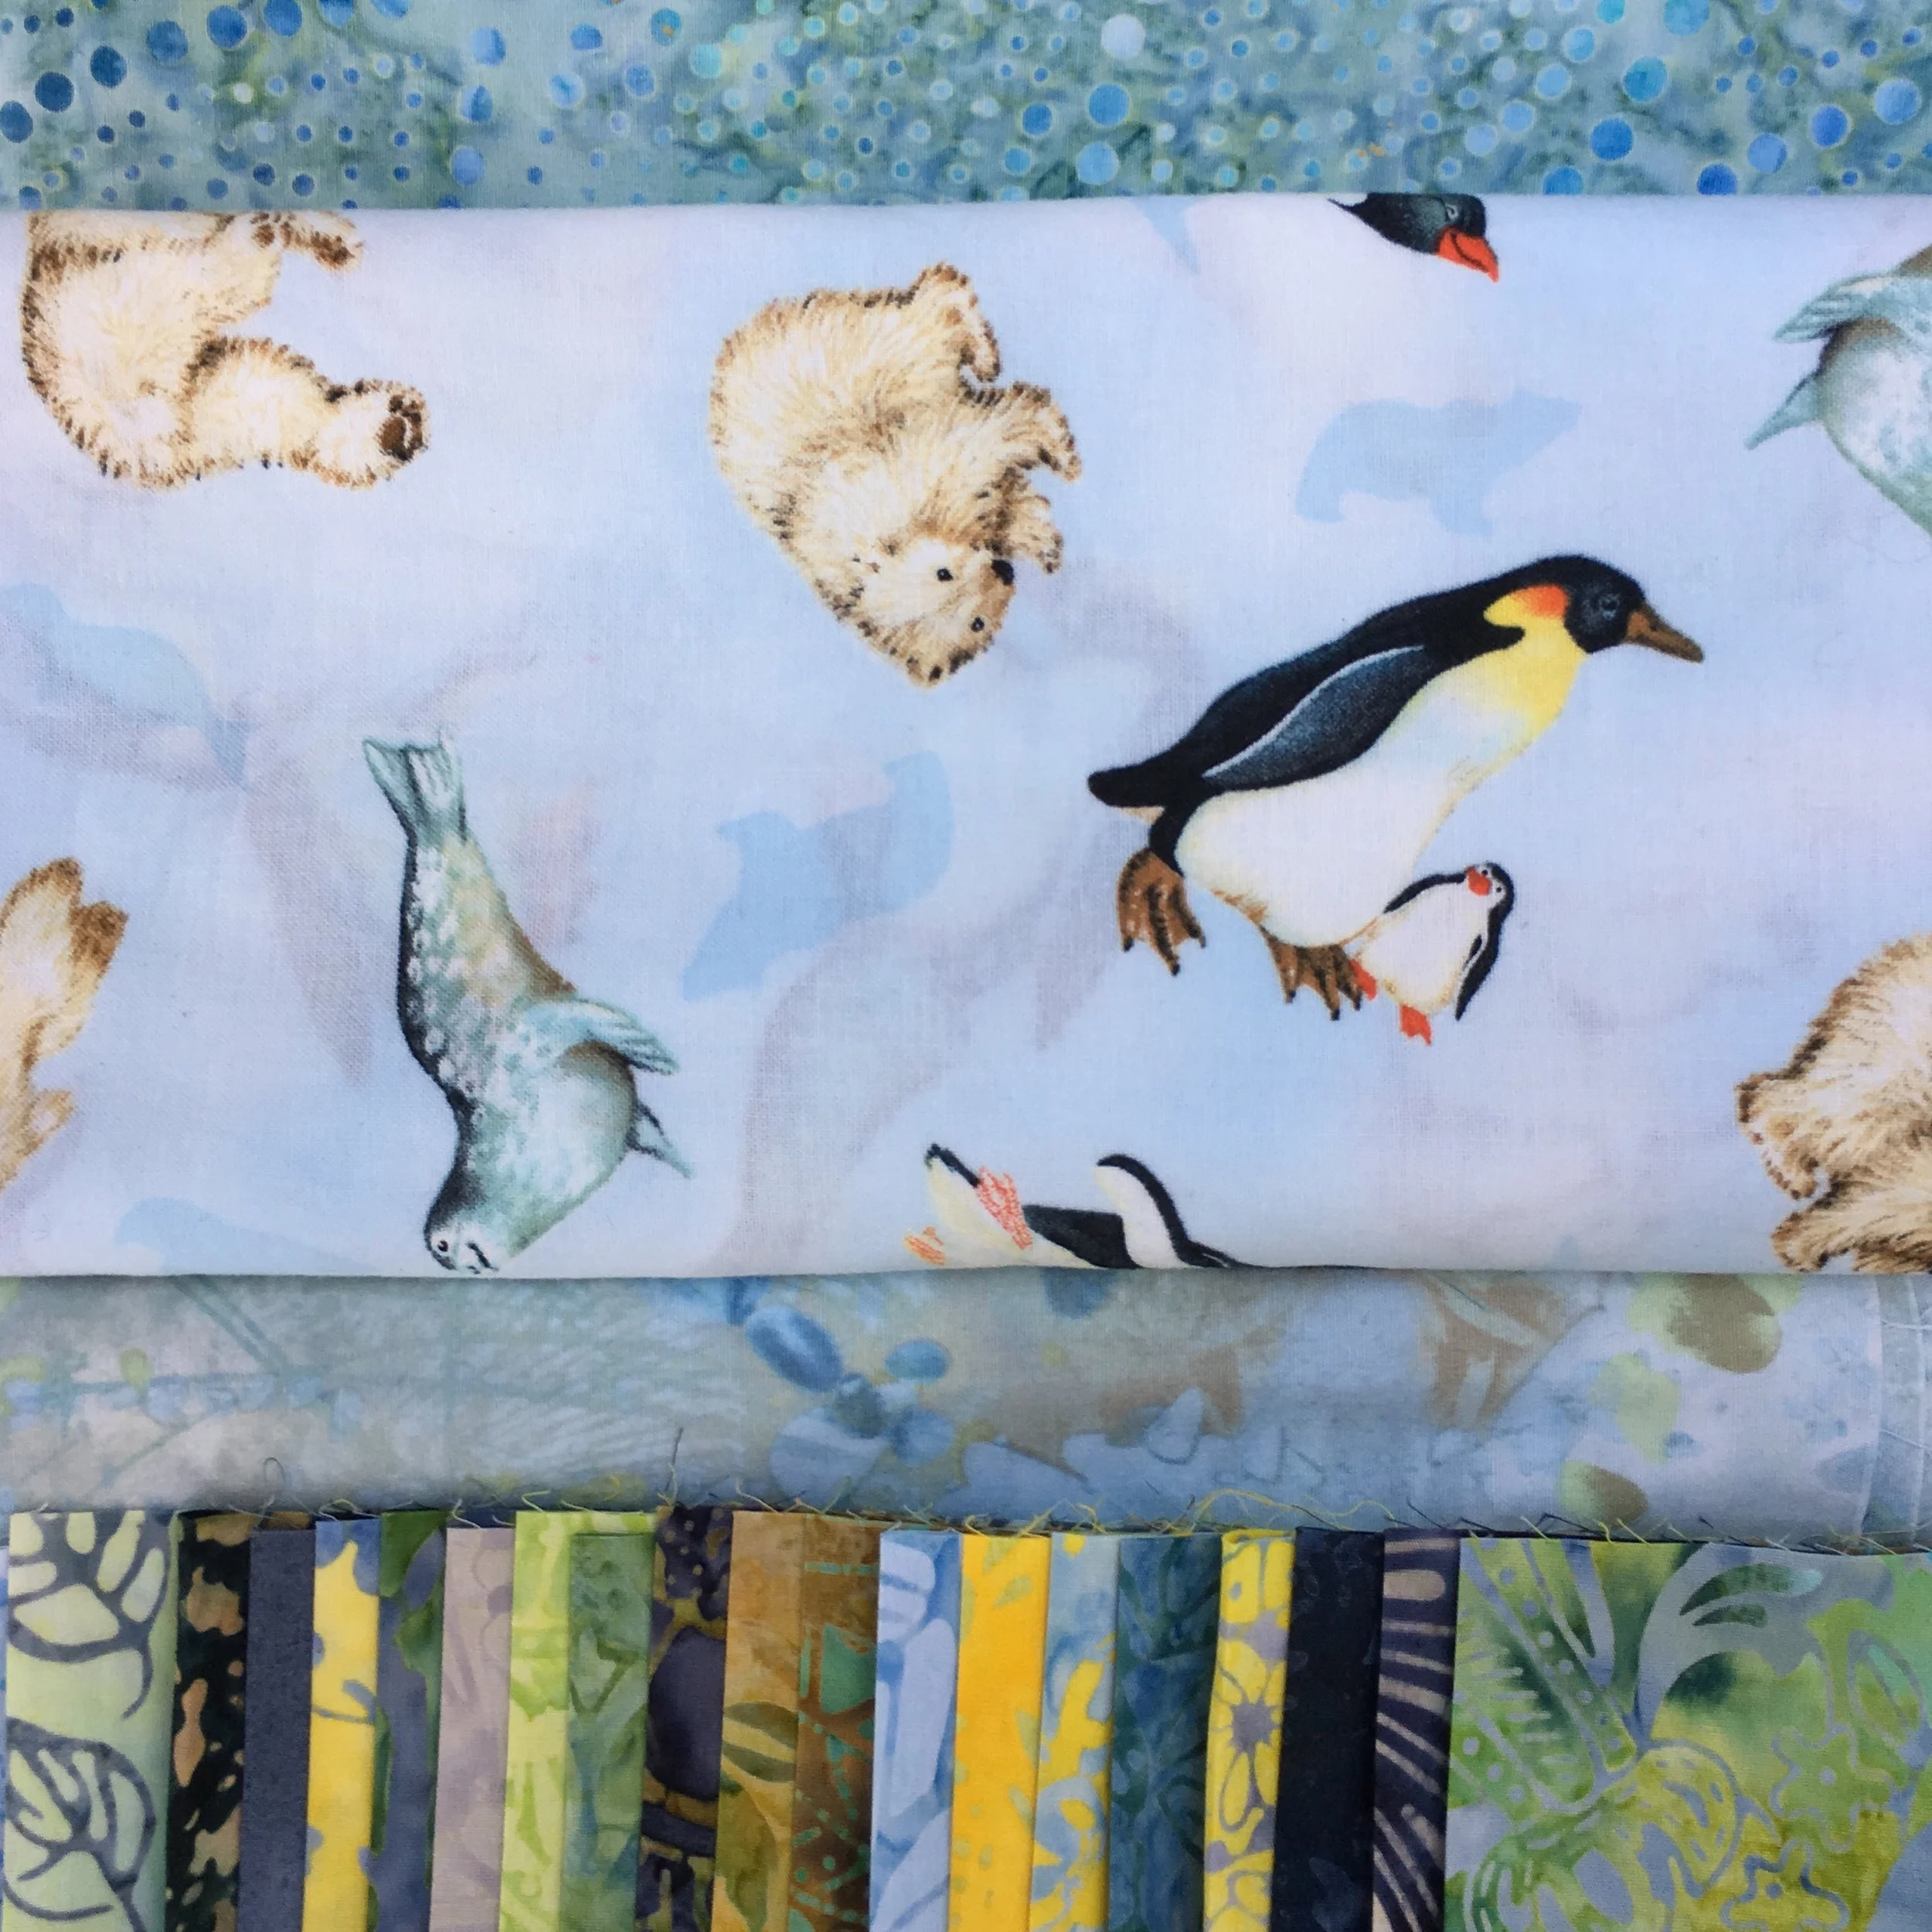
Looking through my stash of fabrics this summer, I found a lovely set a fabrics which had been a gift from a friend. There was a jelly roll of 2 1/2 inch batik strips and two 1/2 yards of coordinating fabrics. I also found 1/2 yard of a novelty print with inhabitants of both North and South Poles which was a perfect match for the watery/icy colors batiks in the jelly roll. I also pulled out some coordinating Kona® cotton solids to add to my collection of fabrics.
I decided to use them to make a medallion quilt. A medallion quilt has a central focus block and strips of fabric or strips of blocks are added concentrically until the quilt is the final desired size. It sound simple, but it's actually rather challenging. It that QUILT MATH THING! I've written previously about Designing Medallion Quilts.
I also wanted to use the book. The Fussy Cut Sampler, by Nichole Ramirez and Elisabeth Woo, published by Lucky Spool Media 2017. I picked "block 32, four-way prints" on page 96 of the book as my central feature block in the quilt.

My Polar version of Block 32 from "The Fussy Cut Sampler"
In the next several posts, I will post step-by-step instructions, with measurements, on how I made this crib sized quilt. It's not a tested pattern but it should work if you want to make a similar fussy cut medallion quilt using a jelly roll. The finished quilt should measure approximately 44 x 52 inches. (I haven't quilted it yet so don't know the exact completed dimensions).
Supplies:
- 1 jelly roll or 2 1/2 inch strips cut the width of the fabric. About 30.
- 1/2 yard of 2 coordinating patterned fabrics
- 1/2 yard of 2 coordinating solid fabrics
- 1/2 yard of a novelty print, with some motifs that are not larger than 2 x 2 inches
- Fabric scraps
STEP 1: Make the Central Medallion Block
- Make a 9 1/2 inch unfinished quilt block with a complex pattern or interesting pattern.
In the next three posts, released each Thursday, there will detailed photos and information for each set of concentric strip sets to make a similar quilt.
Hunt through your stash if you have one, find some great fabrics, and sew along!
Analogous Color Studies--Two Quilts using Analogous Colors
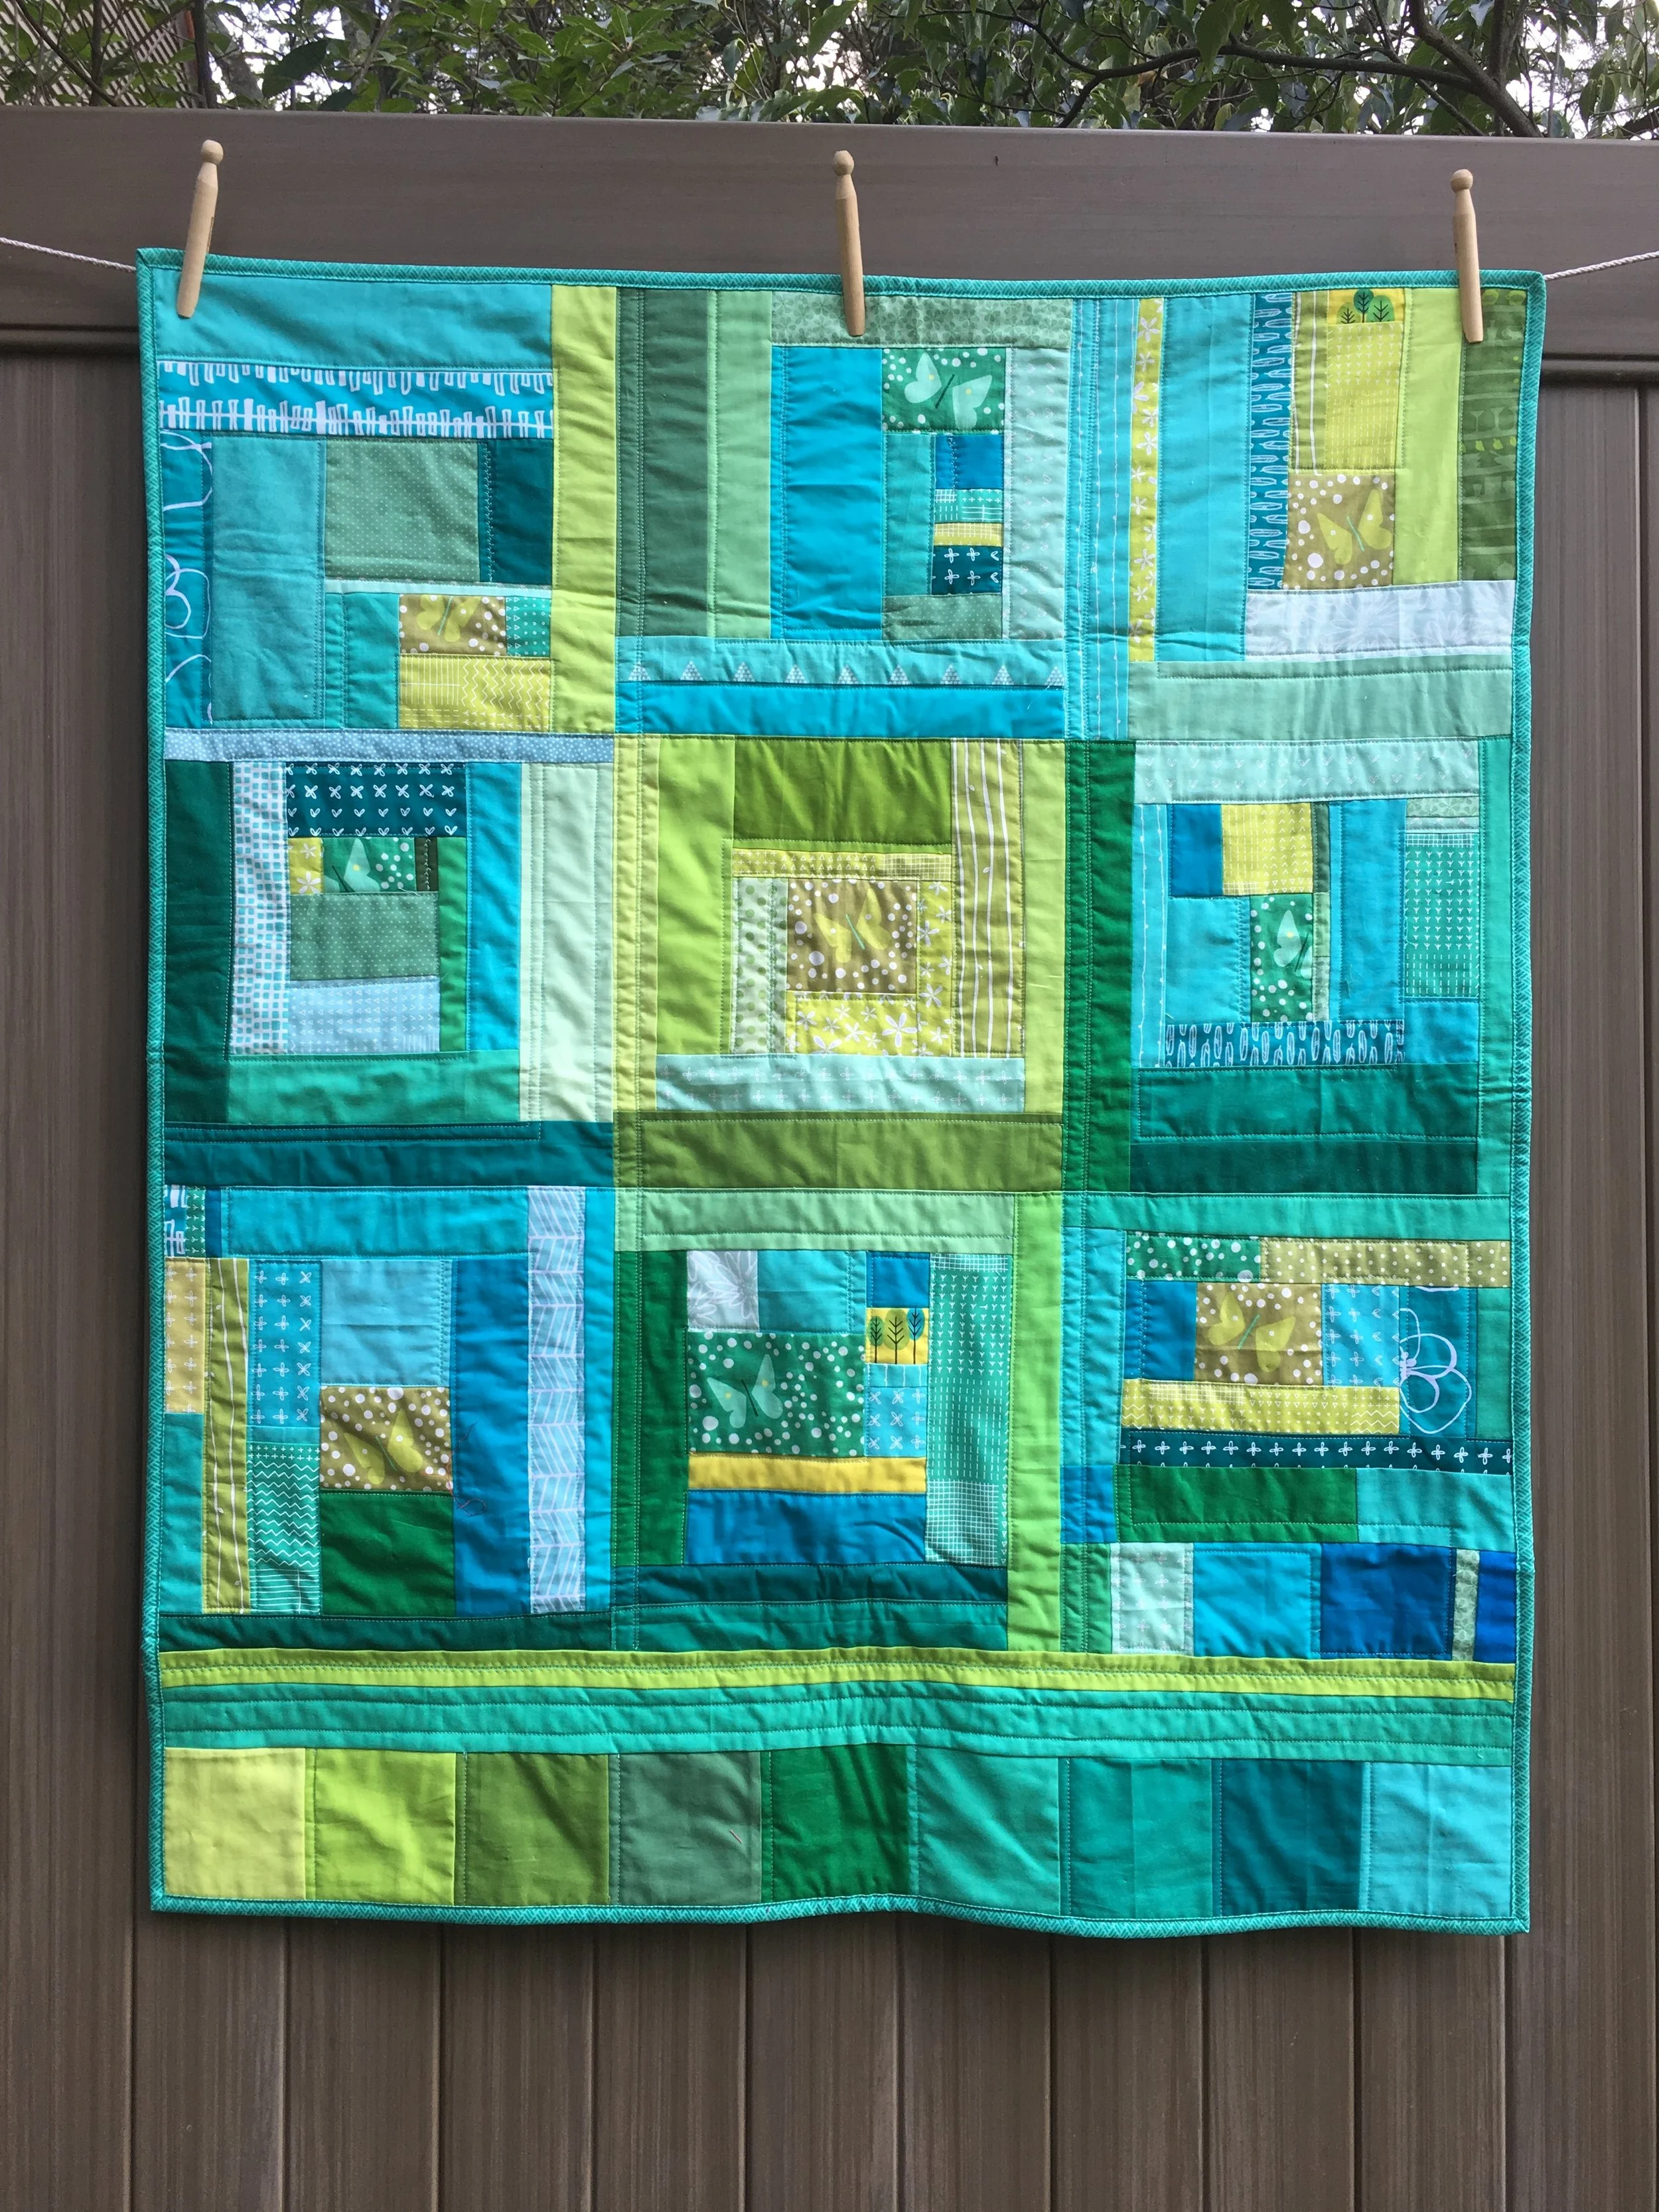
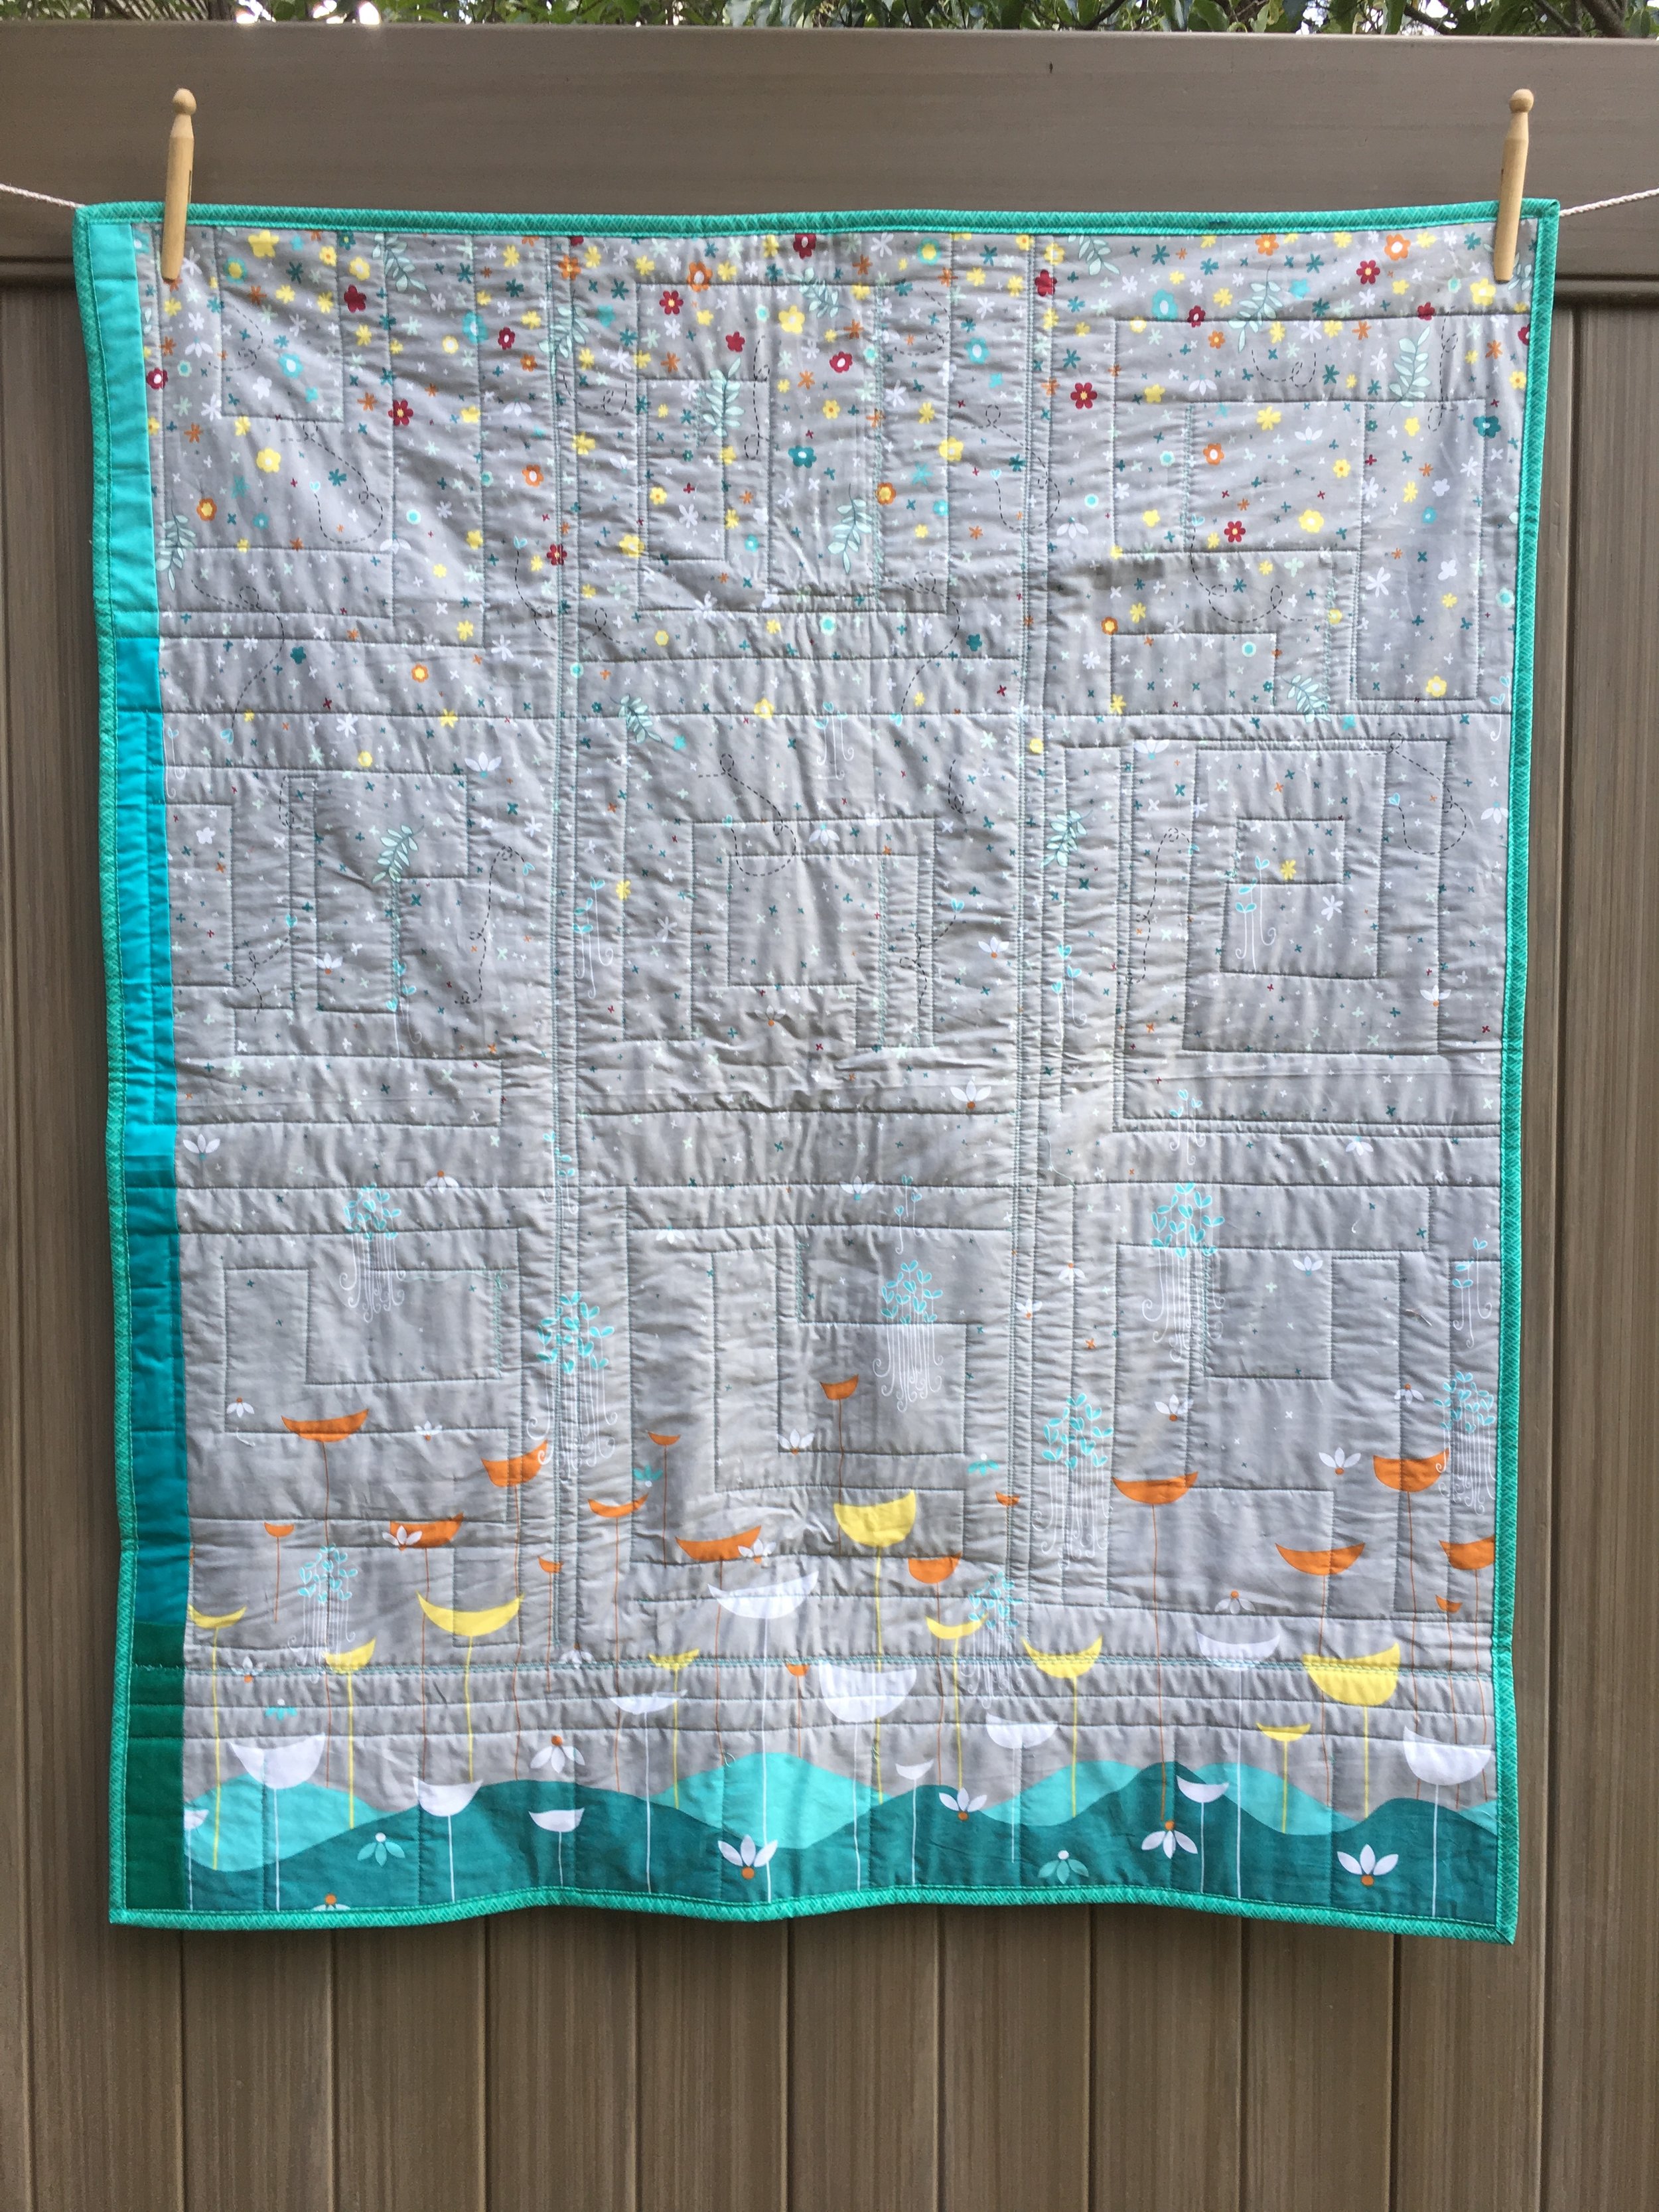
Analogous Colors: Study in Greens, 36 x 43 inches
Analogous Colors: Study in Greens, 36 x 43 inches
Oops! Sorry this post is a day late. It posted last evening, too late in the day to catch the e-mail for blog subscribers. But here it is now!
This is big reveal and the last post in my Analogous Color Studies* series. Above is "Study in Greens." The range colors in the quilts are shown in the blocks at the bottom of the quilt. Three colors are represented: Yellow-green, Green and Blue-green. It's an improv pieced quilt unified with a single Butterfly patch by designer Lizzy House in each 12 inch block. (This fabric is from a prior season and not readily available but some yardage can be found with a search).
I really struggled with the yellow greens! The first blocks I made hardly had any yellow green. As I made more, it gradually took more a star role in the blocks!
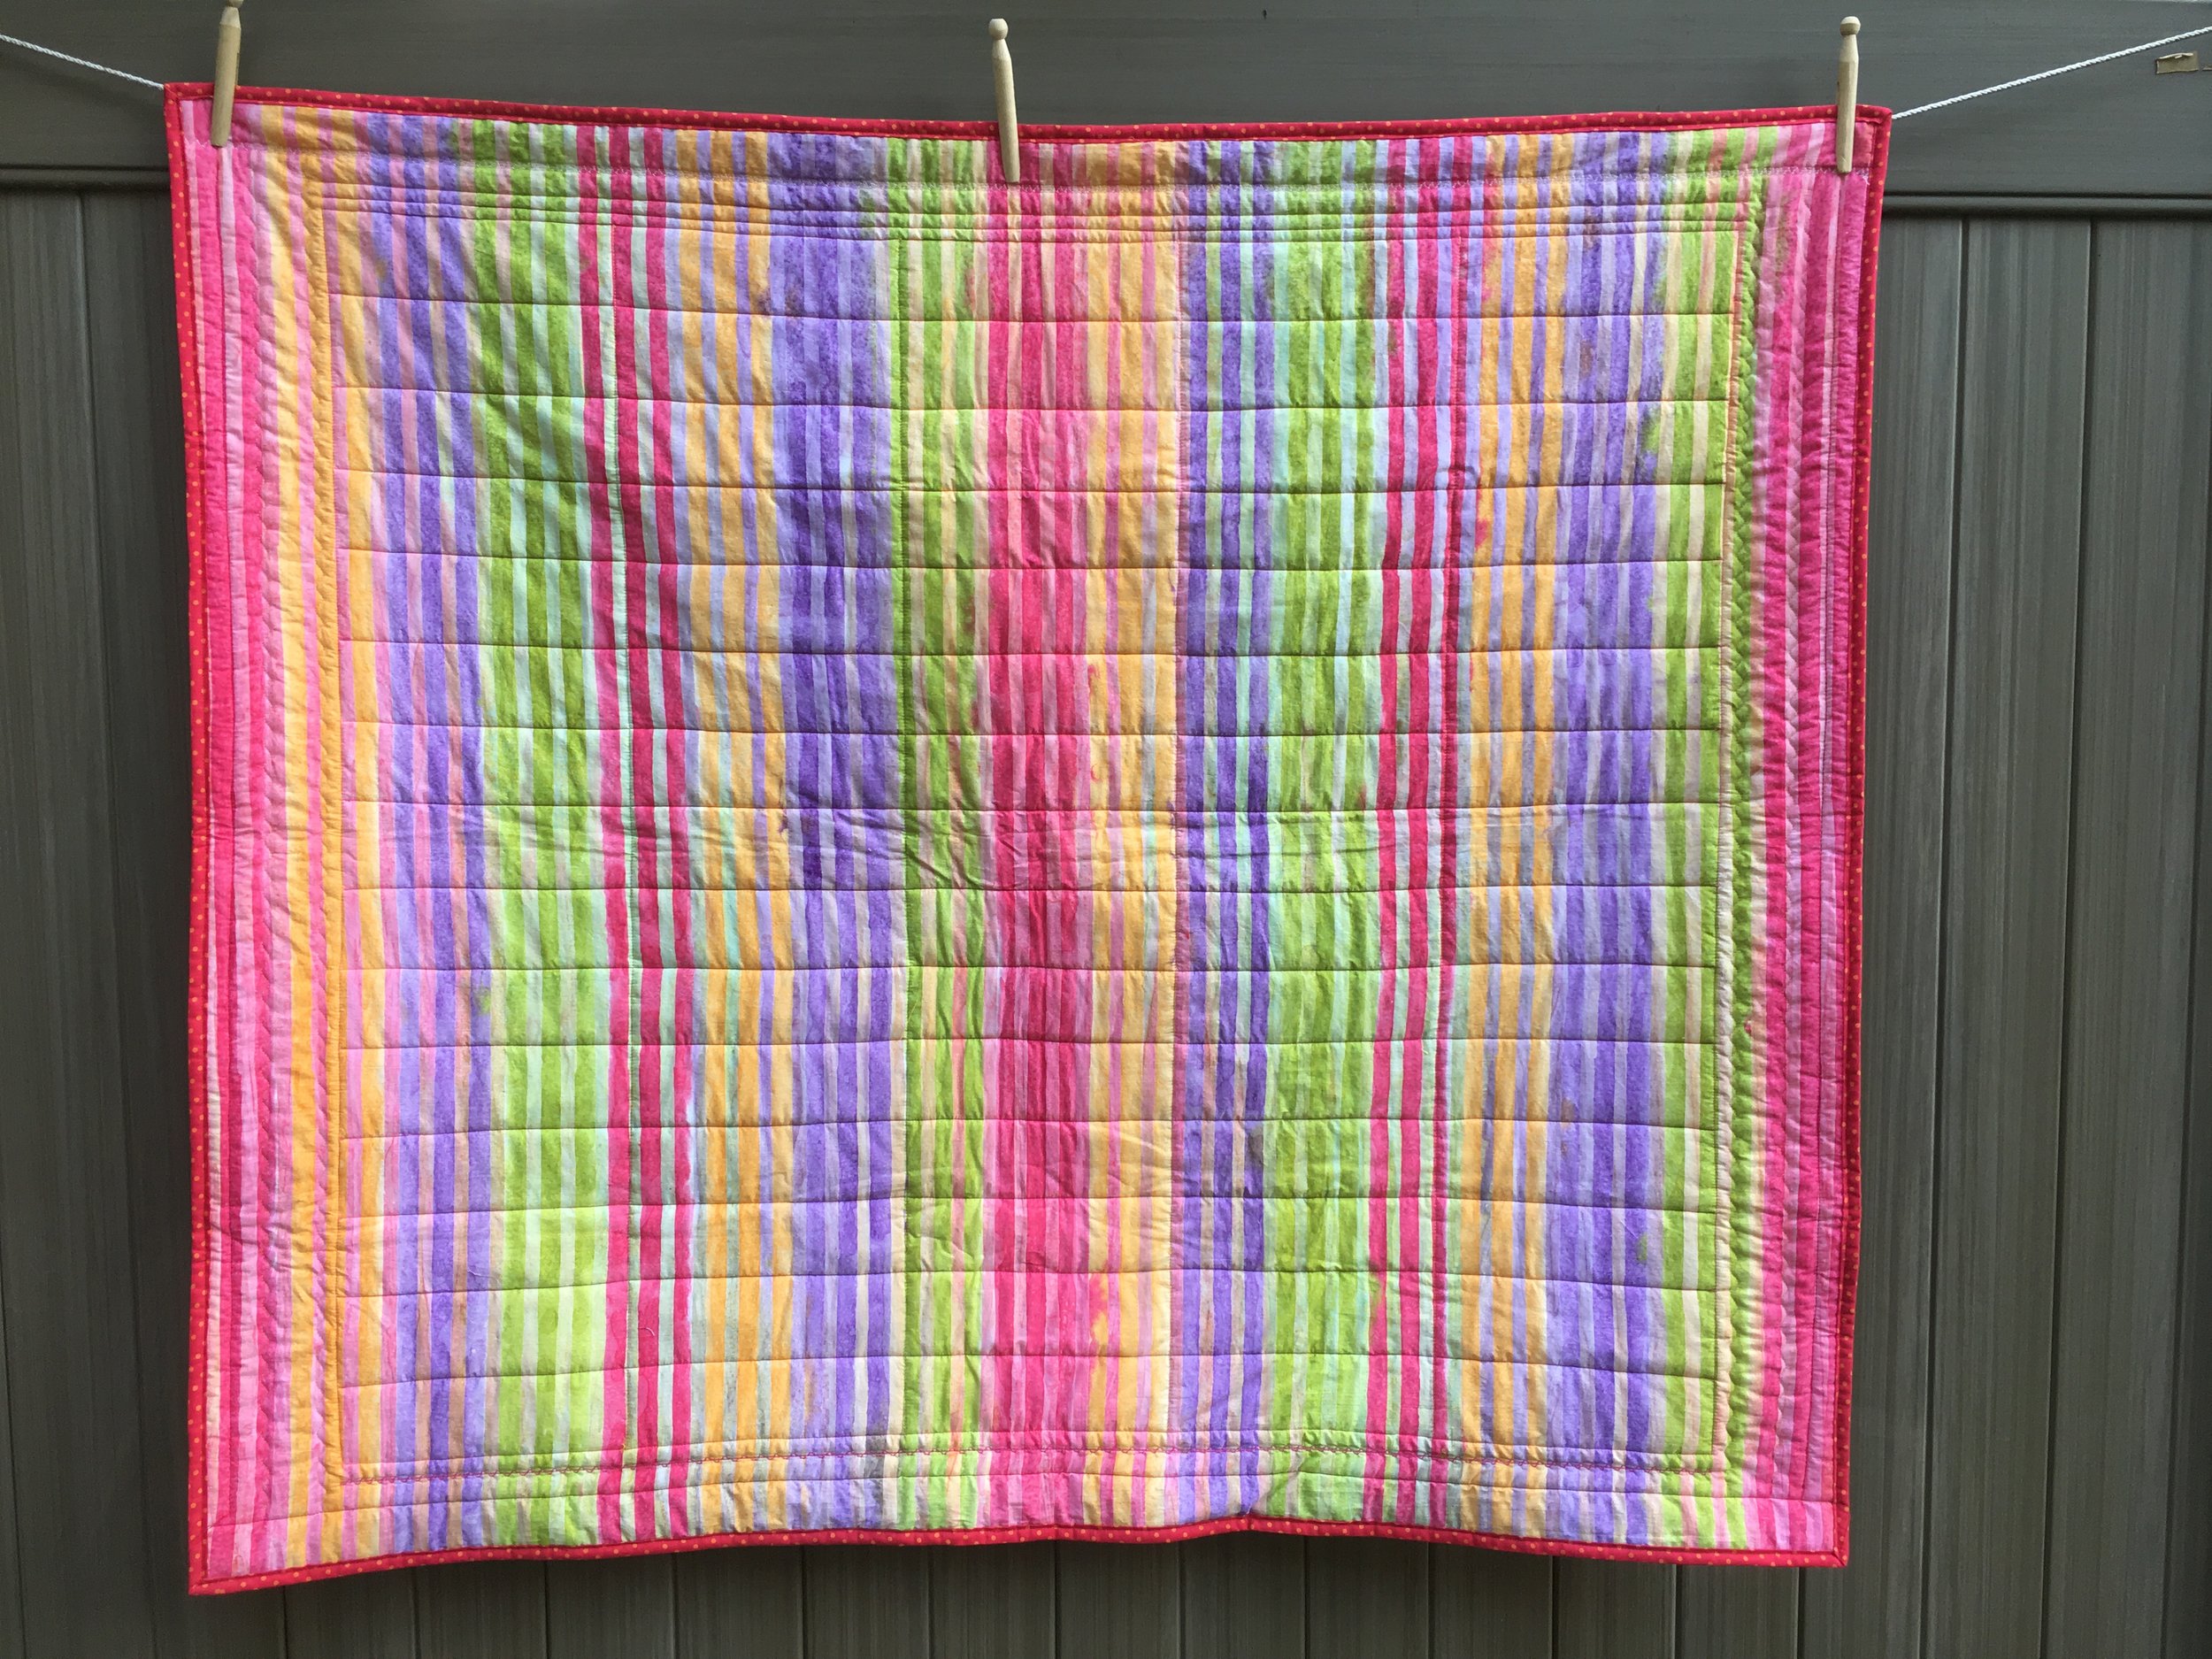
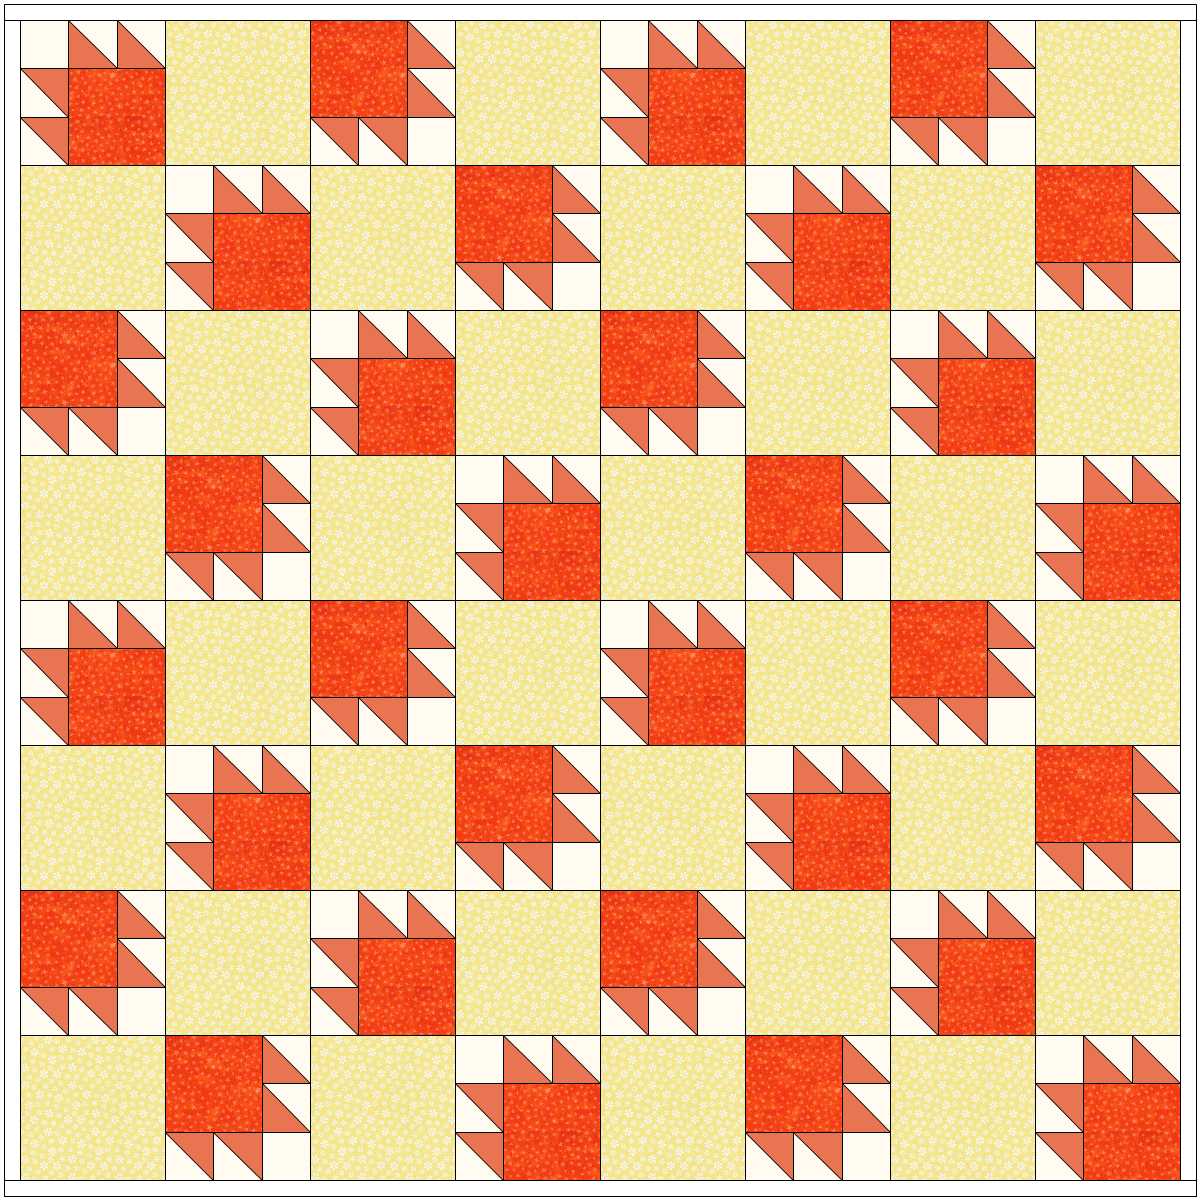
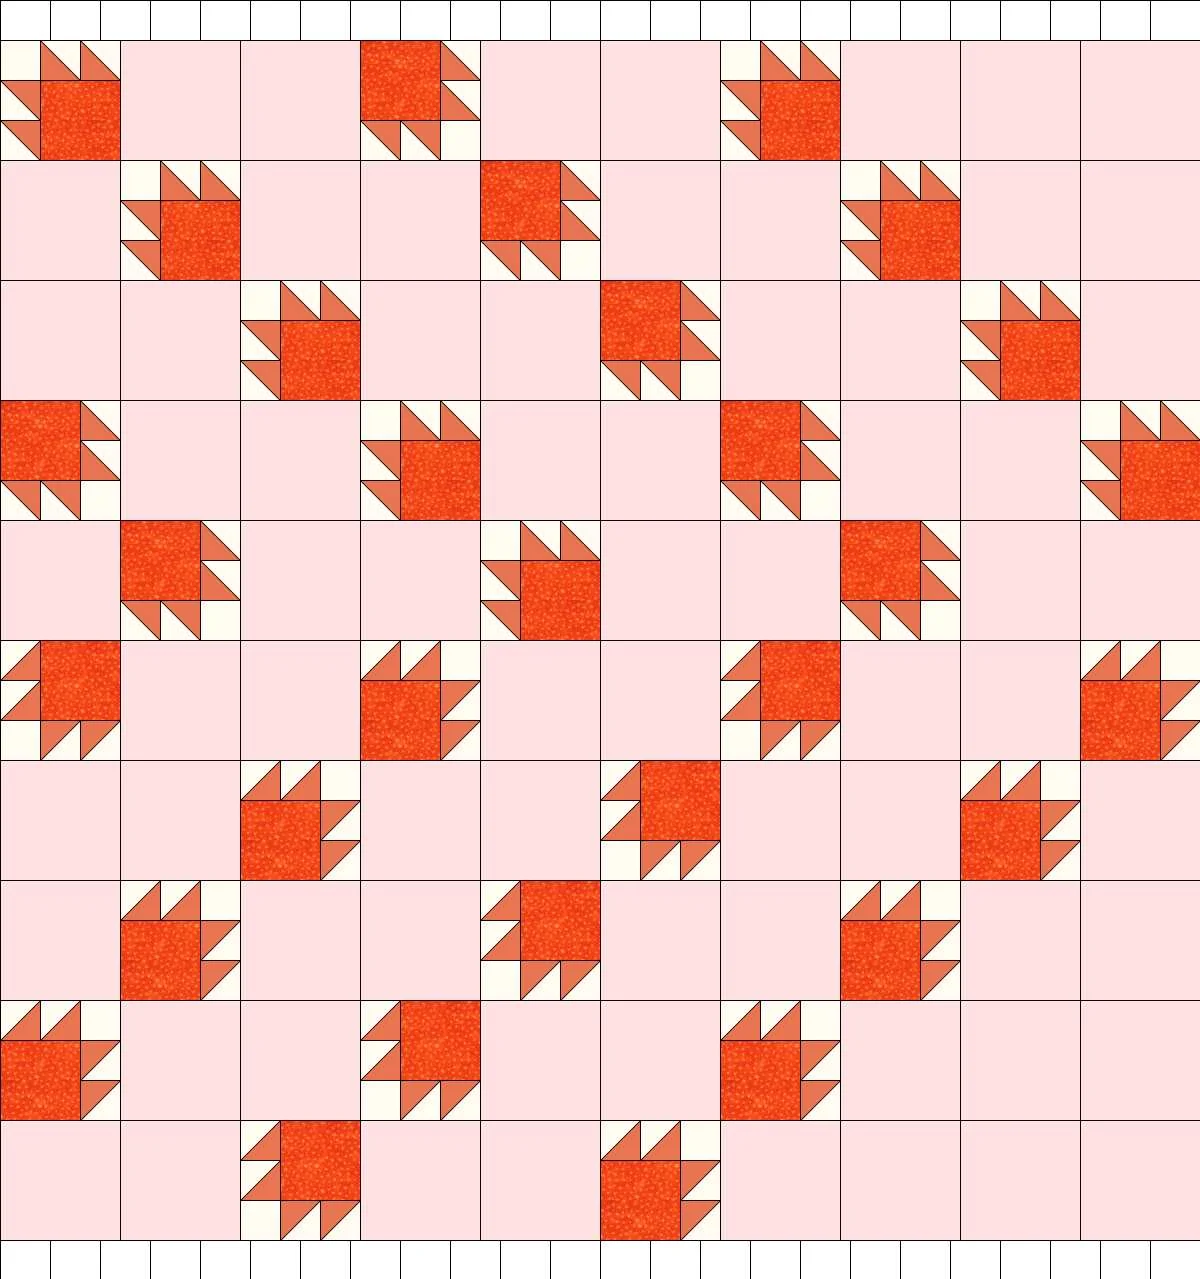
My other Analogous Colors quilt is a study in hot colors--Yellow, Orange-yellow, Orange, Orange-red, and Red. I made it as a winter lap quilt. It even has a wool batting. Warm to look at, warm in use! It is rectangular the long way so someone sitting can tuck it around their legs to keep out the drafts! I found these colors easy to work with.
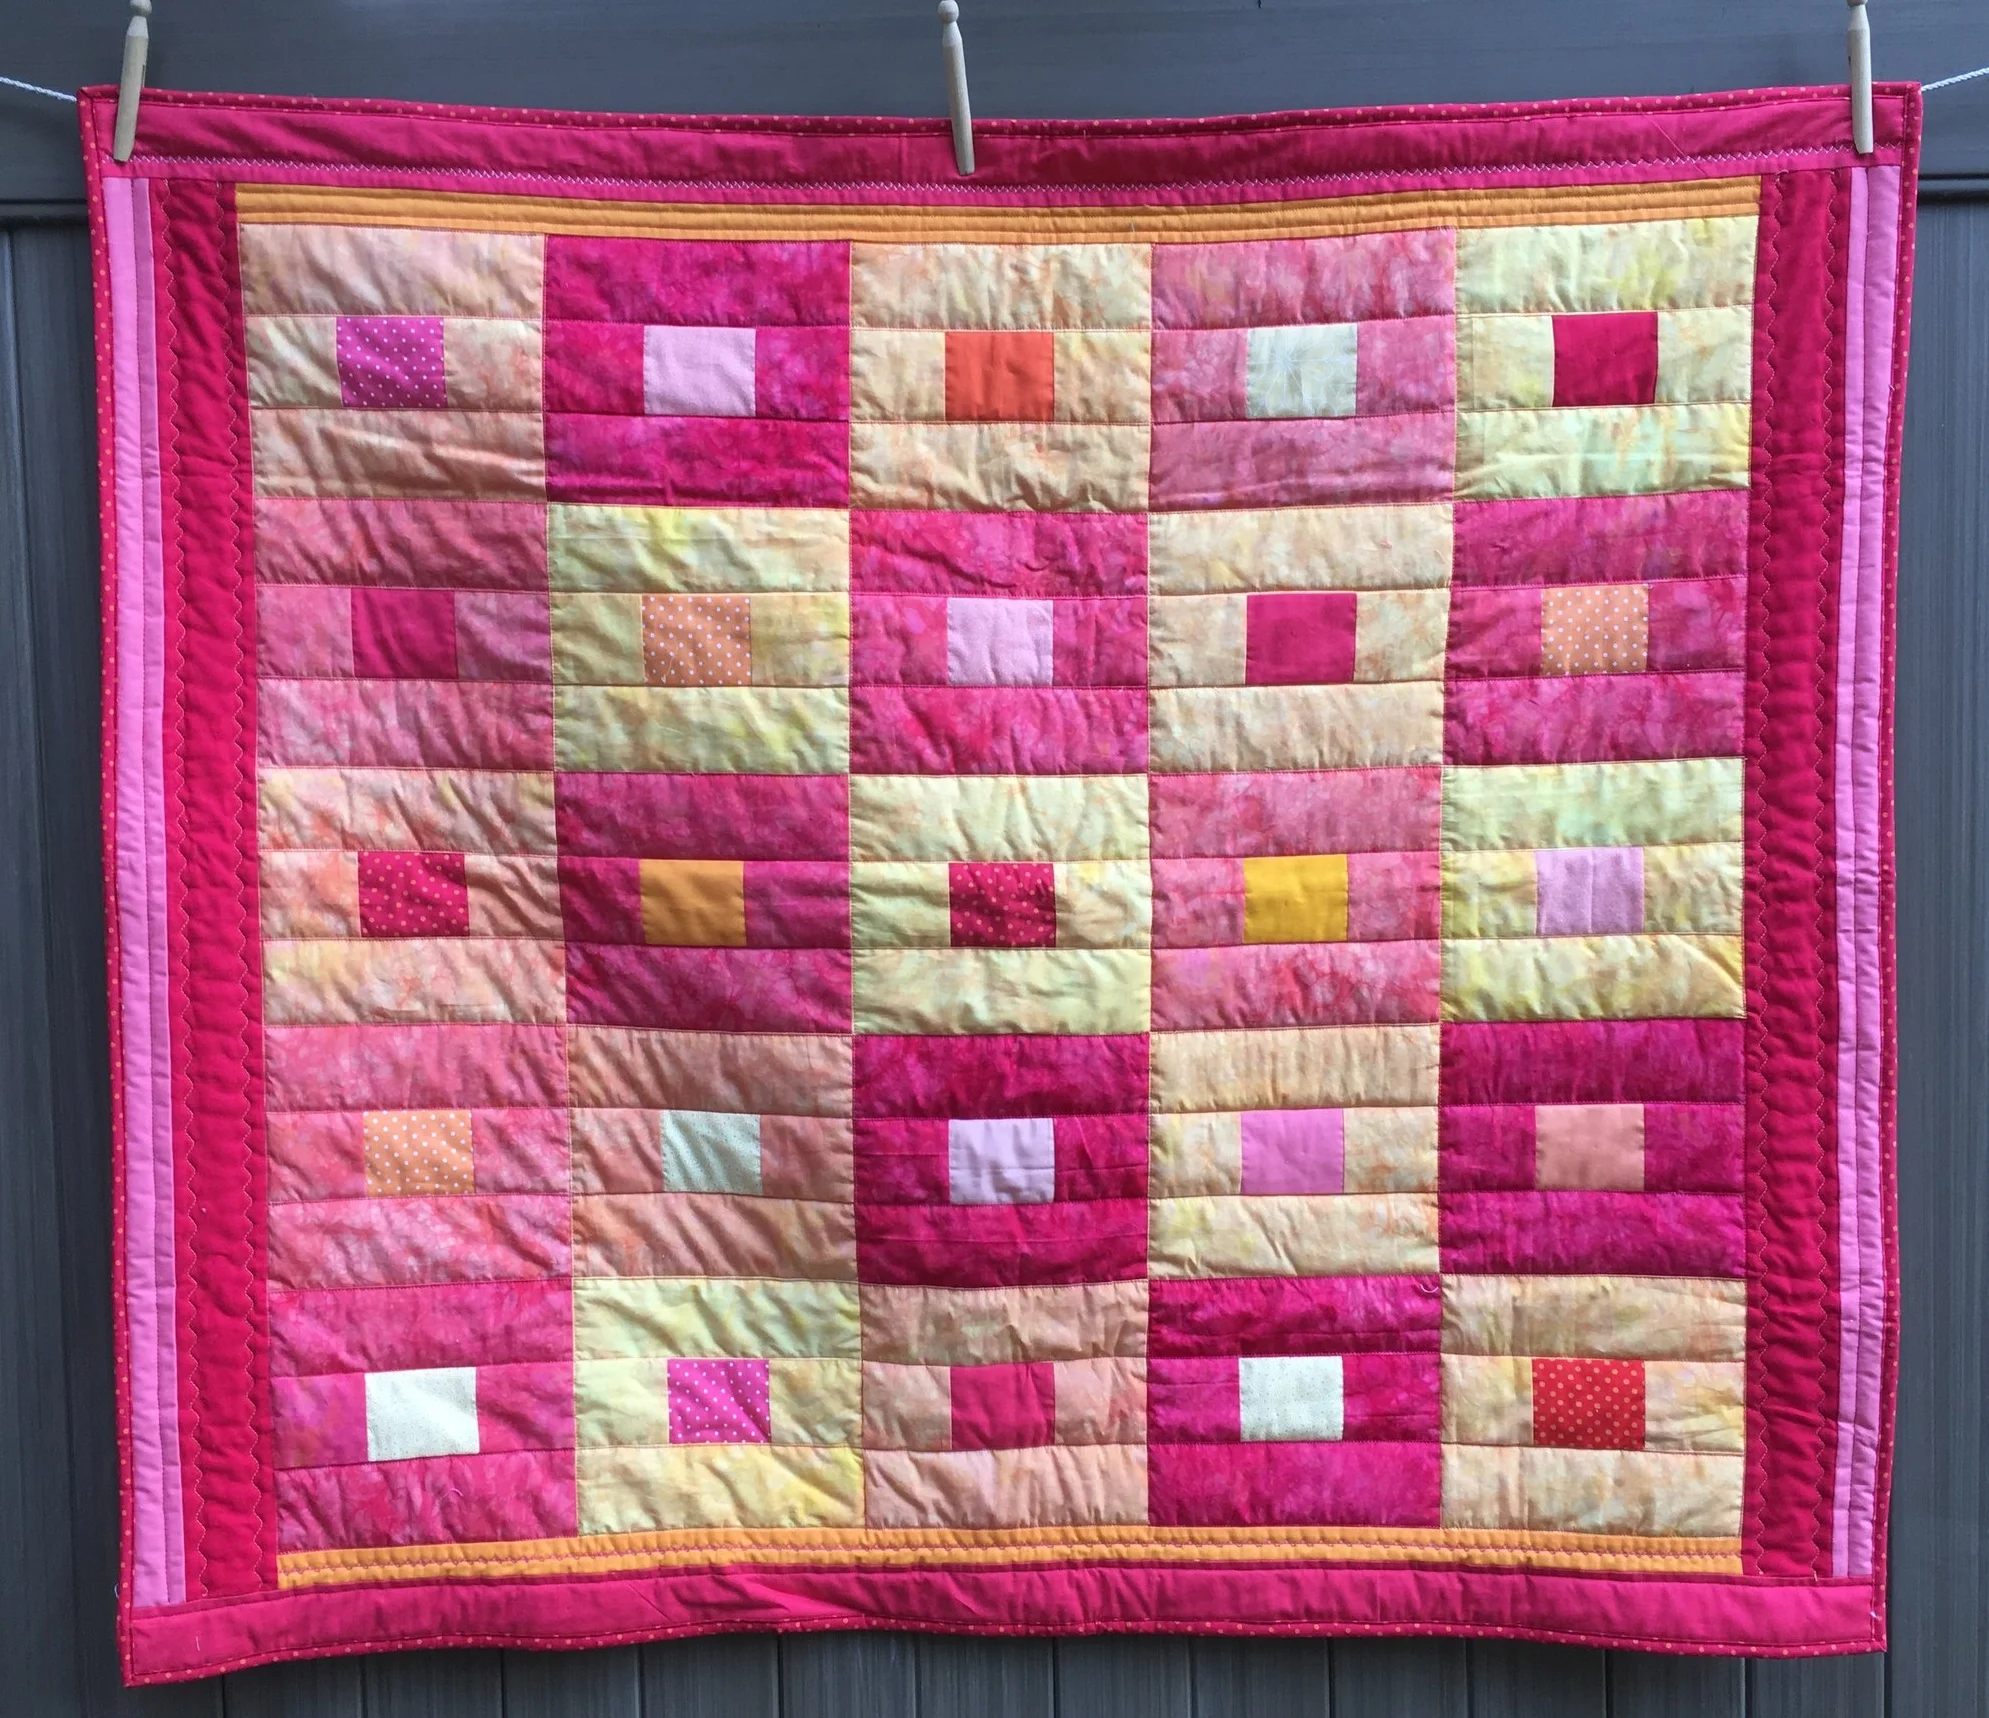
Analogous Colors Lap Quilt--Hots! 42 x49 inches
Here are the backs of the two quilts. They needed to coordinate with the front of the quilt but weren't constrained by the strict use of analogous colors.
These color studies, done as the Summer Challenge for the Proper Bostonian Quilters guild, was a fascinating and fun challenge. I learned more about colors but maybe I learned more about how I use and respond to colors!
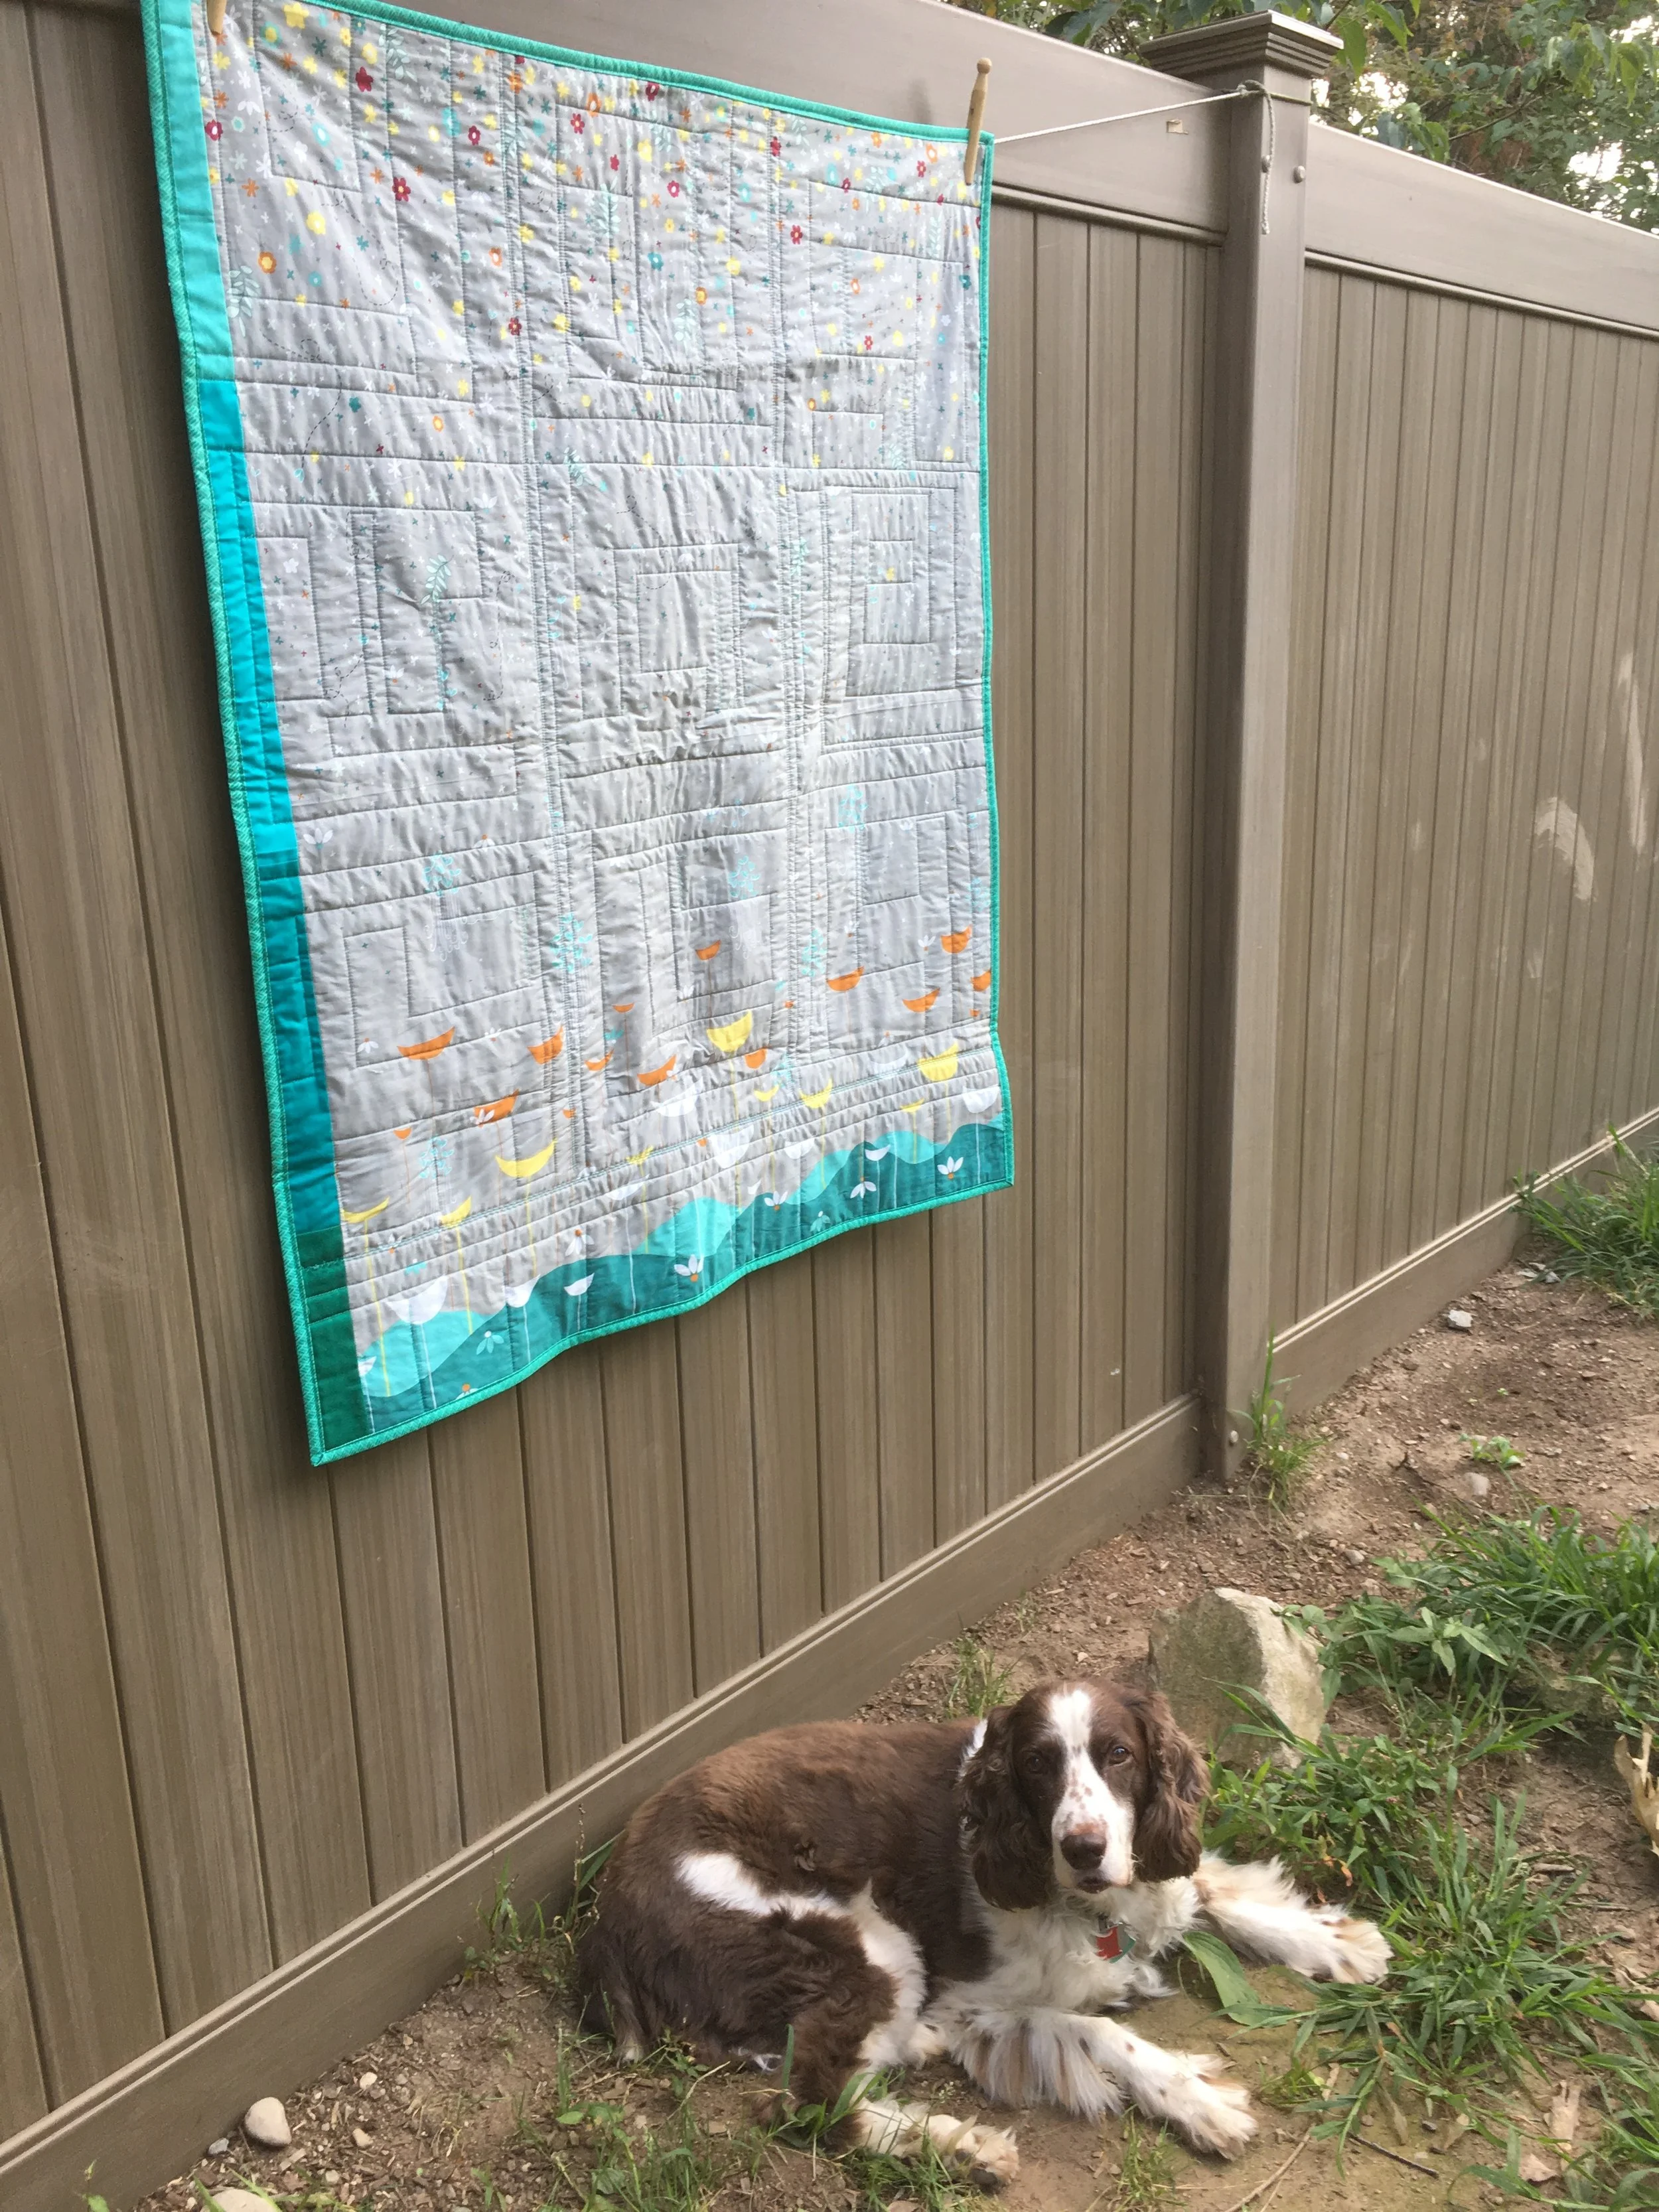
That's Tipper, one of my Springers. He likes to be involved with my photo shoots! He's out of the shot but right in the middle of the action!
* Analogous colors are next to each other on the Color Wheel. It's usually a group of 3-5 colors.
Bear Paw Modern Low Volume Quilt: "Bears in the Meadow"
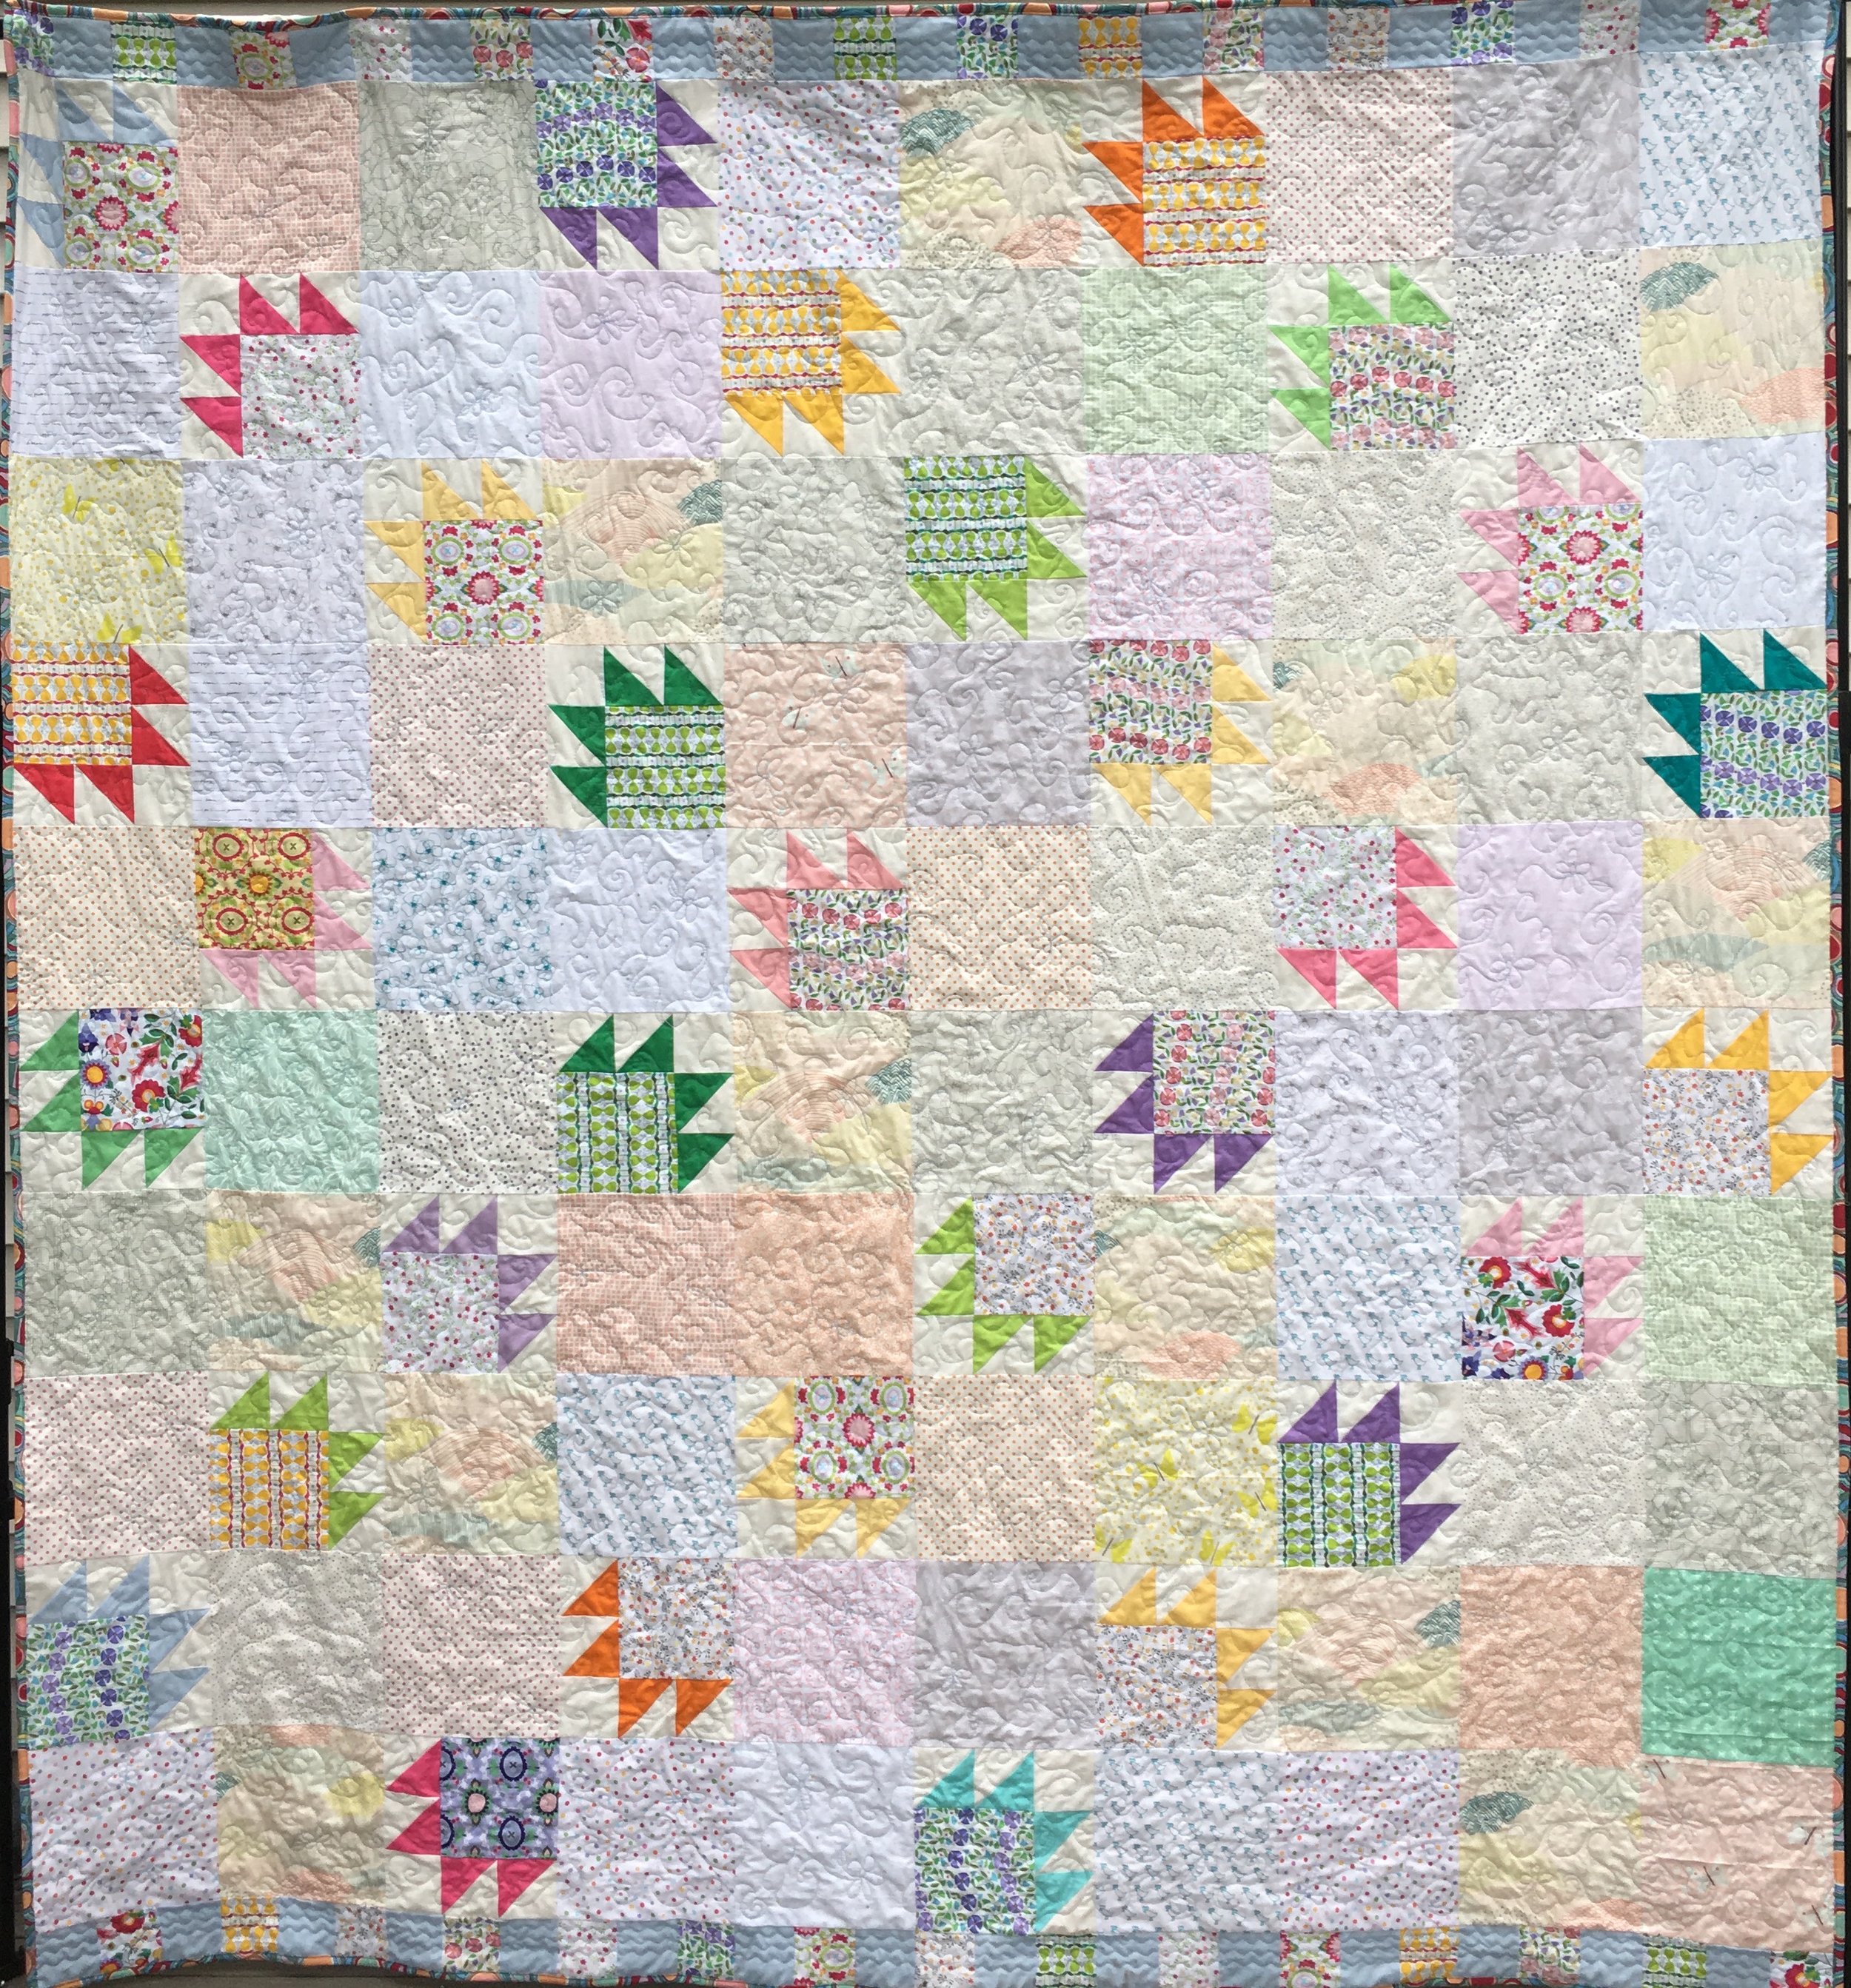
"Bears in the Meadow" Queen size bed quilt
"Bears in the Meadow" Queen size bed quilt
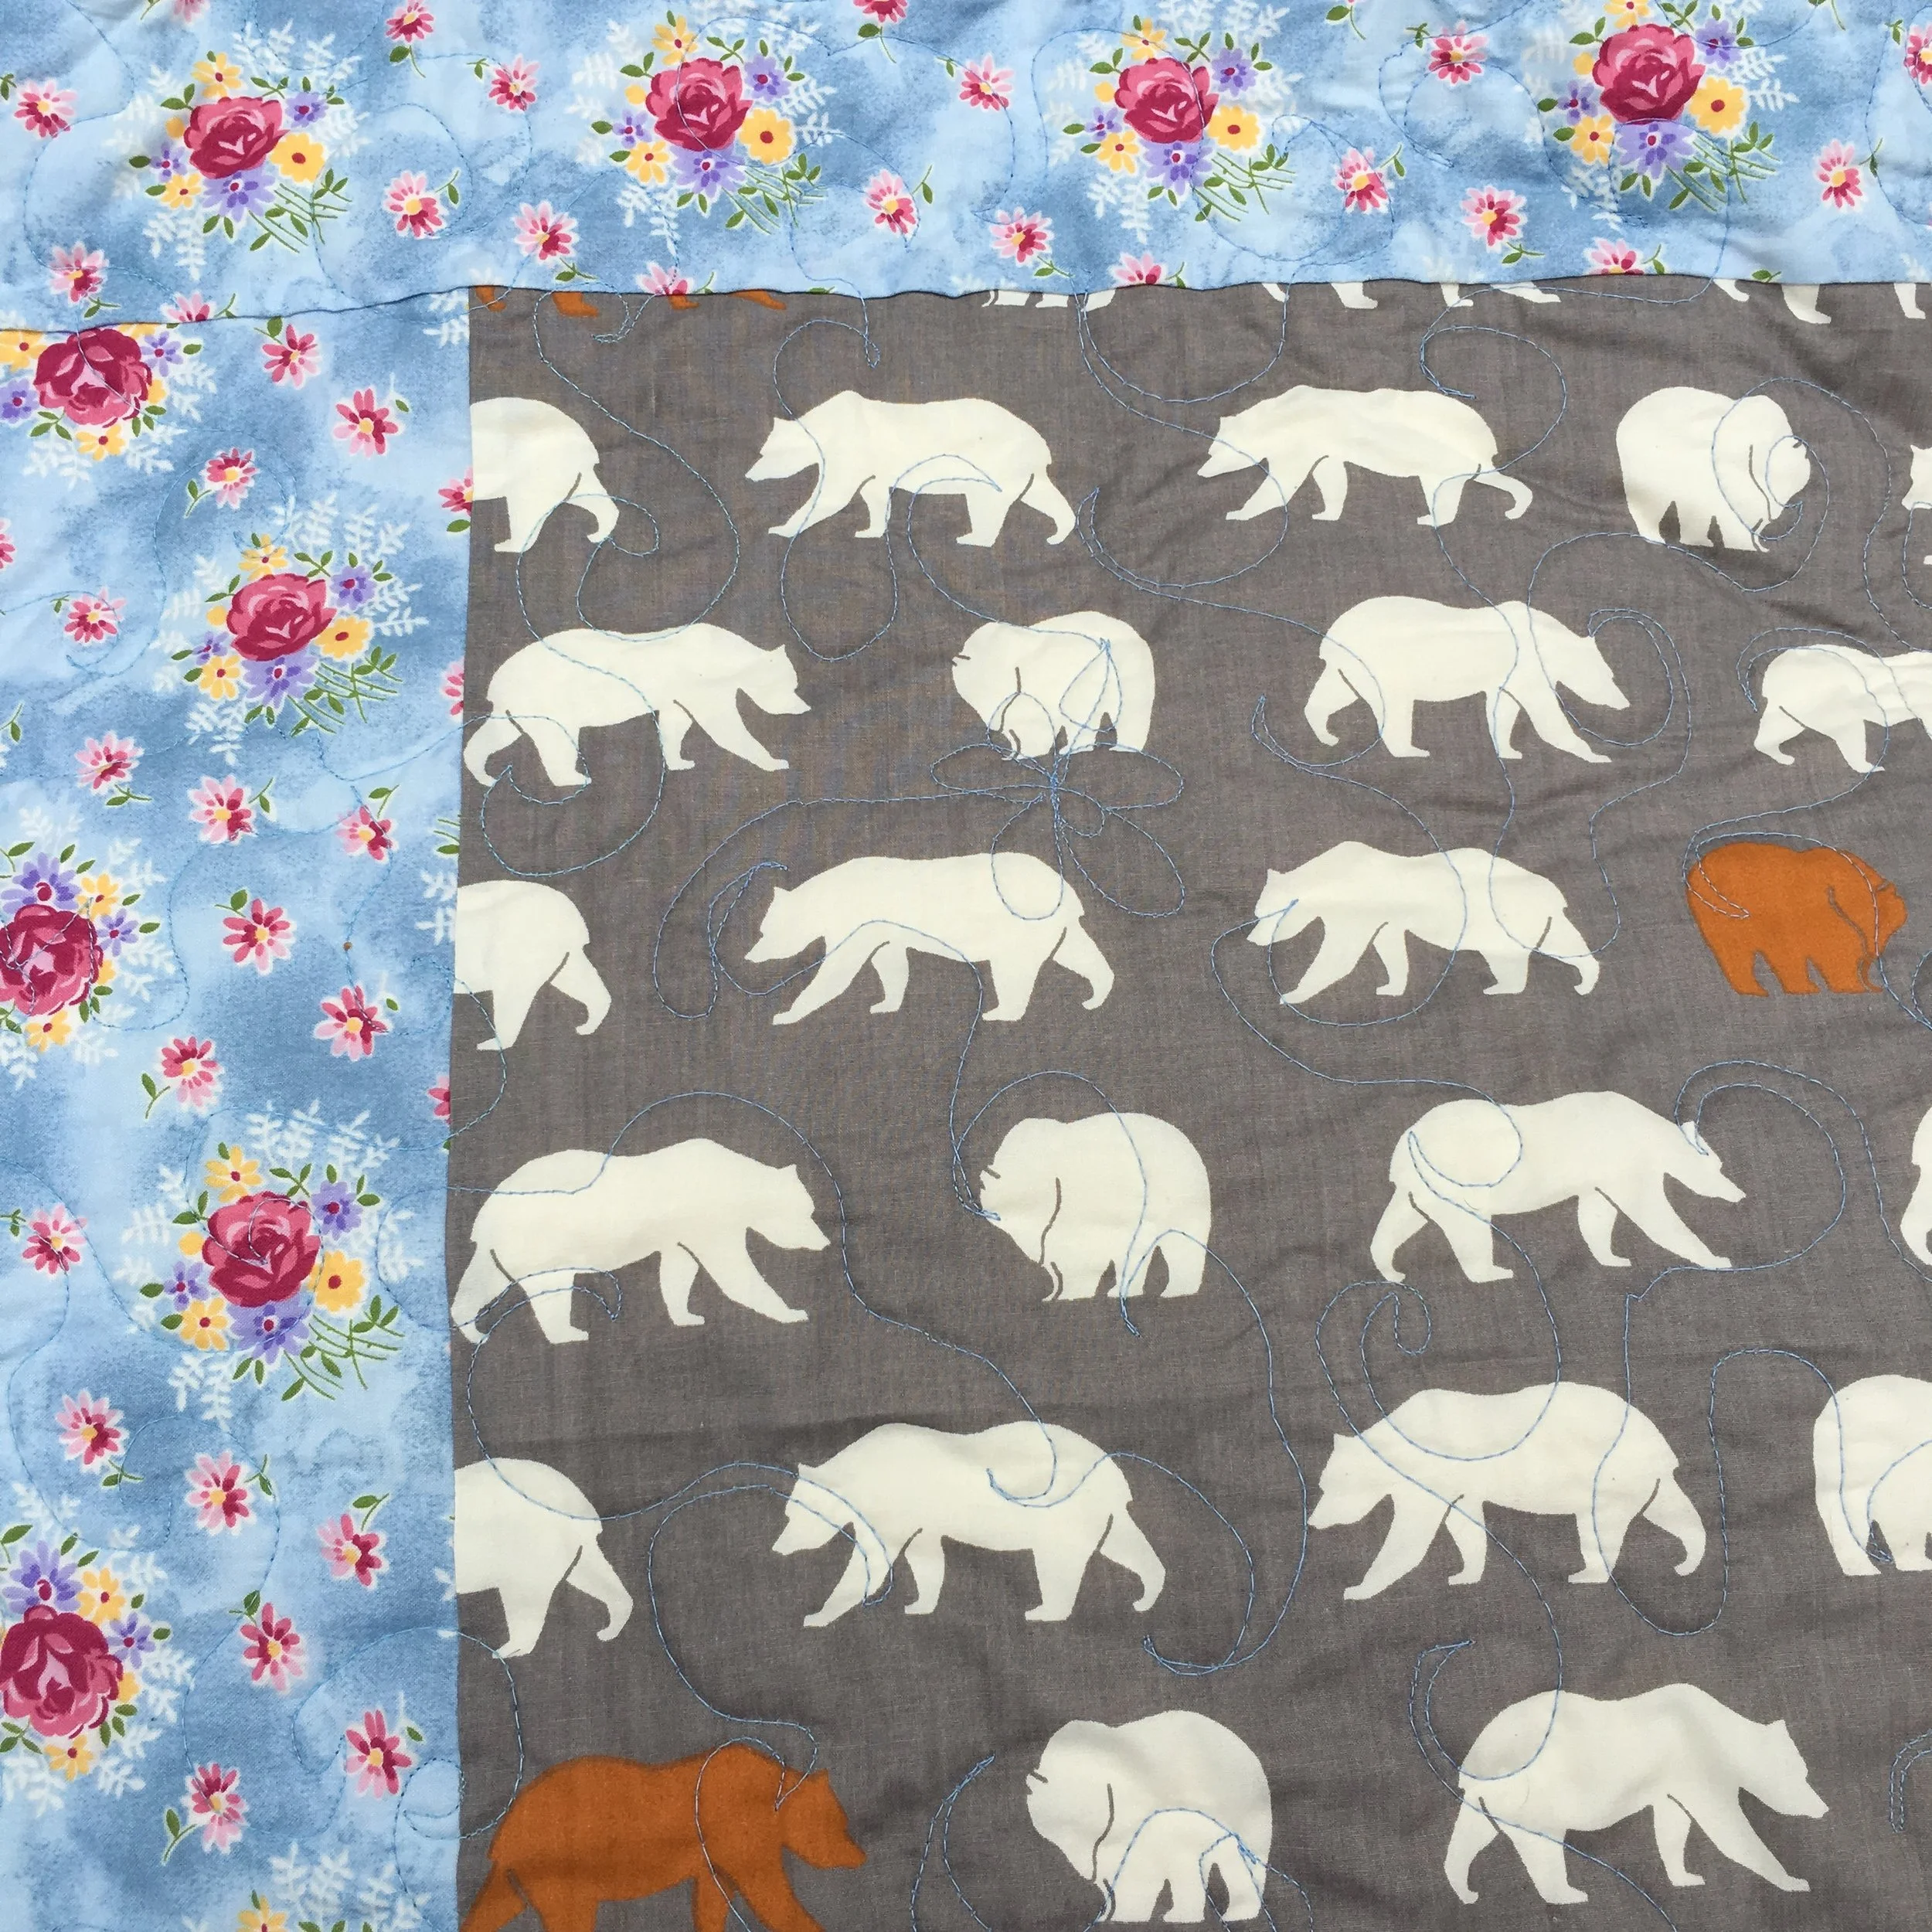
Here's my completed "Bears in the Meadow" low volume quilt with a modern setting using the classic Bears Paw block. I love how the bear paws are wandering to and fro off the margins of the quilt!
Along with swirls and several tiny hearts, there are 16 bears done with free motion quilting. (See my last post). I initially thought I'd only stitch 5 or 6 bears into the quilting but I had so much fun that there are 16! You have to really look hard to find them! Even my count might not be accurate!
The quilt backing is a flower print with a large block of bear fabric in the middle. So, it's bears all round!!
I did try to get a photo of the quilt in a meadow but because the quilt is so large, that turned out to be rather difficult. Here is my best shot, taken from the top of the slide in my neighborhood playground!

in dappled sunlight in the park.
This quilt is so me! It's a keeper!
Free Motion Quilting with an Animal Template
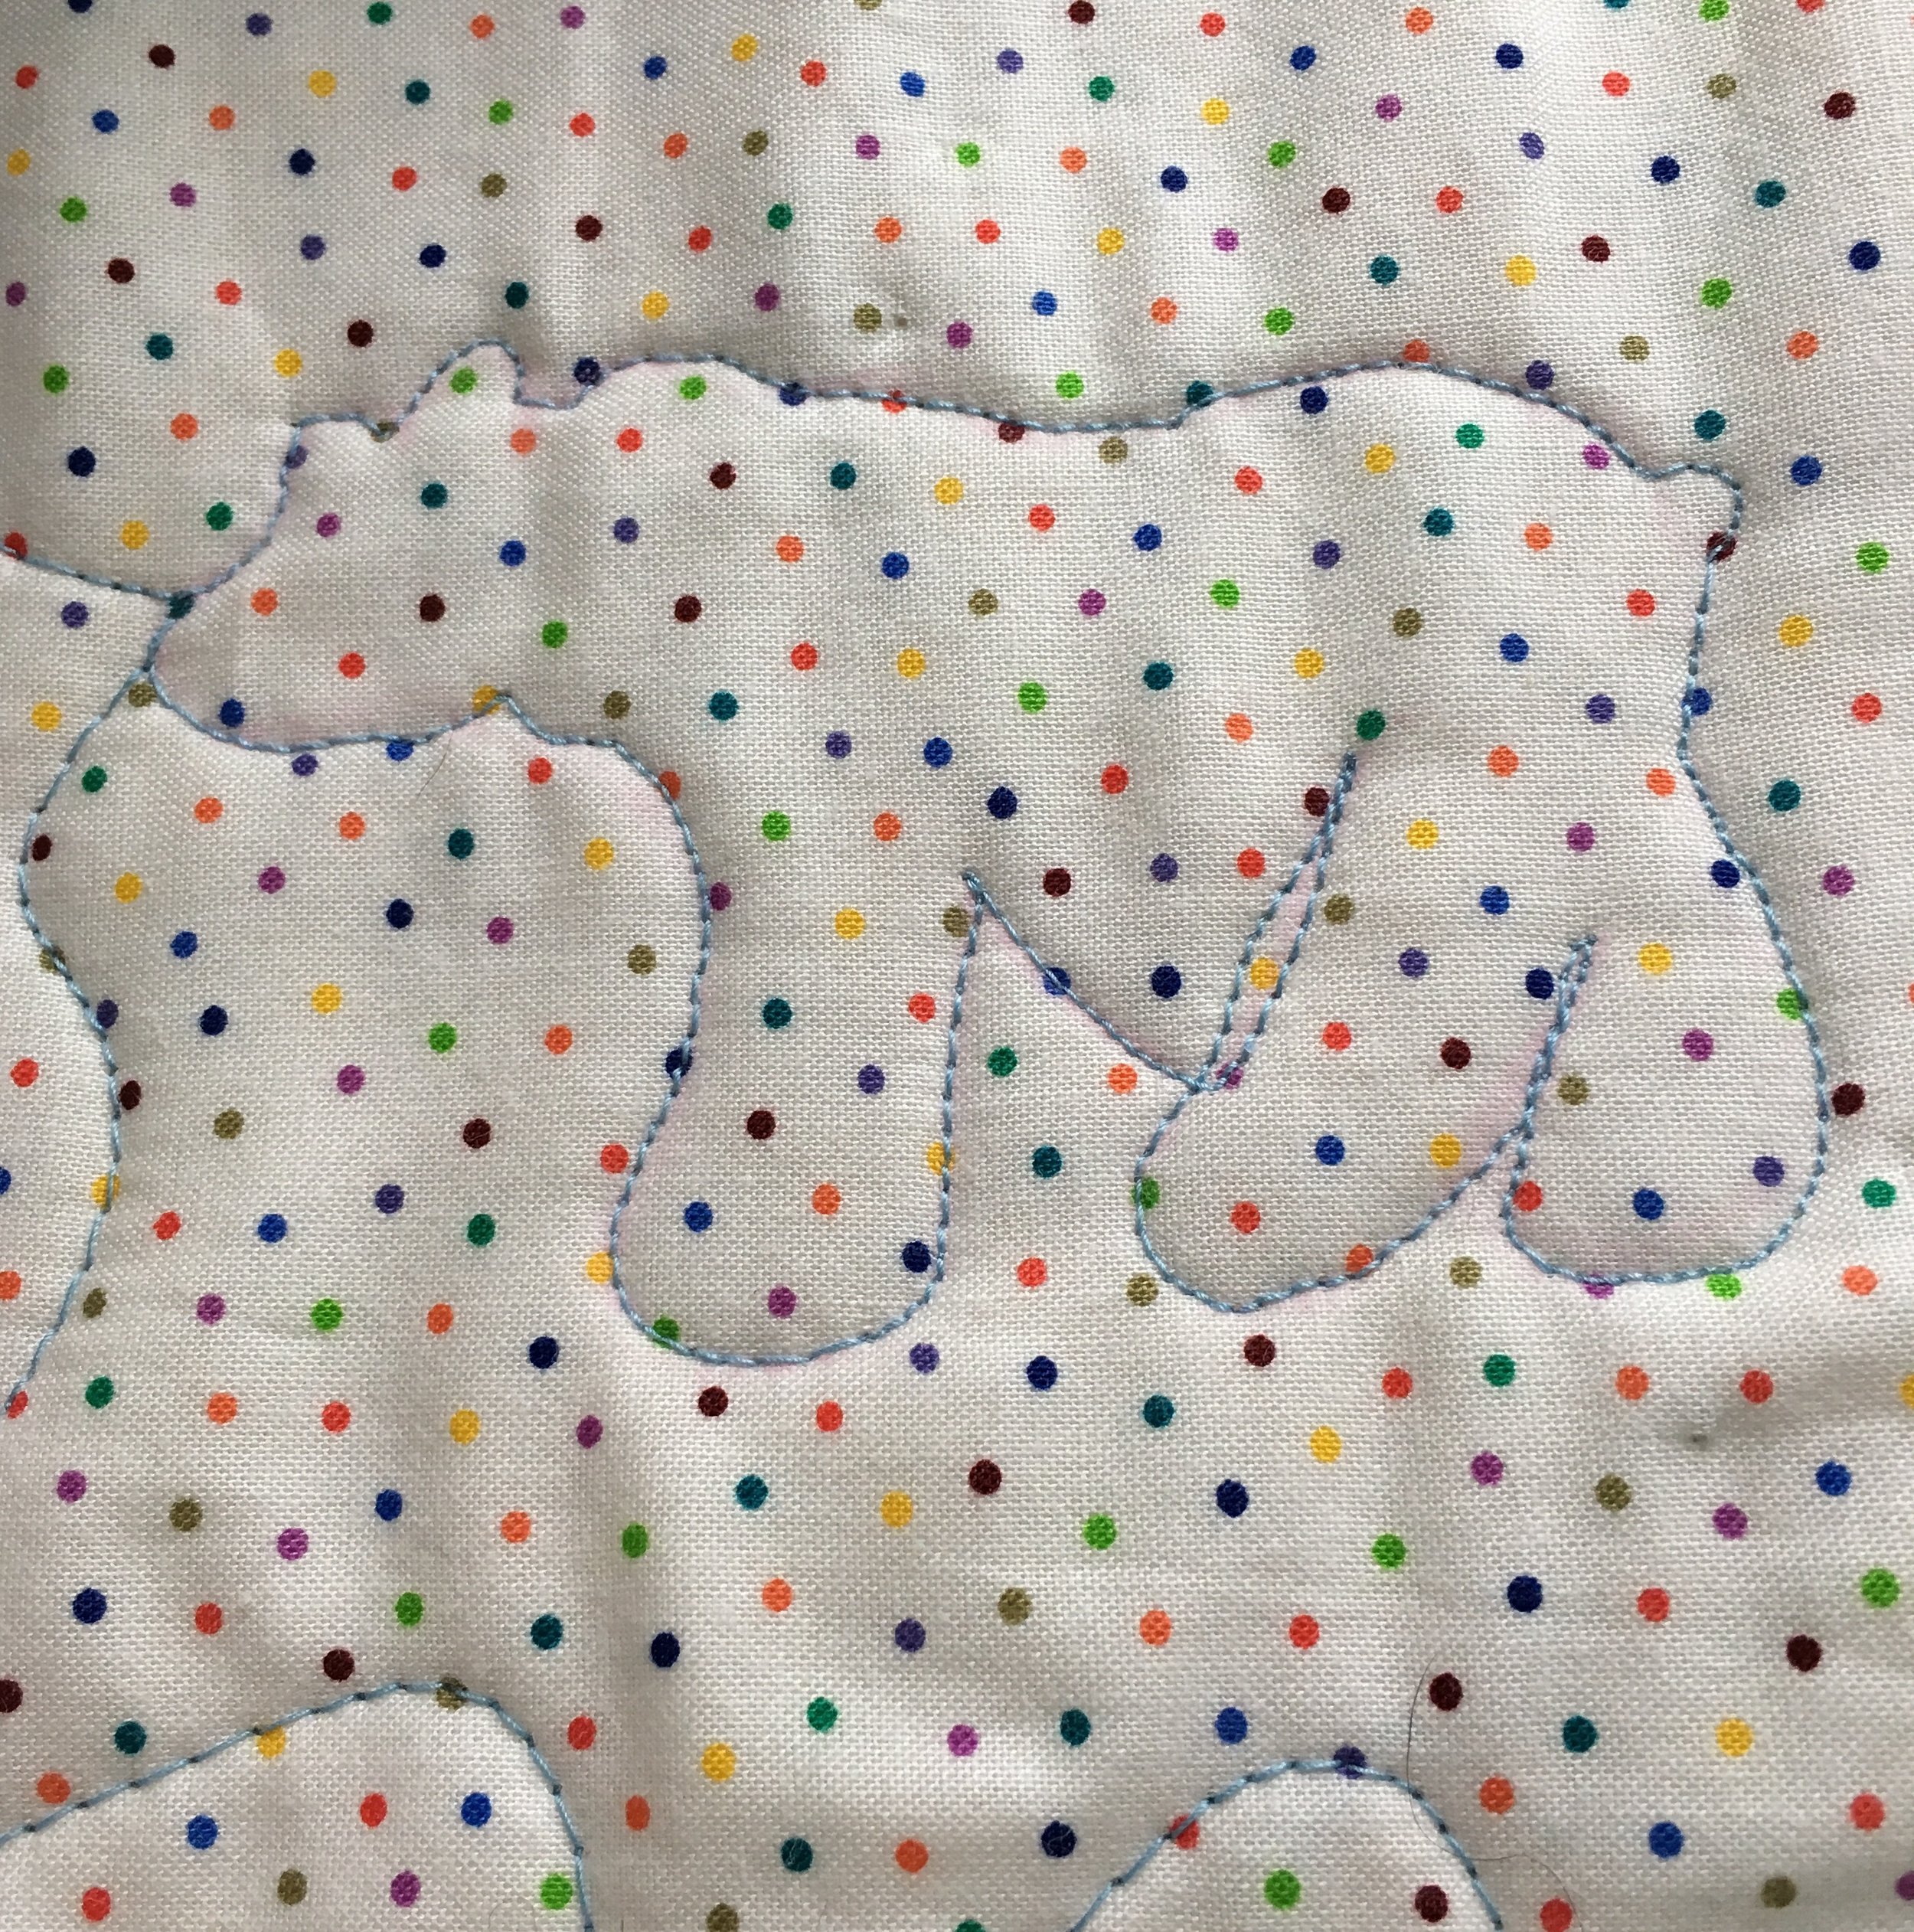
Free motion bear stitched using a template
Free motion bear stitched using a template
I had so much fun using free motion quilting for my "Bears in the Meadow" queen size quilt. I quilted it with my domestic Bernina 440. The quilt is a Bear Paw Block quilt with a modern layout. I'll show the whole quilt in my next post.
I decided it would be fun to but a couple bears into the quilt. I can stitch rabbits and carrots free-hand but from my initial bear sketches I knew I wasn't going to be able to free-hand stitch a brown bear!
I did a search of brown bears in Google Images and then came up with a drawing of a bear that I liked and thought I could stitch. I thought about cutting a plastic template but thought it would be difficult to cut smooth lines. Then I thought about making copies of the bear on paper and stitching over the design on the paper. That works but sometimes the stitches get pulled removing the paper and the stitches need to be very small which wouldn't match the other quilting.
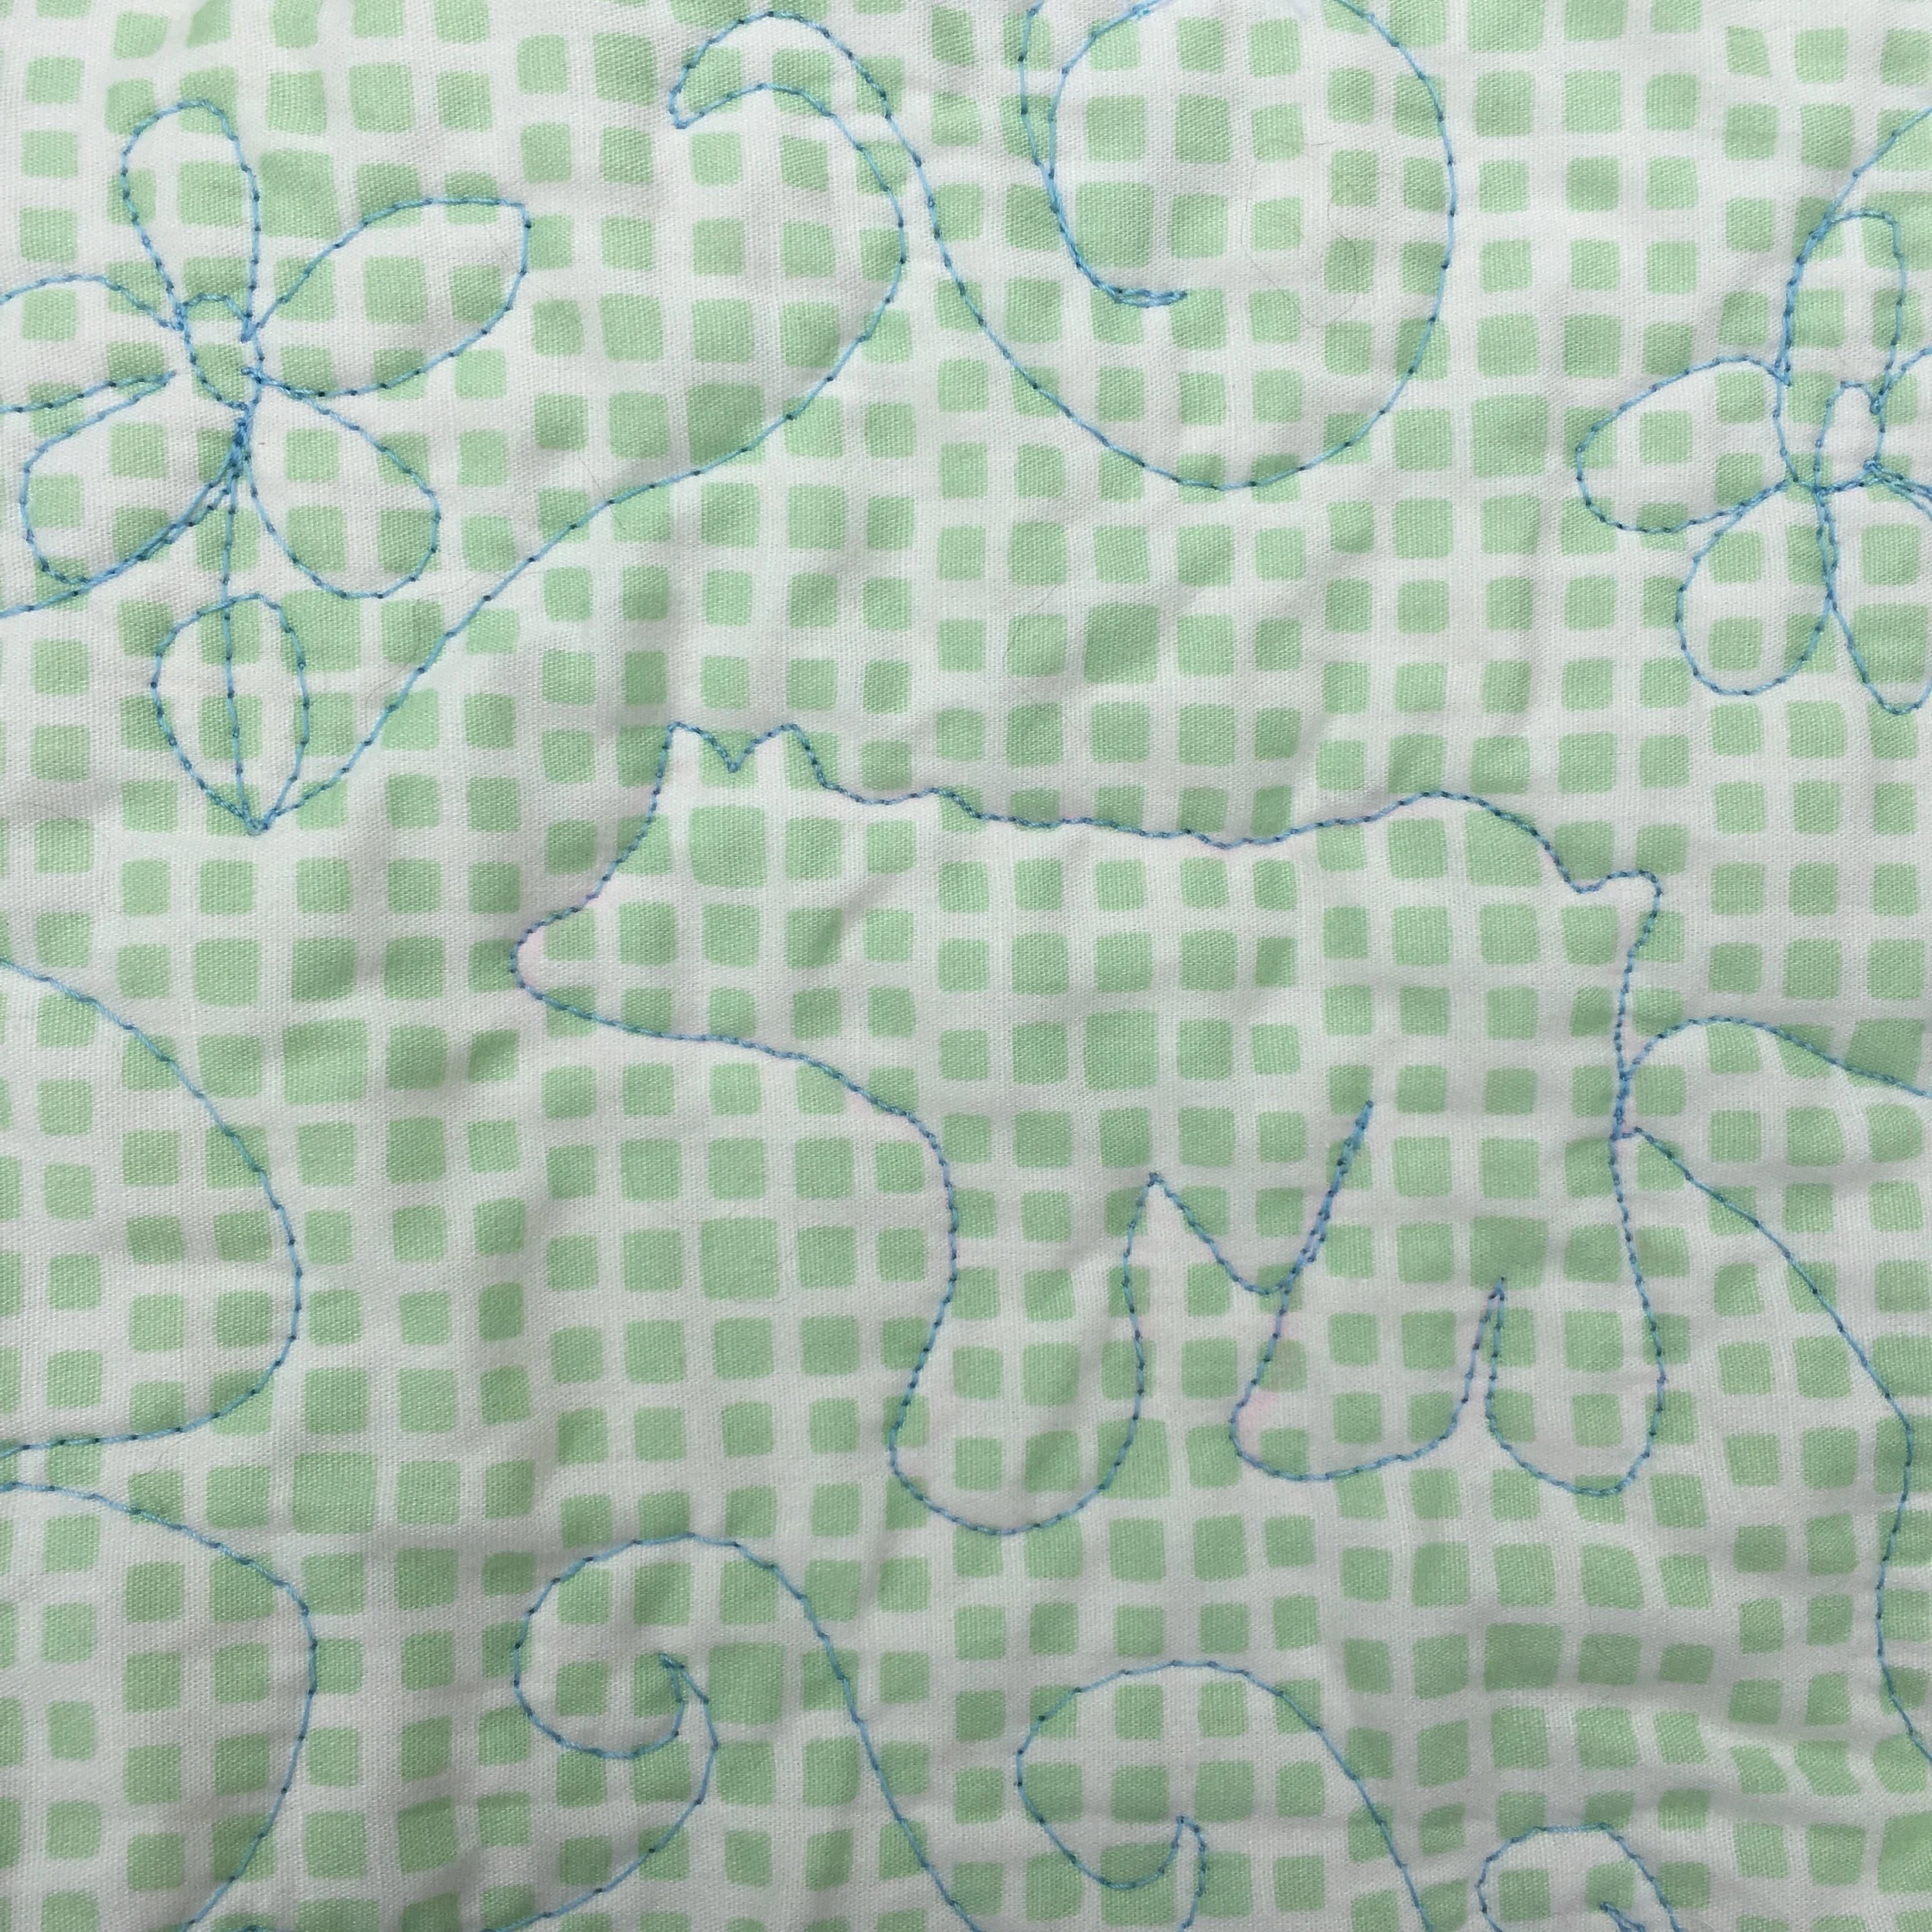
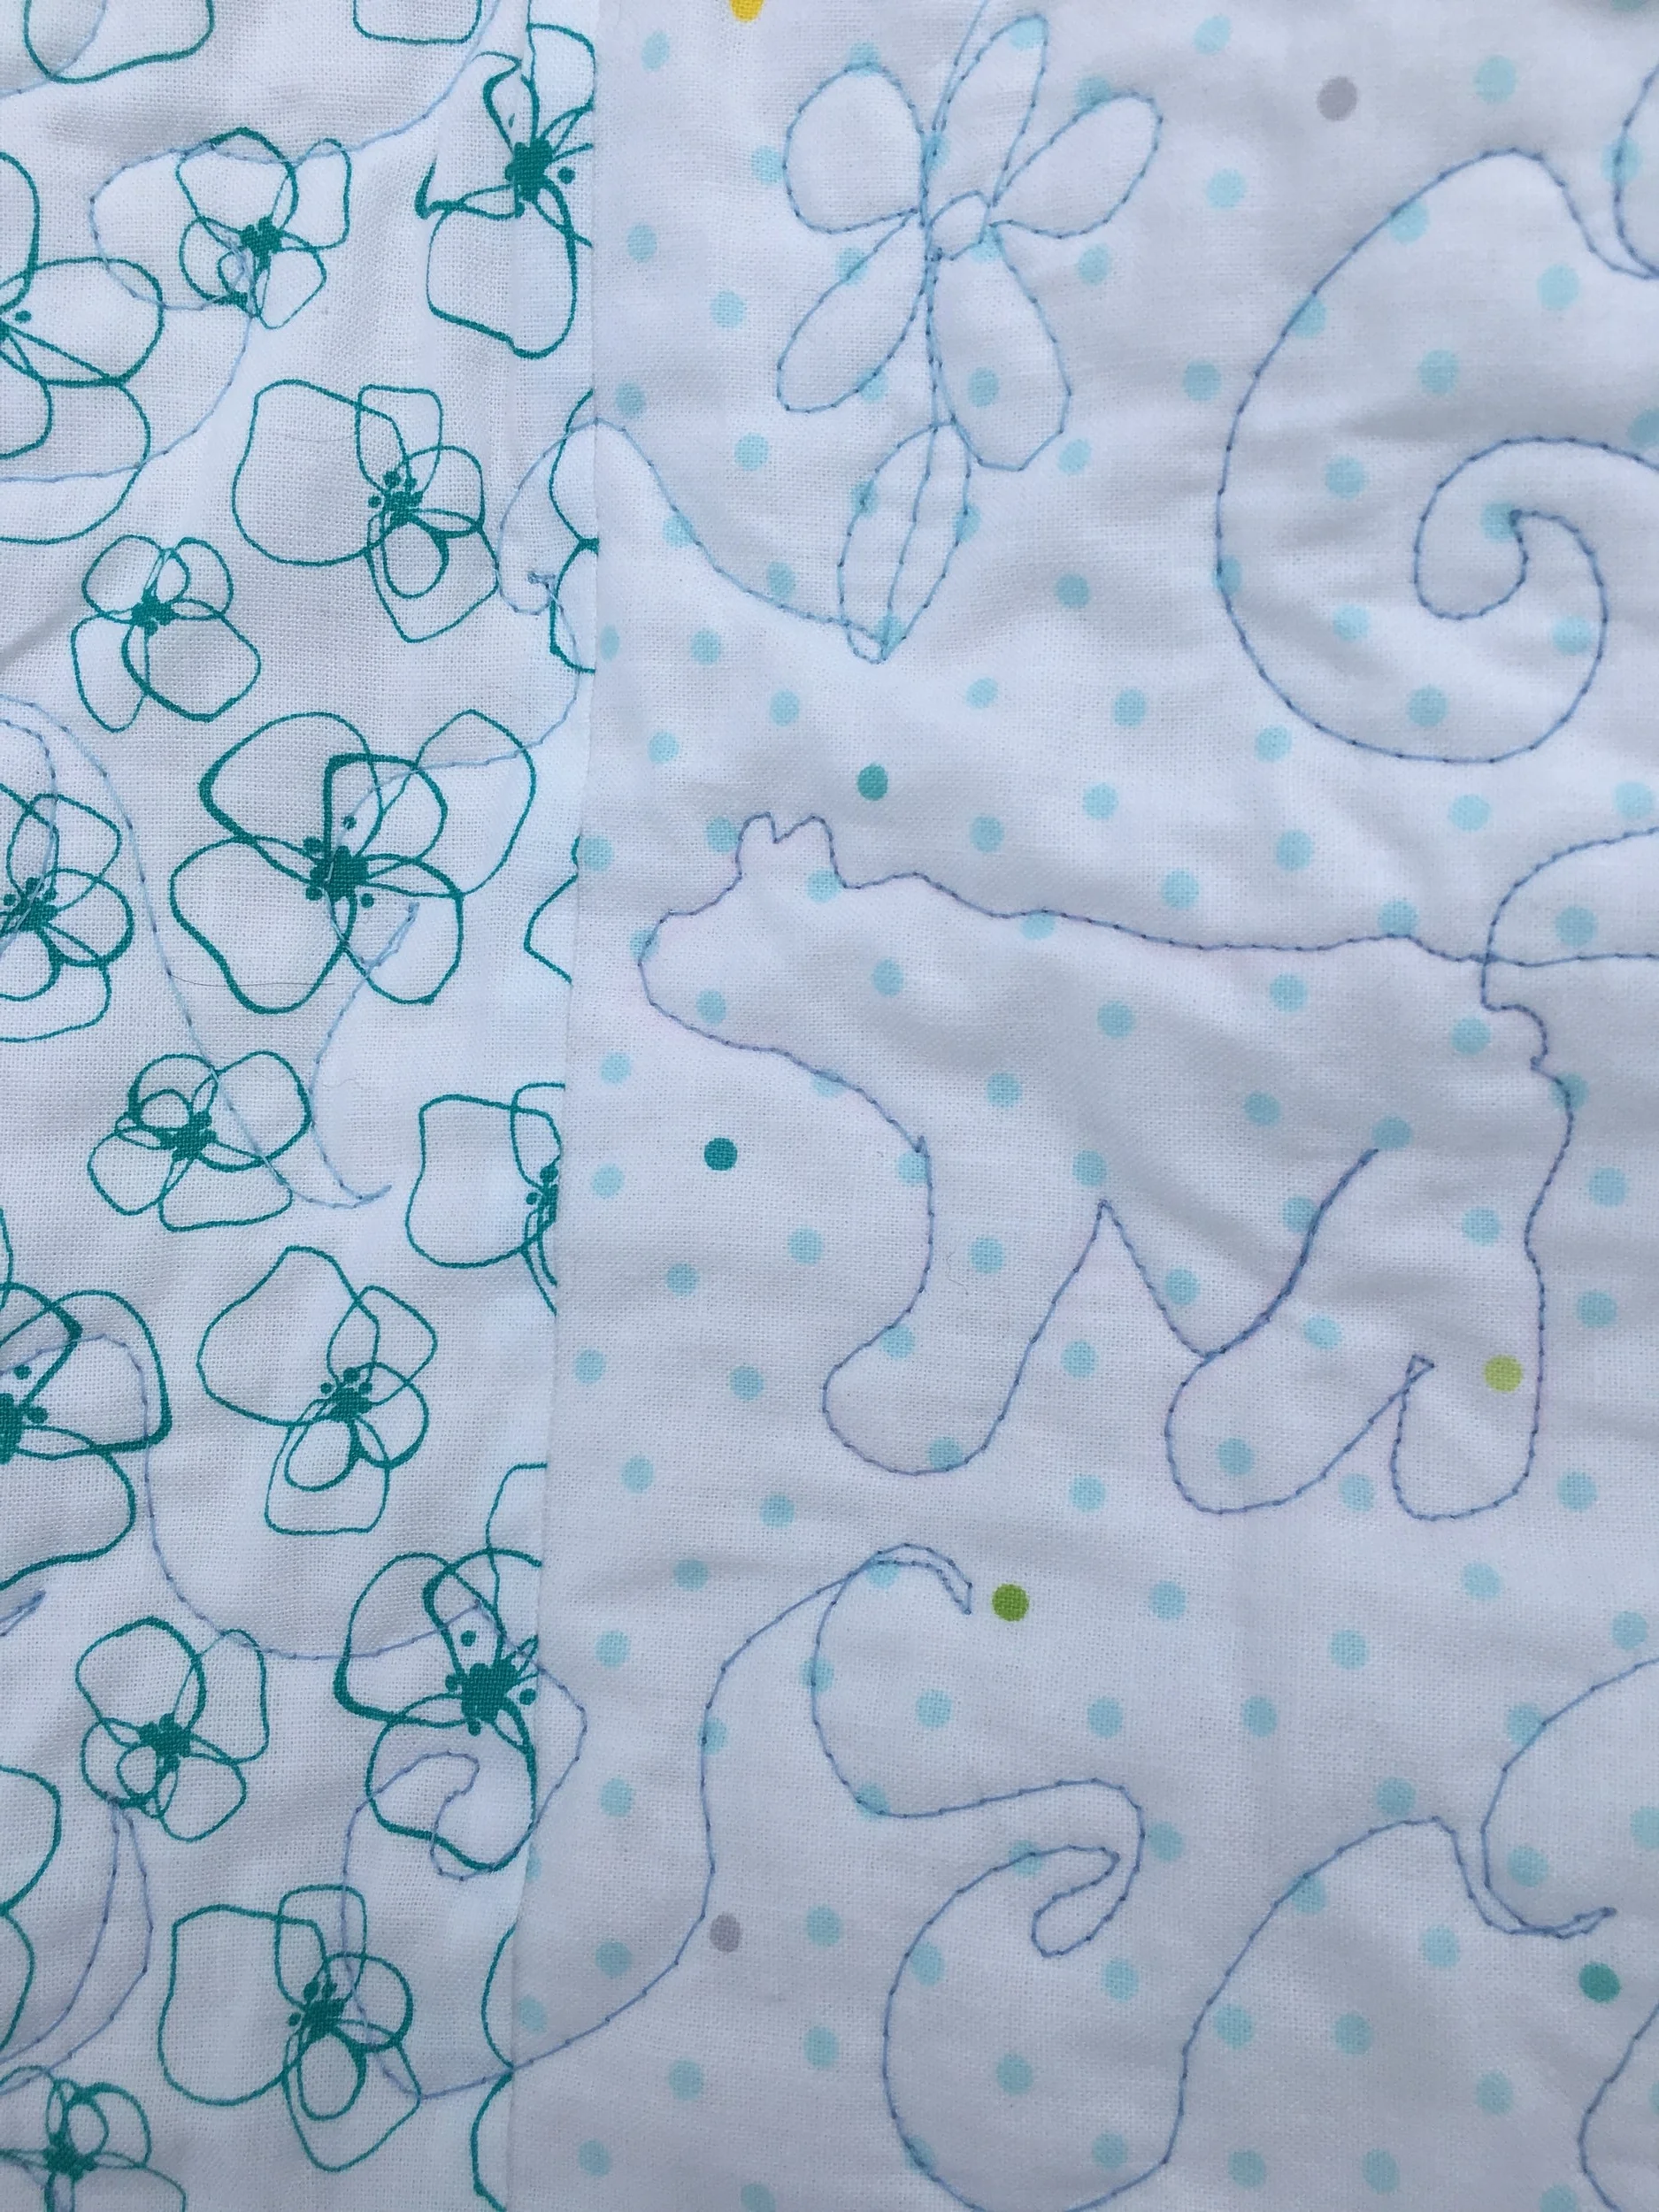
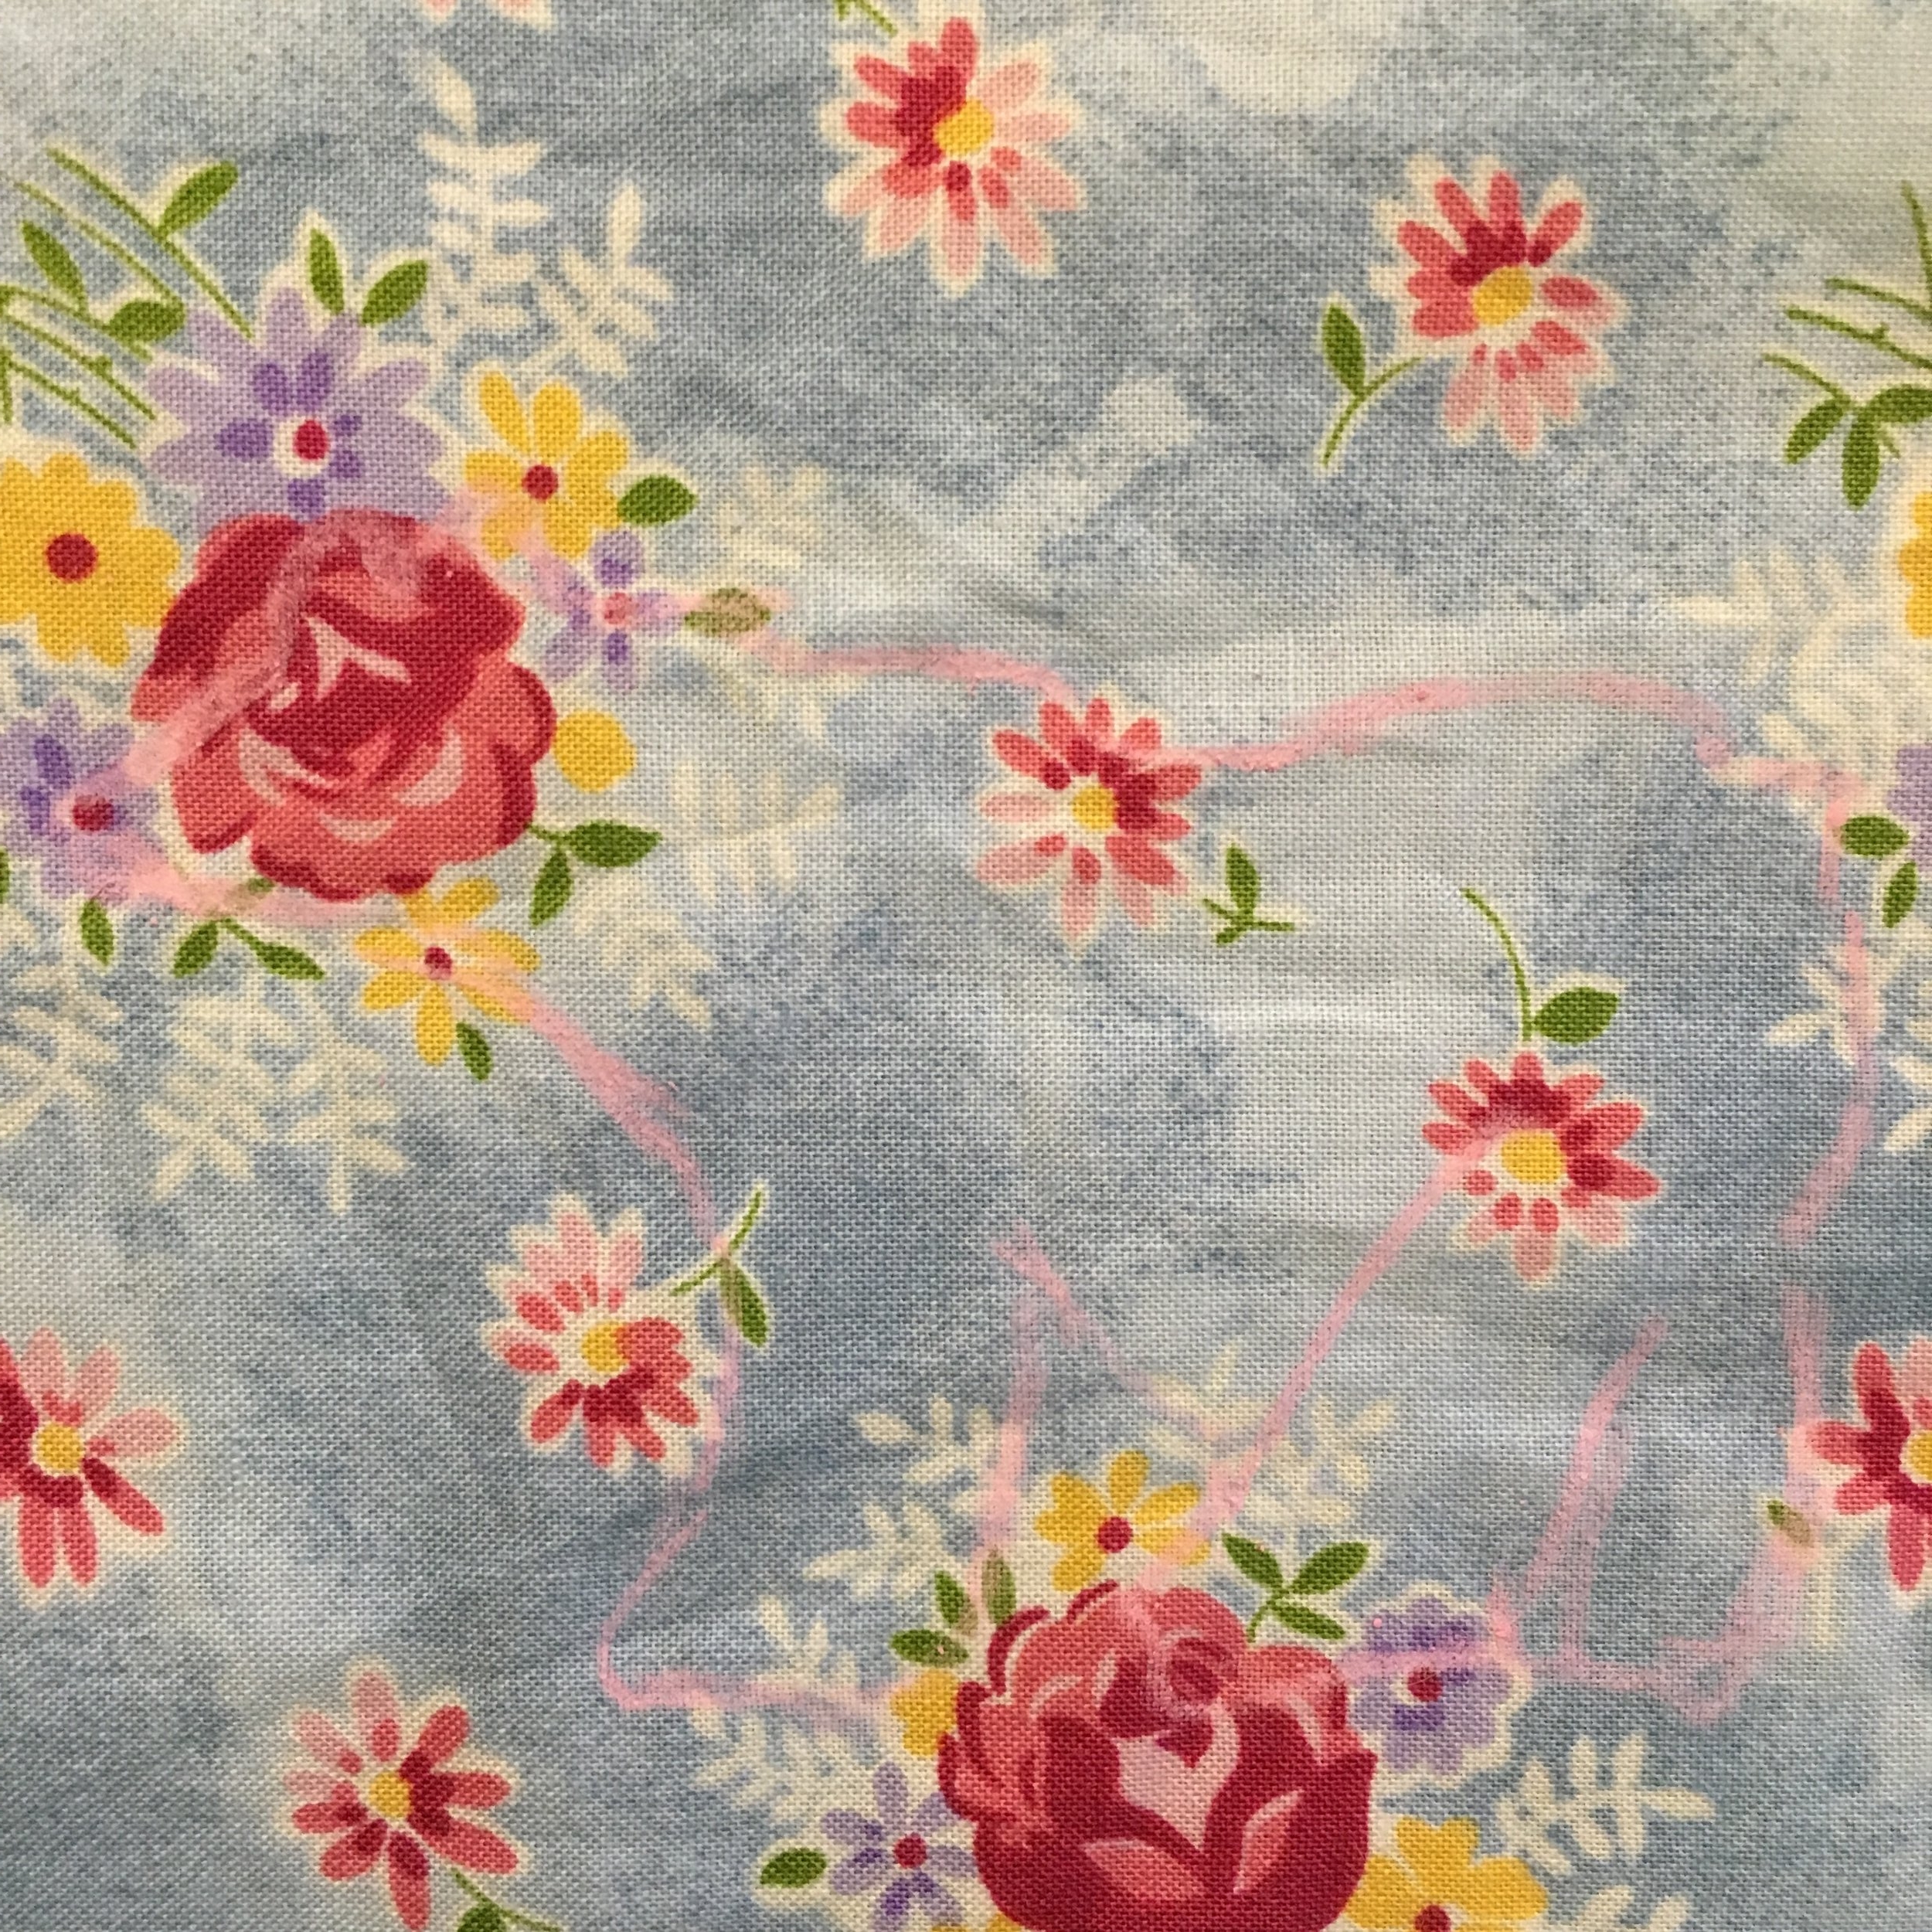
I ended up just cutting out my bear drawing. I used a Clover Water Soluble Pencil to trace around my paper template. This pencil can be sharpened to a point and I find it rubs off easily like chalk. In fact it rubs off so well, that I needed to trace the bear just before I stitched it. If I pre-marked a block, I couldn't find the bear when I got the the block! The The paper template held up remarkably well. The photo below was taken when the quilting was all done.
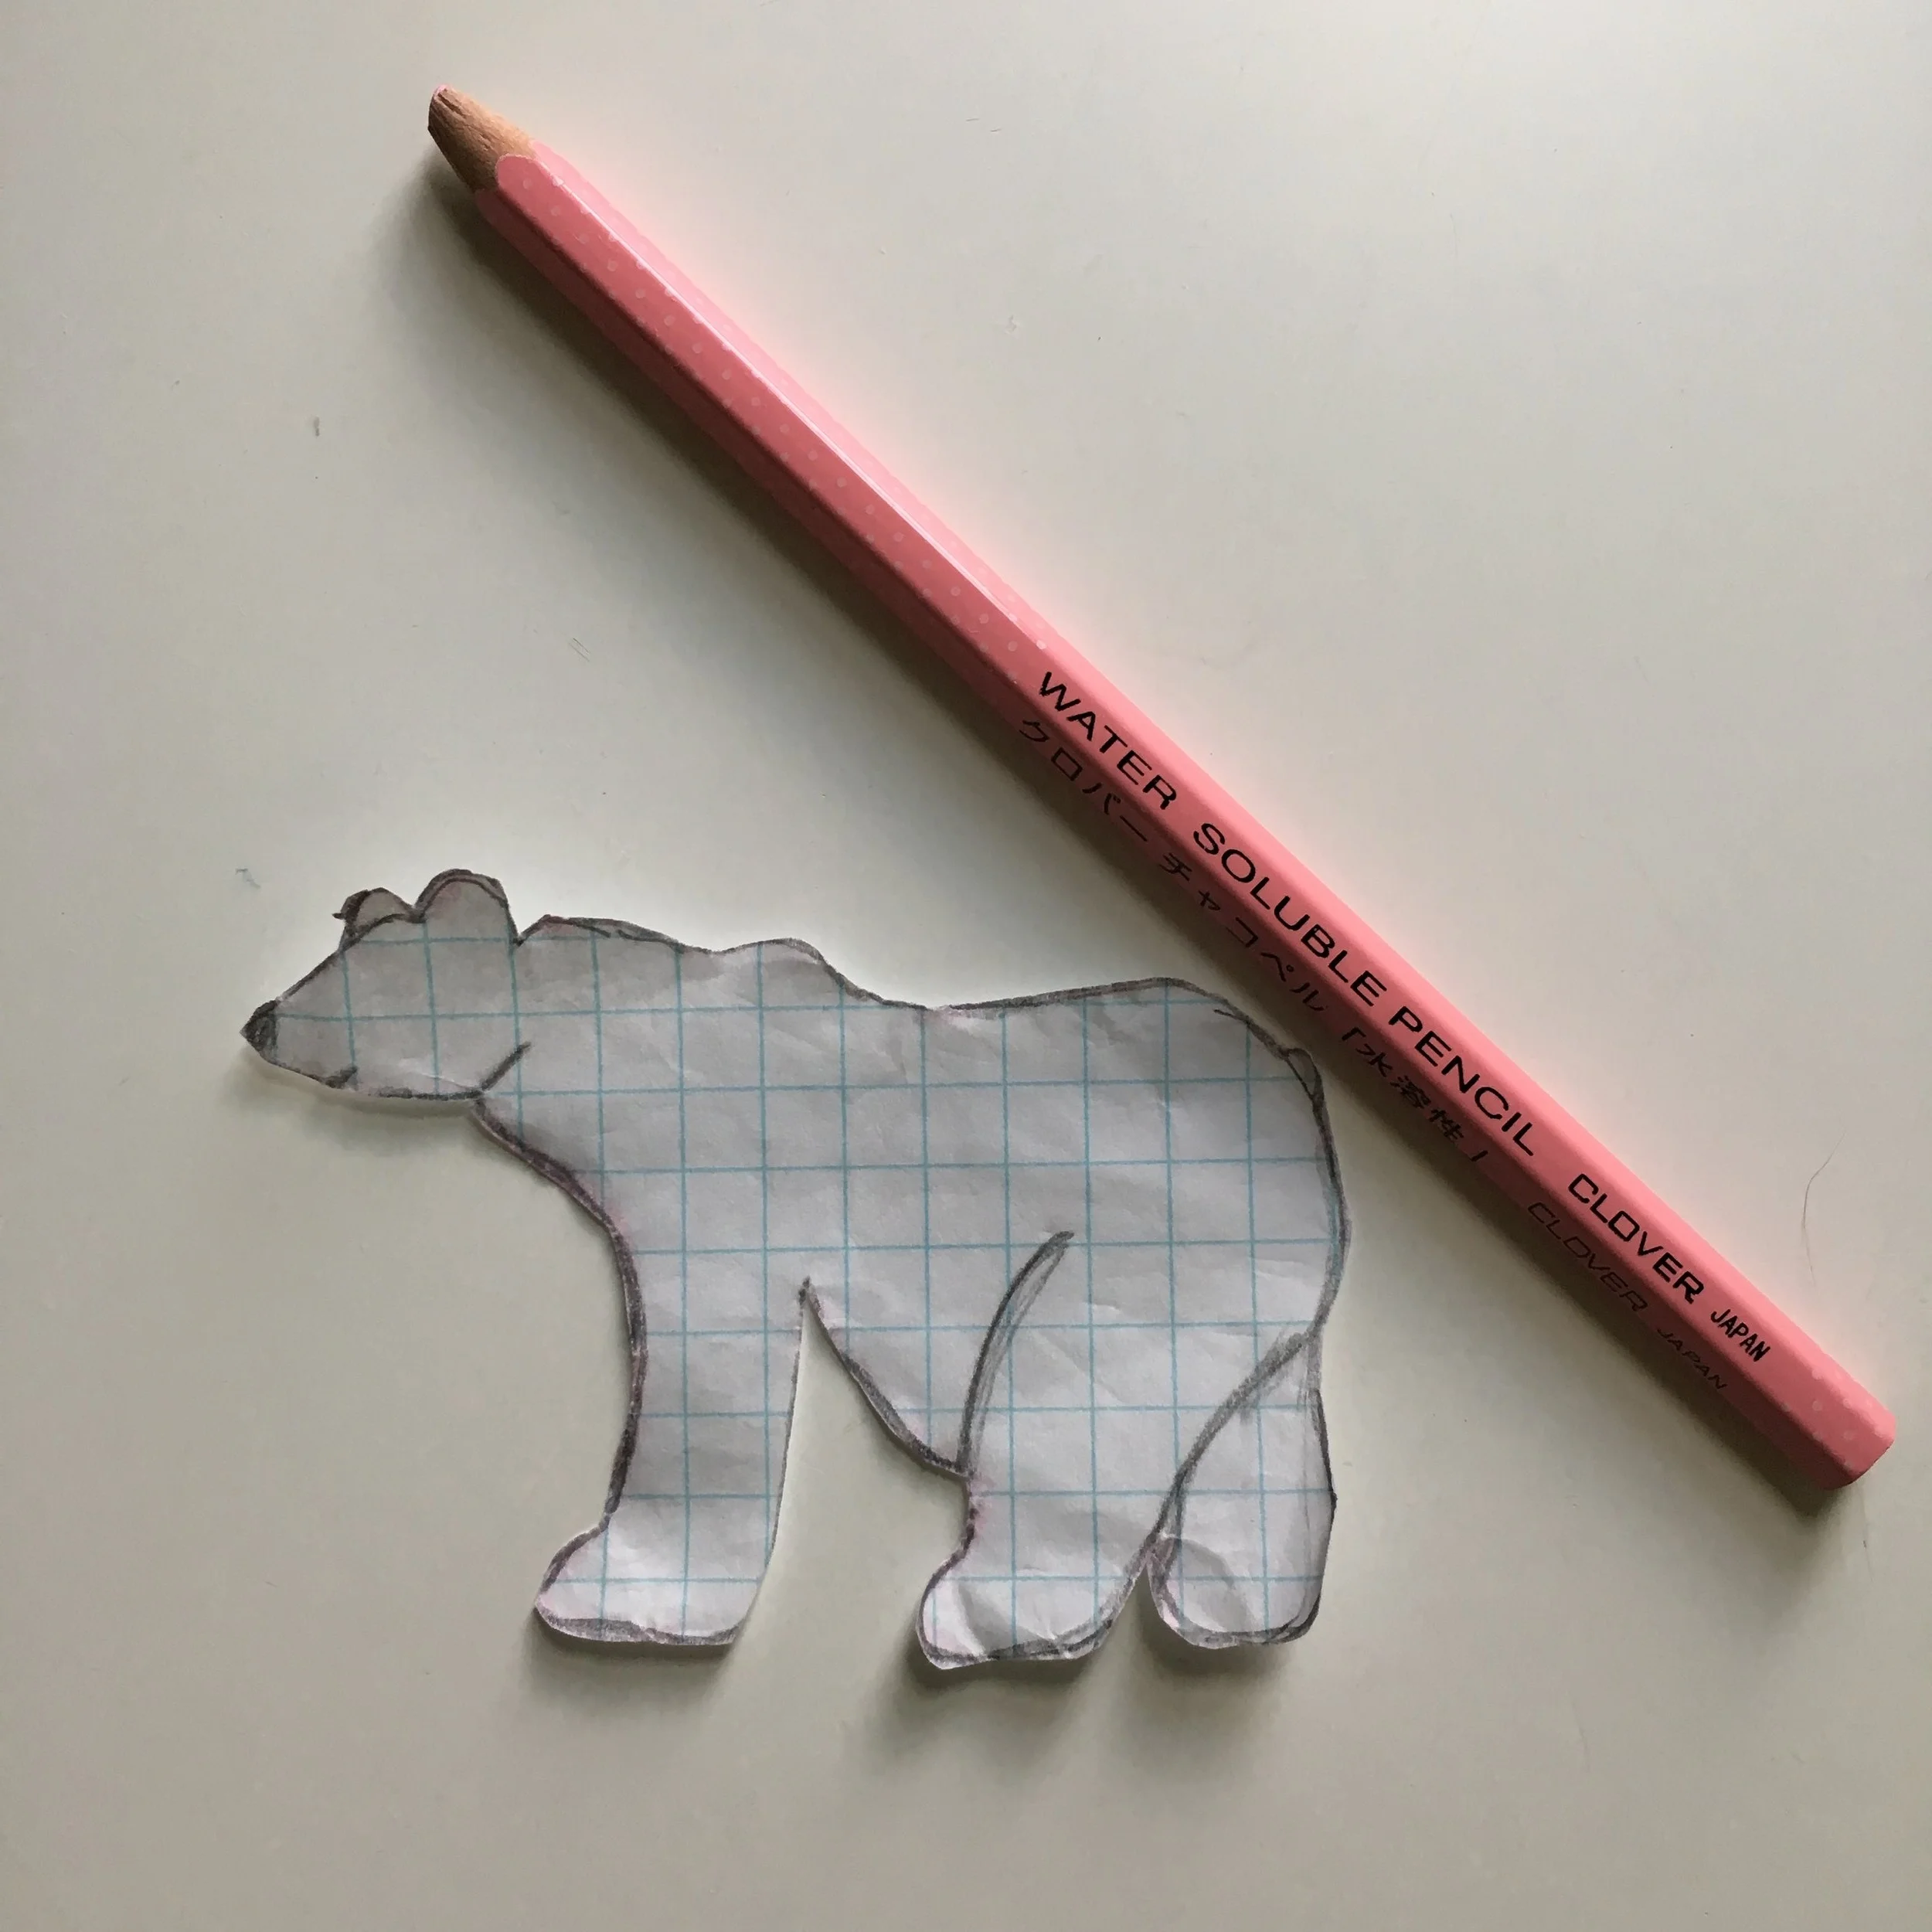
Paper template and Clover Water Soluble Pencil
Here are two bears traced out on fabric and at the bottom, a quilted bear with the marking still visible.
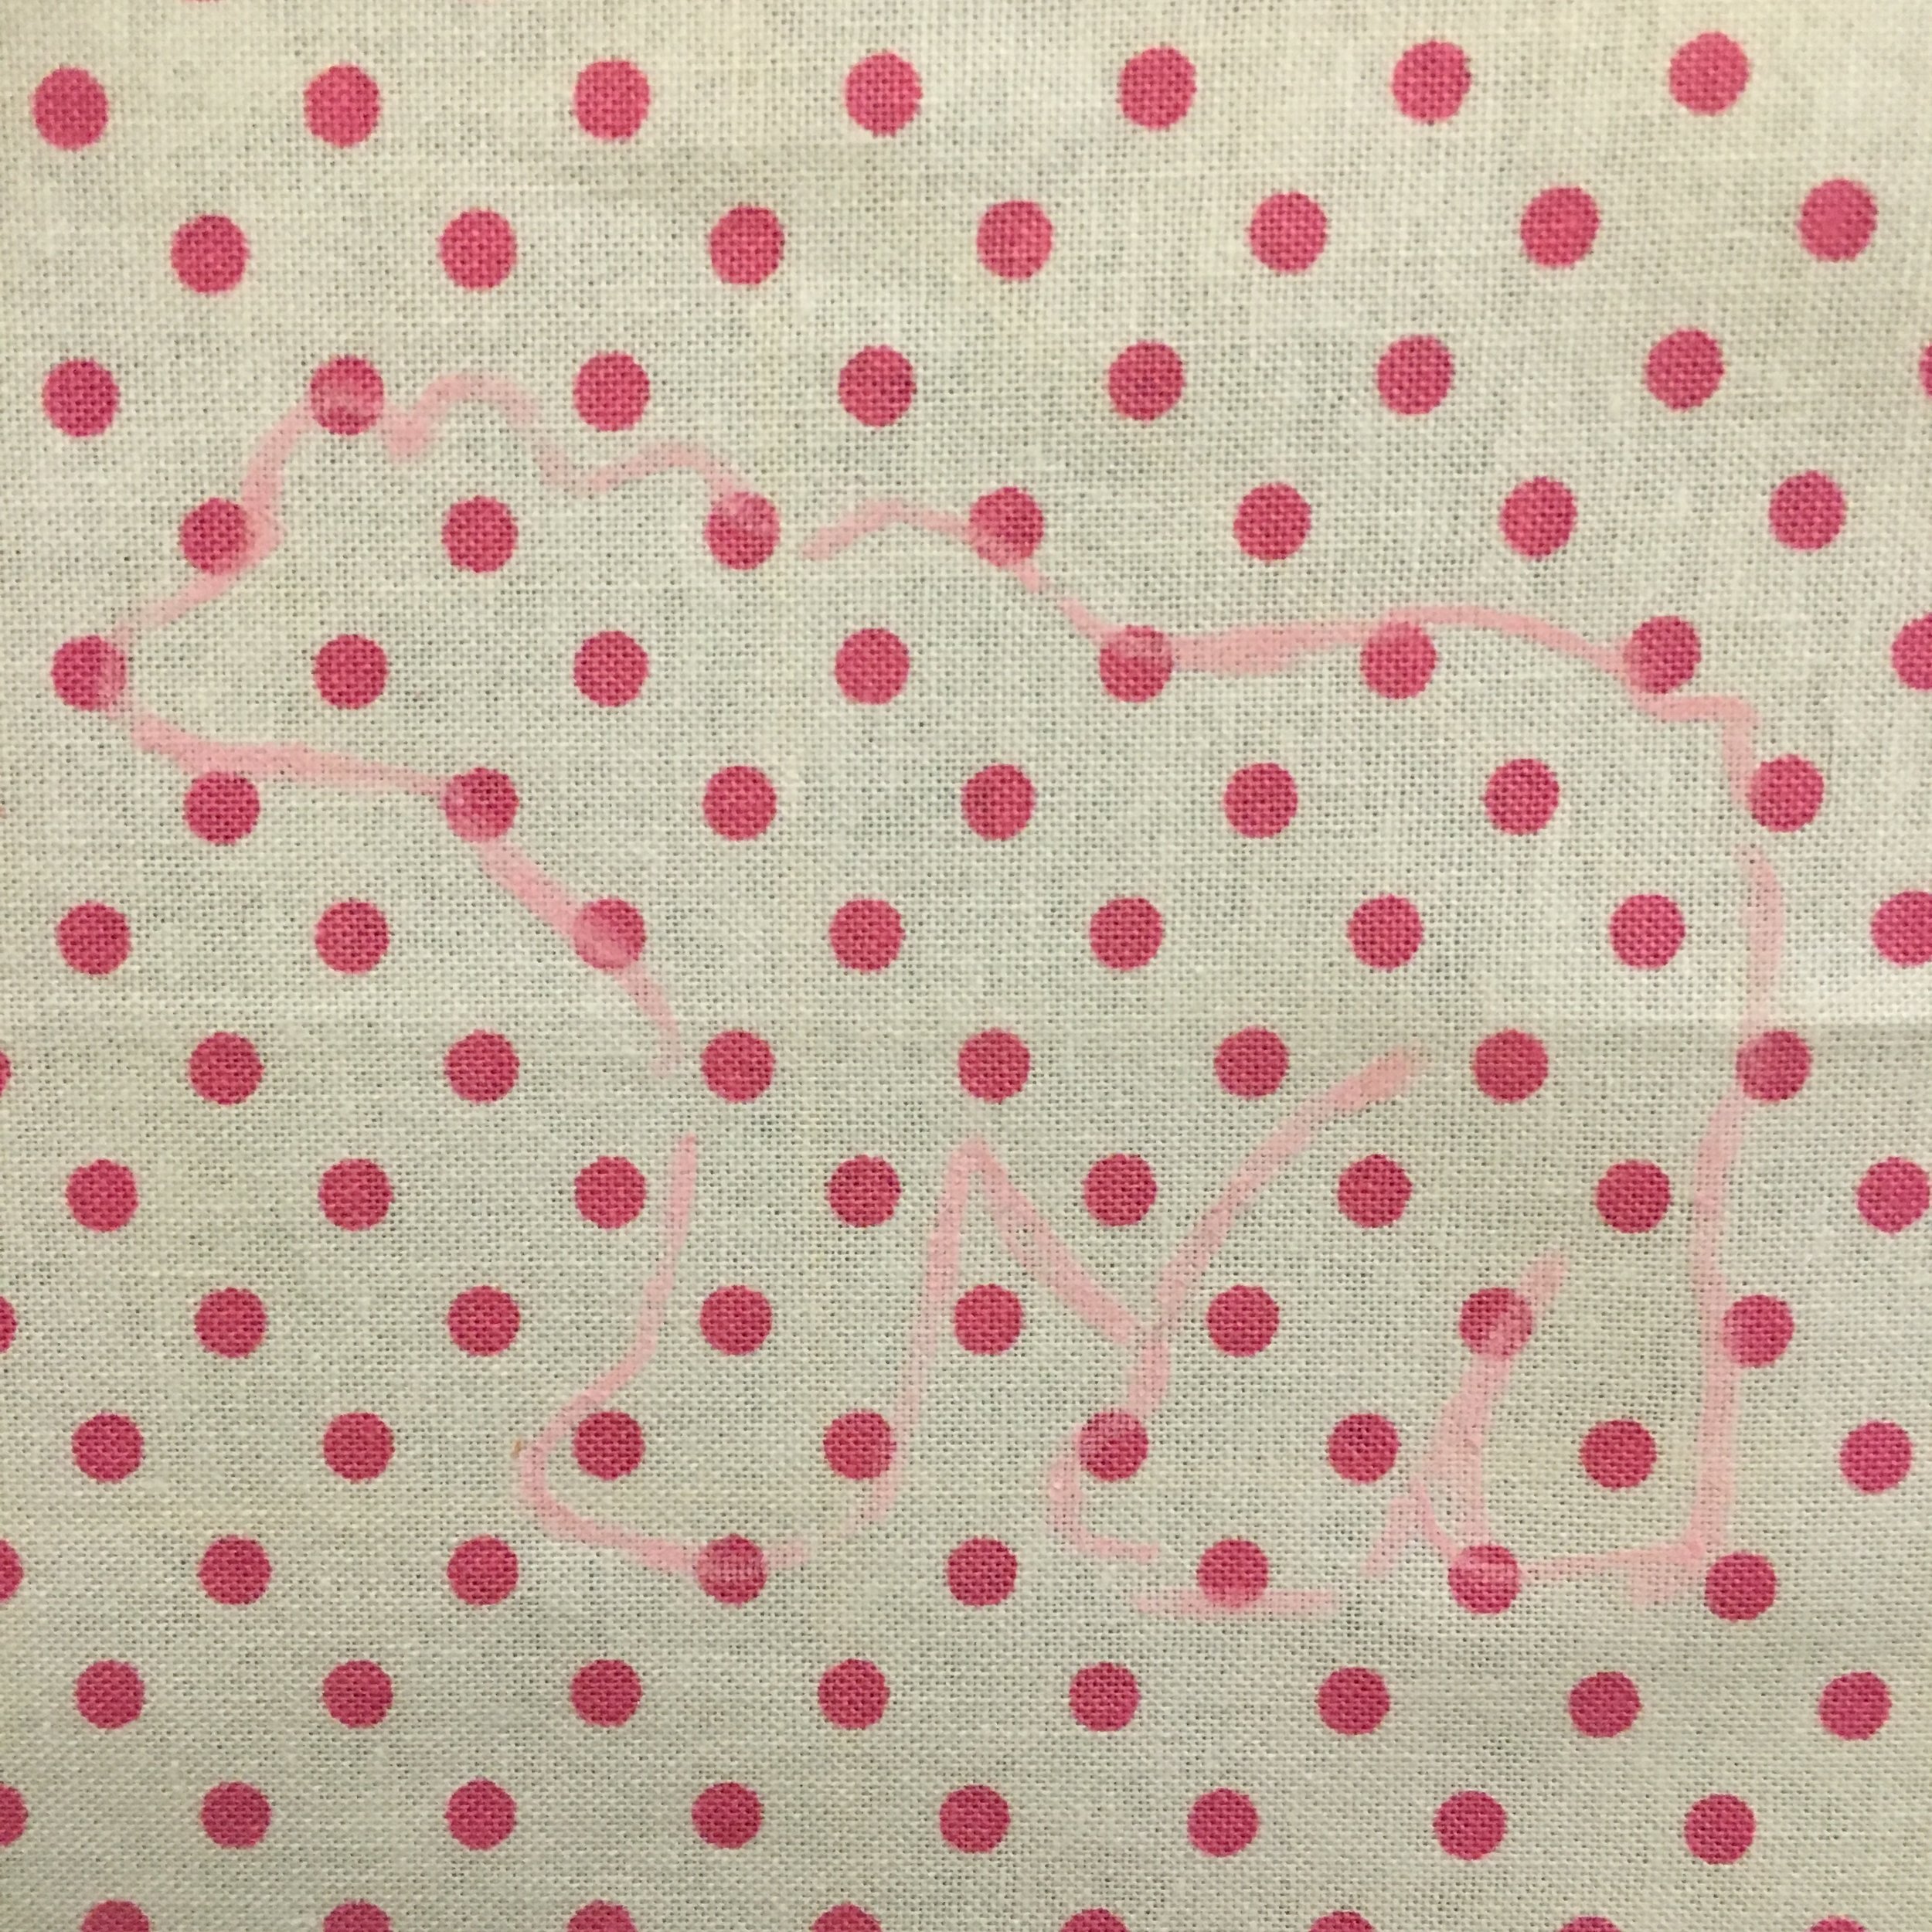
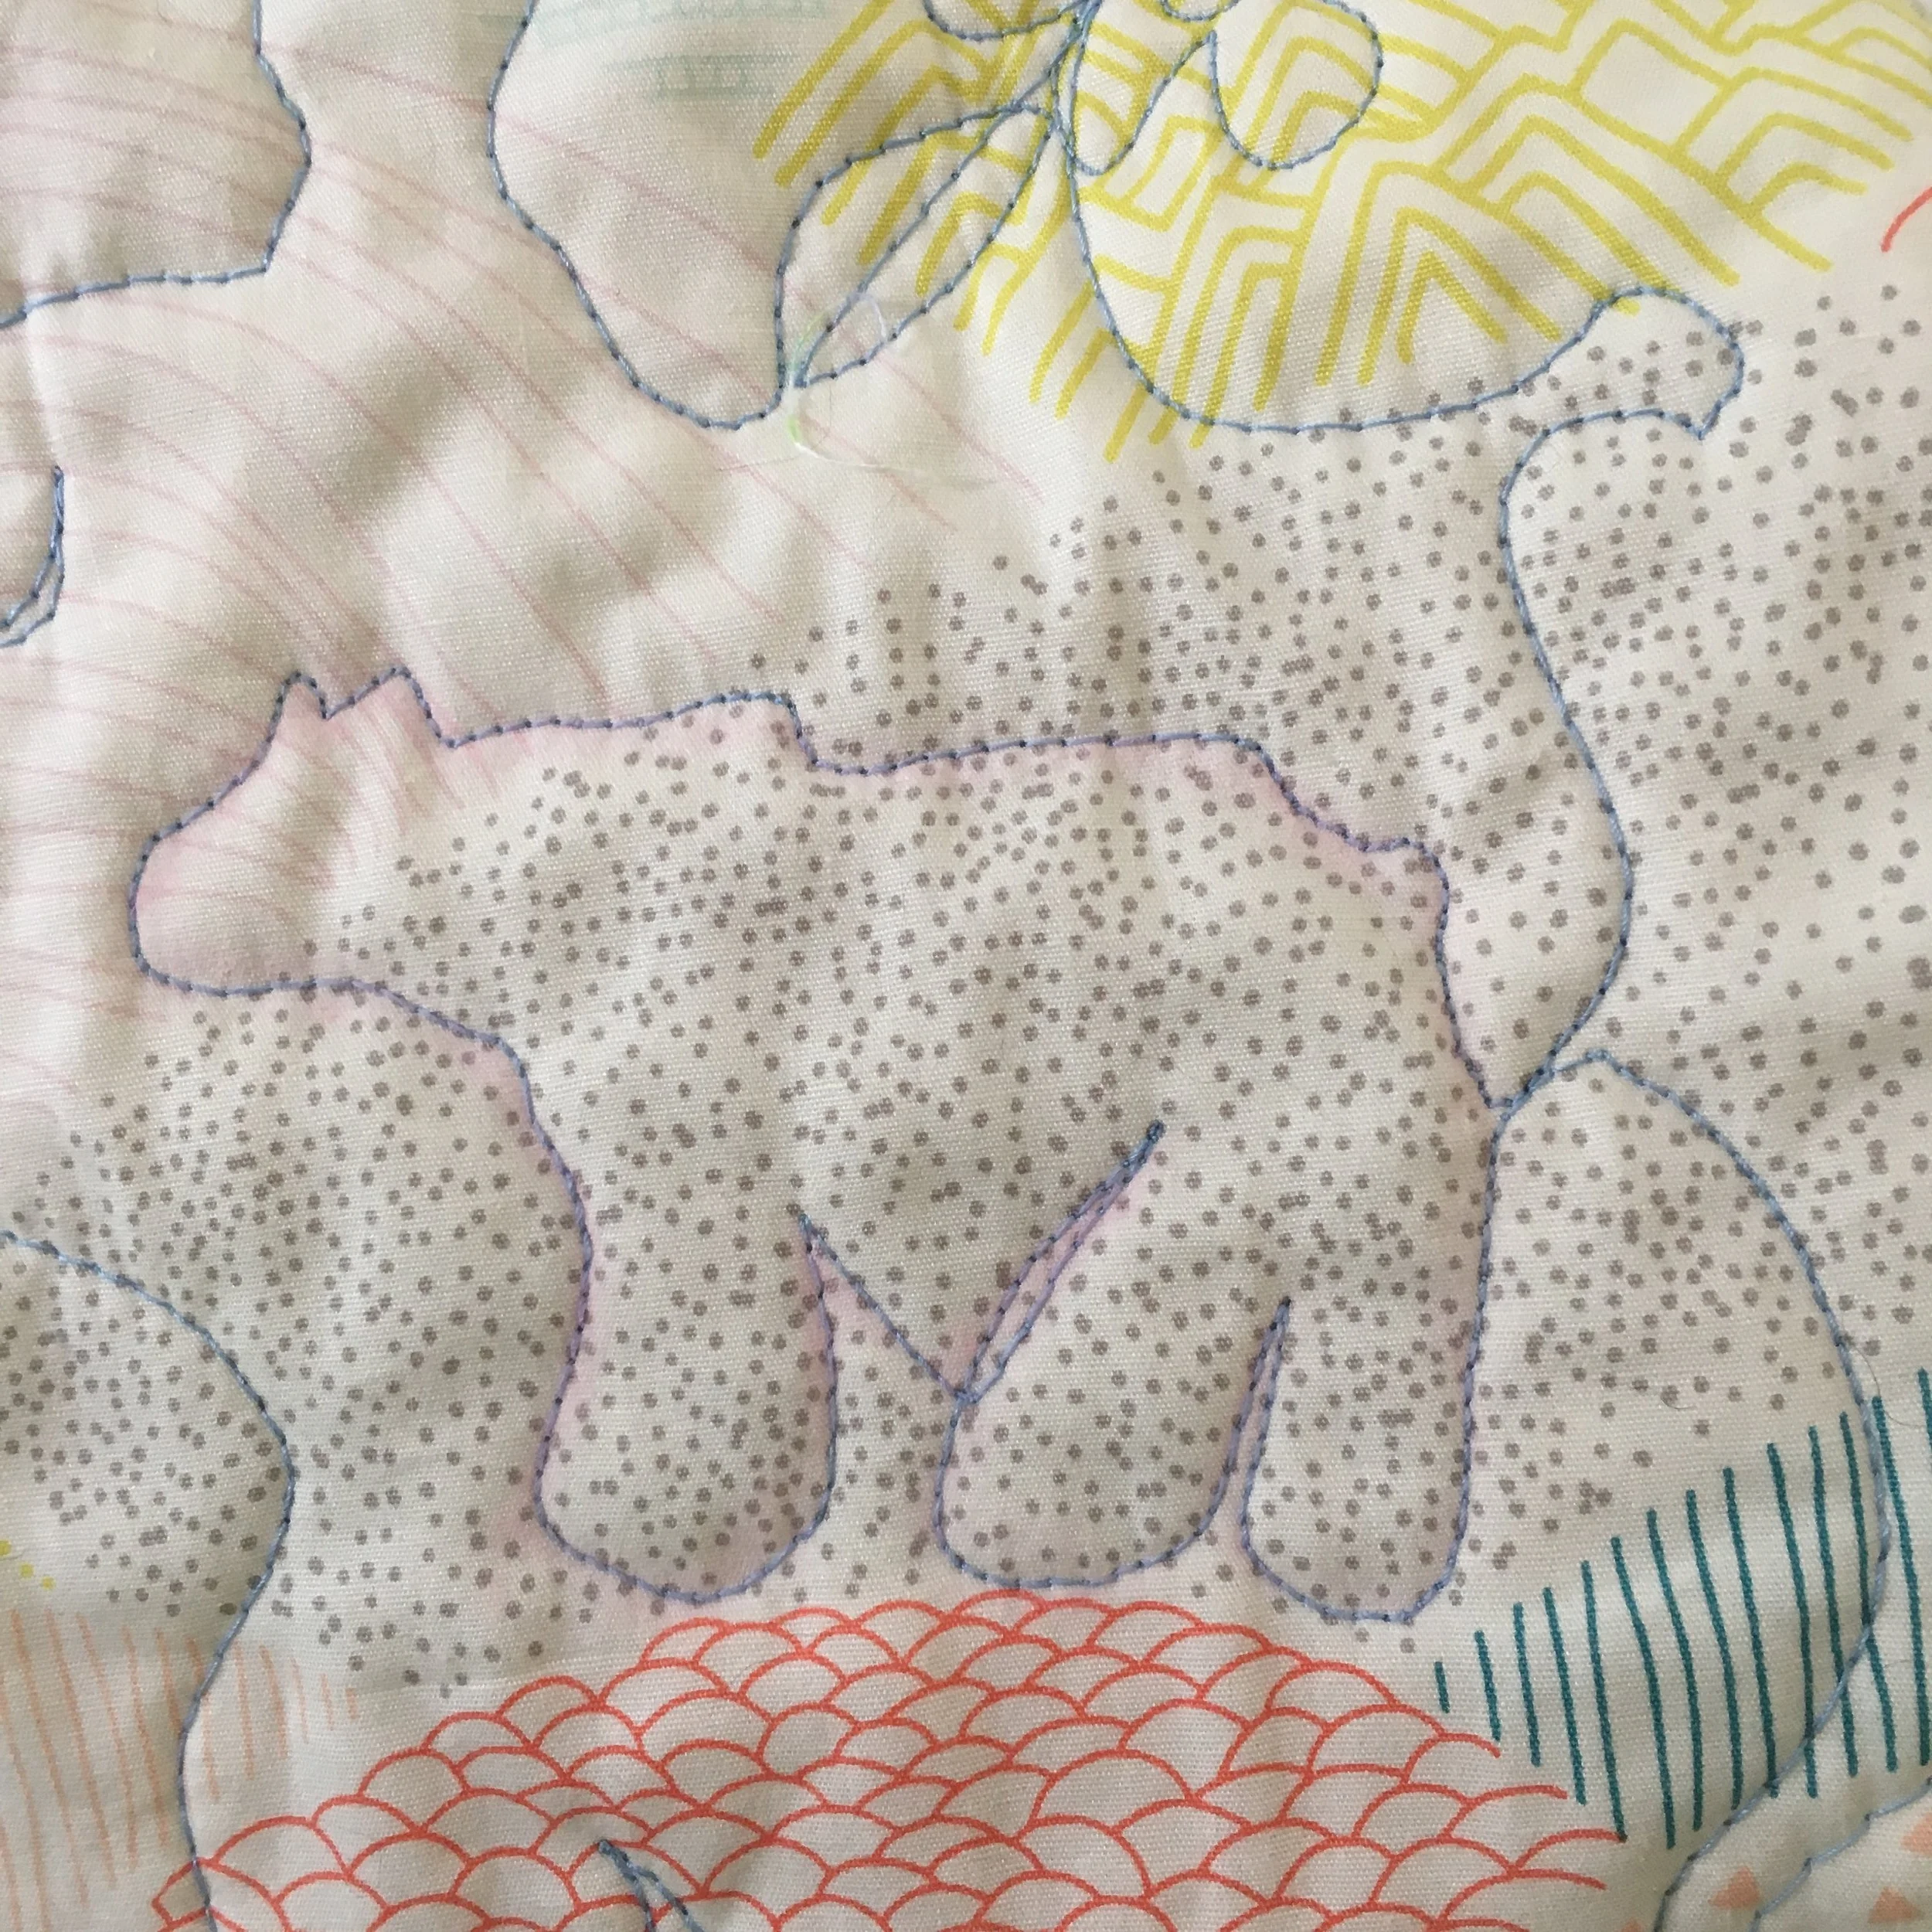
Every bear came out a little bit different. I love that! I loved being able to put the bear in different places on the blocks using my cut out template. This worked really well. It's a technique I would happily use again!
Gallery of Summer Projects

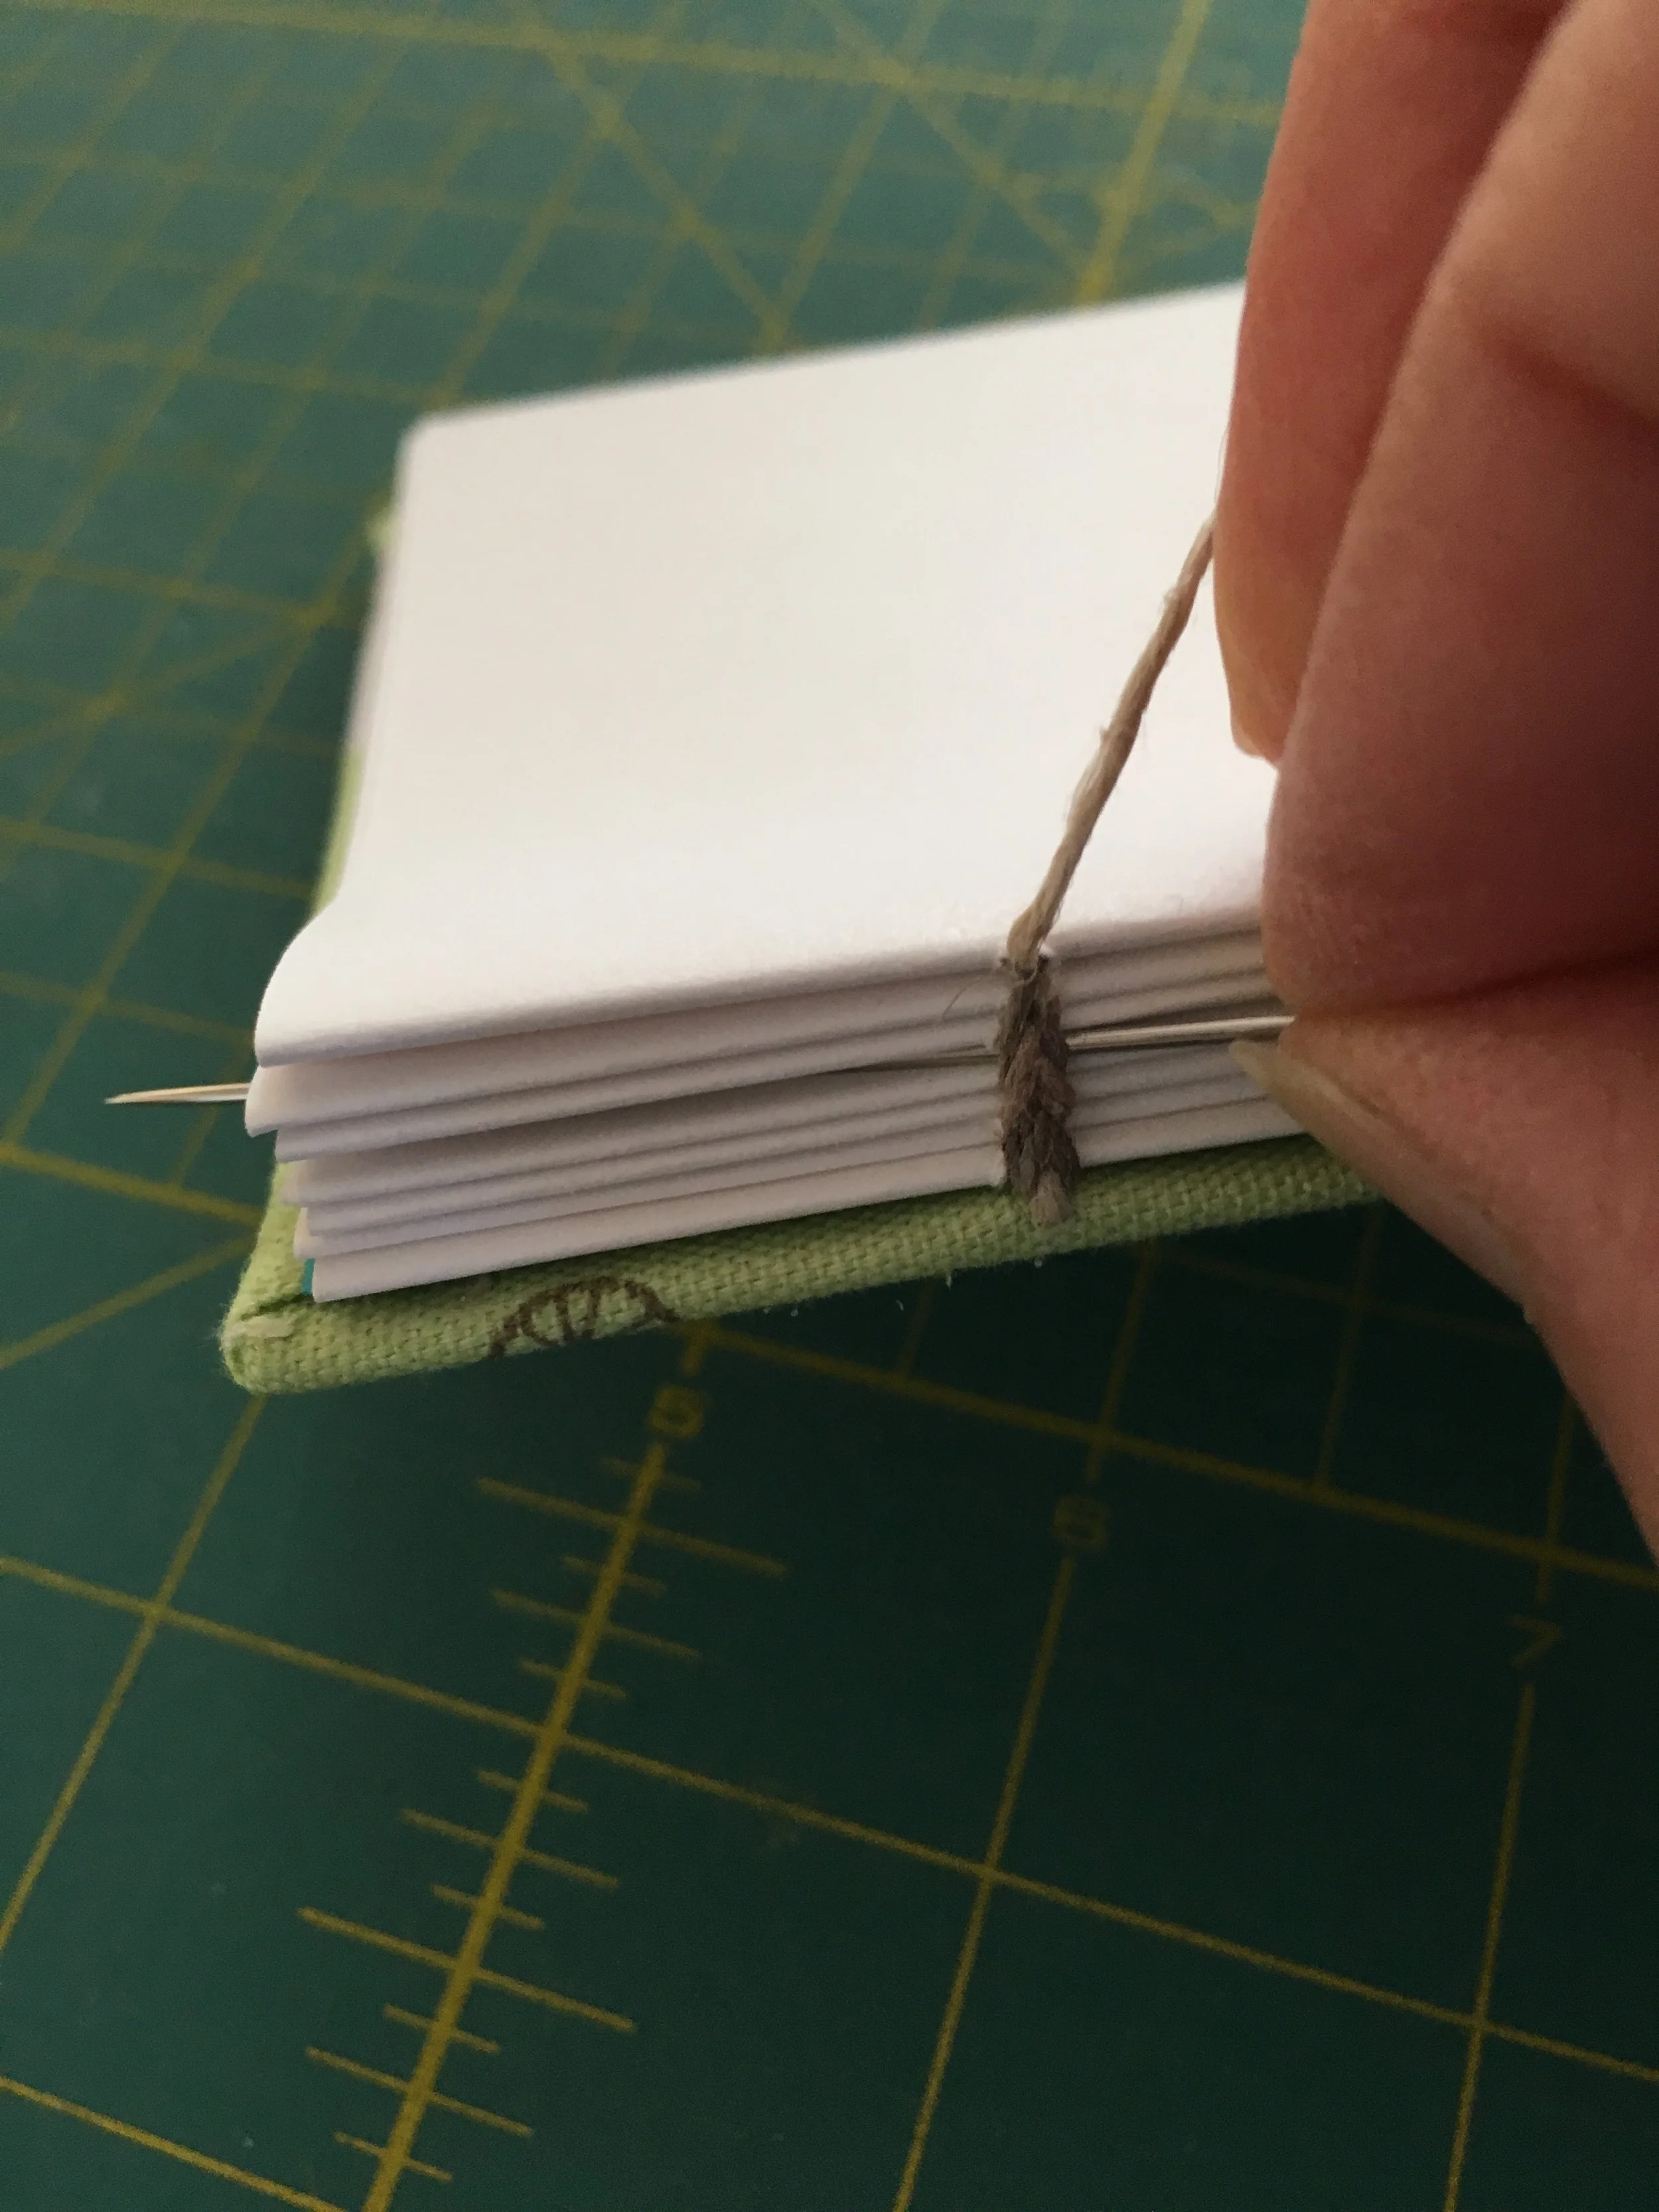
Japanese bindings--Hemp Leaf and tortoise shell
Japanese bindings--Hemp Leaf and tortoise shell
I love Creativebug.com. I learn so much watching their craft videos. This summer i watched several videos presented by Jody Alexander on binding books with Japanese bindings (shown above) and books sewn with Coptic bindings (below). She made this totally doable and lots of fun! I didn't have all the book binding supplies initially but my sewing drawer and tool box had usable alternatives!
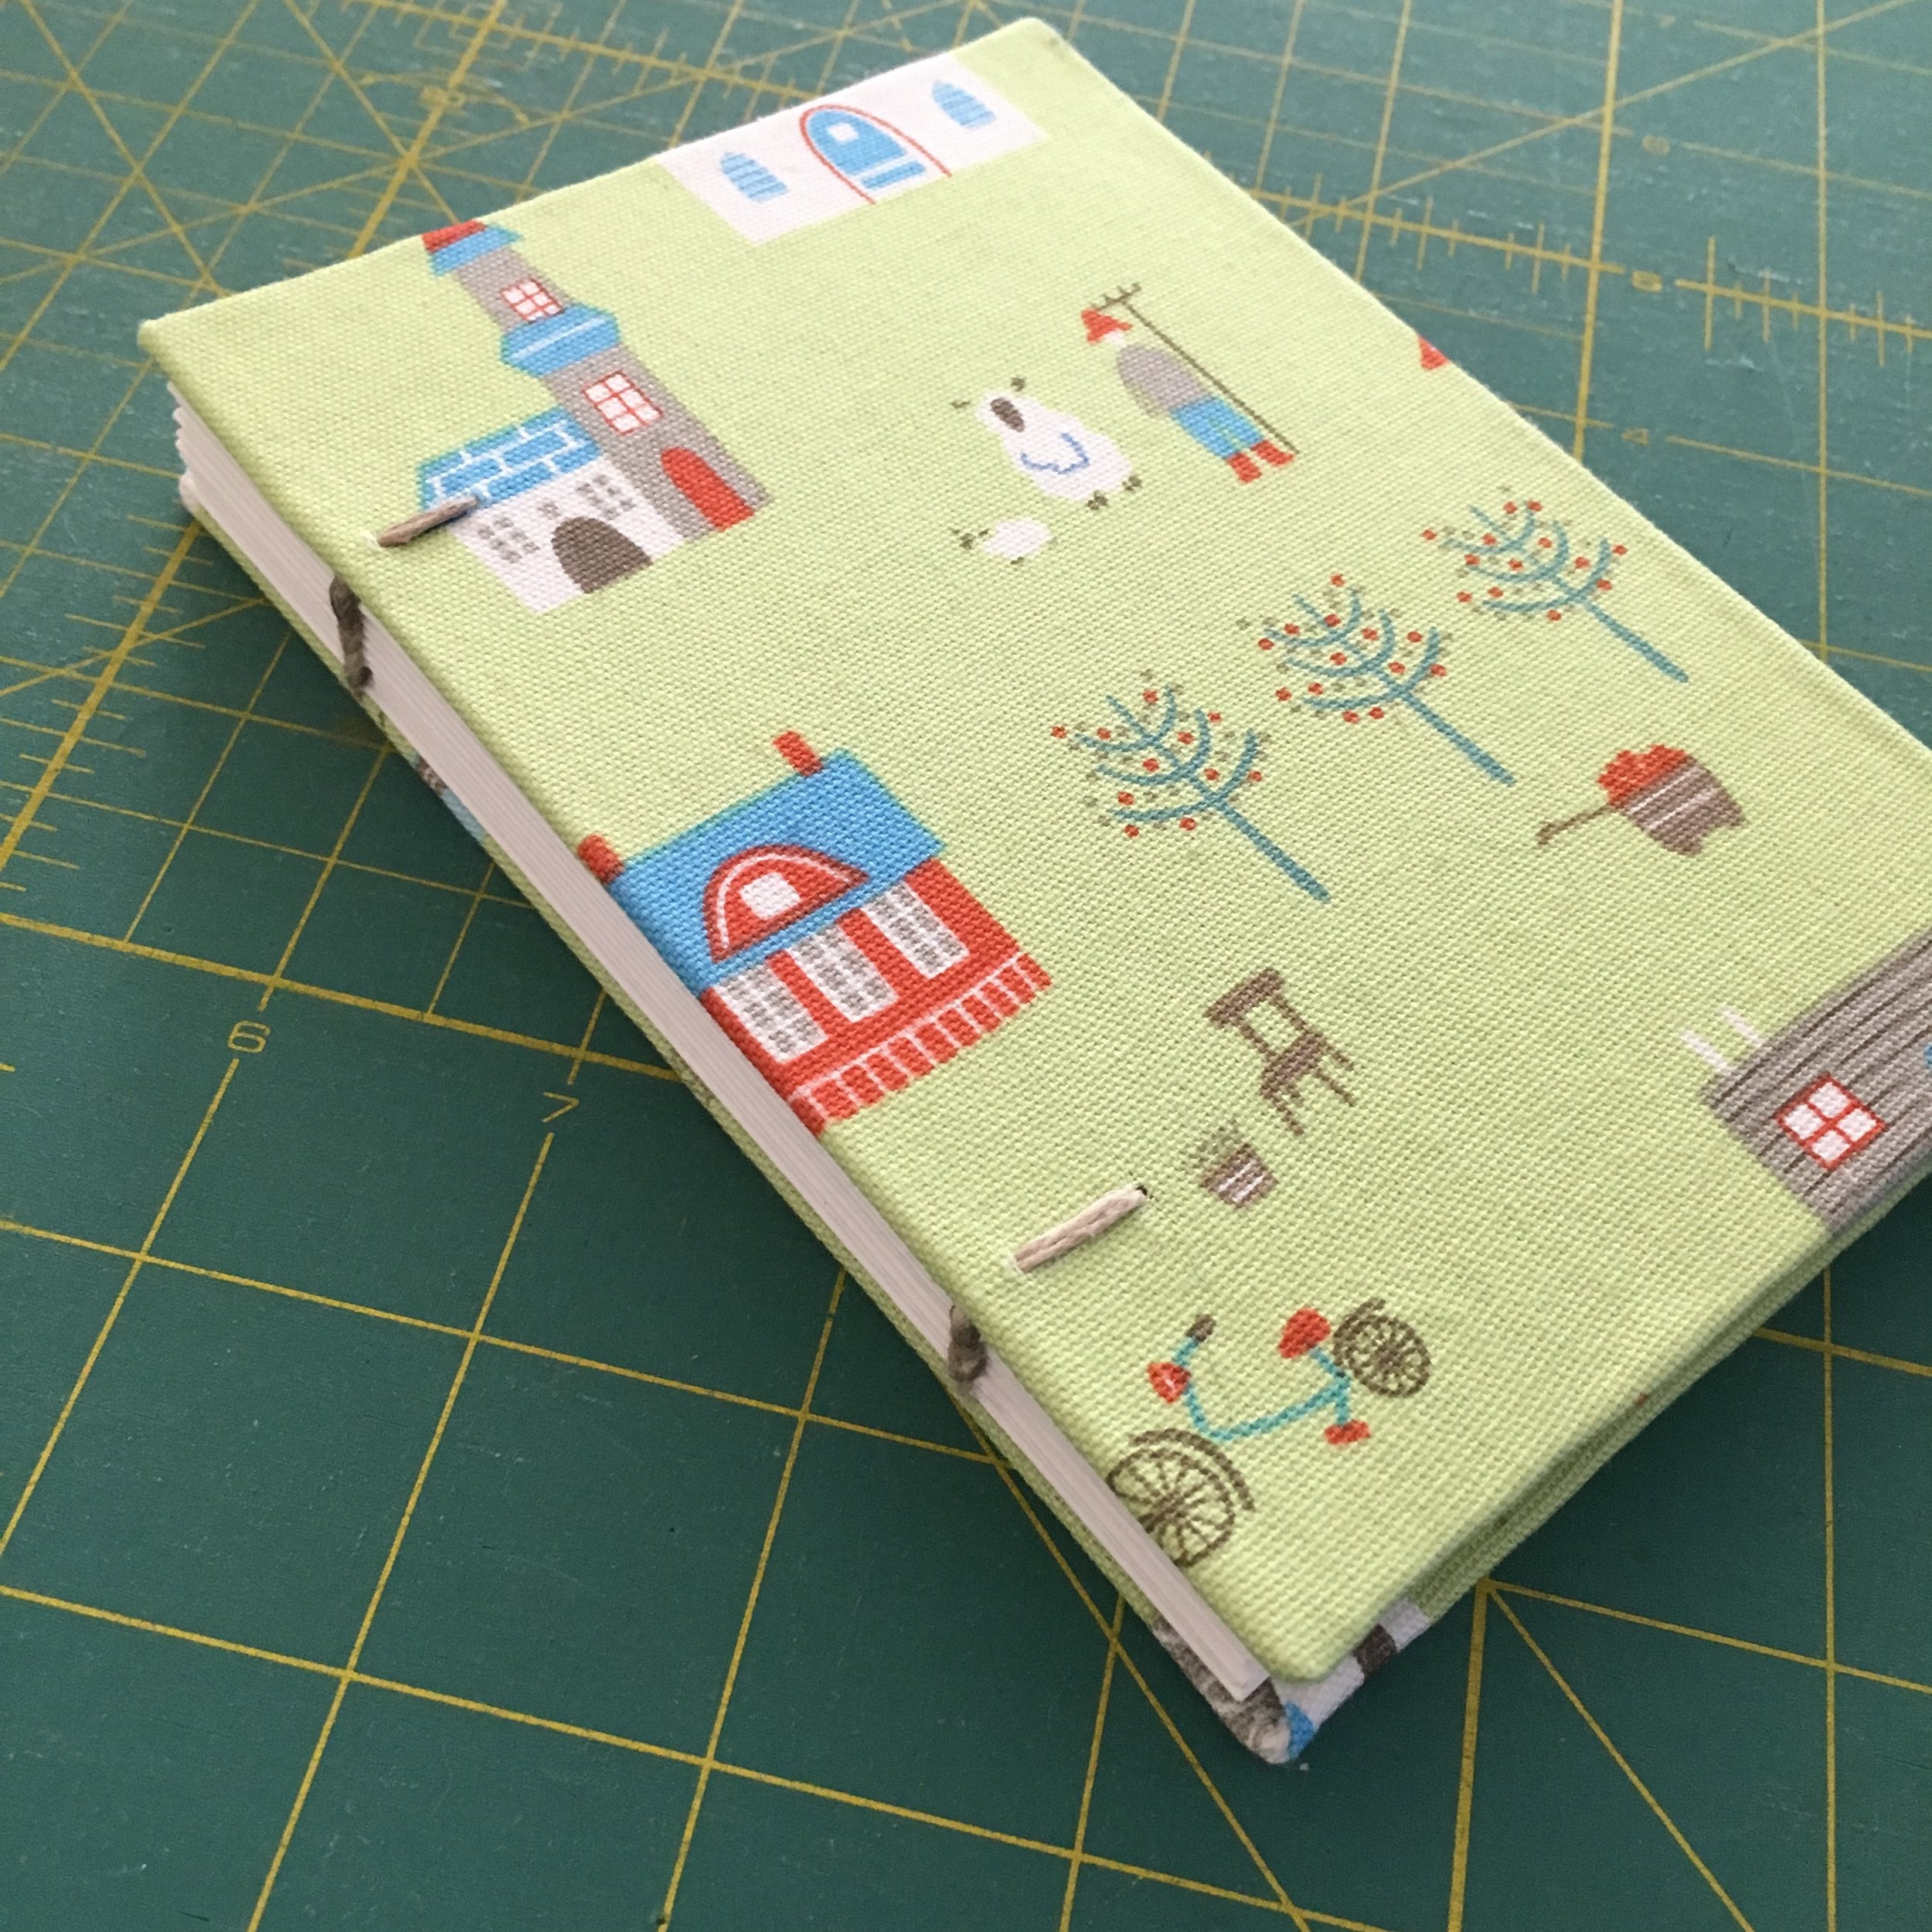
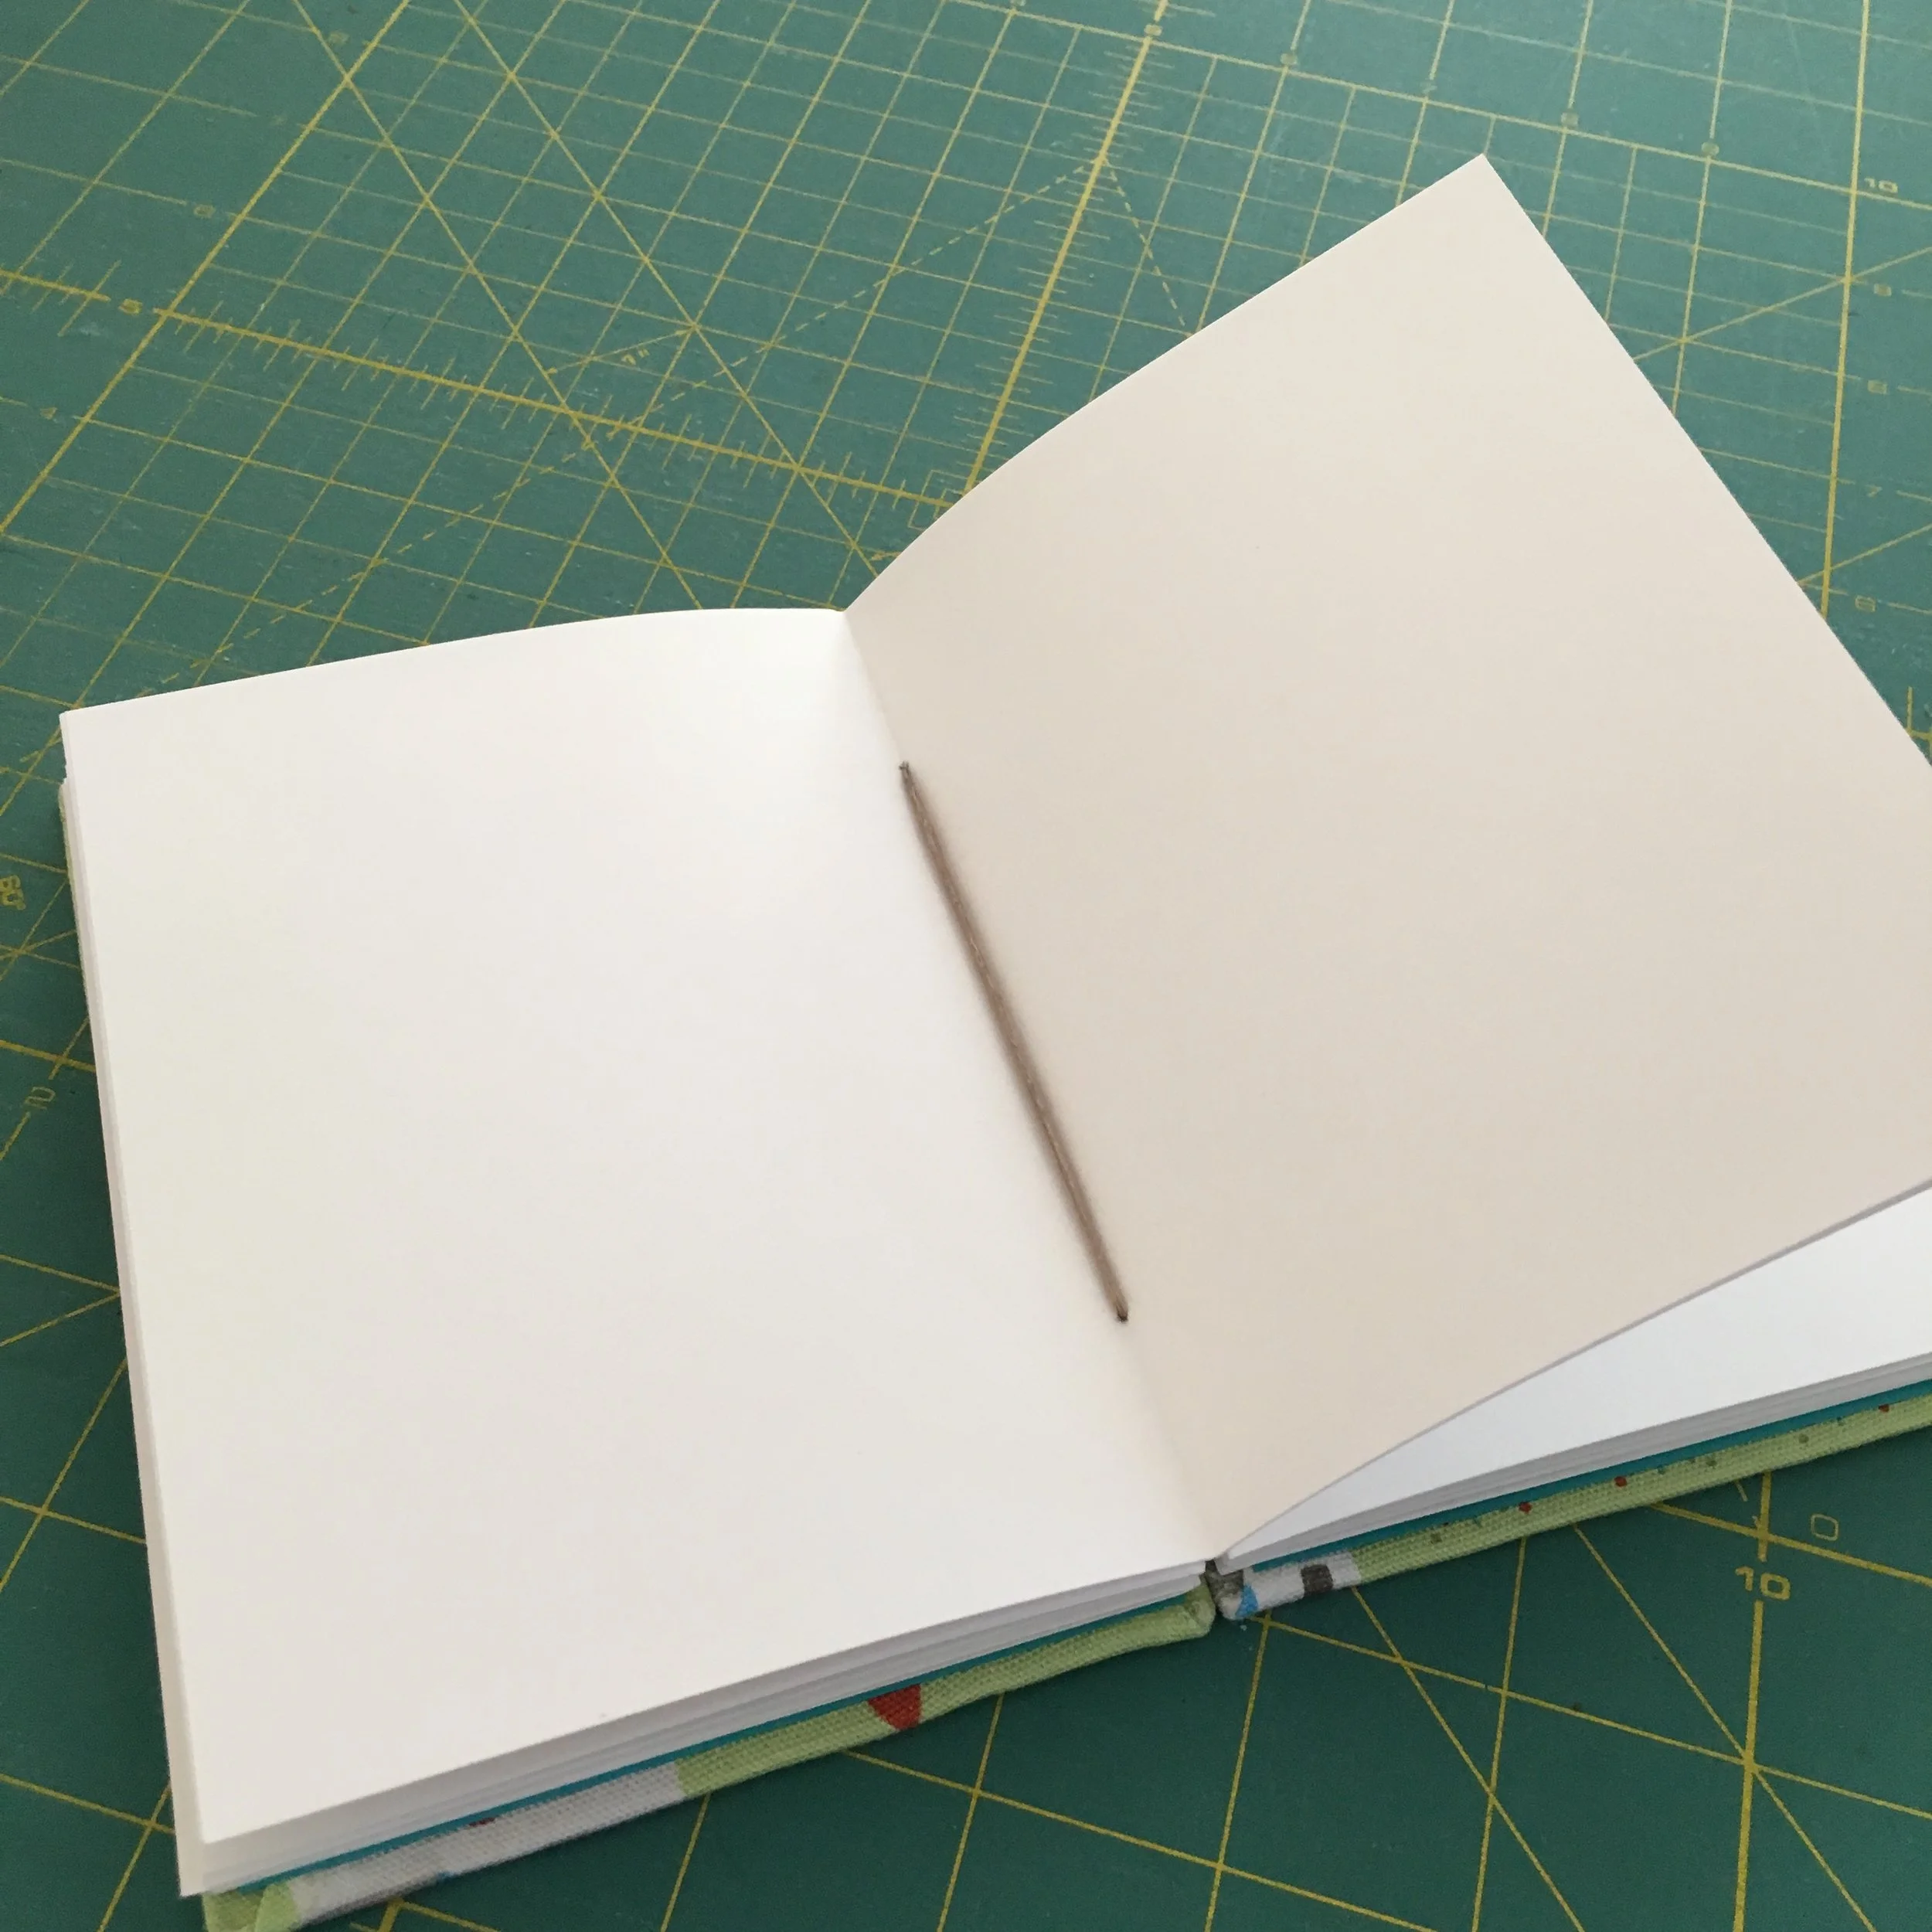
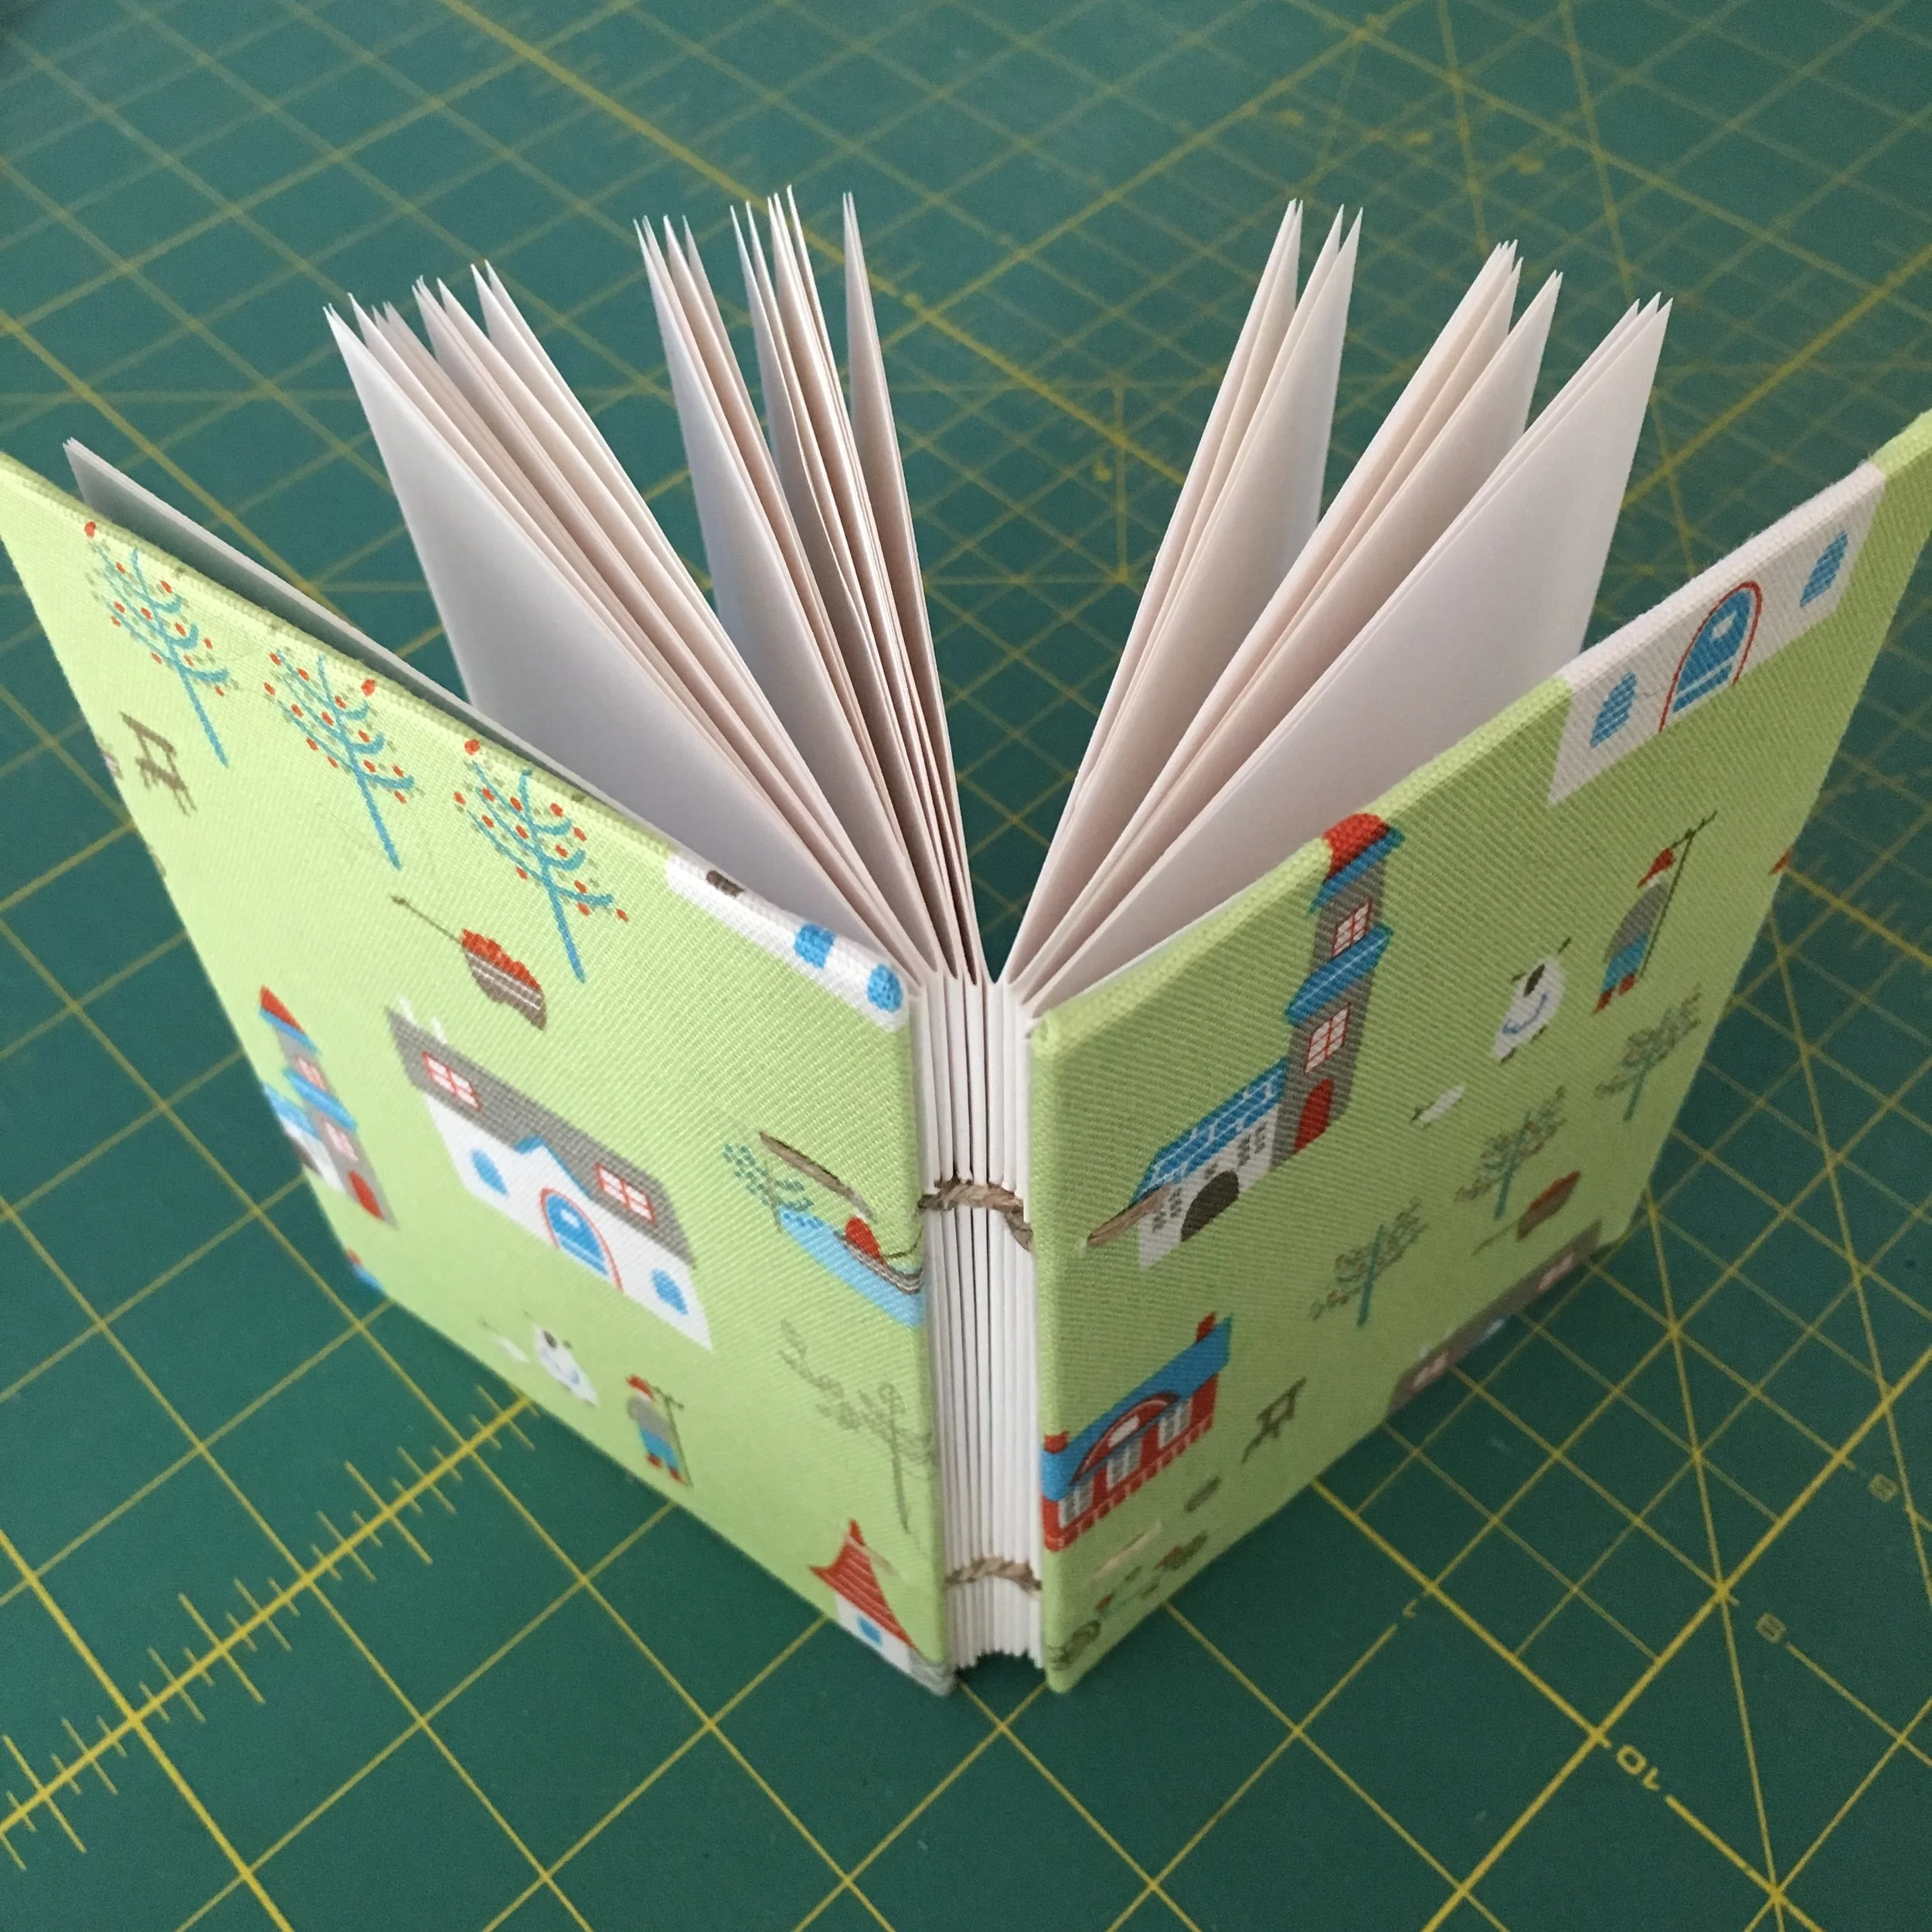
The Coptic binding looks like a braid on the spine of the book. My first attempt was rather lumpy but subsequent books have been looking better.
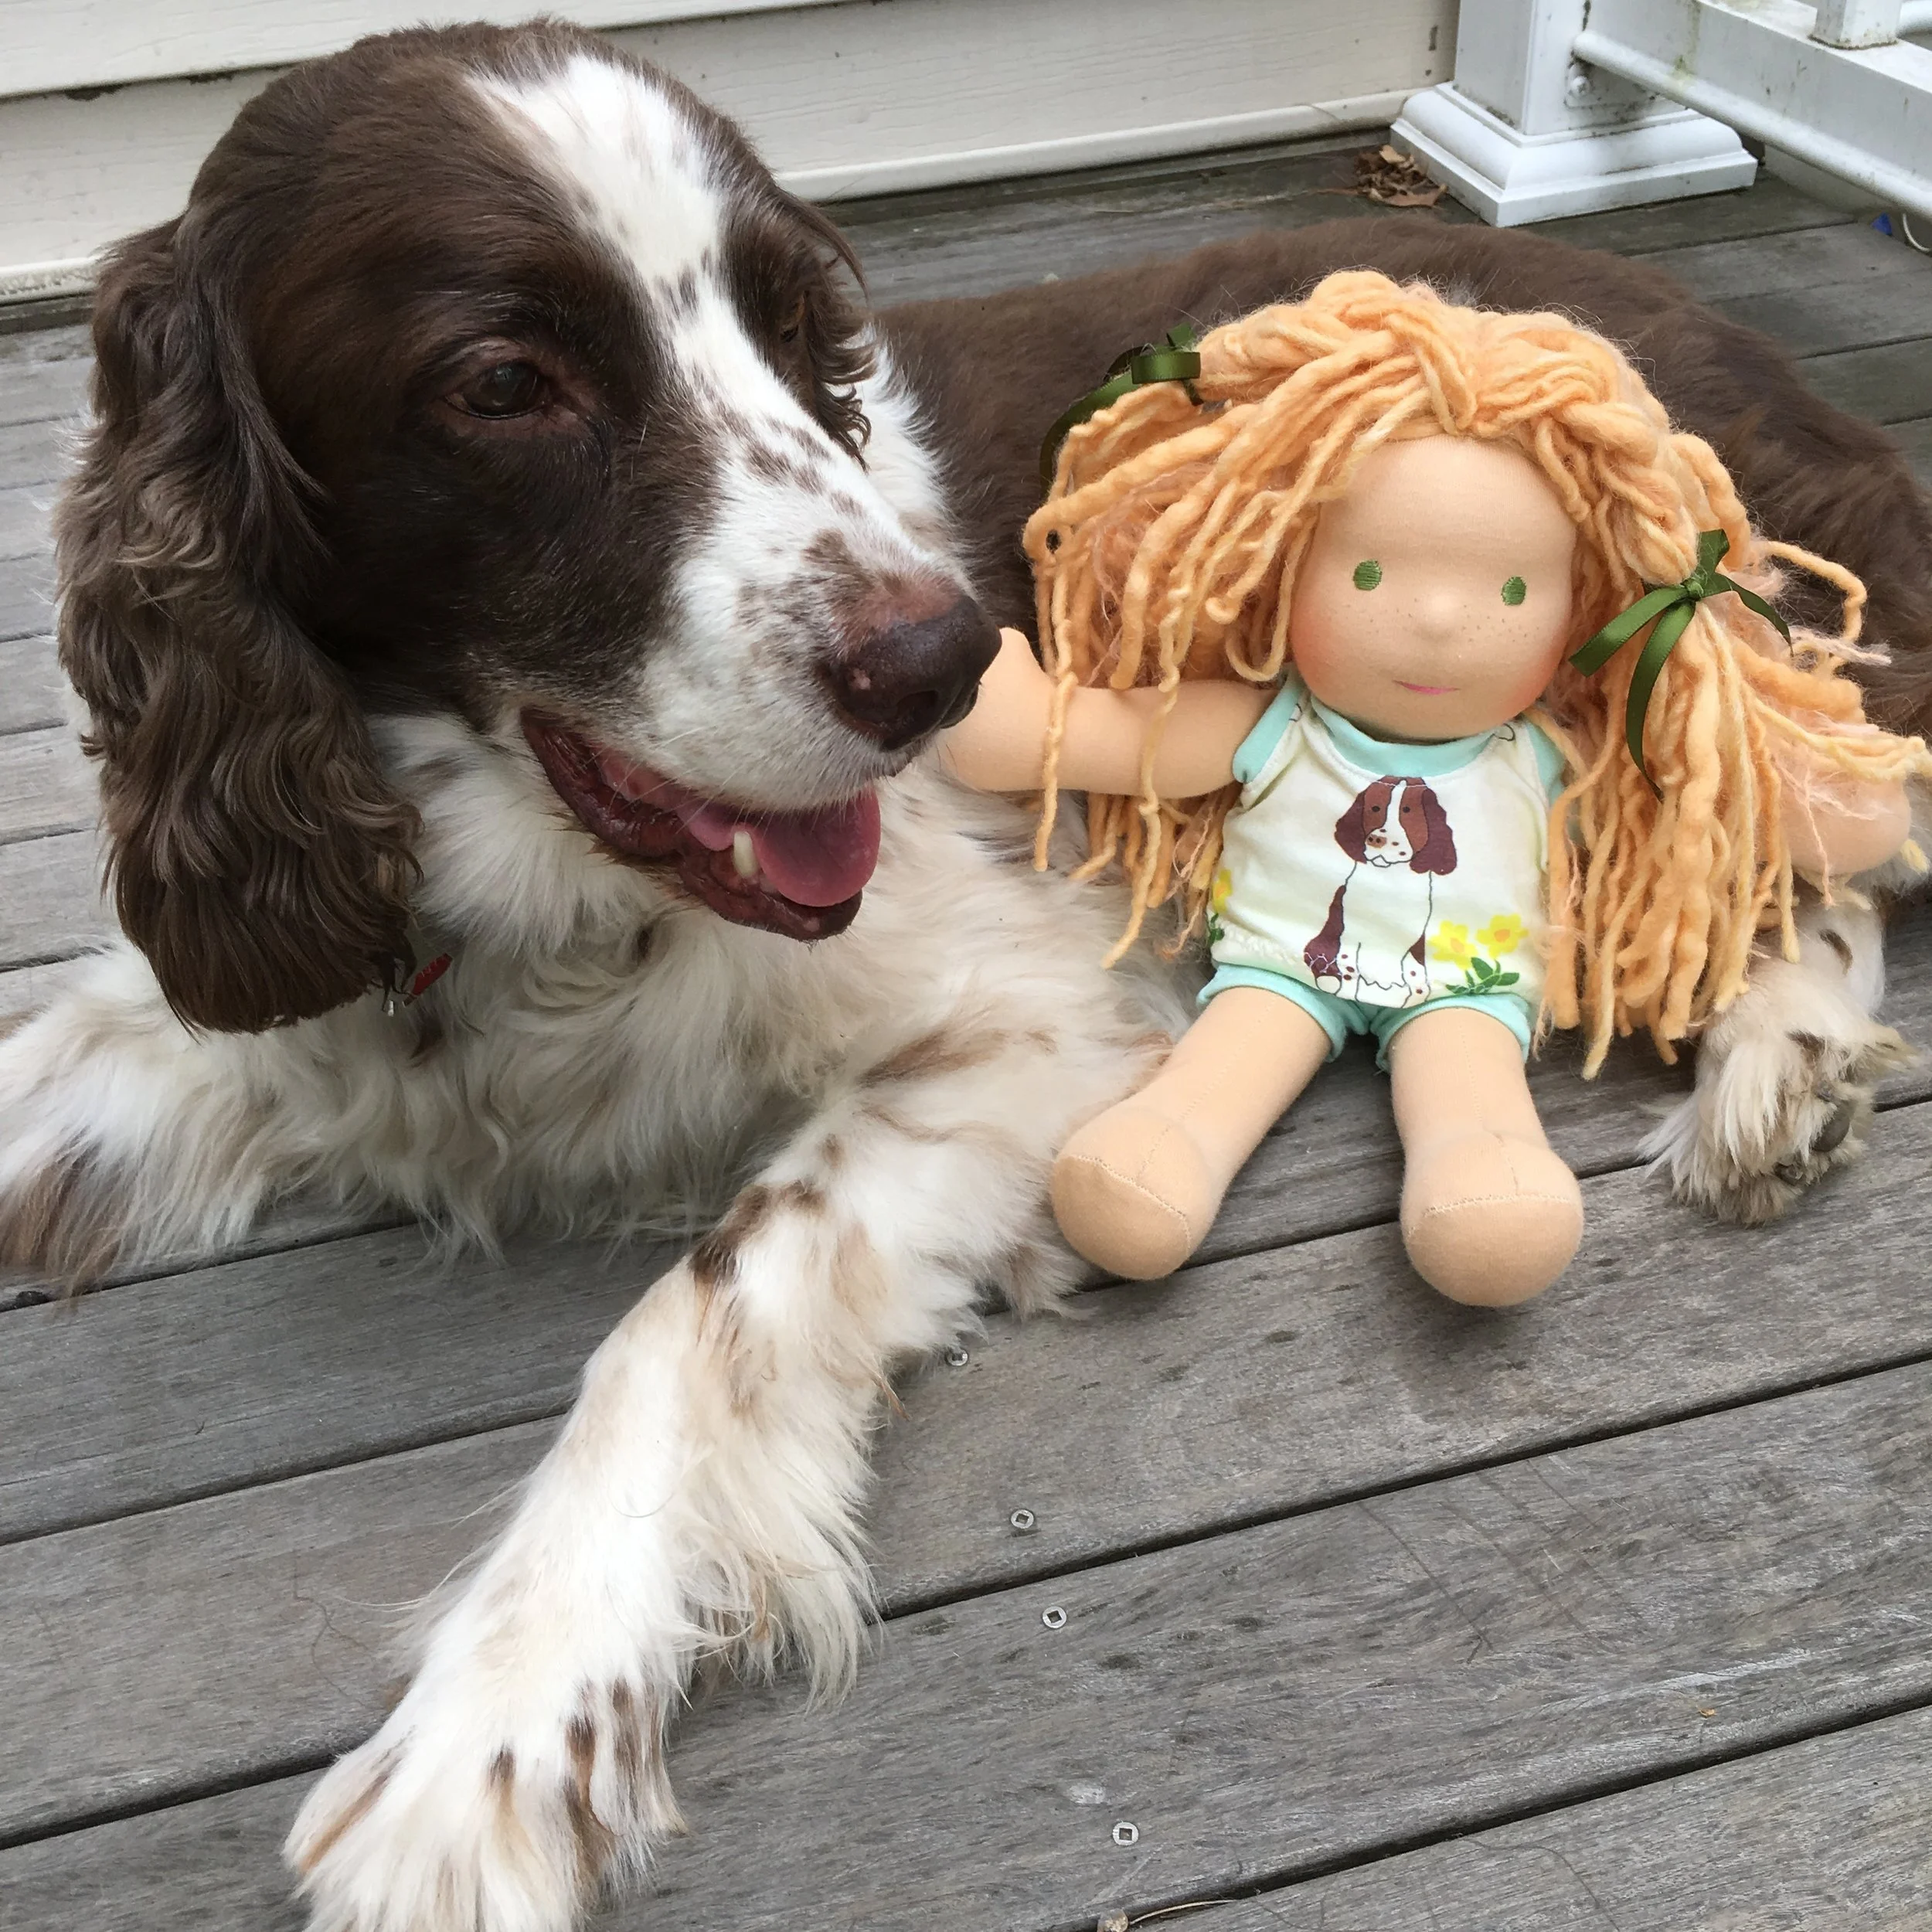
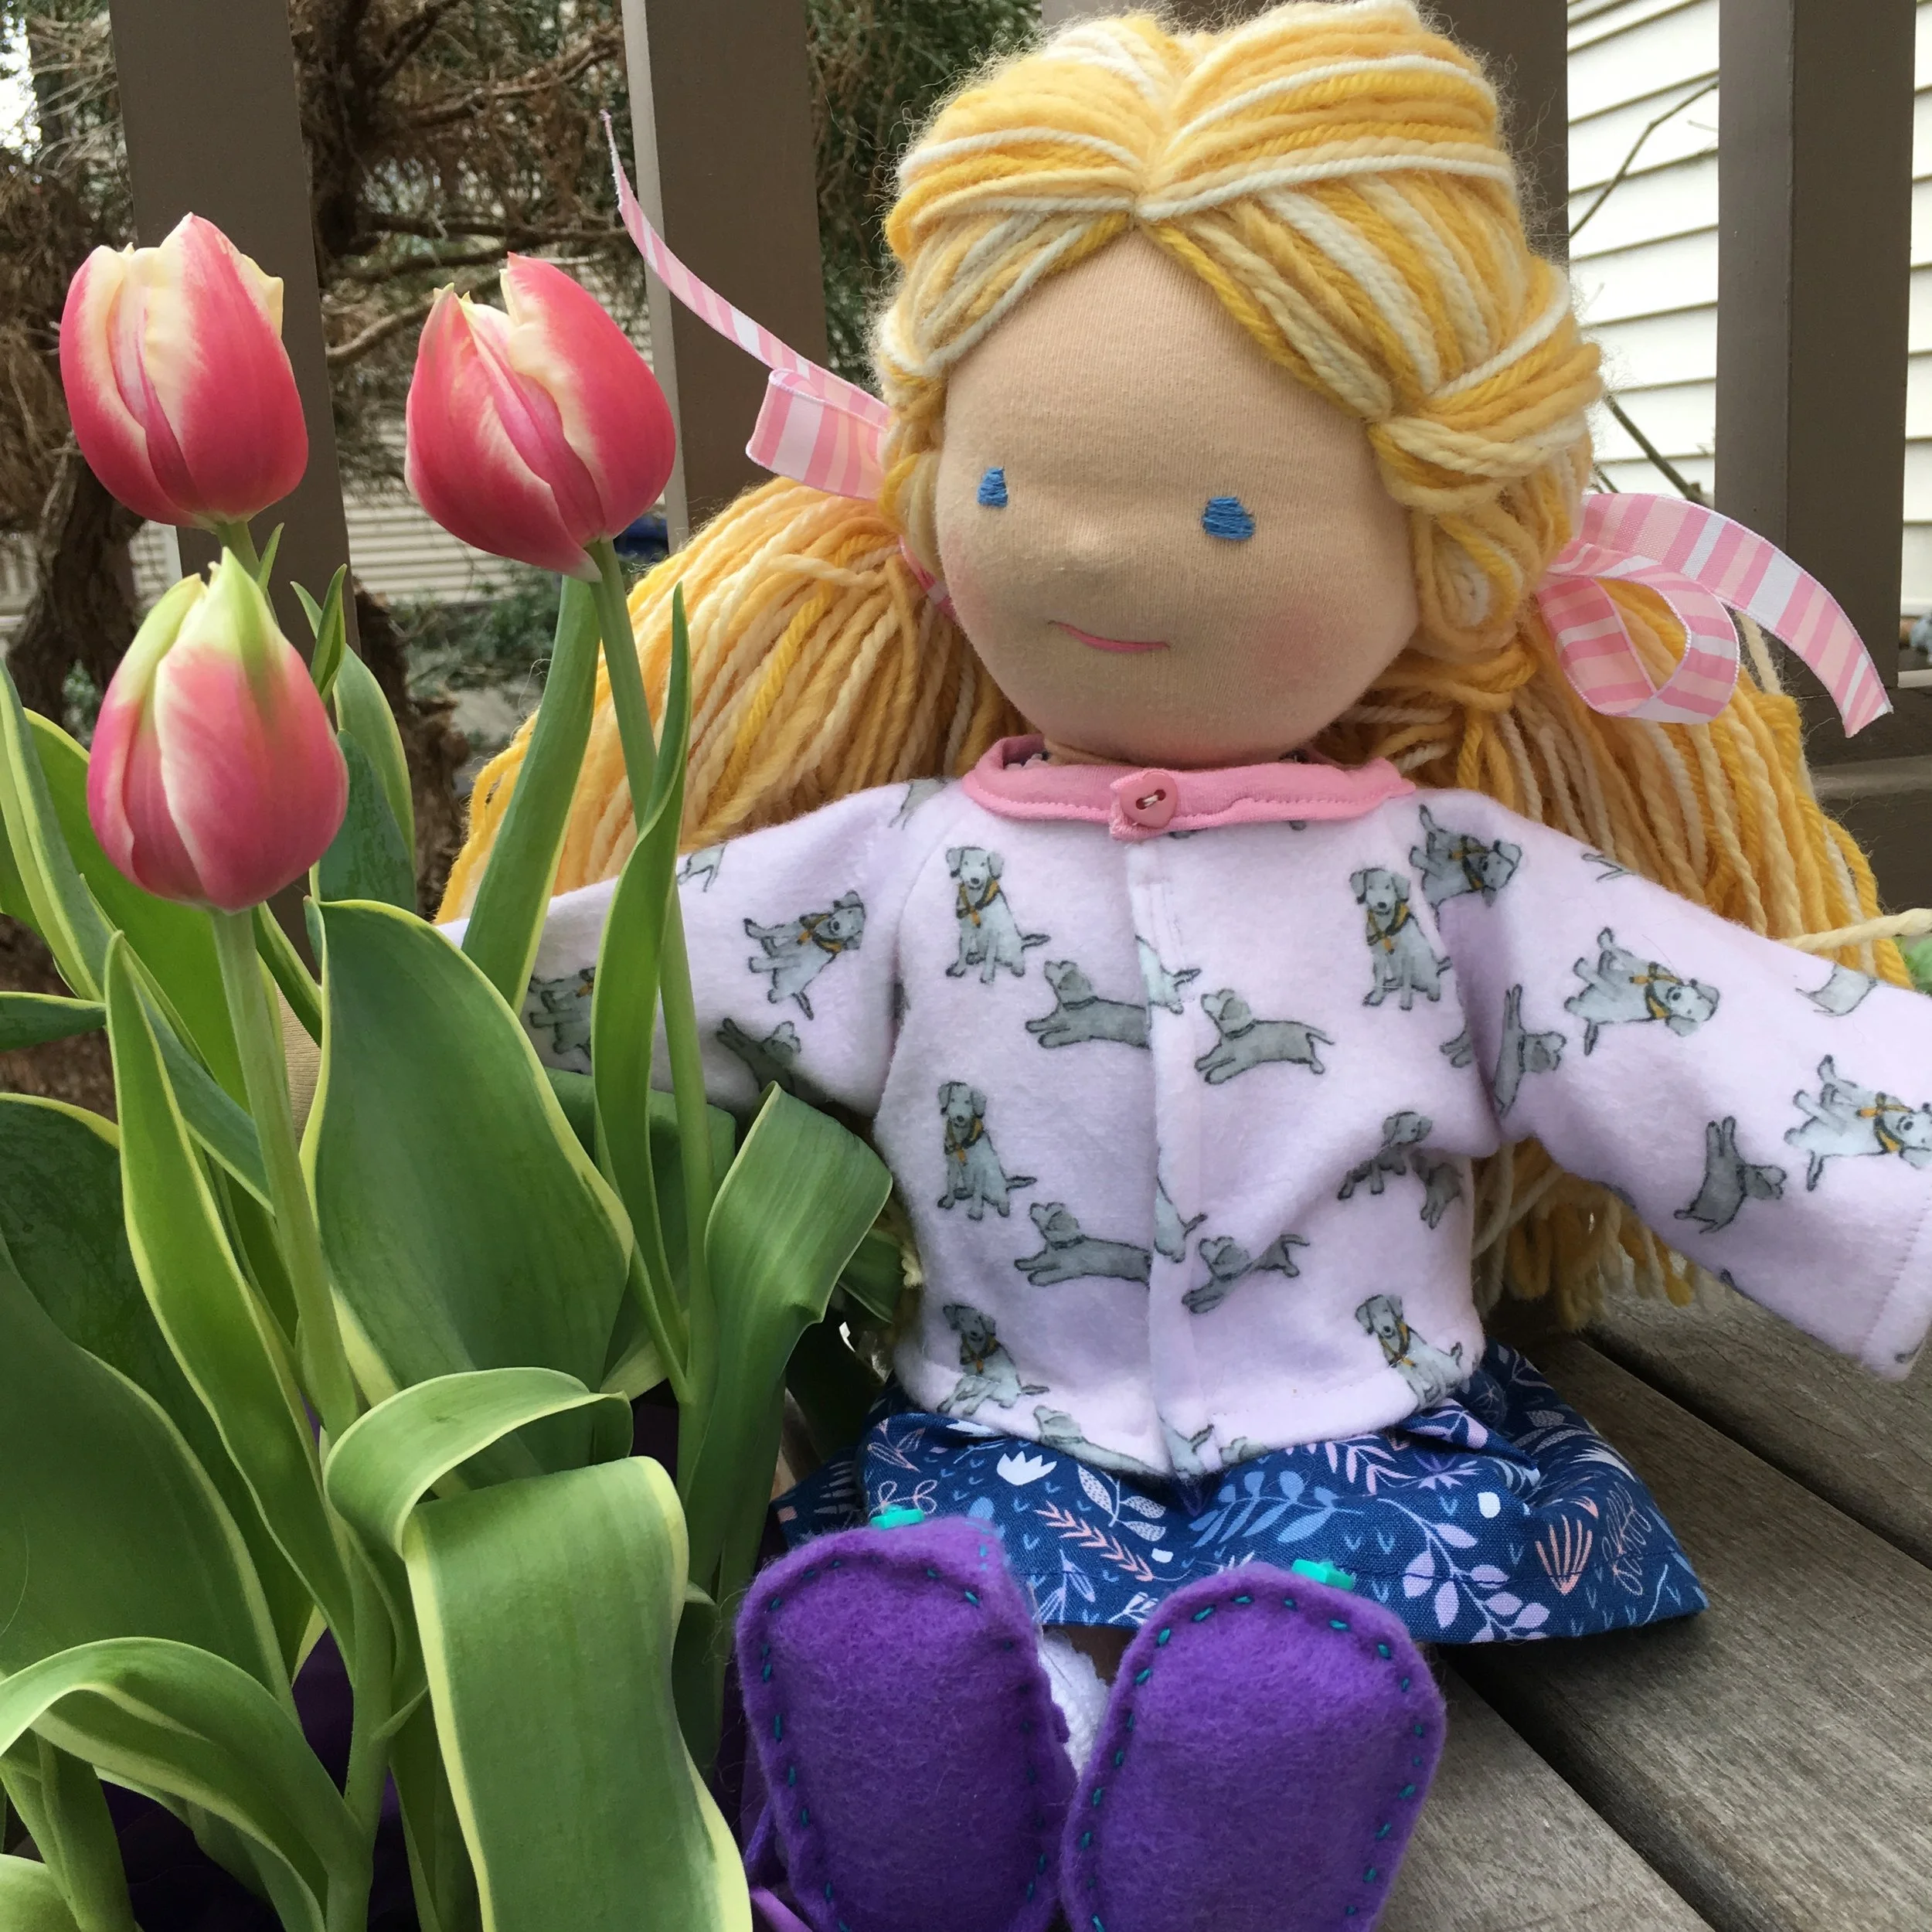
I also did a bit of fussy cutting for some doll jammies made with organic cotton knit printed with my Spoonflower design, "Springer Spaniel with Flowers." I didn't take a photo of the back of the PJ top but there is a Springer on each side of the back. That's Tipper posing with Penny a Bamboletta doll. If you look closely you'll see that the doll has freckles just like the dogs!
The "Bears in the Meadow" quilt top is finished. It's too large to hang on my fence clothes line so here is a peak of the quilt folded and laid on the deck railing. It wasn't my plan to make a low volume quilt but that's how it's turned out!

Quilt top waiting to be sandwiched and quilted
I'm really looking forward to having this quilt finished so I can use it!
Improv Scrappy Block Project 2017--Summer blocks
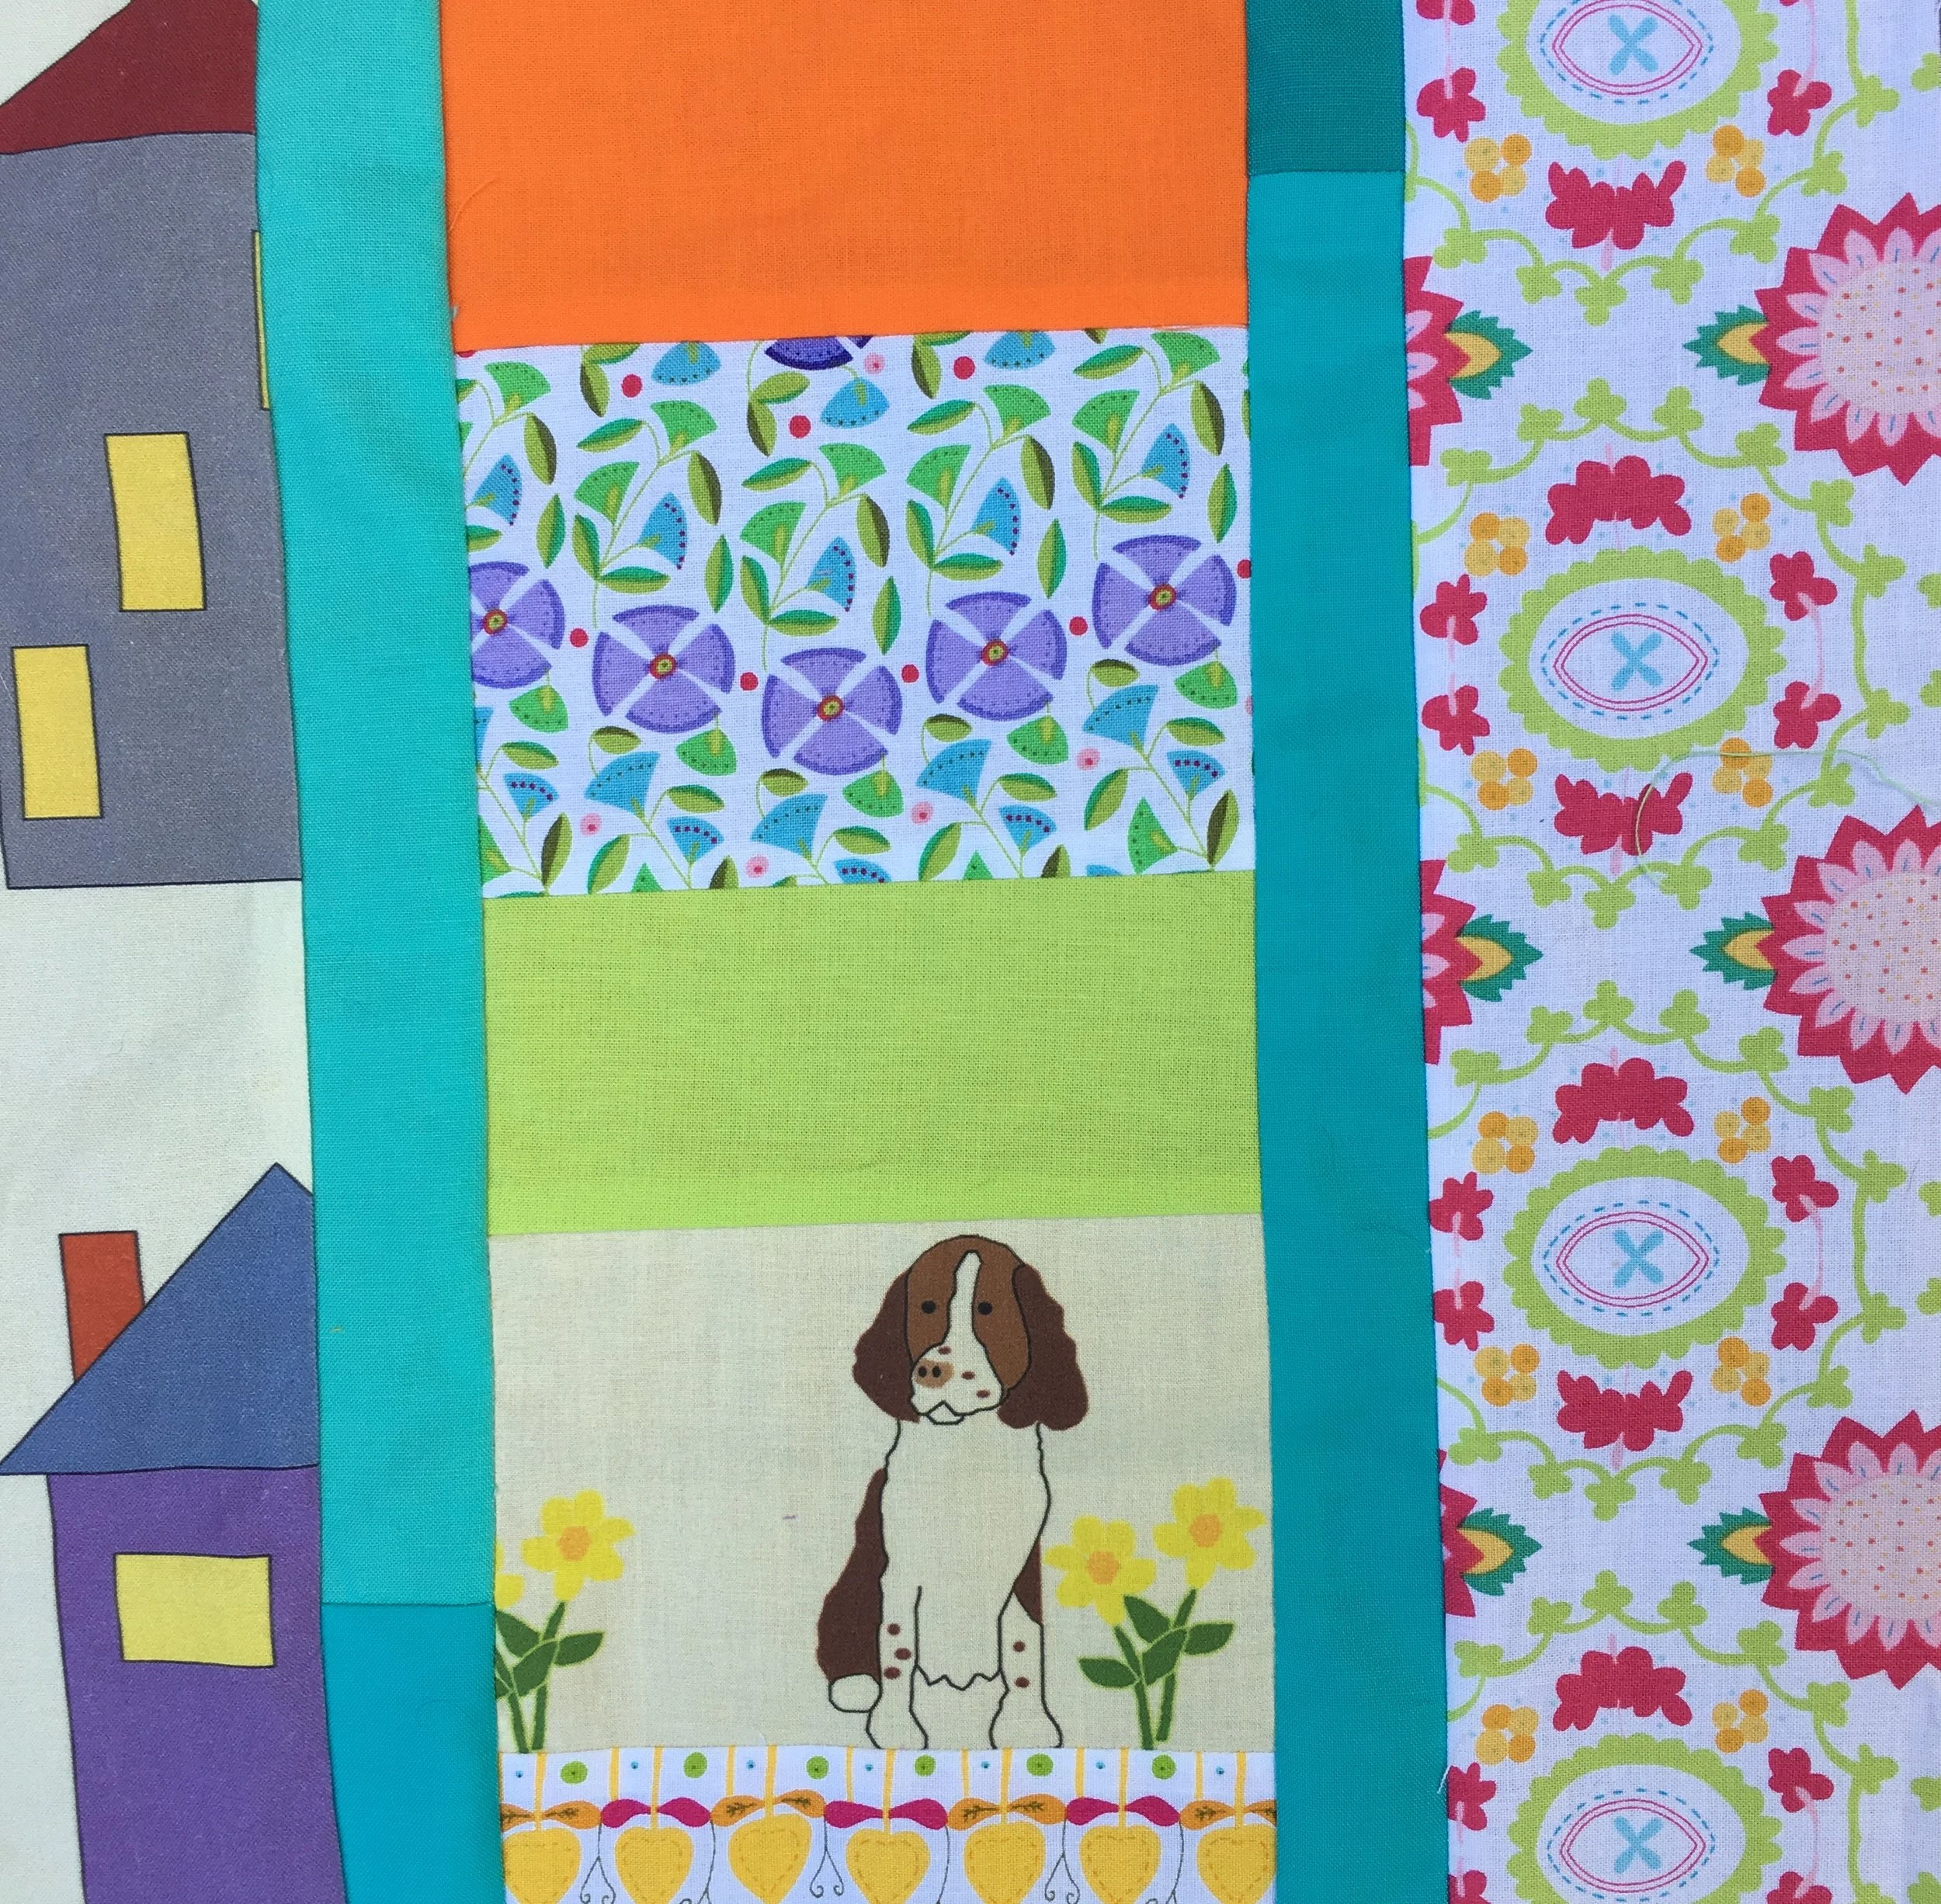
A July block
A July block
Here is a gallery of the June, July and August blocks for my year long Improv Scrappy Block Project. I think I'm going to call the finished quilt, "Improv, Gone to the Dogs!"
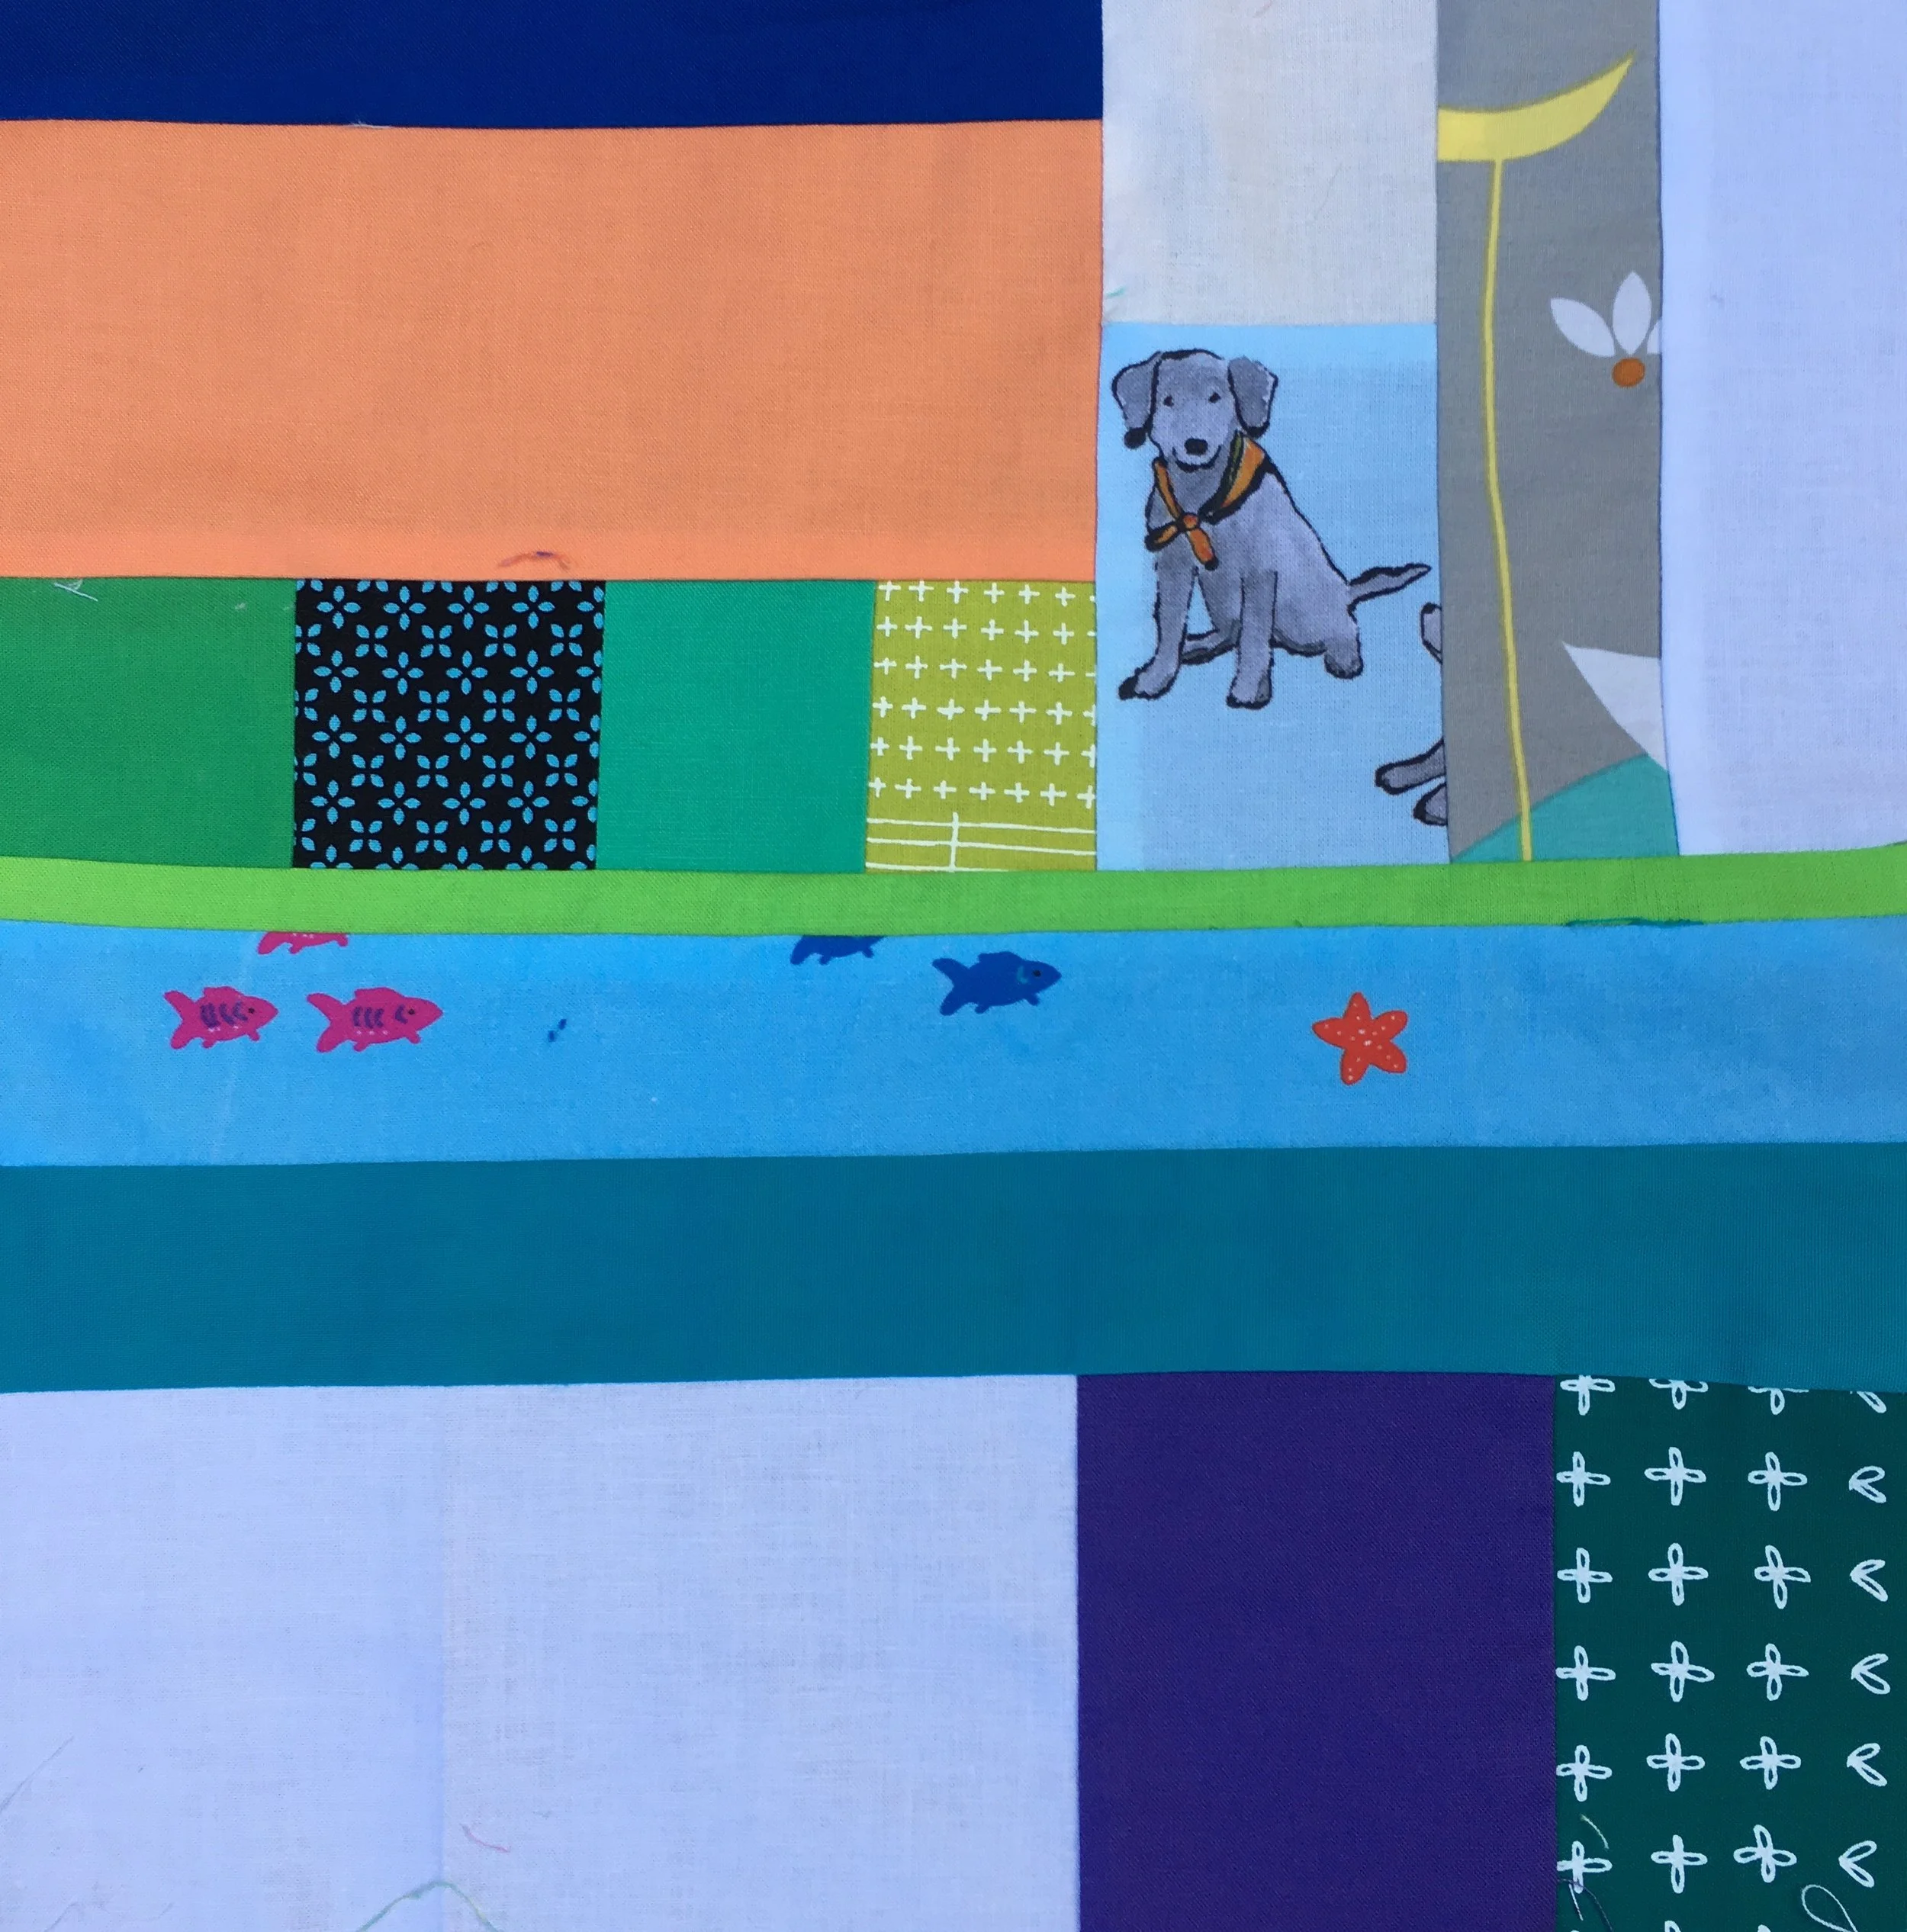
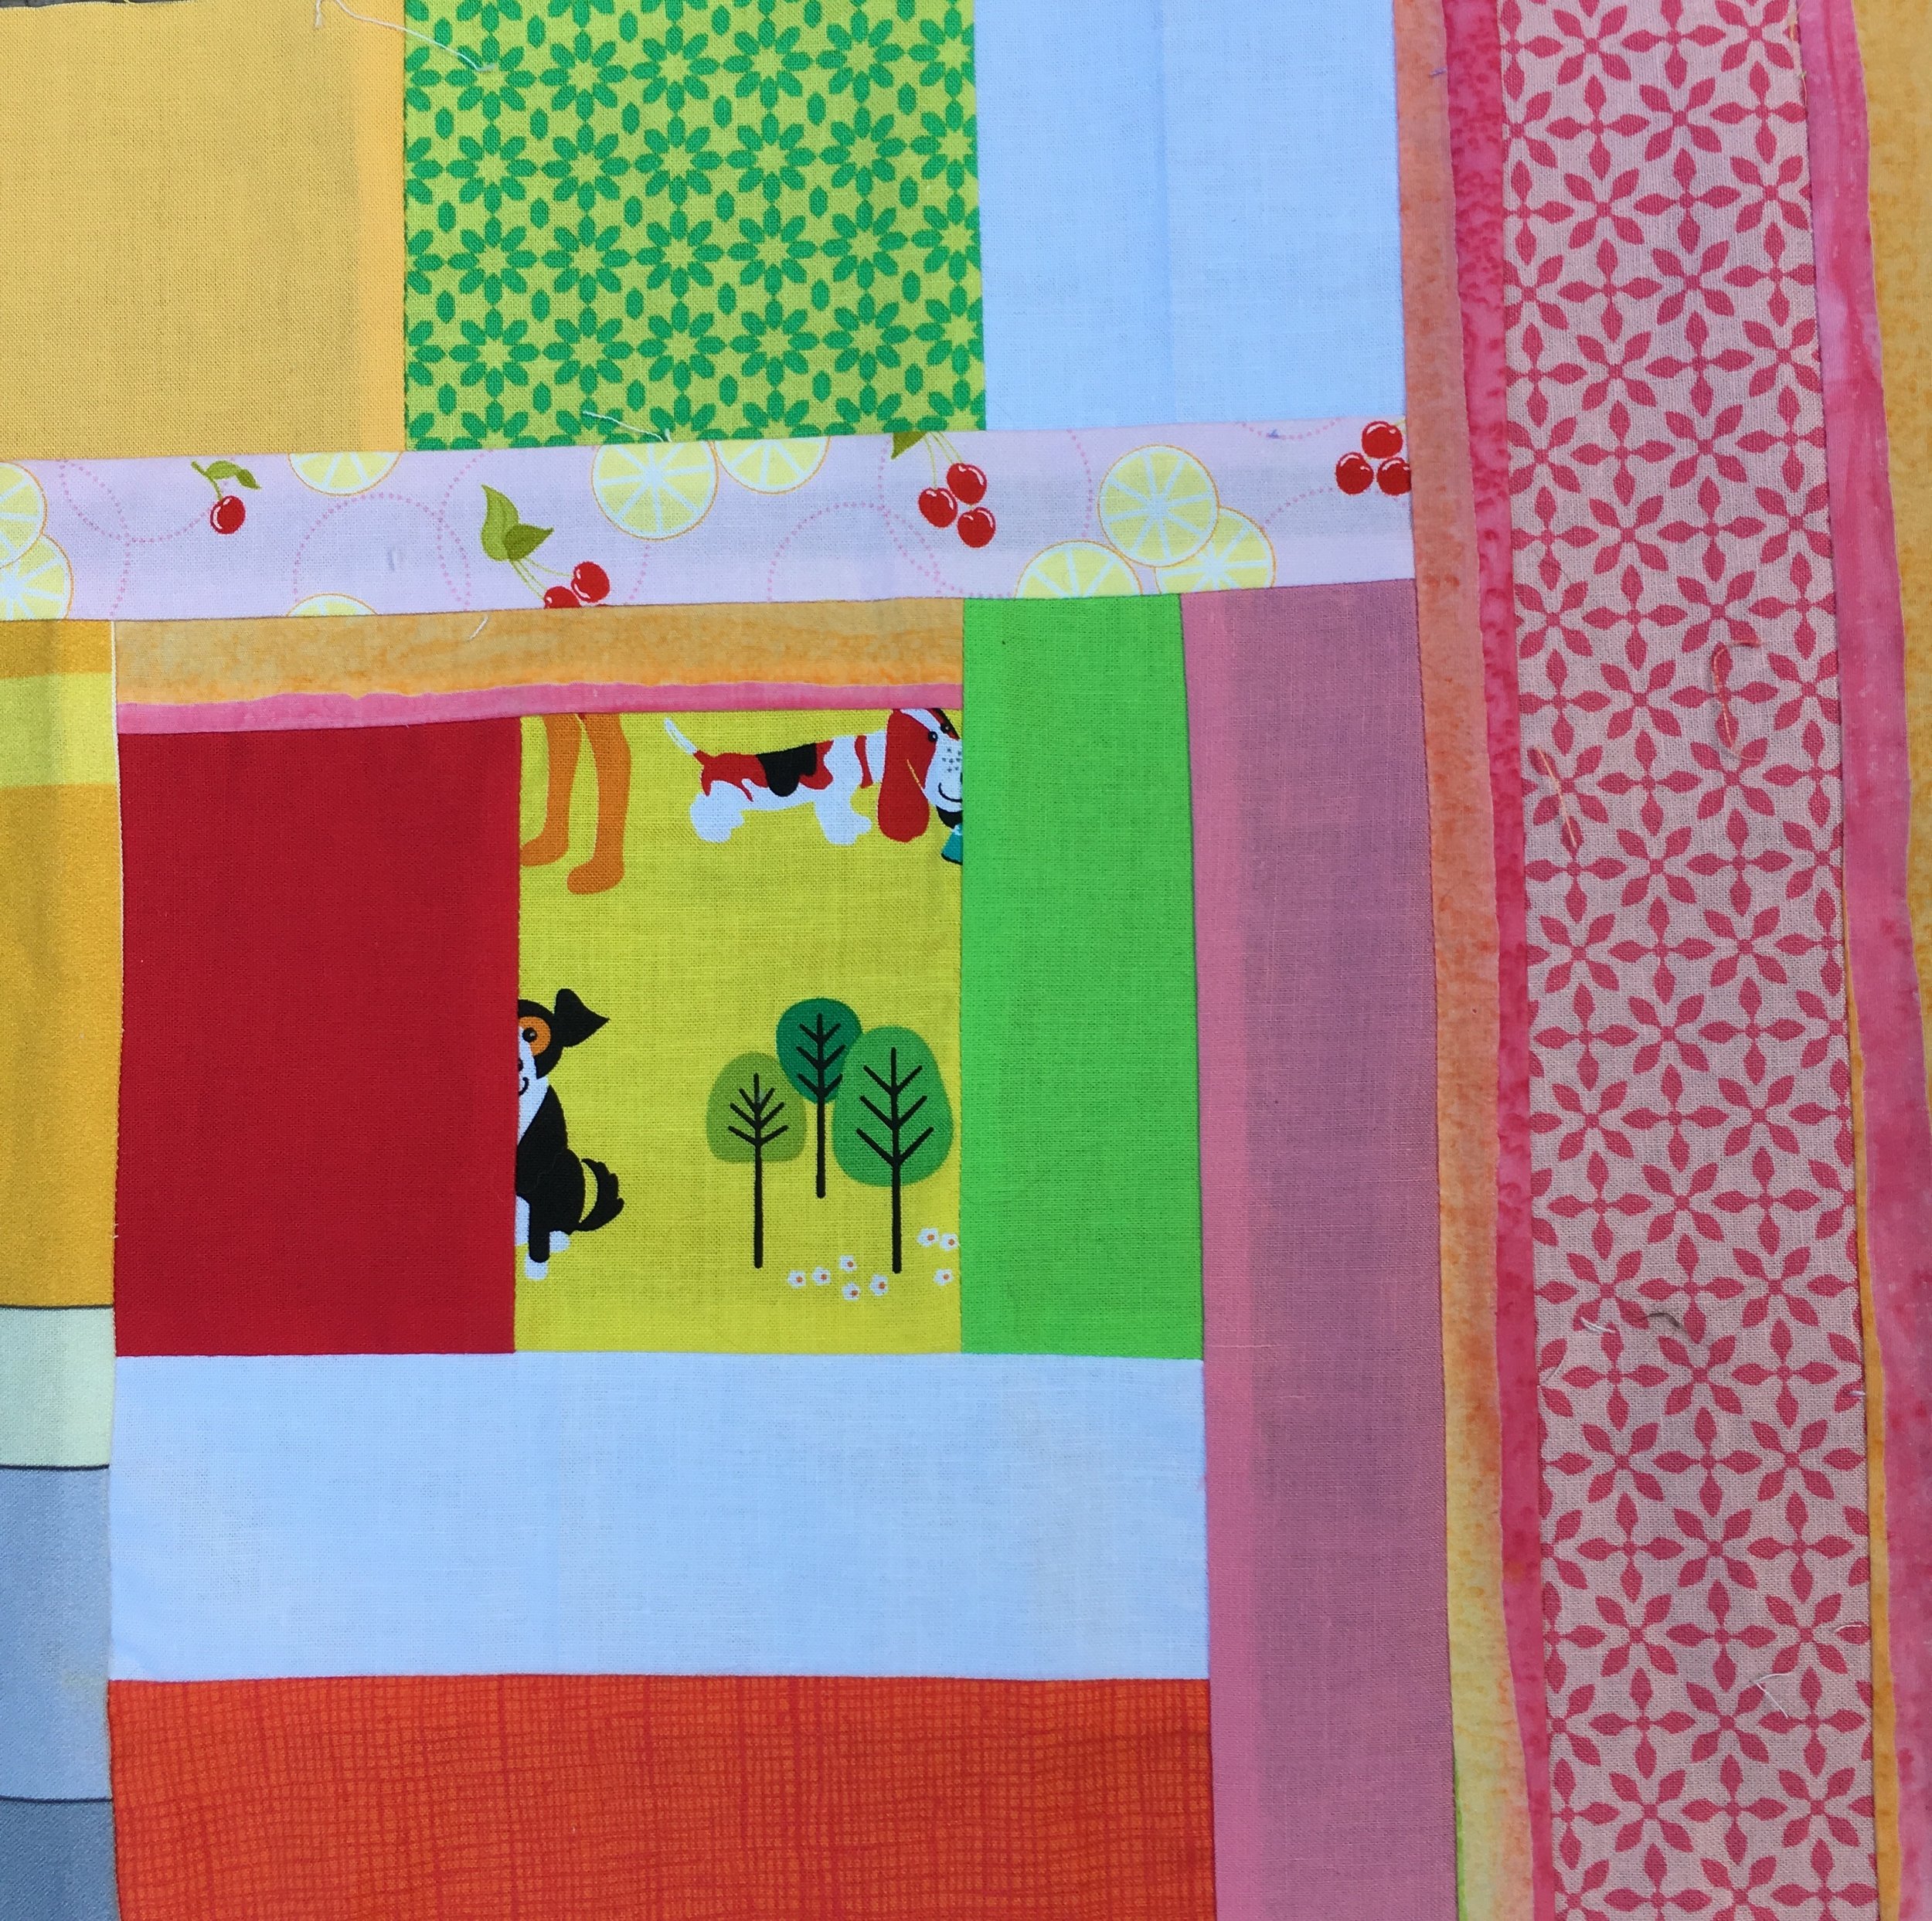

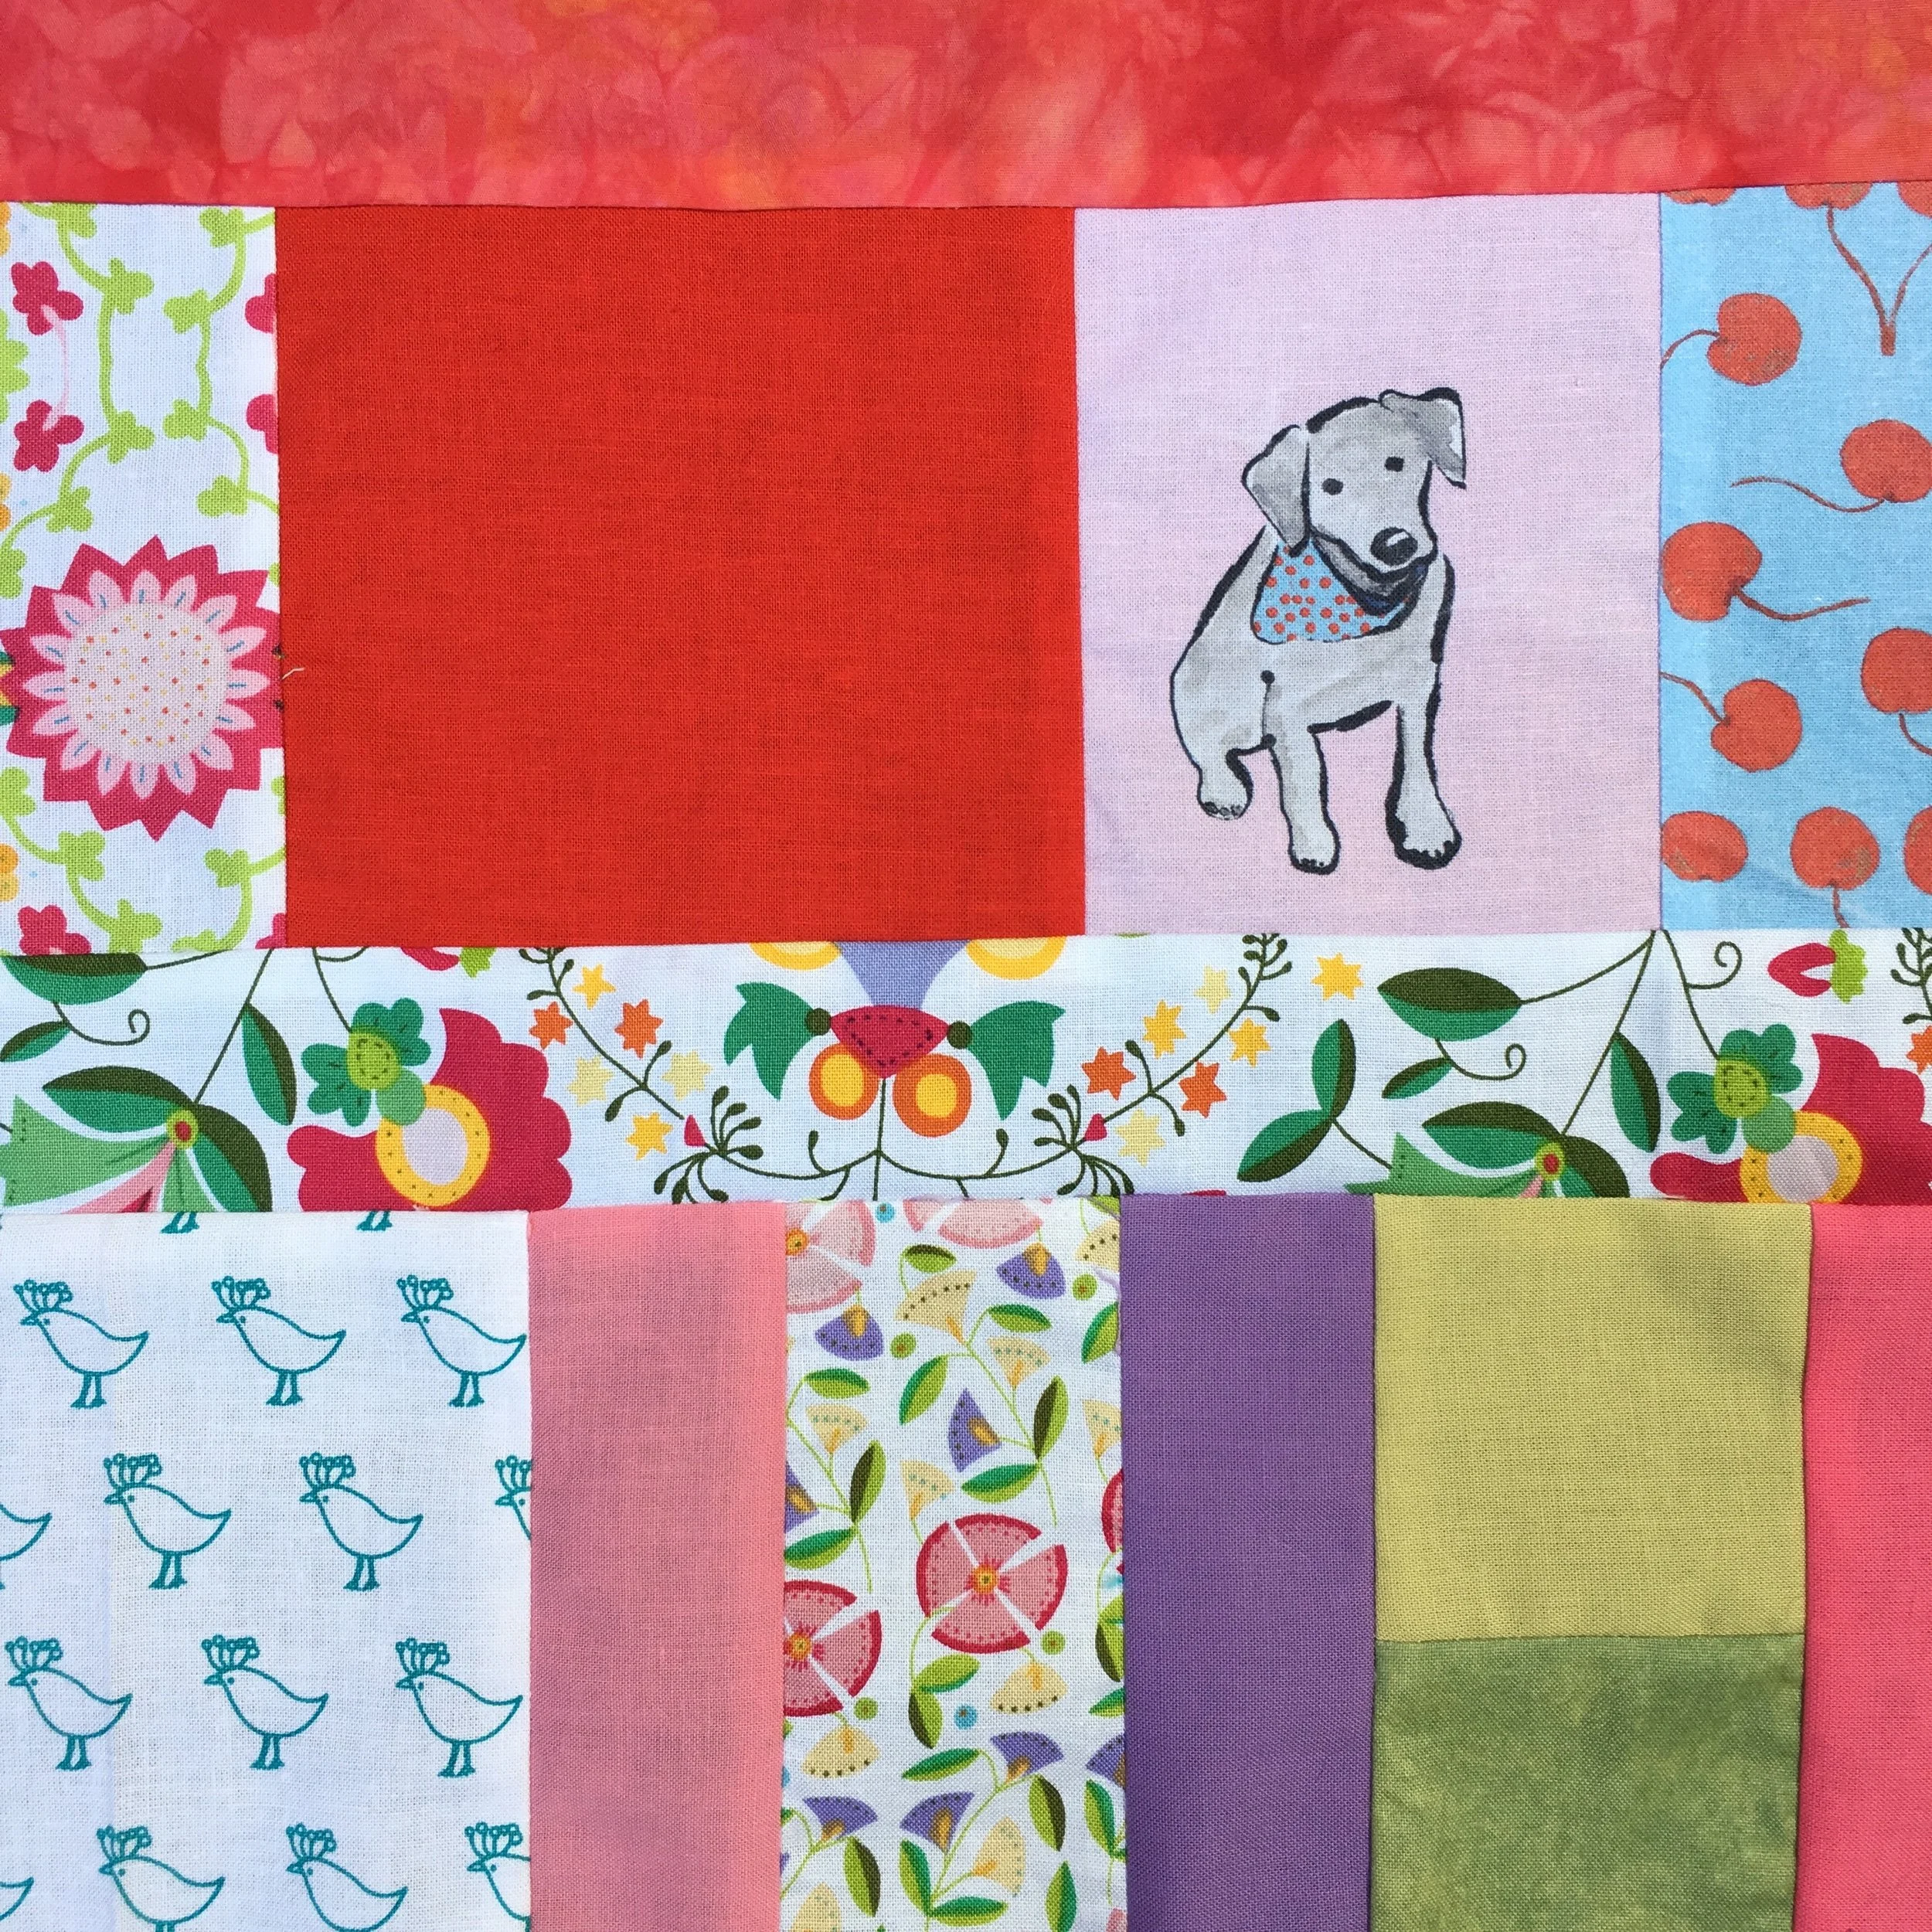
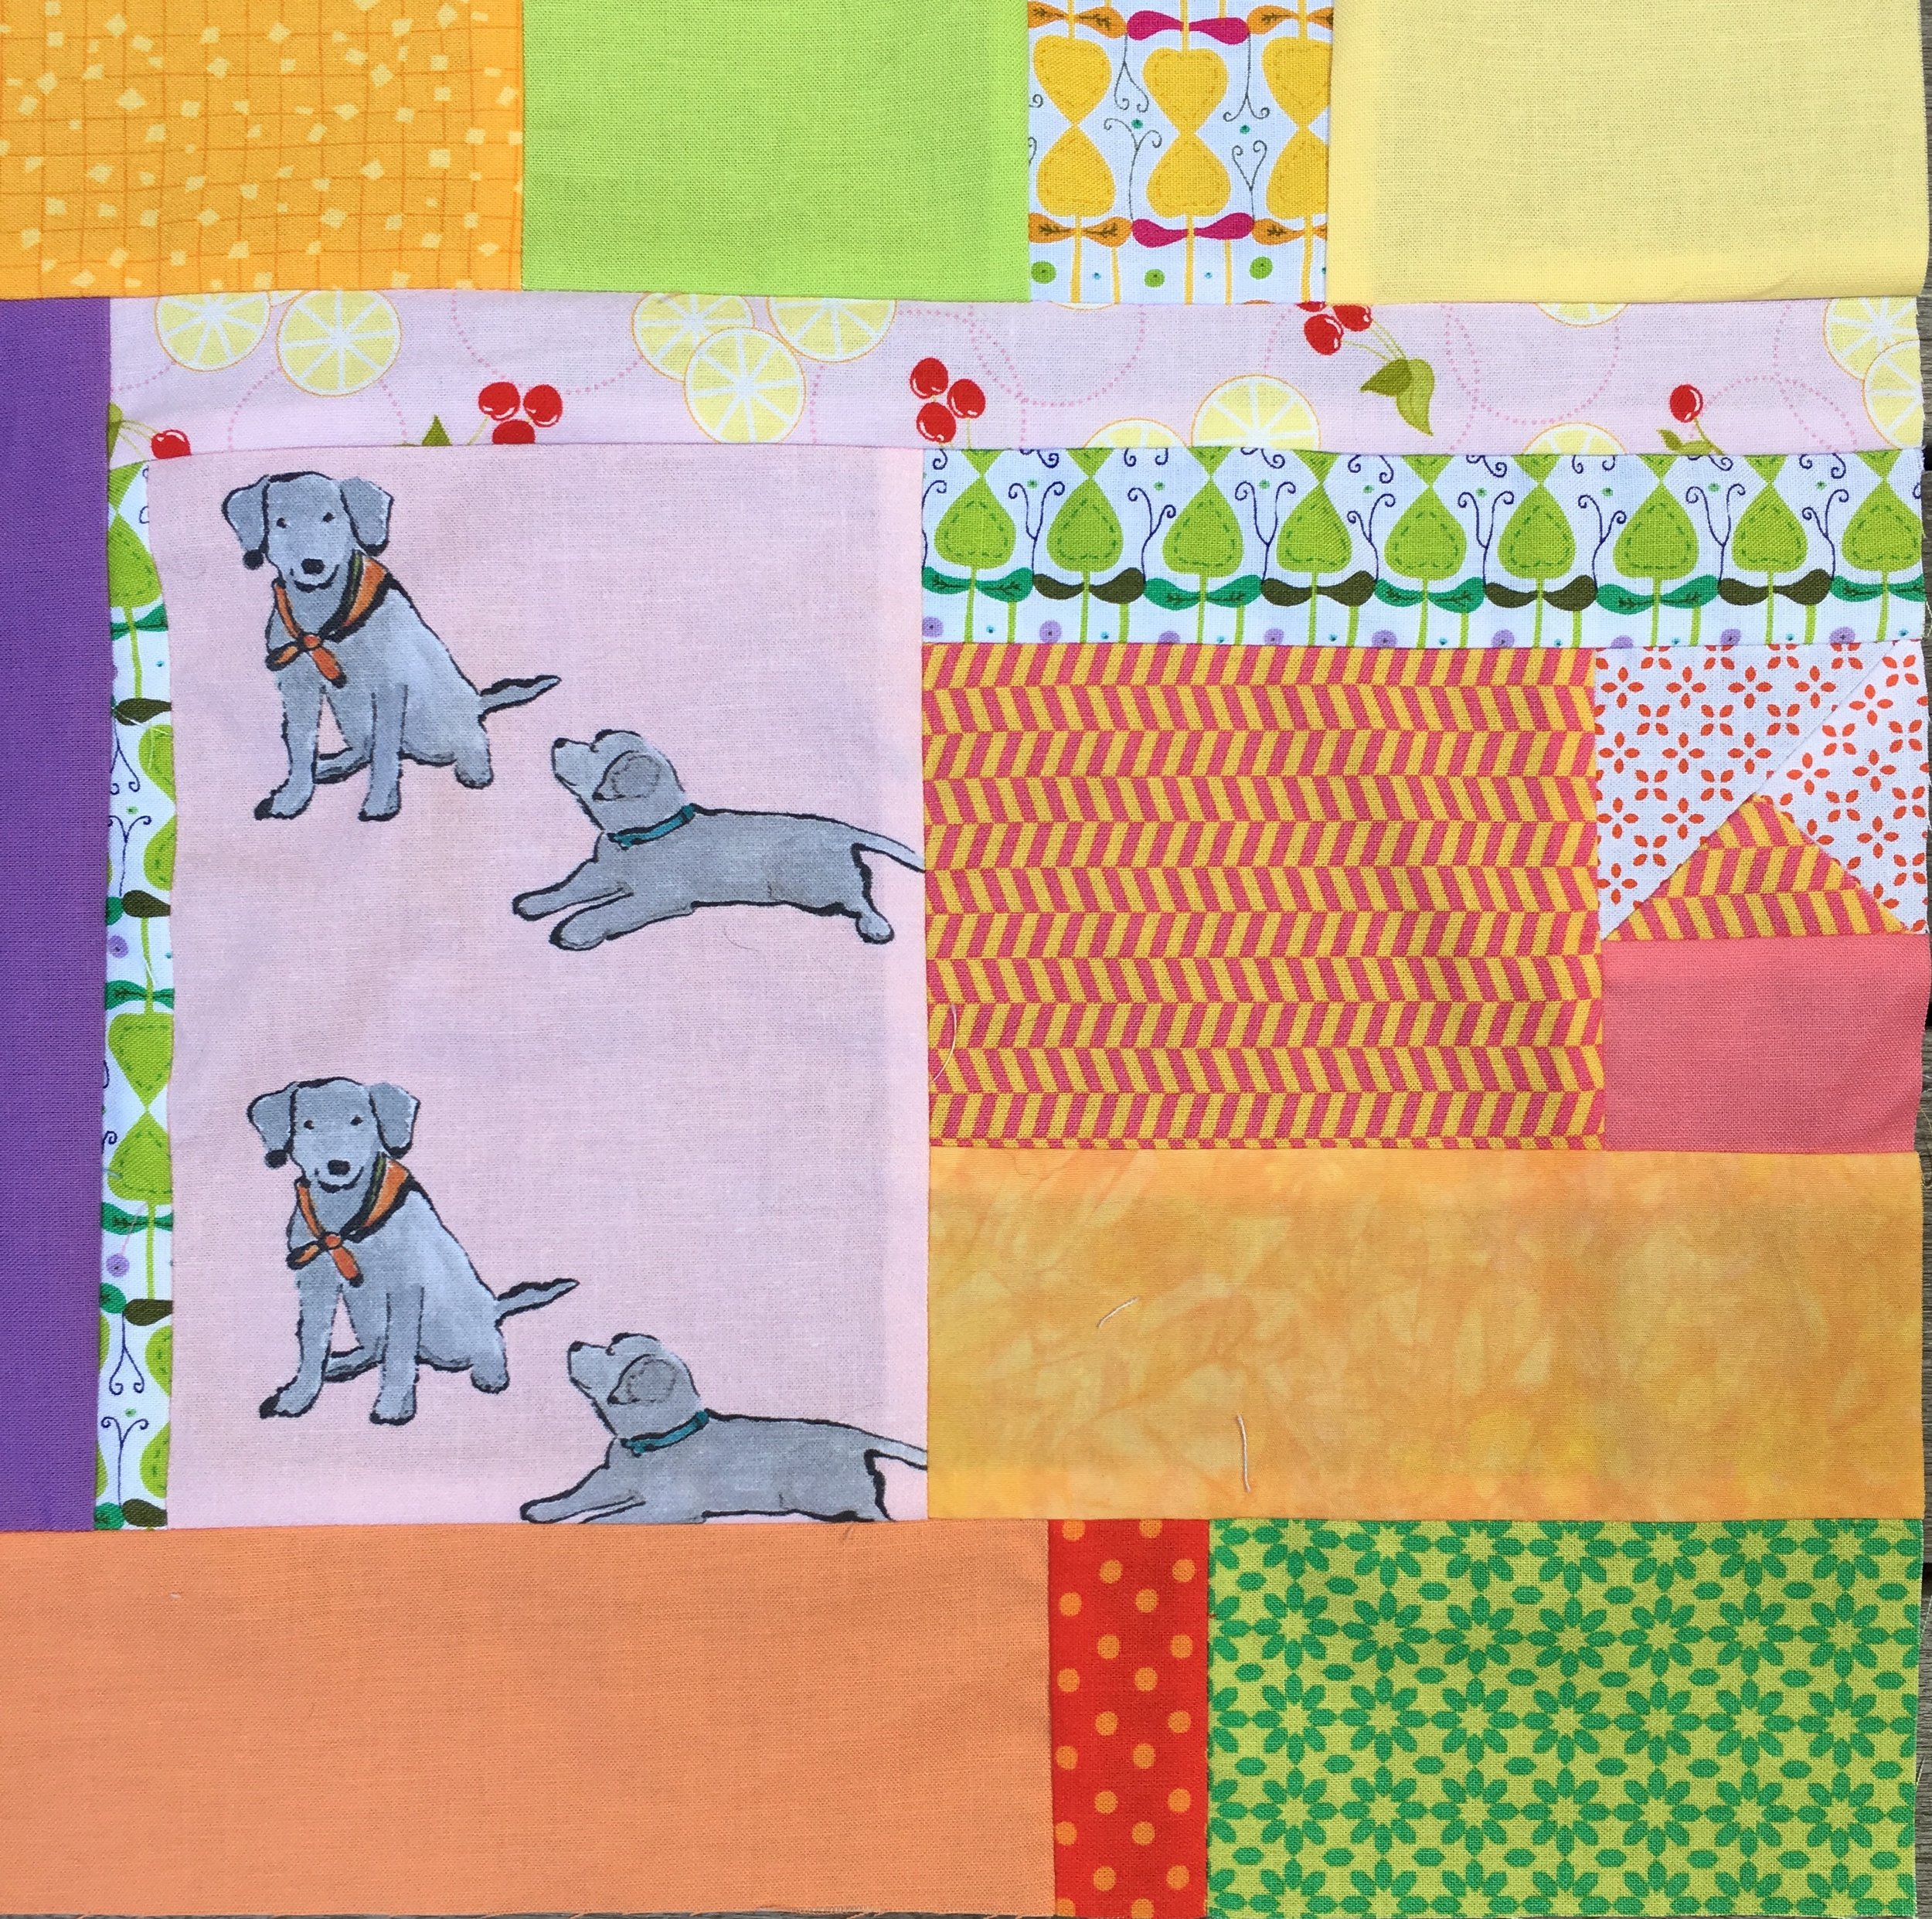
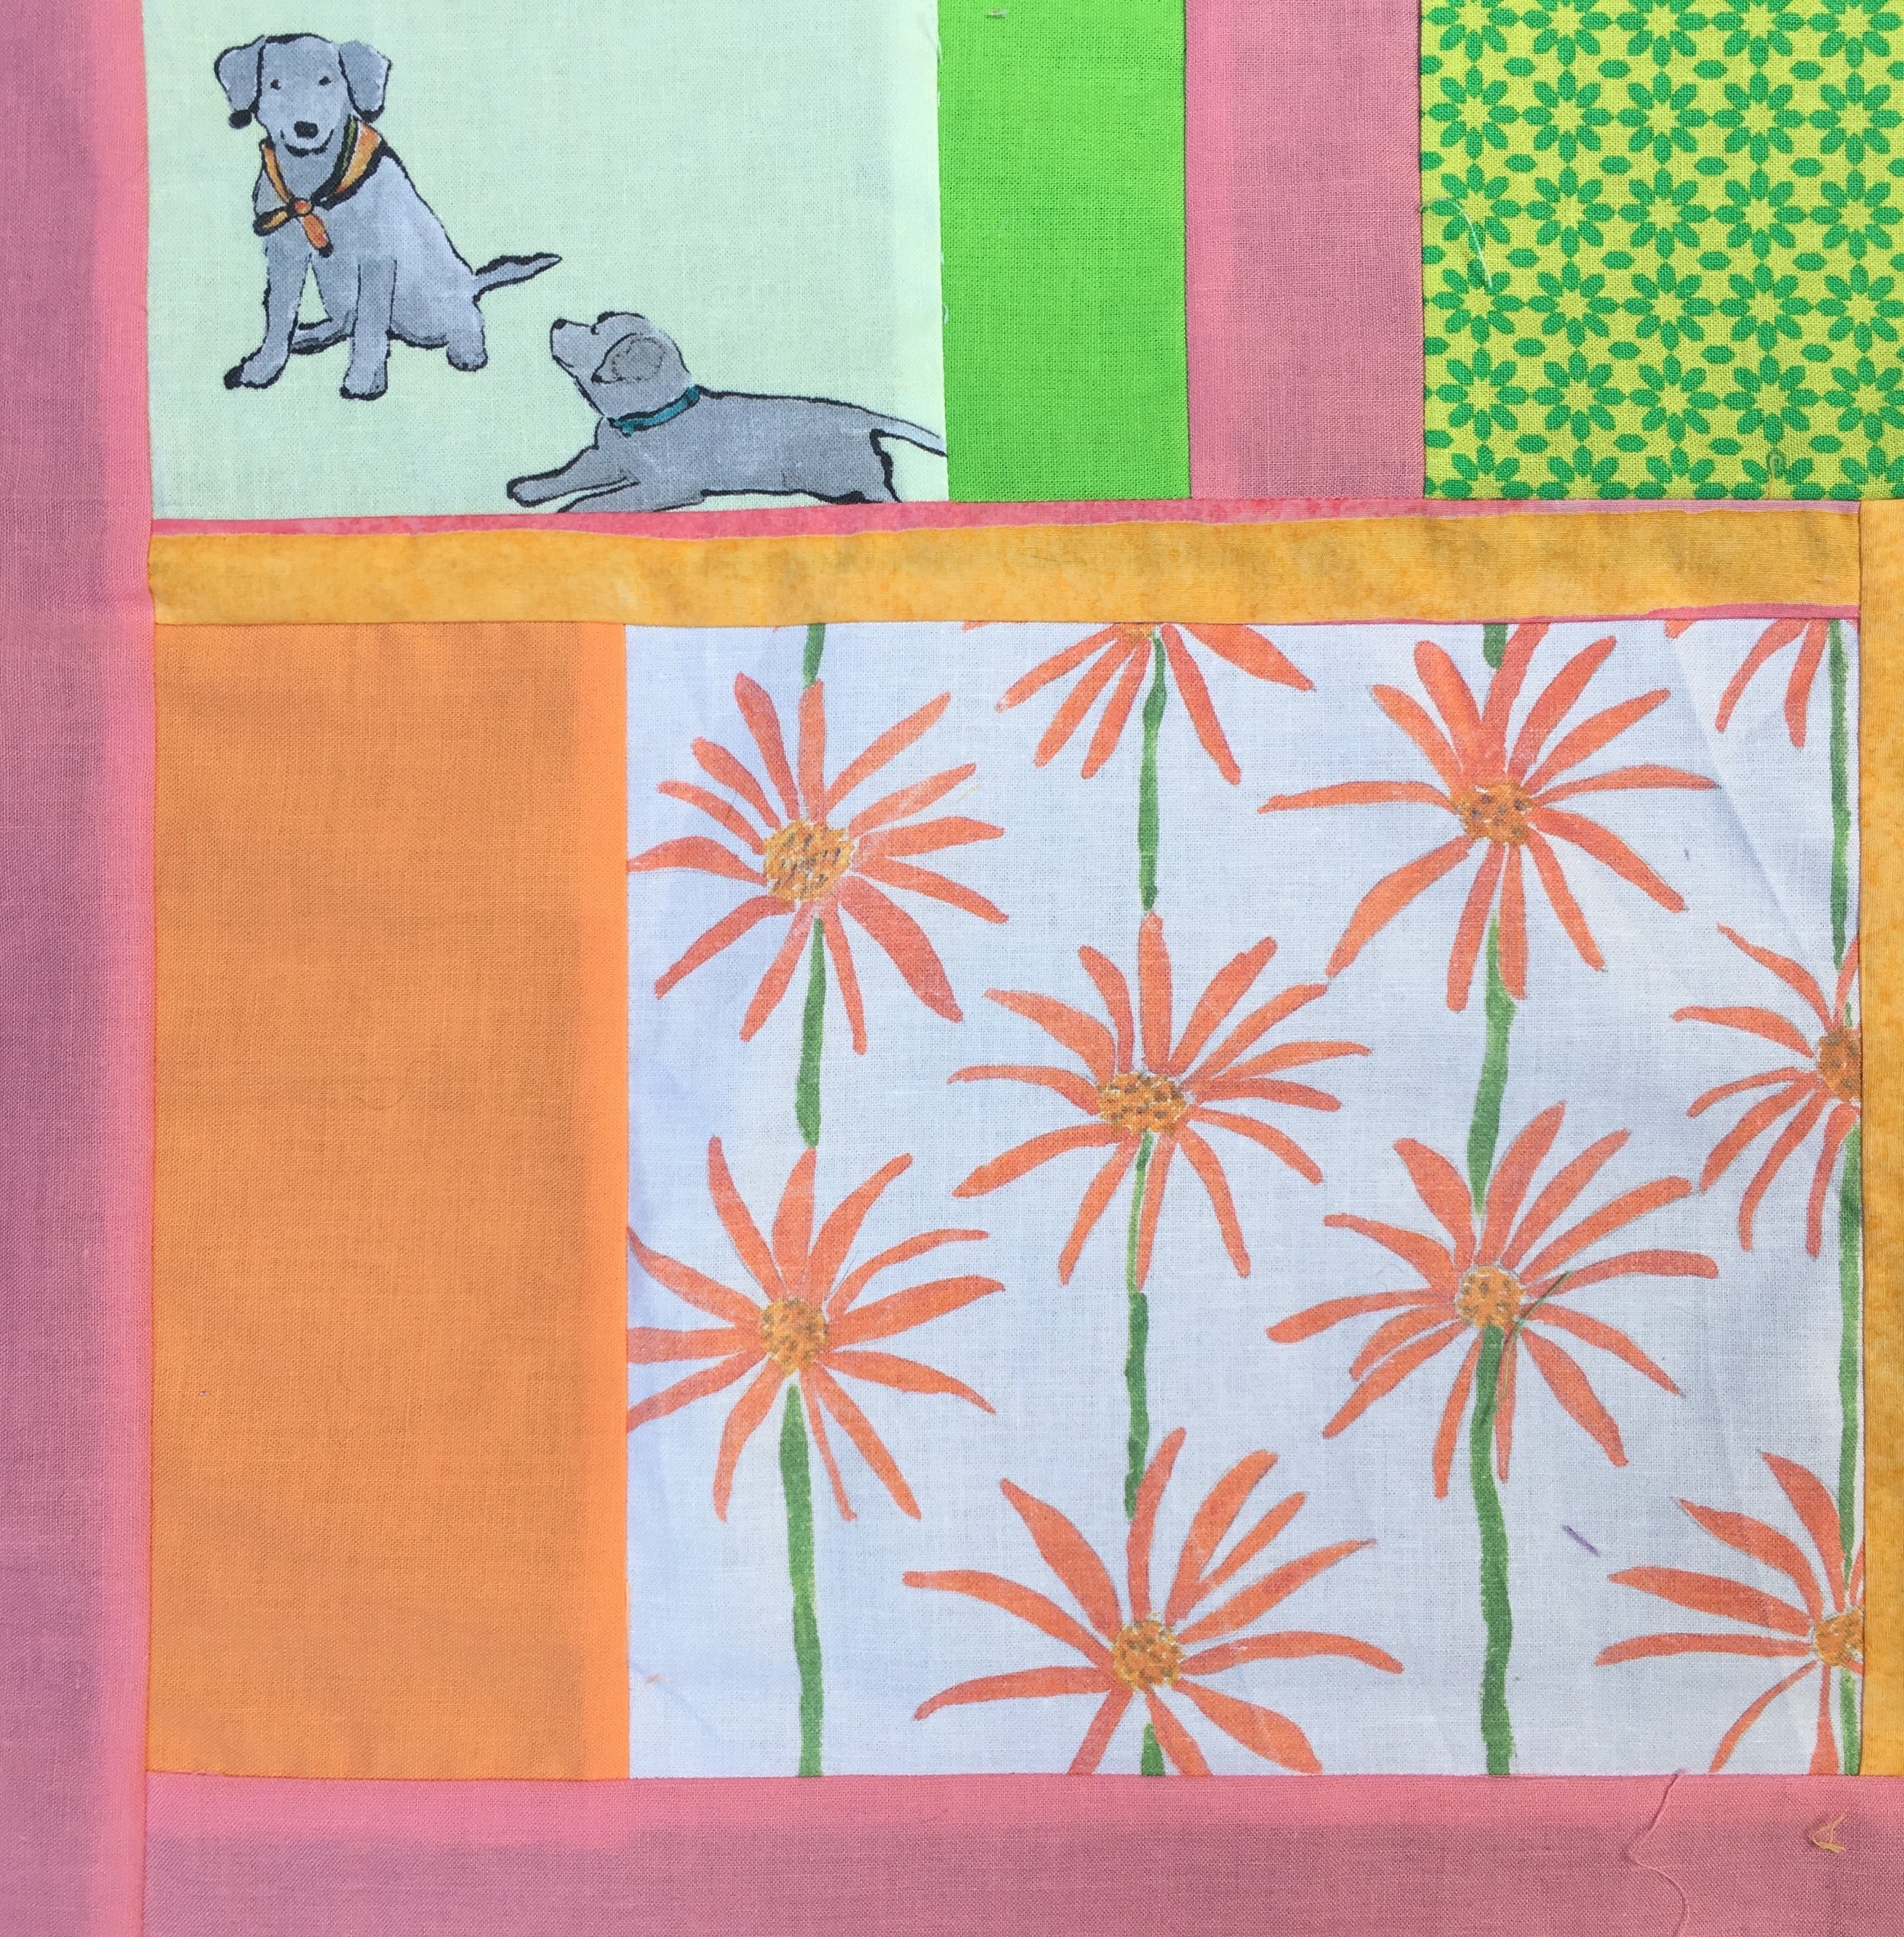
Many of the blocks from previous months have a white patches. Somehow none of these summer blocks do! It's clearly the season of high color!
Analogous Color Studies Continue
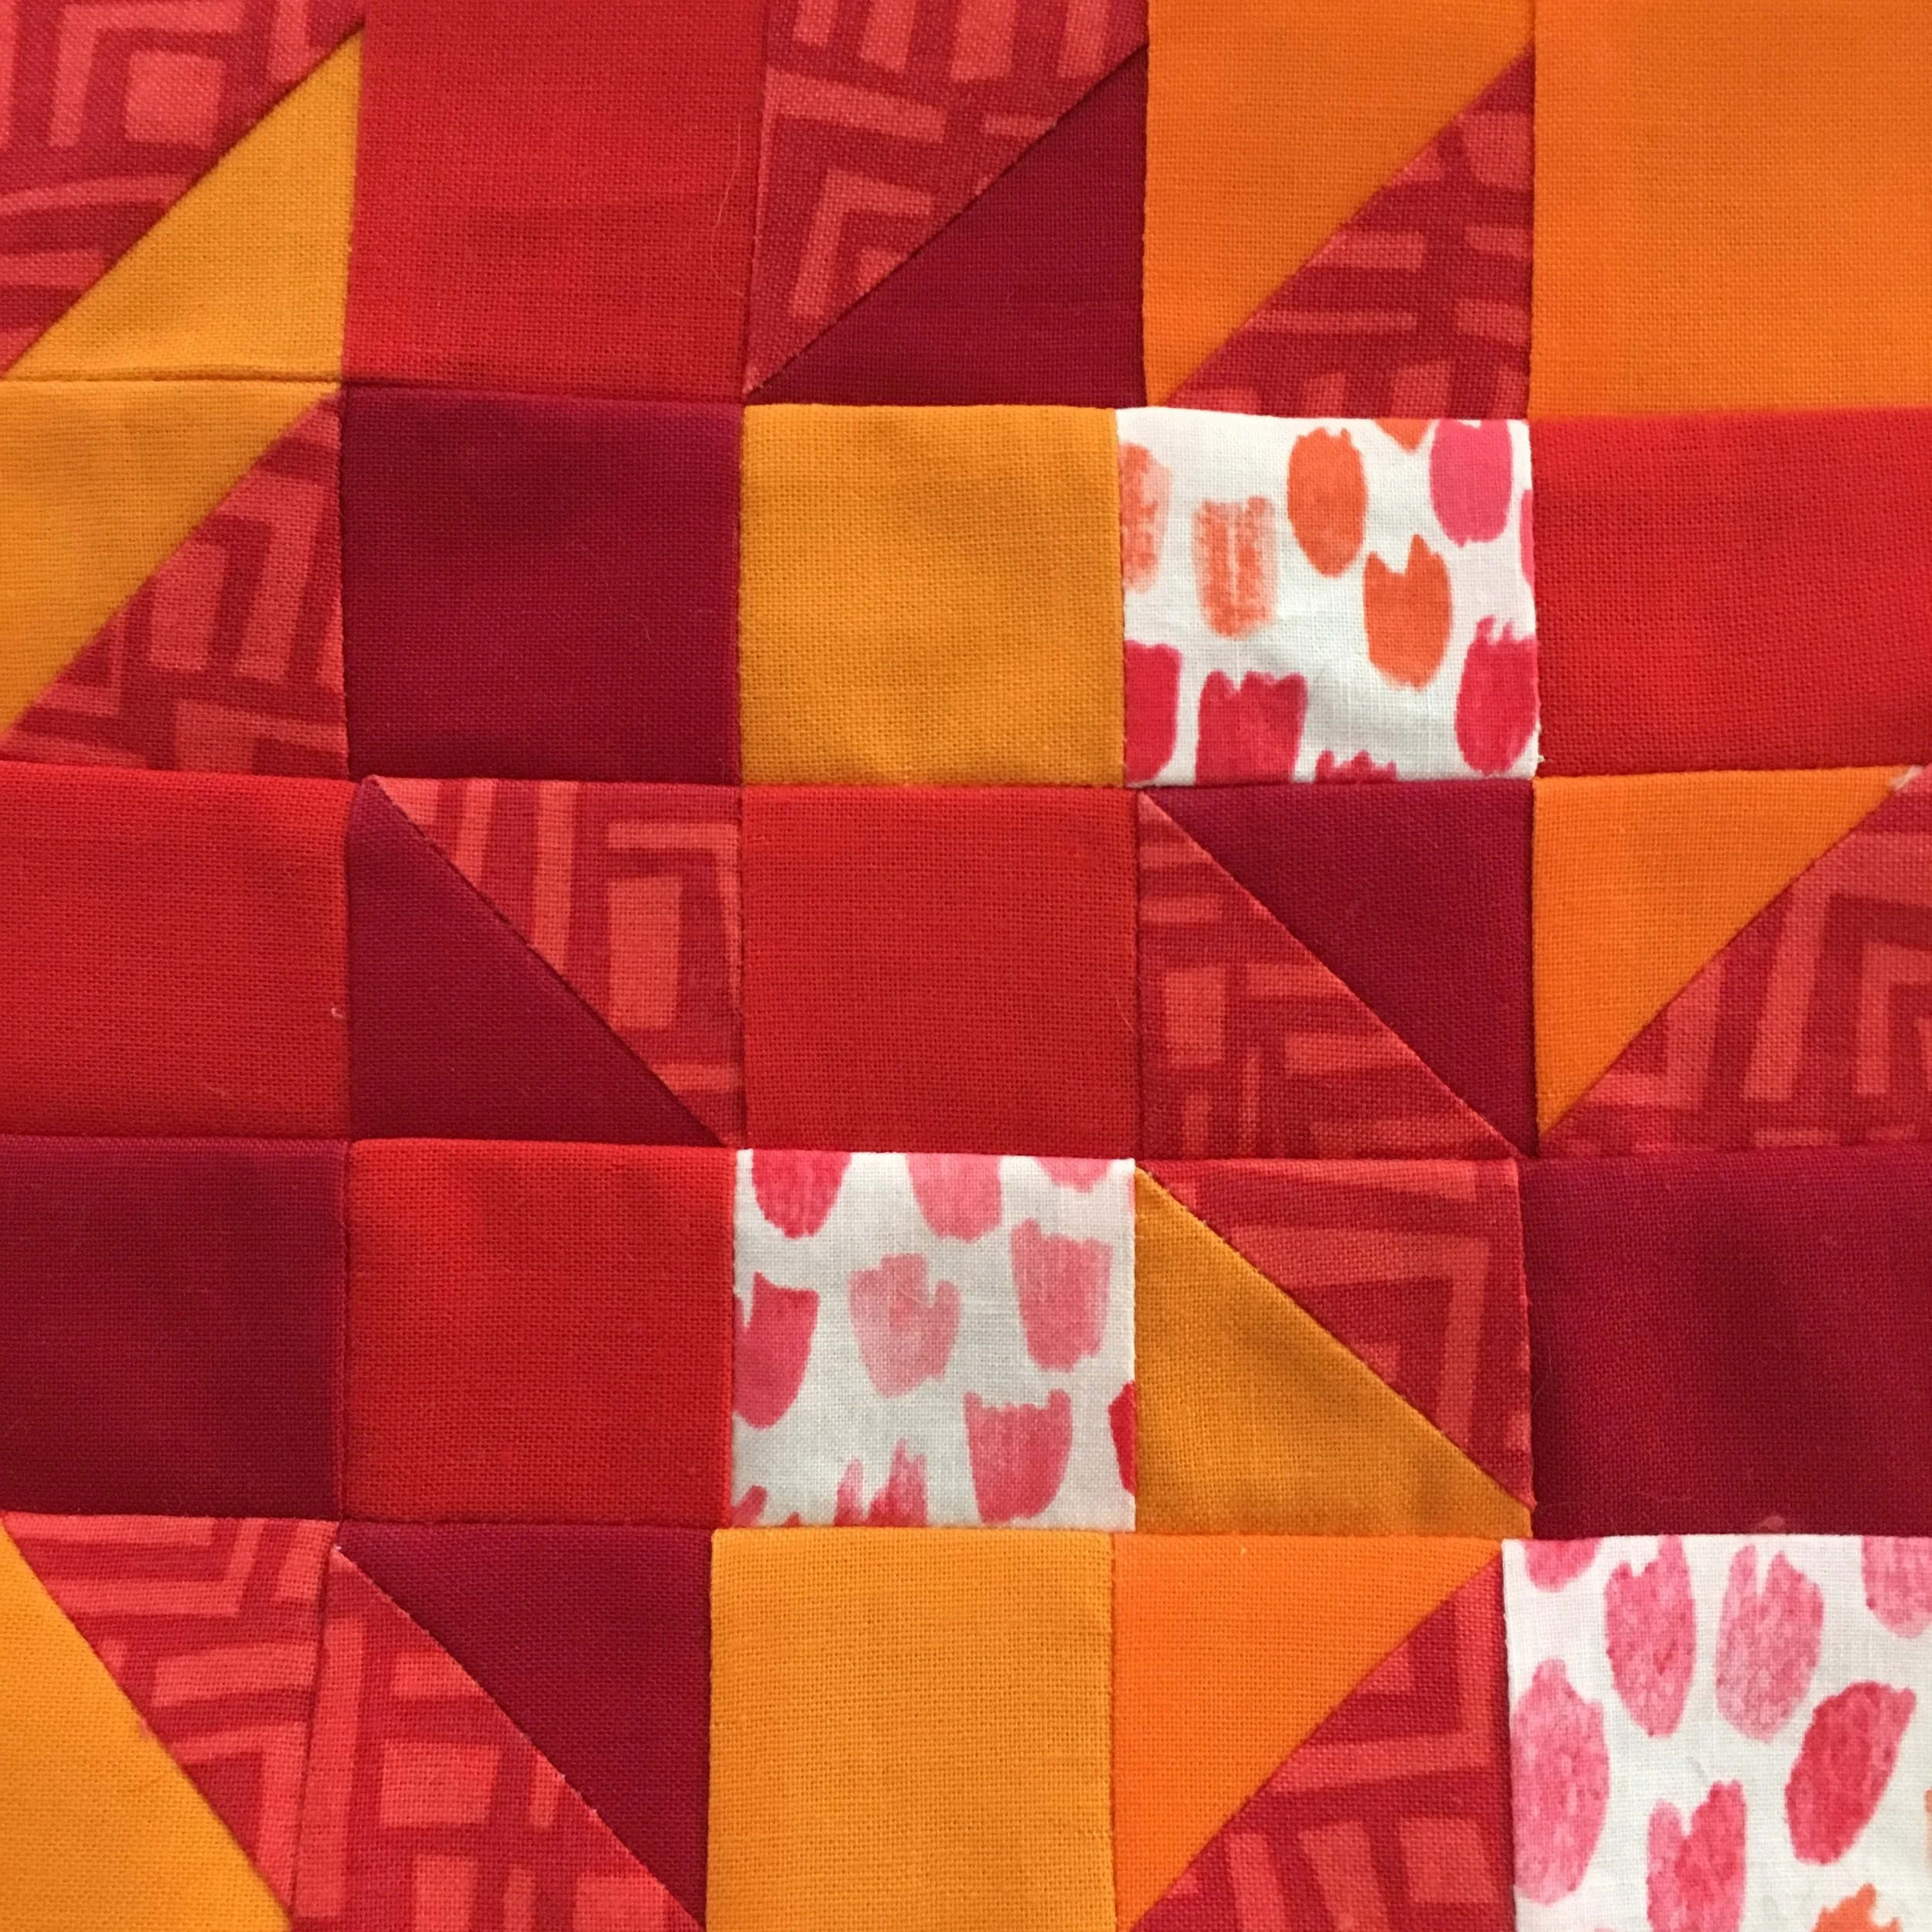
Orange to Red Analogous colors
Orange to Red Analogous colors
Analogous colors...they are colors that are right next to each other on the color wheel. Above is an example of a very warm palate. (It is August after all)! Orange, red orange, red. The pinks are tints of red and give the block added interest.
Analogous colors in Nature. Red, red-violet, purple. Warm colors moving toward cool colors.

And finally, the entire color wheel -- pincushions embroidered with summer flowers.

I do love color!
There will be one more post in this series in September. That one will show my finished Summer Challenge Analogous Color Quilts.
Tips for cutting quilt backs or curtains
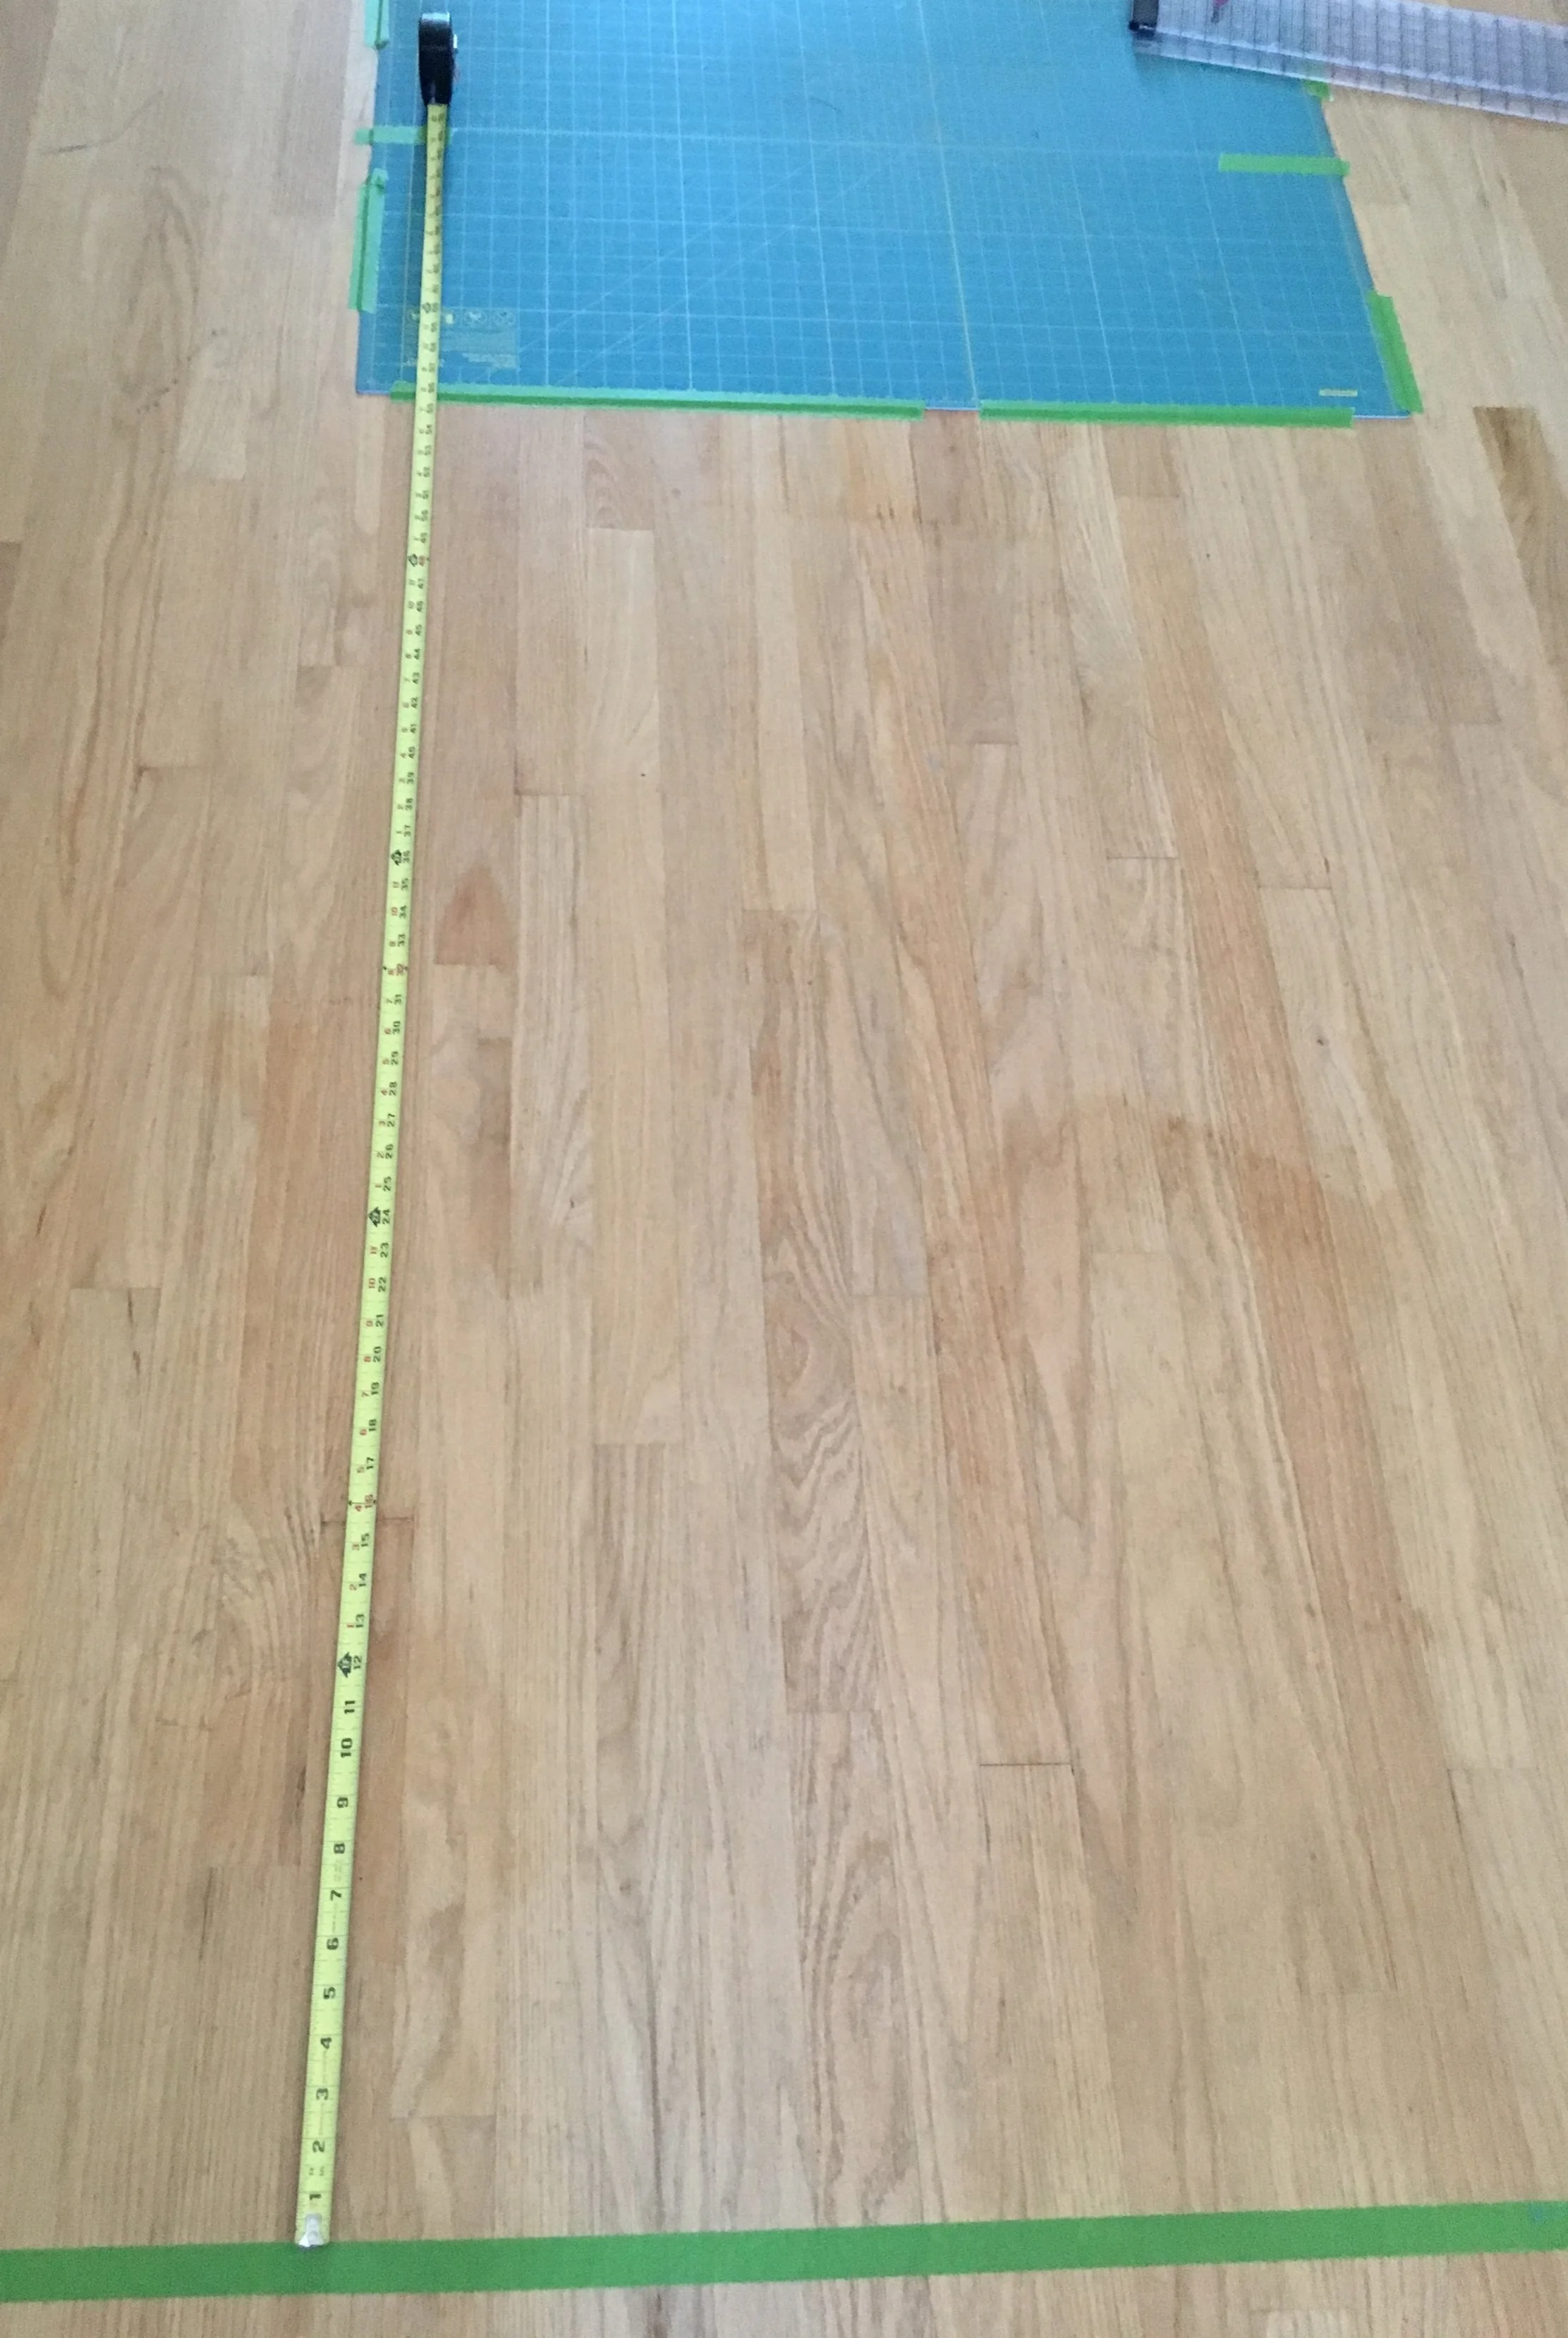
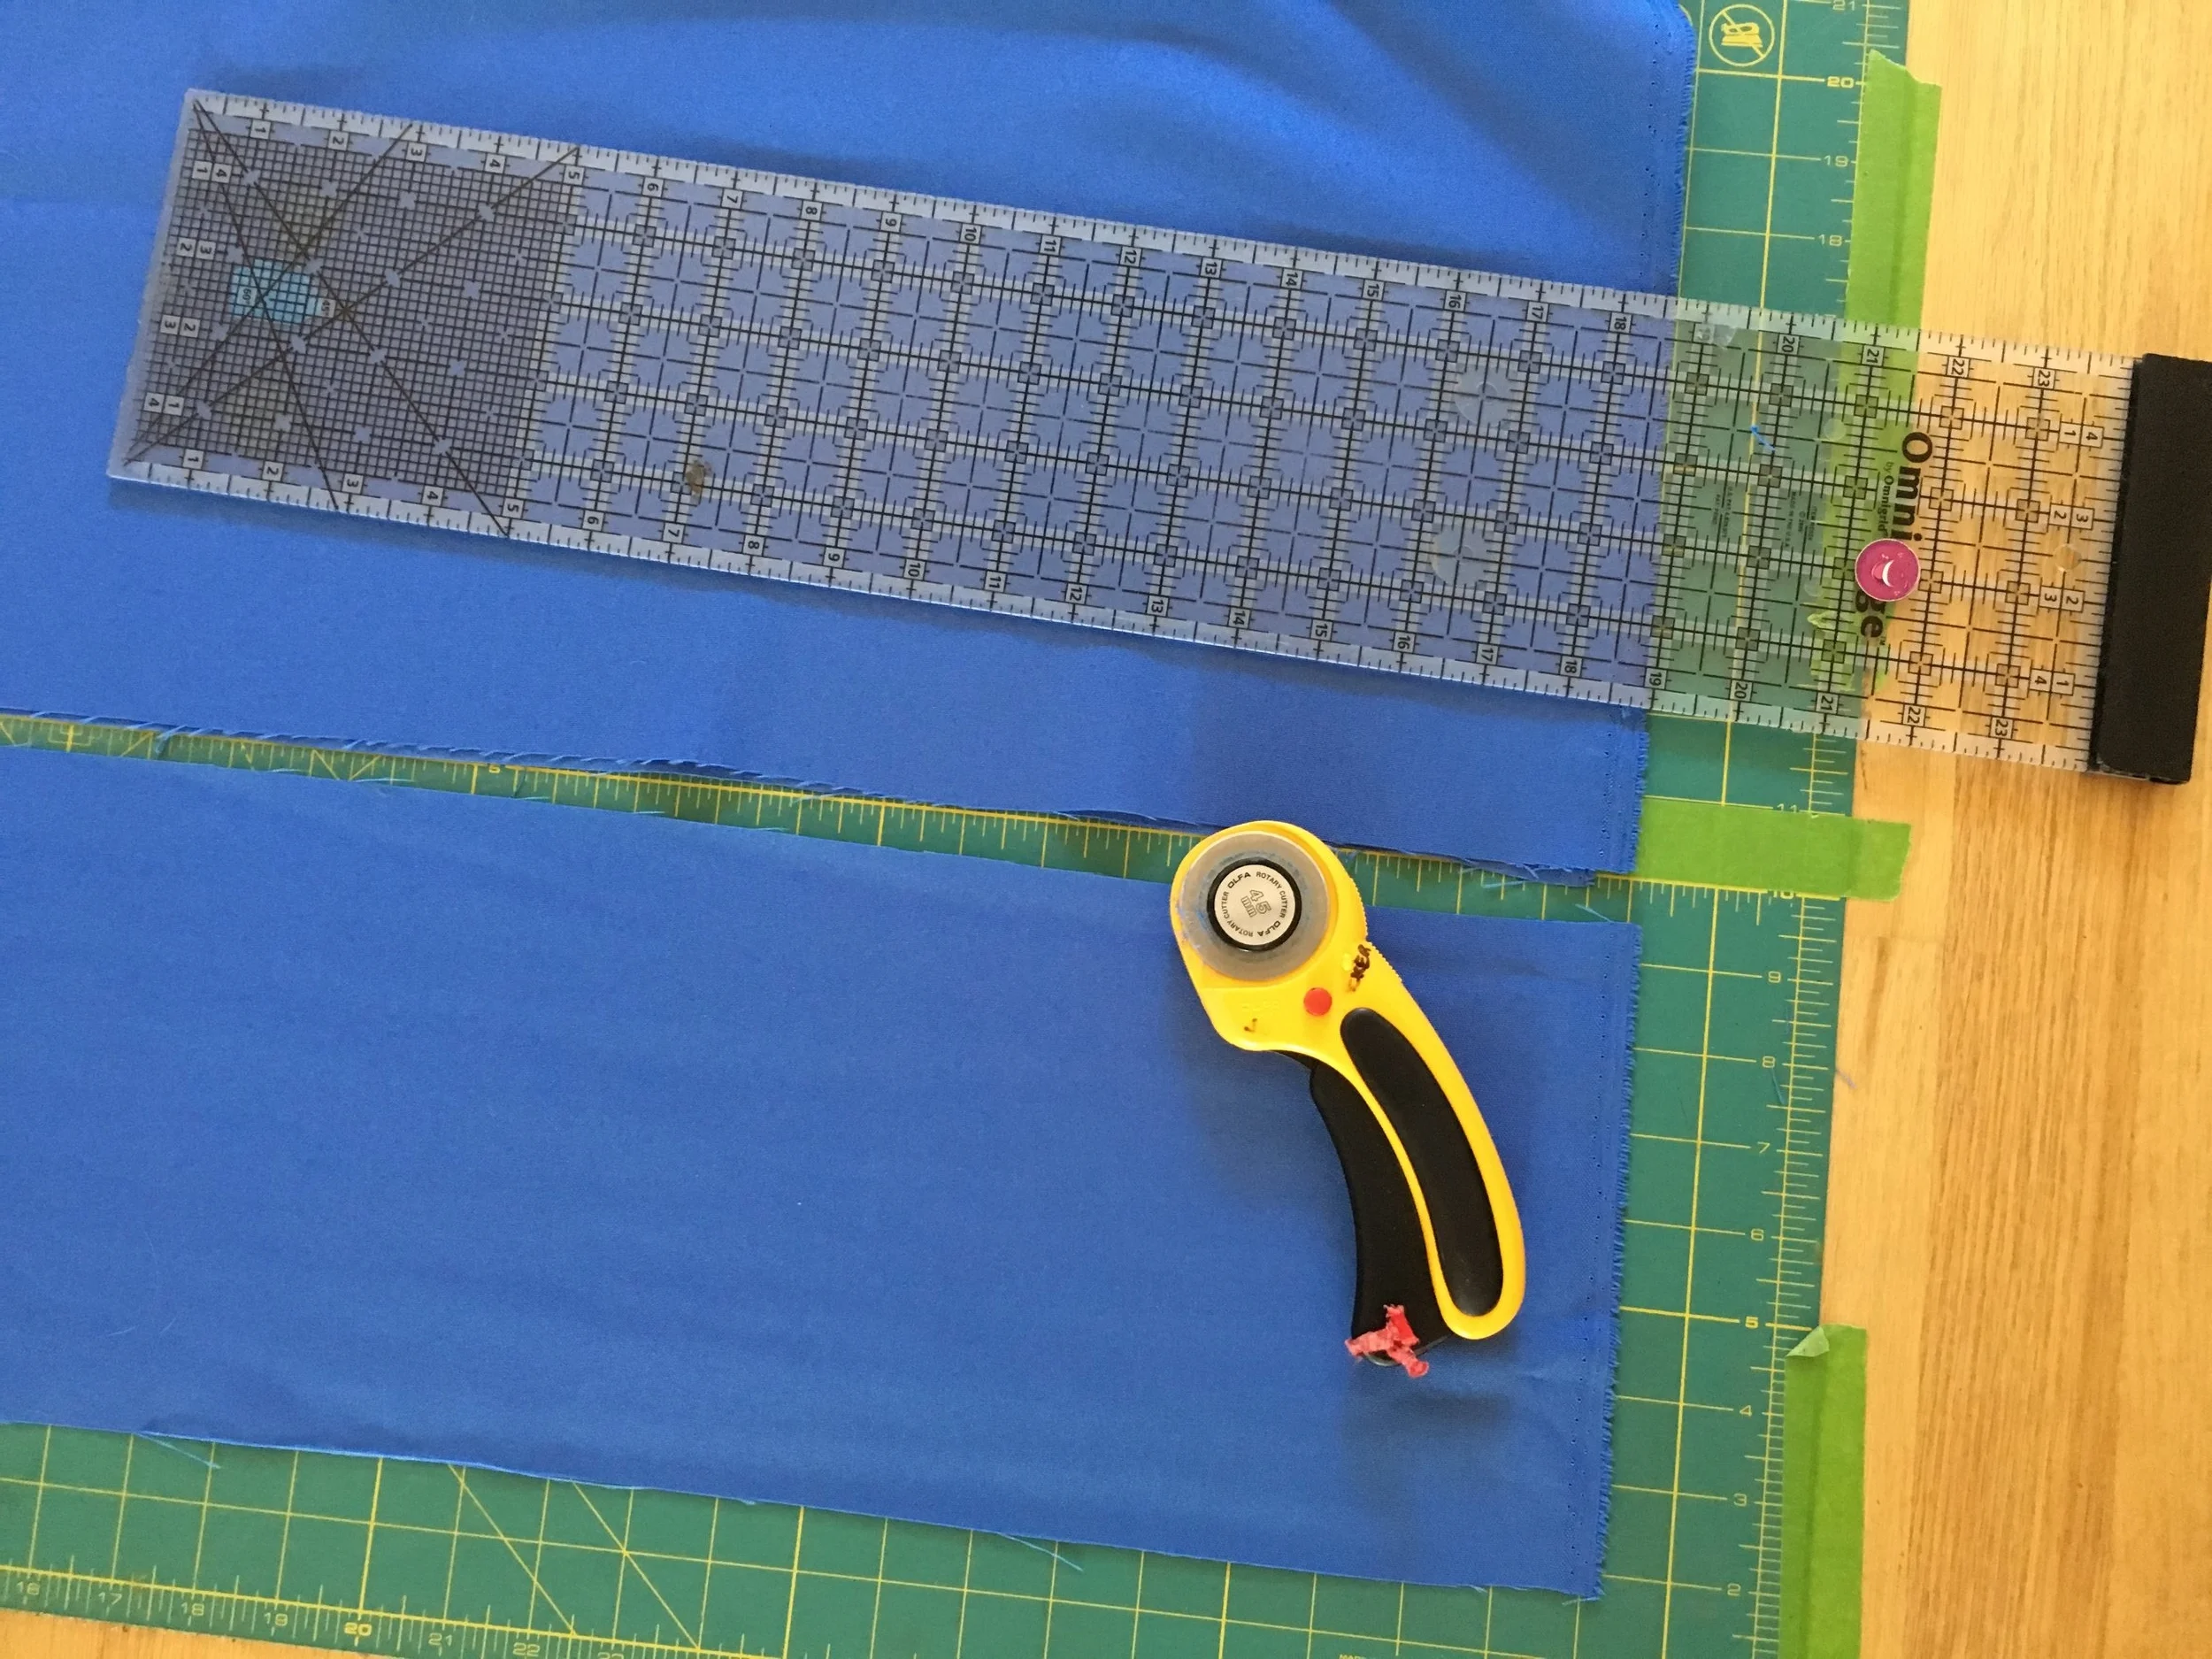
Cutting mat taped to the floor with rulers and rotary blade
Cutting mat taped to the floor with rulers and rotary blade
I cut quilt backs all the time so cutting long multiple lengths of fabric should be something I do with finesse. But more often than not, when the back measures more than 60 inches, I find my 2 cut pieces of fabric are 1/4 to 1 inch different in length, even when I thought I had measured accurately. It never bothers me much. I make sure the top edge of the quilt back is straight across so that the quilt layer is straight. I don't worry about the uneven lengths at the bottom. They'll be trimmed off once all the quilting is done.
But this summer I made curtains for the windows of the gym at my church. They are big, double width windows. My fabric cuts needed to be accurate from the start. The curtains were just too large to try to even things up as I went.
So I set up a cutting station on my attic floor. I have lots of space up there so it was perfect. But I could also have done this in a long hall.
My fabric cuts were much more accurate using this method. It looks complicated but it only takes a couple minutes to do the set up.
To set up a cutting station on the floor
- Make sure the floor is really clean! Vacuum it and then dry mop.
- Using painters tape make a straight line at the top end of your cutting area. Make sure it is straight.
- With a tape measure measure out the length of fabric to be cut. I use a metal carpenter's tape because it's stiff and stays in one place.
- Place a large cutting mat, a least the width of your fold fabric under the tape so that the cutting line will be in the middle of the mat. Make sure the mat is straight. I used the flooring as a guide. Tape the cutting mat down to the floor with painters tape.
- Now set up a cutting line on the mat. Measure the exact length you need to cut from at least 3 places along the length of the tape you placed in step 2.
- Mark the cutting length with painter's tape across the width of the cutting mat. Make sure the painters tape you apply is long enough so it extends beyond the width of fabric. You will be cutting along the LOWER edge of the painters tape.
- The set up is ready to start cutting.
Cutting area all set up ready to cutting (Photo makes the tape look skewed but it's really straight)
Cutting the fabric
- Cut a straight edge at the top of the fabric with your quilting ruler before you set it on the floor.
- Place the straightened edge of the fabric on the floor, matching the fabric edge with the LOWER edge of the painters tape, and run the fabric yardage across the floor and over the cutting mat. Check to make sure the top of fabric hasn't wiggled away from edge of the tape at the top of your cutting area.
- Place a ruler over the fabric on the mat, lining it up with the LOWER edge of the tape used to mark the cutting line on the mat. (My fabric was 60 wide so I needed to use 2 rulers to reach across the width of fabric). Cut across the width of fabric with a rotary cutter.
- Repeat to until all the lengths needed are cut.
Note how the cut edge of the fabric matches the LOWER edge of the painters tape
The fabric I was given for this project was polyester....very slippery stuff! It was really difficult to iron because it kept sliding off the ironing board.
I solved that problem by putting a folding table on next to my ironing board on the opposite side from where I was standing. That table was really helpful when the panels of the curtains were sewn together and got heavier and larger.
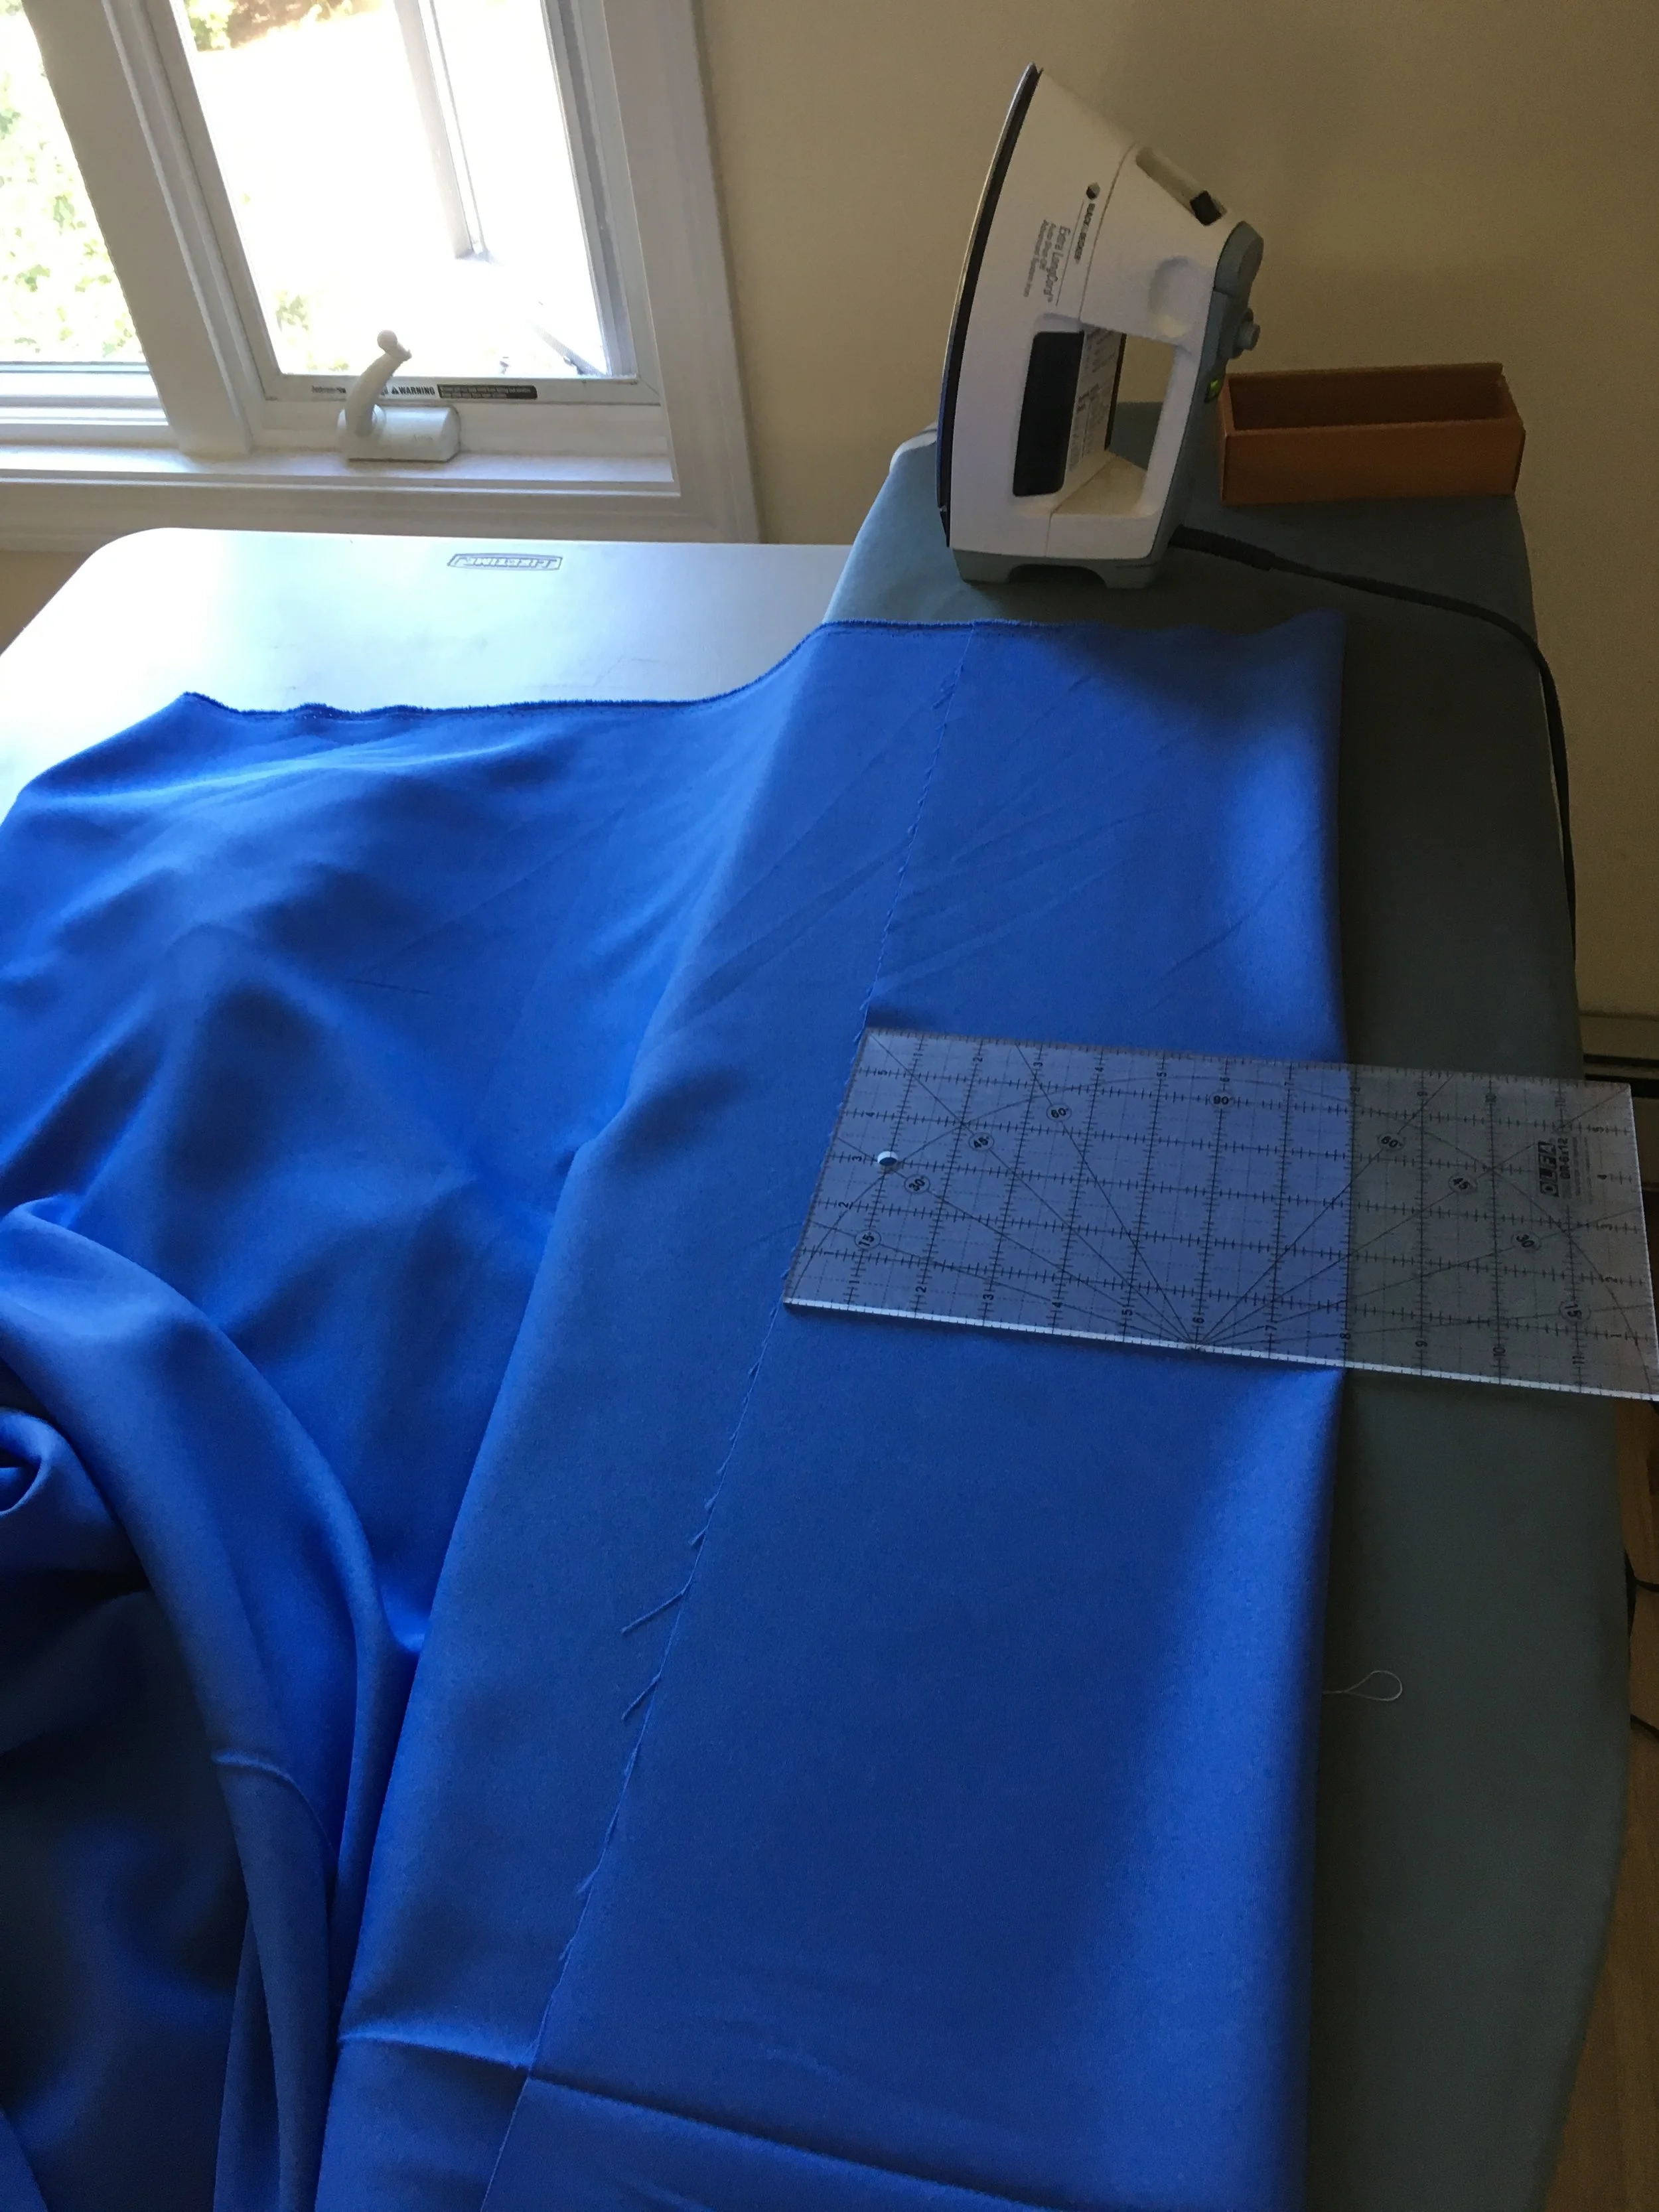
Table placed on the far side of the ironing board to support the weight of the fabric and help keep it on the ironing board
Hope these tips help with your project!
Bear Paw Sighting!

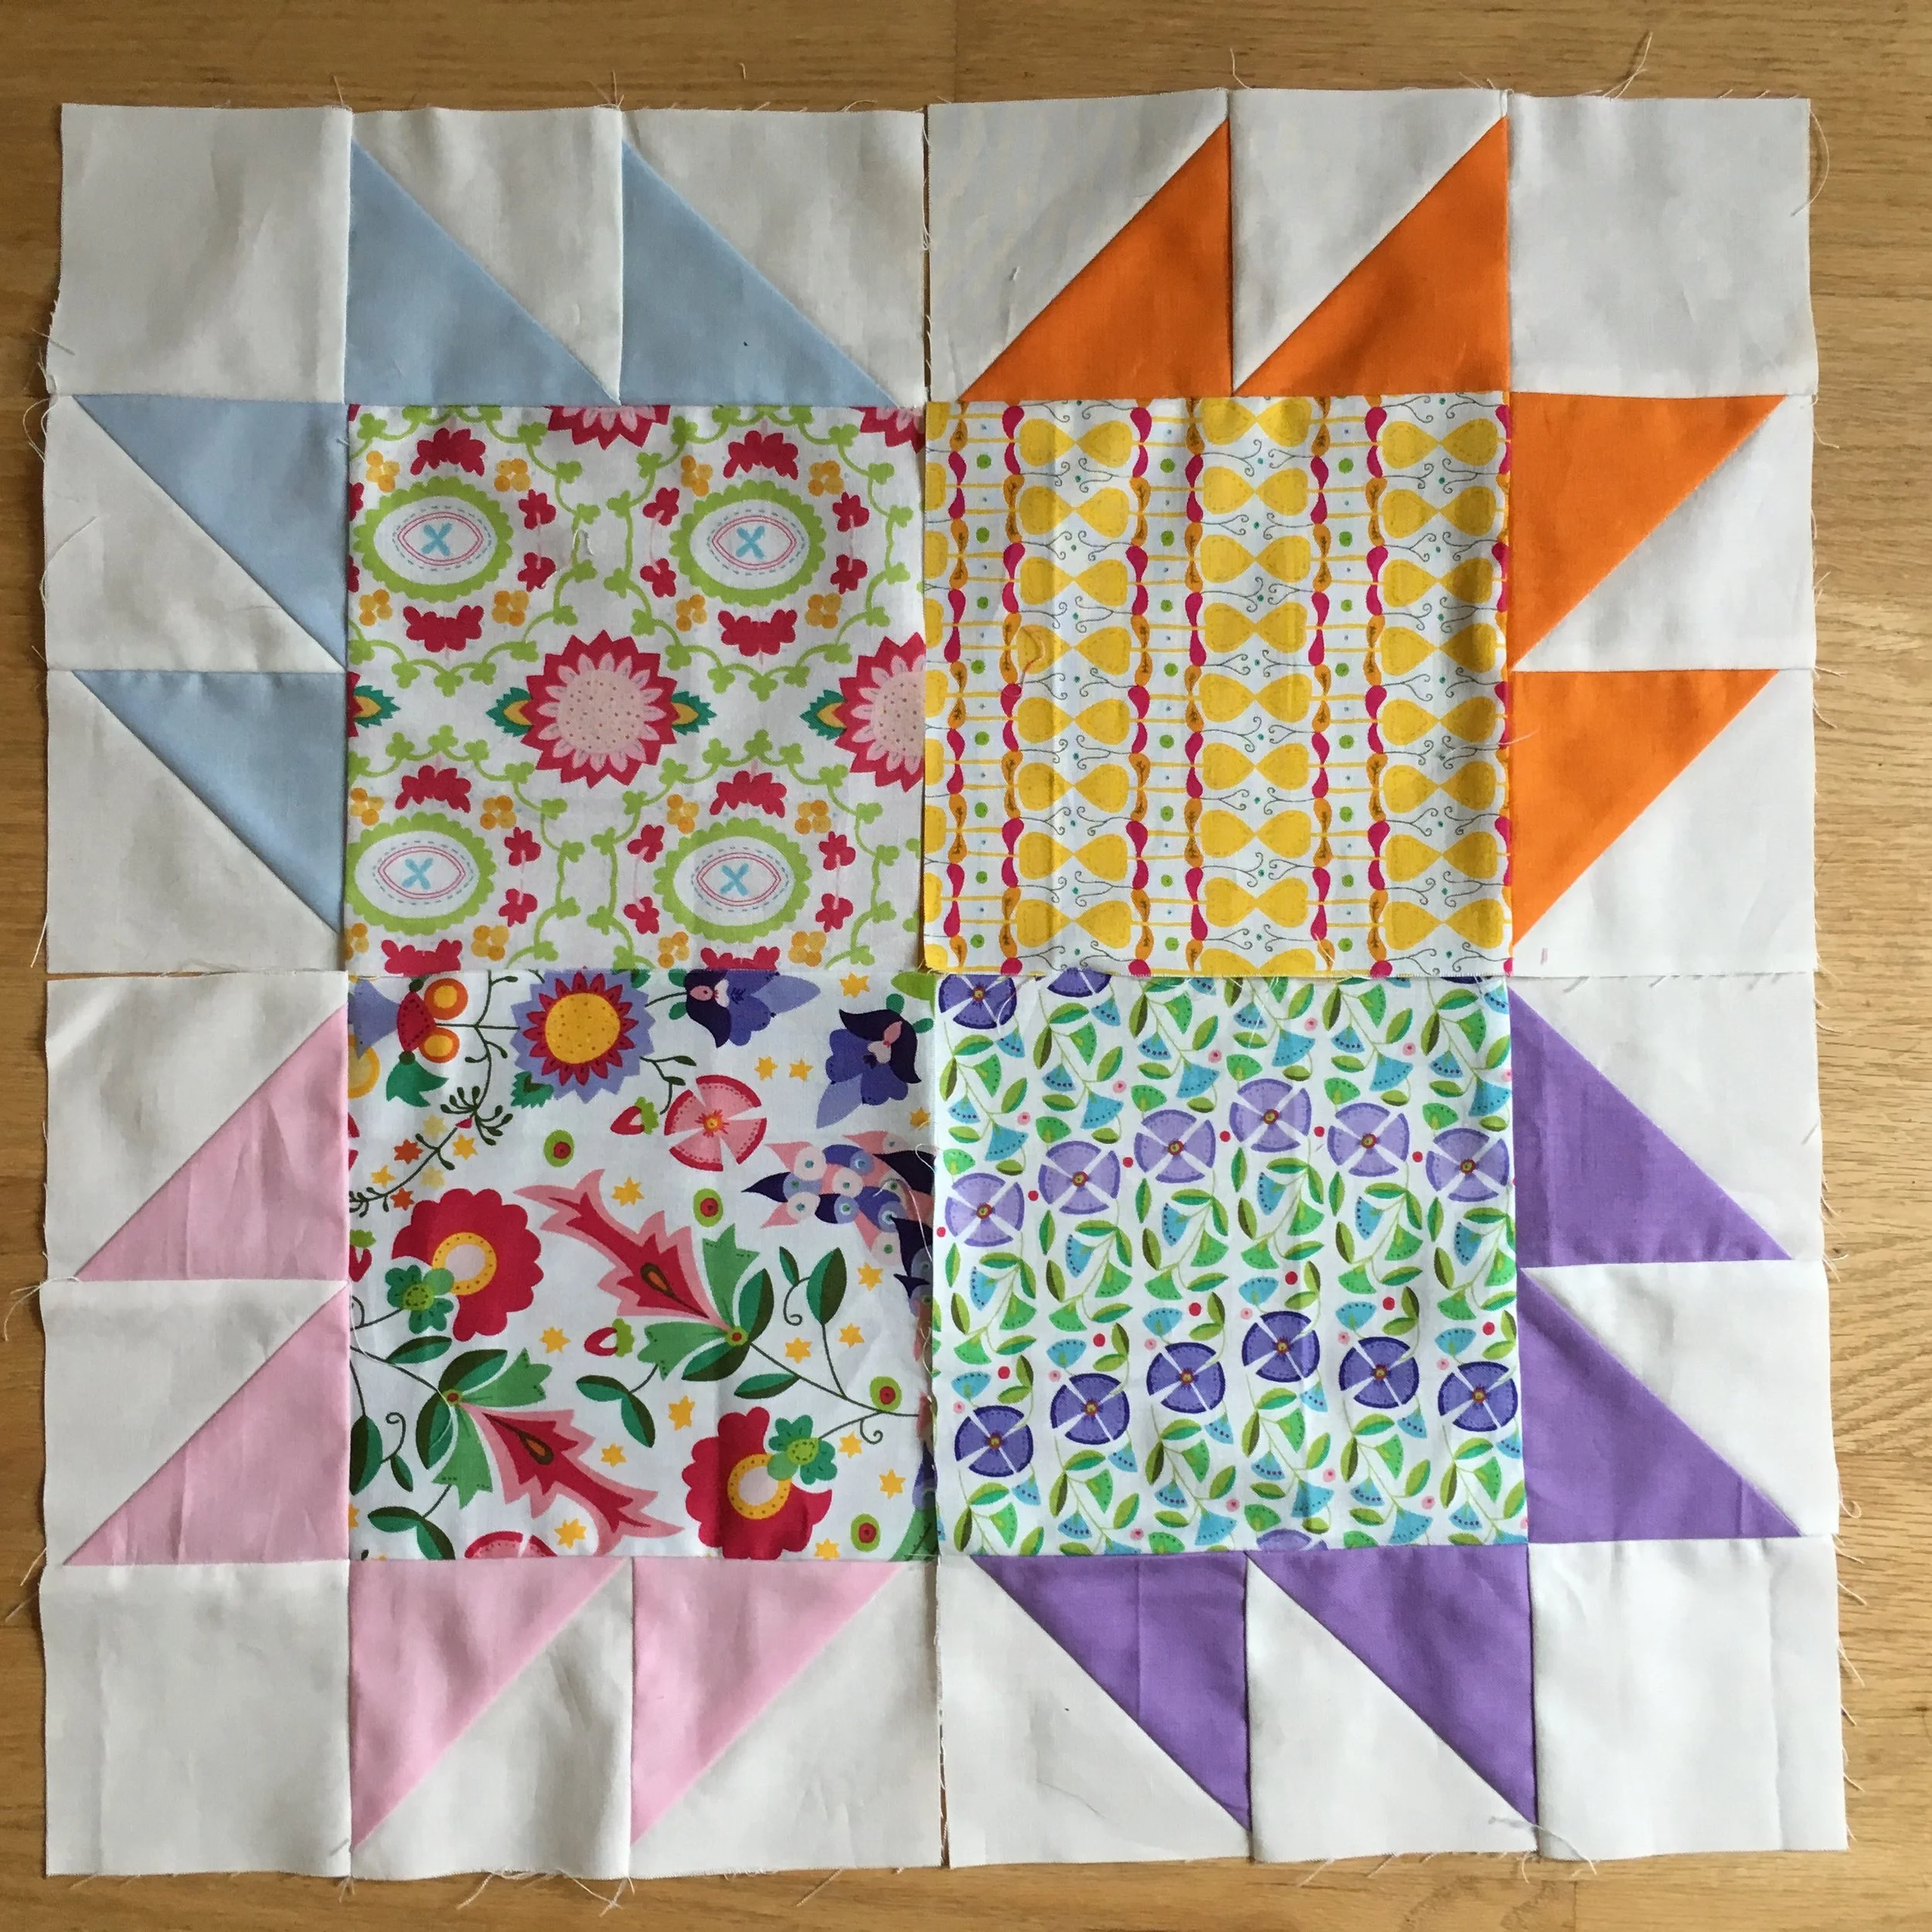
Four Bear Paw Blocks
Four Bear Paw Blocks
Making a quilt using the classic Bear Paw block has been on my quilting bucket list since the 1970s. But there were no rotary cutters or short cuts back then....just cardboard templates. My accuracy cutting with cardboard templates left a lot to be desired! It was just too much trouble and the blocks didn't look good enough for me to want to make a whole quilt. Since I could do free form needle turn applique that's what I used to do! Bear Paw blocks were put on an indefinite hold!
Digging through my stash recently, I came across a short stack of floral fat quarters. How fun would it be to make a quilt that looked like a meadow with Bear Paw prints!
That idea ruled out the traditional Bear Paw layout with the paws facing outward in 4 directions (often with sashing between the blocks). See below. It's very sweet with these floral fabrics but not what I wanted.
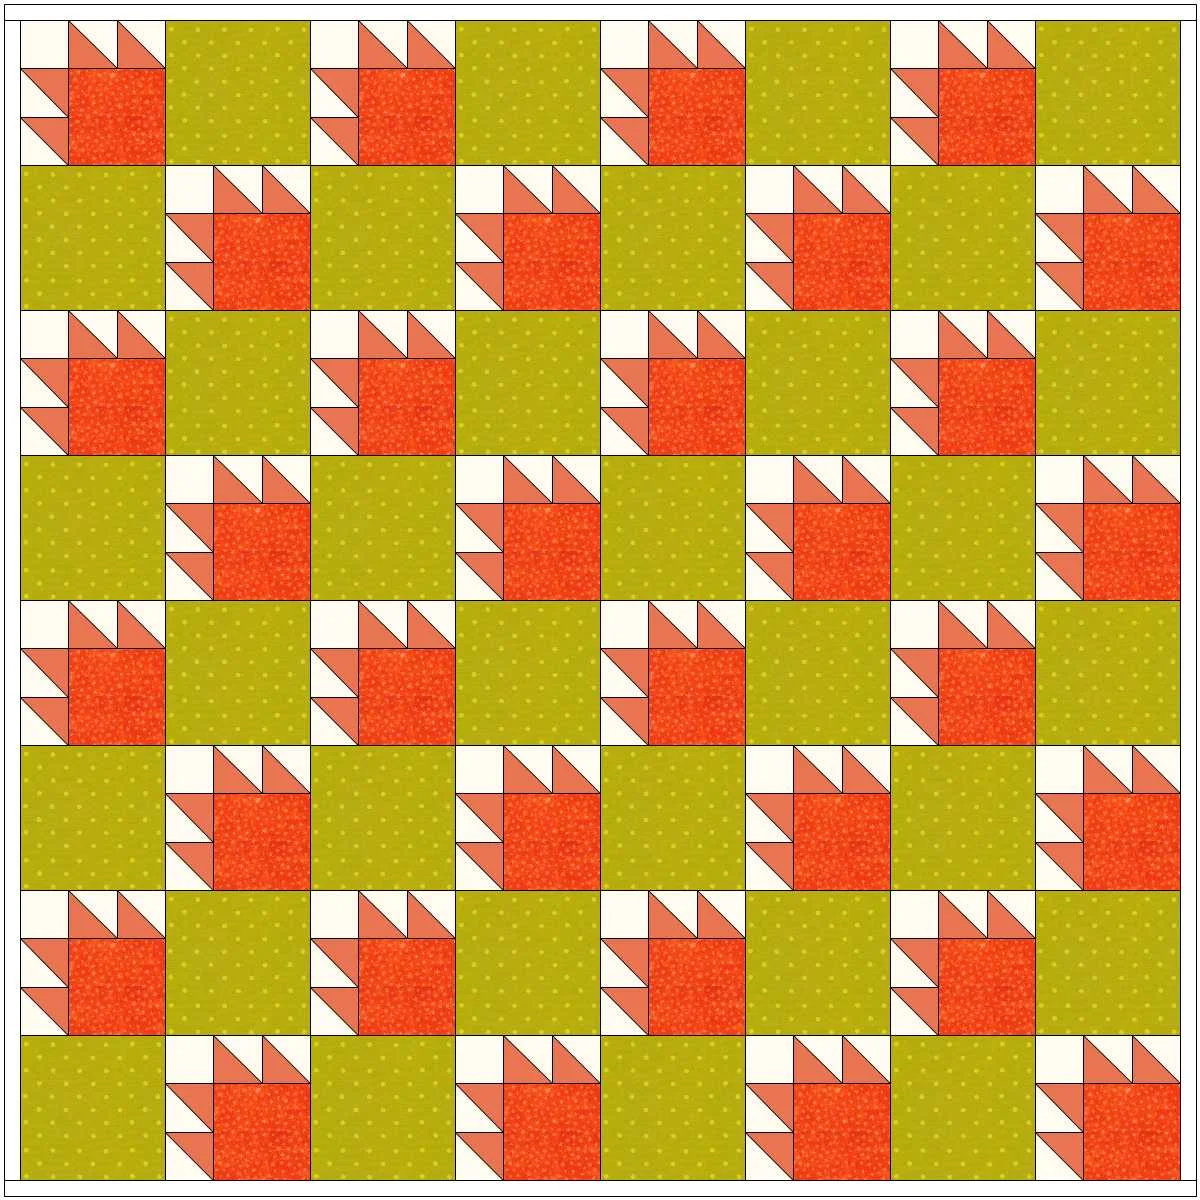
I started to draw the quilt on graph paper but quickly realized I wanted to see a variety of layouts. So I opened EQ7 (Electric Quilt 7) on my computer. I needed to draw my single bear paw block (the bear paw block in the EQ7 block library is similar to the 4 patch above) but then it was was easy to use my new bear paw block to look at a number of options. I started with the straight forward quilt on the far left below. Next to it are other two possibilities.
I've picked my design (not exactly any of those shown!) and with the aid of all the current quilting tools and shortcuts have been happily sewing Bear Paw blocks! I love working with these cheerful summery Sarah Fielke "Enchanted" flower prints by Windham Fabrics (2014) with Kona® cotton solid color accents!
New Waldorf Type Doll

I've been waiting for months to share my newest Waldorf type 16.5 inch doll. She's finally gone to my niece's 3 year old so she's no longer a secret!
I started sewing this doll last summer. So I've had lots of time to create quite a wardrobe for her! Below are the outfits that I sent with her.
Clockwise from top left:
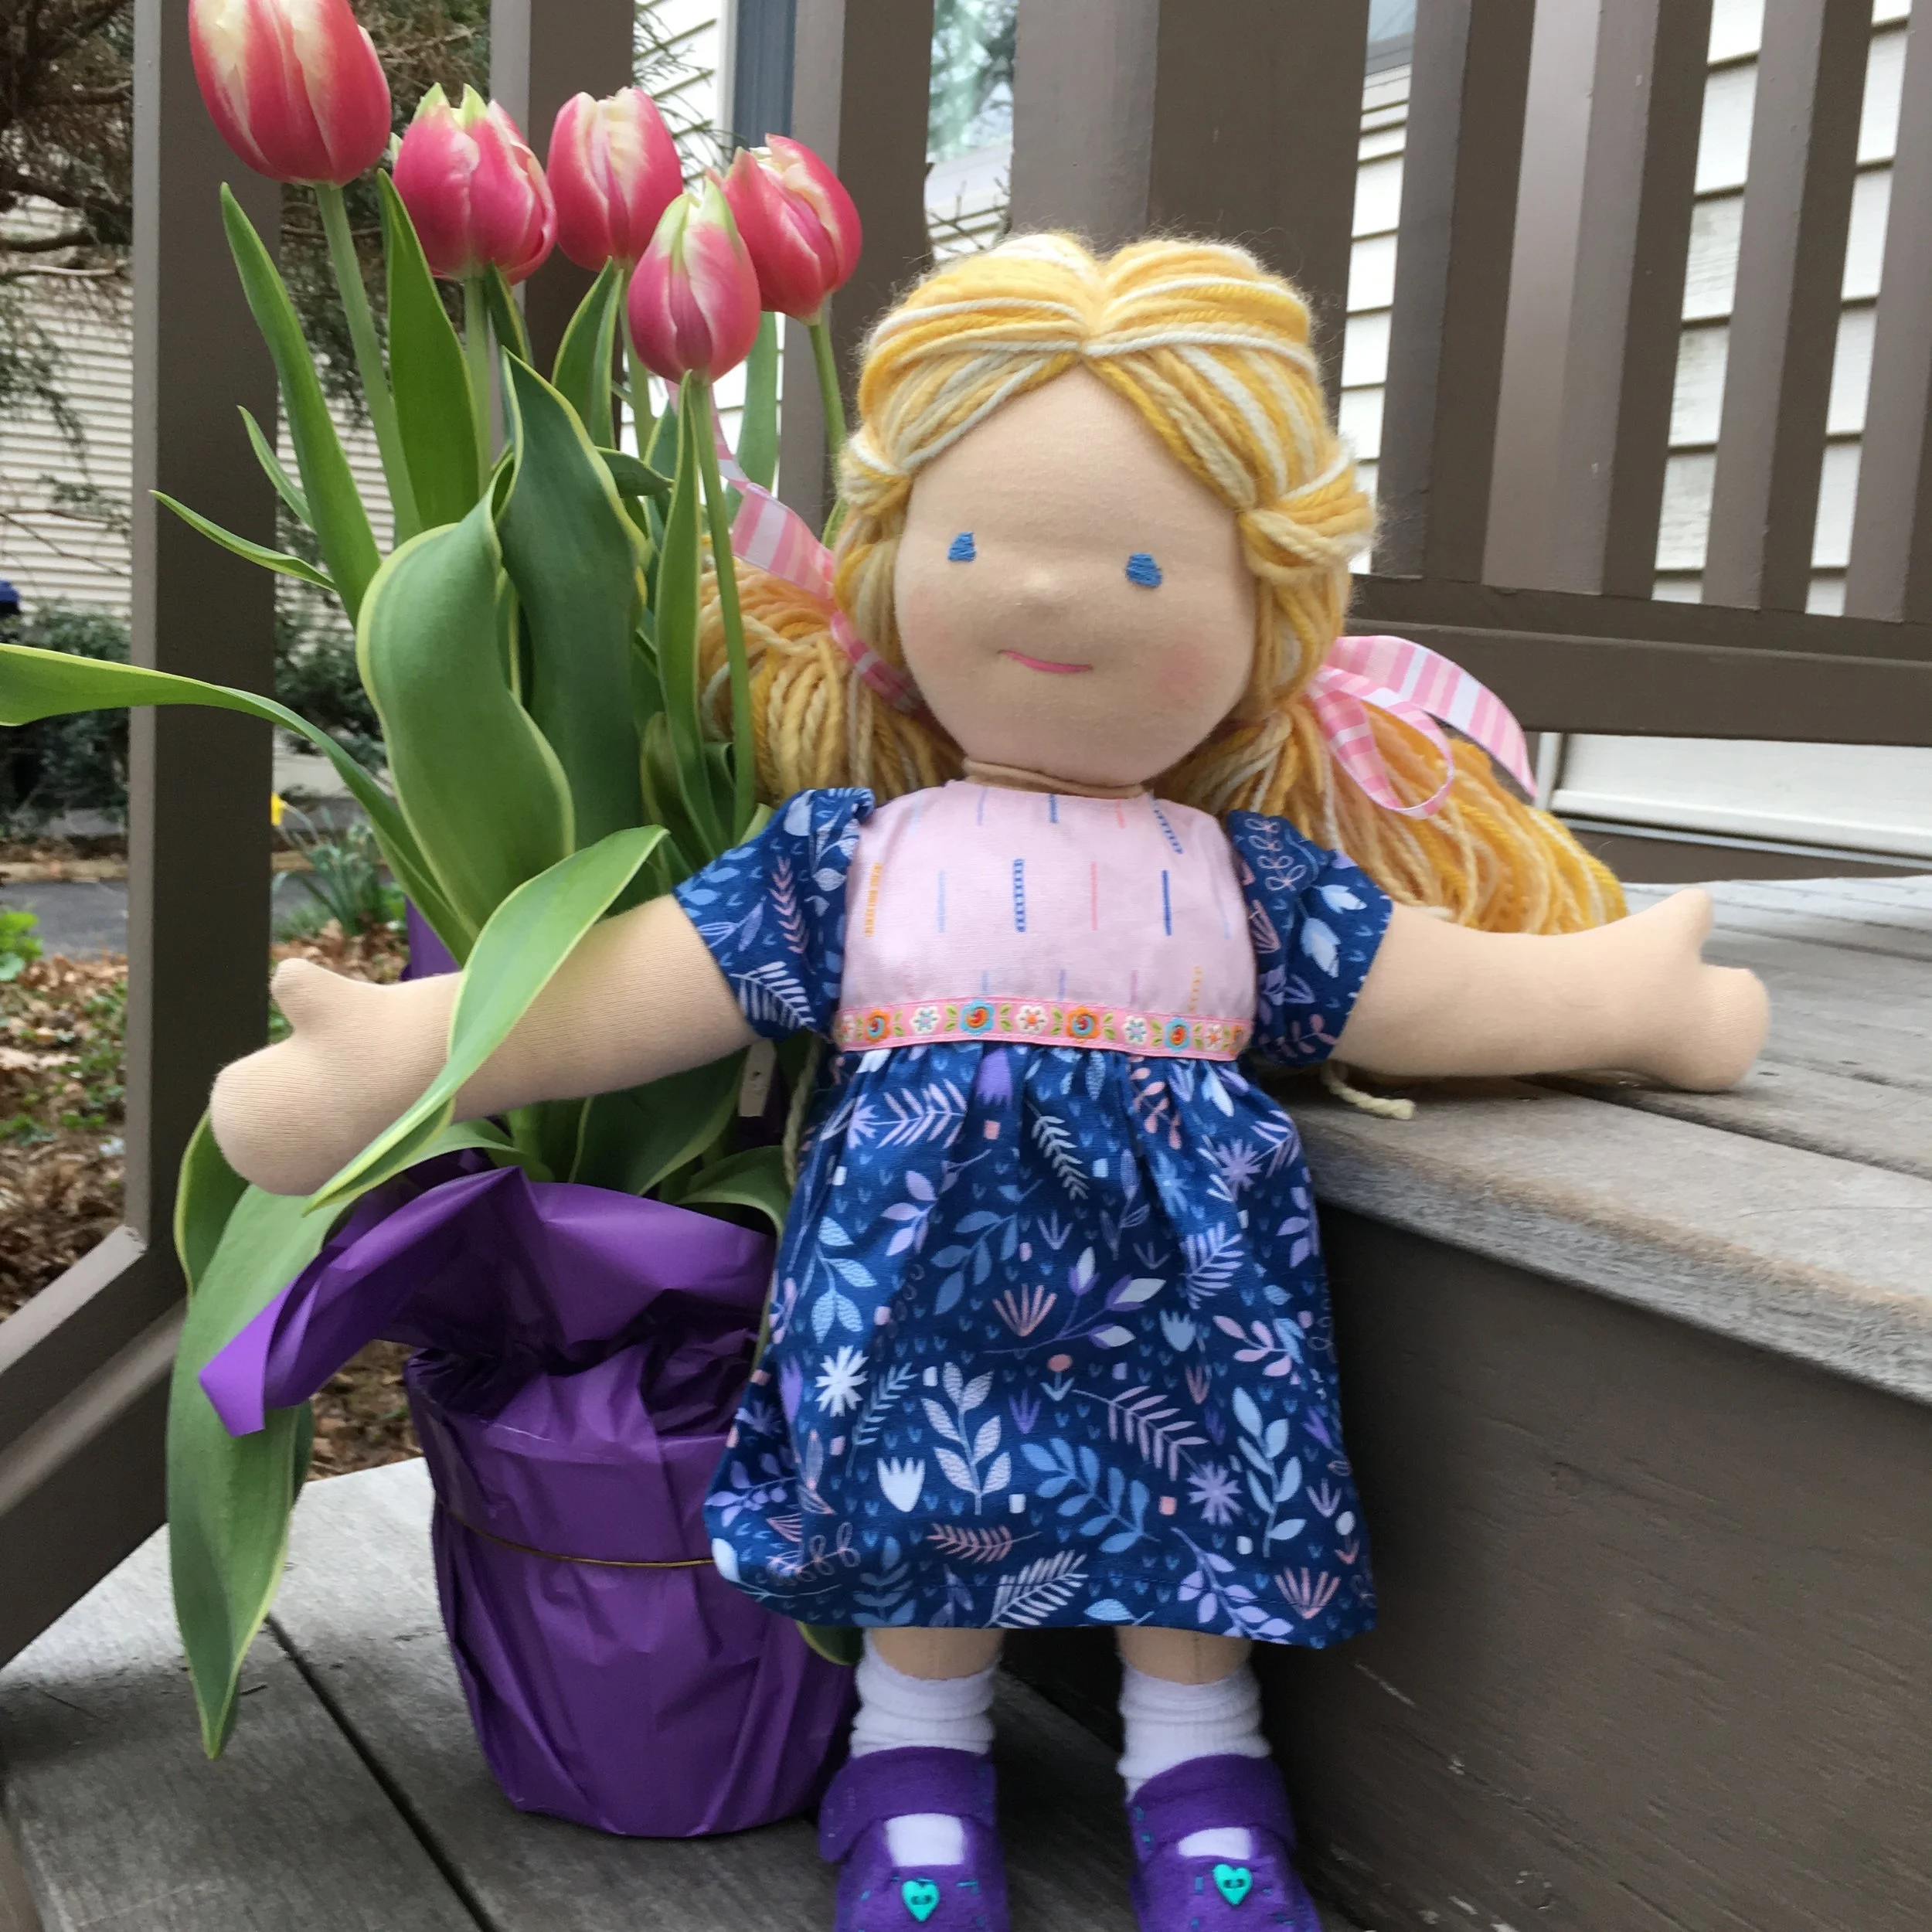
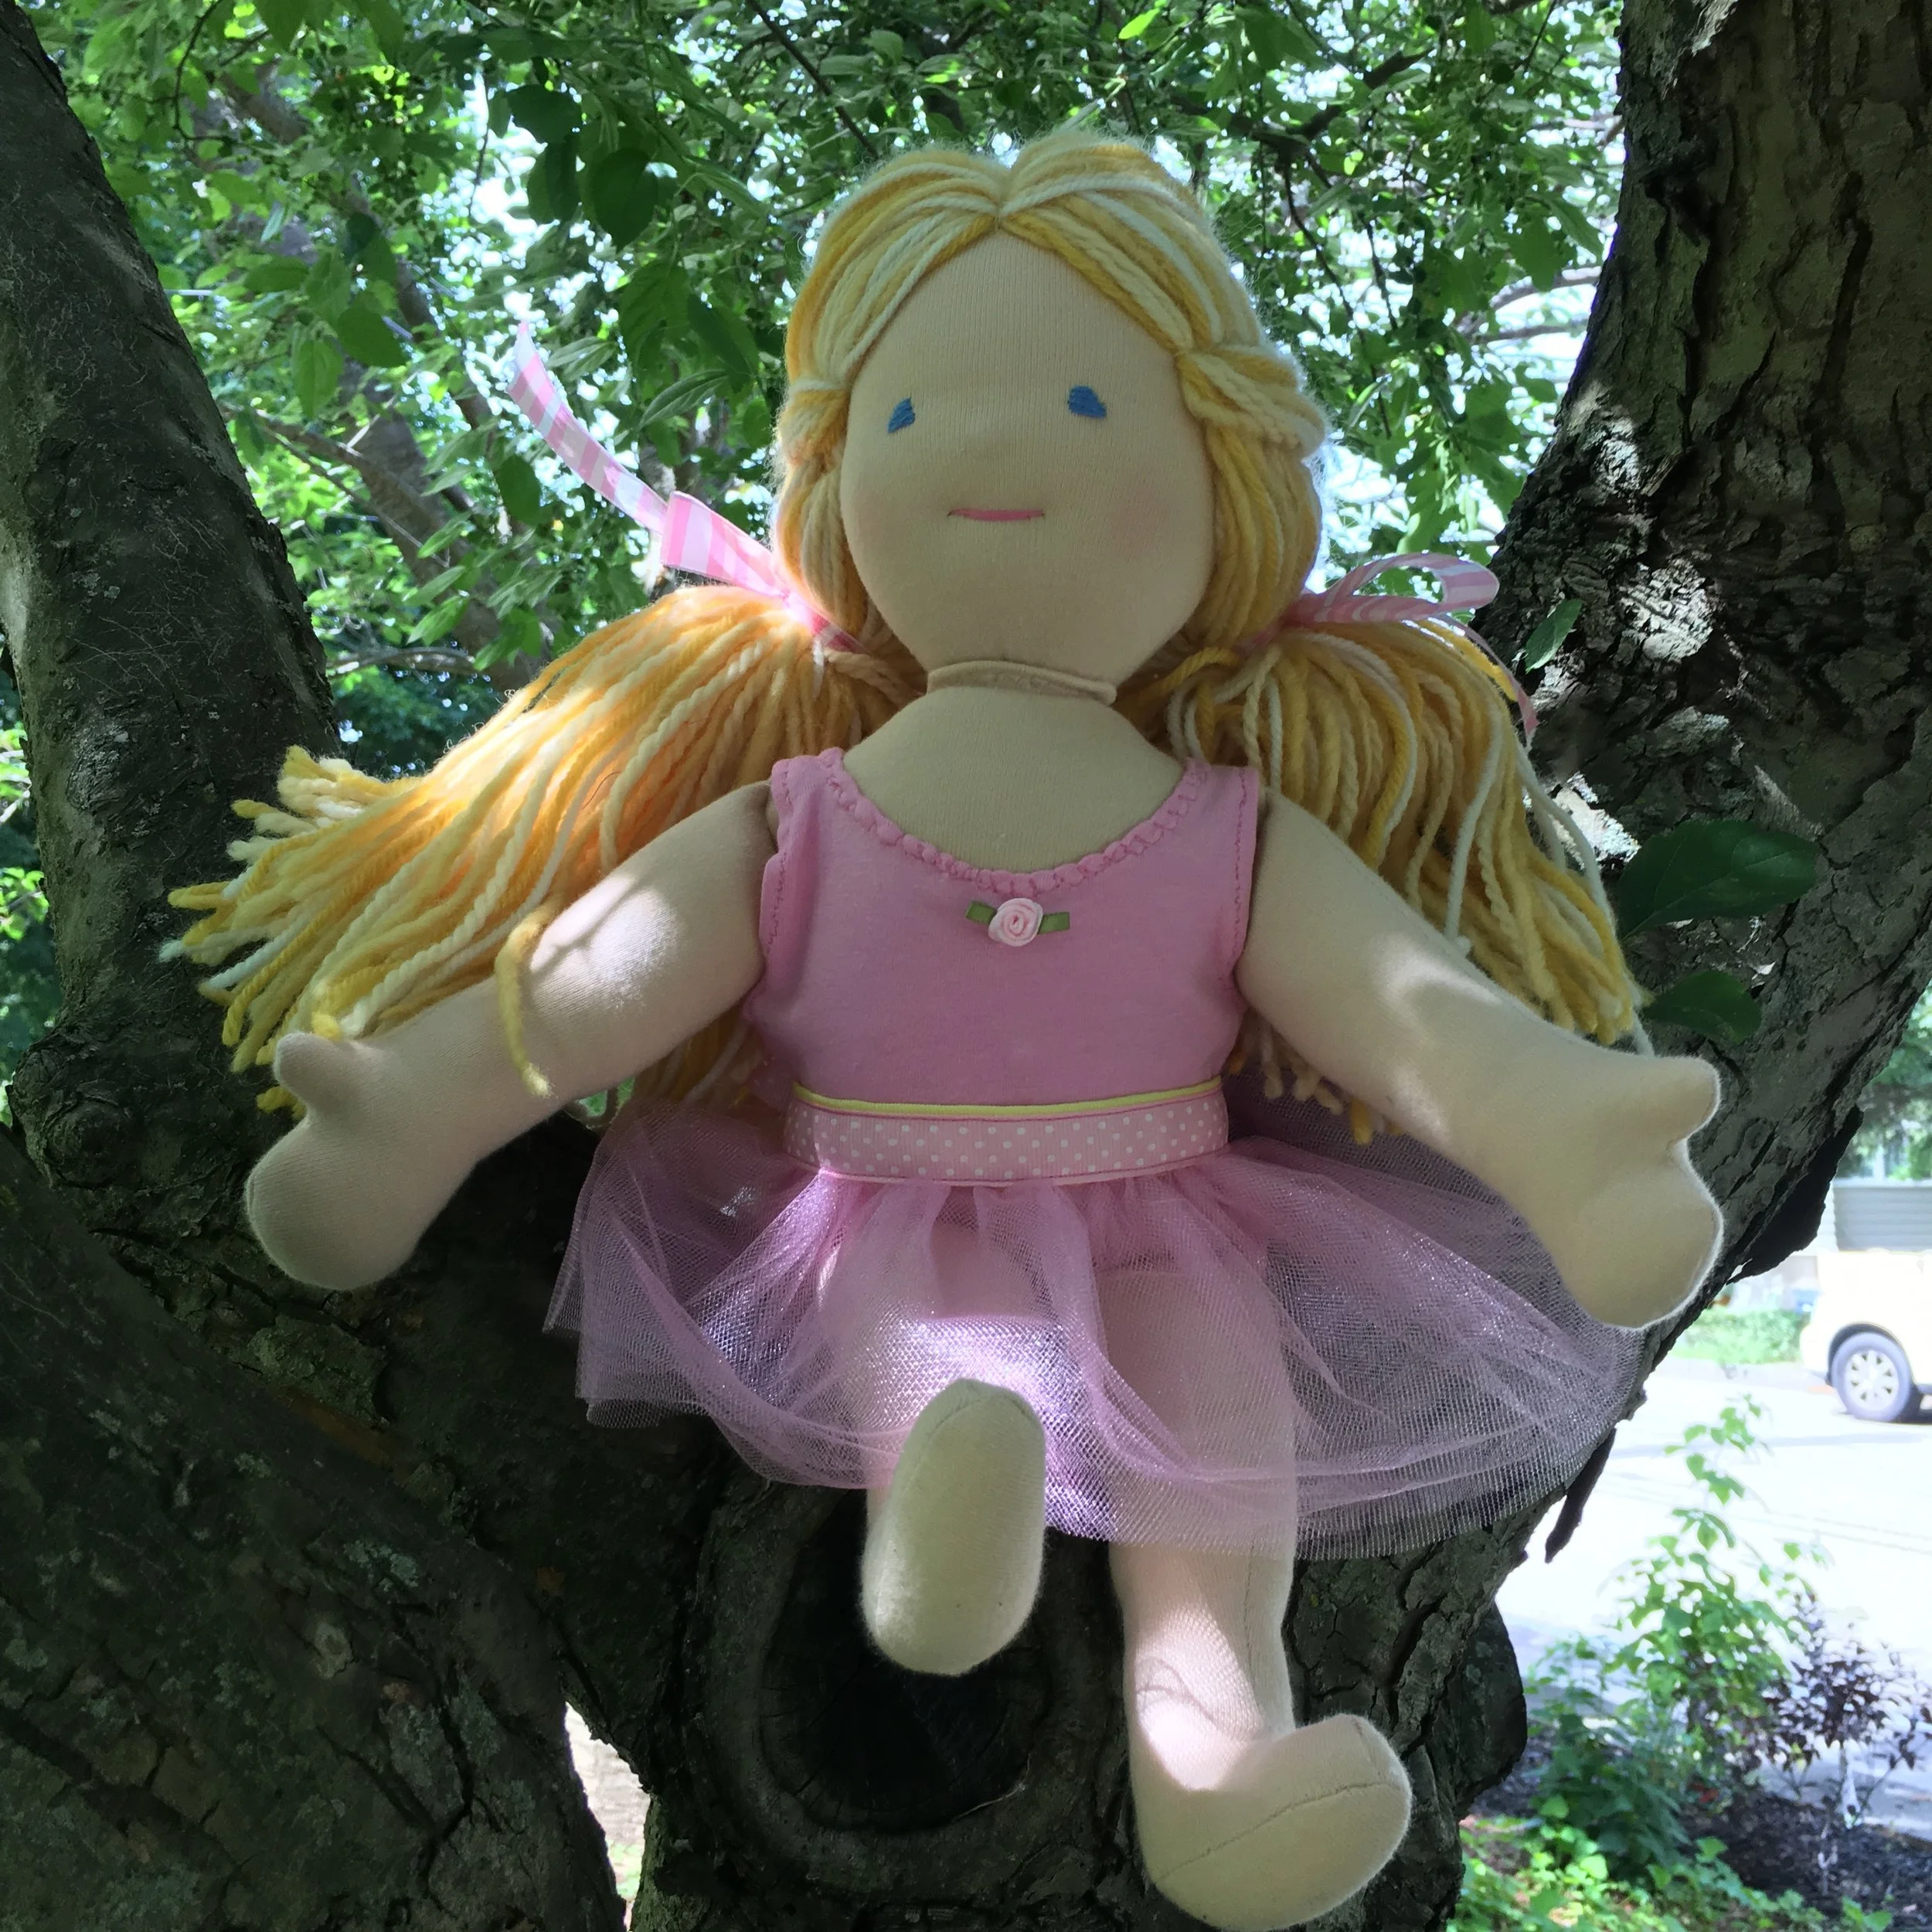
Fleece jacket (her new person has a matching hoodie!), Birthday Party dress, summer sundress, and summer shortie PJs! Her purple Mary Jane felt shoes are a new design for my dolls--my dolls usually get felt clogs.
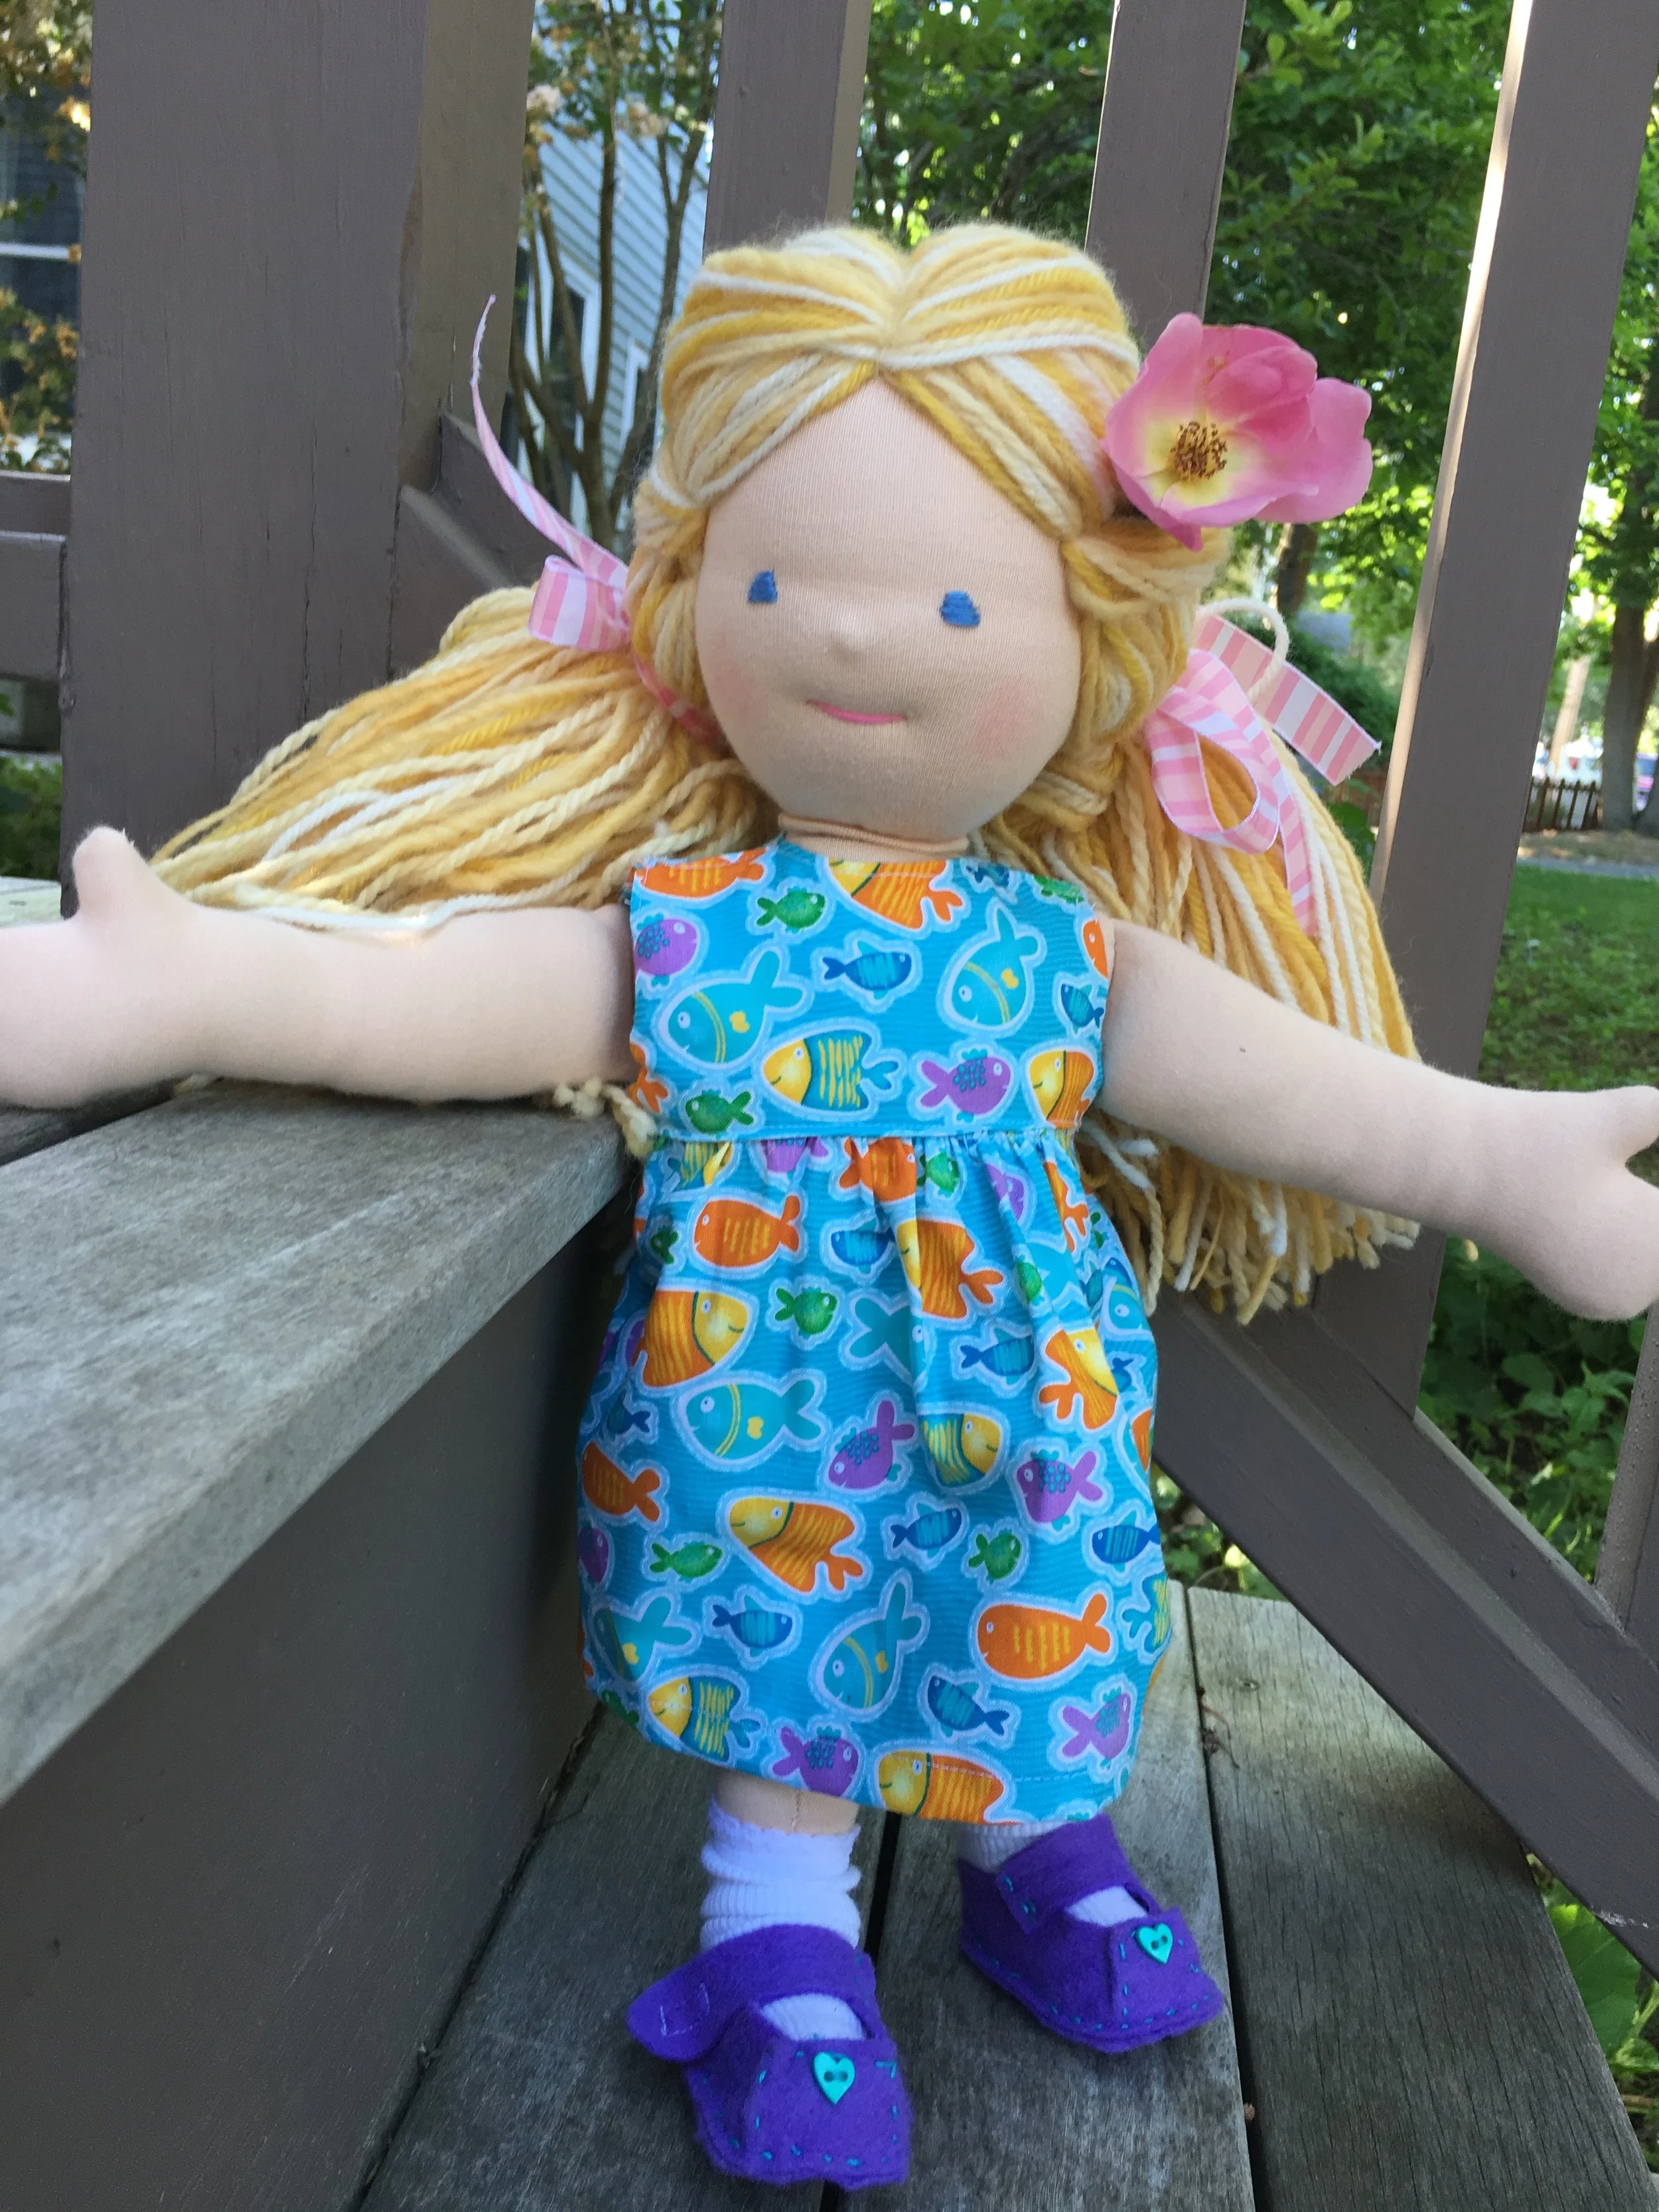

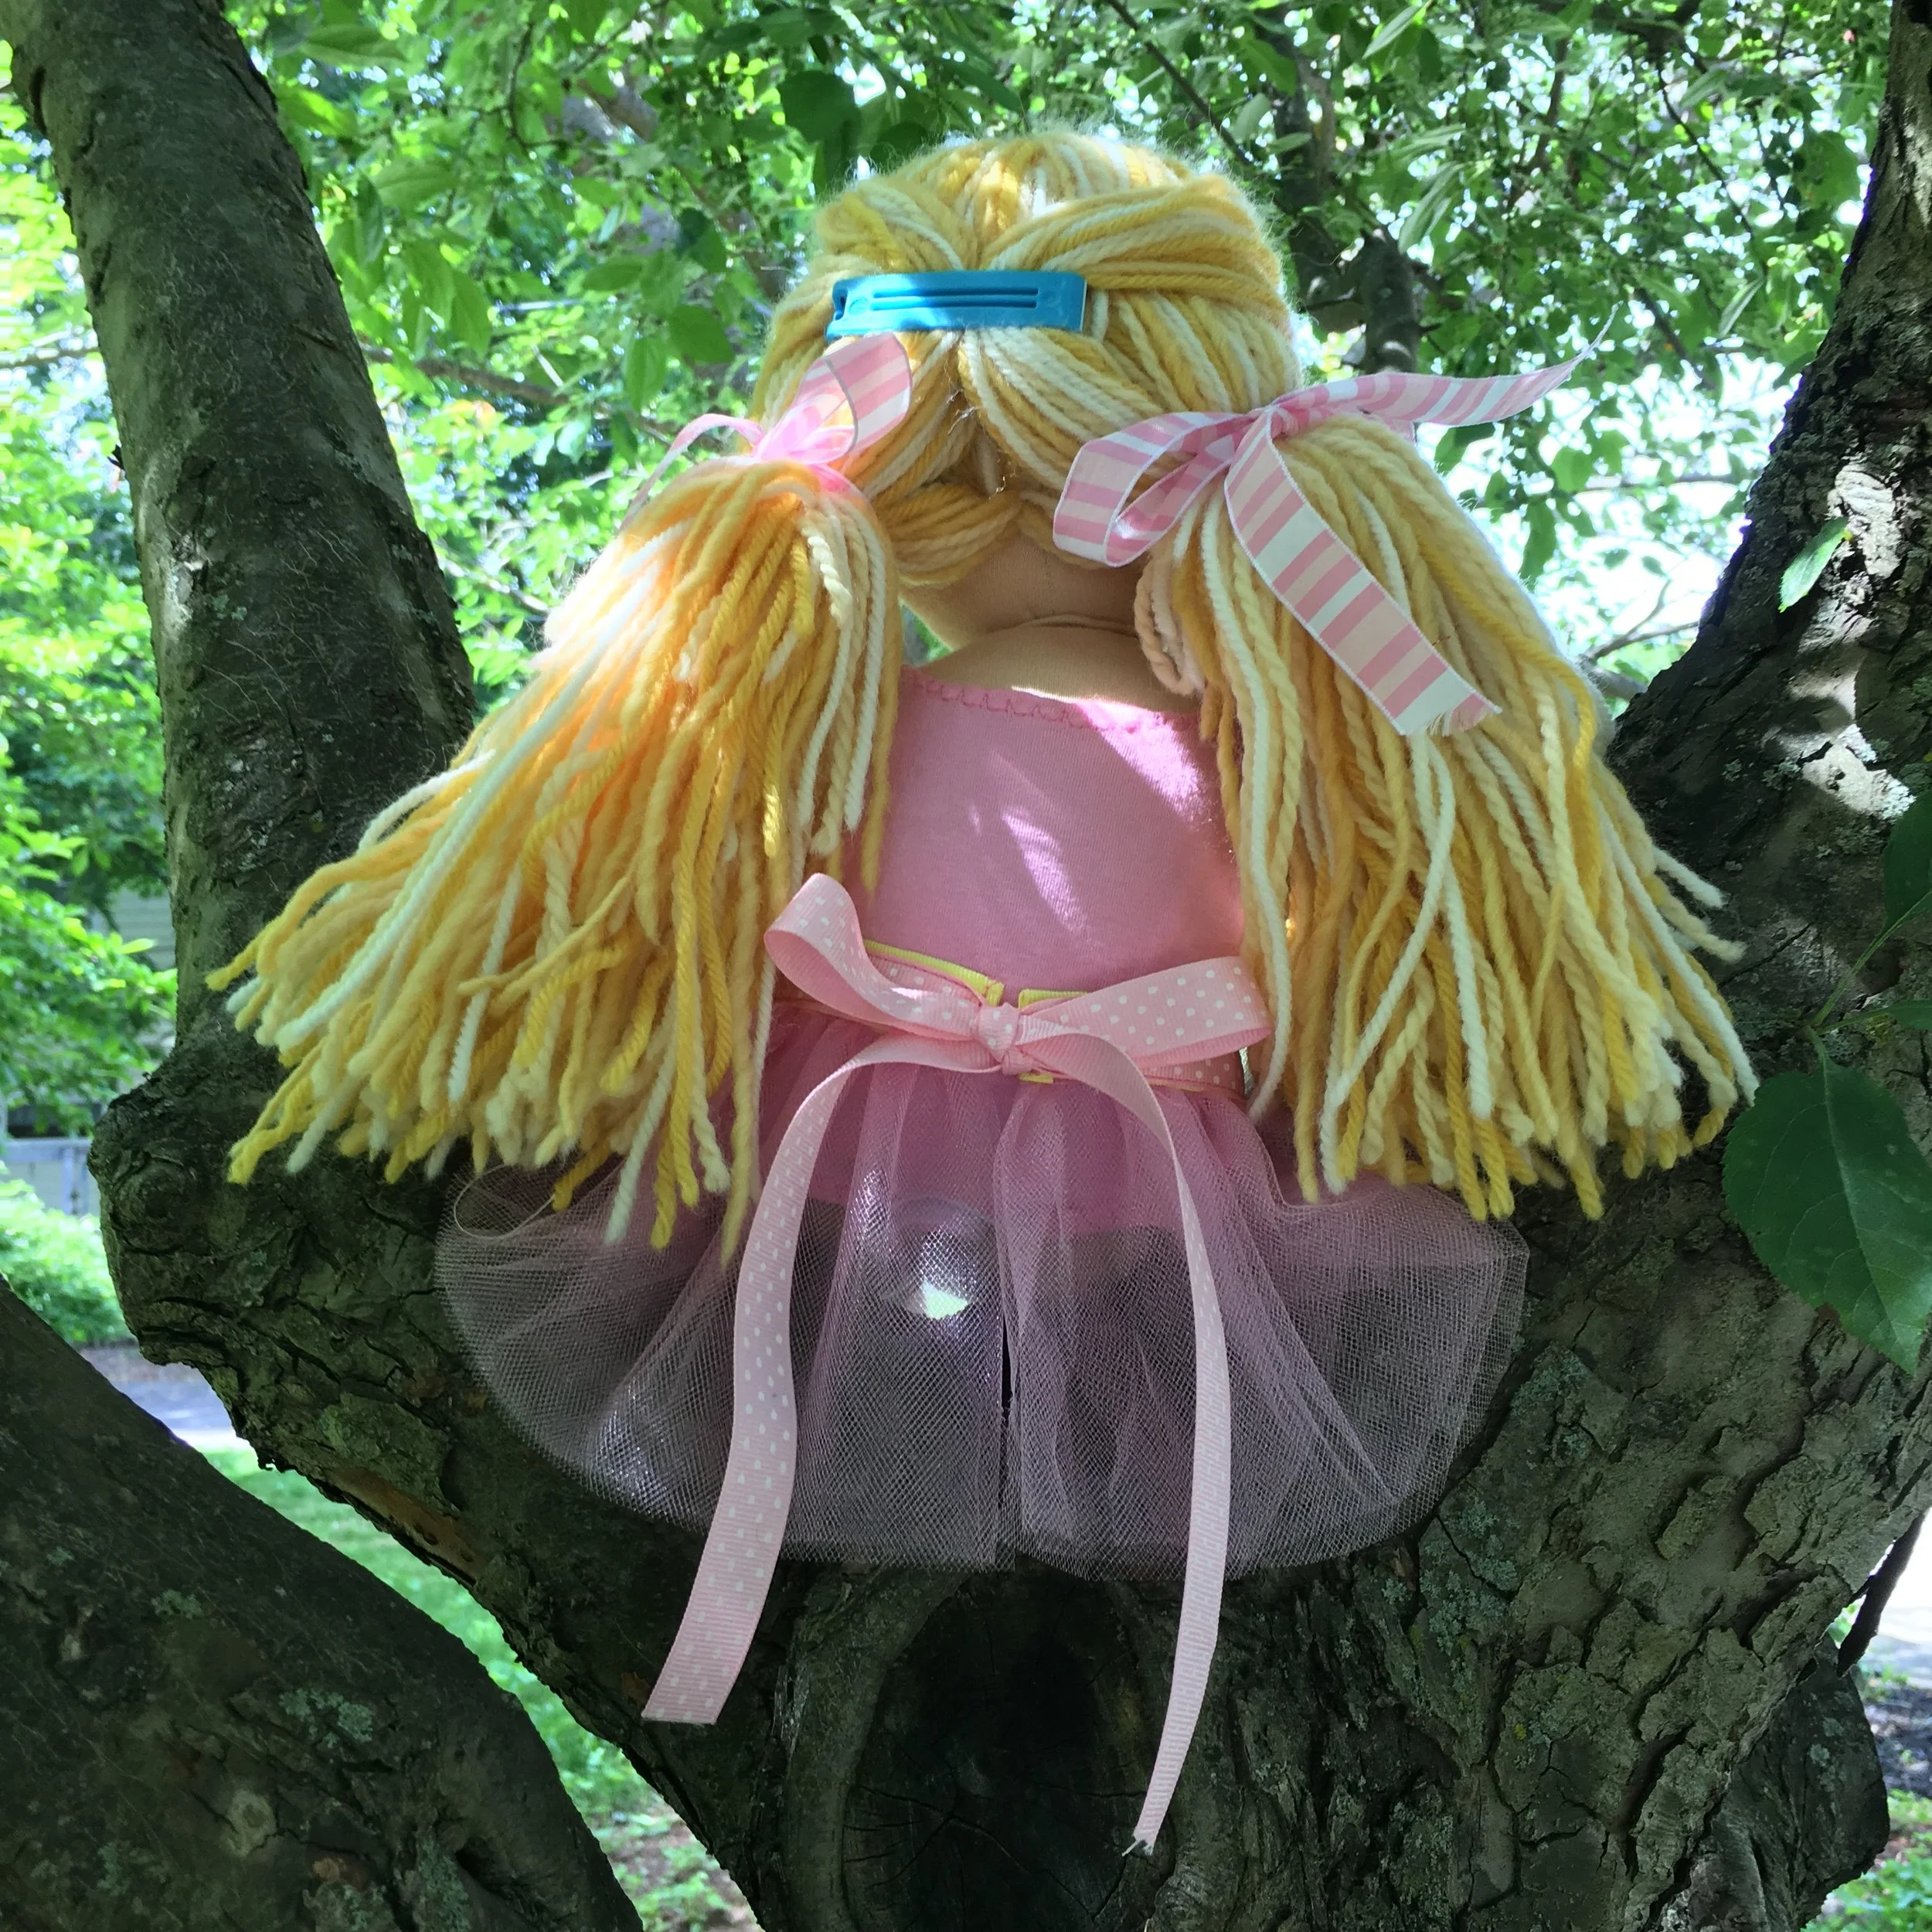
I used an IKEA® bag clip as a hair barrette figuring it might be easier for young fingers and less likely a risk for accidentally swallowing!

I so hope this doll will be our family's little cutie's new BFF!

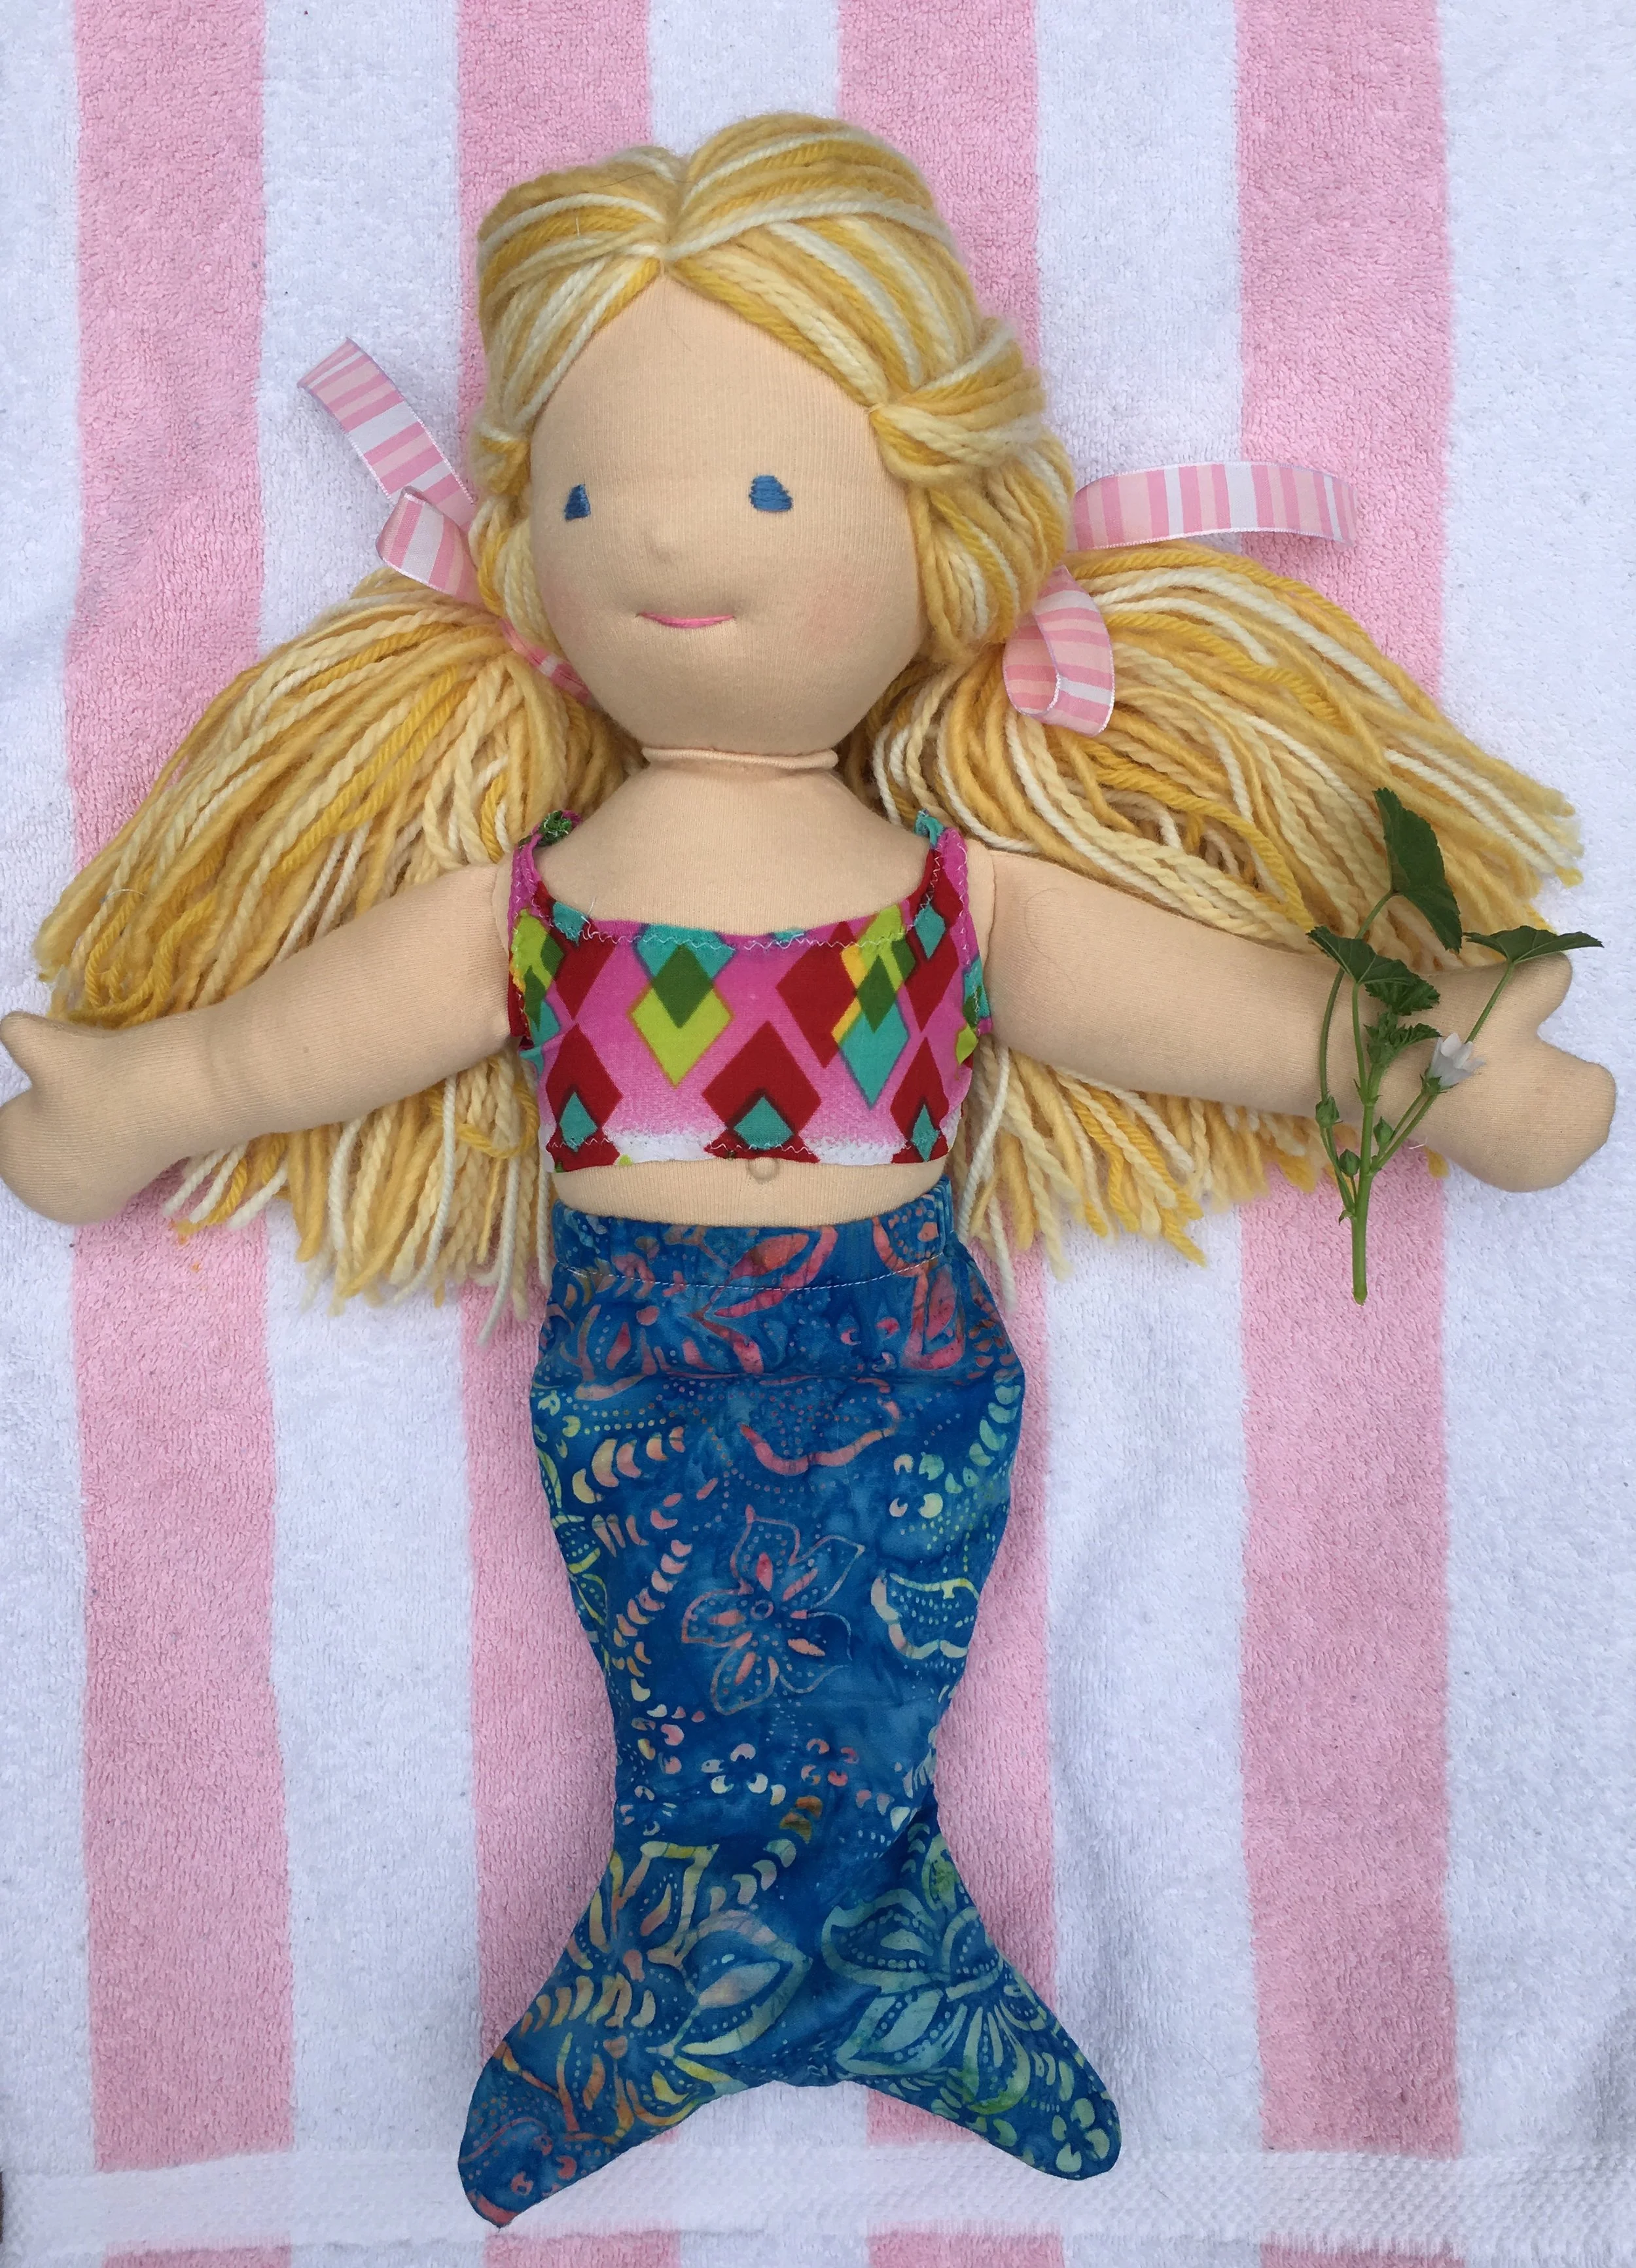
Here are two more outfits...Shhhh...These are still "secret sewing"! But they were just too cute not to photograph while I still had to doll to model them! (That's a pull-on set of mermaid fins in the lower left photo)!
Analogous Color Studies

Analogous Color Study--Blue Green, Green and Yellow Green
Analogous Color Study--Blue Green, Green and Yellow Green
This is the Summer of Analogous Colors! The Proper Bostonian Quilter's guild's Summer Challenge is to make a quilt (or just a one block slab) using 3-5 analogous colors on the color wheels. (Analogous colors are right next to each other on the color wheel, holding hands as it were). Using shades (the color plus black) and tints (the color plus white) are allowed but even so, sticking to just these 3-5 colors is a lot harder to do than it sounds. The brain really wants to add an accent color!
It was my job to present this year's Summer Challenge so I had to make up some blocks to see if this was even feasible!
Above are blocks with just 3 analogous colors--the most limiting, and therefore, the hardest to do. The colors are Blue Green, Green and Yellow Green. The yellow green grated on my nerves initially. But by the time I'd made about 5 blocks, I was able to let the yellow green have center stage instead of a tiny role in the background!
Here is another example using Yellow, Yellow Orange, Orange and Red Orange, 4 analogous colors. This combination was a lot easier. Probably because these are the colors of citrus fruits which we see together all the time!
More analogous color studies will appear intermittently this summer! Give this a try! It's a lot of fun.
Tutorial: Cut-and-Sew Mermaid Skirt for a Child and a Doll Skirt

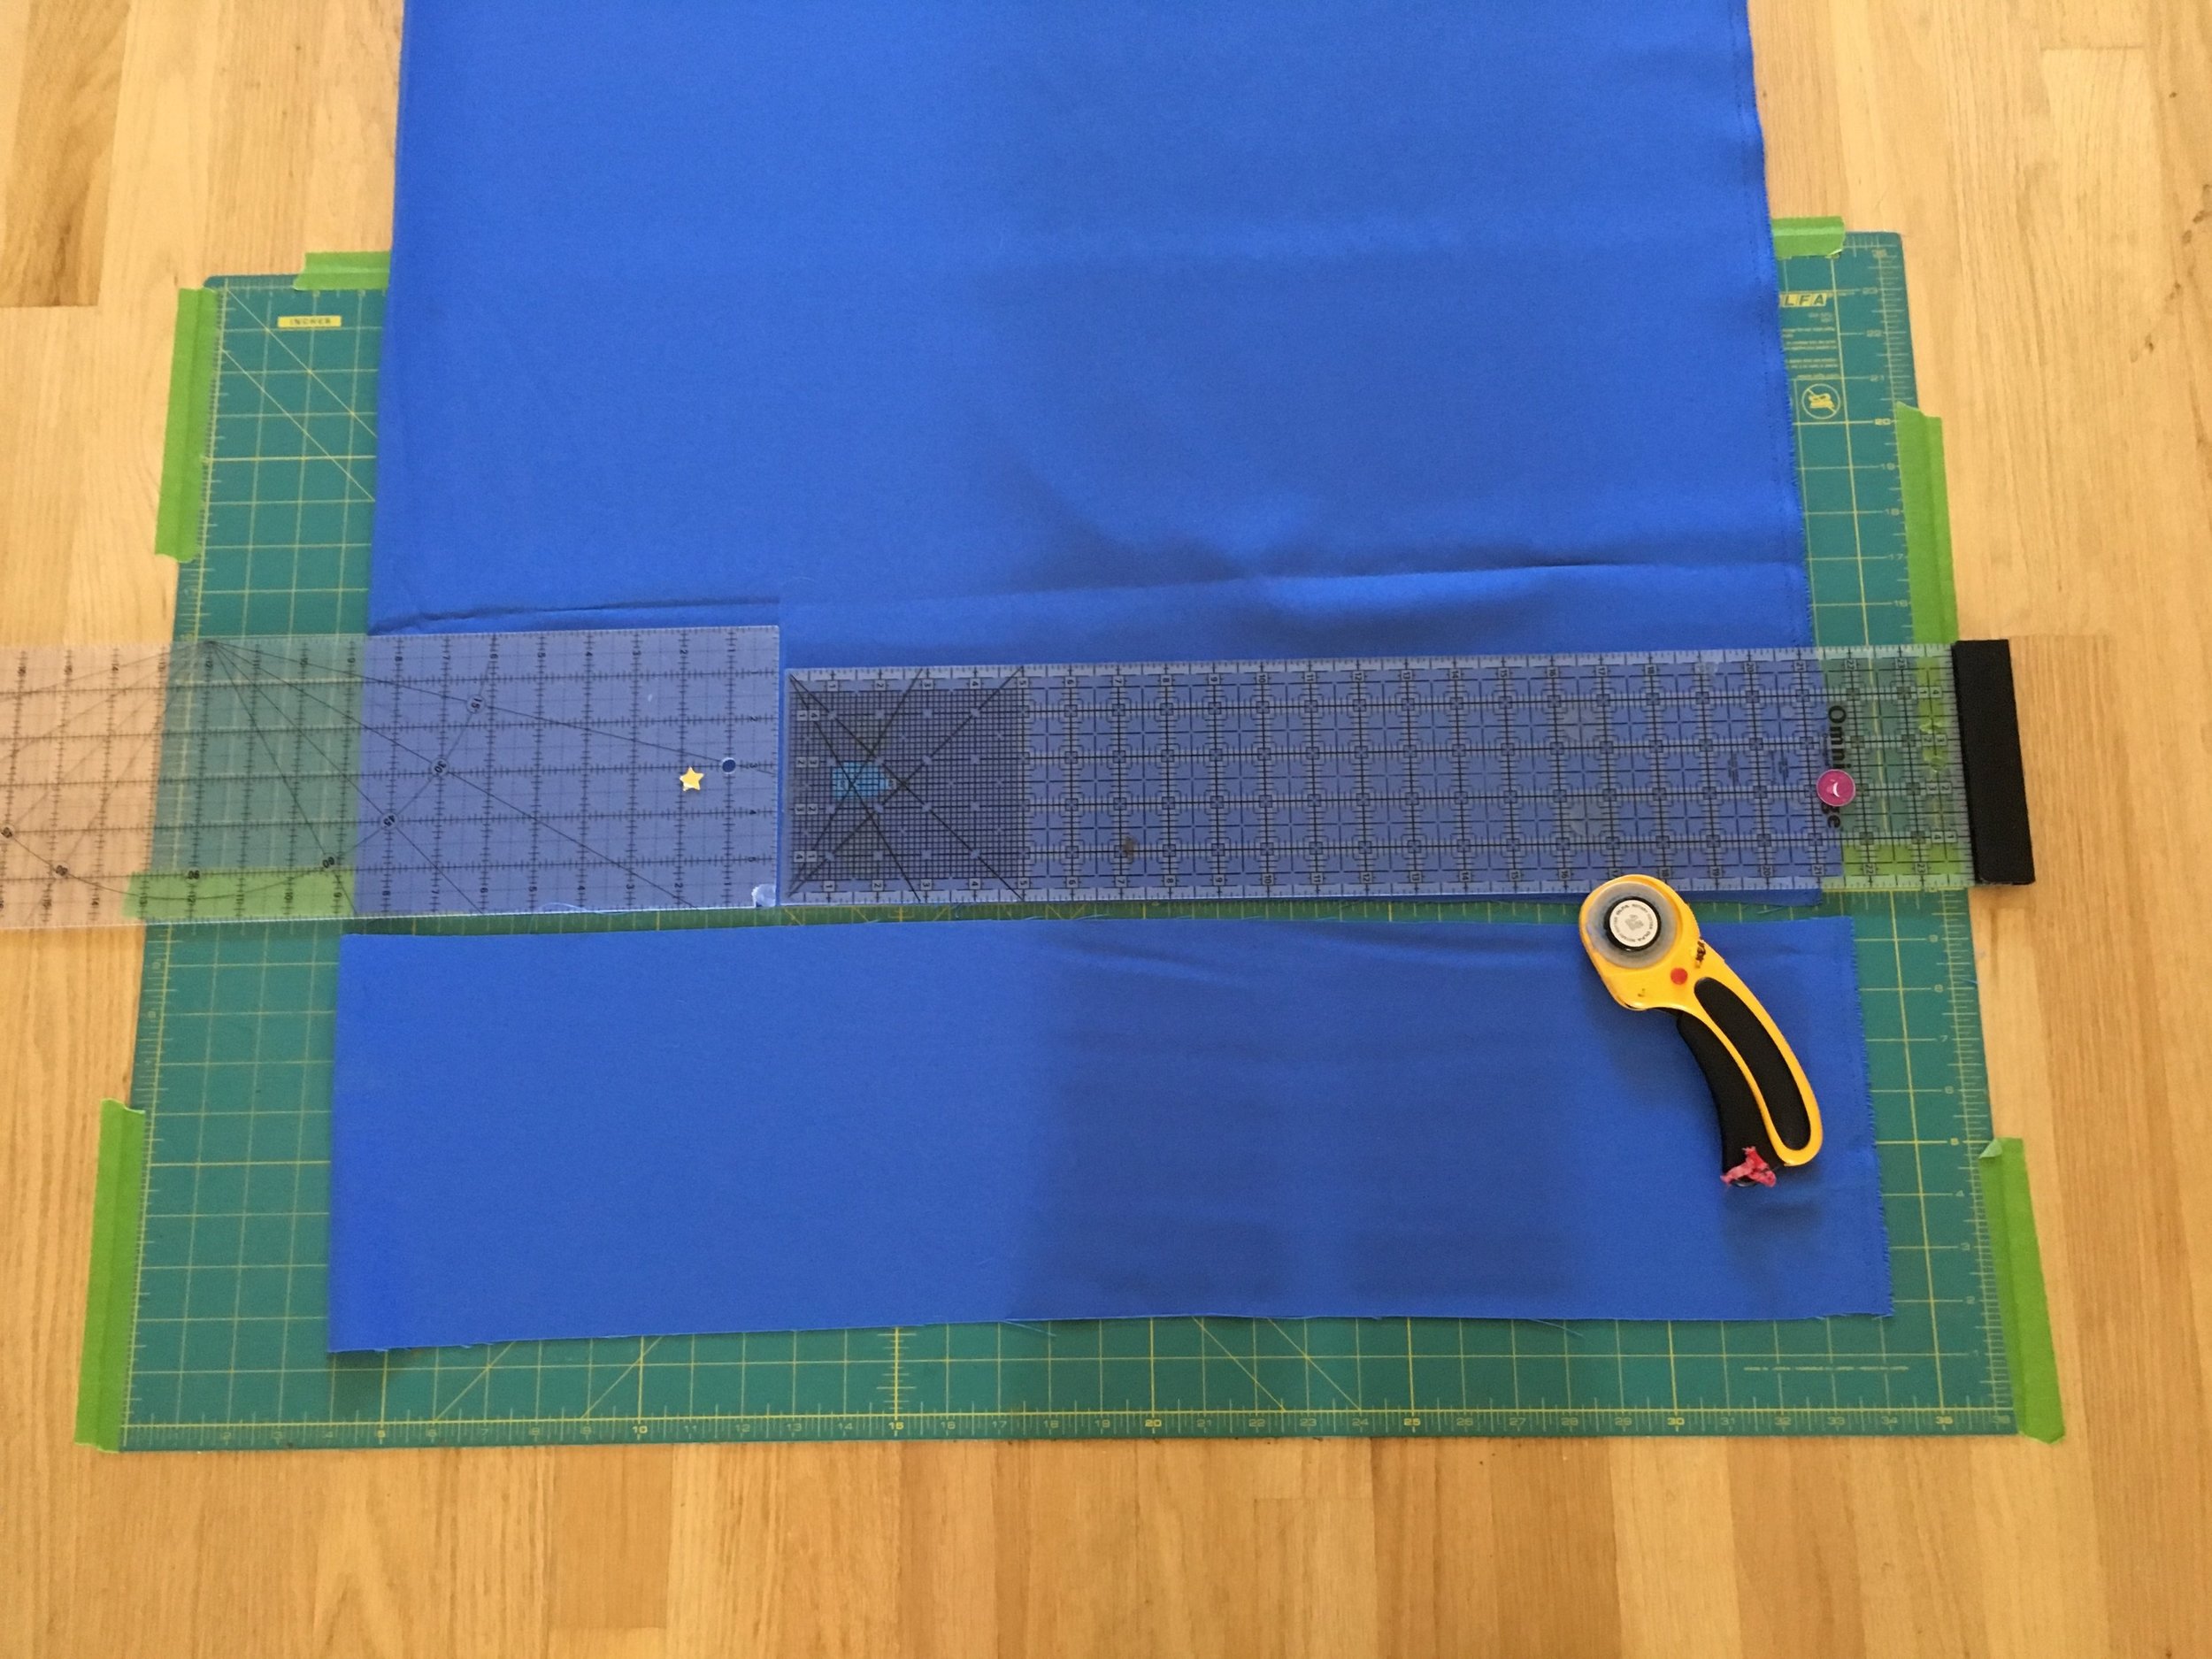
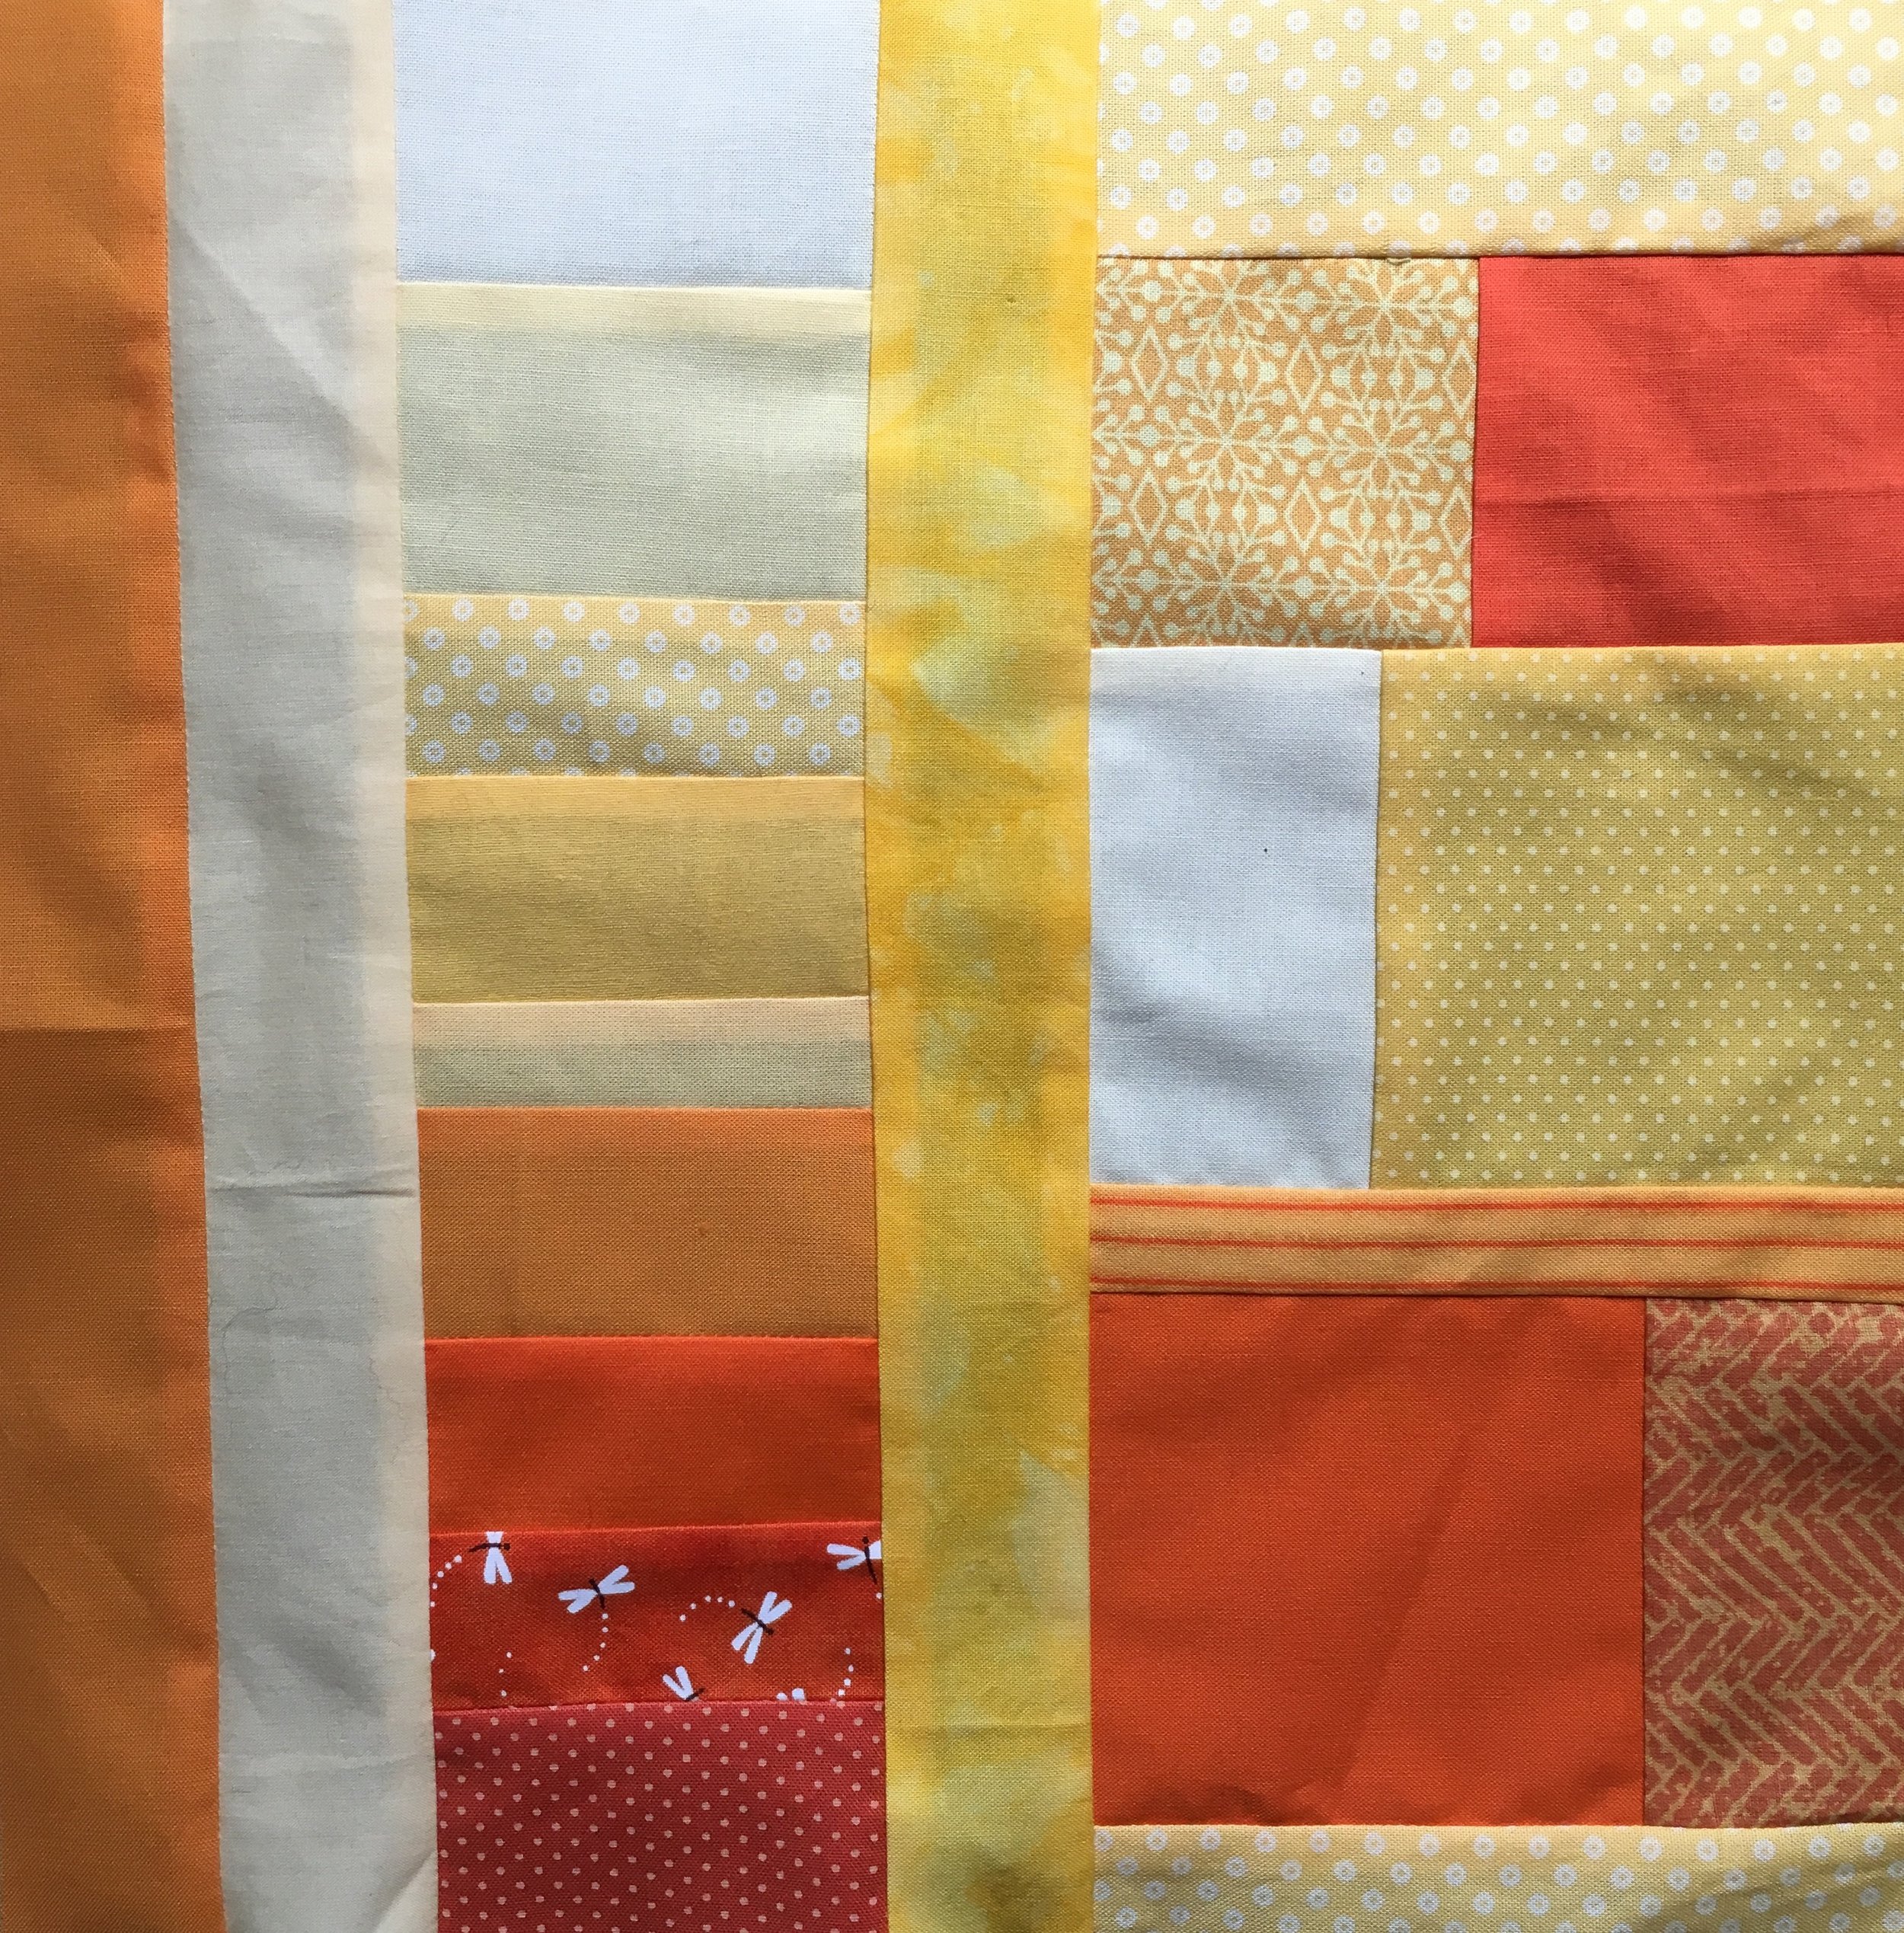
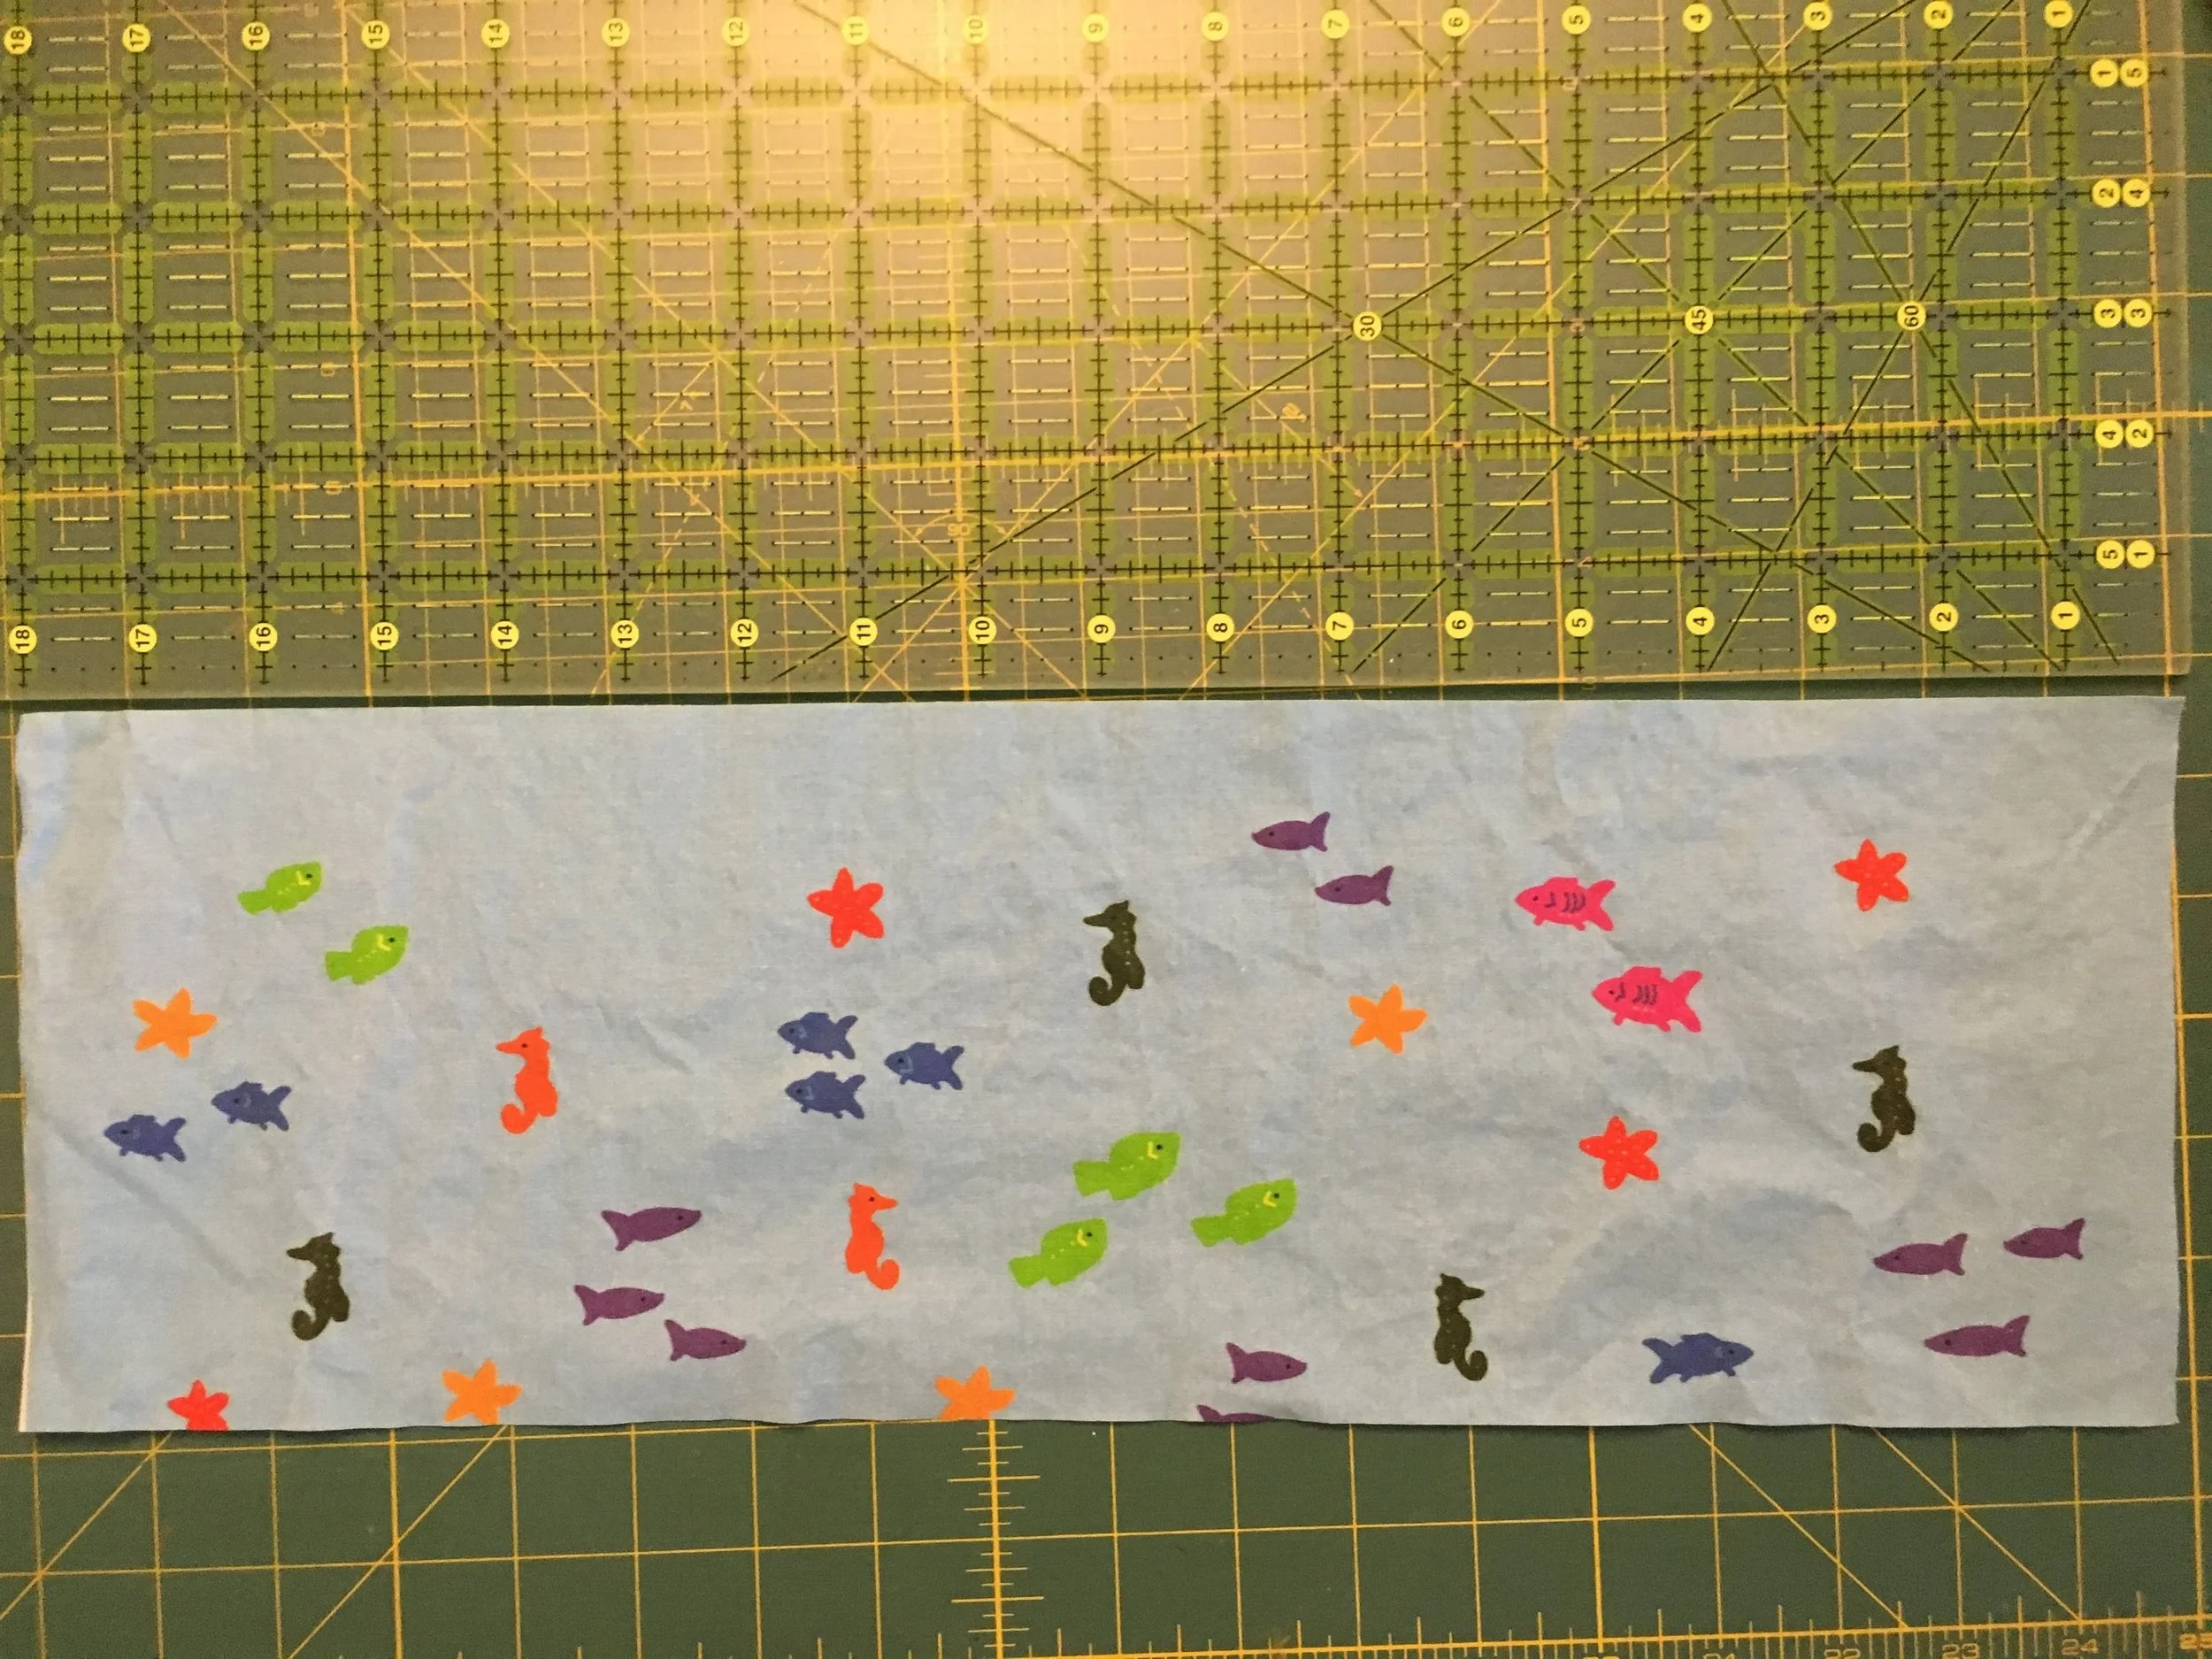
Mermaid Panel for the Child's Skirt
Mermaid Panel for the Child's Skirt
In my last post, I showed a child's Mermaid skirt and a Doll's coordinating fish skirt made from the Mermaid Skirt Cut-and-Sew Panel I designed that is for sale at Spoonflower.com.
Instructions for sewing the skirts are printed on the panel. Here is a short tutorial to show the steps of making the skirt.
NOTE: This design works best for children ages 4 to 10. It can be made as small as a 3T size (maybe a 2T if you cut off the sandy bottom) and as large as a Child's size 12. The smaller sizes will have quite full skirts and the larger sizes will less full.
Supplies:
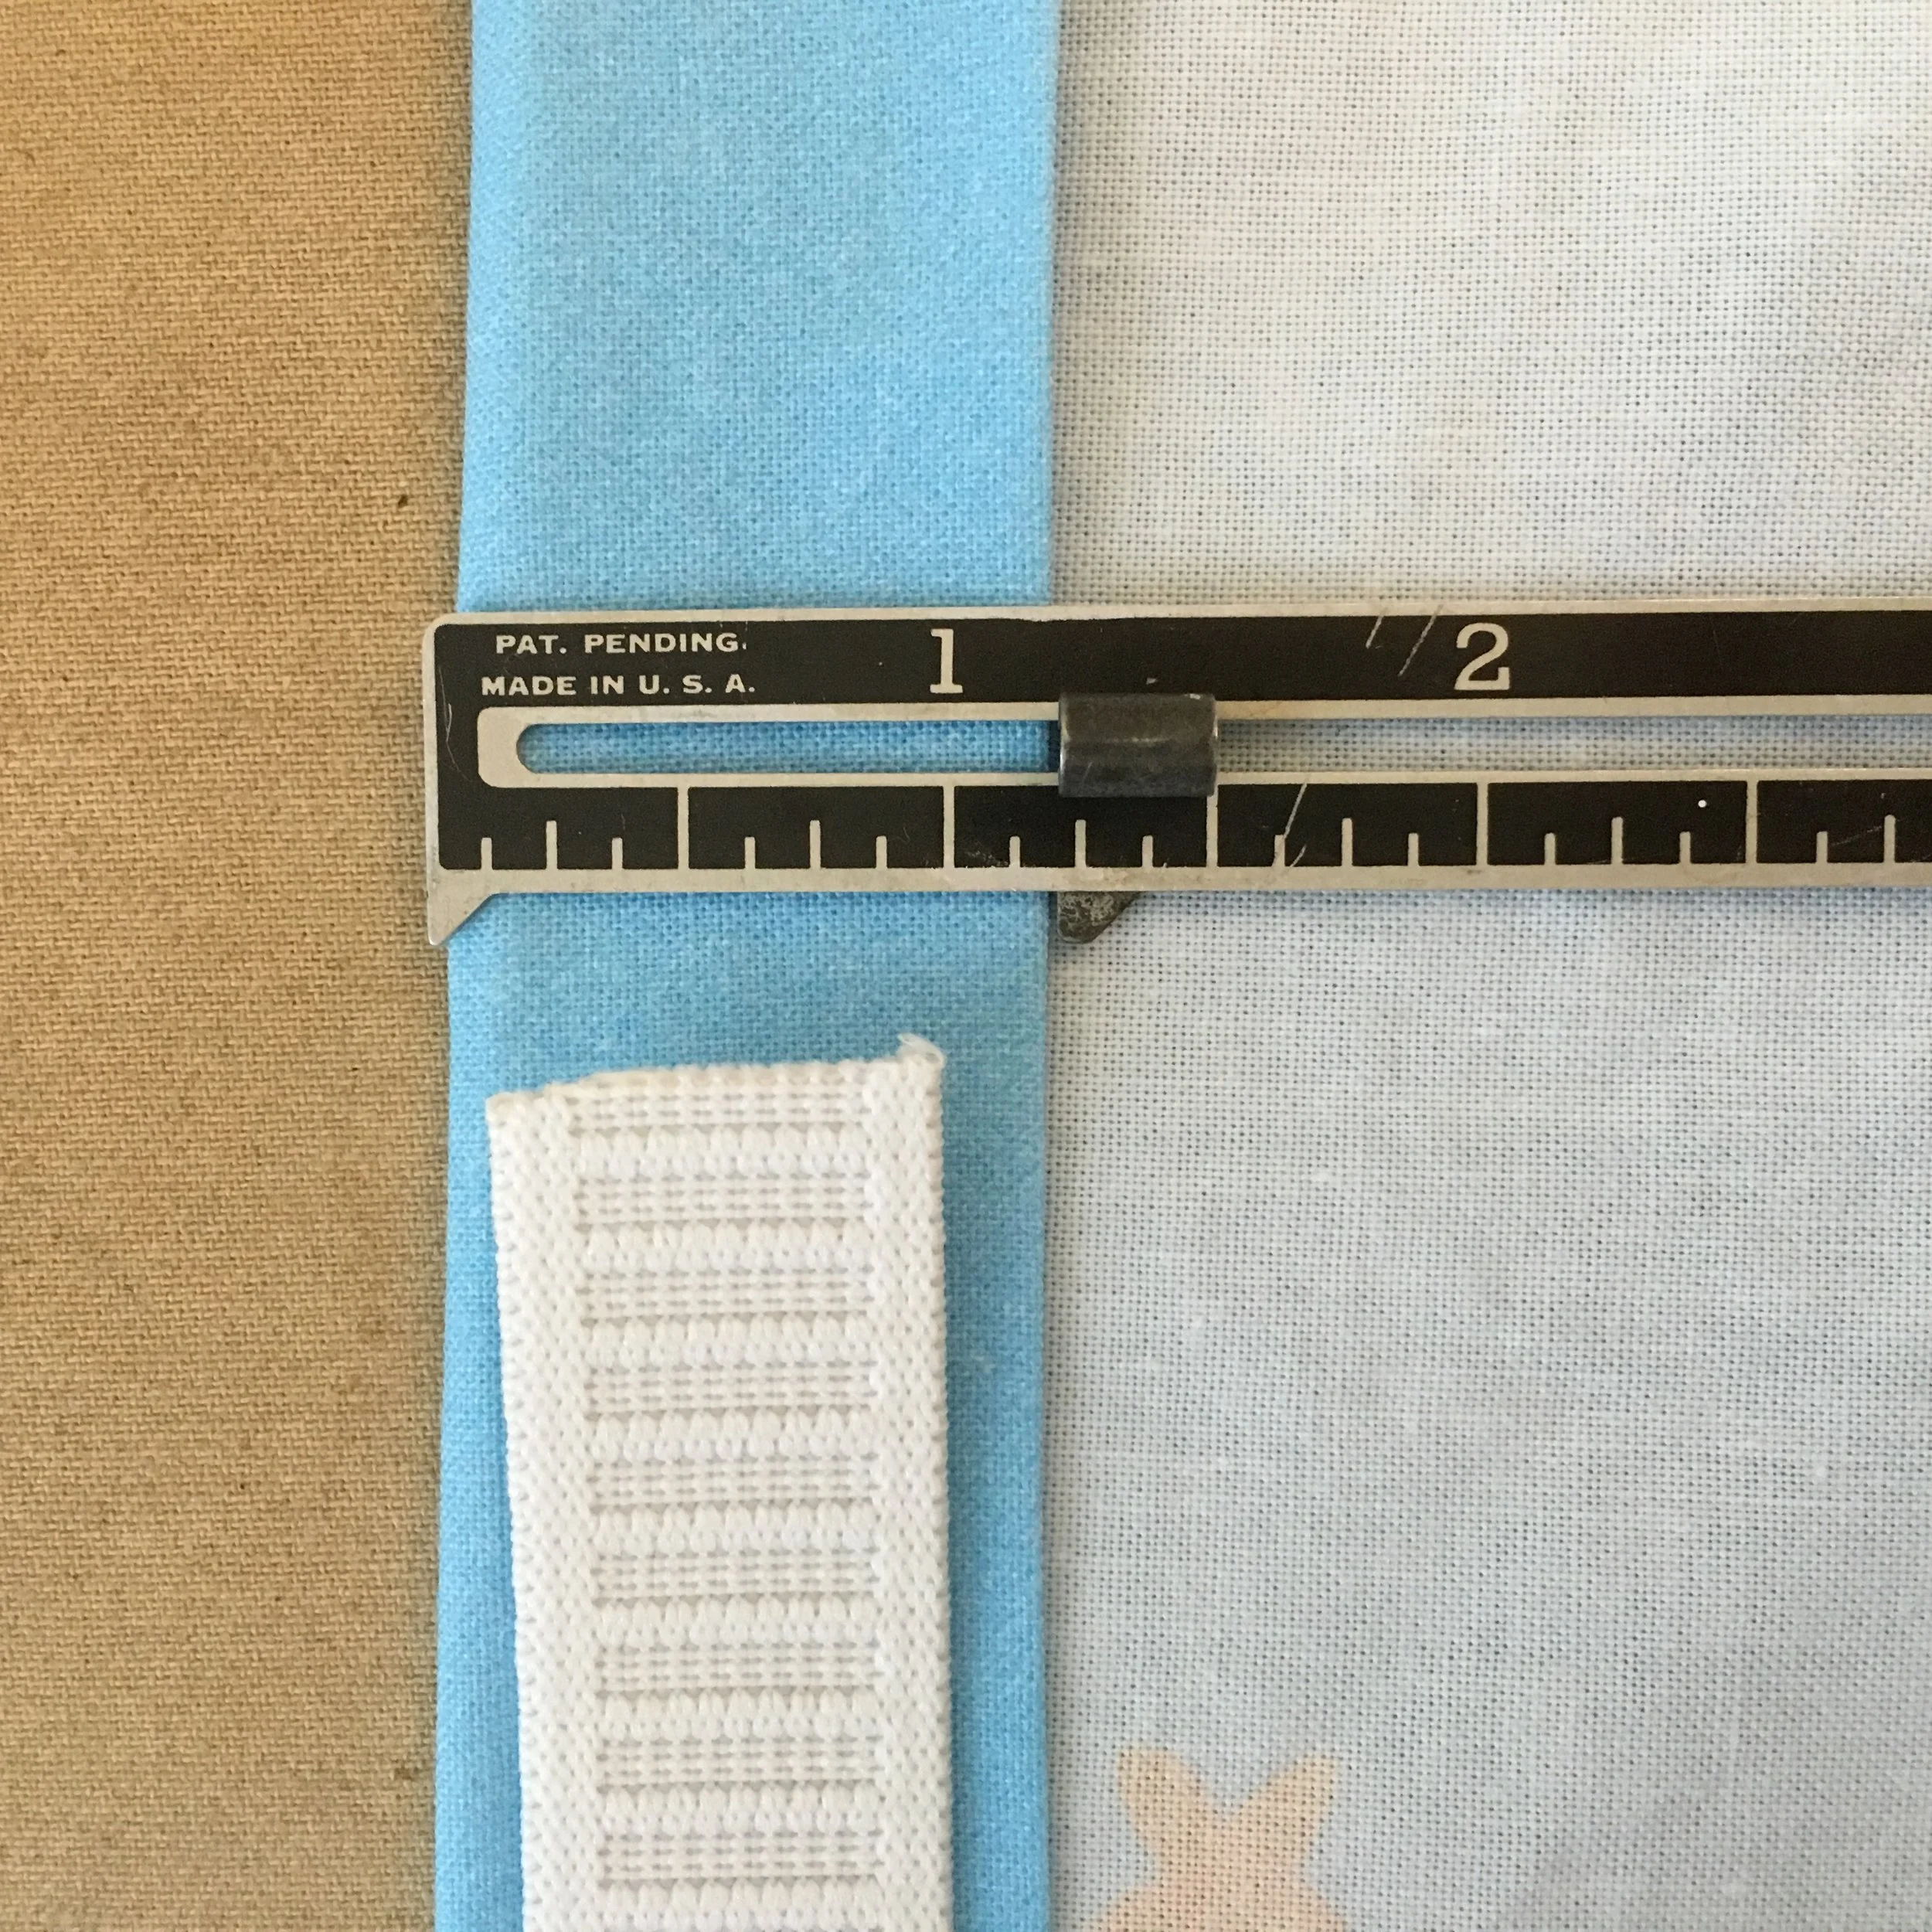
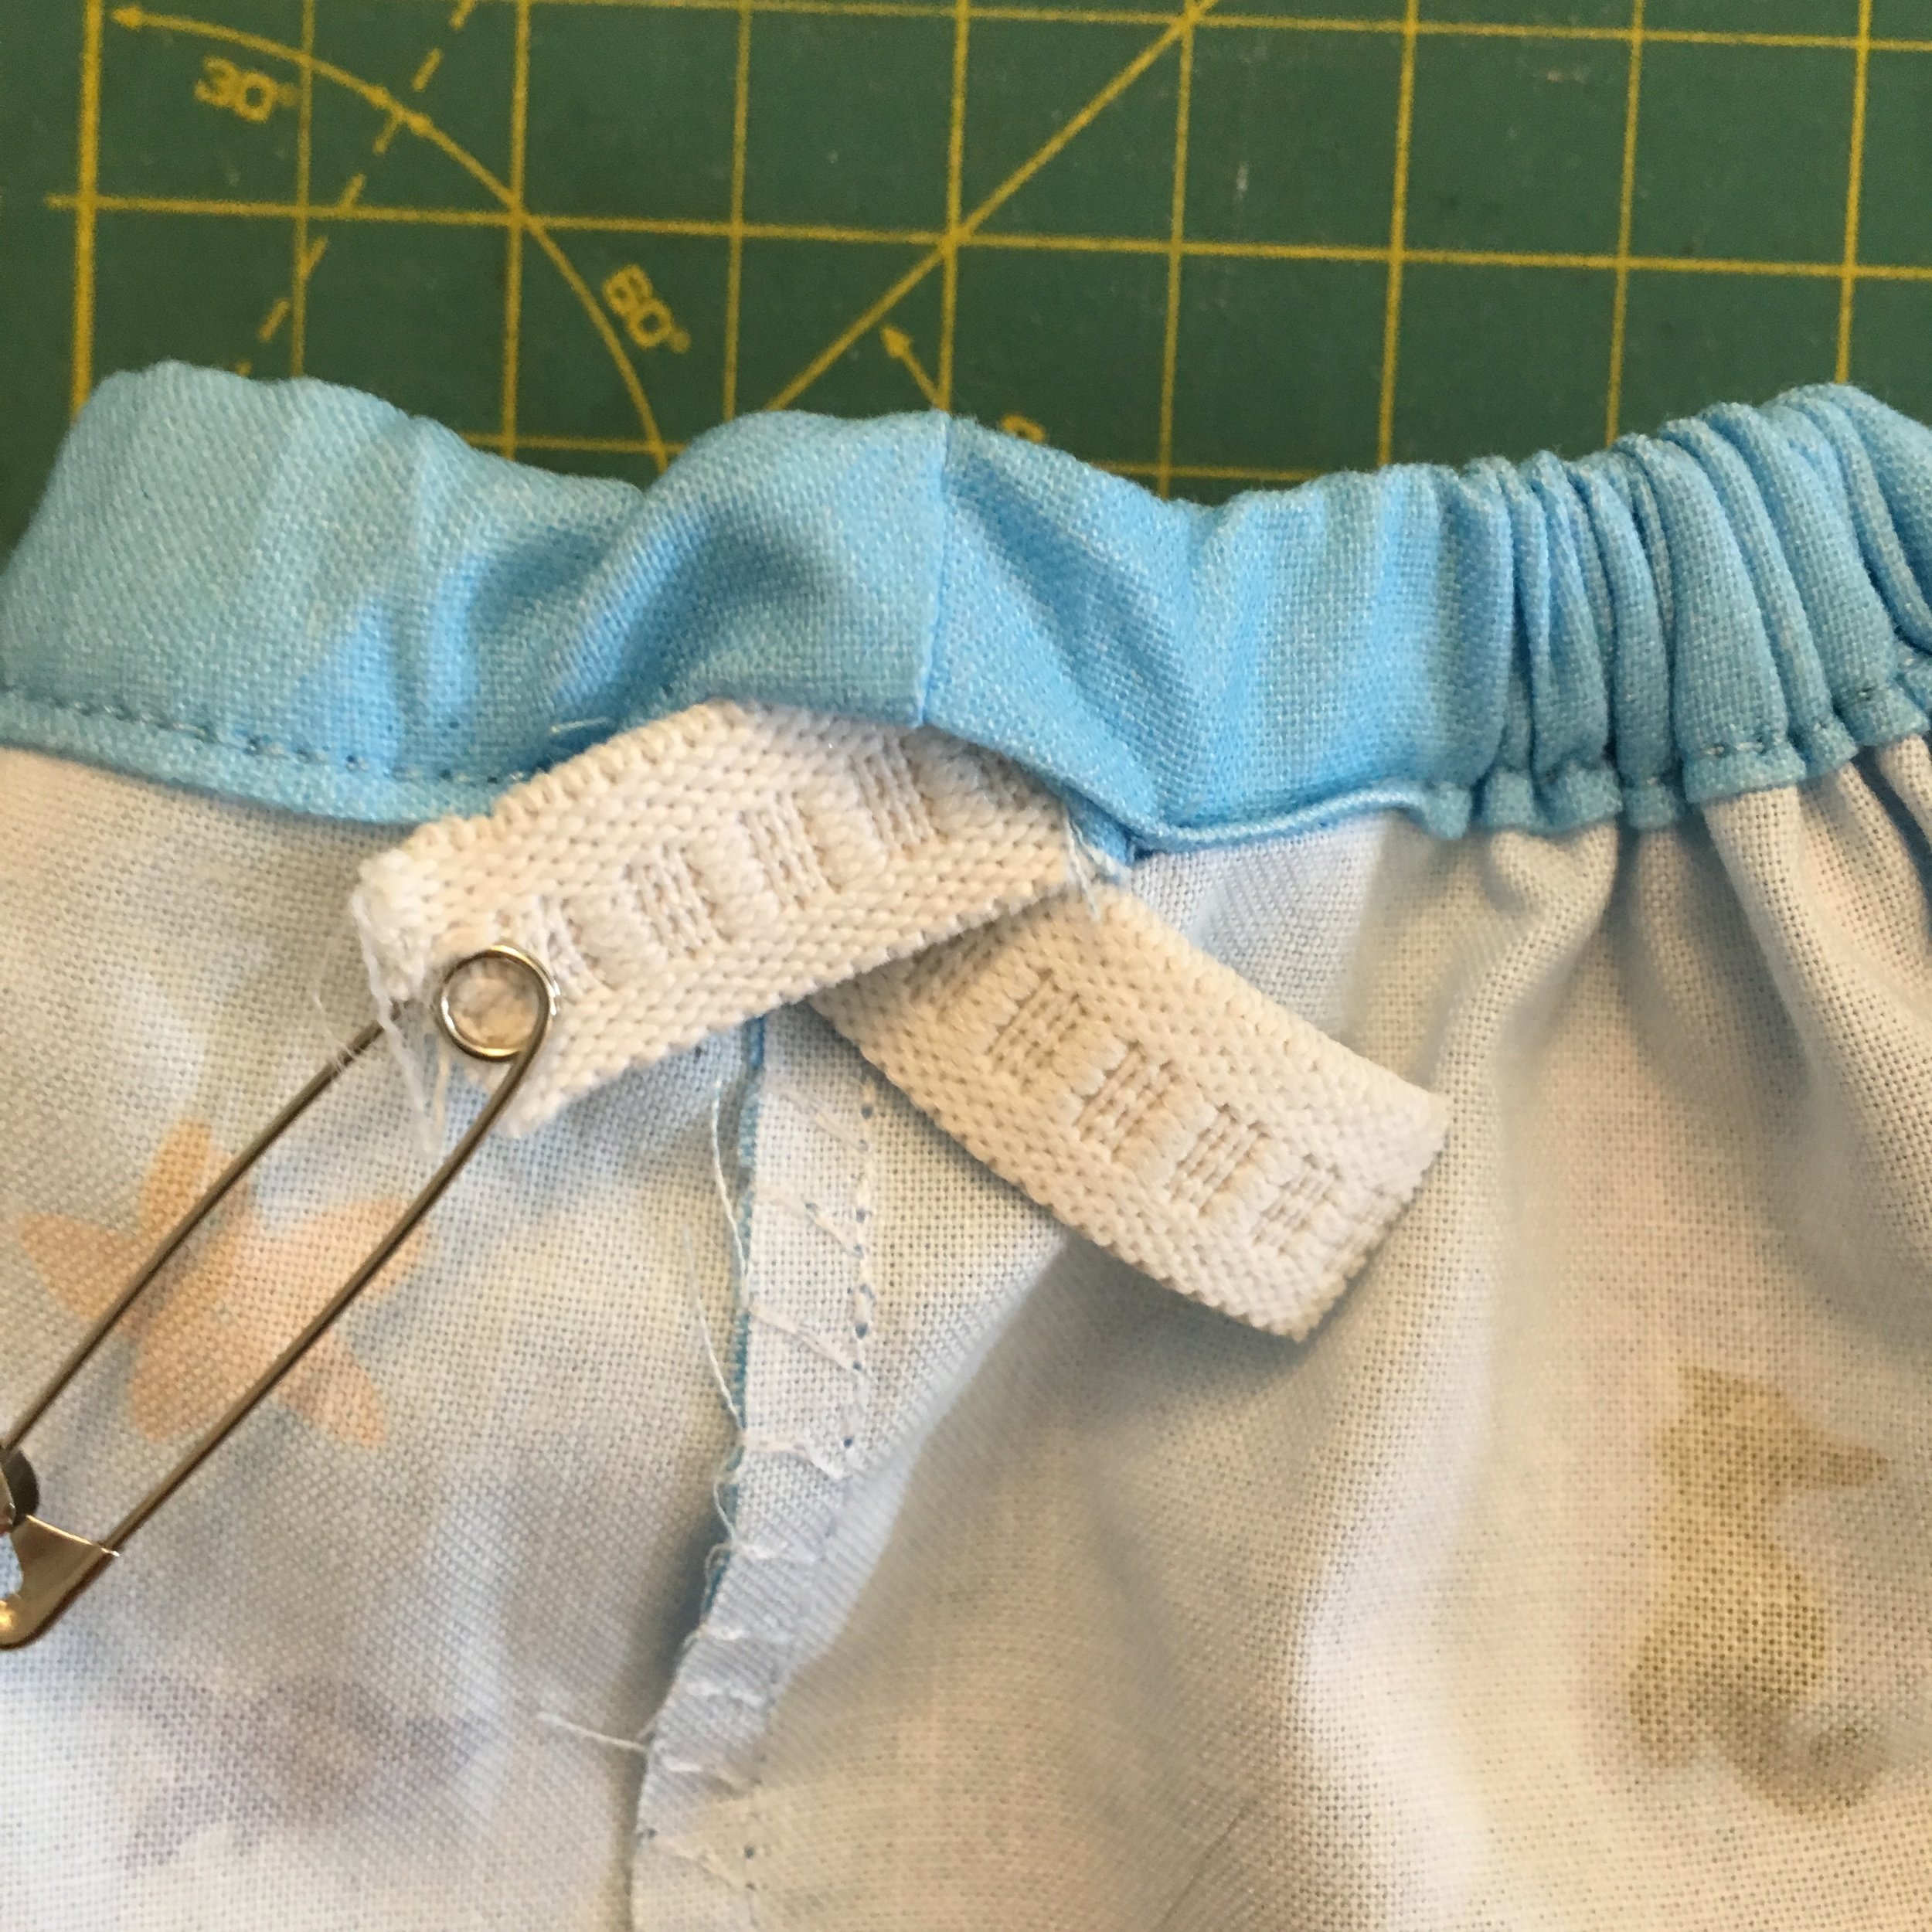
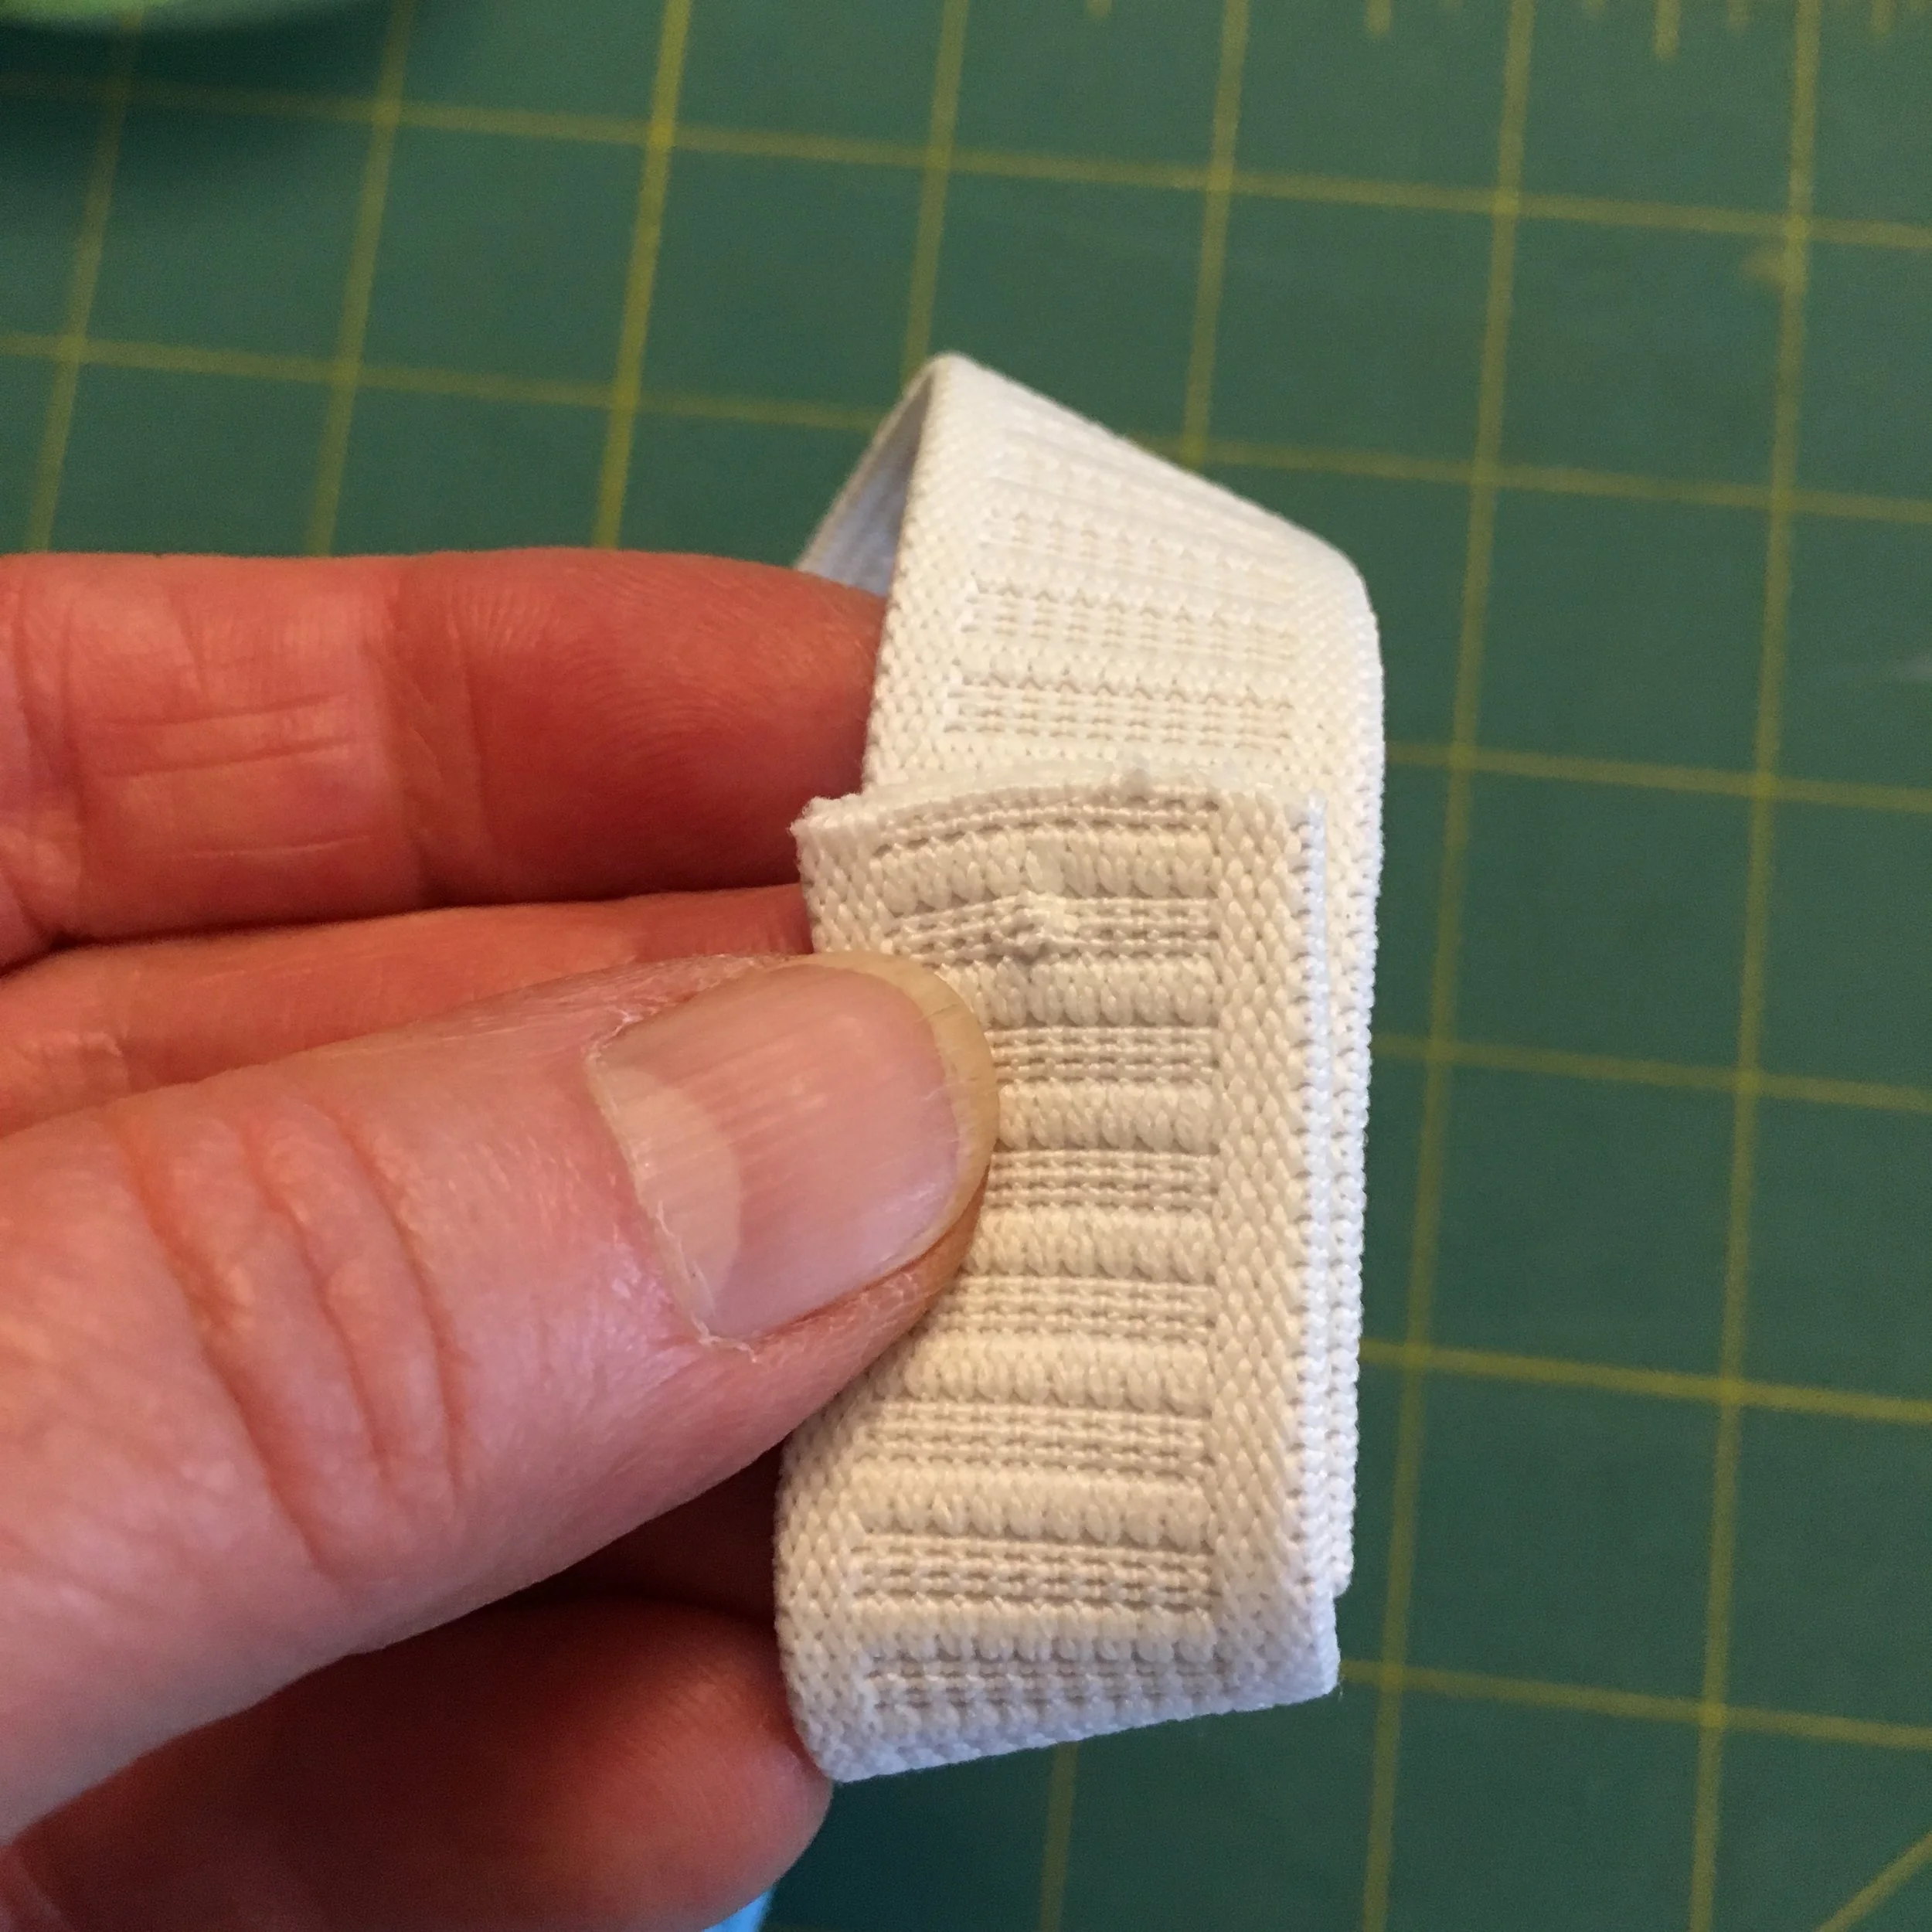
Scissors, sewing machine, matching blue thread (you might think you need tan thread for the hem, but once it's folded, you'll be stitching in the blue fabric), 3/4 inch elastic for the child's skirt and 1/2 inch elastic if you plan to make the coordinating doll's skirt.
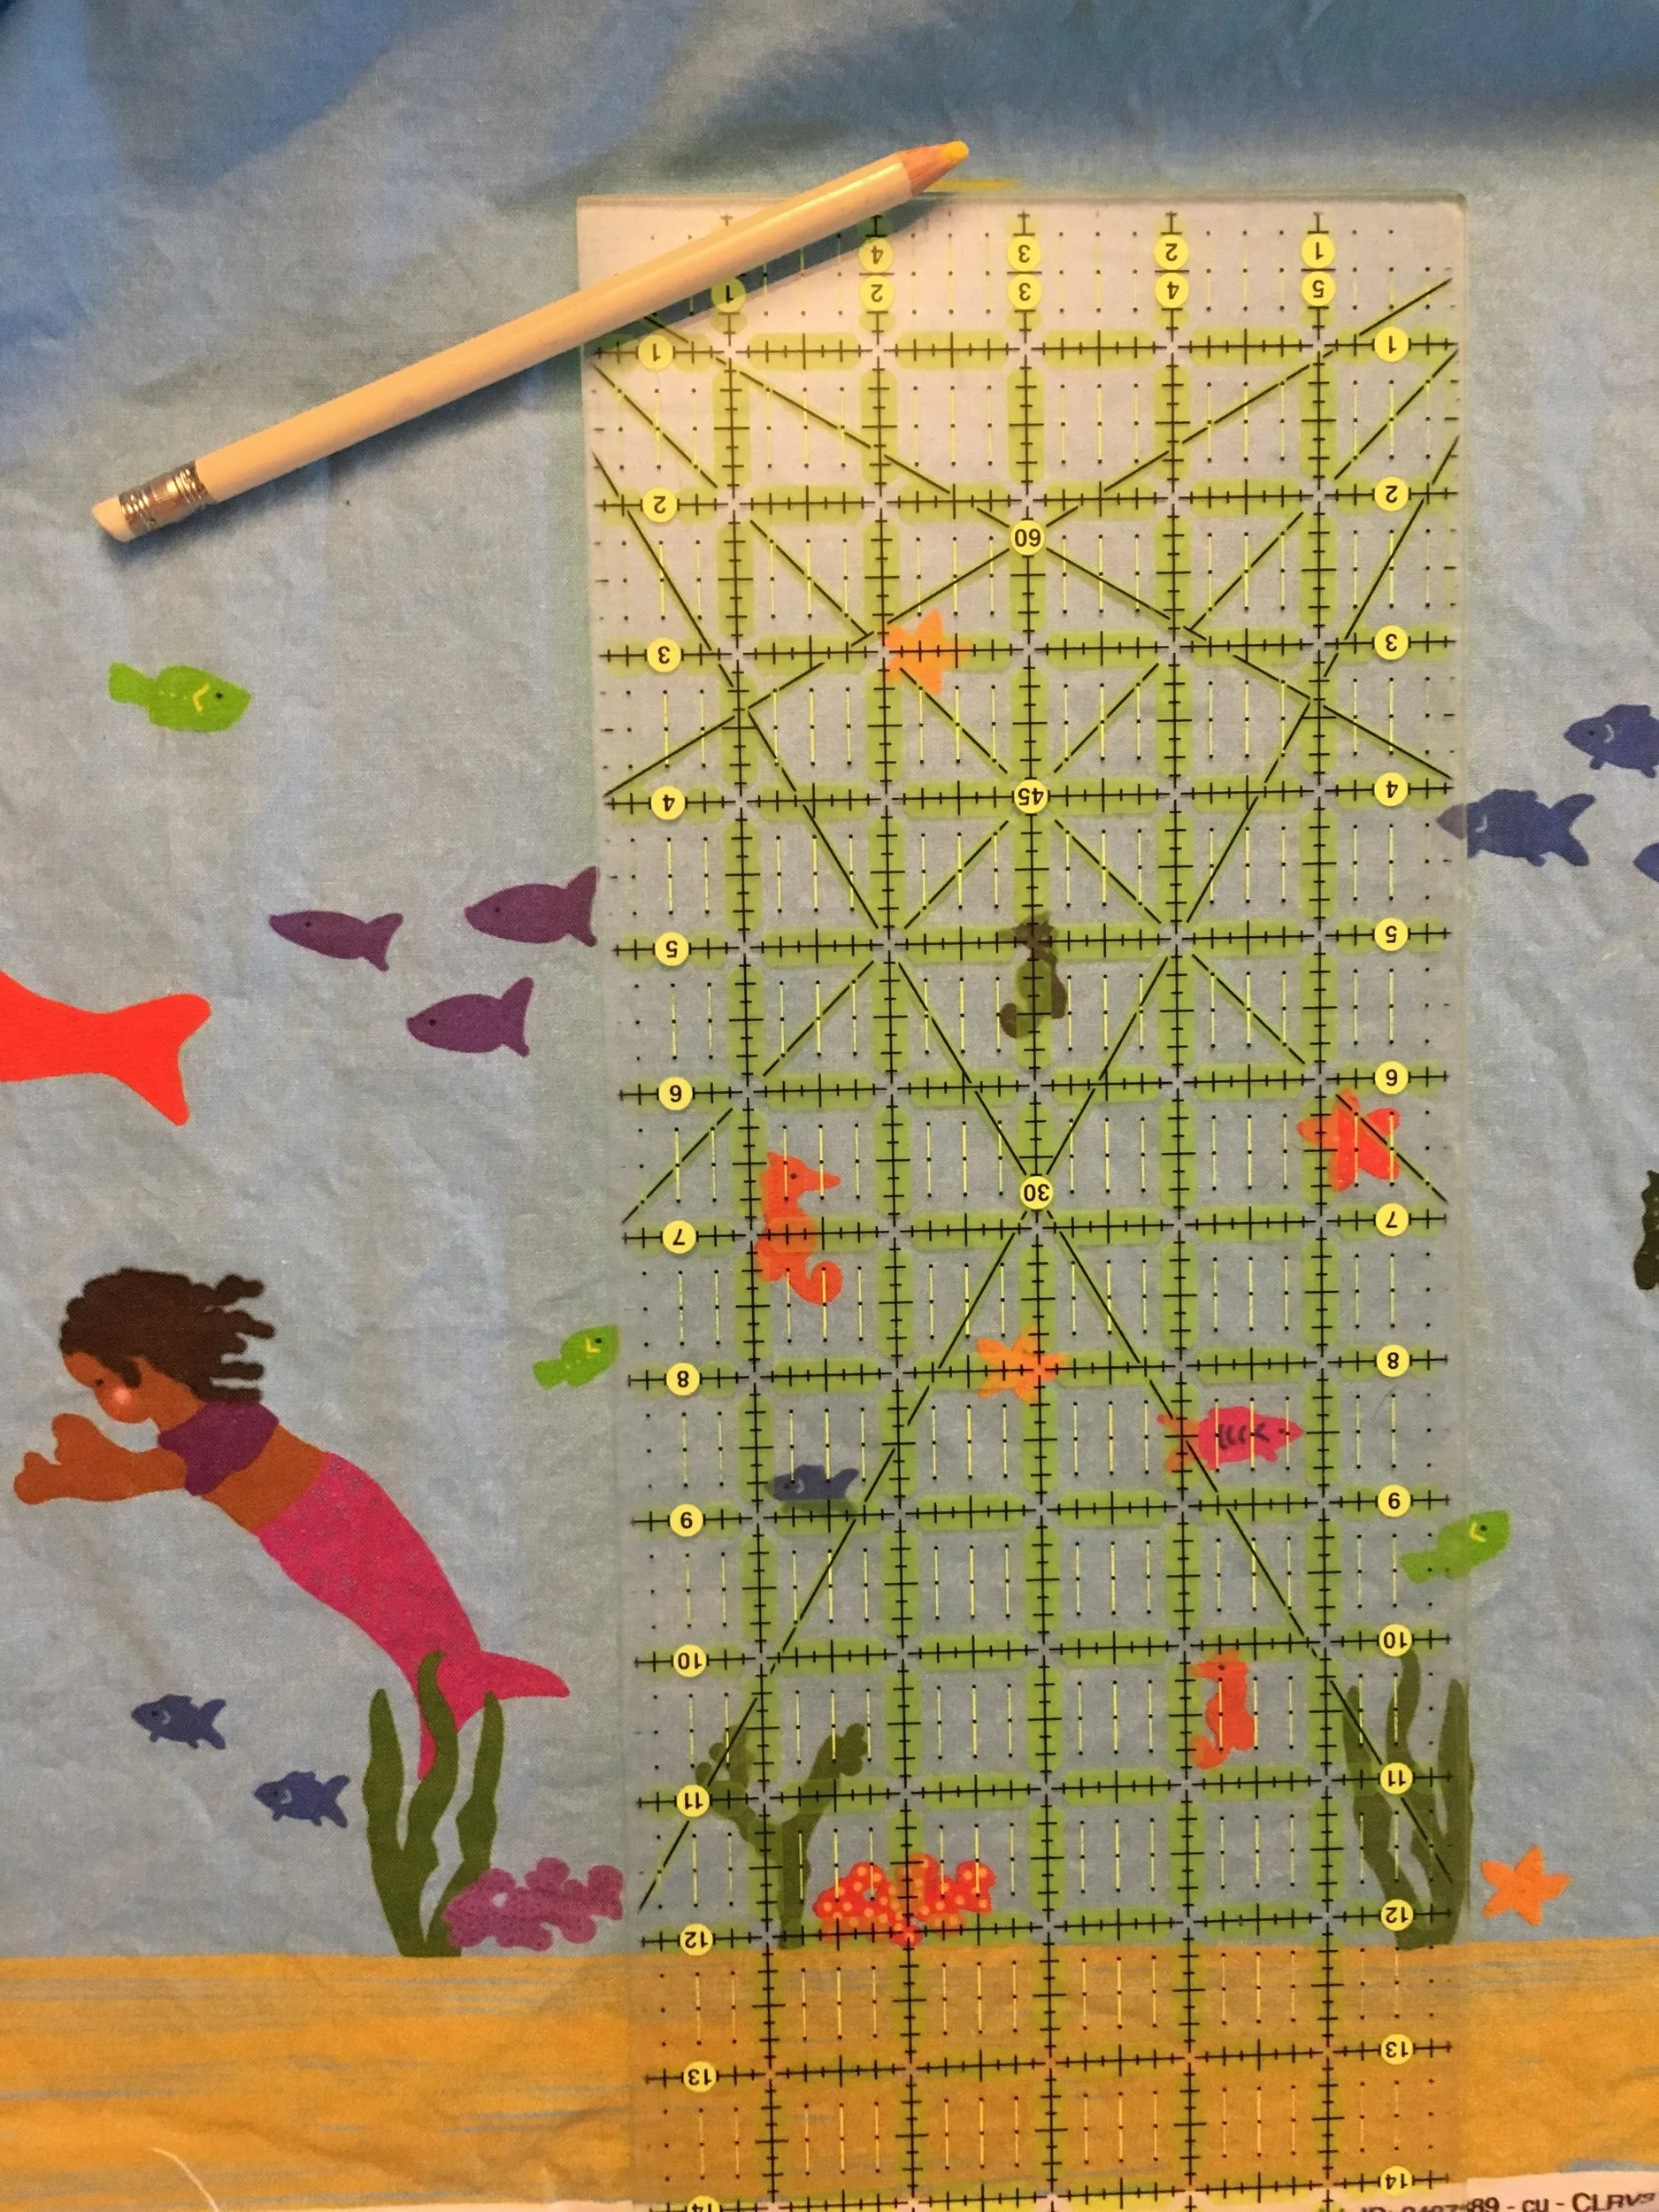
Decide how long you want the child's skirt to be. Here's a helpful skirt length link from Craftershours if you don't have a skirt you can measure. (I looked at the original source for these charts but this information is no longer available there).
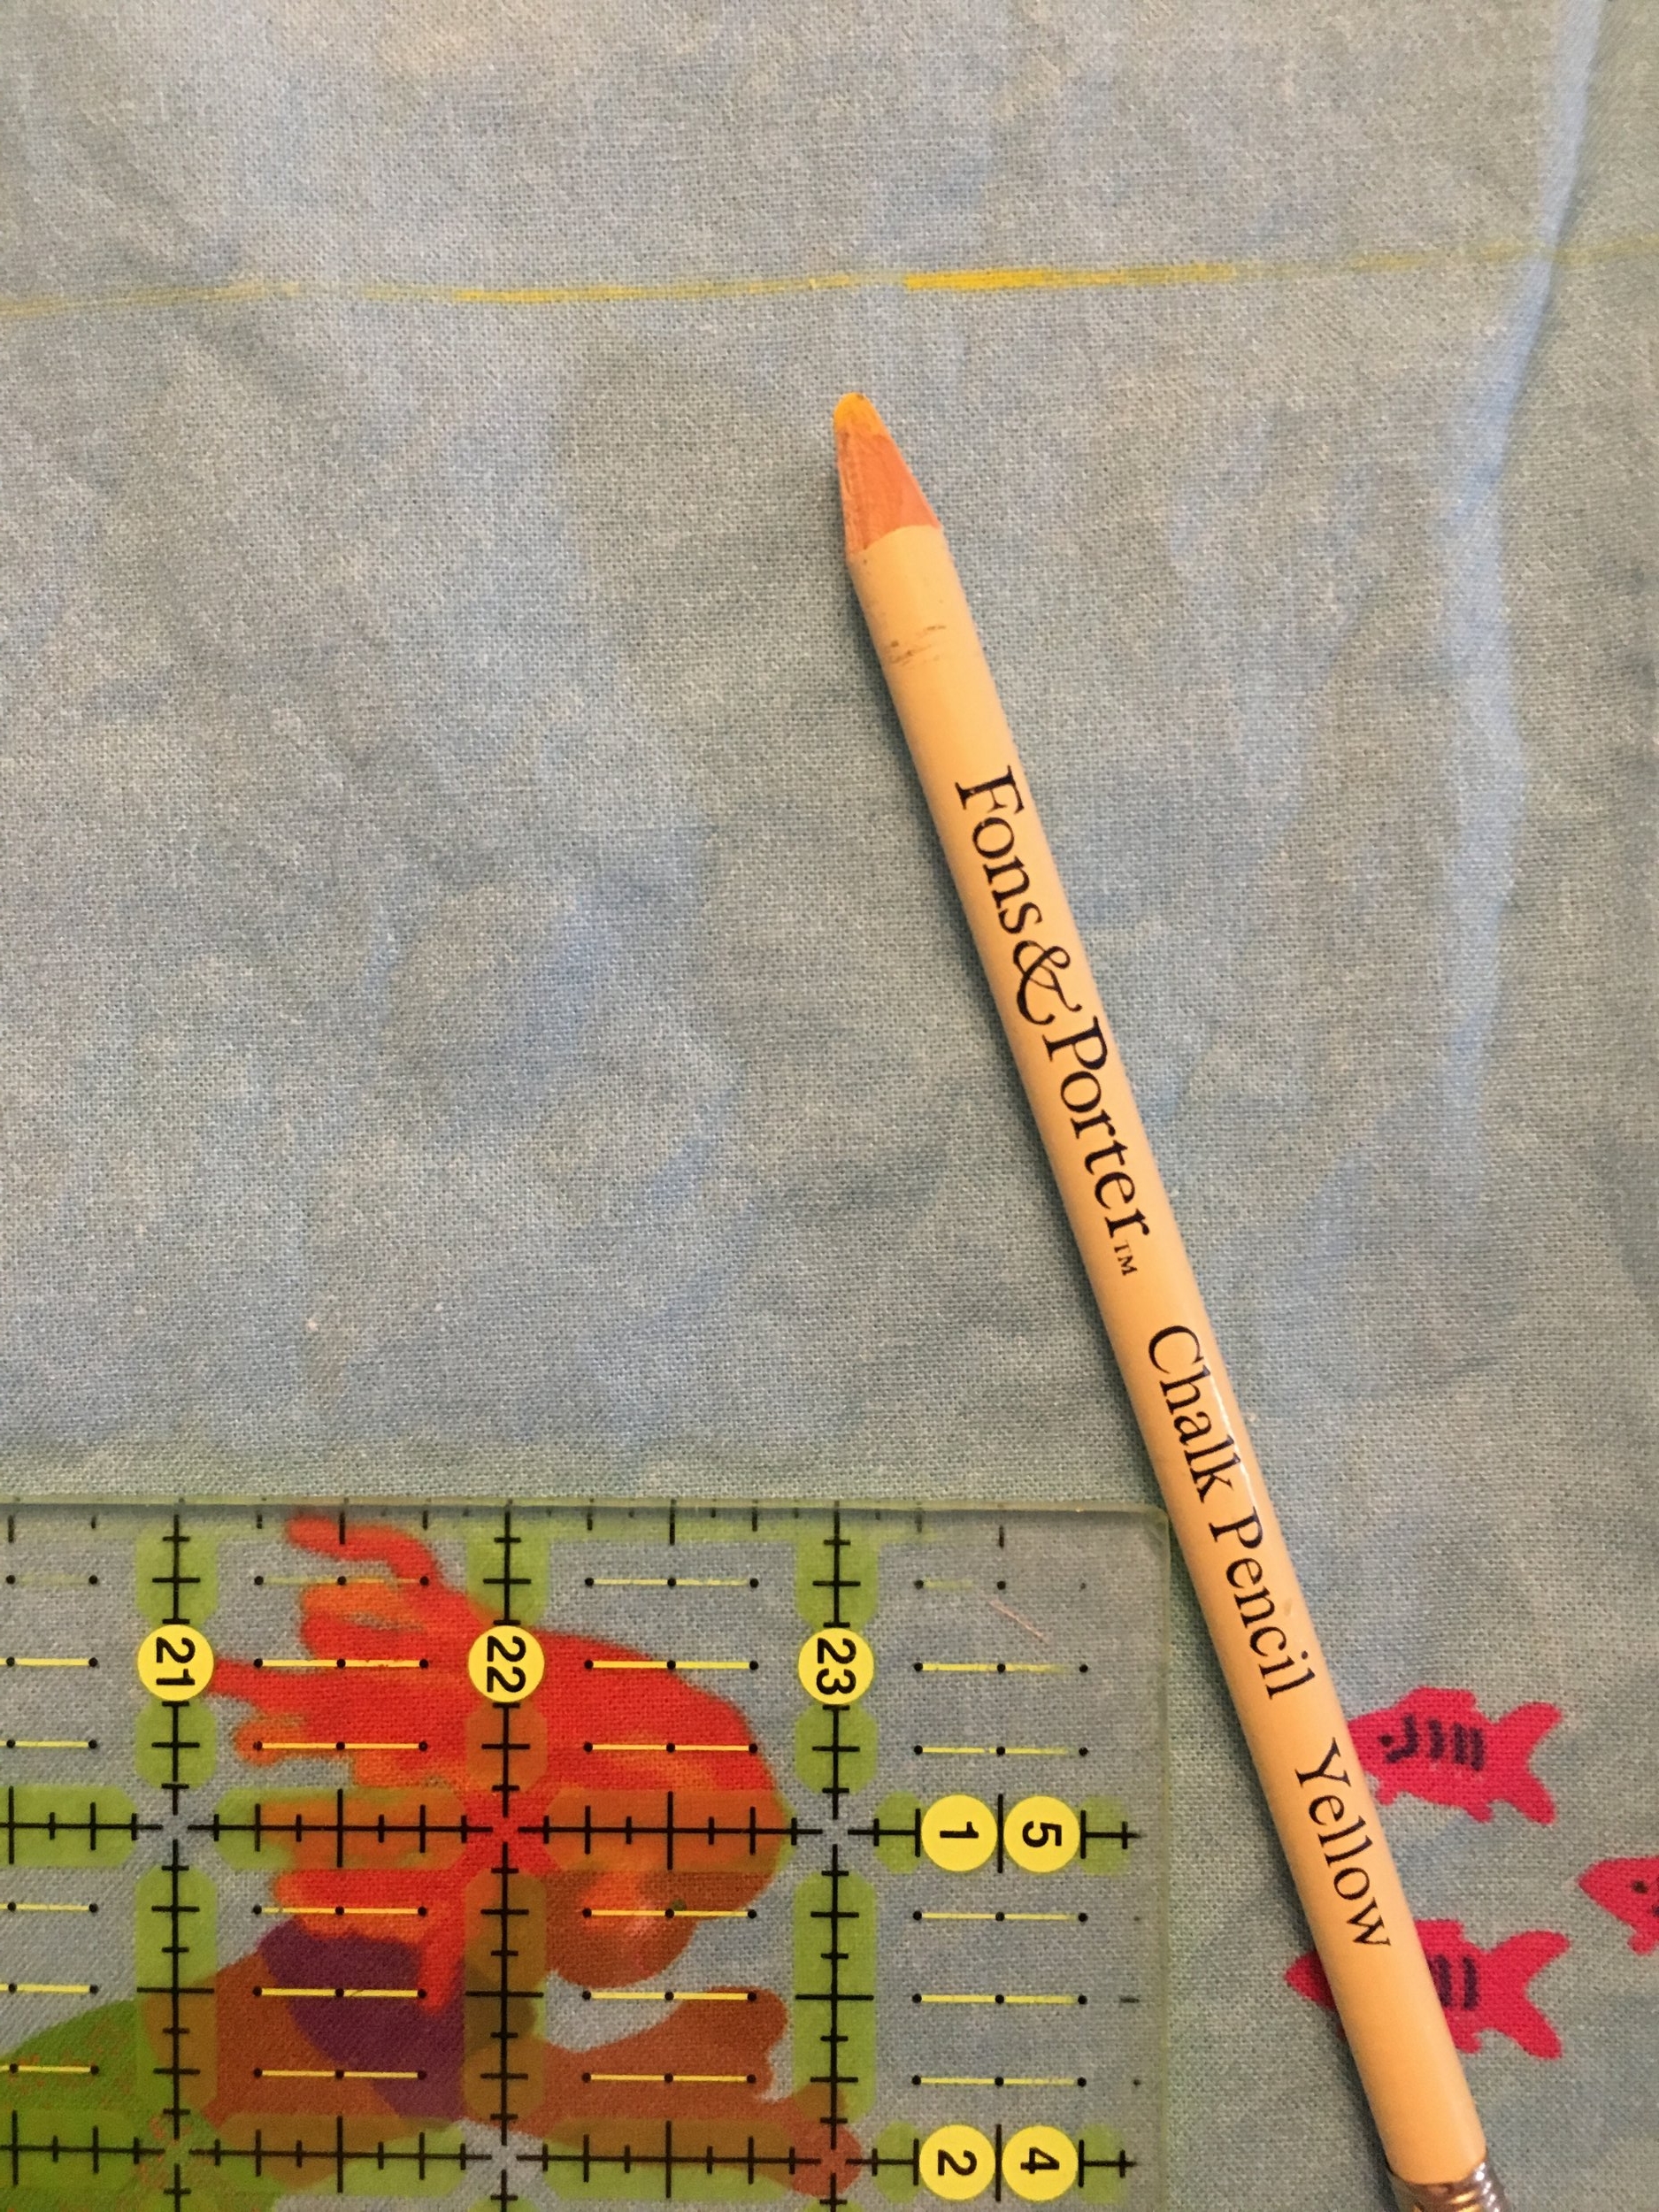
- Cut the child's skirt the desired finished length PLUS 4 1/2 inches to allow for the elastic casing at the waist and the hem at the bottom of the skirt. Measure from the BOTTOM edge of the "sand" on the ocean flower. Mark this length several places along the skirt panel, draw a straight line across the panel and cut out the skirt. Trim off the un-printed white margins on the fabric.
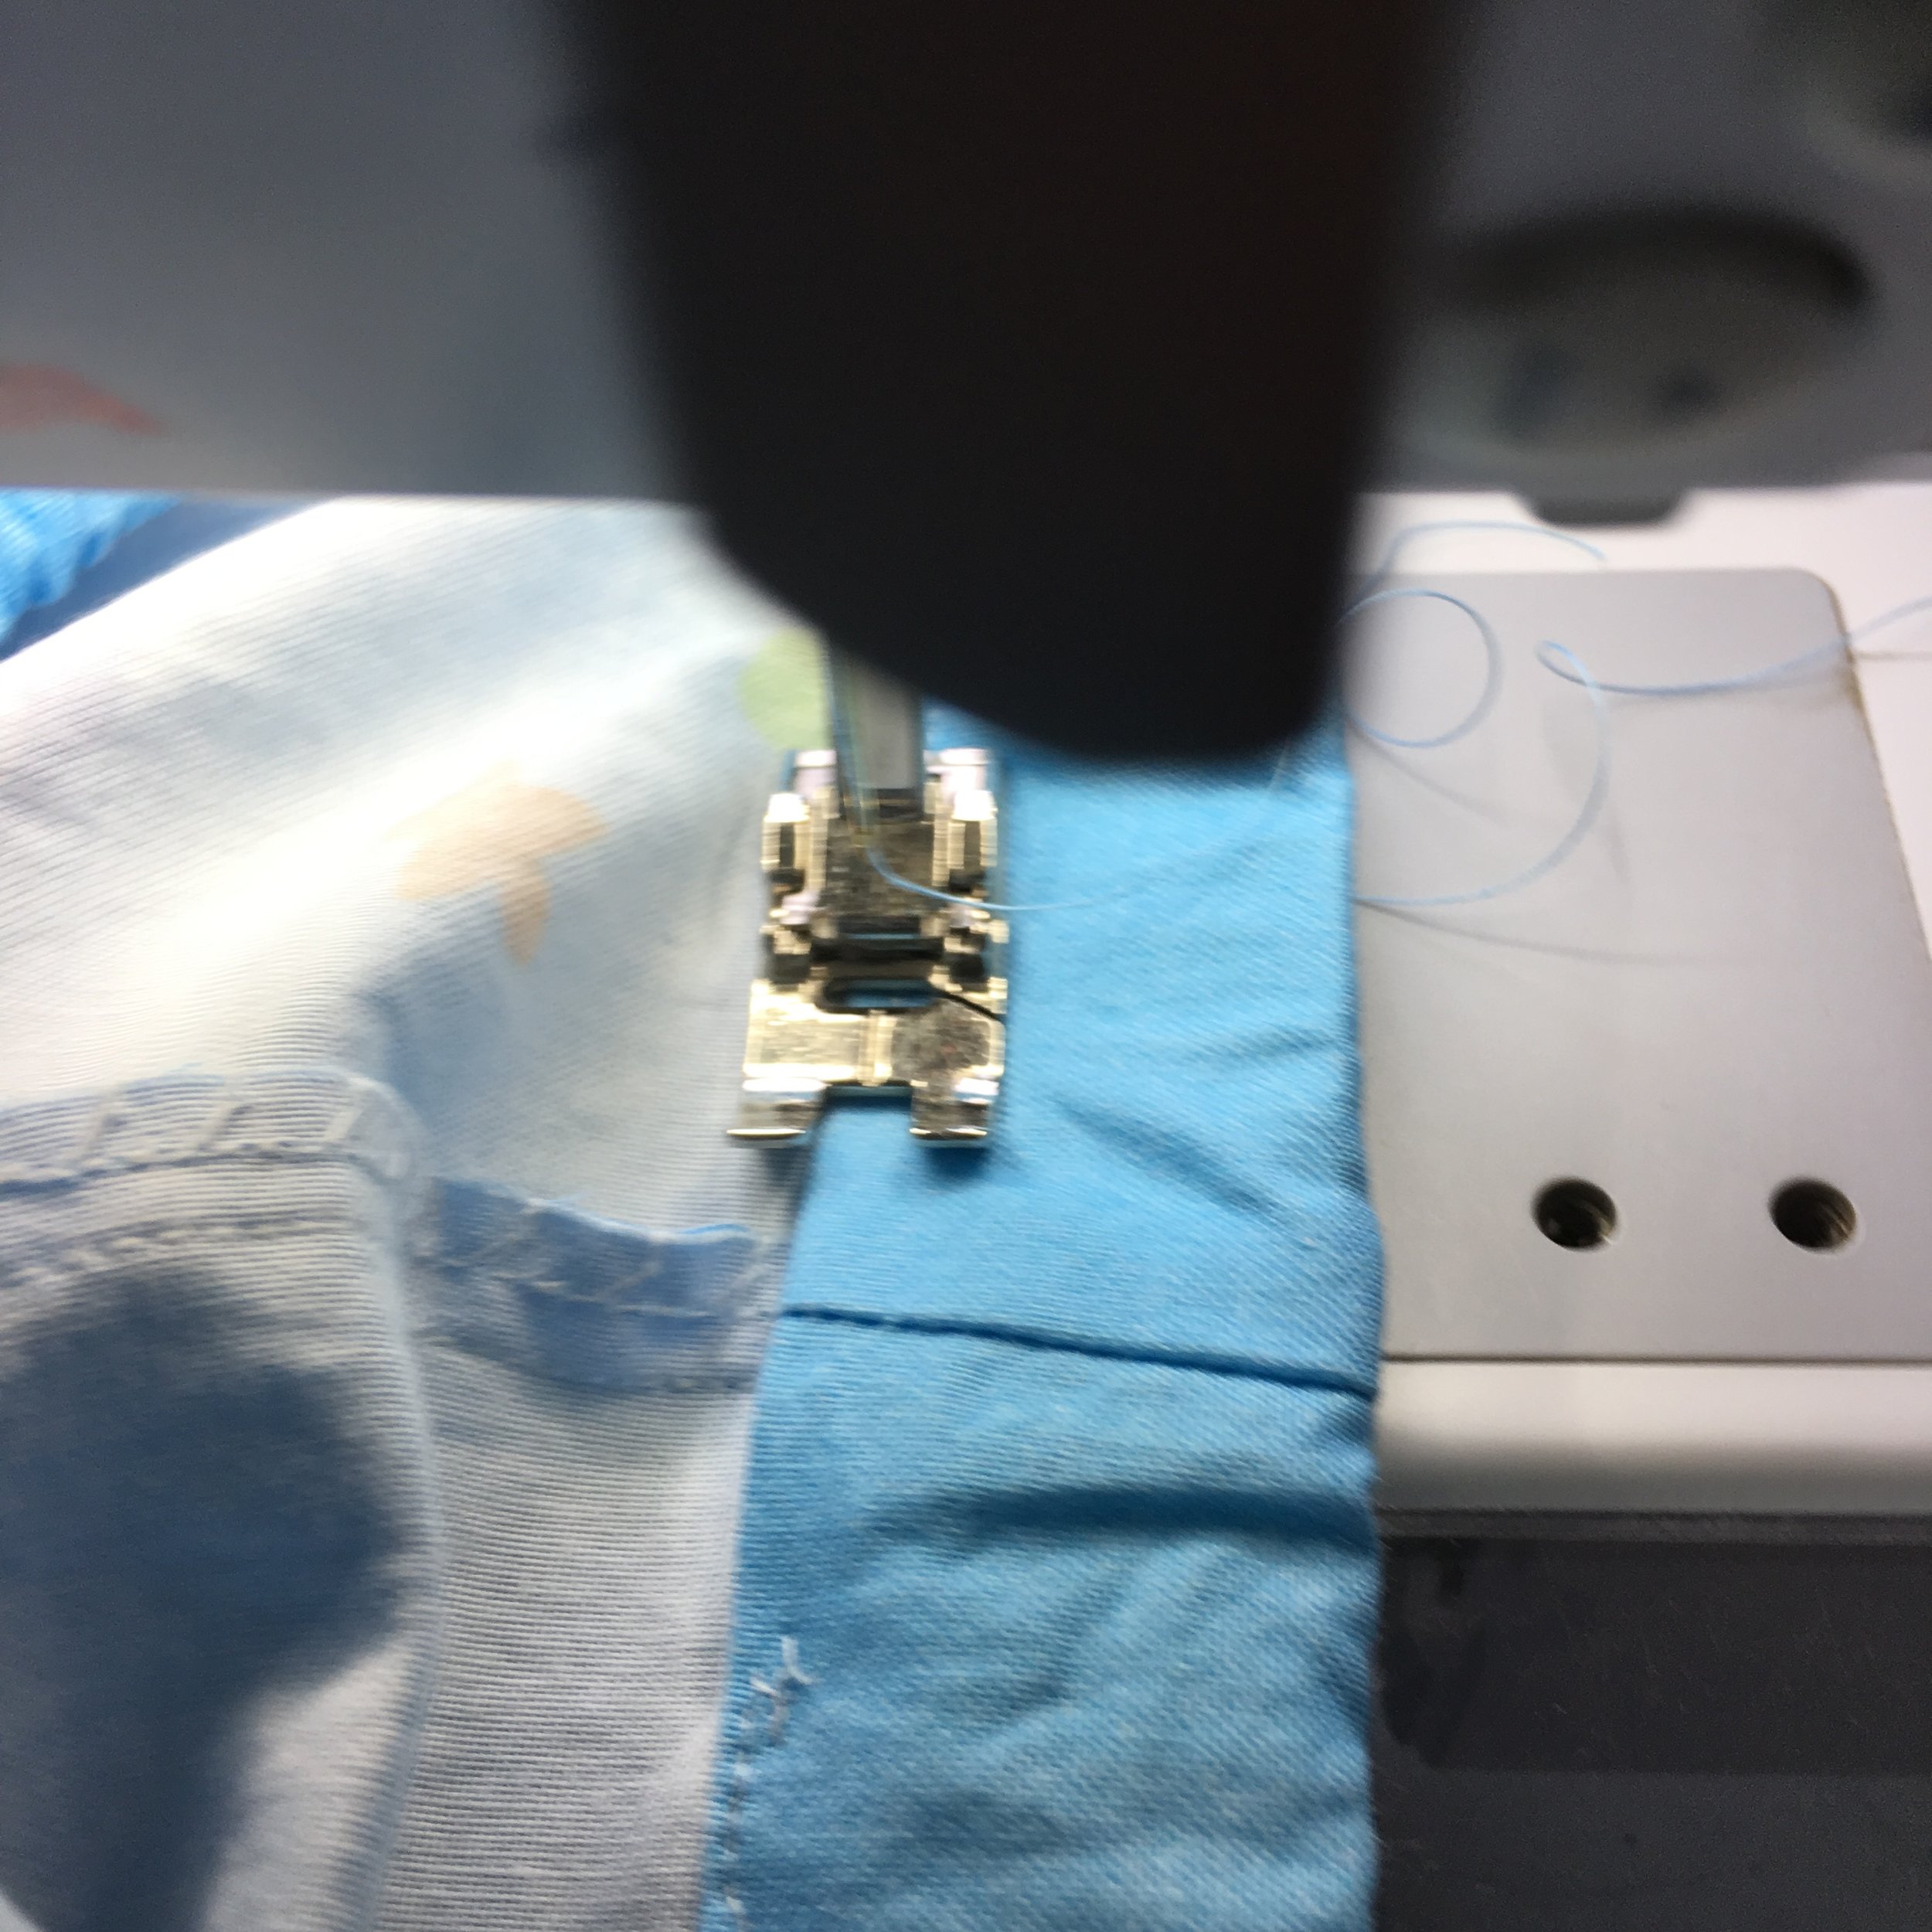
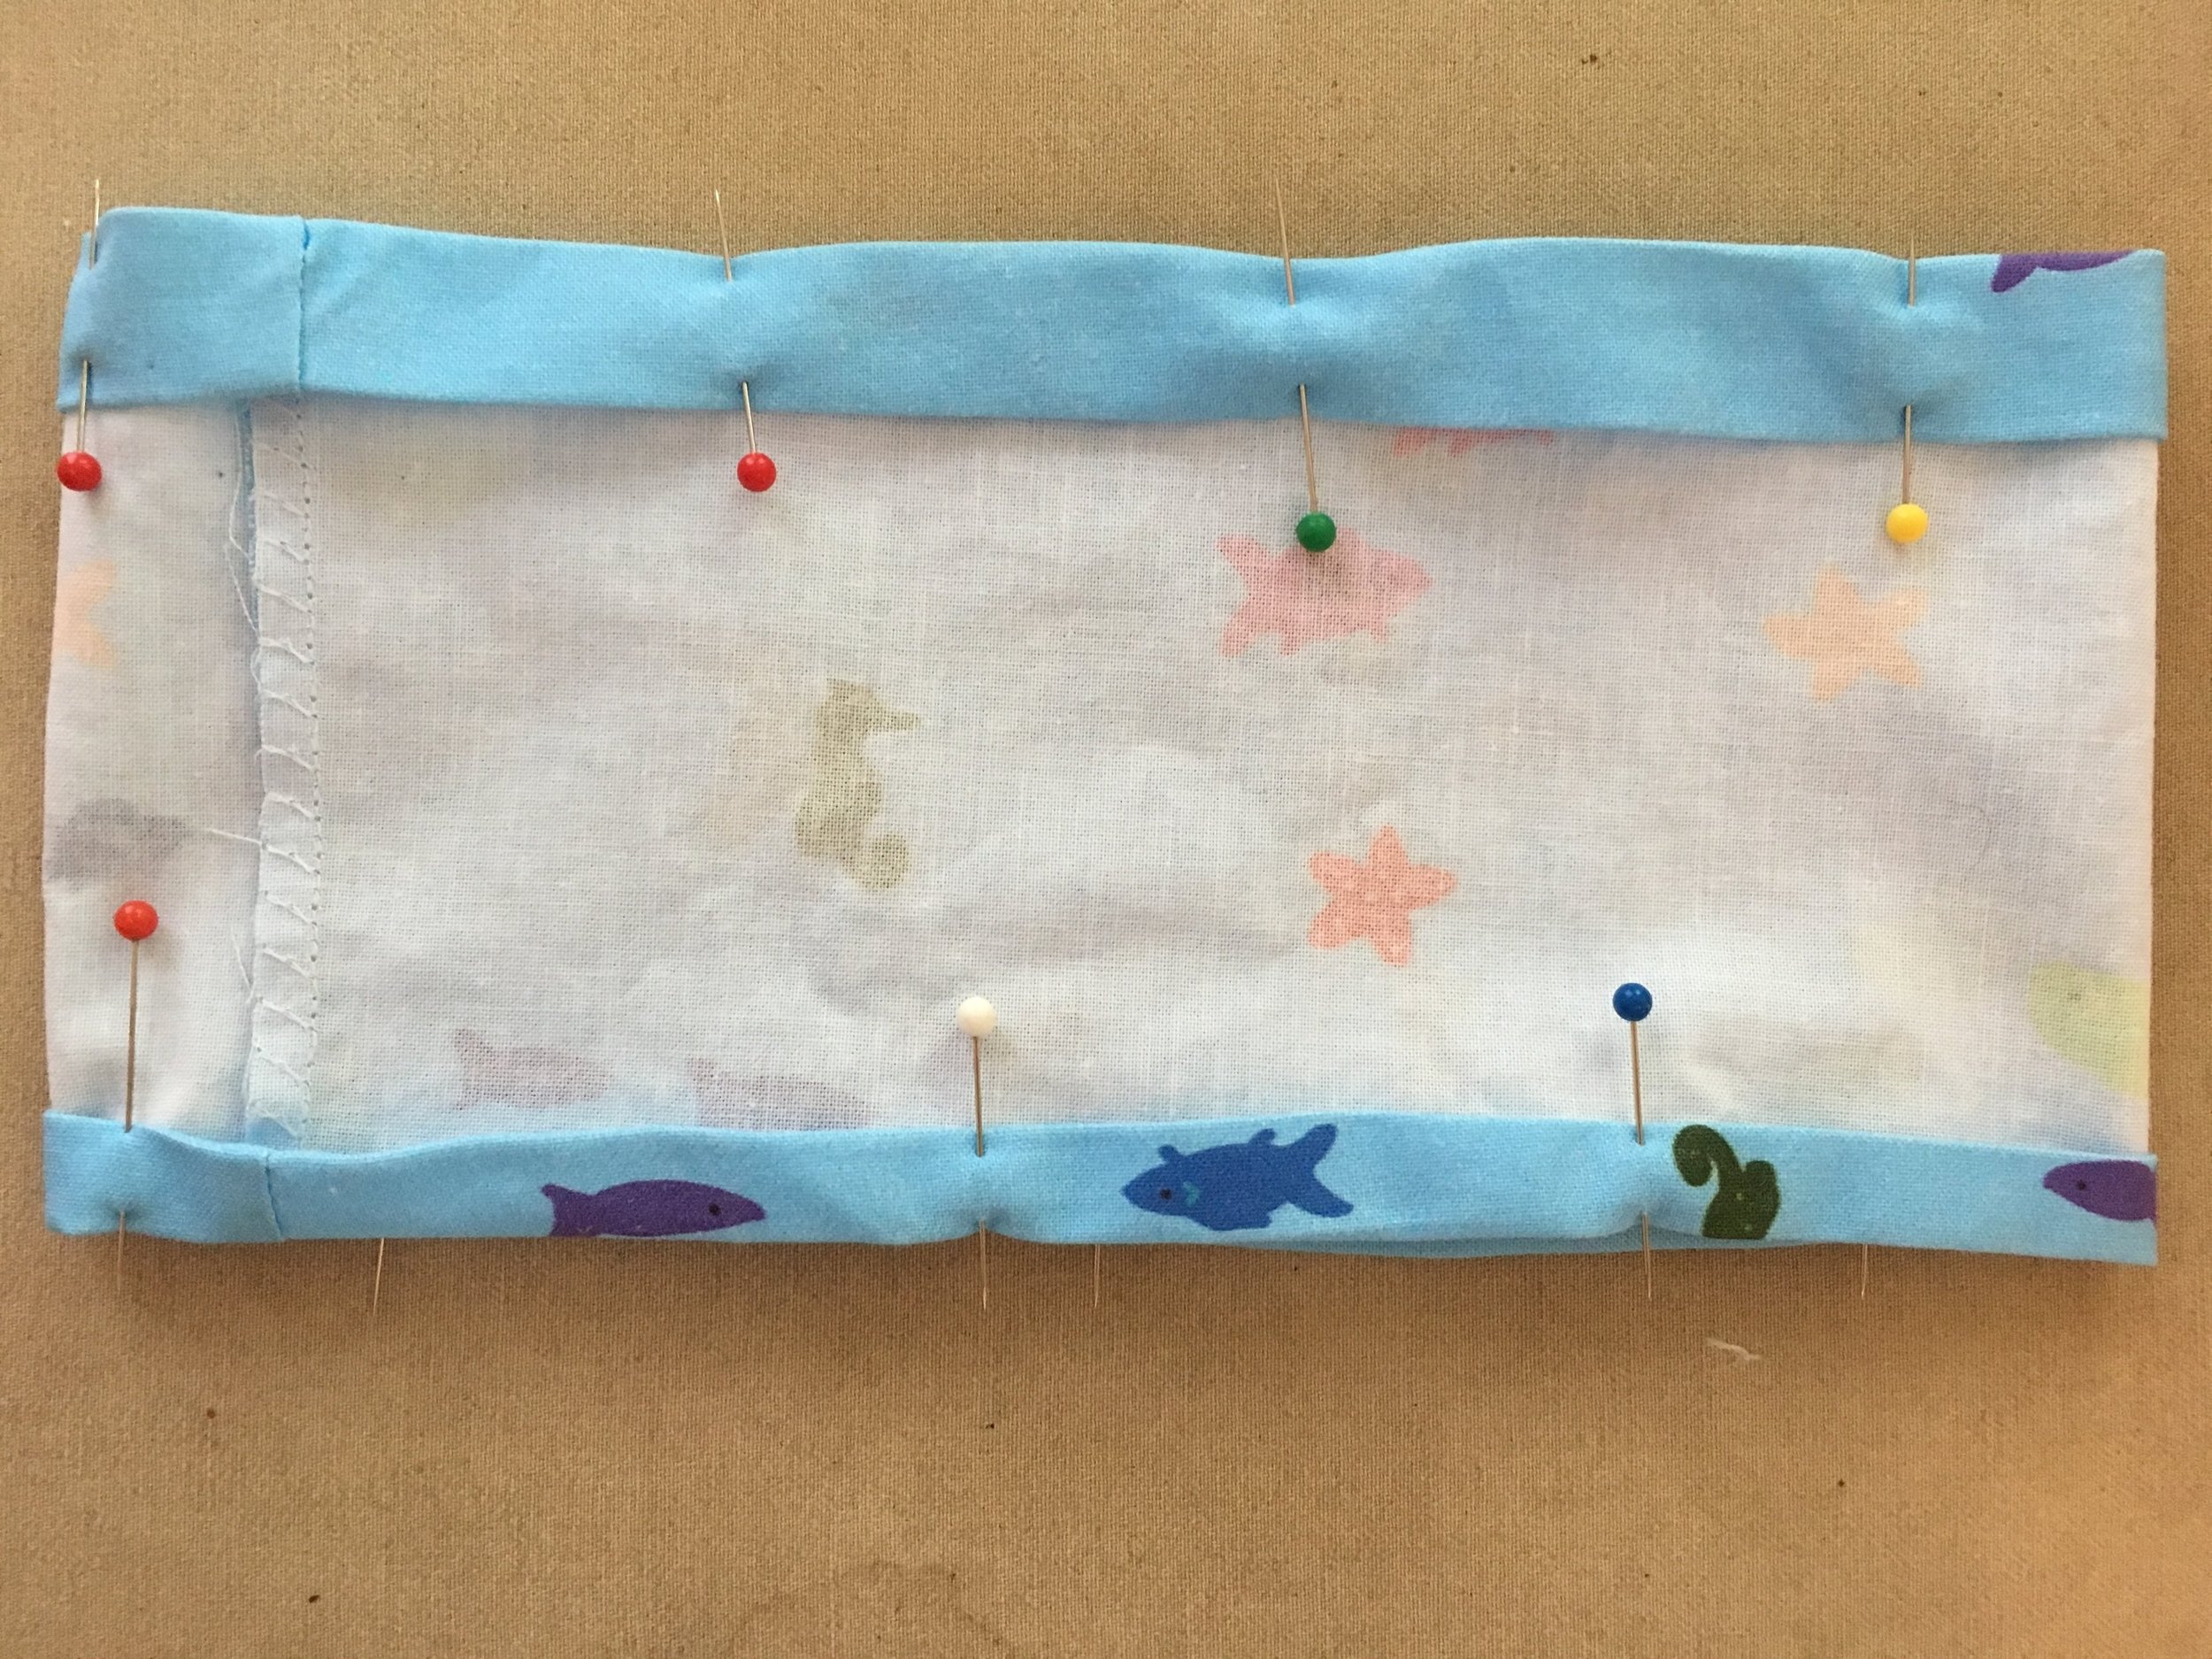
2. Fold the fabric in half, right sides together to make the back seam of the skirt. Pin. Stitch 1/2 inch seam.
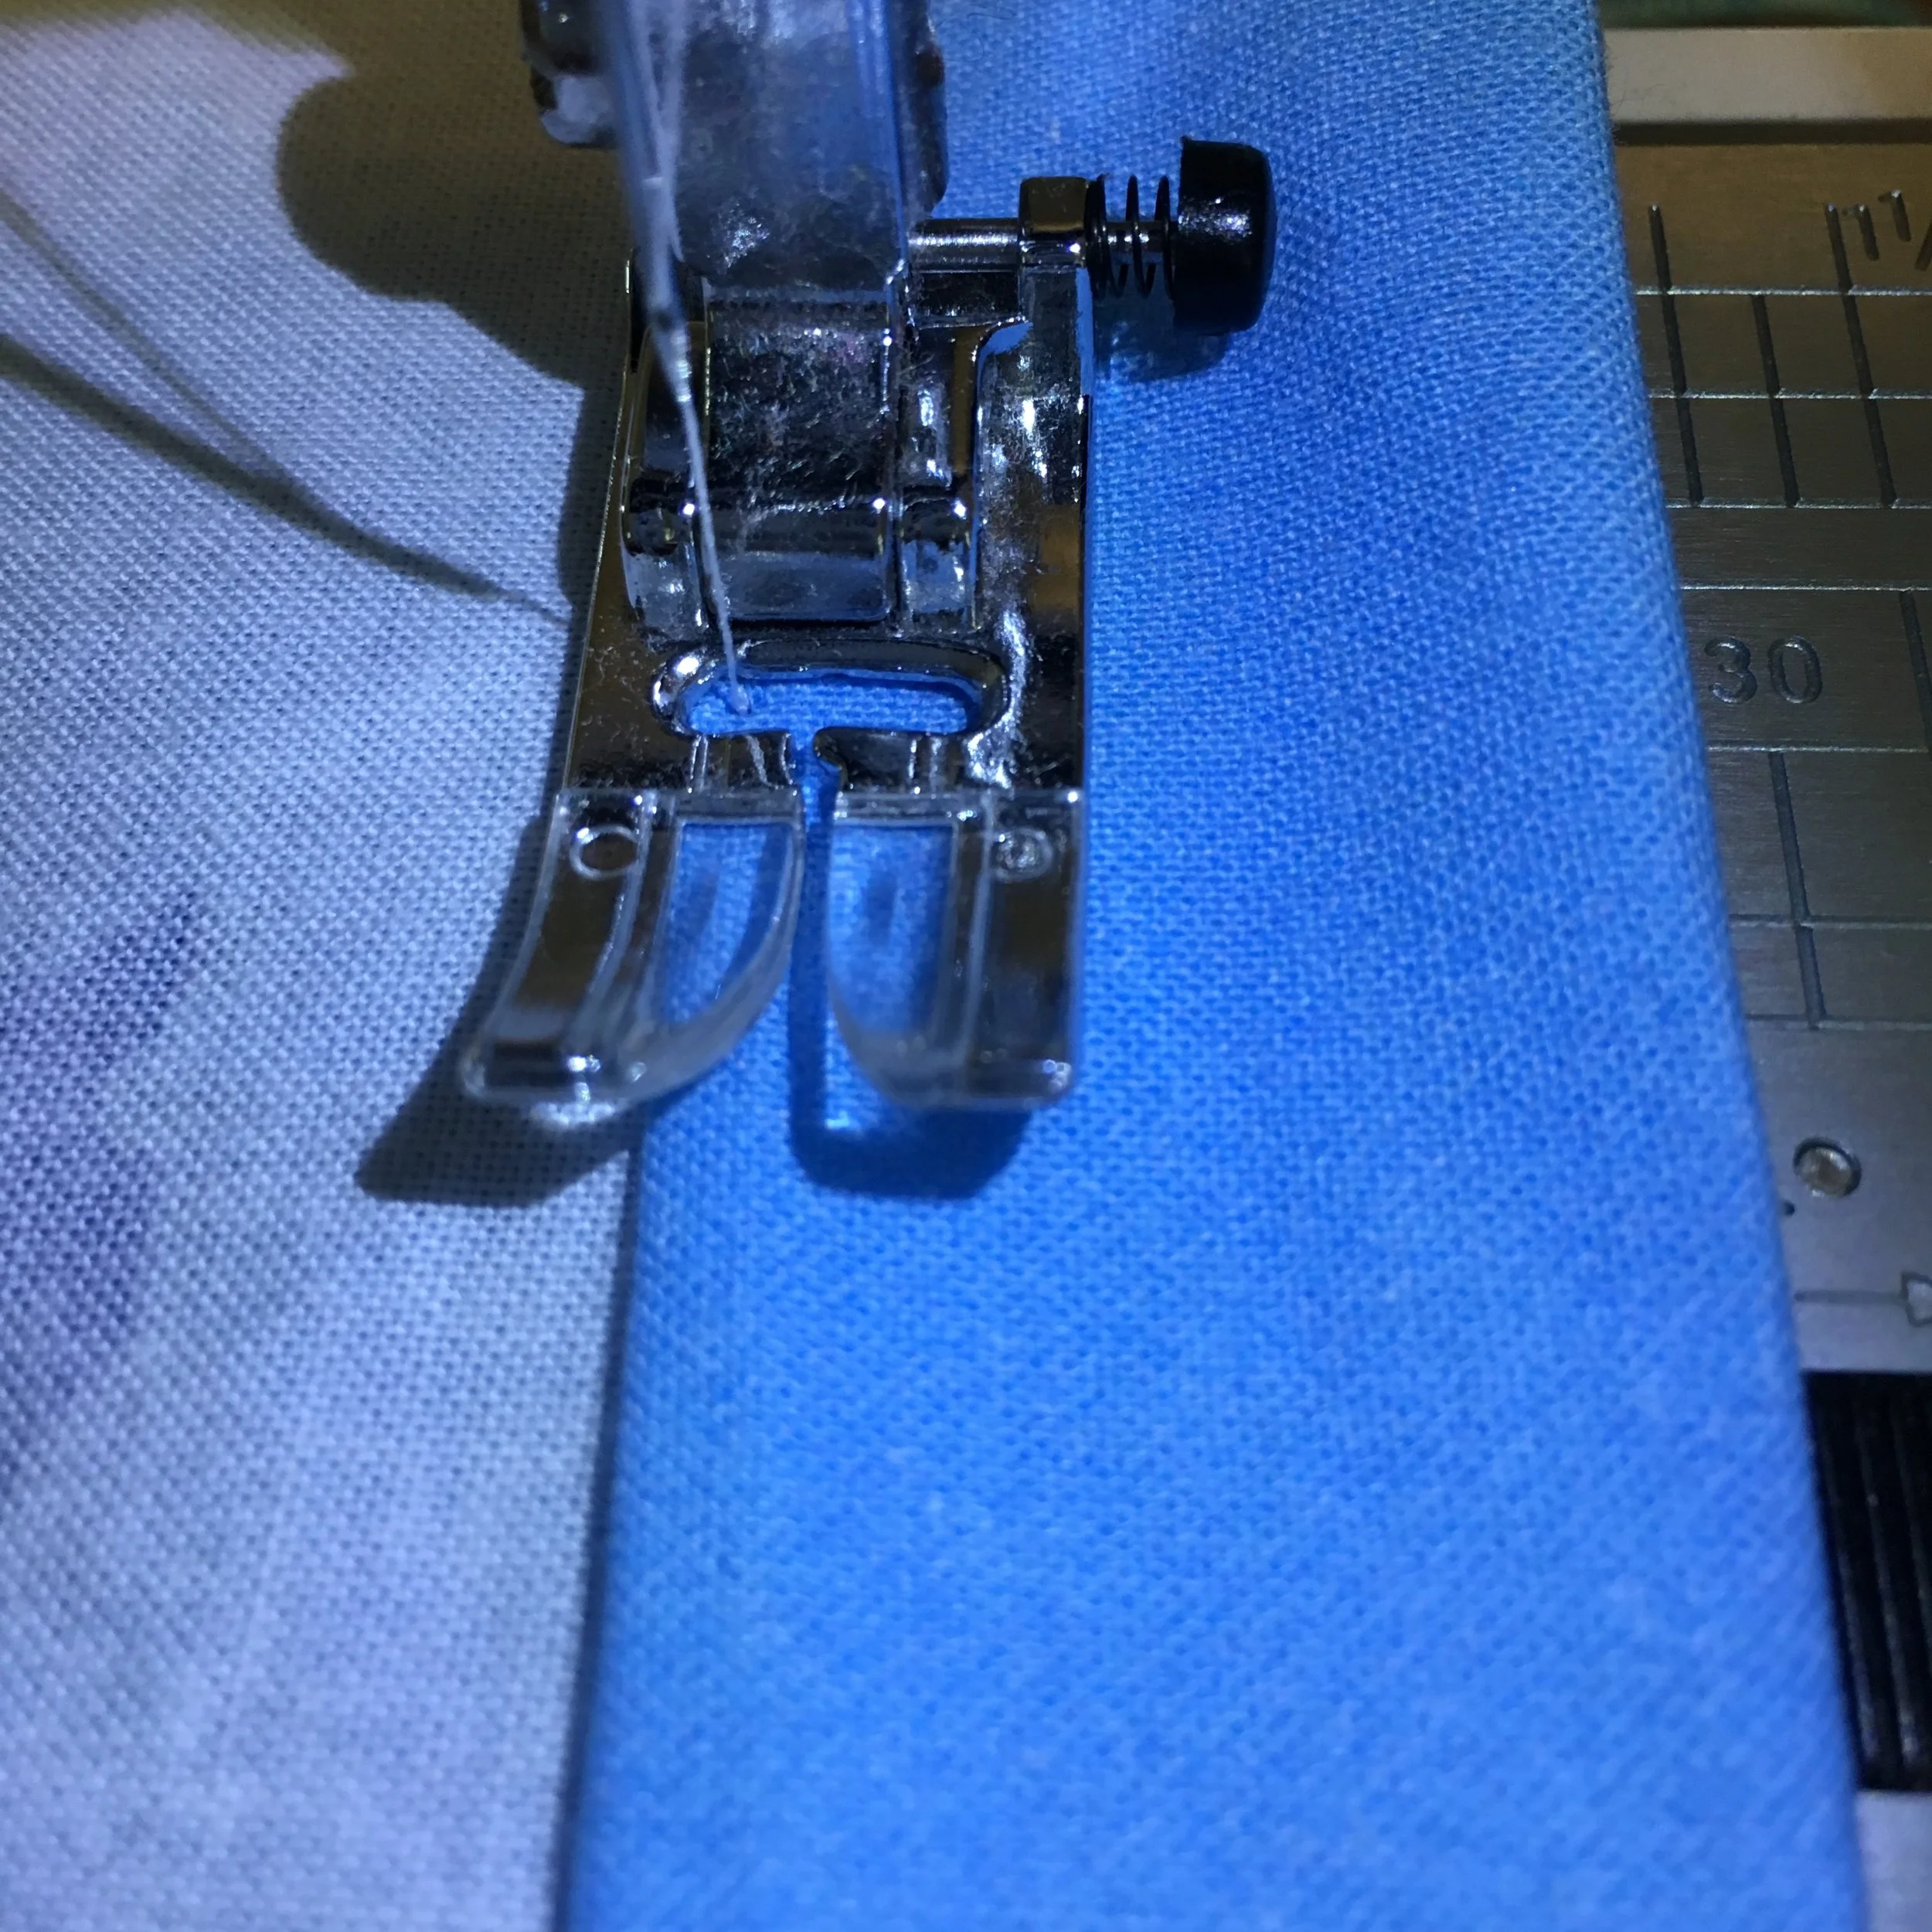
3. At the top edge of the skirt, fold down the fabric, wrong sides together, 1/4 inch. Press. Then fold over again 1 1/4 inches to make the casing for the waist elastic. Stitch close to edge of the fold, leaving a couple inches open at the back seam to insert the elastic in the casing.
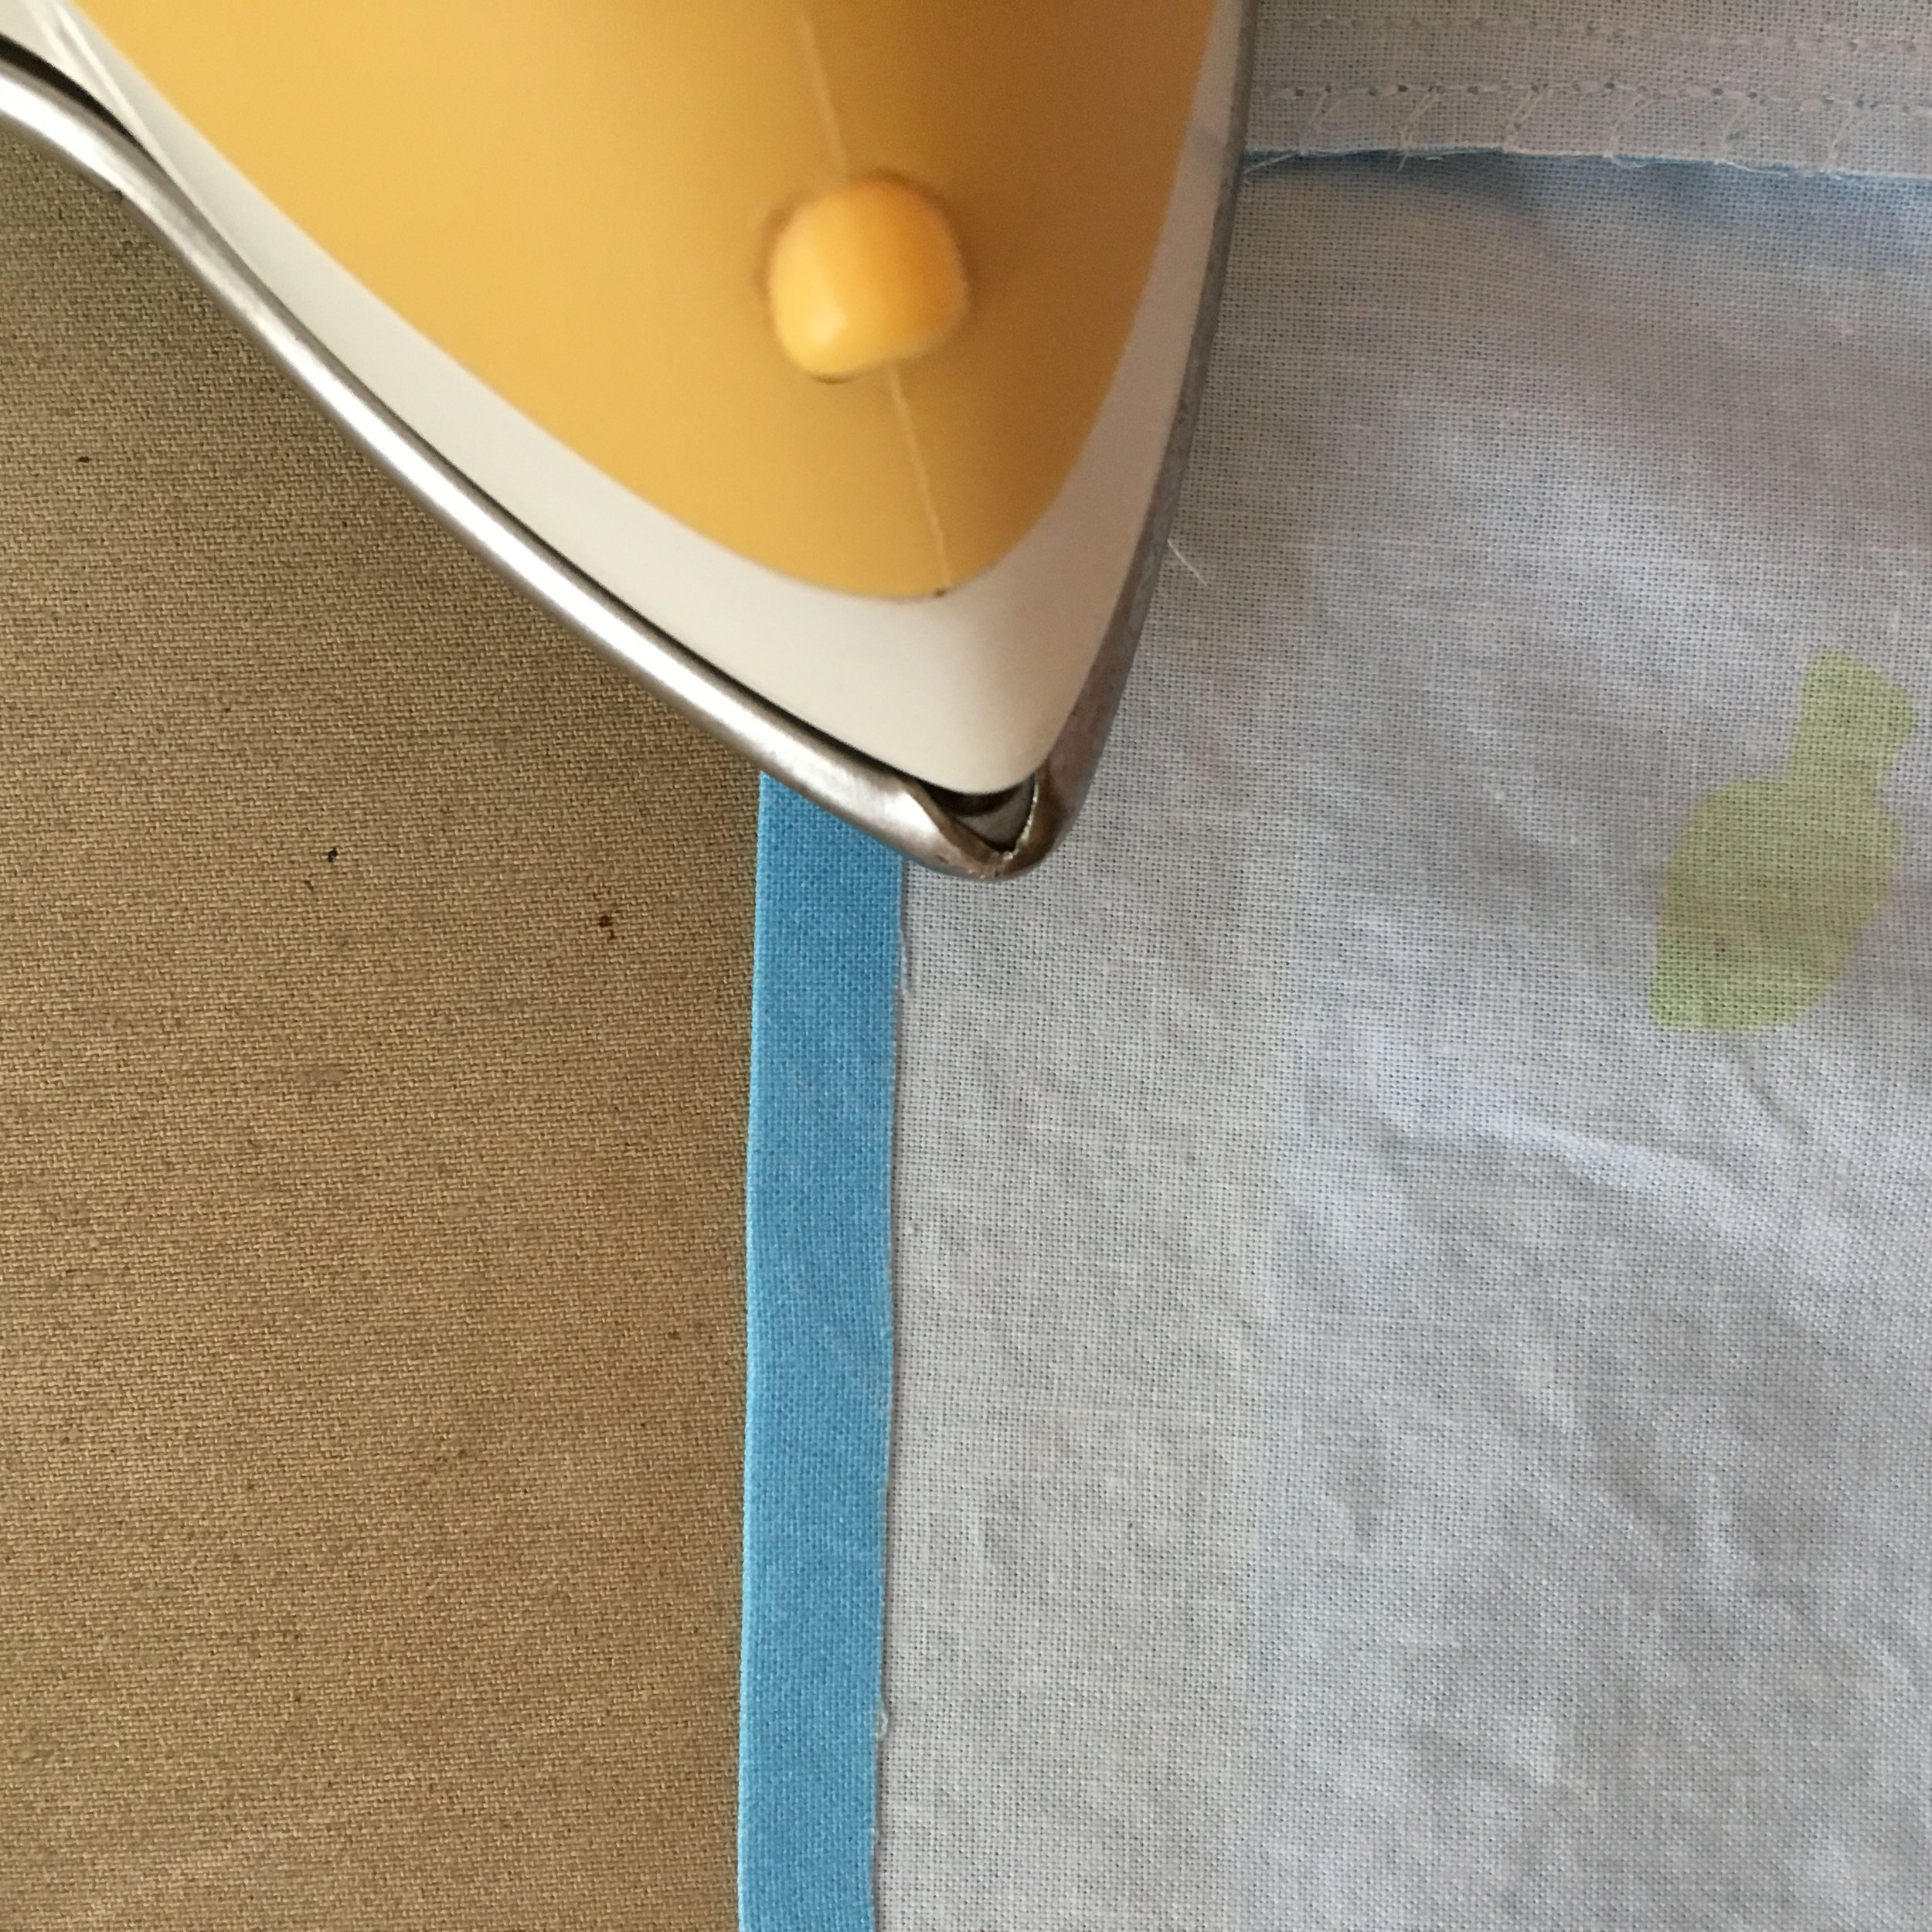
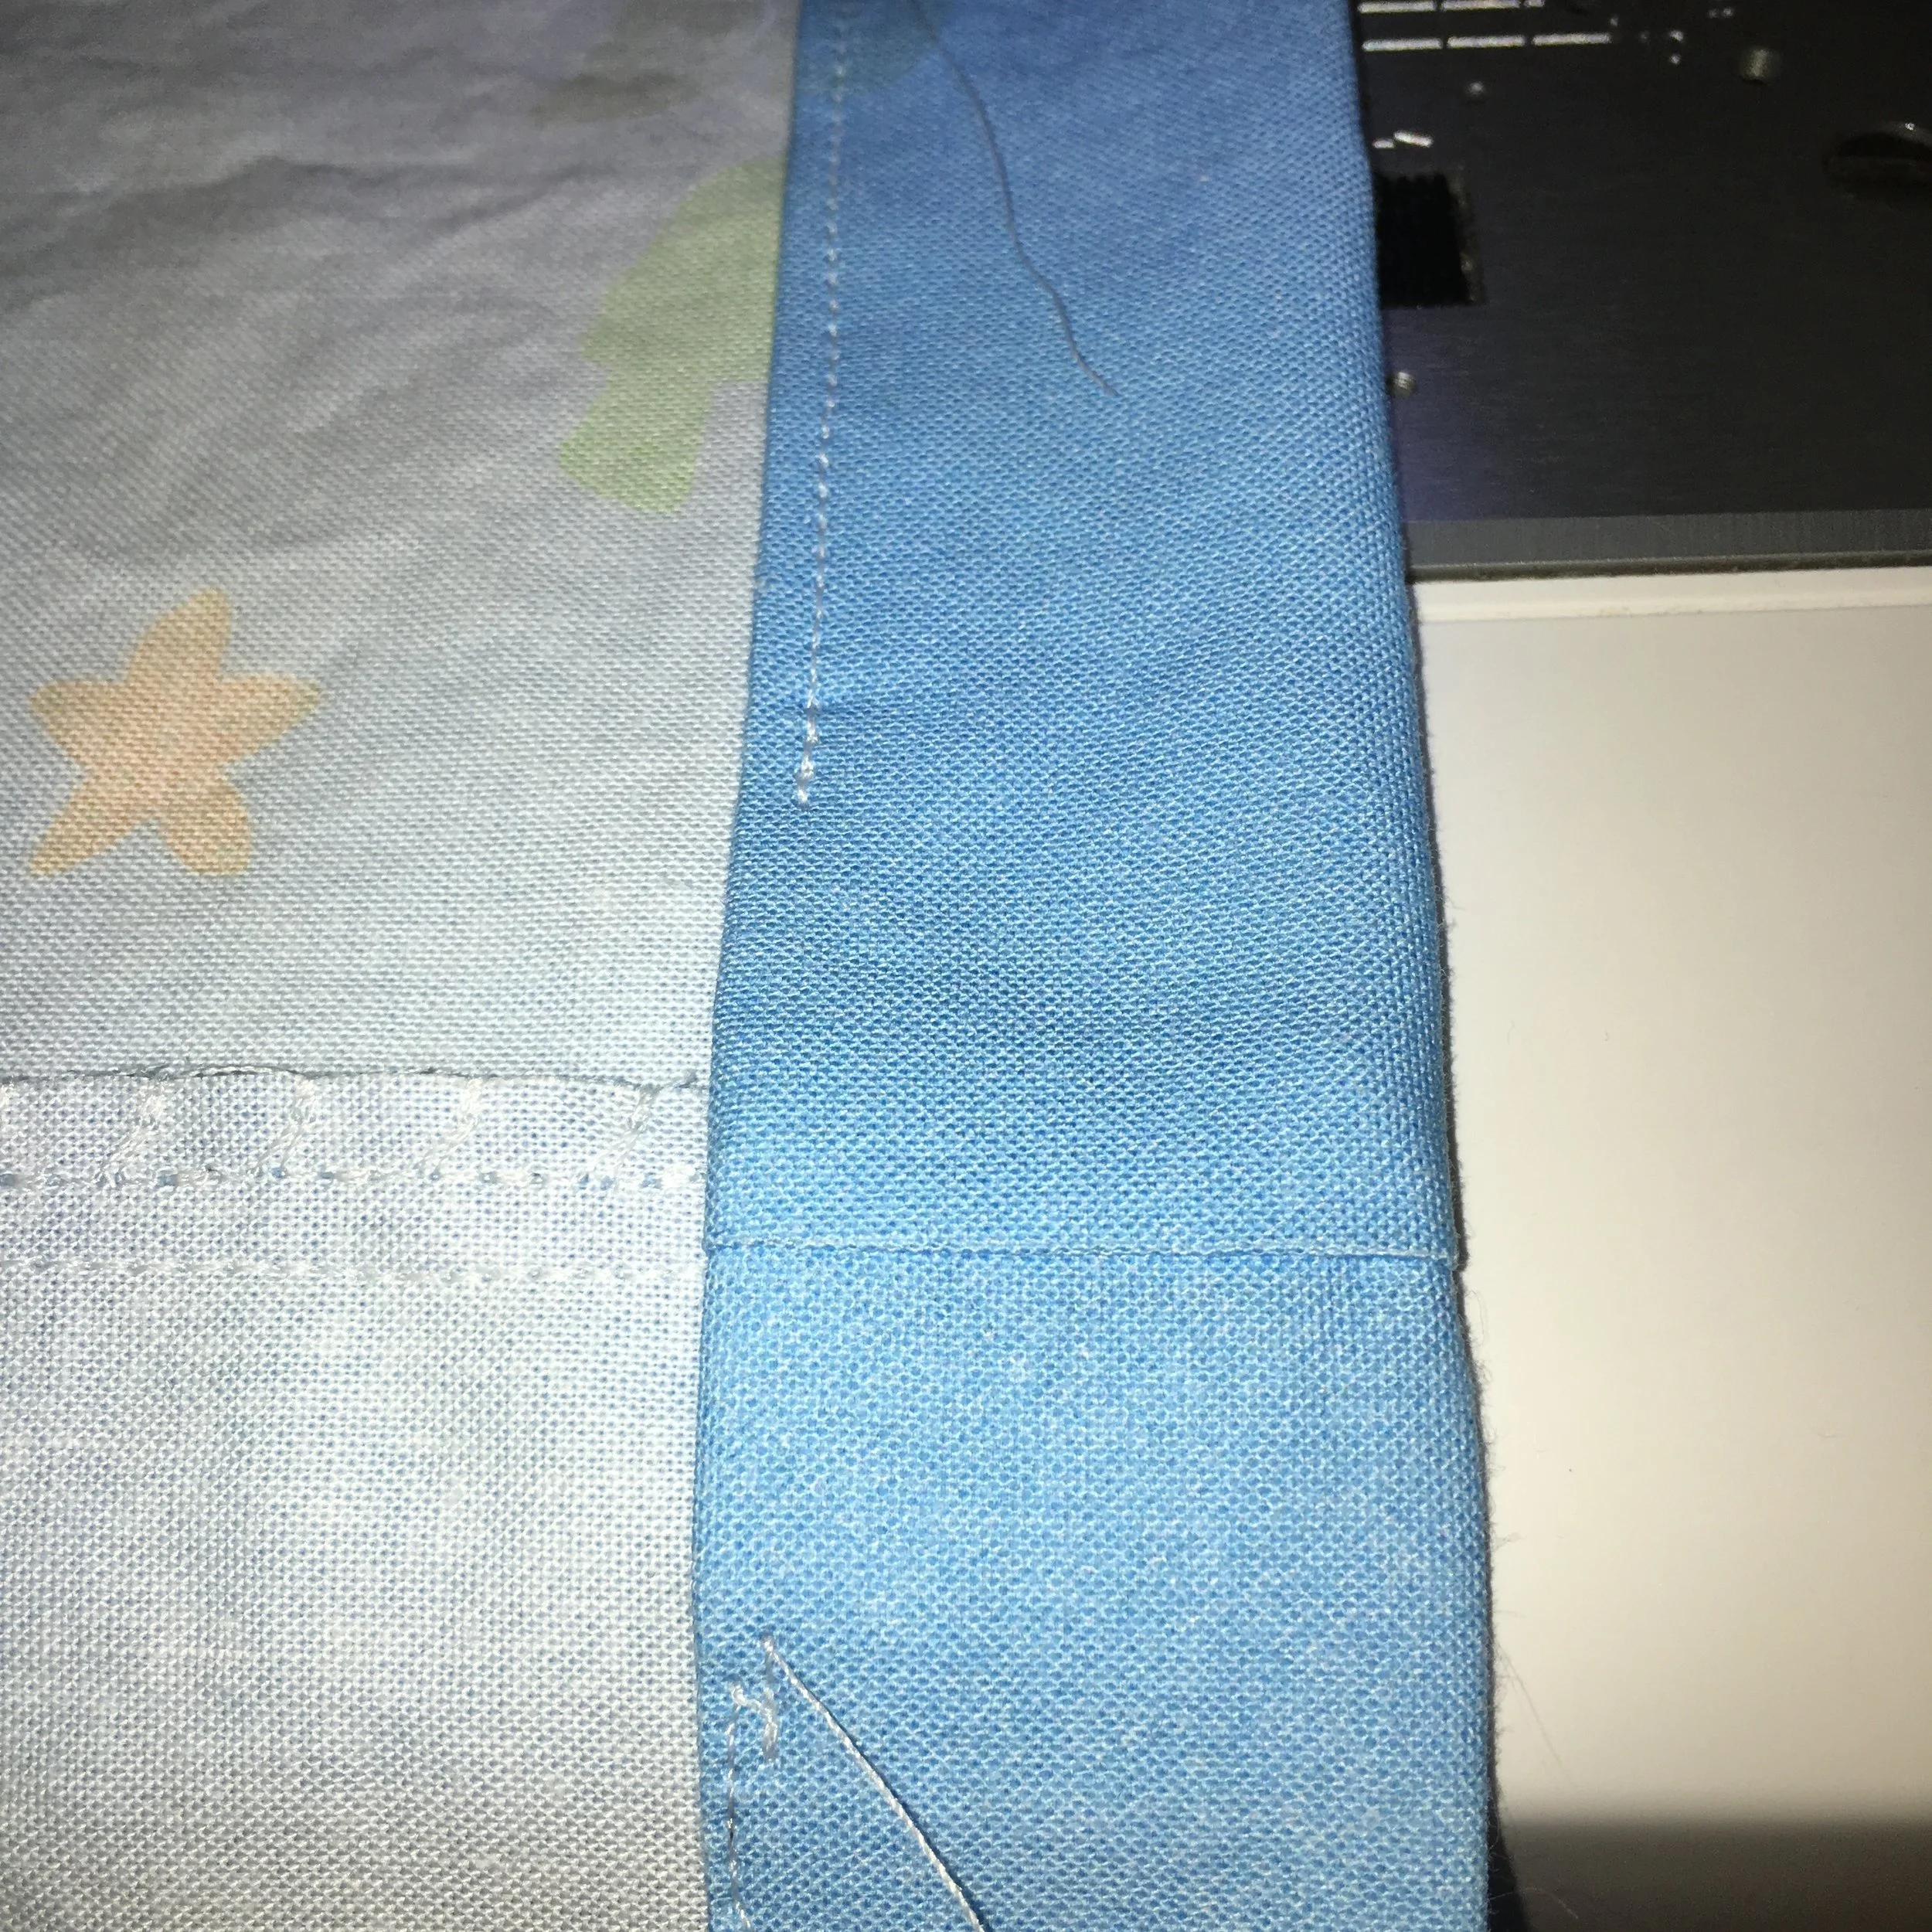
4. At the bottom edge of the skirt, fold down the fabric, wrong sides together, 1/4 inch. Press. Then fold over again 1 inch to make the hem. Stitch close to the folded edge to hem the skirt.
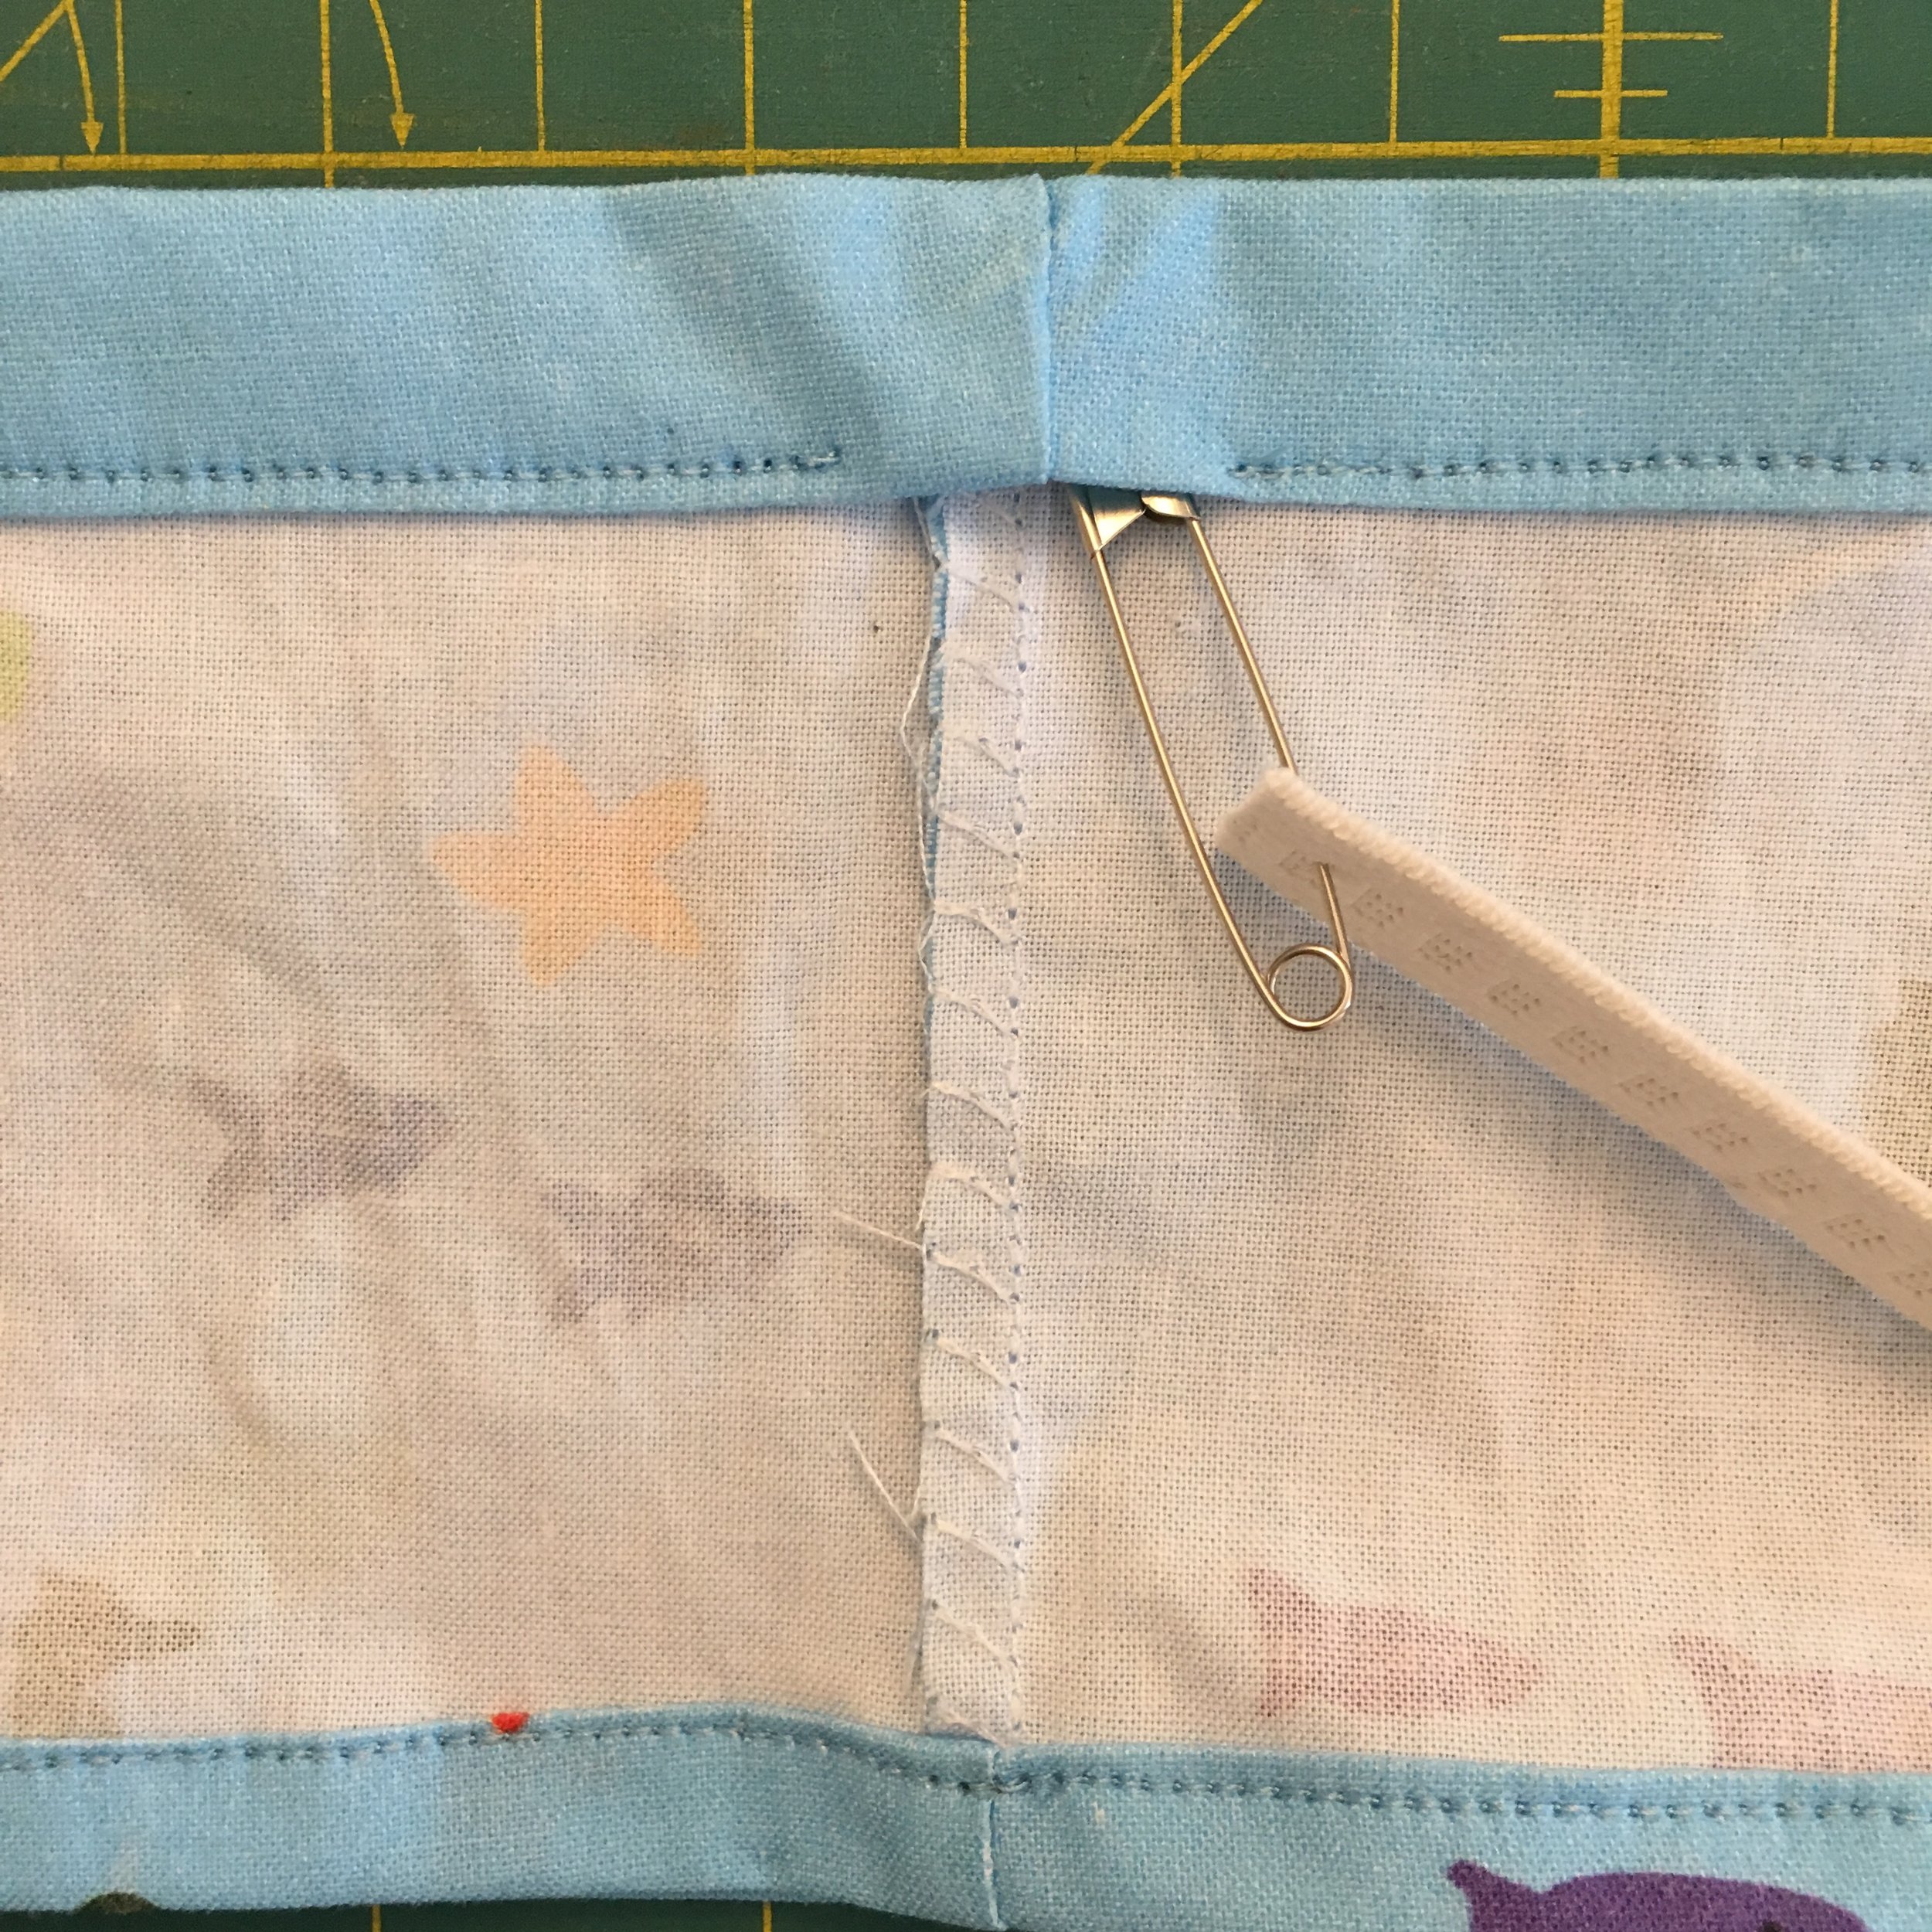
5. Cut a piece of 3/4 inch elastic for the waist. Use with waist measurement PLUS to 2 inches. (If you don't have the child available to measure, waist sizes can be found on line at mail order stores that sell children's clothes--for example Lands End will have this information). Using a safety pin as a guide, run the elastic through the channel at the waist of the skirt. Make sure not to lose the far end of the elastic in the channel)!
6. Overlap the 2 ends of the elastic, taking care not to twist them. Stitch them together using a zig-zag stitch. Now stitch down the opening in the casing.
7. Great job! Iron the skirt and have the child try it on!
For the doll's skirt: Use the same directions to make the doll's skirt with these changes
- Cut the fish doll skirt panel the desired skirt length PLUS 2 inches.
- Since the doll's skirt uses 1/2 inch elastic, make the elastic channel at the waist 3/4 inches, rather than the 1 1/4 used for the child's skirt.
- Cut the length of the elastic for the doll the measurement of the doll's waist. Don't add any extra. Dolls need a tight fit so the skirt doesn't slide off!
- The hem in the doll's skirt is made by making the first fold 1/4 inch as with the child's skirt and then folded again 1/2 inch.
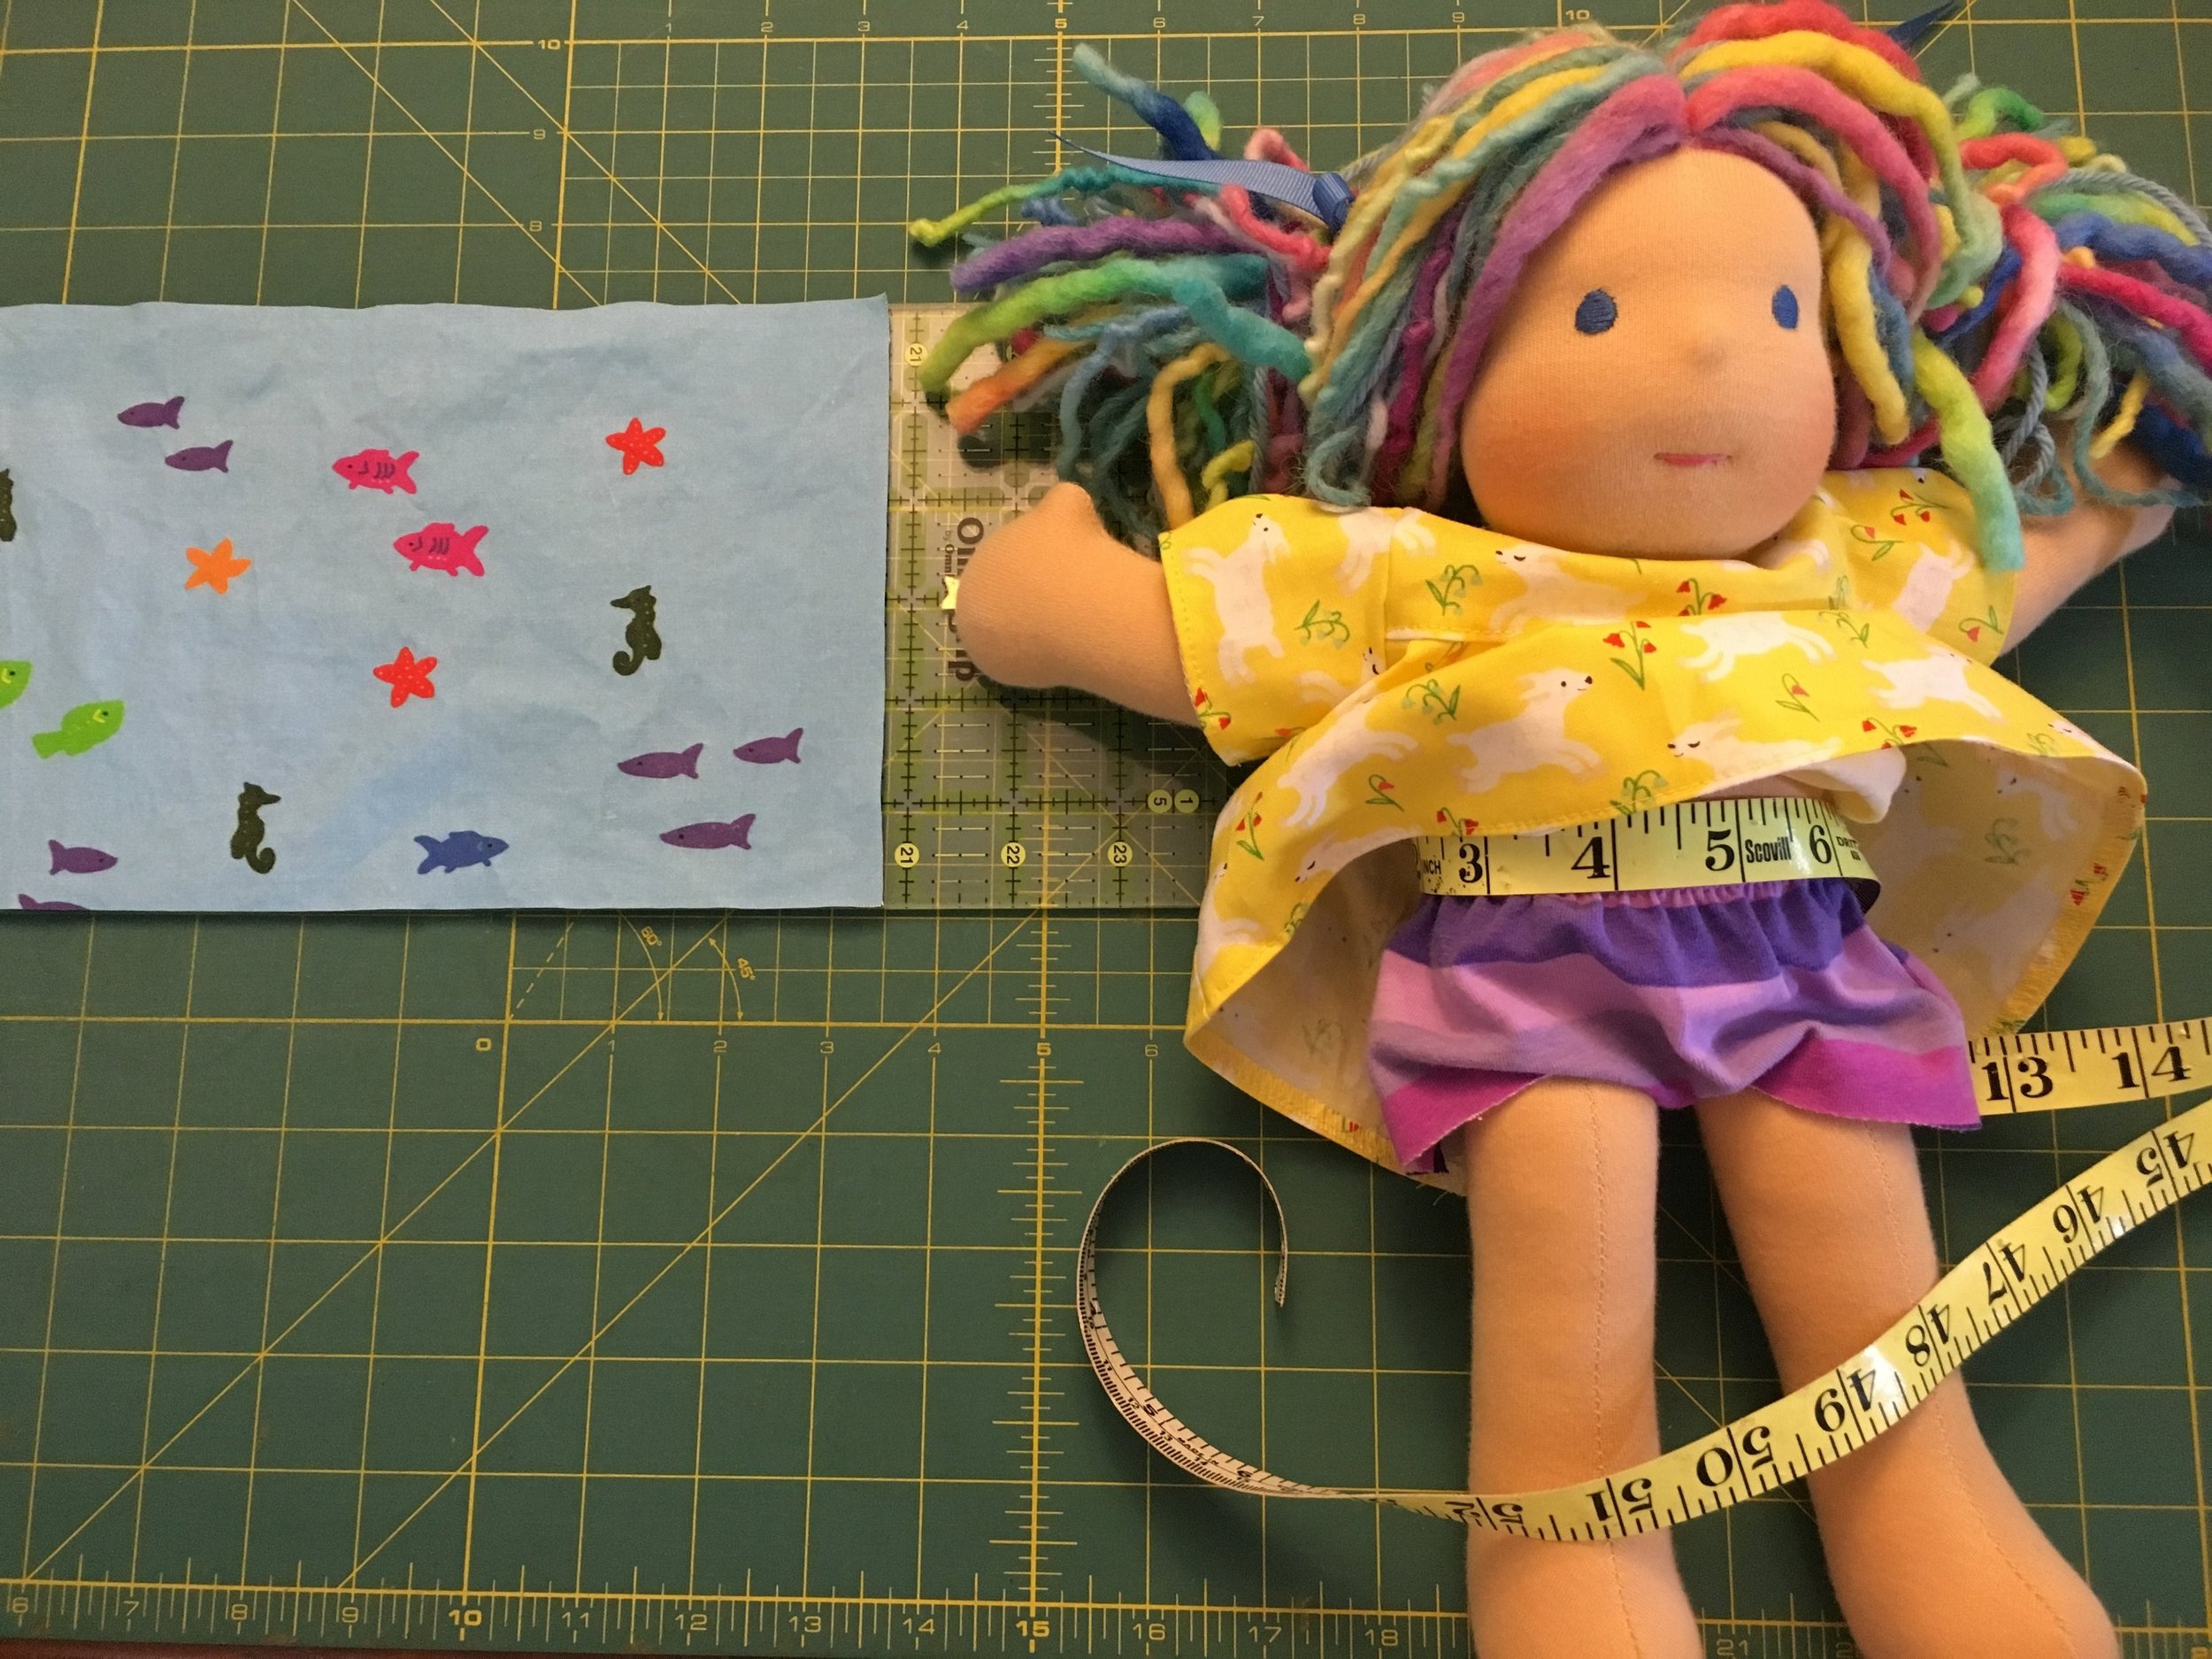
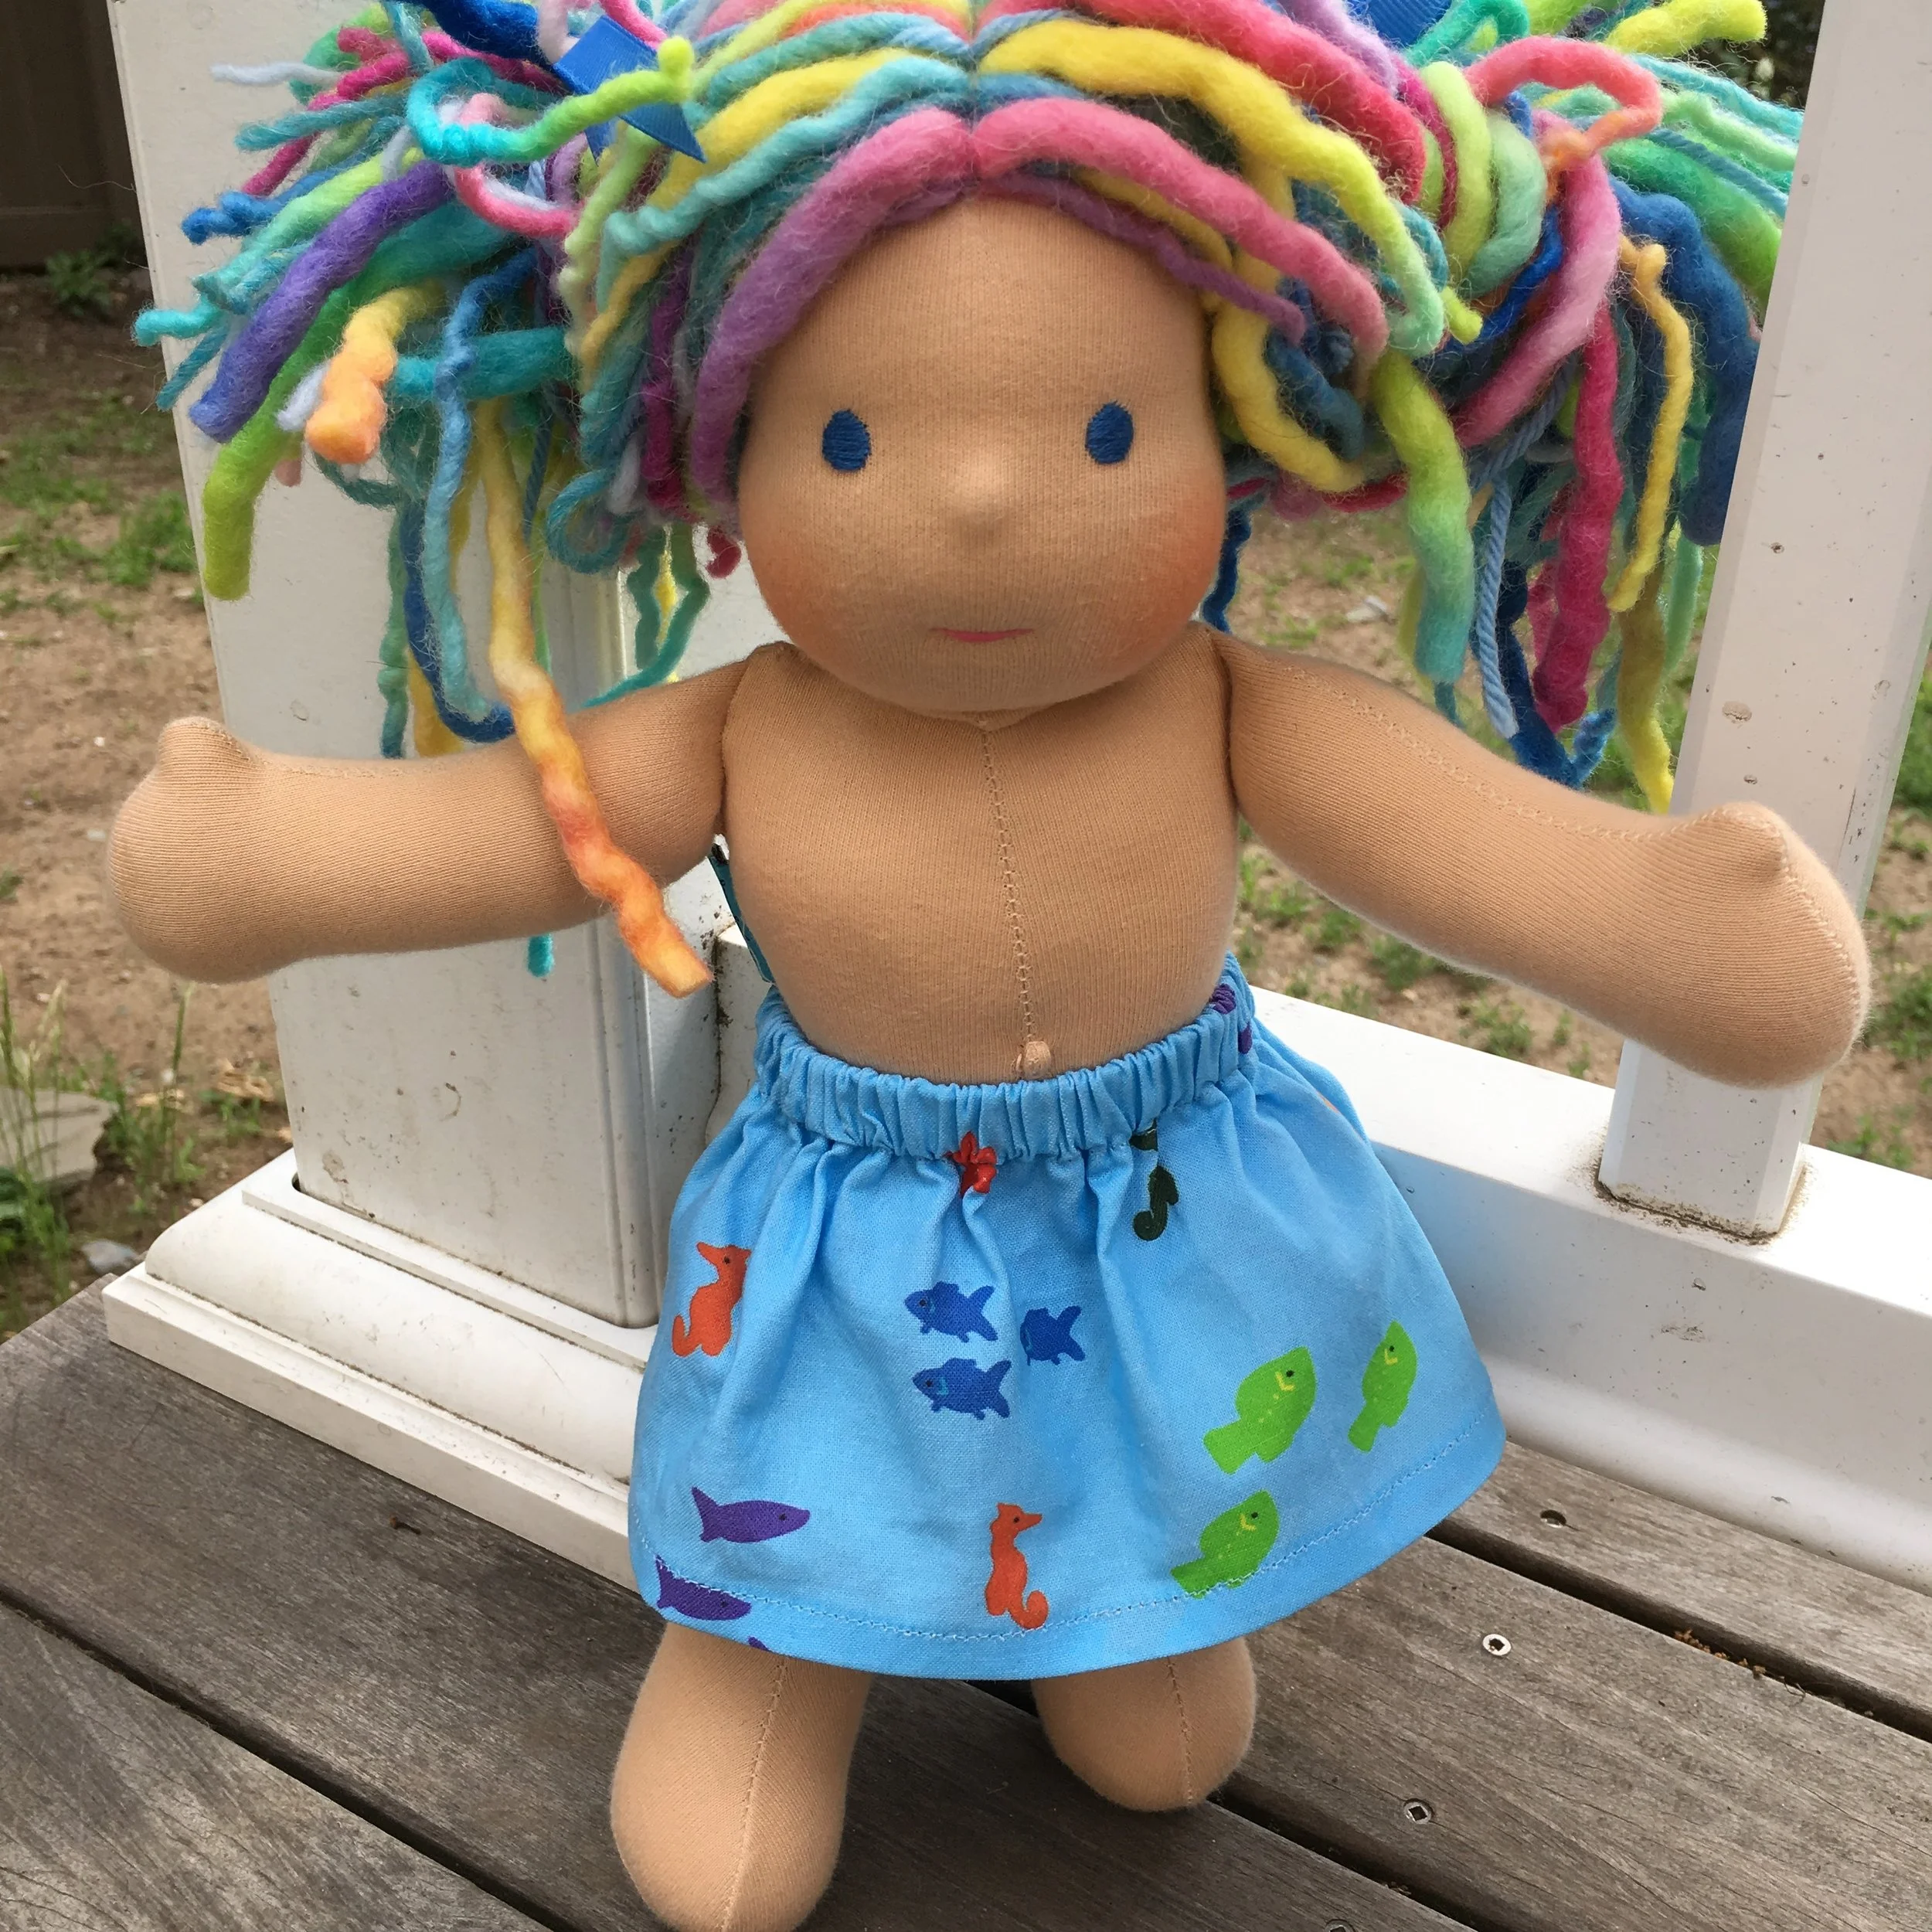
The doll pictured here is a Bamboletta Cuddle Doll. Bamboletta sometimes has very cute Mermaid dolls for sale too! Their Mermaid dolls were my inspiration for this Mermaid skirt design!
Hope the little girl in your life enjoys these coordinating skirts!