
Great work on Saturday! You are doing so much better with your rotary blades and rulers! Well done!
Once all your fabric is cut, you will be ready to start sewing.
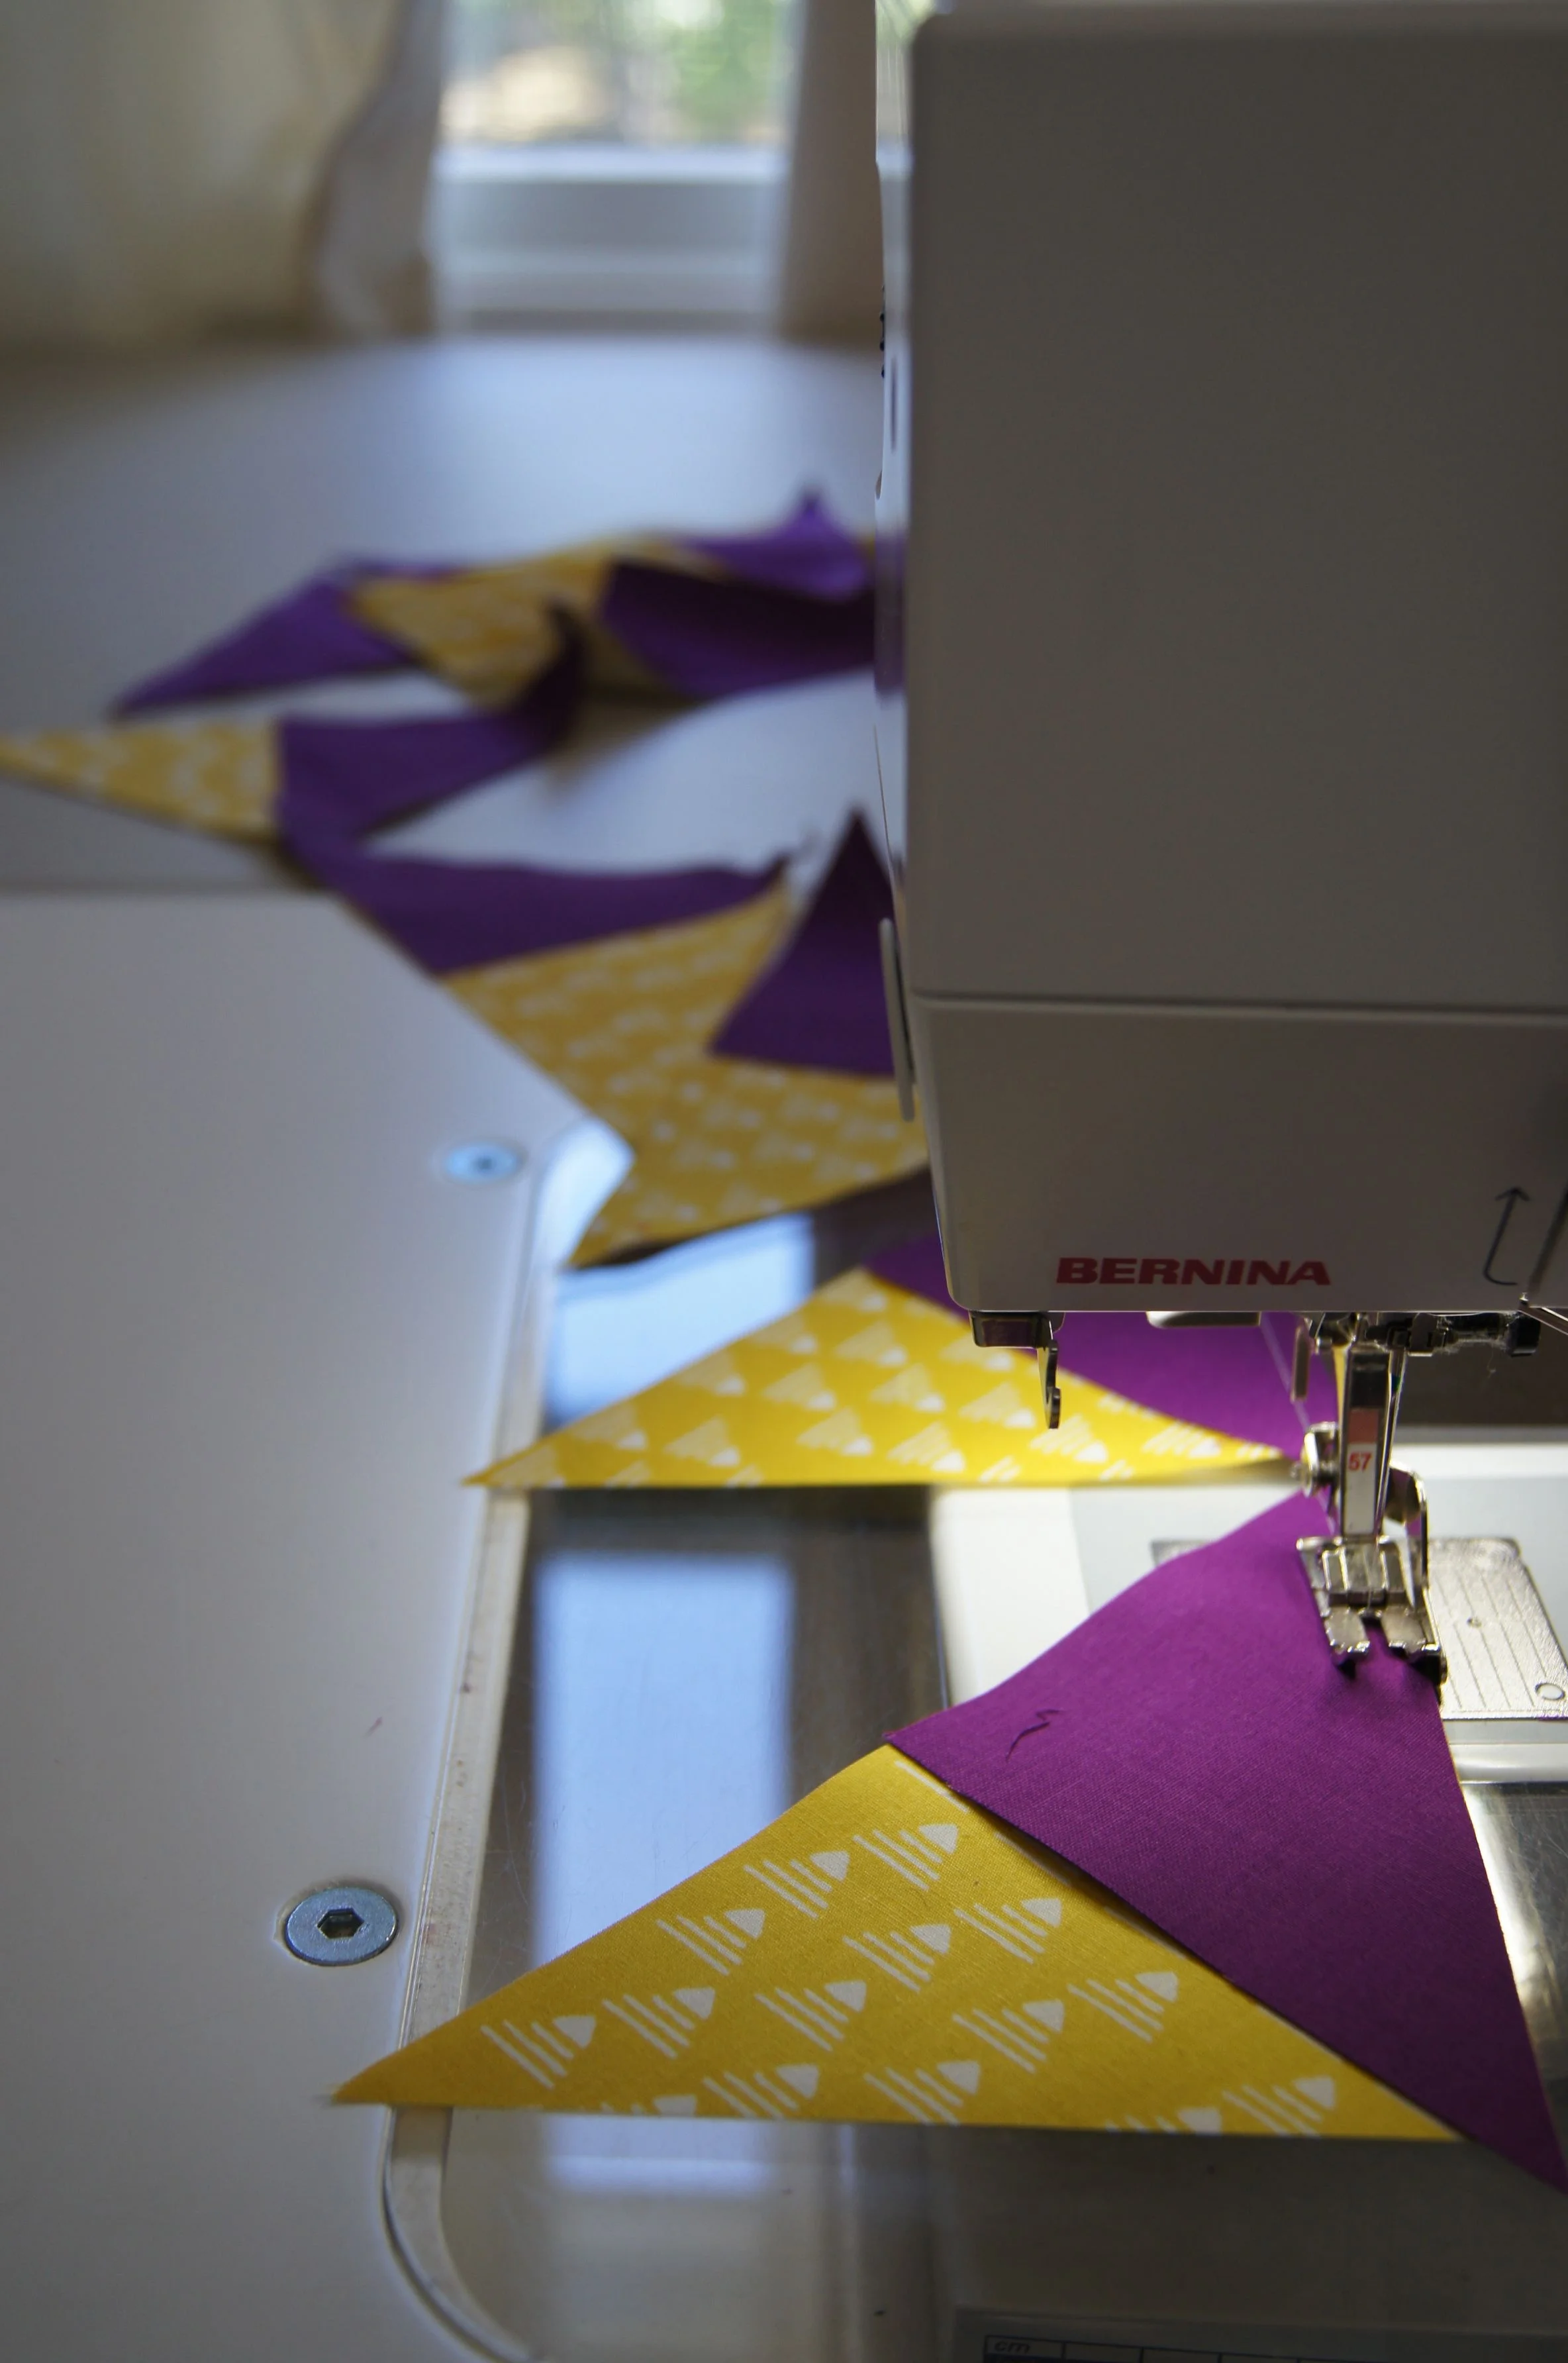
The flying geese blocks can be chain pieced. With chain piecing you can sew continuously without stopping to cut thread between the blocks. Sew your first block, then continue sewing a few stitches beyond the block, then feed in your next block. Continue feeding in blocks in the same step until you have sewn all of them.
Chain of sewn flying geese units
Chain piecing saves time and thread. It also organizes your blocks and keeps them altogether until you snip them apart when that step is finished.
I find it easier to sew the wing onto the left side of the large central triangle but if you feel more comfortable doing the right wing first that's fine. Just try to keep that choice consistent as you sew all the blocks.
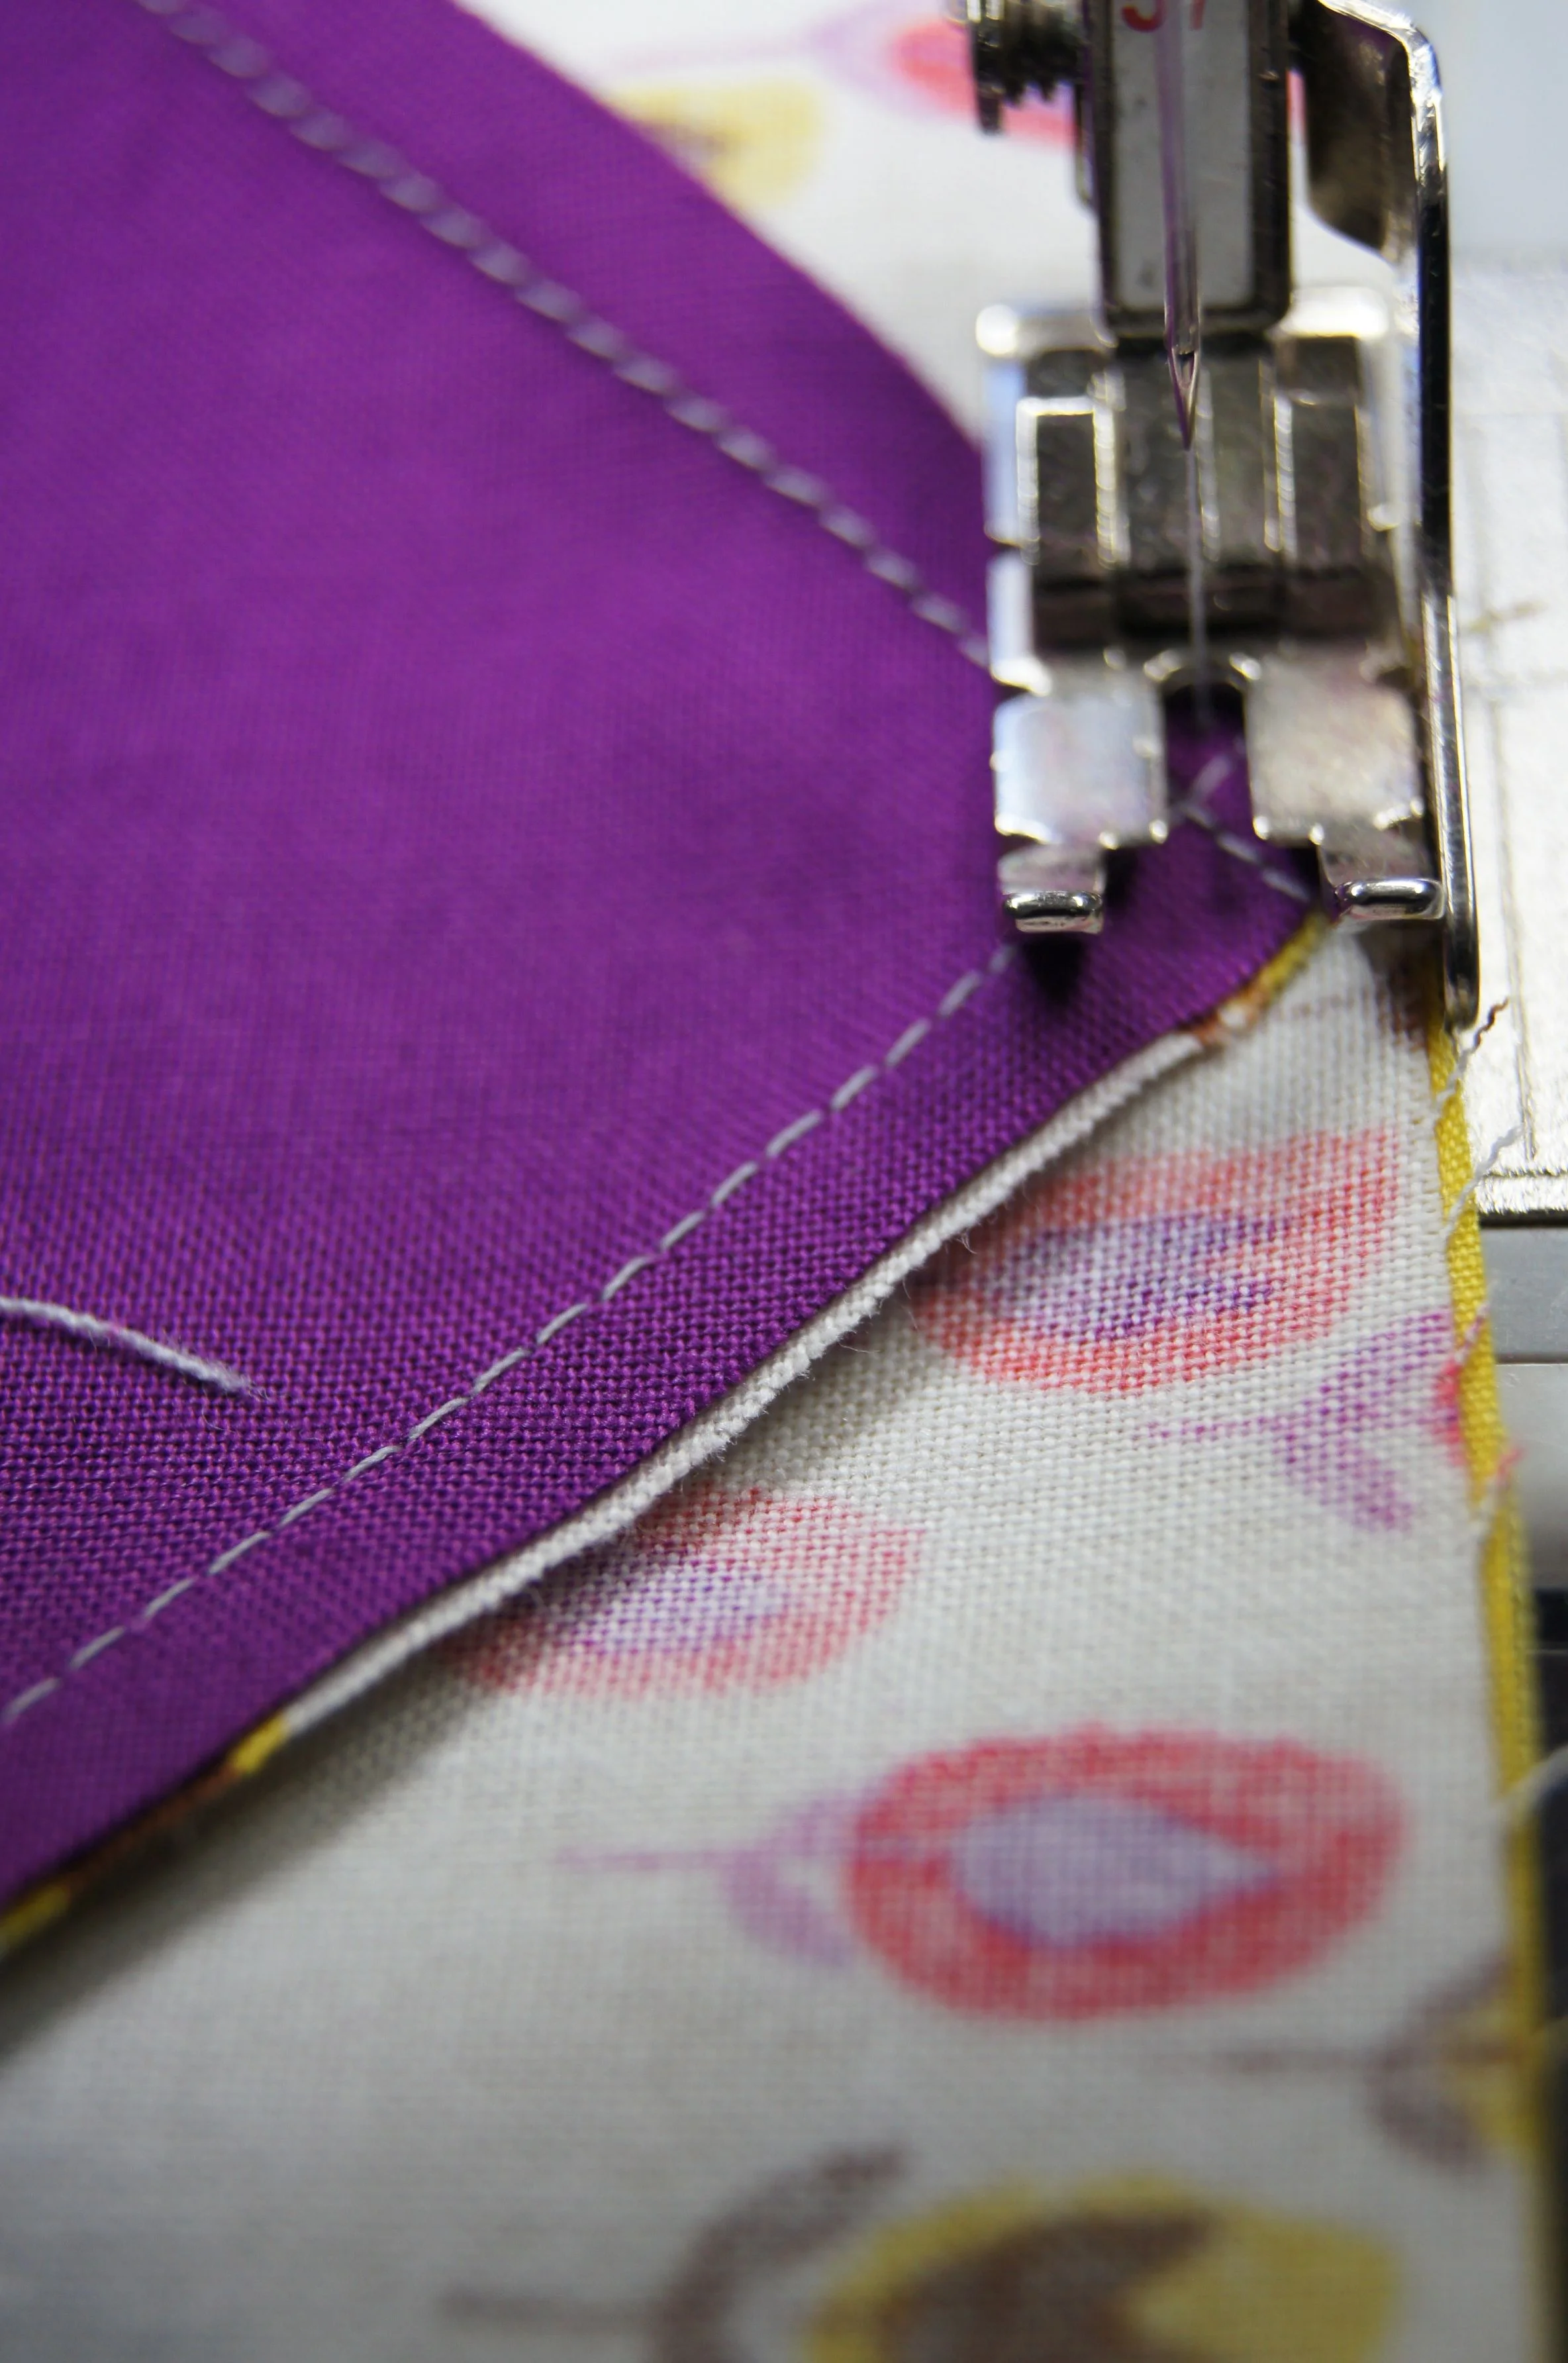
Sew a consistent 1/4 inch seam on these blocks for best results. I'm planning to show you how to make a "fence" you can use a fabric guide in our next class. But if you want to start sewing before then, here is a link to Bonnie Hunter's tutorial on making a 1/4 inch seam guide which is pretty clever. Stacking up several layers of painters tape can be used as the "fence" too.
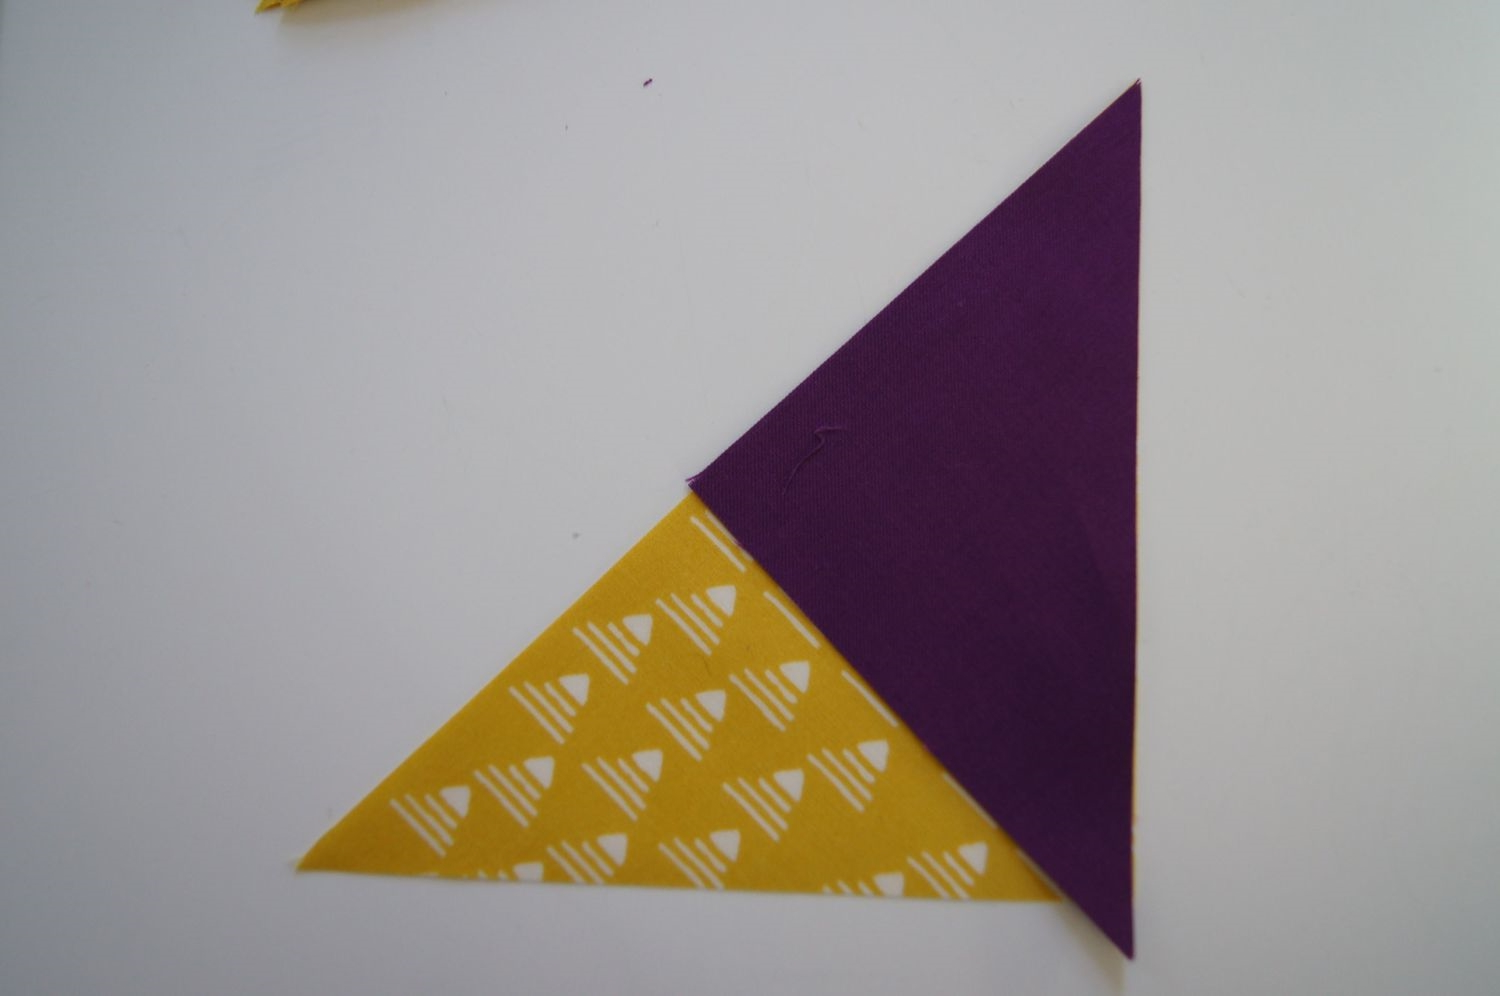
Here is the left wing on top of the central triangle, right sides together. It's been rotated to make it ready to sew. Start stitching at the point on the corner of the long side of the central triangle, ending the stitching at the point of the central triangle. Chain piece all the left wings. Press seam toward the wing.

Then sew on the right wing to all flying geese units. Press this seam toward the wing you just sewed onto the block.
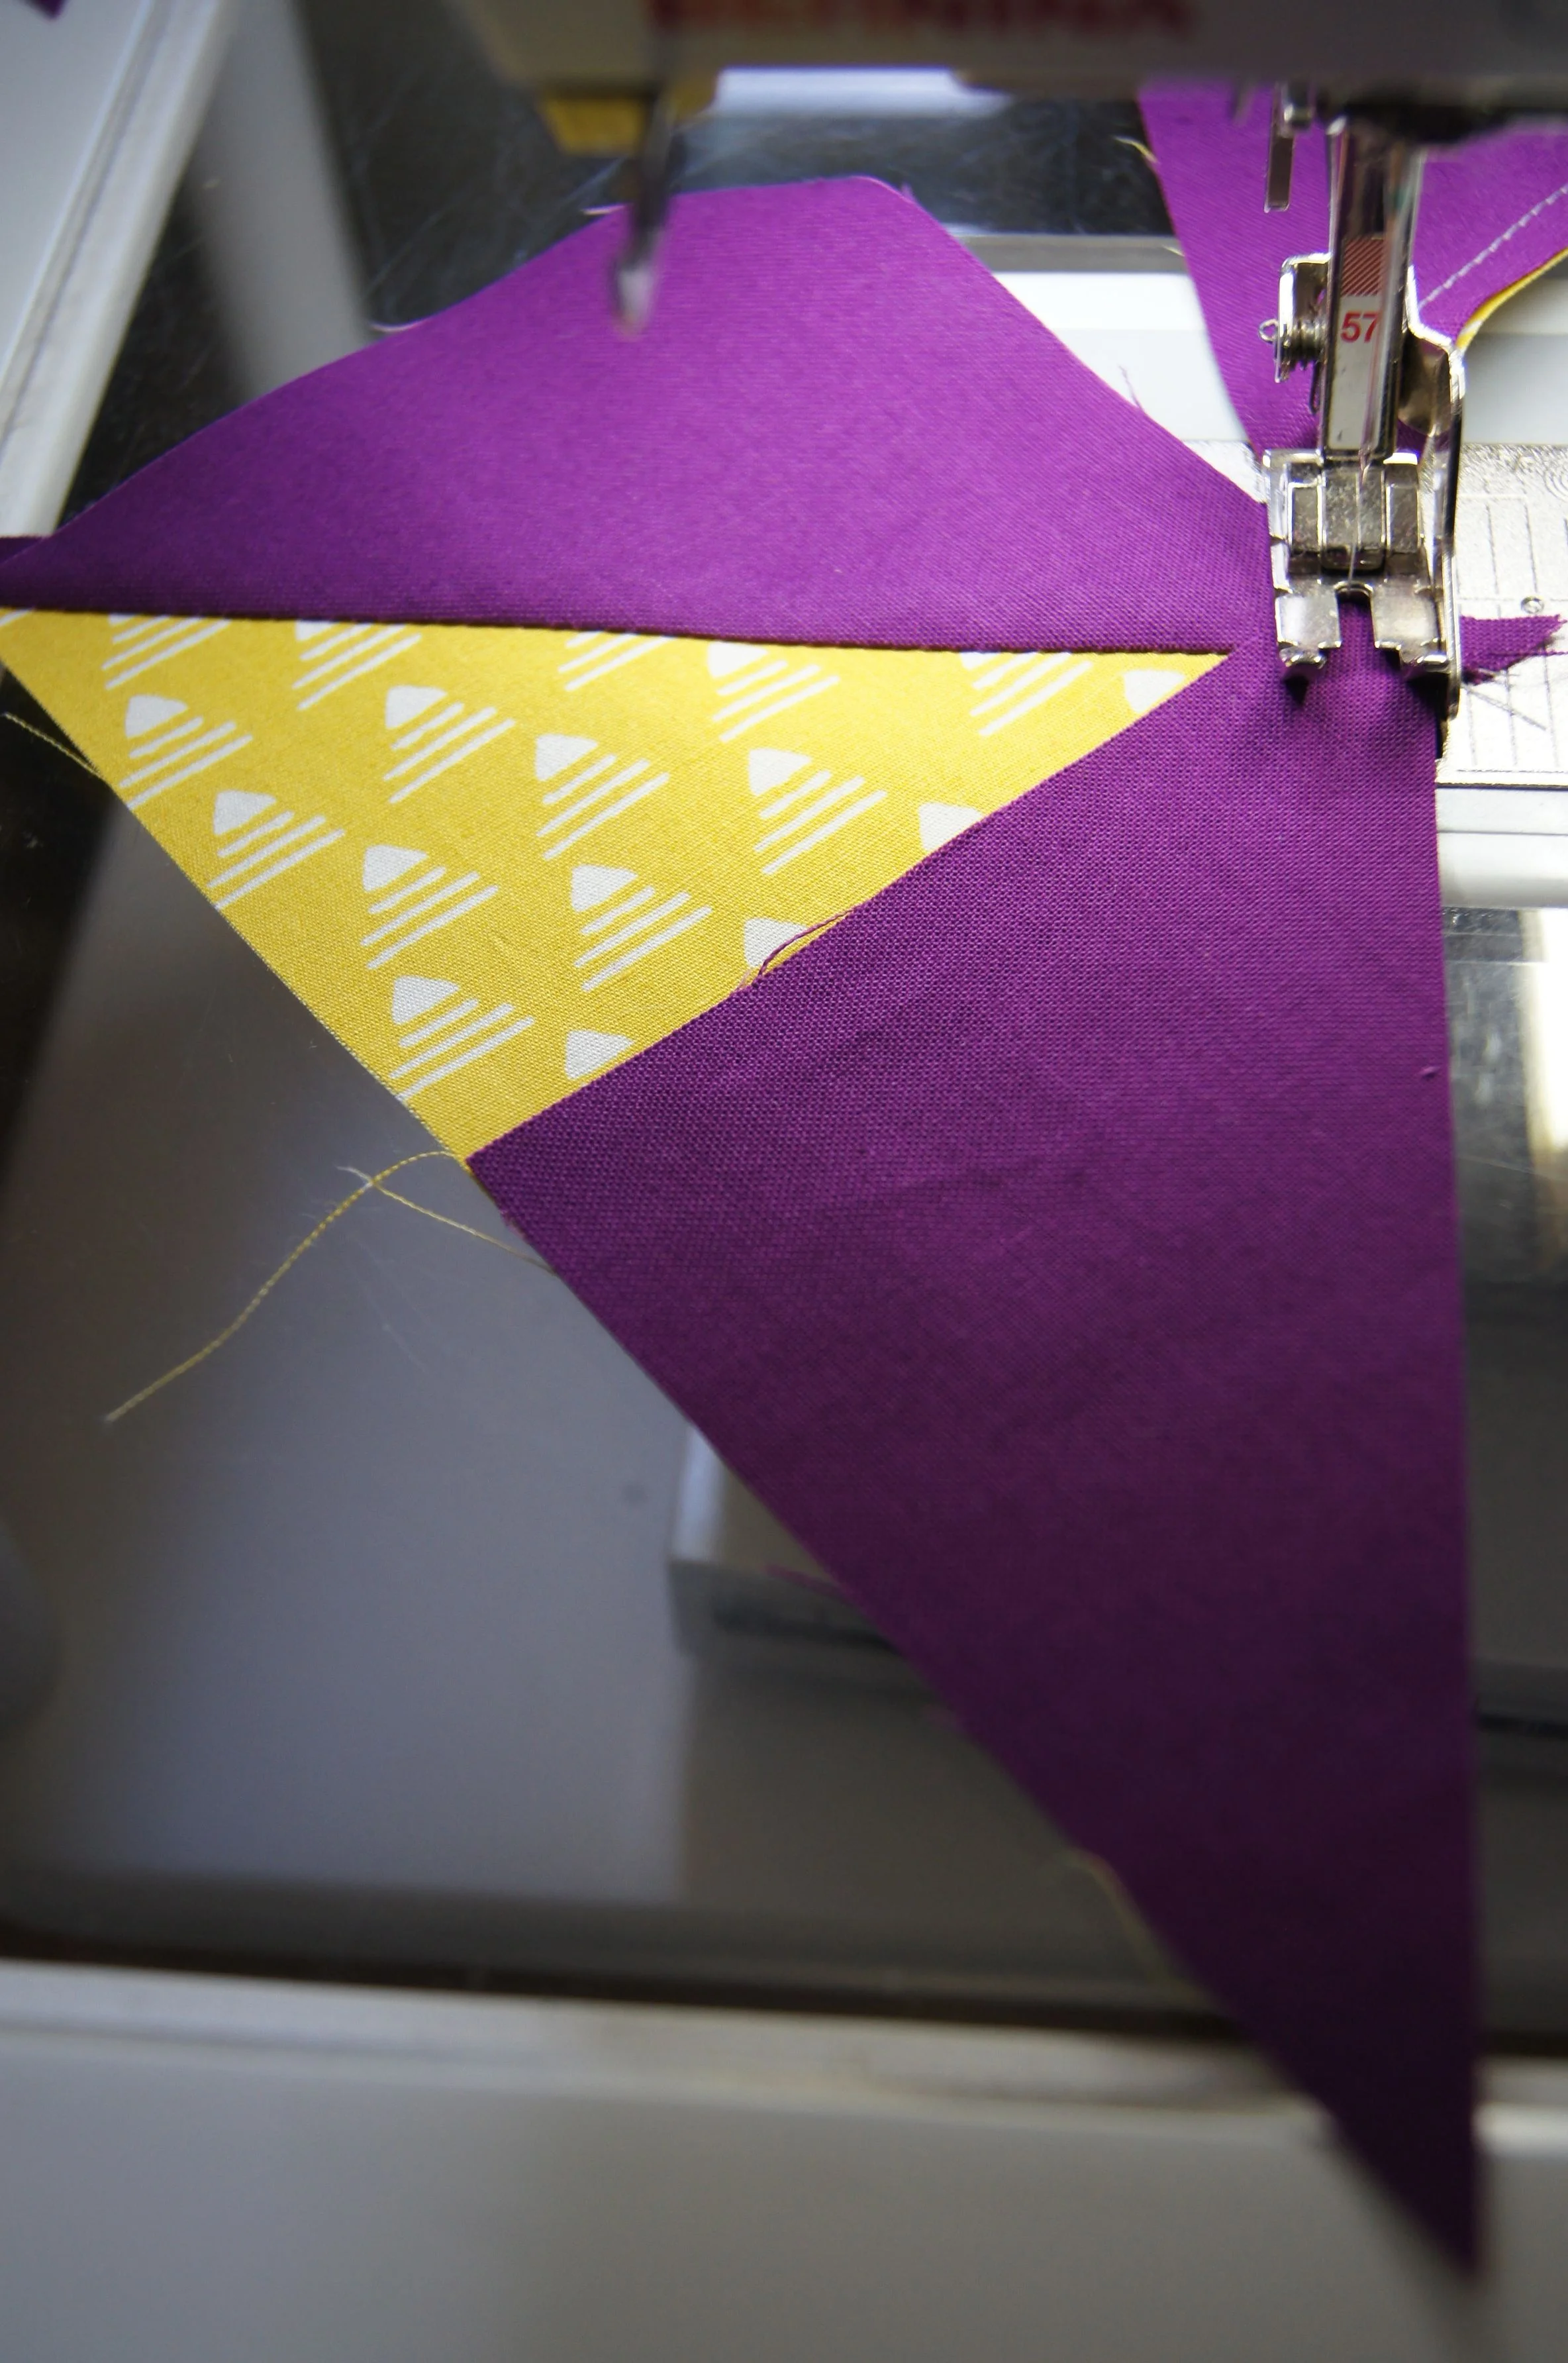
Sewing on the 2nd wing.
Here is the completed block.
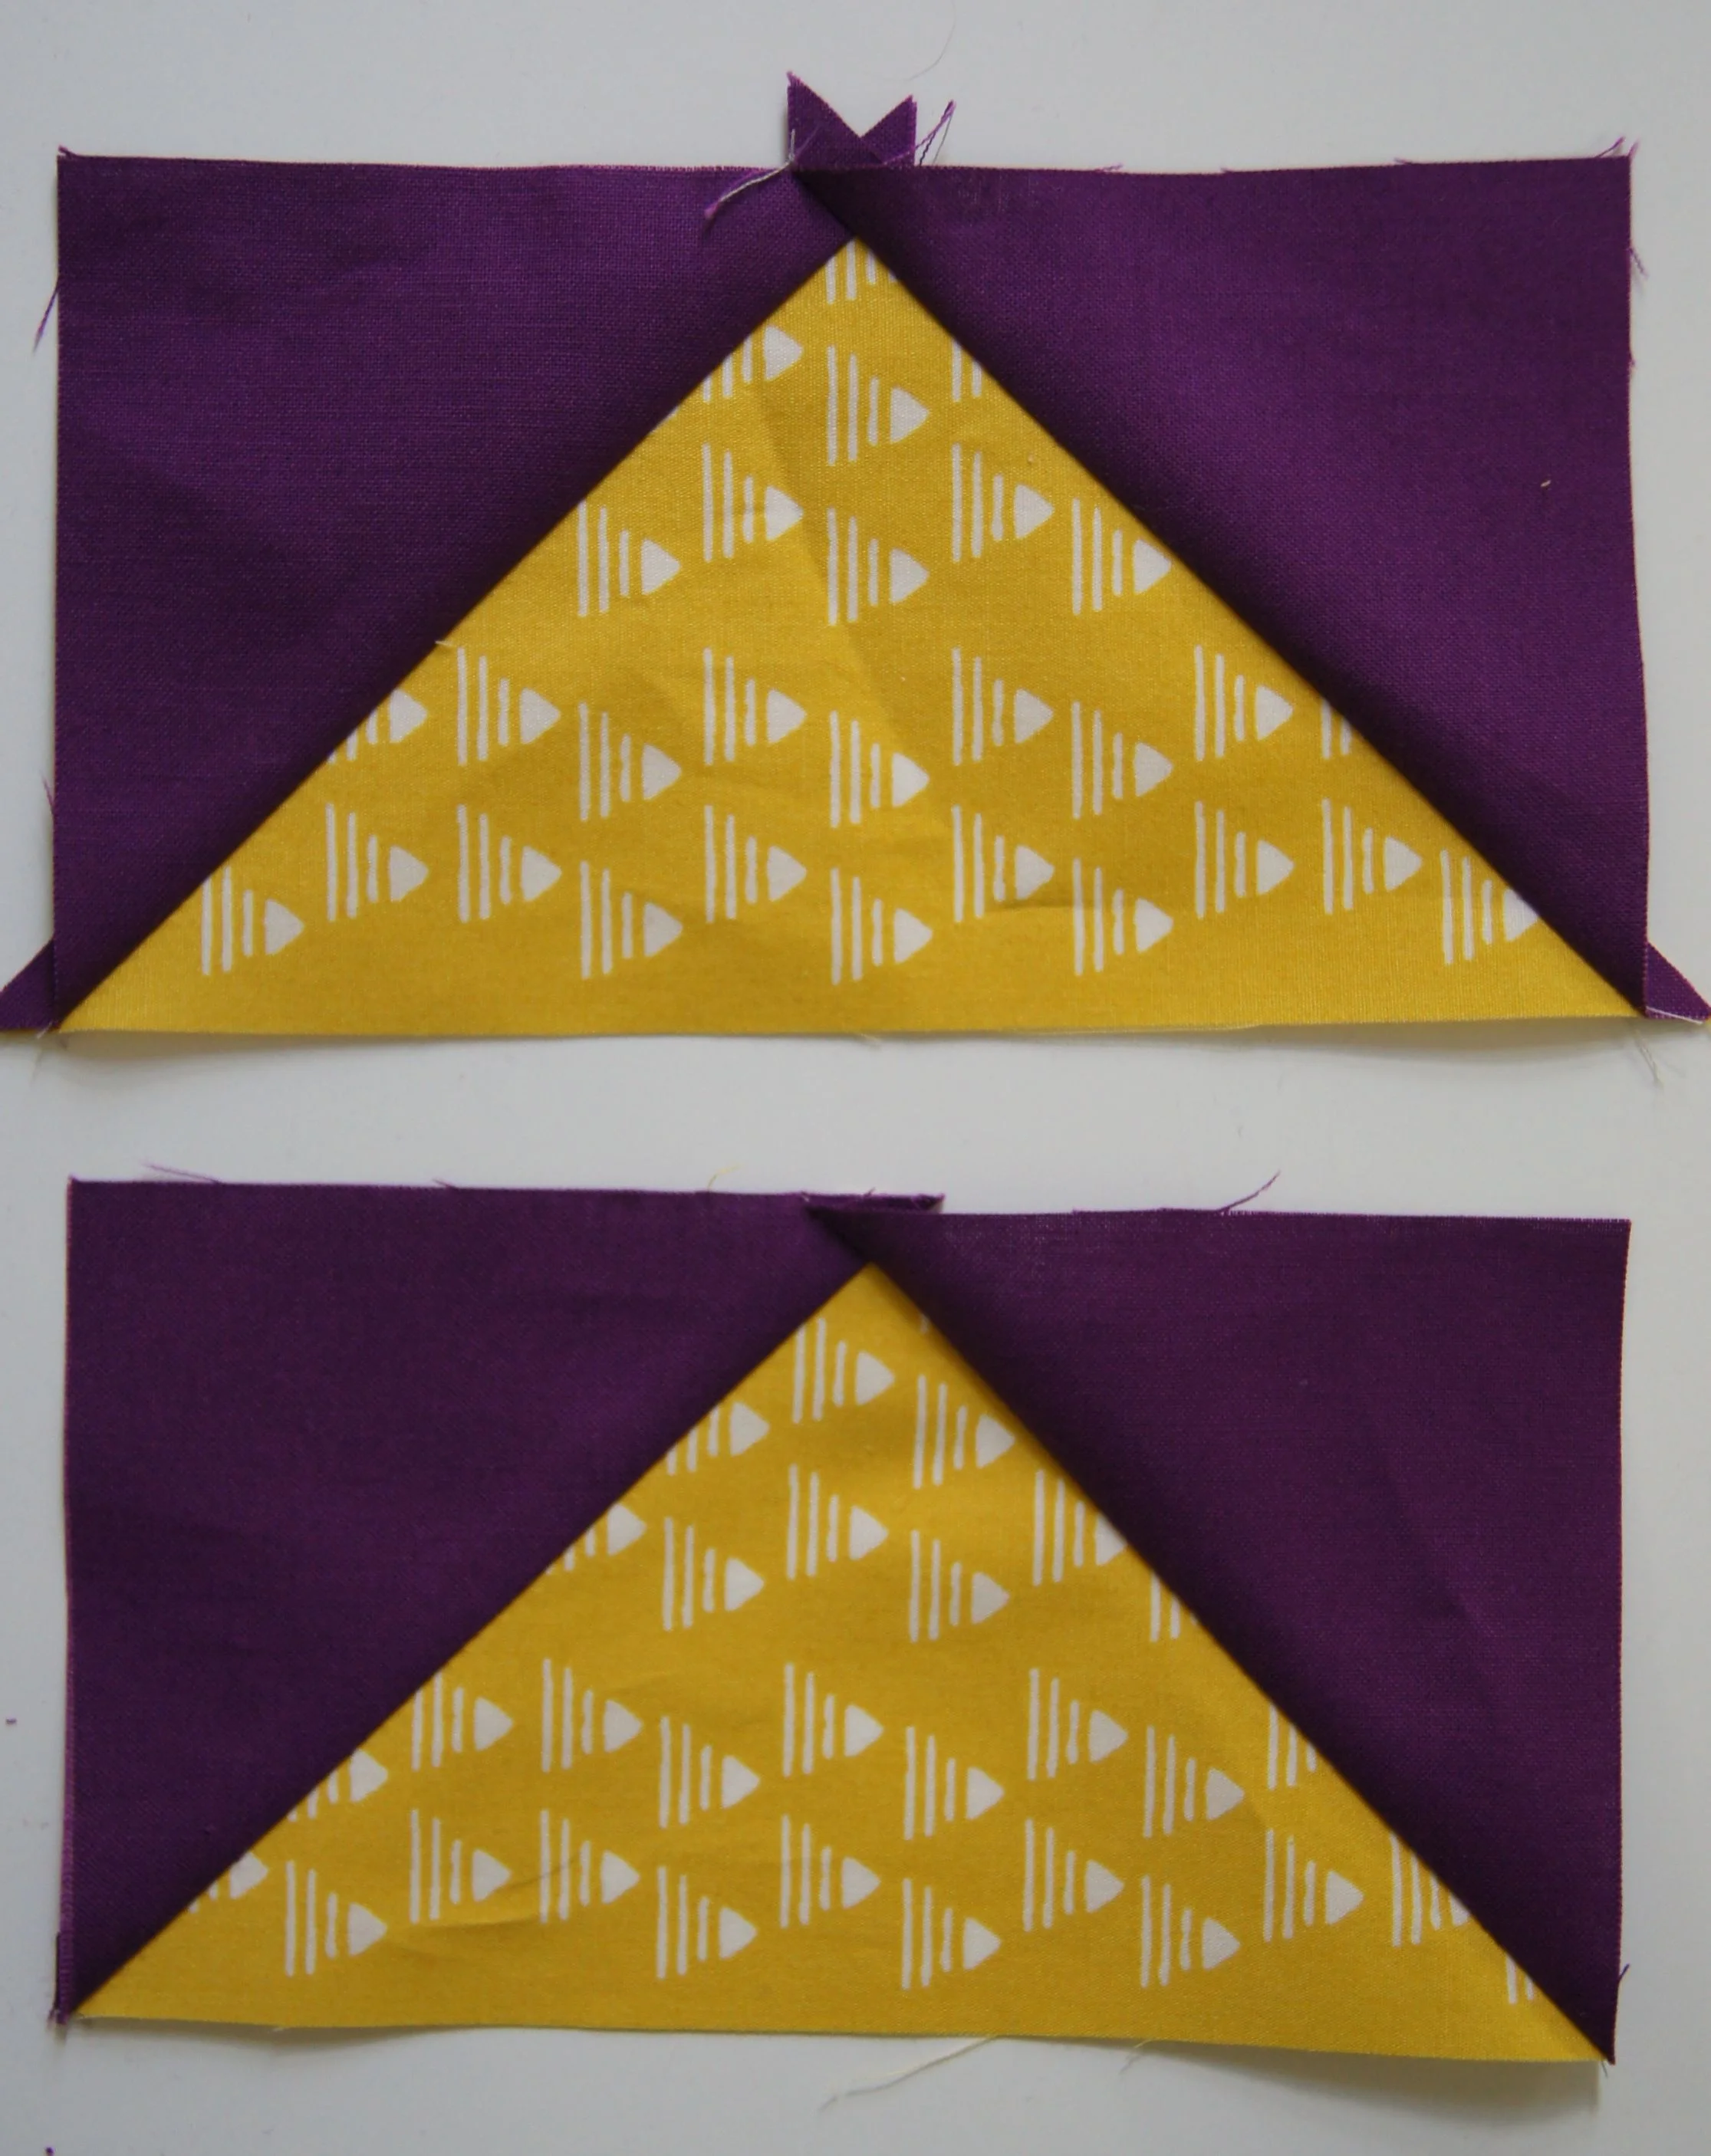
Flying Geese unit with the dog ears and then trimmed.
When your flying geese units are done you'll have a couple of "dog ears" sticking out at the top of the block. Trim them off so that you have a straight line. The dog ears make the seam lumpier than necessary if not trimmed off.
Now sew the pairs of flying geese together. Make sure to sew the blocks together with the flying geese unit with the light central triangle as the upper block,
As you sew the blocks together, make sure you sew through the "x" made by your 2 lines of sewing at the center point of your flying geese blocks. If you sewing crosses the center of the "x" you should have a perfect point on your finished flying geese blocks.
Sewing across the "x" formed by the stitching at the center of the block.
Once all the pairs of flying geese have been sewn together you are ready to assemble your quilt.
Use your design wall, or hang a picnic tablecloth on a wall with the wrong (fuzzy) side facing out. Your blocks should stick to the fussy side of the tablecloth. Below is a photo of one of my quilts (not the flying geese pattern) on the design wall. I take photos of quilts on the design wall on my phone and don't usually save them so I don't have a photo of the quilt you are working on while it was on the design wall.

Arrange the blocks of your quilt following one of the examples on the last page of the pattern. Feel free to try other arrangements. It's your quilt--anything you like is fine! Walk across the room and look at your quilt. Do you like it? This is the time to change the layout if you think another arrangement looks more interesting.
Once you have your final layout on the design wall, take a photo of it. Look at the photo. It's easier to see design errors or layout problems in the photograph. You'll see things in the photograph that you may not see when you look at the block on the design wall.
Now sew the blocks together in rows, sewing the blocks running across the width of the quilt.
Once all the blocks are sewn into strips, sew the strips together. It's easiest the top half of the of the rows together into a unit. Then sew the lower half of the rows together. Finally sew the 2 halves of the quilt to each other.
Well done! Your quilt top is complete!