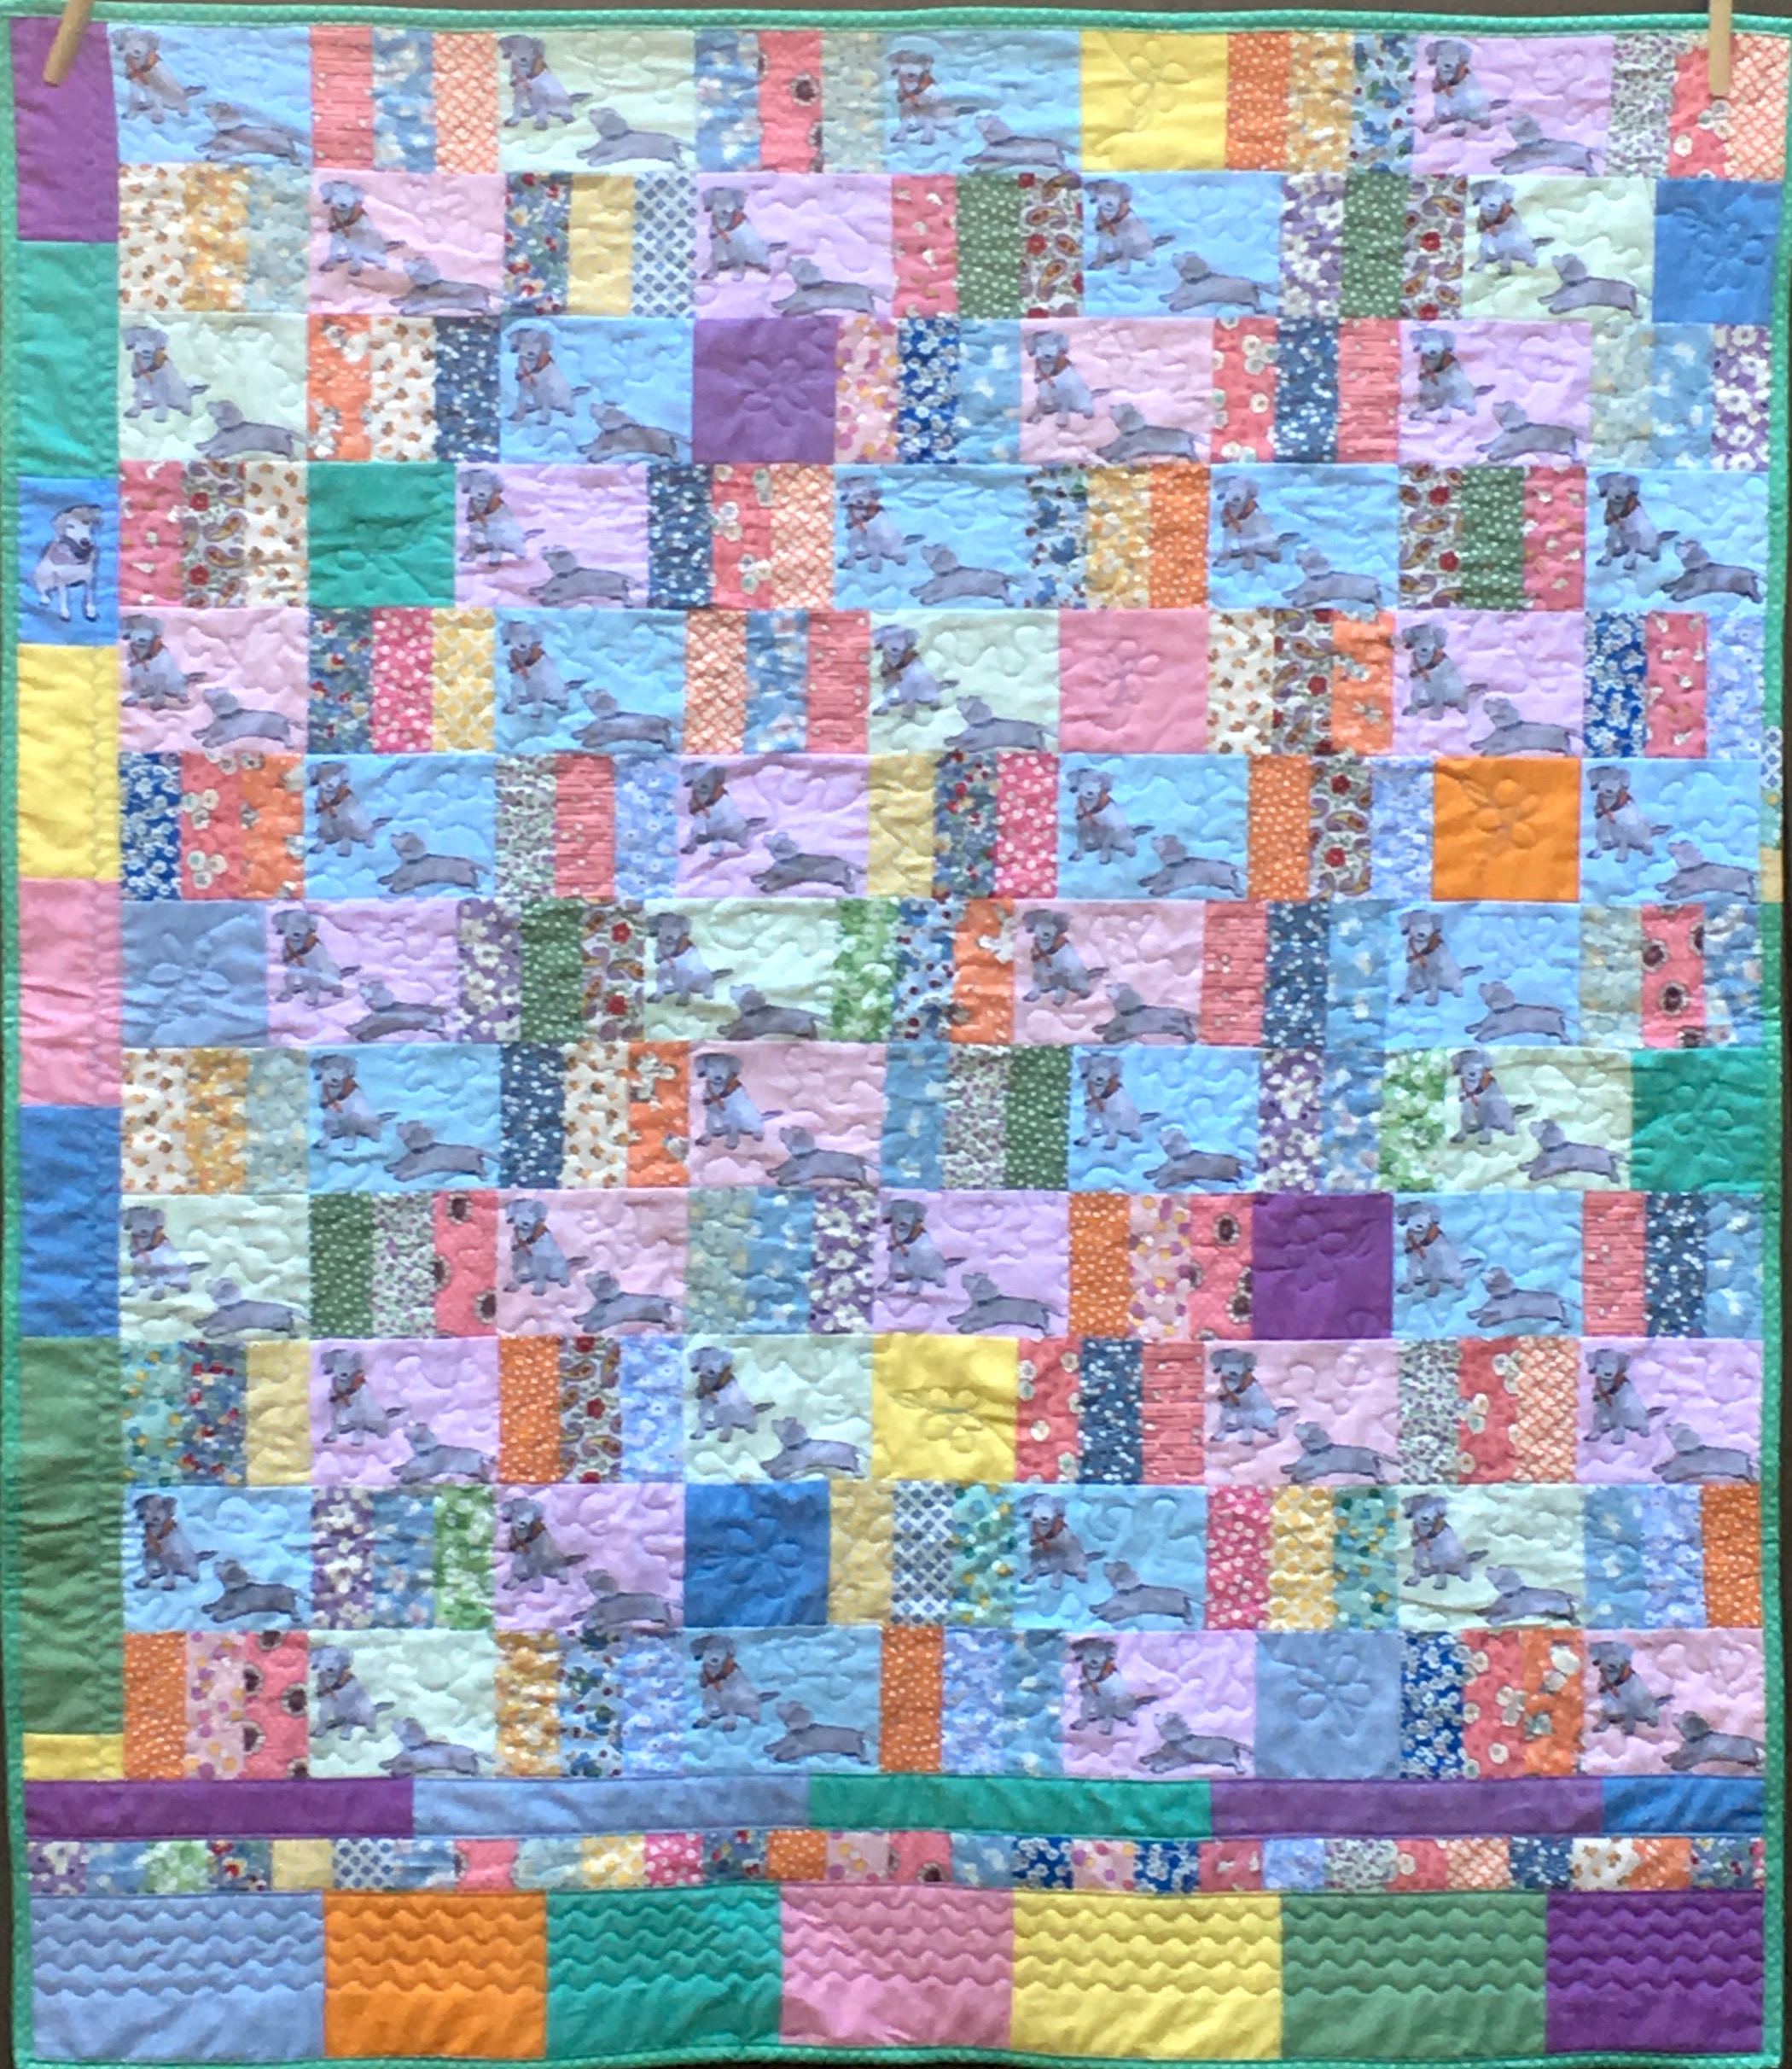
Lab Puppies Quilt, 40 x 45 inches
As promised, here is the completed Lab Puppies quilt!
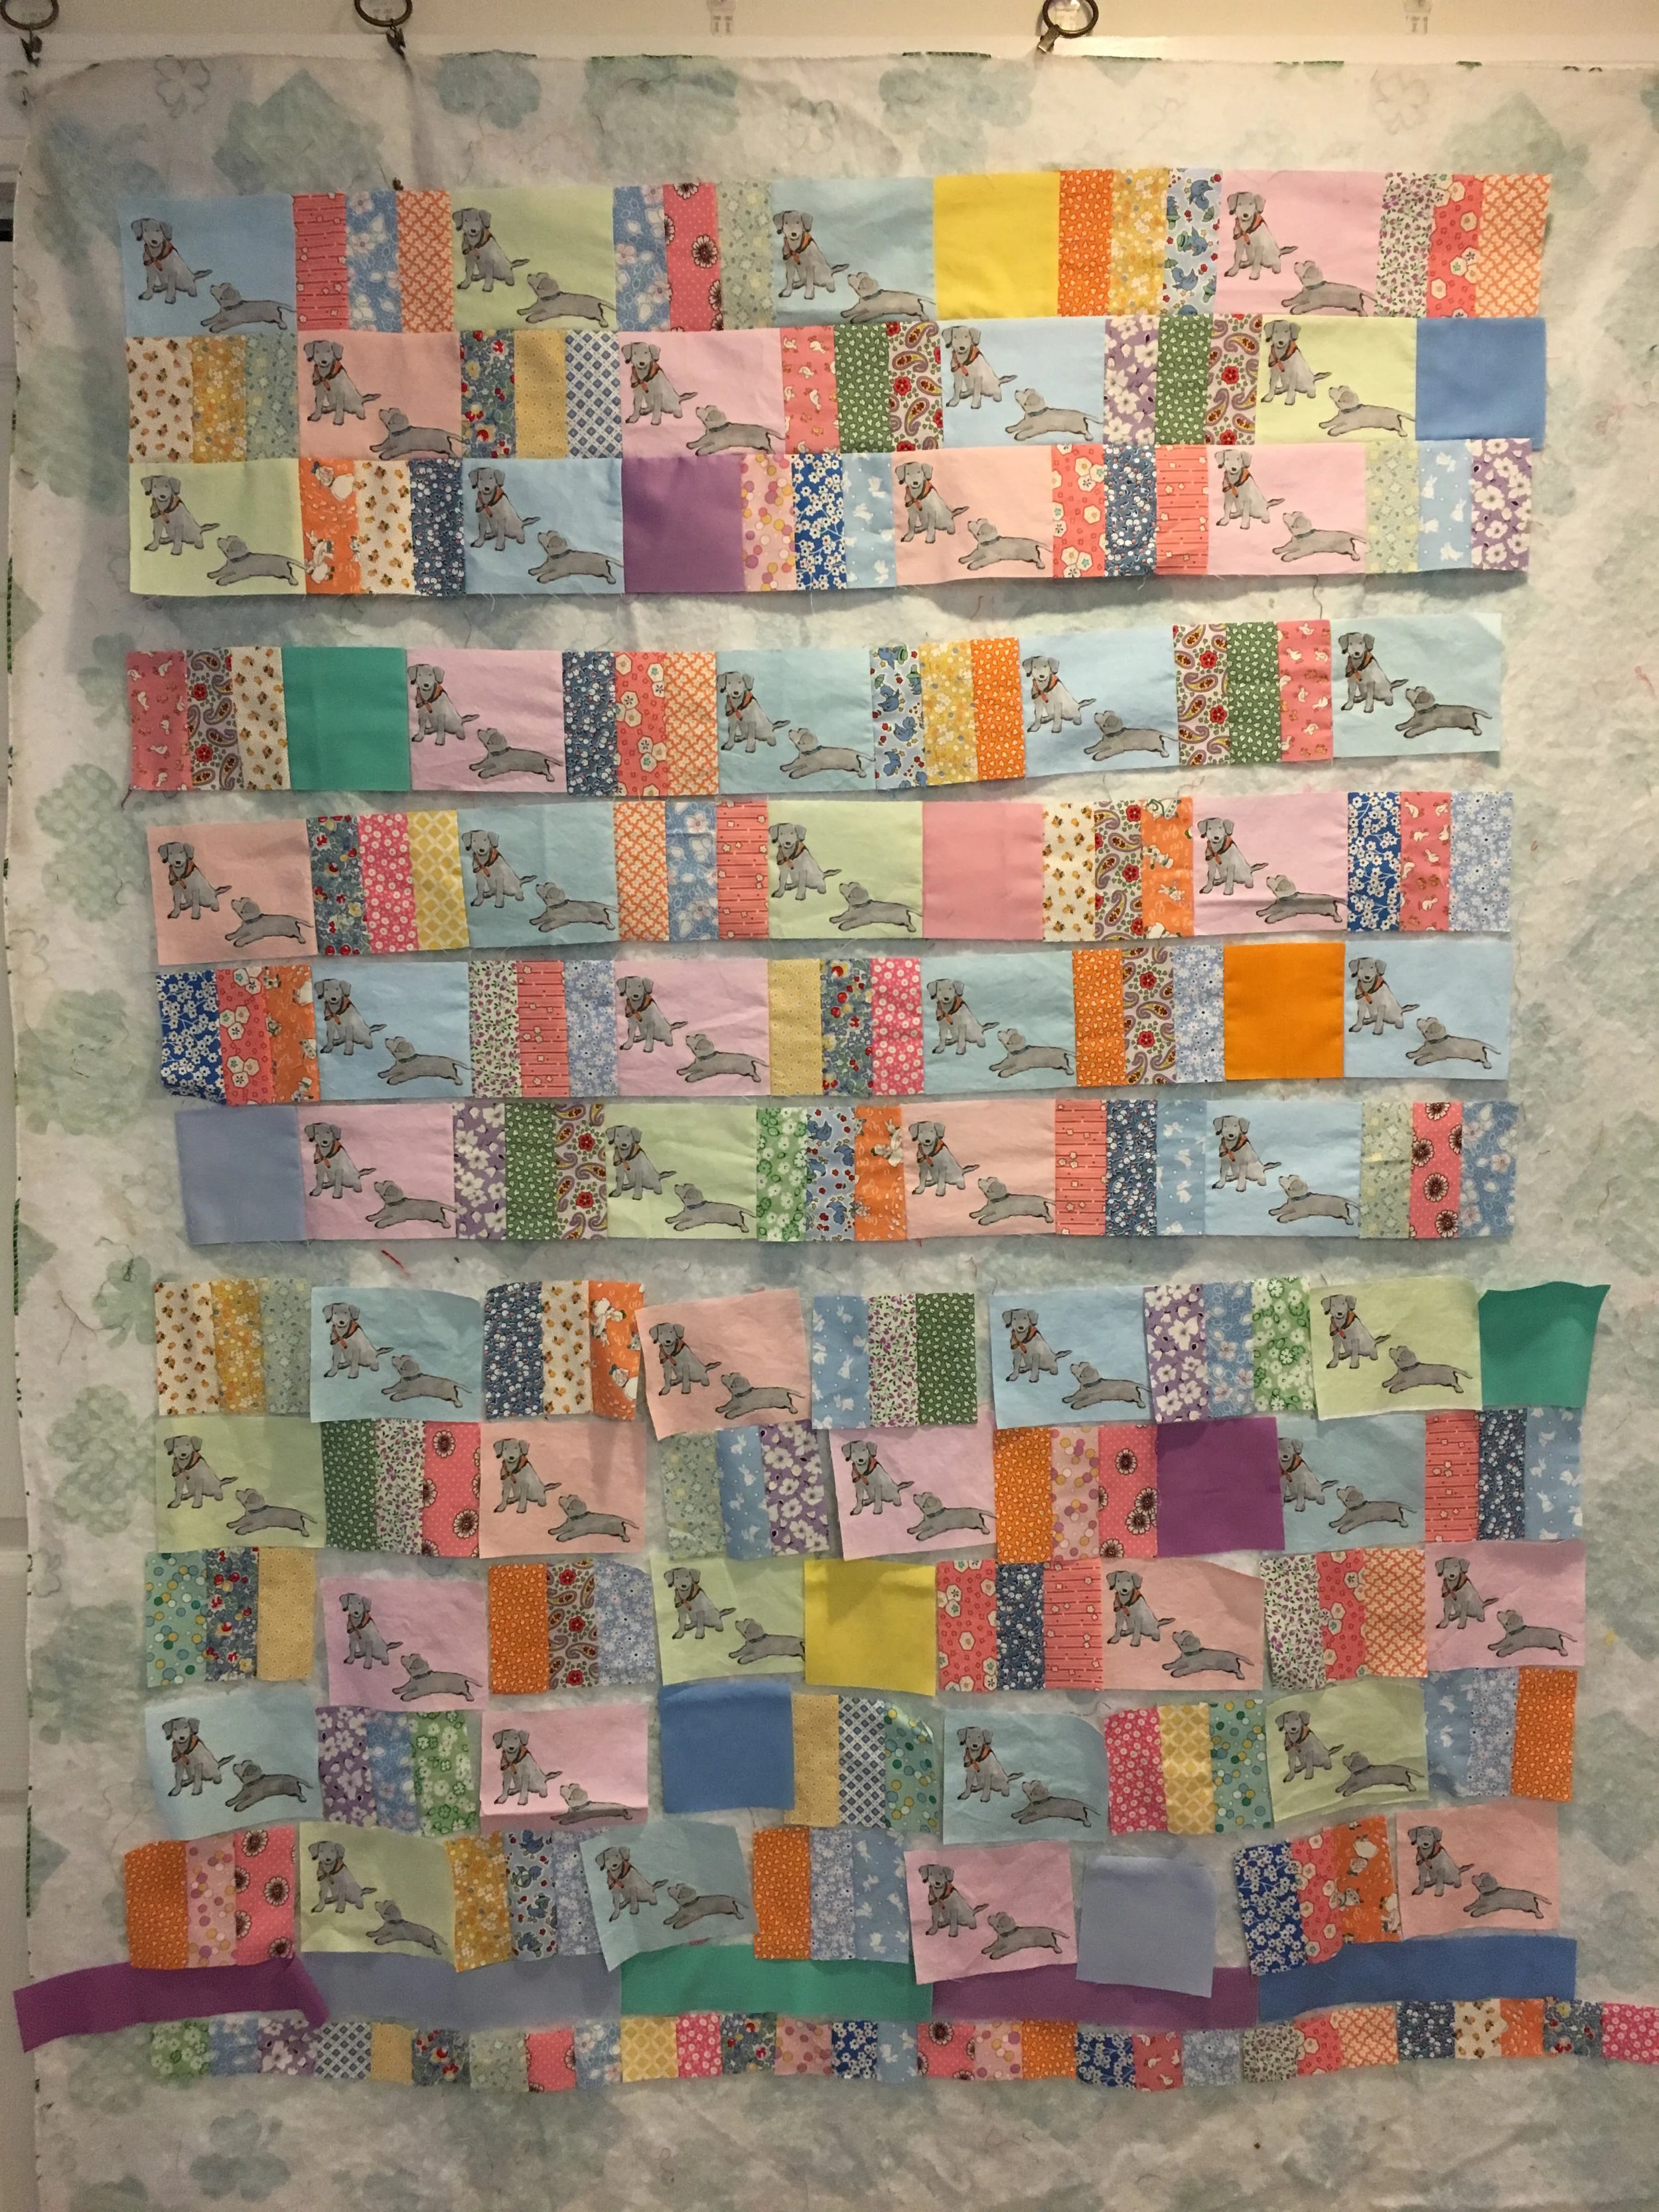
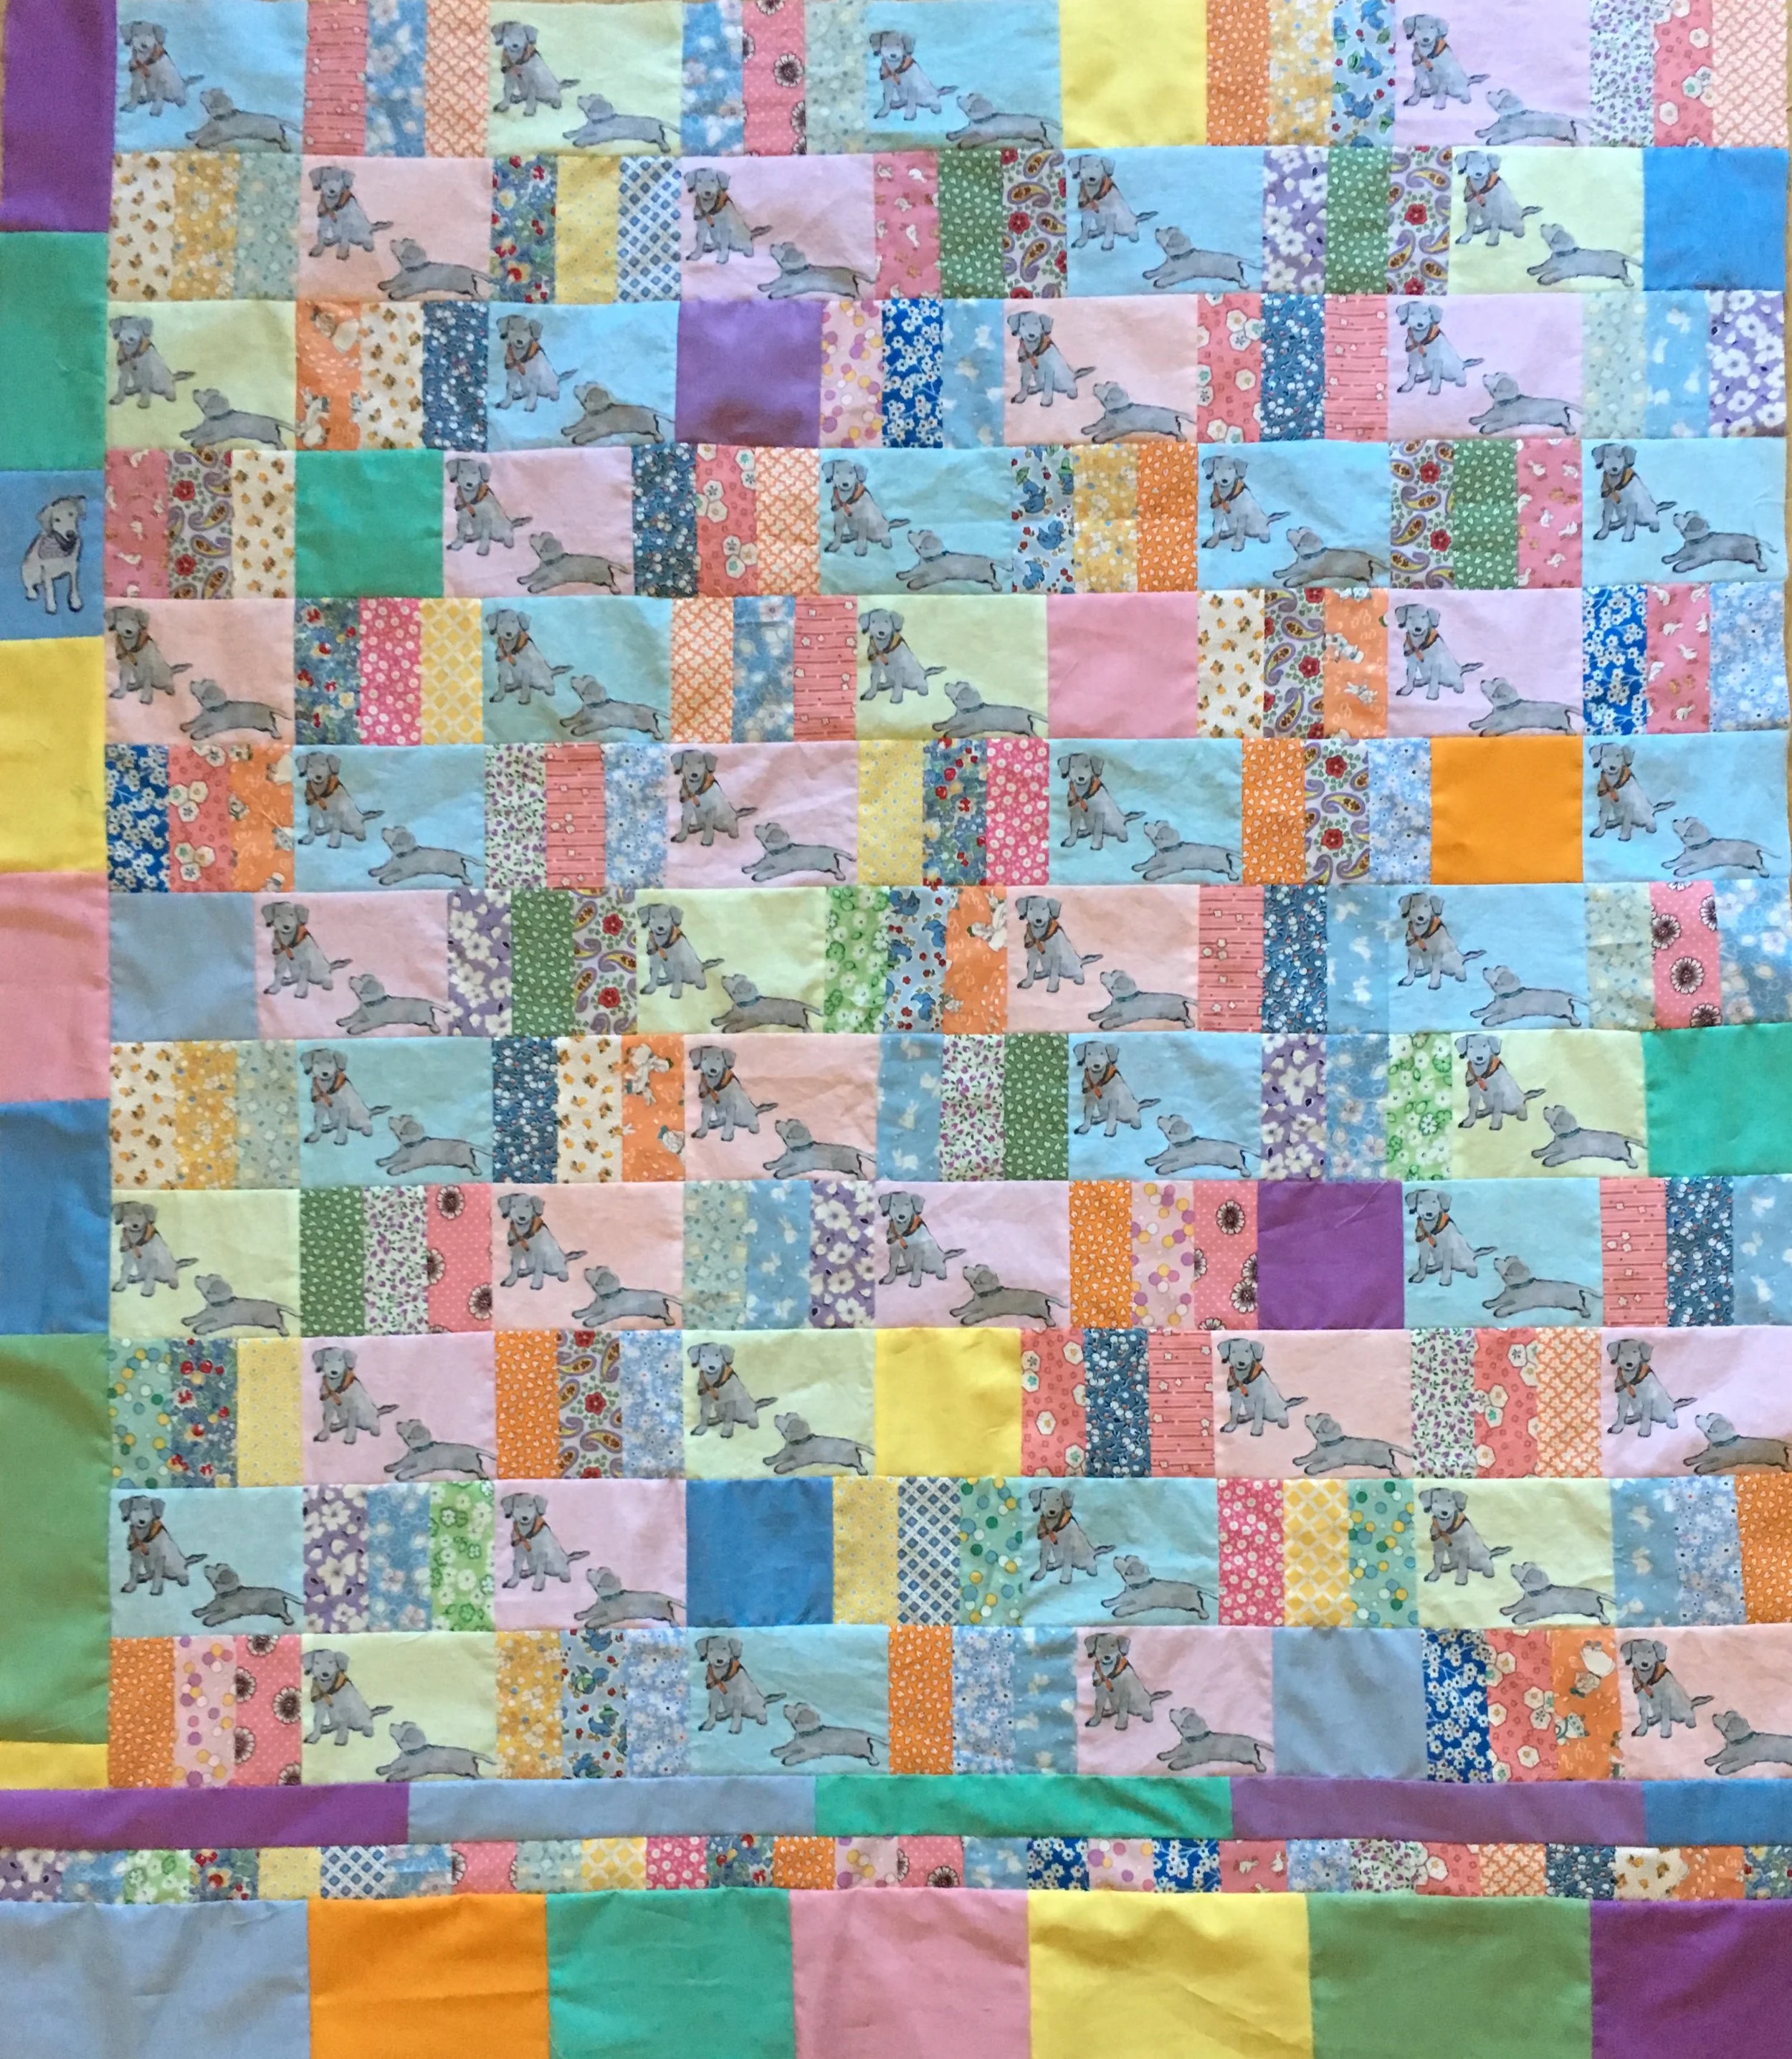
It has a very simple alternate grid layout. One square block was added randomly to each row of rectangular blocks. Those blocks add just enough disruption in the design to make the design more interesting and to give it some movement.
This is an easy design for for a quilt with fussy cut blocks that are all cut to the same dimensions. Here are instructions to design your own quilt.
- Determine the size of the fussy cut blocks and cut enough for the size quilt you plan to make. The number of fussy cut blocks will be approximately half the number of blocks needed for the entire quilt.
- The pieced 3 strip blocks are cut to the same width and height of the fussy cut blocks. To determine the width to cut each strip: add 1 inch to the width of the fussy cut block then divide that number by 3. You need the same number of strip blocks as fussy cut blocks.
- Cut 1 square block the height of the fussy cut block, using a different fabric--either a solid or fabric that reads as a solid. Cut one square for each row in the quilt.
- Using a design wall, lay out the blocks, alternating fussy cut blocks with pieced strip blocks.
- Now randomly add a square to each strip to disrupt the symmetric layout. Scatter them around the quilt. In my design I always had a square paired with a fussy cut block. Do what looks good to you.
- Cut the right hand border the height of the pieced quilt top.
- Cut the bottom borders the full width of the quilt AFTER the right border is added.
- Have fun designing your quilt!