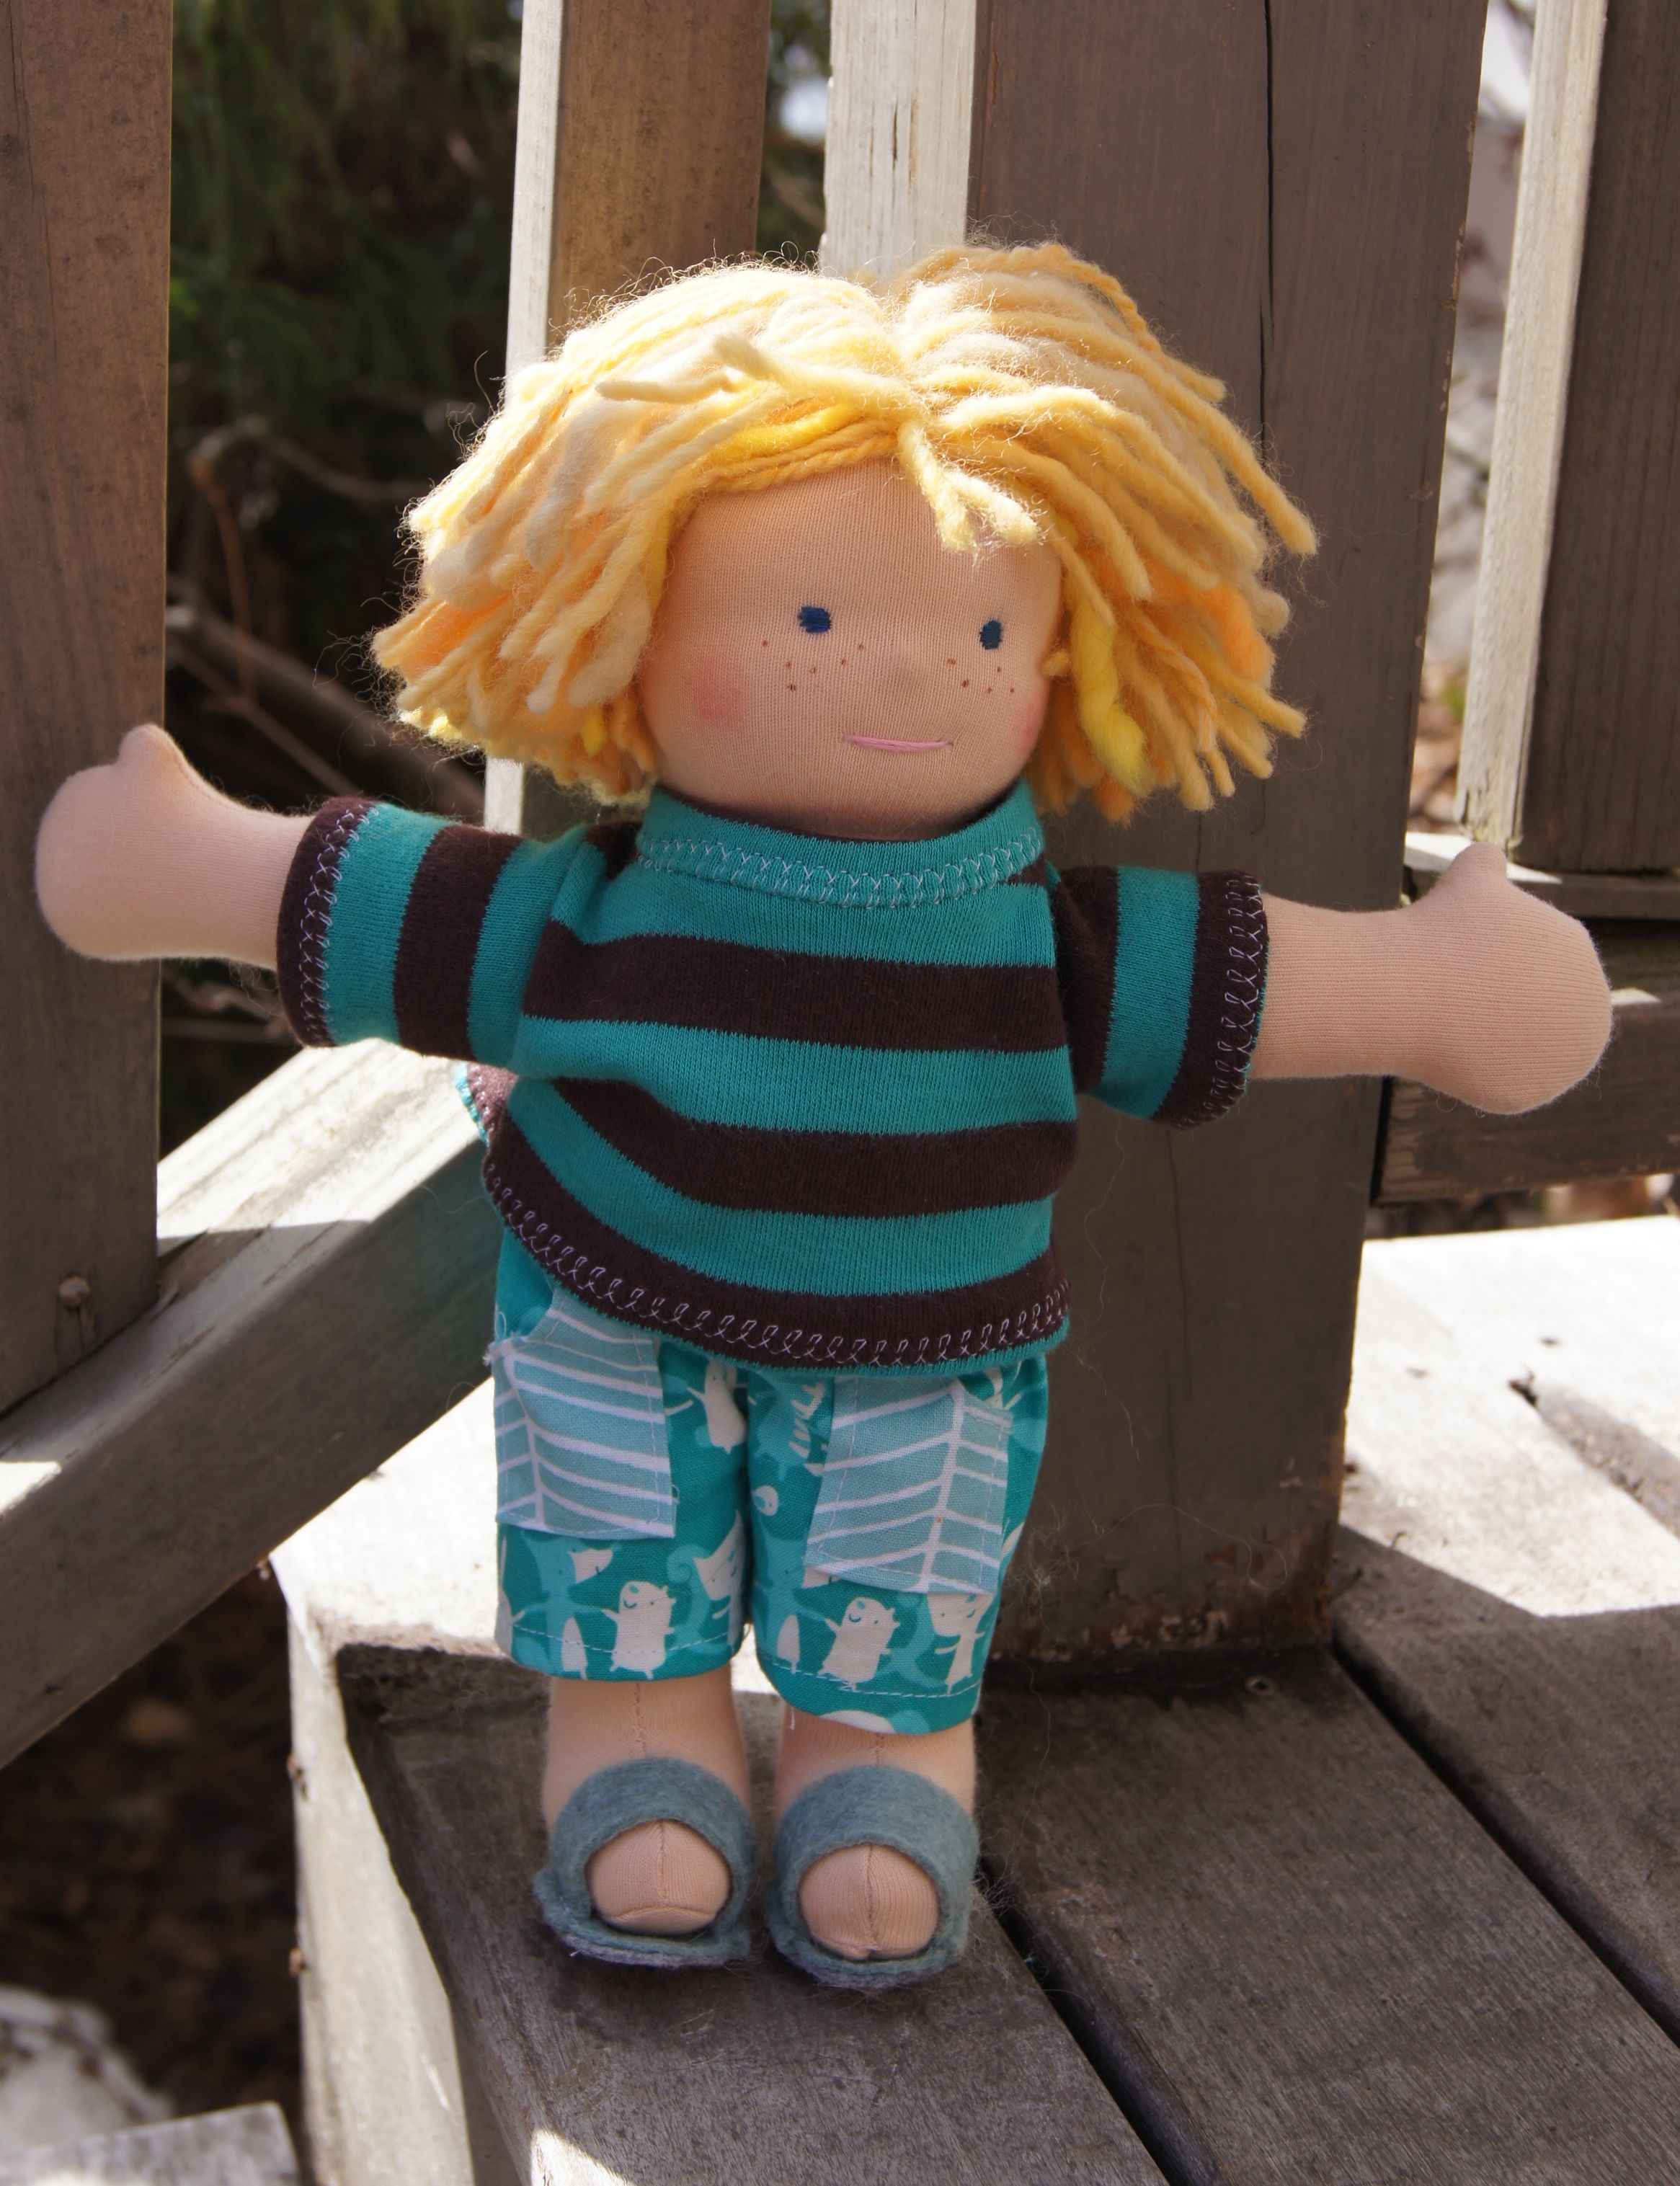
I've made 4 Waldorf type dolls so far. Two of them have been boys. One was 10" and the second was 13". I didn't find many patterns for dolls those sizes and even less for boy dolls. So I drafted clothes for both boy dolls.
This tutorial of for Boy Doll Undies.
My 13" tall doll has a 10" waist. He is a bit short-waisted. You will need to adjust this pattern to fit your doll.
I used a lightweight jersey with Lycra but interlock knits will work too.
Supplies:
- Knit fabric, jersey or interlock, 1/4 yd (or scraps if you have some).
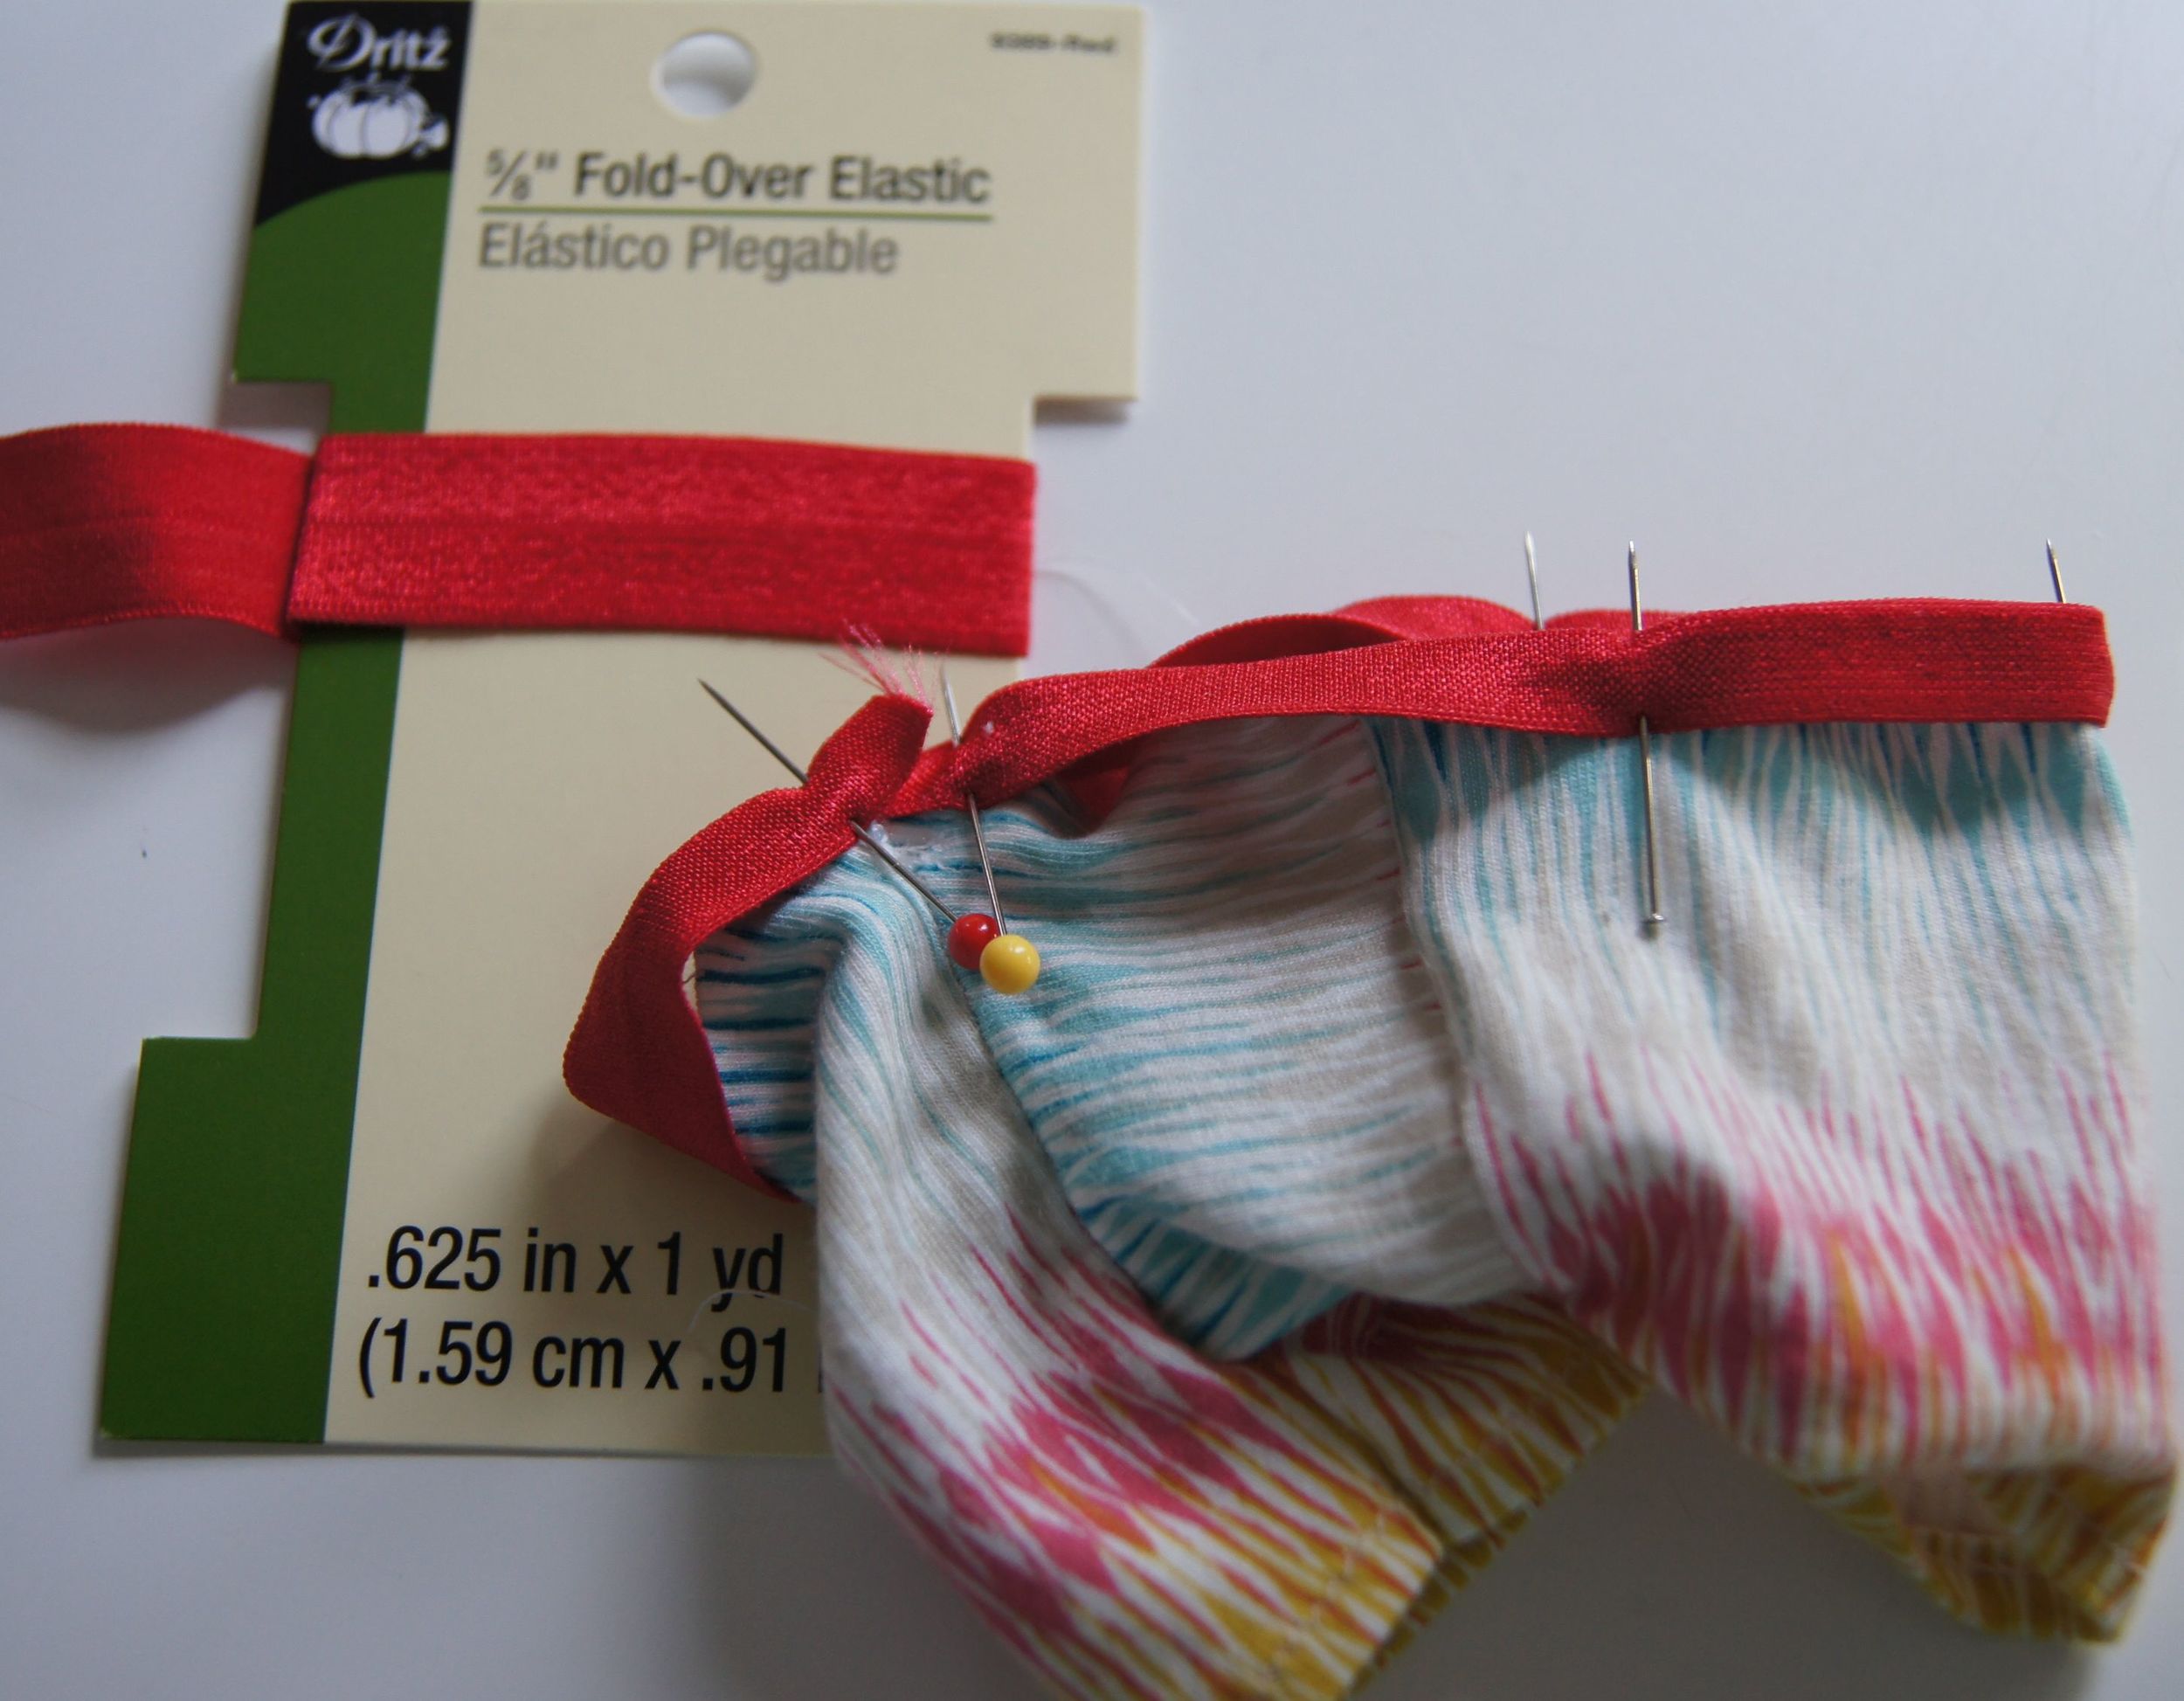
- Fold-over elastic
Pattern:
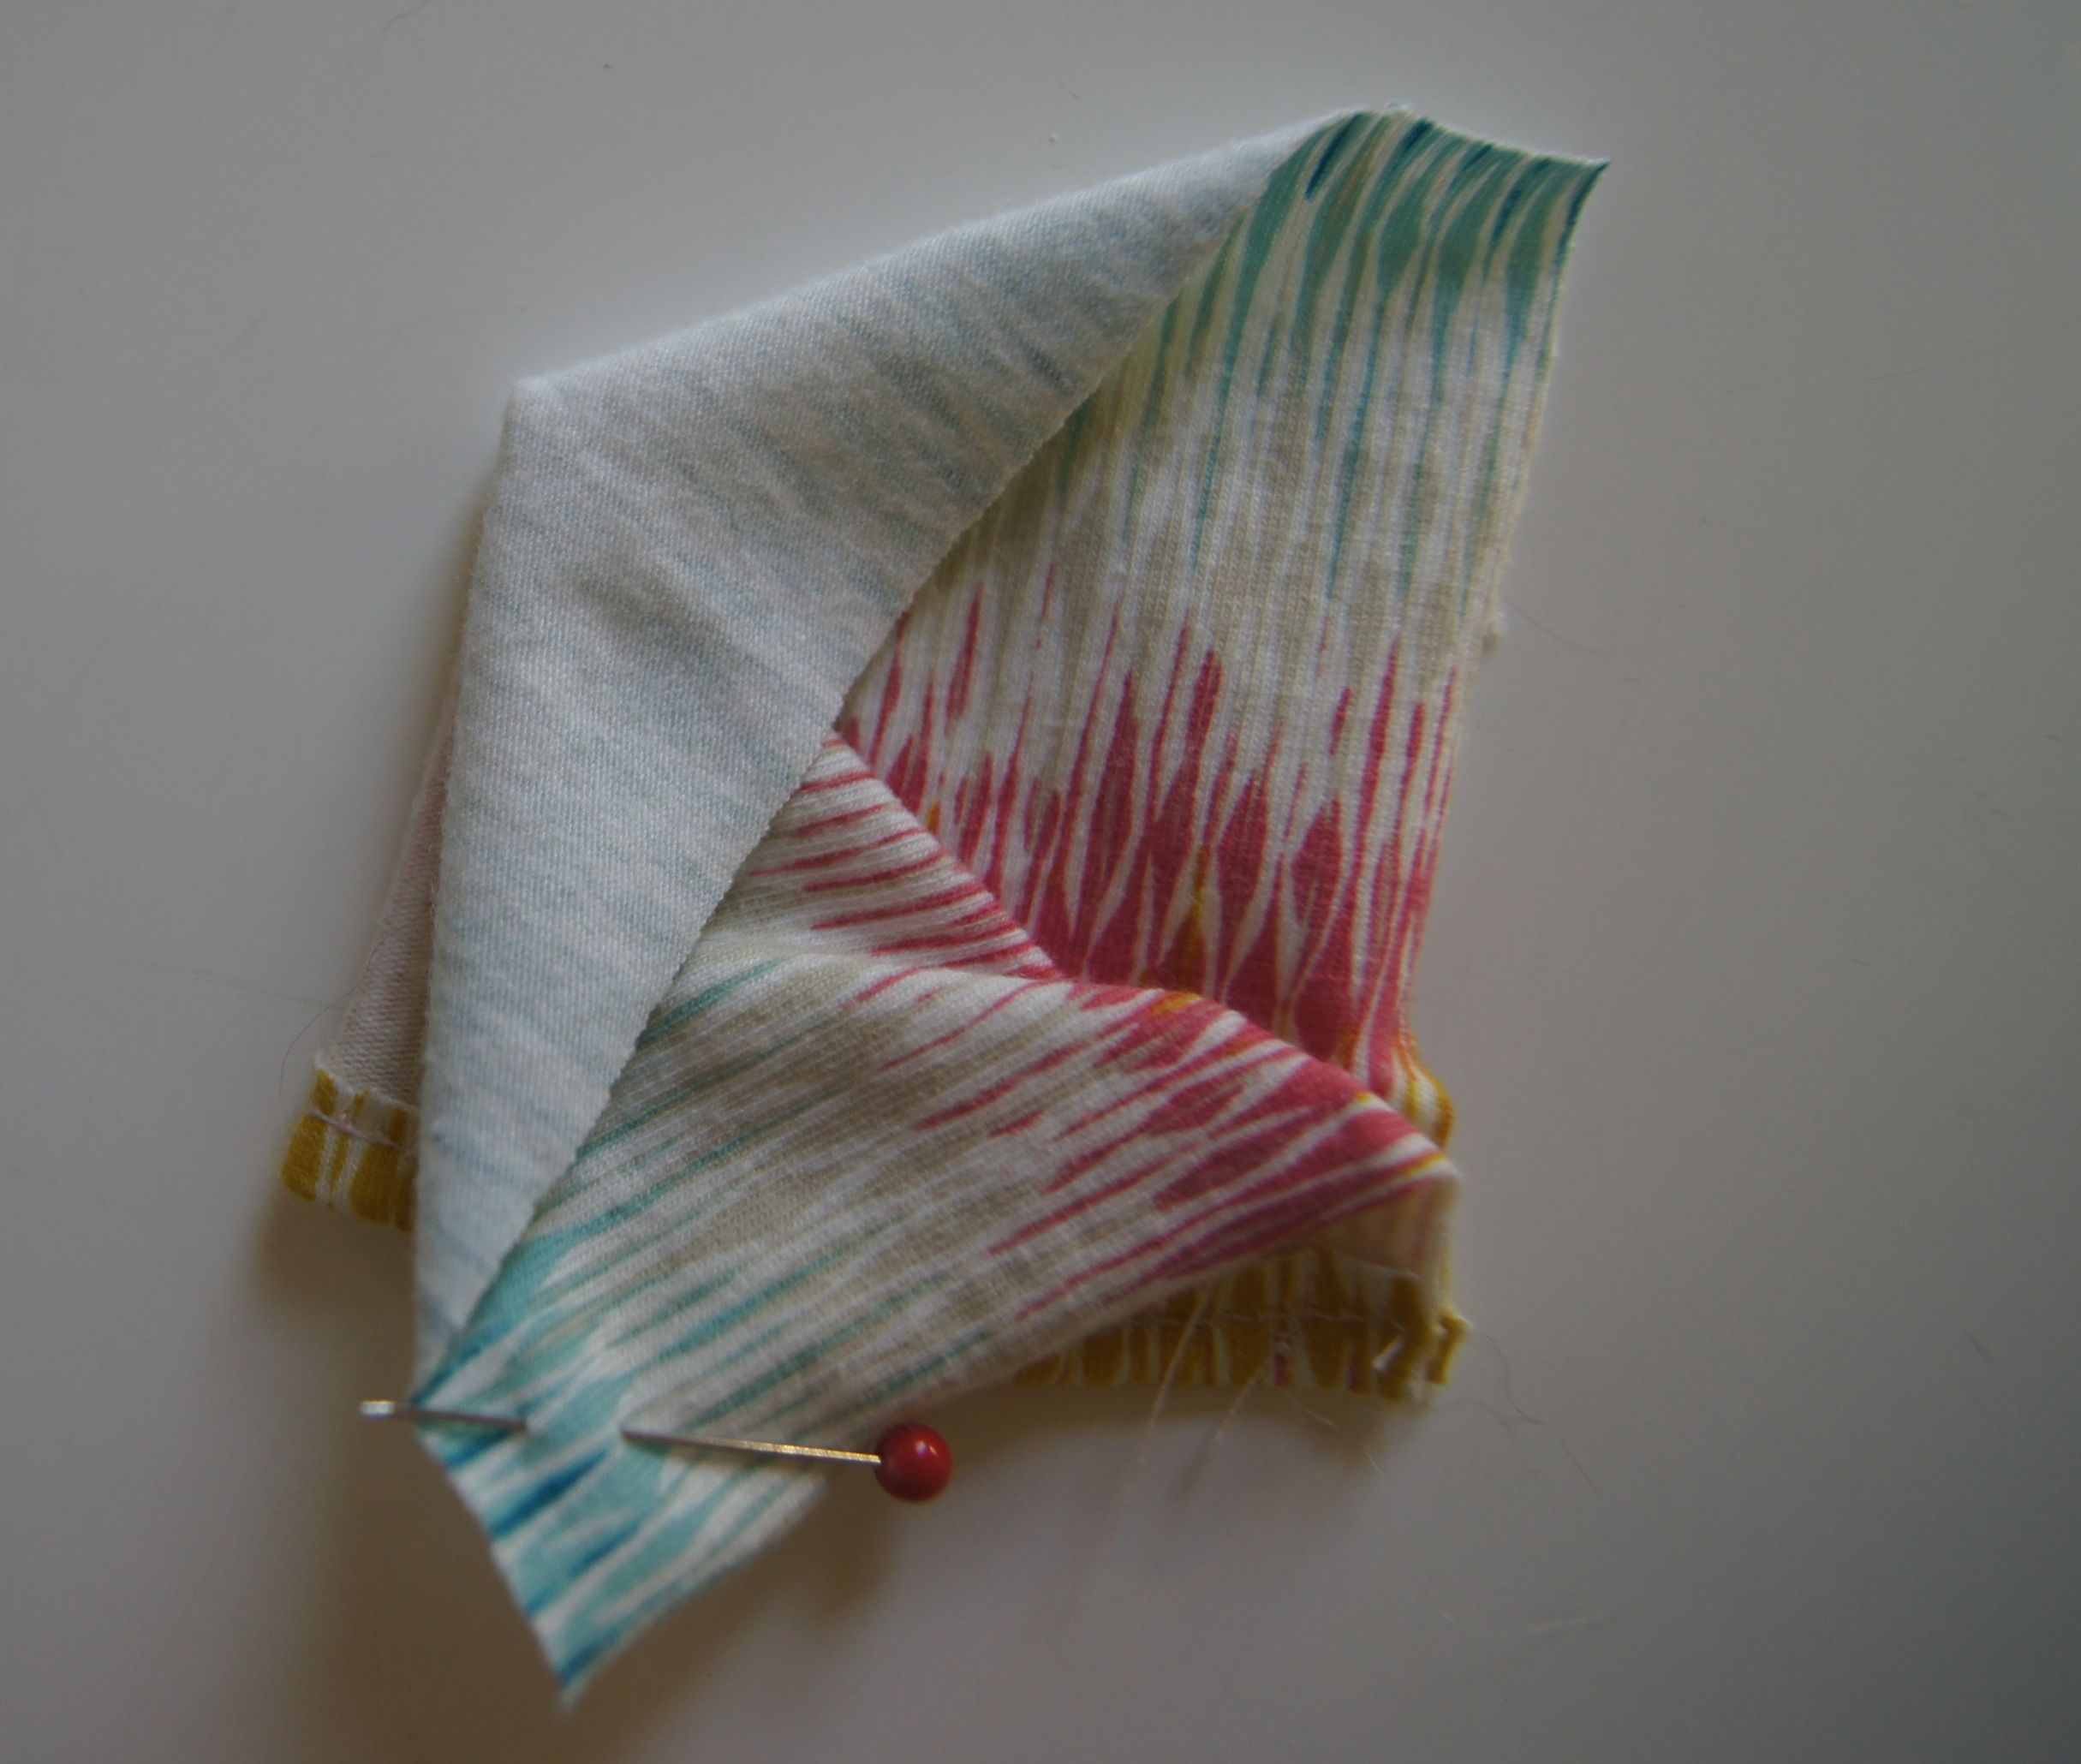
- Cut 2 slightly trapazoidlal pieces of knit fabric, 4 1/2 inches by 3 inches at the front seam sloping up slightly to 3 1/4 inches at the back seam. The sloping edge will be at the waist. The bottom edge of the pieces should be straight.
- One 1 piece 1 1/2" x 4". This will be the center piece of the undies. If you have stripes, cut this piece across the width of the fabric to create a contrasting piece. Or you could this piece from a different color fabric.
- Cut 1 piece of fold-over elastic, 1/2 smaller than the circumference of you doll's waist. You want the briefs to be a bit tight at the waist so they don't fall down!
- TIP: If you are using jersey, it rolls up easily. Put a heavy book on top of your cut pieces until you are ready to use them. That helps to keep them flat. Ironing with spray starch will also help some if the pieces do roll up.
Construction: Here are photos of each step. The pin with the red head is in the slightly shorter front edge of the undies. I put them all together to make it more print friendly.
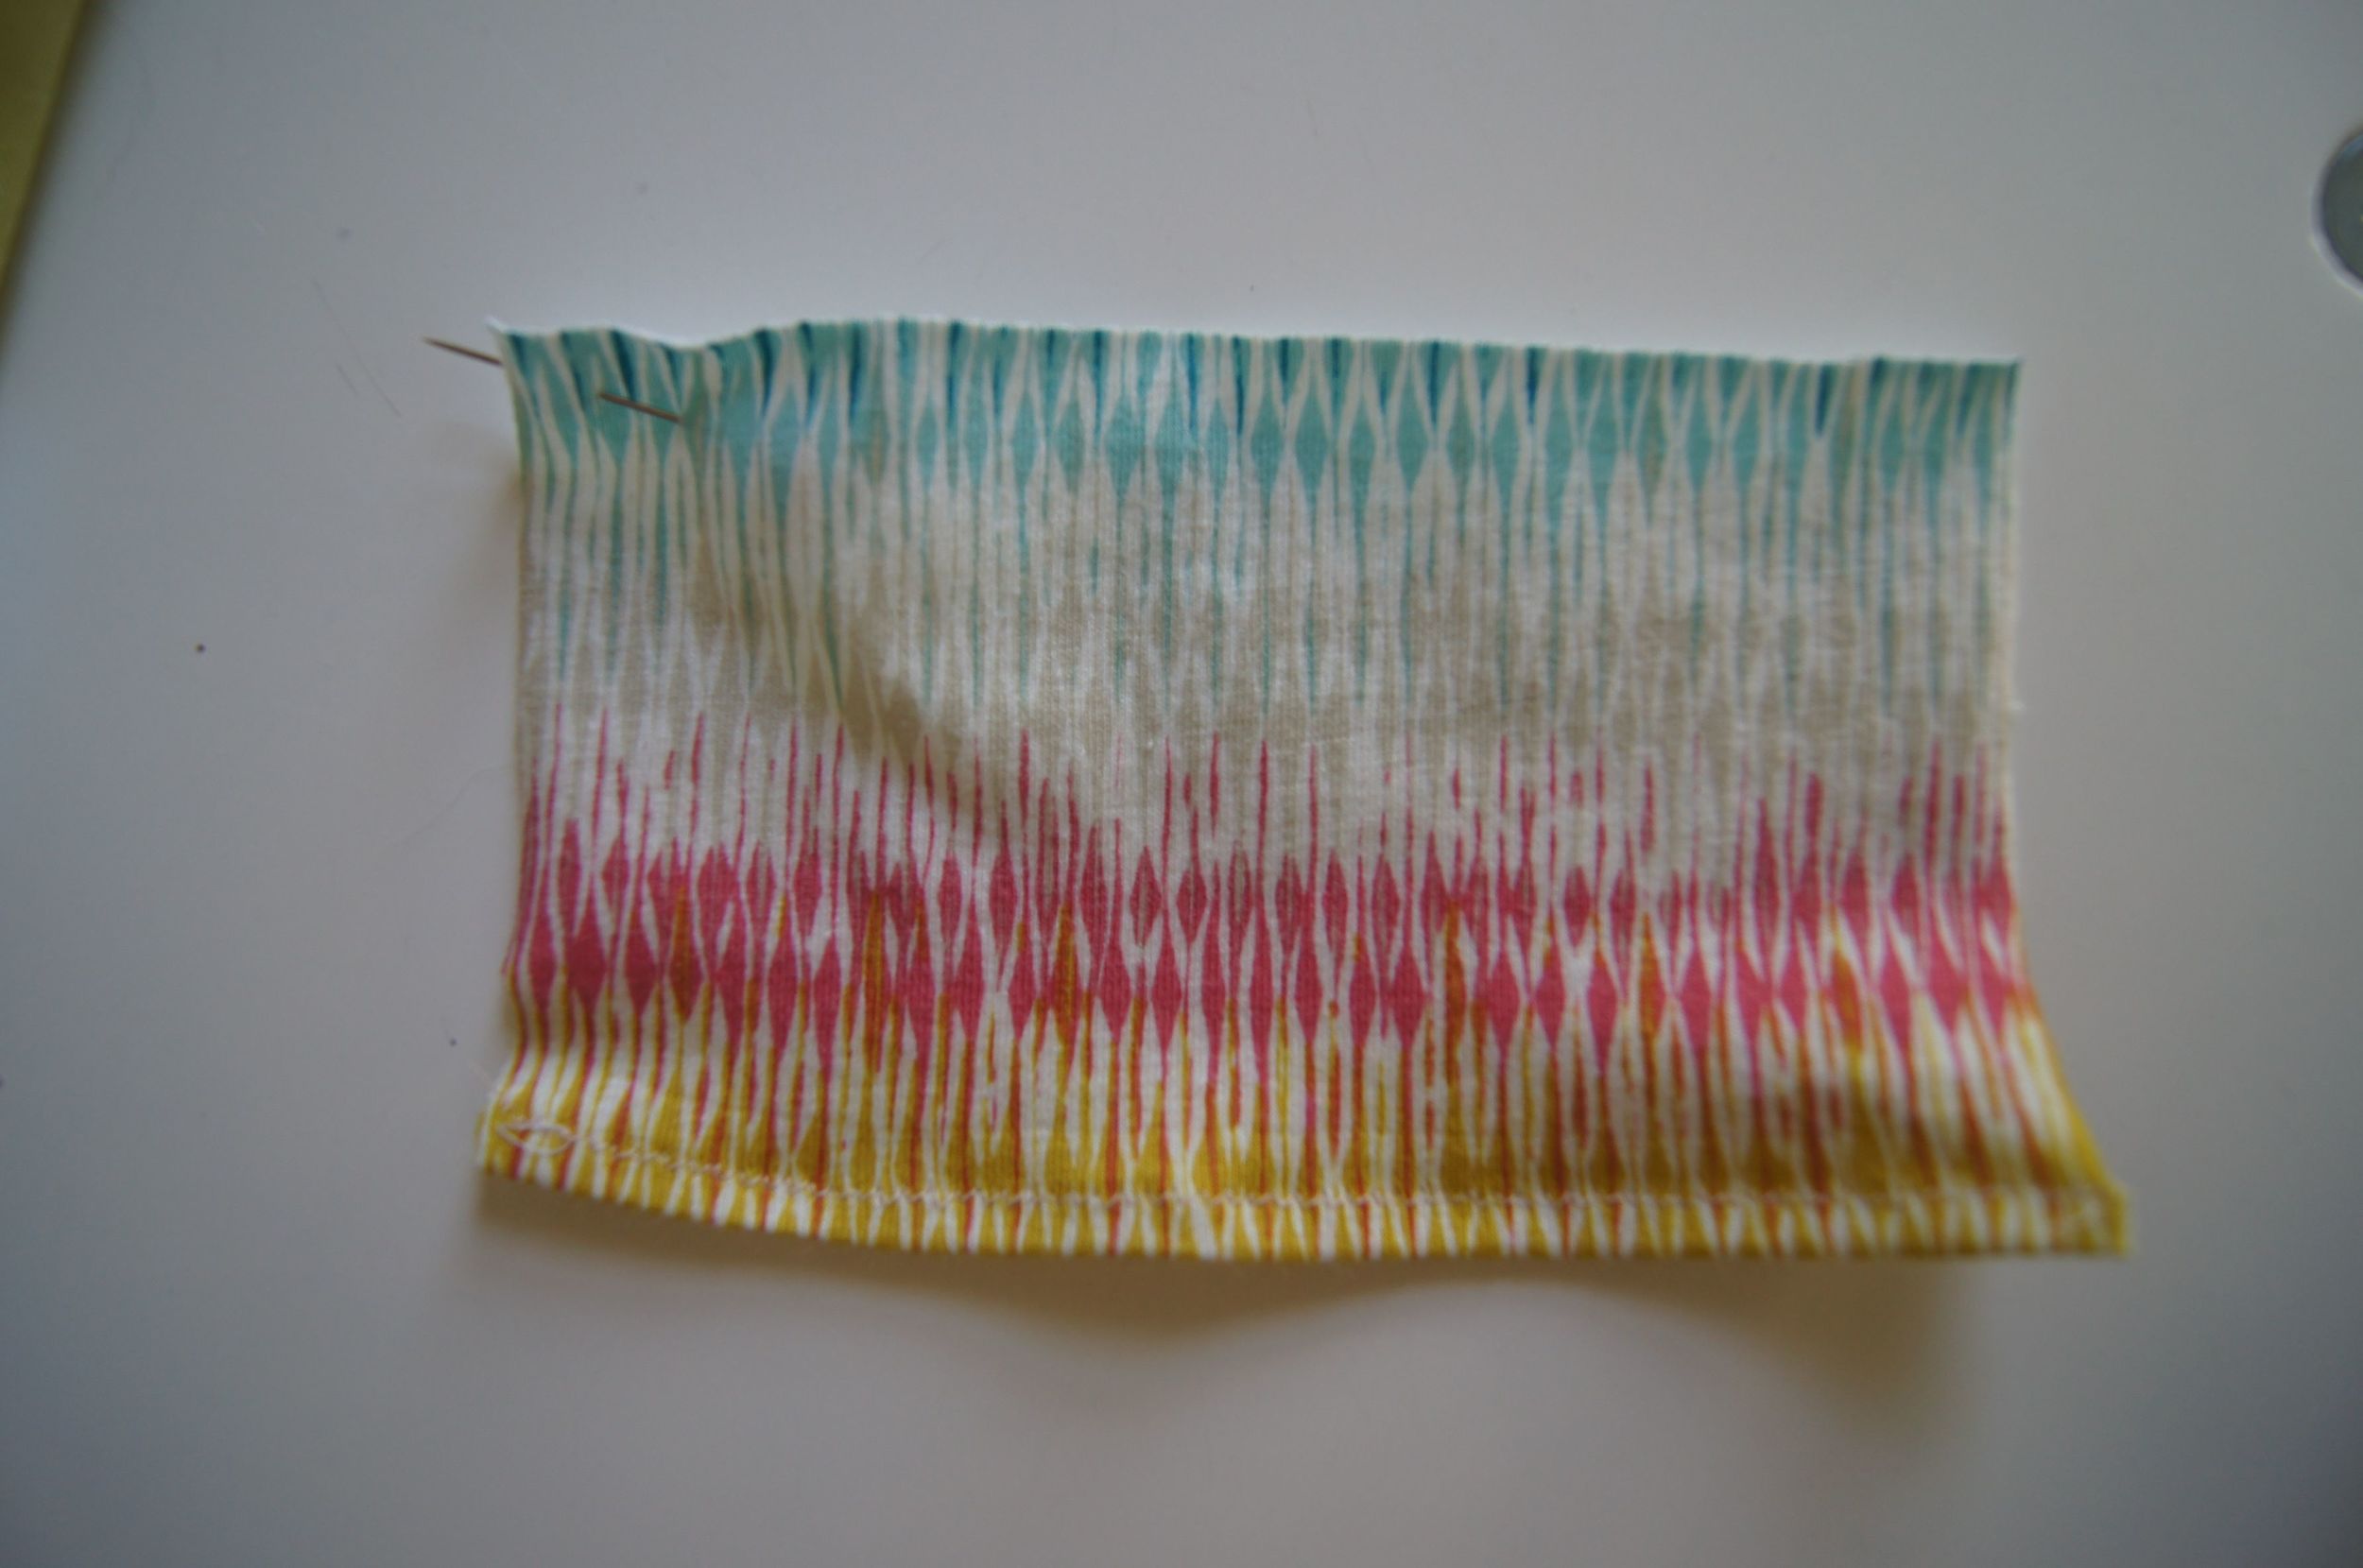
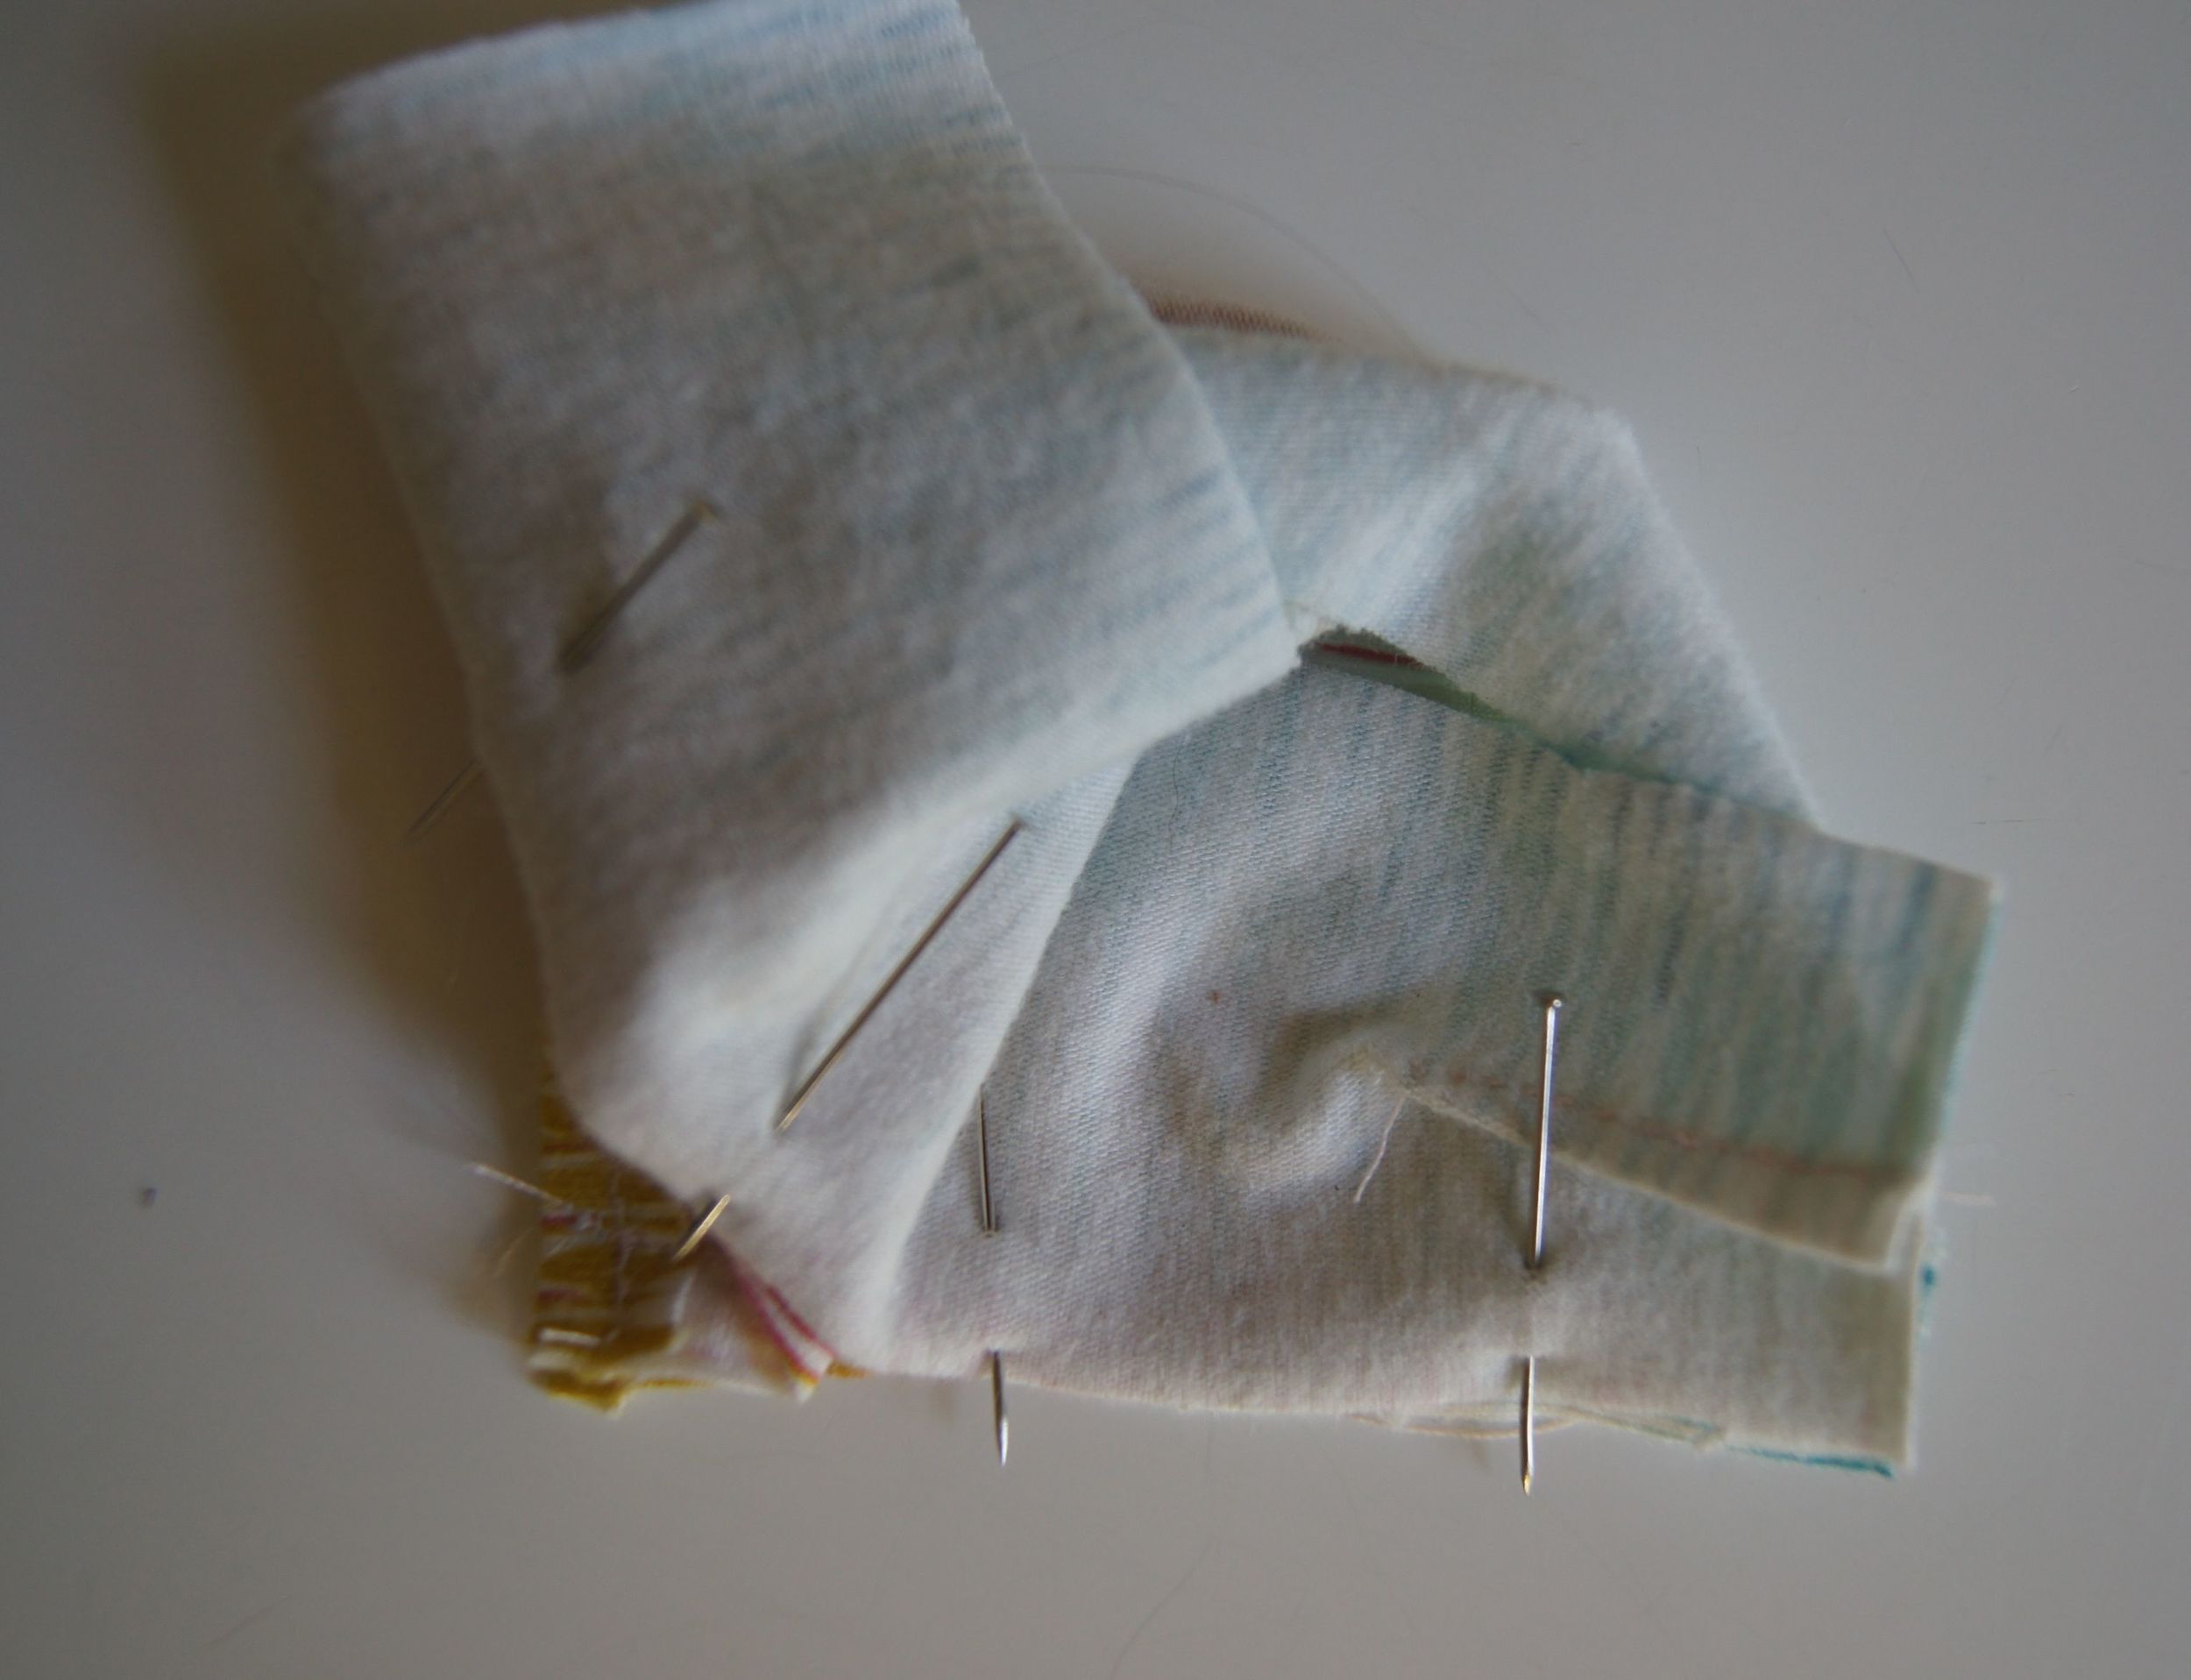
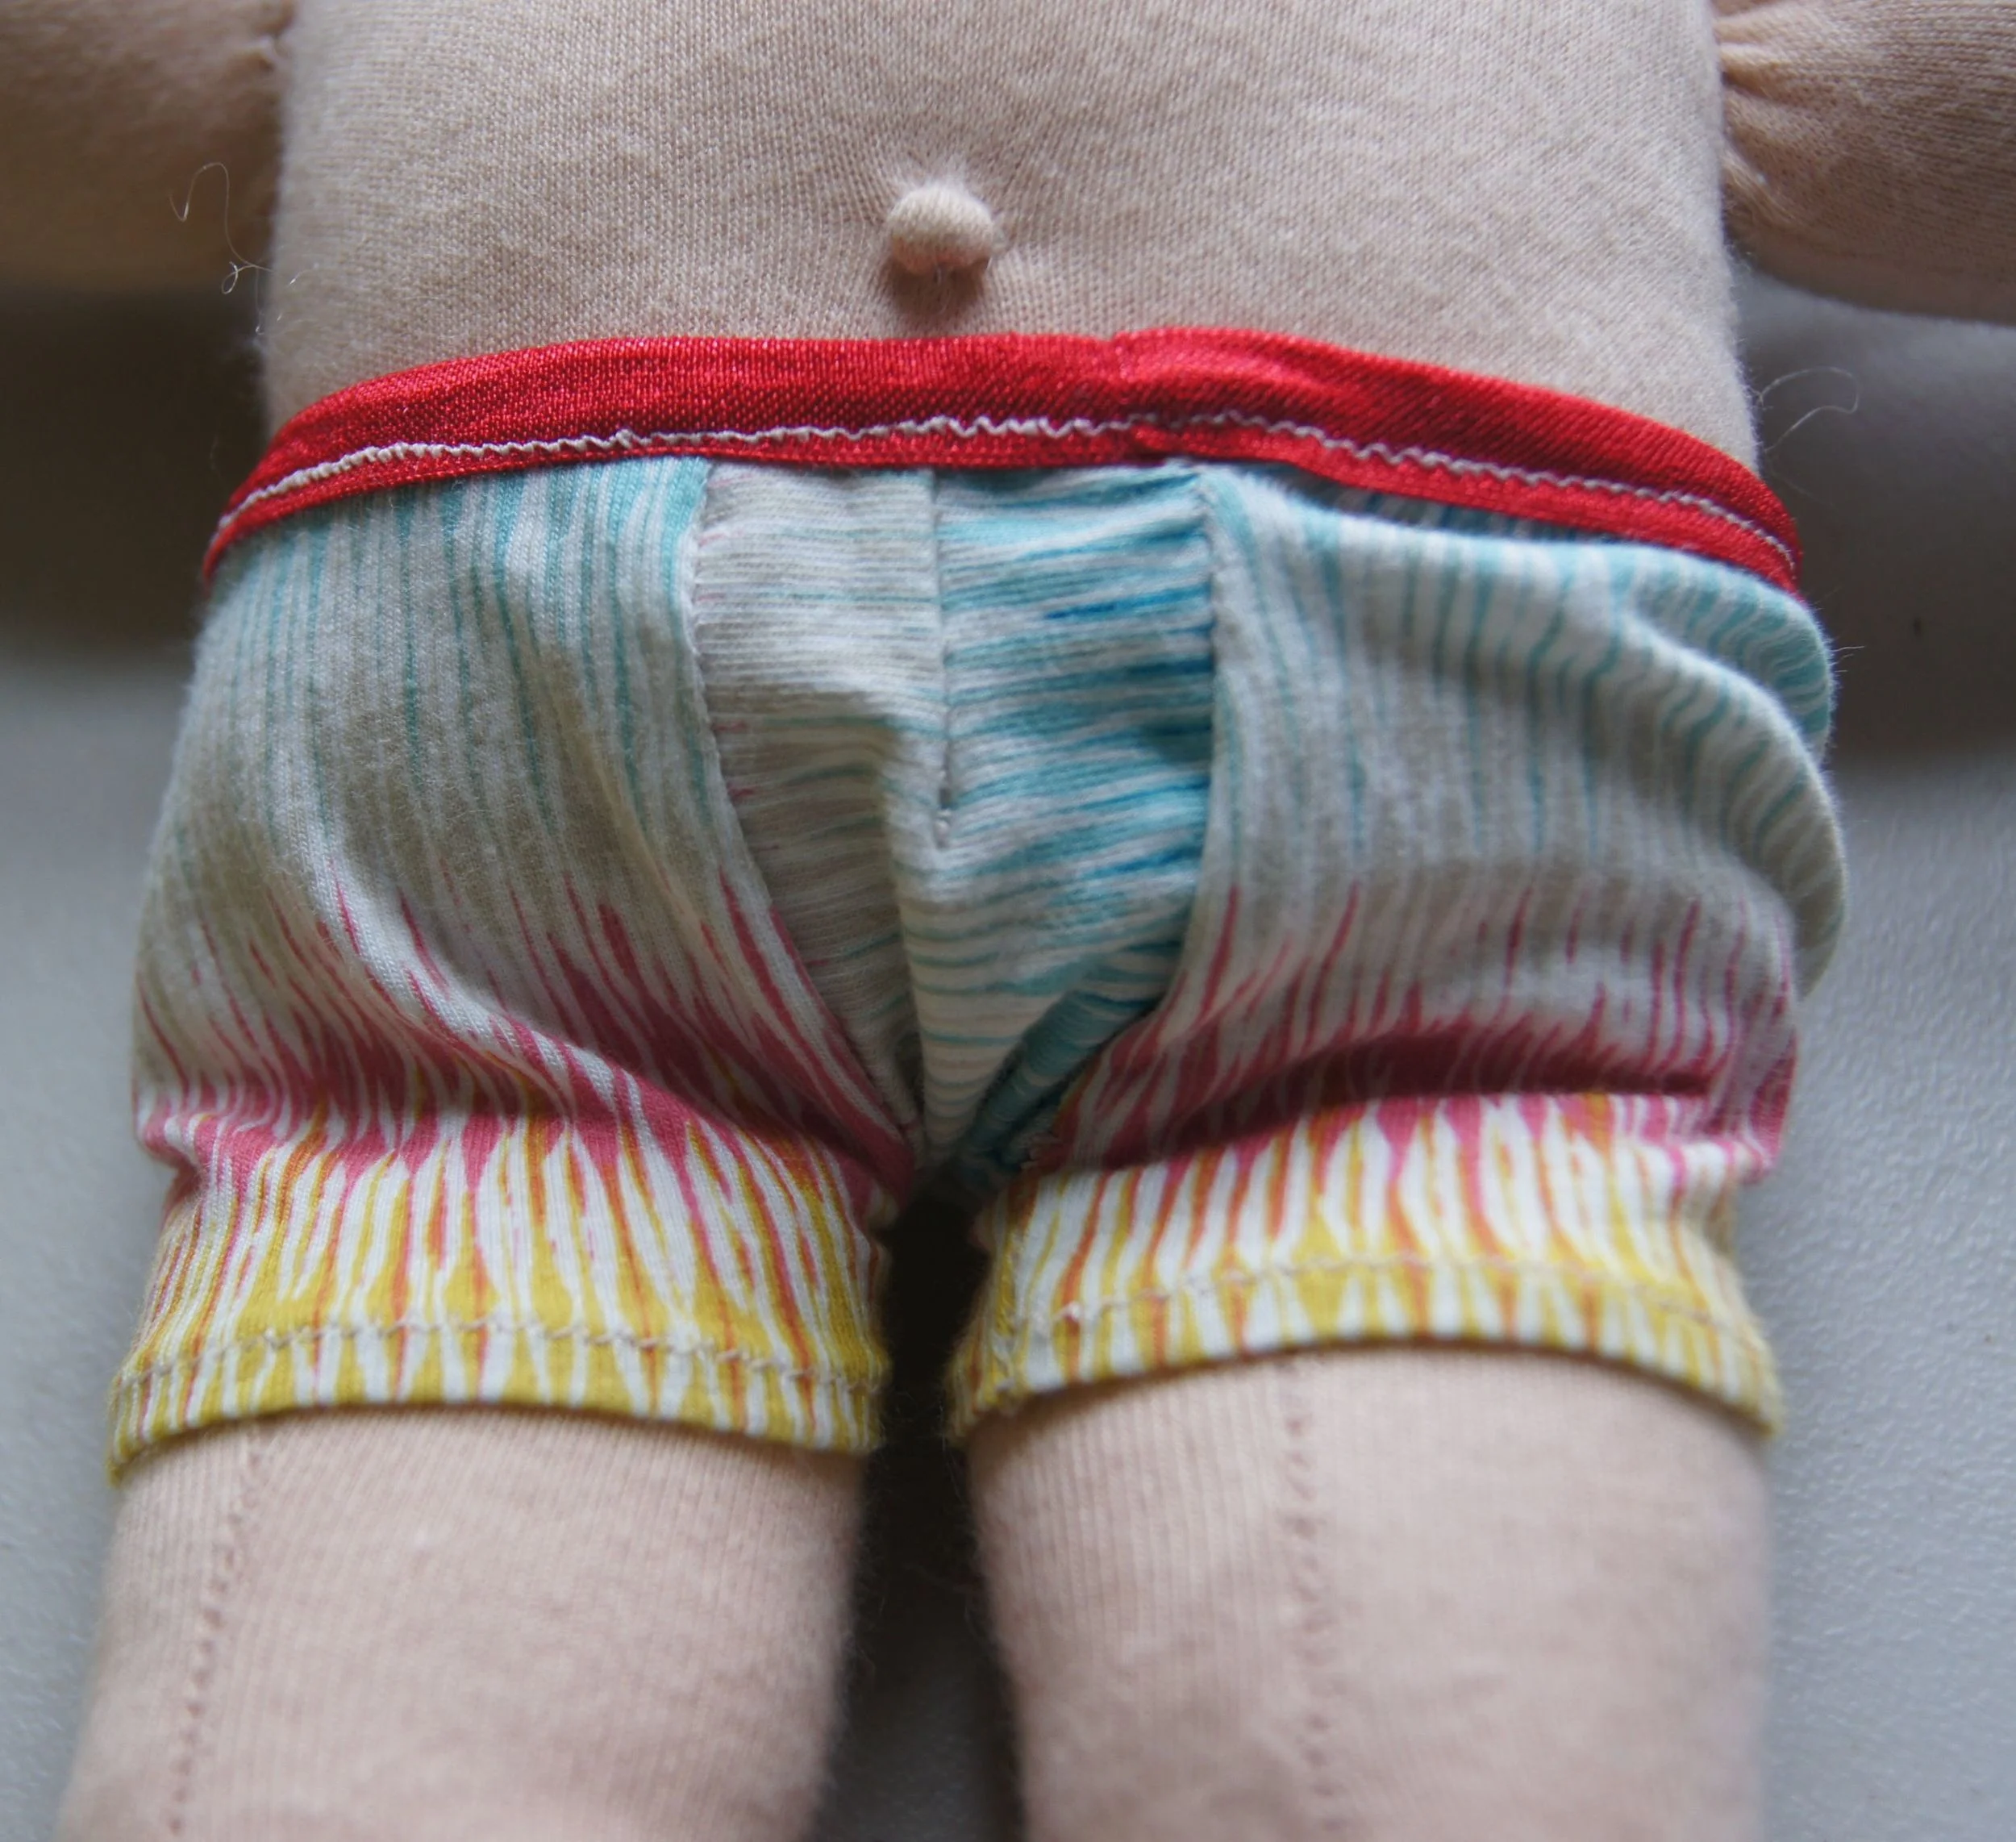
- Make a small dart in the upper (narrow edge) of the 1 1/2 x 4 inch center piece. My dart is 1/4" wide x 1 inch long. It's not critical how big it is. My boy dolls are not anatomically correct but the dart in the undies creates the illusion that they might be!
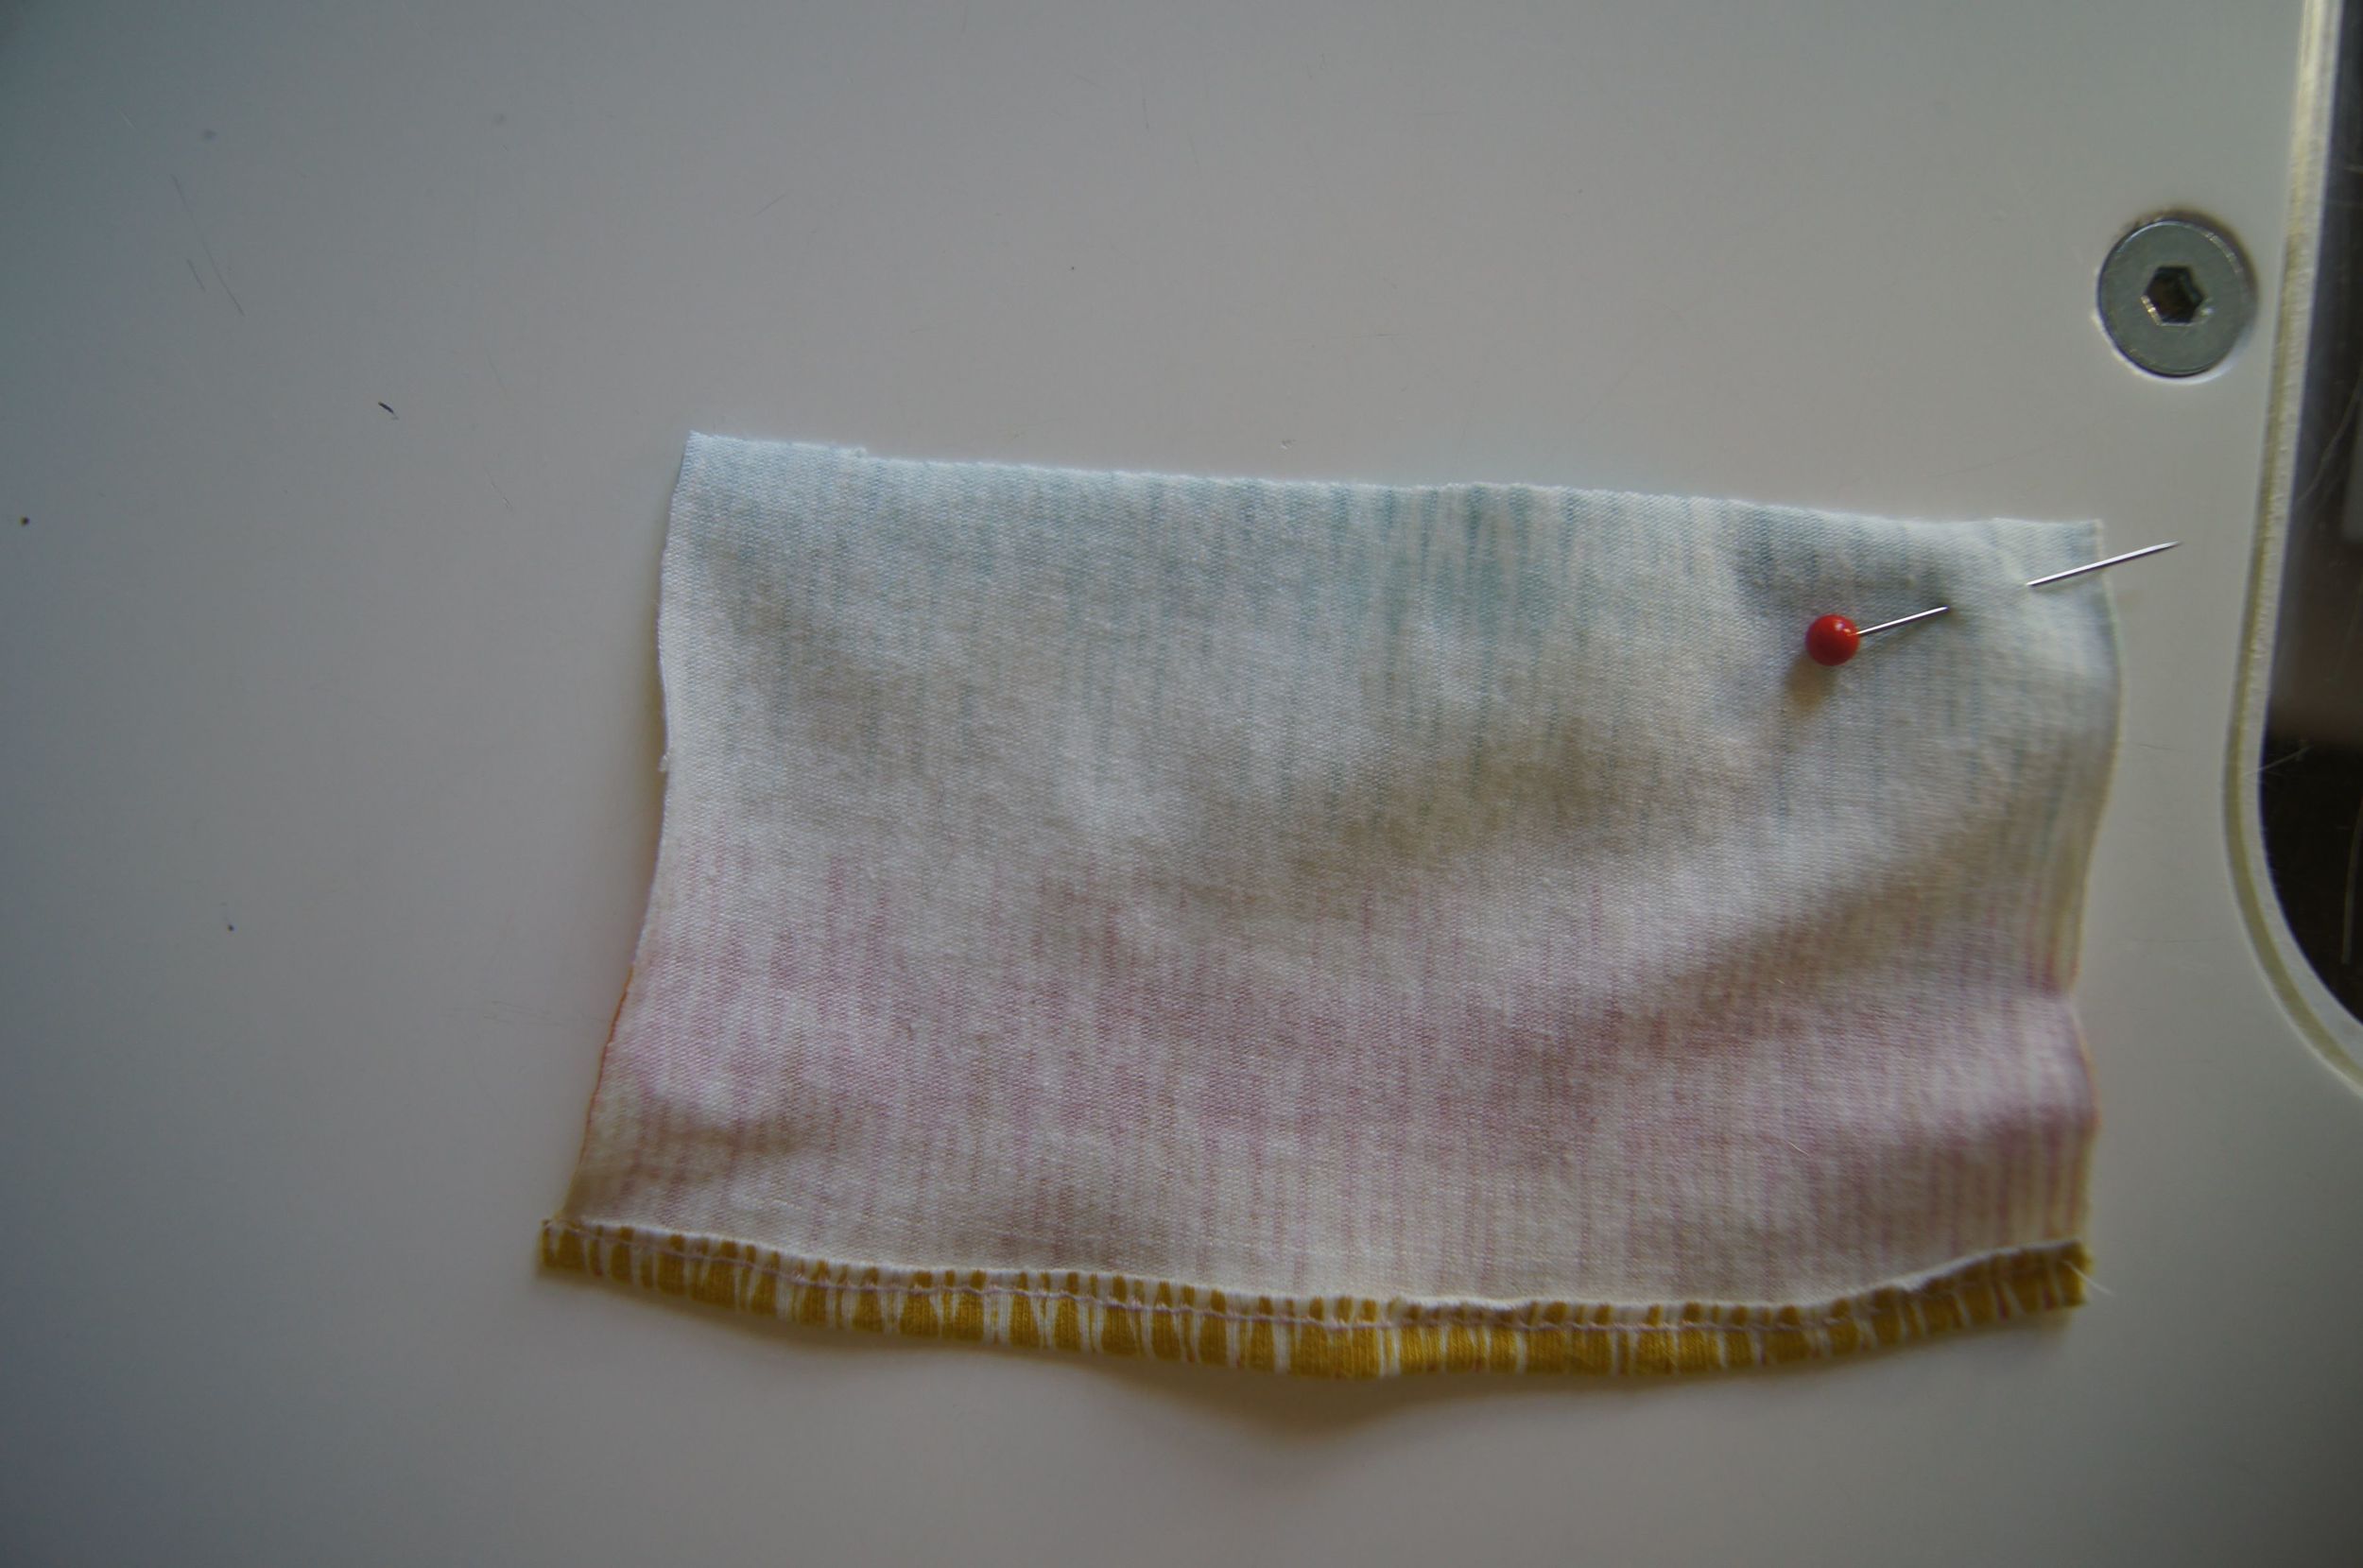
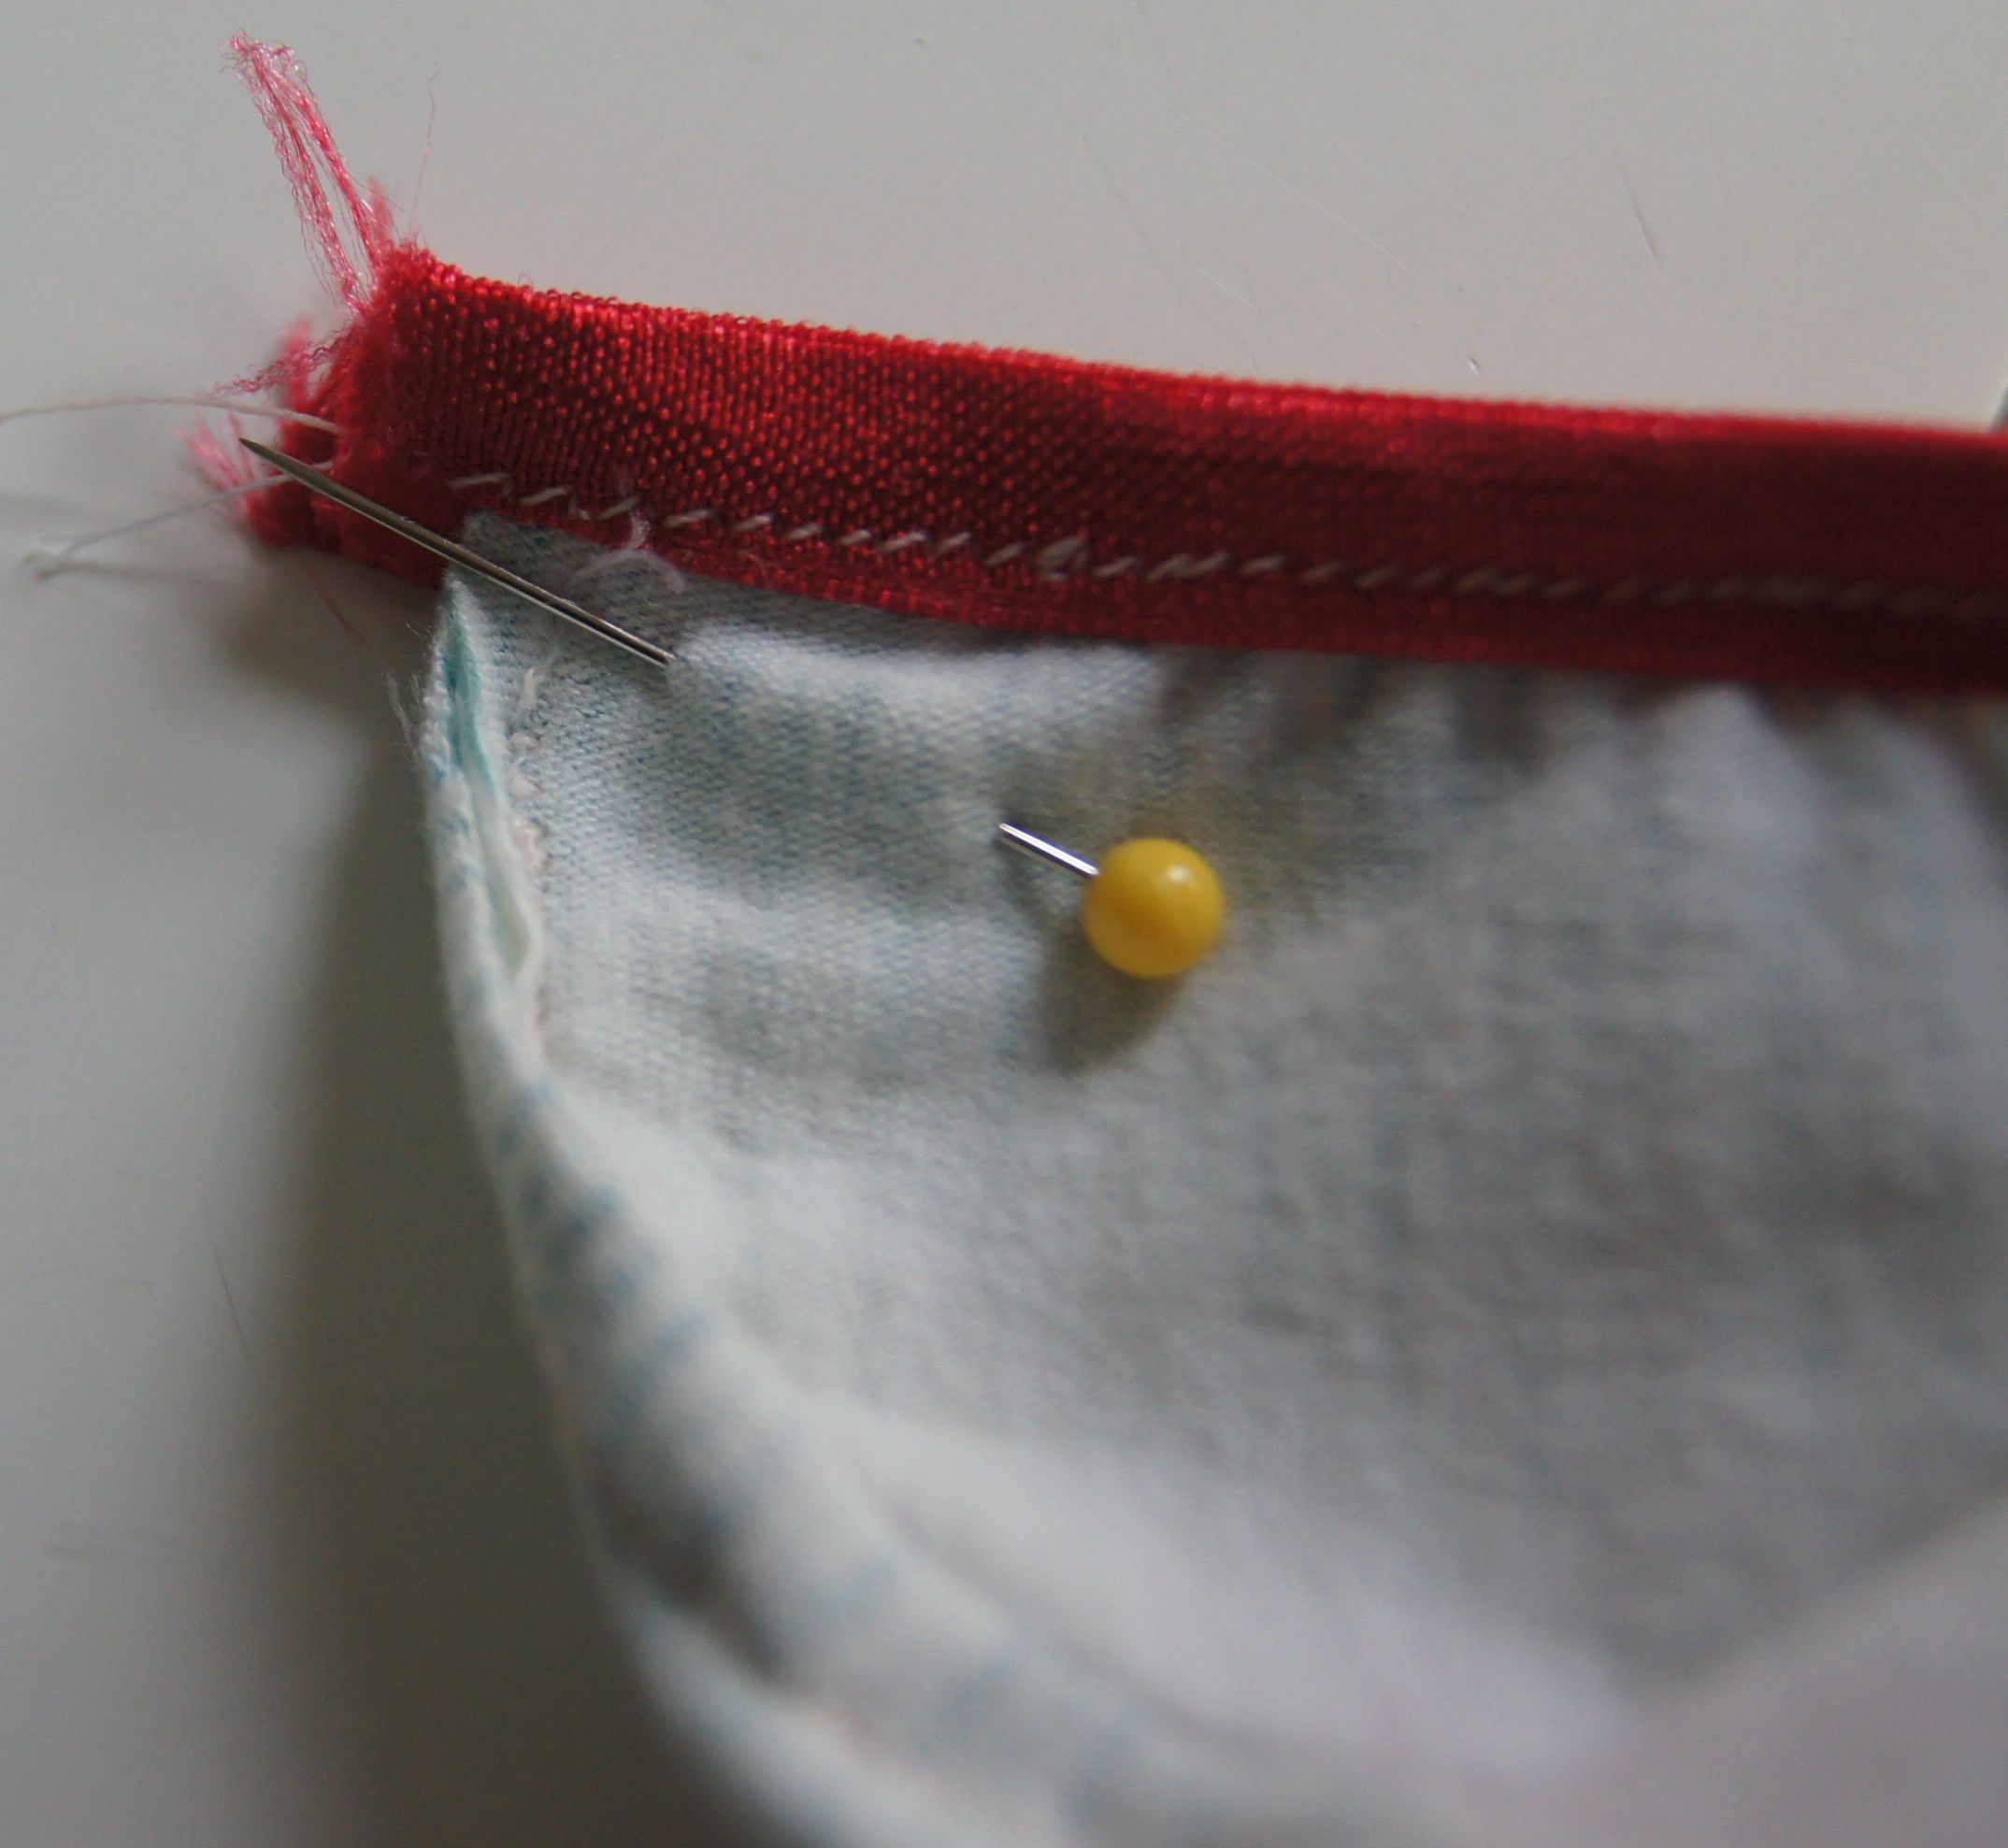
- Fold over and iron a 1/4 inch hem at the lower edge of both large pieces. Hem with a stretch stitch, zig-zag or overlock stitch.
- Now fold each of these hemmed pieces in half the long way, right sides together. From the LOWER edge sew a 1/2" inch seam to make the leg of the undies.
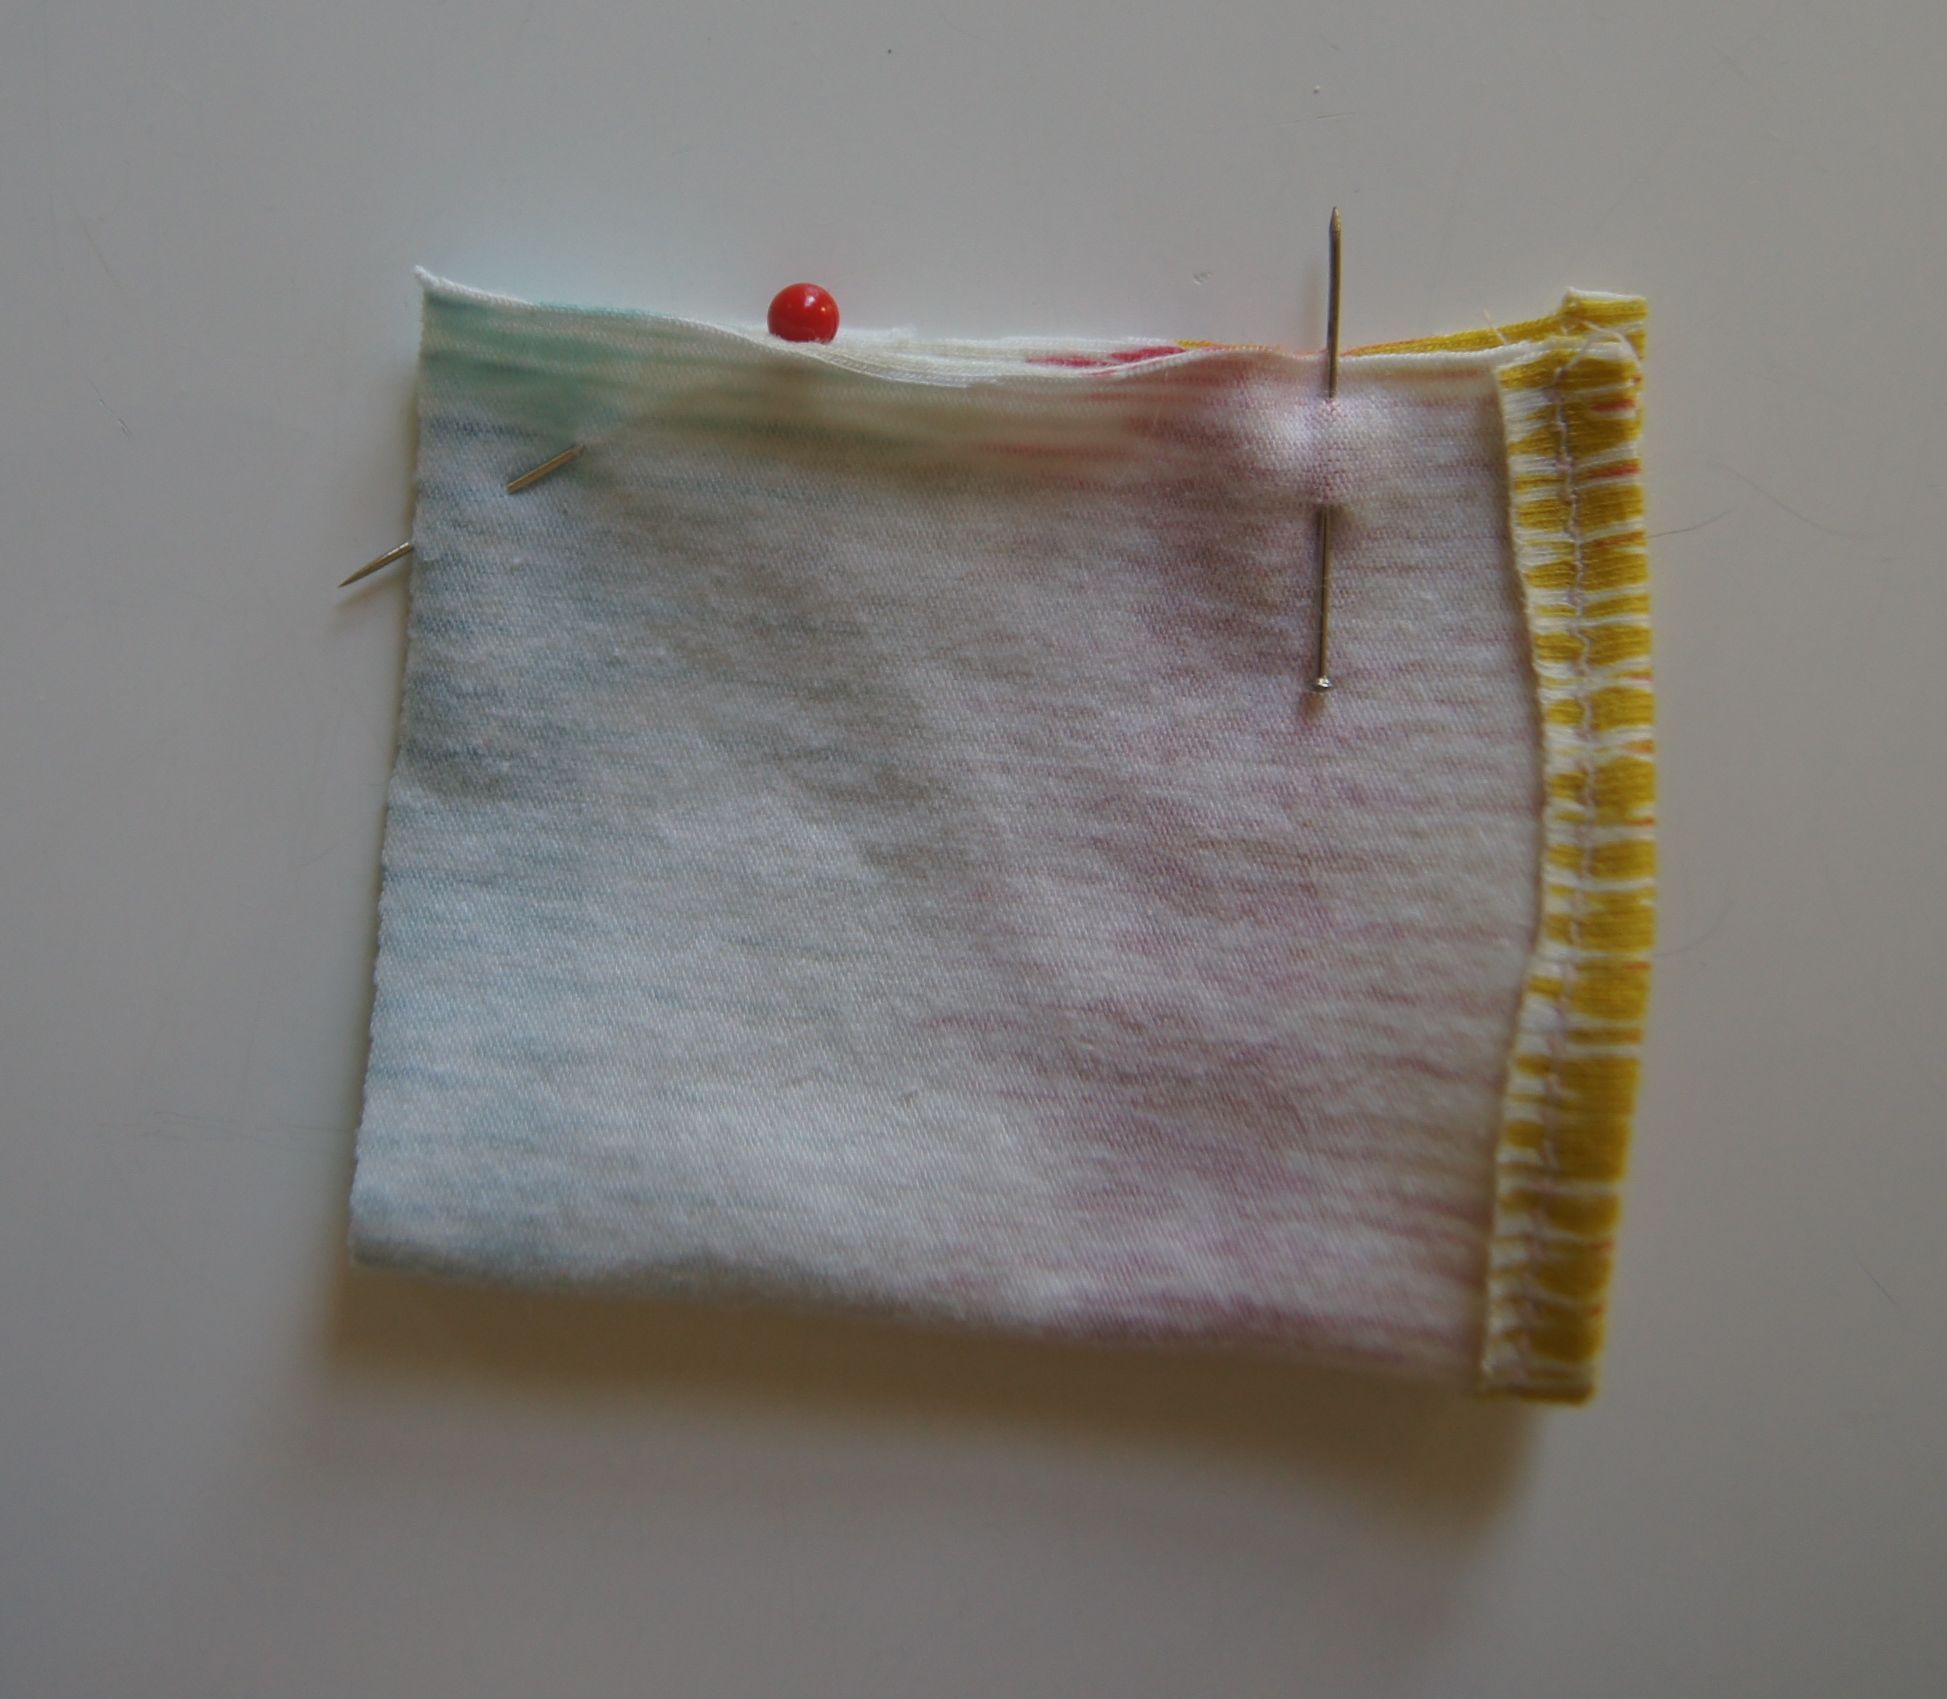
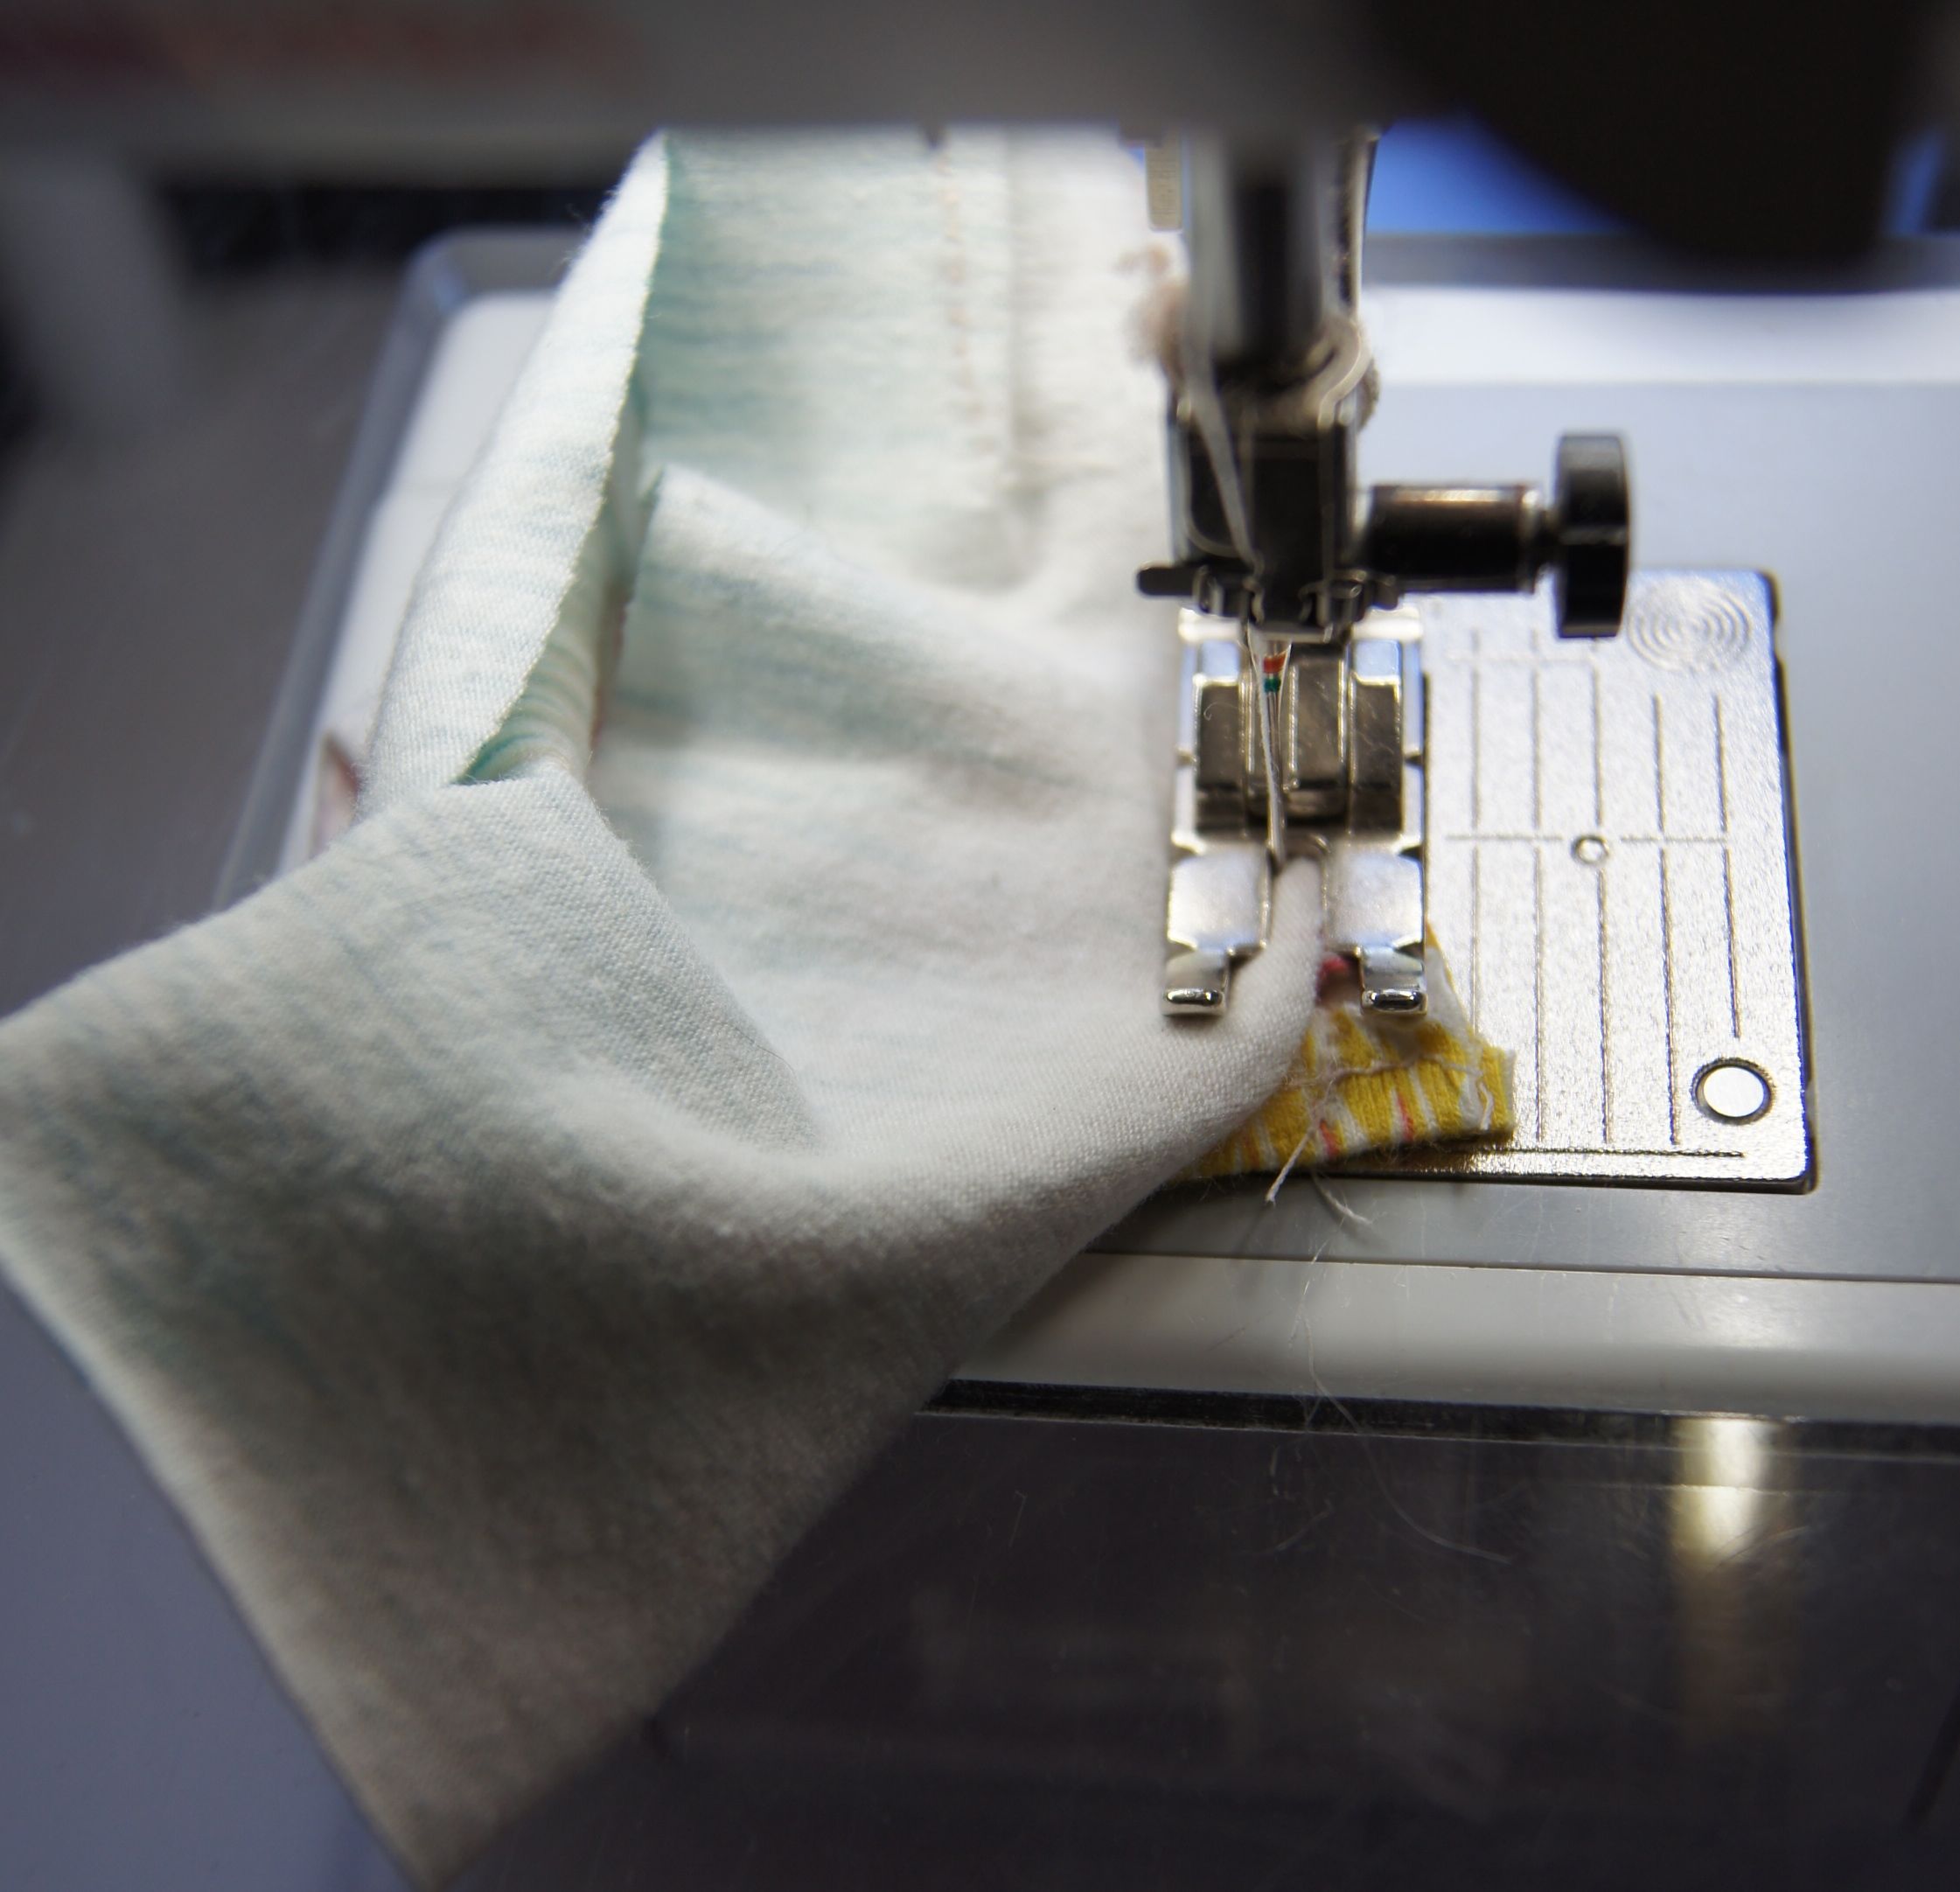
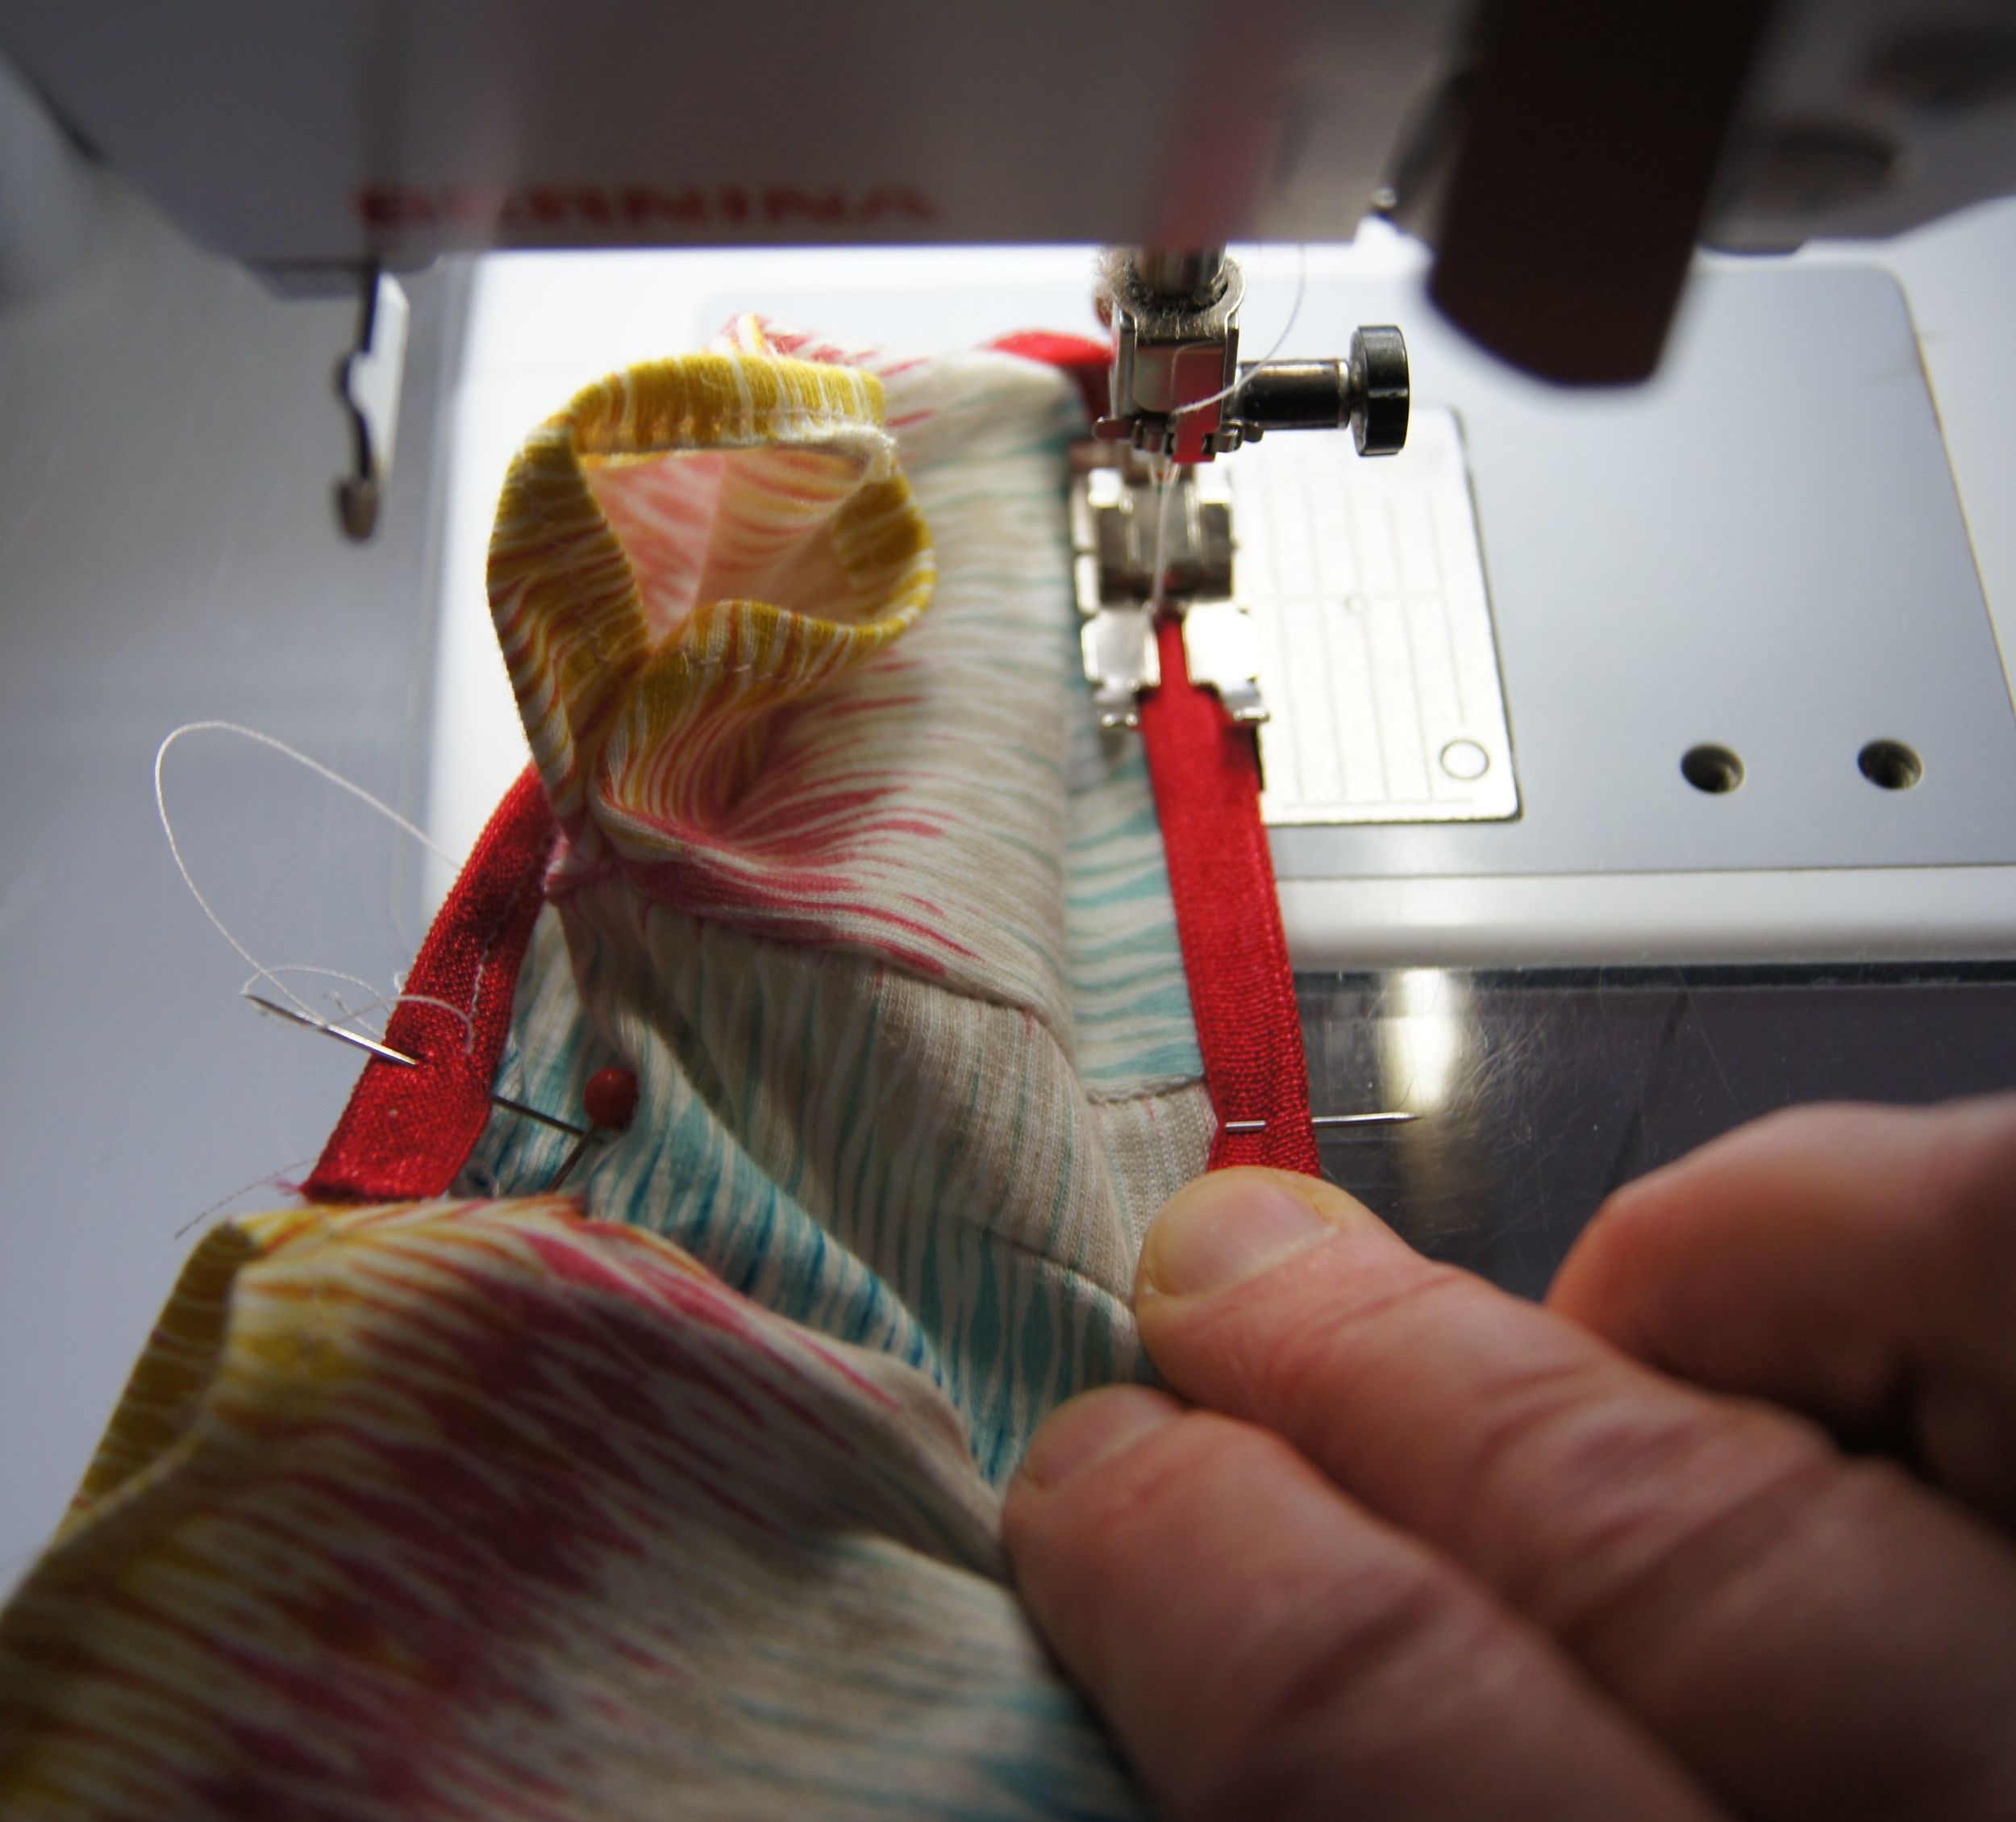
- The center band is going to extend from the waistband in front, through the crotch and up the back of the undies. Attach it by sewing it, with a stretch stitch, starting at the front upper edge of the large pieces, starting with the end of the center piece which has the dart.
- Sew down the front center seam on one side, pivot at the leg seam, and sew up the back center seam. Your center piece will probably be 1/2 too long. That can be trimmed so it is the same height the waist band once you have one side attached.
- Now sew the other side of the center piece to the other half of the undies. Pivot at the leg seam, sew another inch and STOP!
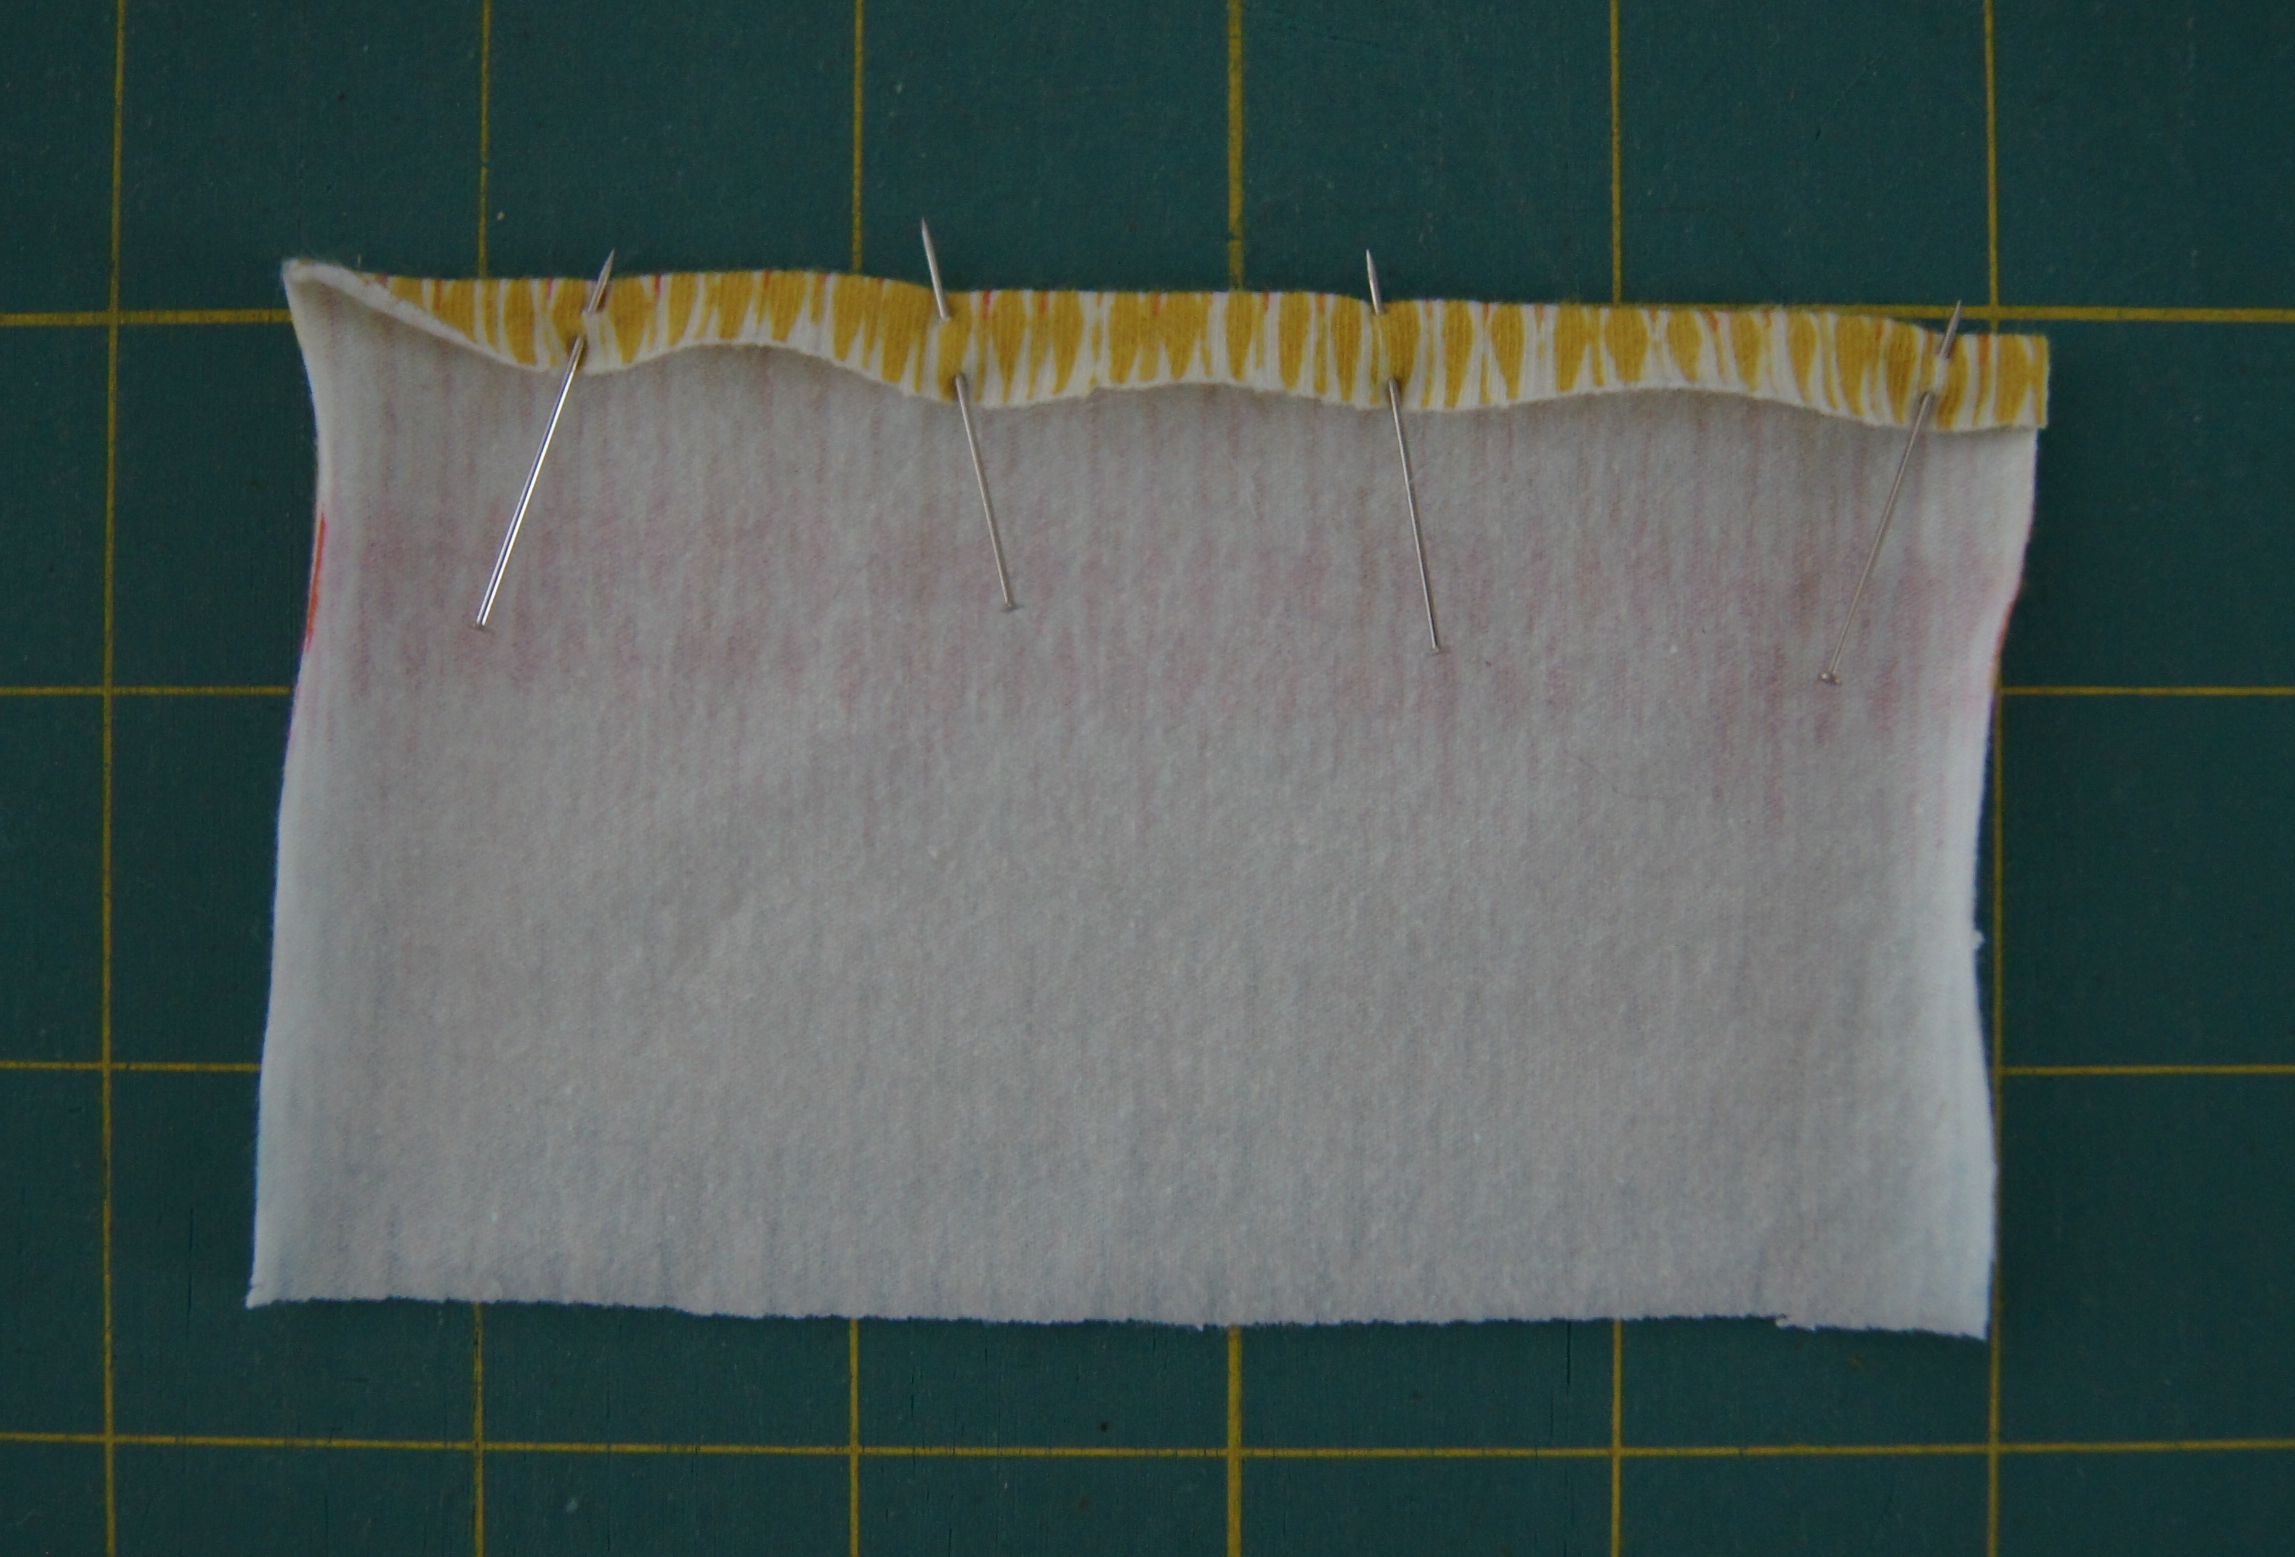
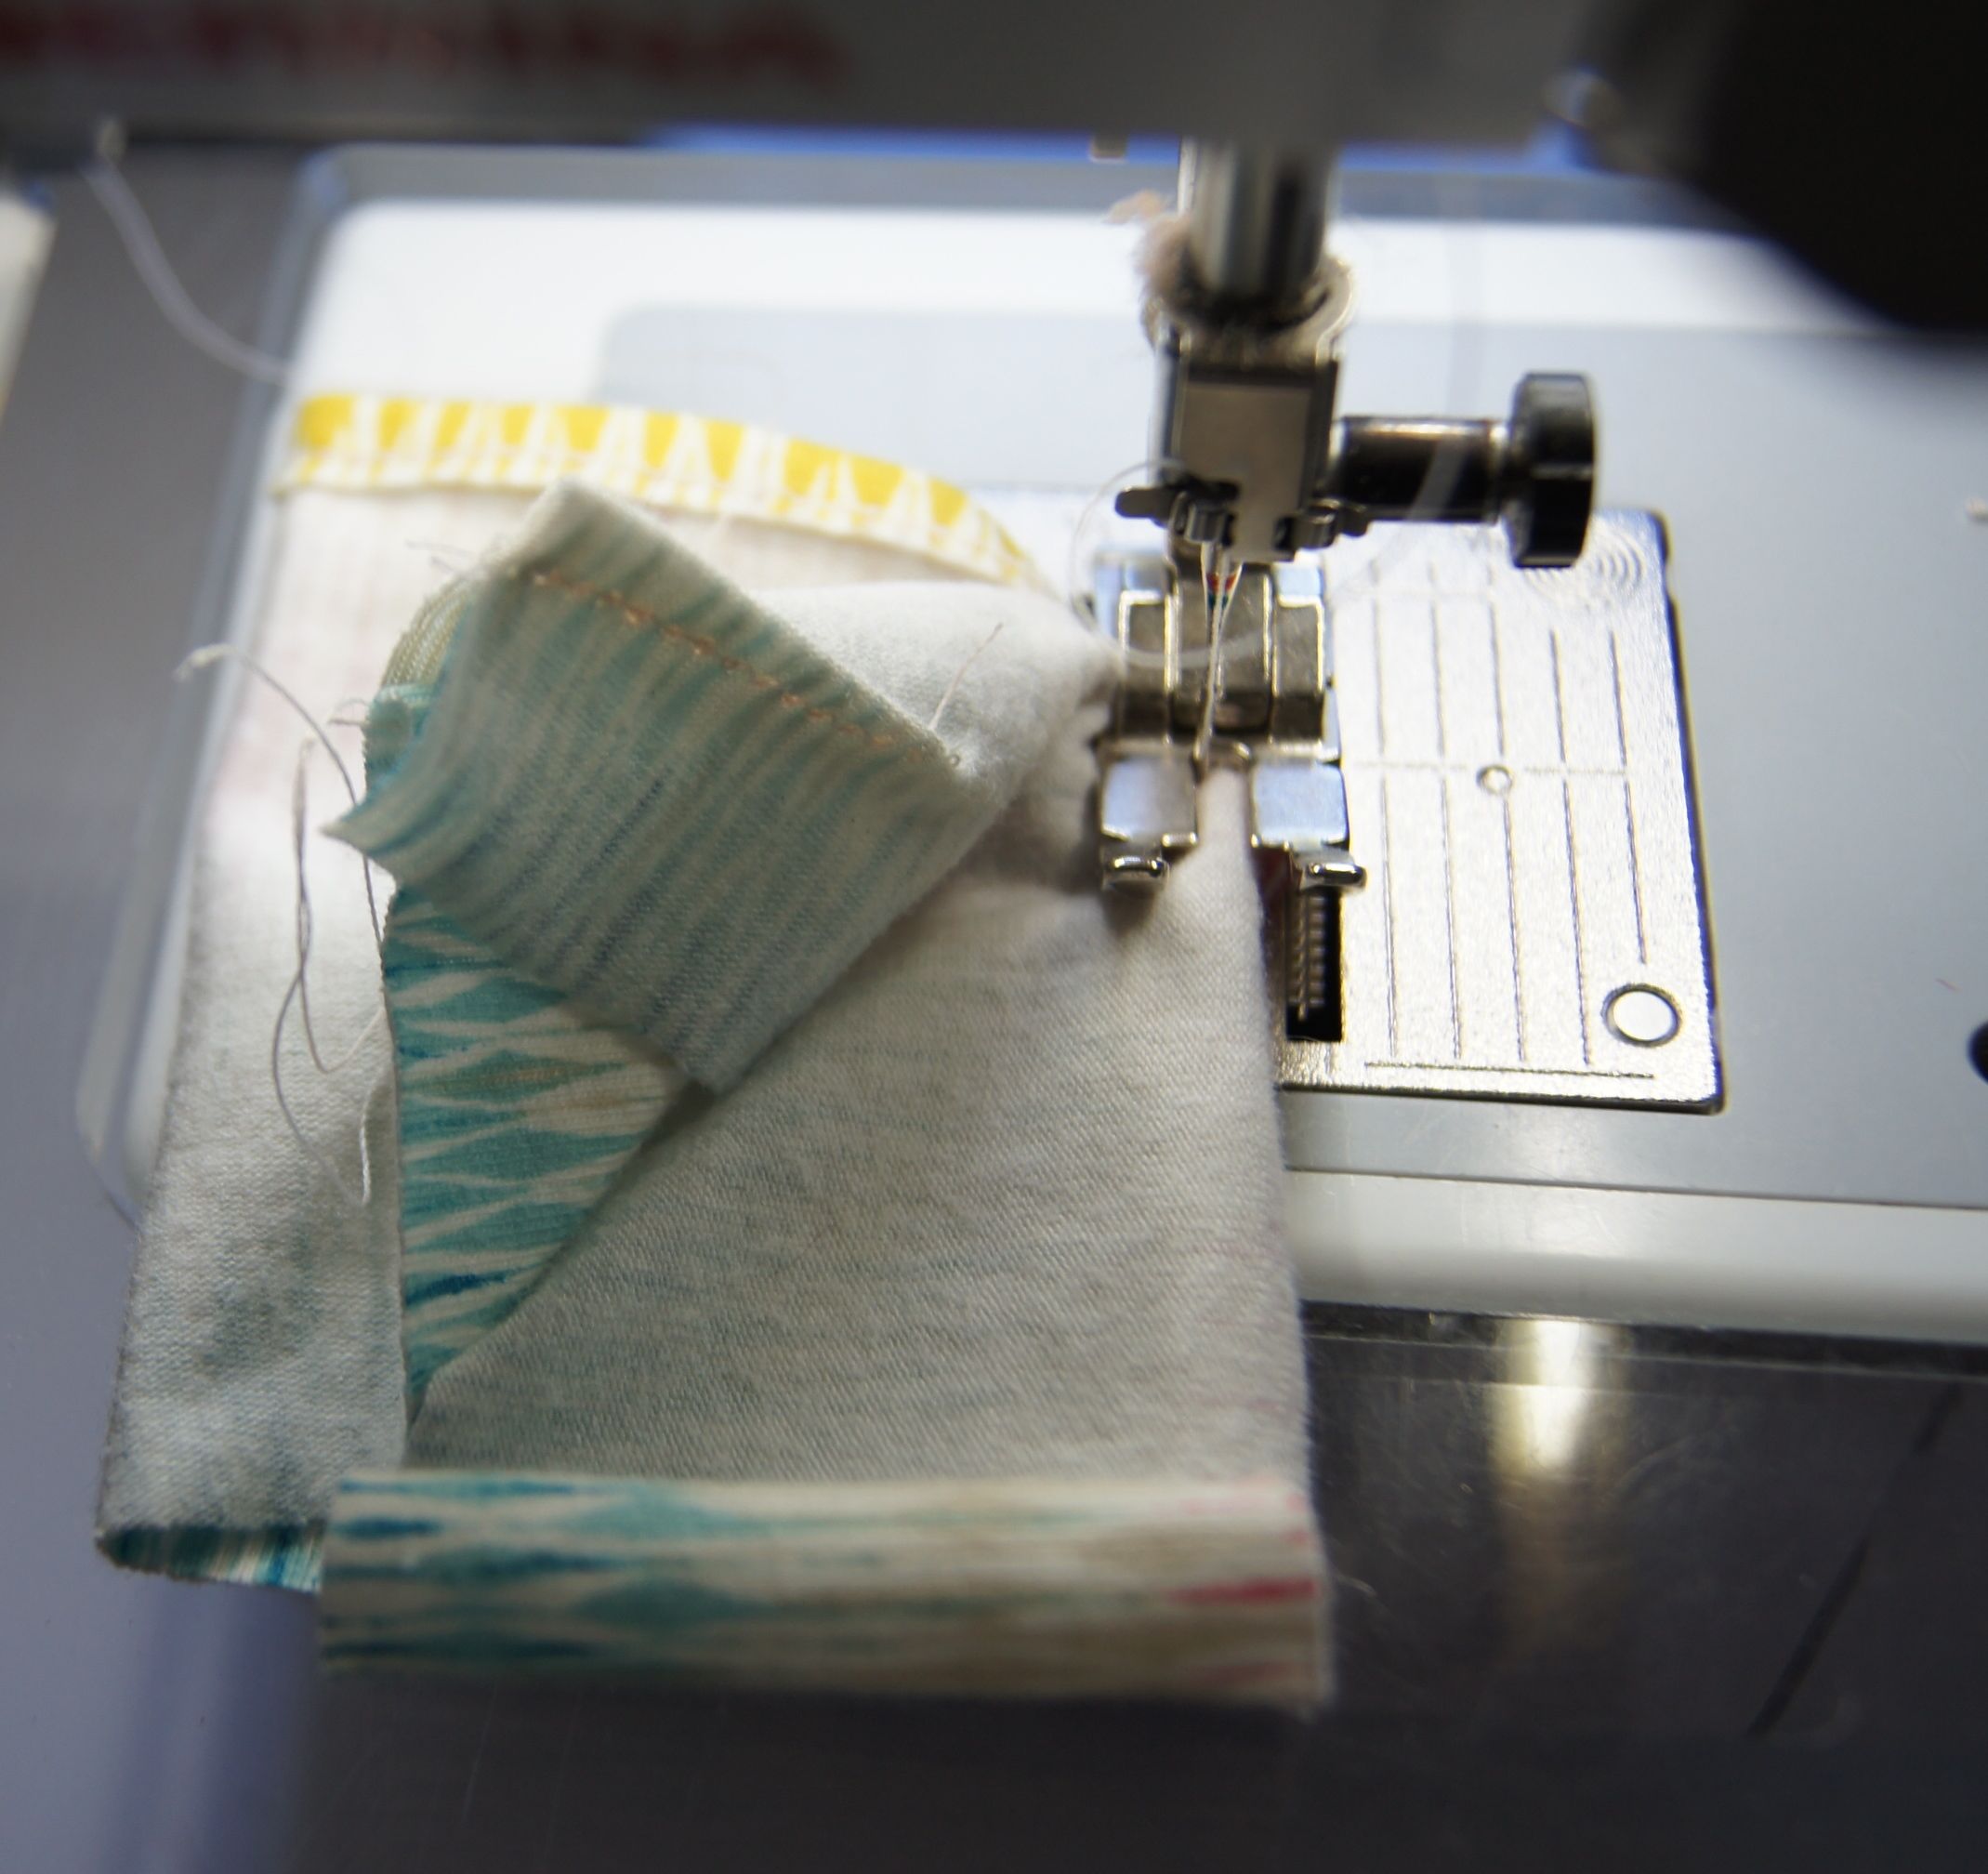
- Attach the fold over elastic. Pin in about 4-6 places to the waistband of the undies. You will need to pull on the elastic so it will fit the waist of the undies which is long. This will create a slight gather along the waist of the undies.
- Once the fold over elastic is attached, sew up the remainder of the back seam. This is a good time to adjust the fit to the doll.
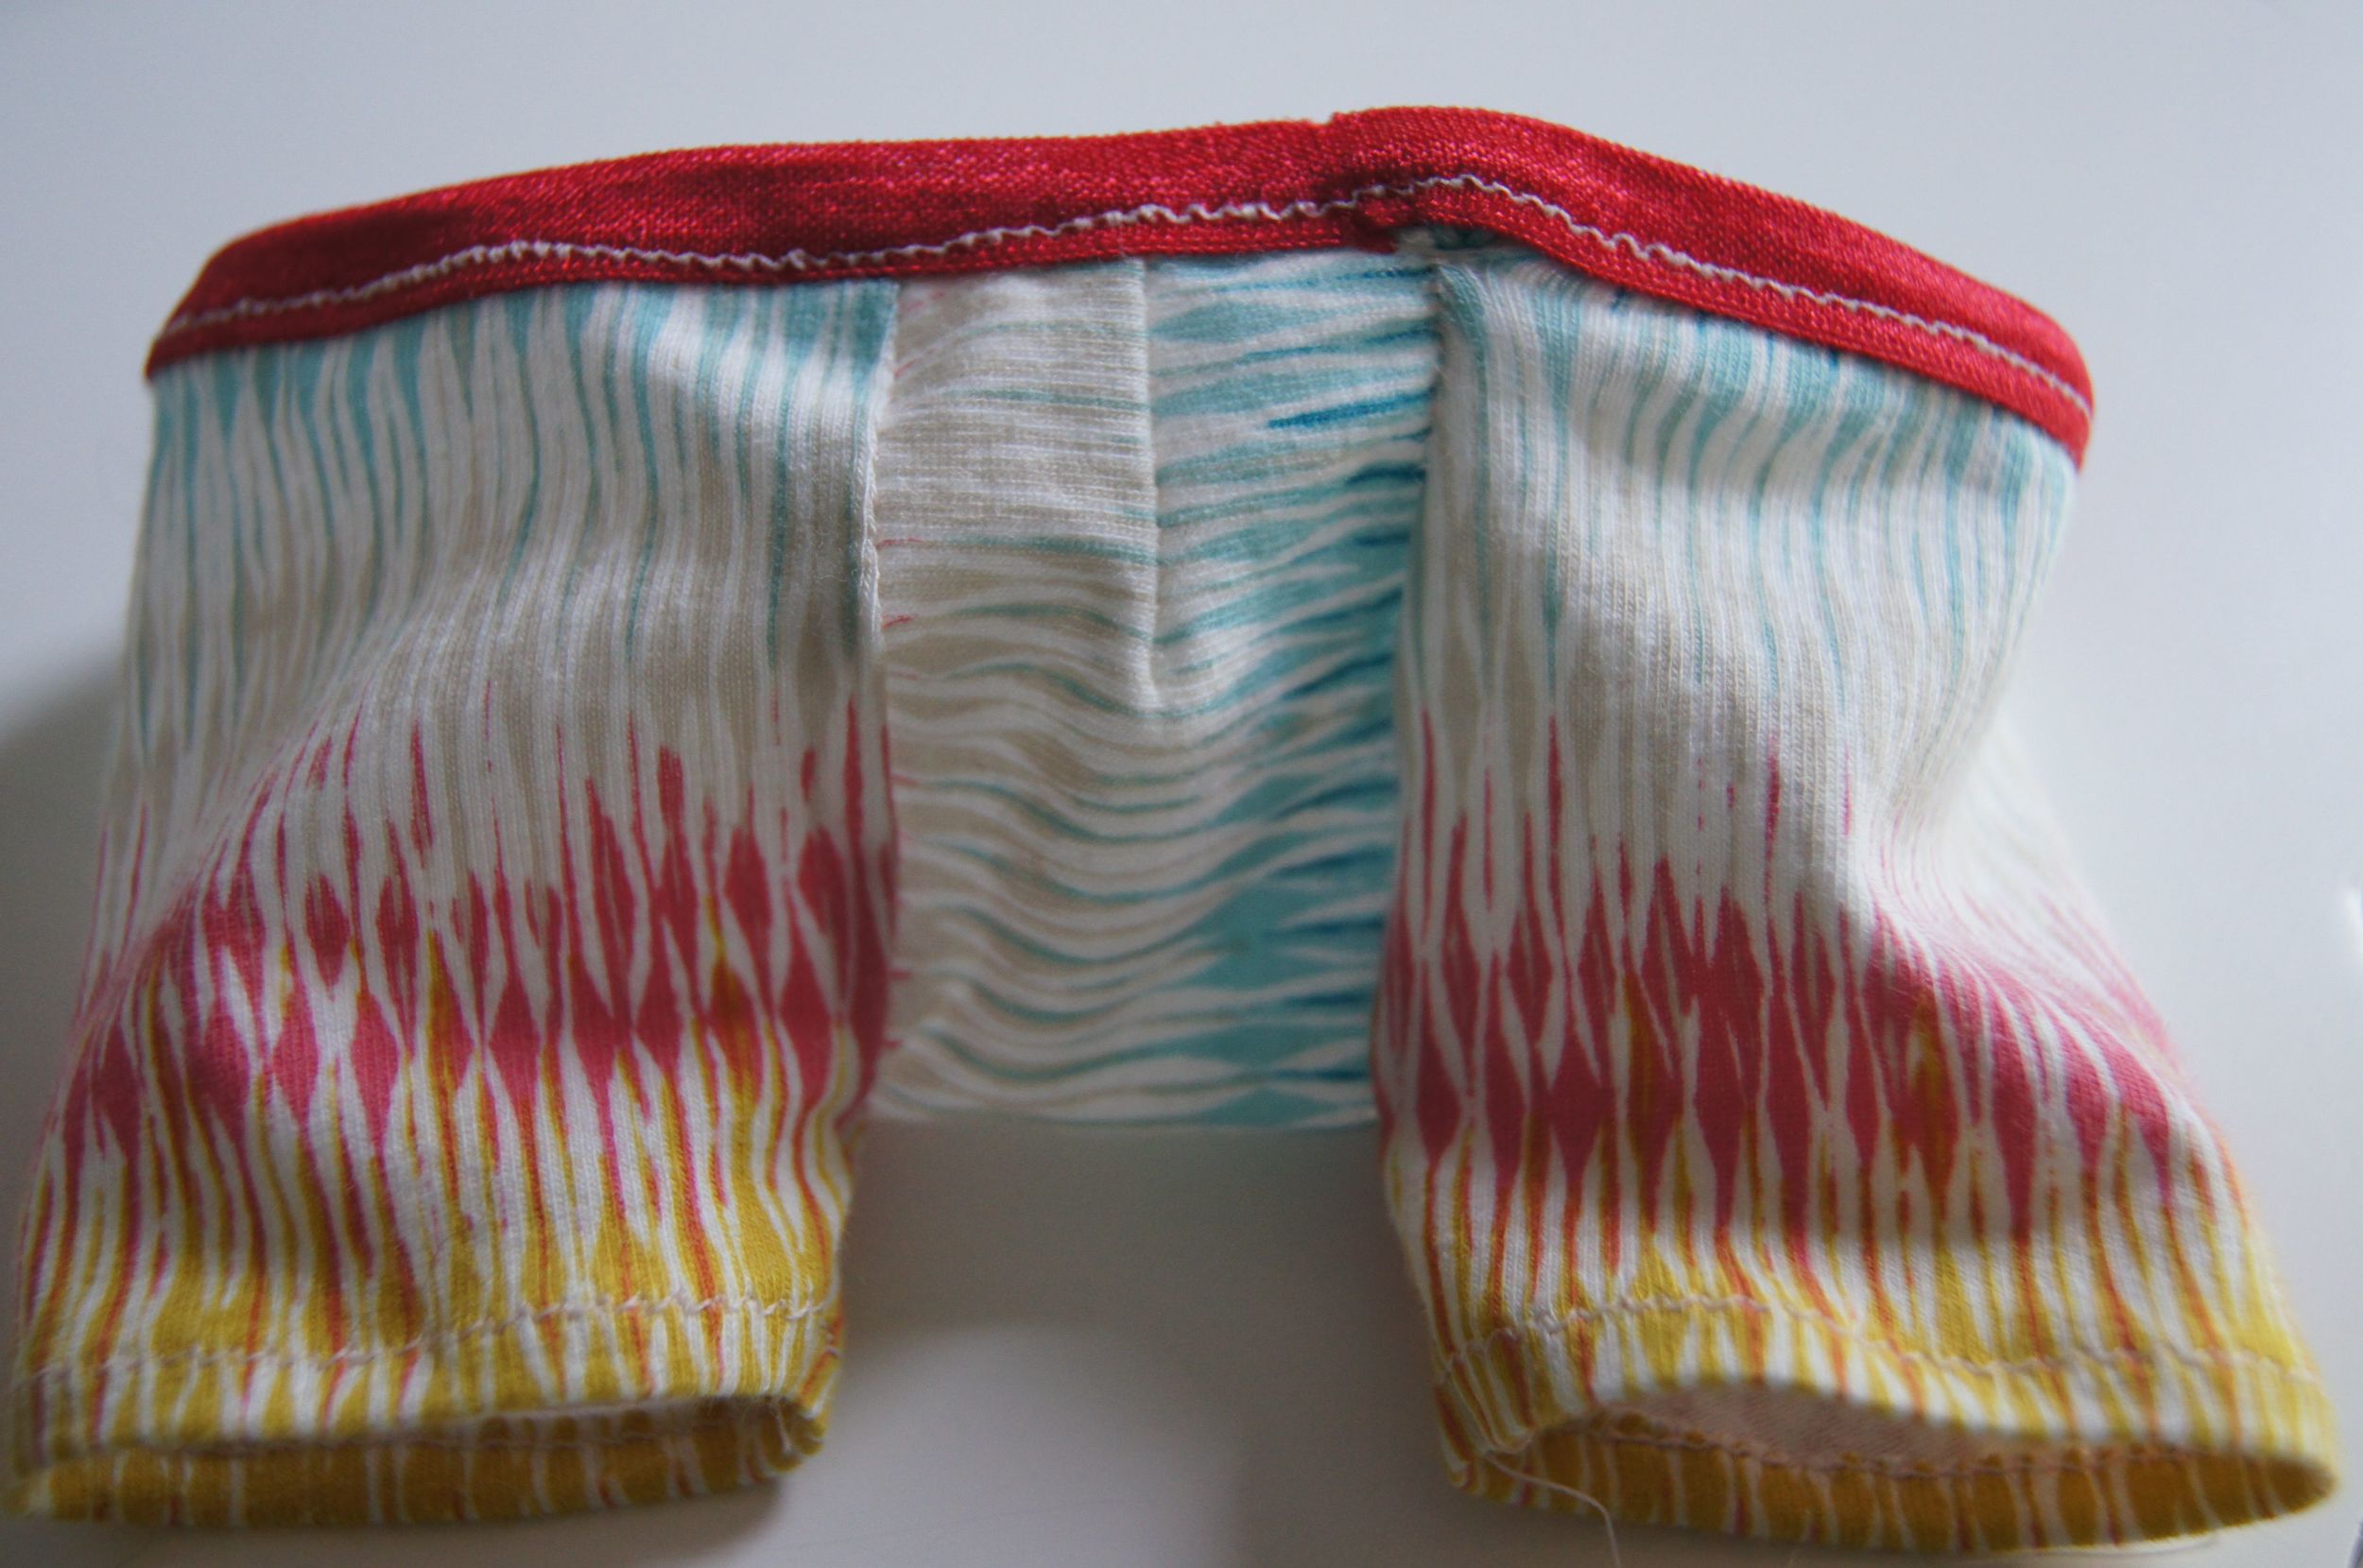
- That's it! Boy Briefs!