Search
  • Information
    • About
    • Contact
    • Privacy Policy
  • Blog
  • Subscribe
  • Tutorials
    • Tutorials
    • Doll Clothes: Photos and some Patterns
  • Suggested Reading
  • Quilts: My Original Designs
  • Gallery: Color Studies
  • Gallery: Quilts I've Made
  • Doll Making Blog Posts
  • Recent blog posts
  • Quilts Based on The Improv Handbook for Modern Quilters
Close
Menu
Search
Close
  • Information
    • About
    • Contact
    • Privacy Policy
  • Blog
  • Subscribe
  • Tutorials
    • Tutorials
    • Doll Clothes: Photos and some Patterns
  • Suggested Reading
  • Quilts: My Original Designs
  • Gallery: Color Studies
  • Gallery: Quilts I've Made
  • Doll Making Blog Posts
  • Recent blog posts
  • Quilts Based on The Improv Handbook for Modern Quilters
Menu

Sleeping Dog Quilts

SLEEPING DOG QUILTS

June 15, 2023

"Puss in the Corner" quilt

by Judy Tucker


“Ladybugs in the Corner” quilt

“Ladybugs in the Corner” quilt

This is a quilt I made for a quilt guild project. The pattern is called “Puss in the Corner” but in my quilt, it’s Tula Pink’s Ladybugs in the corners! I love how bright and cheery this quilt is.

I quilted the blocks with straight stitches but then had a lot of fun doing a continuous free-motion floral pattern going from solid block to solid block. This double stitched flower is one of my favorite designs and I’ve used it on several quilts. I actually got the idea for the design from a pattern on the fabric backing one of my quilts! You never know where you’ll find inspiration for your projects!

Free-motion quilted flower design


TAGS: Puss in the Corner Quilt, Free Motion quilting a flower design


June 8, 2023

"Nine Patch Challenge" Quilt

by Judy Tucker


“Nine Patch Challenge” Quilt

“Nine Patch Challenge” Quilt

This “Nine Patch Challenge” quilt is another pattern from the book, Just One Charm Pack Quilts. You can read about the making of this quilt in my April 6, 2023 post.

I really enjoyed quilting this lap size quilt. I stitch just outside the ditch around the square patches but then put flowers and leaves in the alternate blocks. I started out thinking I would try to stitch the flowers in a continuous line from block to block, but after doing that once, I decided I liked them better as separate flowers. Can you spot the one place where I stitched from one block into the adjacent one?

IMG_4620.jpeg
IMG_4623.jpeg
IMG_4622.jpeg
IMG_4621.jpeg

I decided that the nine patch blocks needed to be anchored centrally. I initially thought I’d try to make a petal pattern but in my first attempt the petals were very subtle and I discovered I’d actually stitched out a loose, free-motion circle! I loved it. So I did that in all the blocks.

Free-motion free-form circle around the central patch in the nine patch block

The wavy line of stitching in the #4 stitch on my Bernina 440, set at stitch length 25. It’s one of my favorite stitches for borders.

I love the striped binding fabric chosen by O’Sewpersonal Sewing Center who kitted the fabrics for this pattern.

TAGS: Nine Patch Challenge quilt, Nine Patch Blocks, Free Motion quilting a flower design


June 3, 2021

Tula Pink's "Lil' Stinker" in my "Dodging the Skunk" quilt

by Judy Tucker


“Dodging the Skunk, Or Skunks and Wild Roses” Lap Quilt  48 1/2 x 57 inches

“Dodging the Skunk, Or Skunks and Wild Roses” Lap Quilt 48 1/2 x 57 inches

“Dodging the Skunk, Or Skunks and Wild Roses” Lap Quilt  48 1/2 x 57 inches

“Dodging the Skunk, Or Skunks and Wild Roses” Lap Quilt 48 1/2 x 57 inches

Whew! I hustled and got my quilt, “Dodging the Skunk” OR “Skunks and Wild Roses” lap quilt done this past weekend. It was a perfect weekend for finishing up quilts…so cold here, that it broke the old record for the low temperature set back in 1917!

There is straight line quilting along the grid lines created by the big blocks. And free motion quilting inside both the skunk blocks and the chaining alternate blocks.

I wasn’t sure how I was going to quilt all that negative space in the alternate blocks, but when I started out on the first one, I realized I could quilt in a circle around the block without needing to stop. I was so delighted to see I had created a wreath of floppy wild roses. What could be better for a skunk quilt??

FloppyWildRoseWreath.jpg

The skunks are outlined in their blocks, and there are swirls quilted around the skunks. Think whatever you will about that!!

SwirlsAroundTheSkunk.jpg

For more info about my quilt pattern, look back at my last post.

I wasn’t sure if I was really going to like this skunky quilt. But now, because of the free motion quilting, I think it’s one of my favorites!

TAGS: Using Tula Pink's "Lil' Stinker" skunk in a quilt design, "Dodging the Skunk!" quilt, Free Motion quilting a flower design, Free motion Quilting


November 7, 2019

"Triple Barnstar" Quilt Completed

by Judy Tucker


“Triple Barnstar” Queen Size quilt

“Triple Barnstar” Queen Size quilt

“Triple Barnstar” Queen Size quilt

“Triple Barnstar” Queen Size quilt

Done!
Here’s my “Triple Barnstar” quilt designed by Amy Gibson. The pattern is a star, in a star, in a star!

I did walking foot echo stitching around the stars, with sitch-in-the-ditch along the grid lines between the blocks. I never really pay close enough attention to really keep all the stitching in the ditch between the blocks. I much prefer stitching 1/8 to 1/4 inch away from seams where a little wobble isn’t as obvious!

Walking Foot Stitching and Stitch-in-the-Ditch (sort of!)

Walking Foot Stitching and Stitch-in-the-Ditch (sort of!)

In open large triangles there are flowers without leaves and in the blocks without any piecing I did free motion flowers with 2 leaves. There is also a big of meandering and loops in the very large triangles near the center of the quilt.

1A950876-E4DE-4273-BADF-6CF11C8252E7.jpg
B8F9BDD3-2BC8-4153-B27C-389E69529A69.jpeg

So, this big project is finally done. And just in time—I heard something about possible snow in the coming week! It’s a perfect autumn quilt.

TAGS: "Triple Barnstar" Quilt Top by Amy Gibson, Free Motion quilting a flower design, Walking Foot quilting


October 24, 2019

How To Quilt a Free Motion Flower Design

by Judy Tucker


Free Motion Flower Design

Free Motion Flower Design

Free Motion Flower Design

Free Motion Flower Design

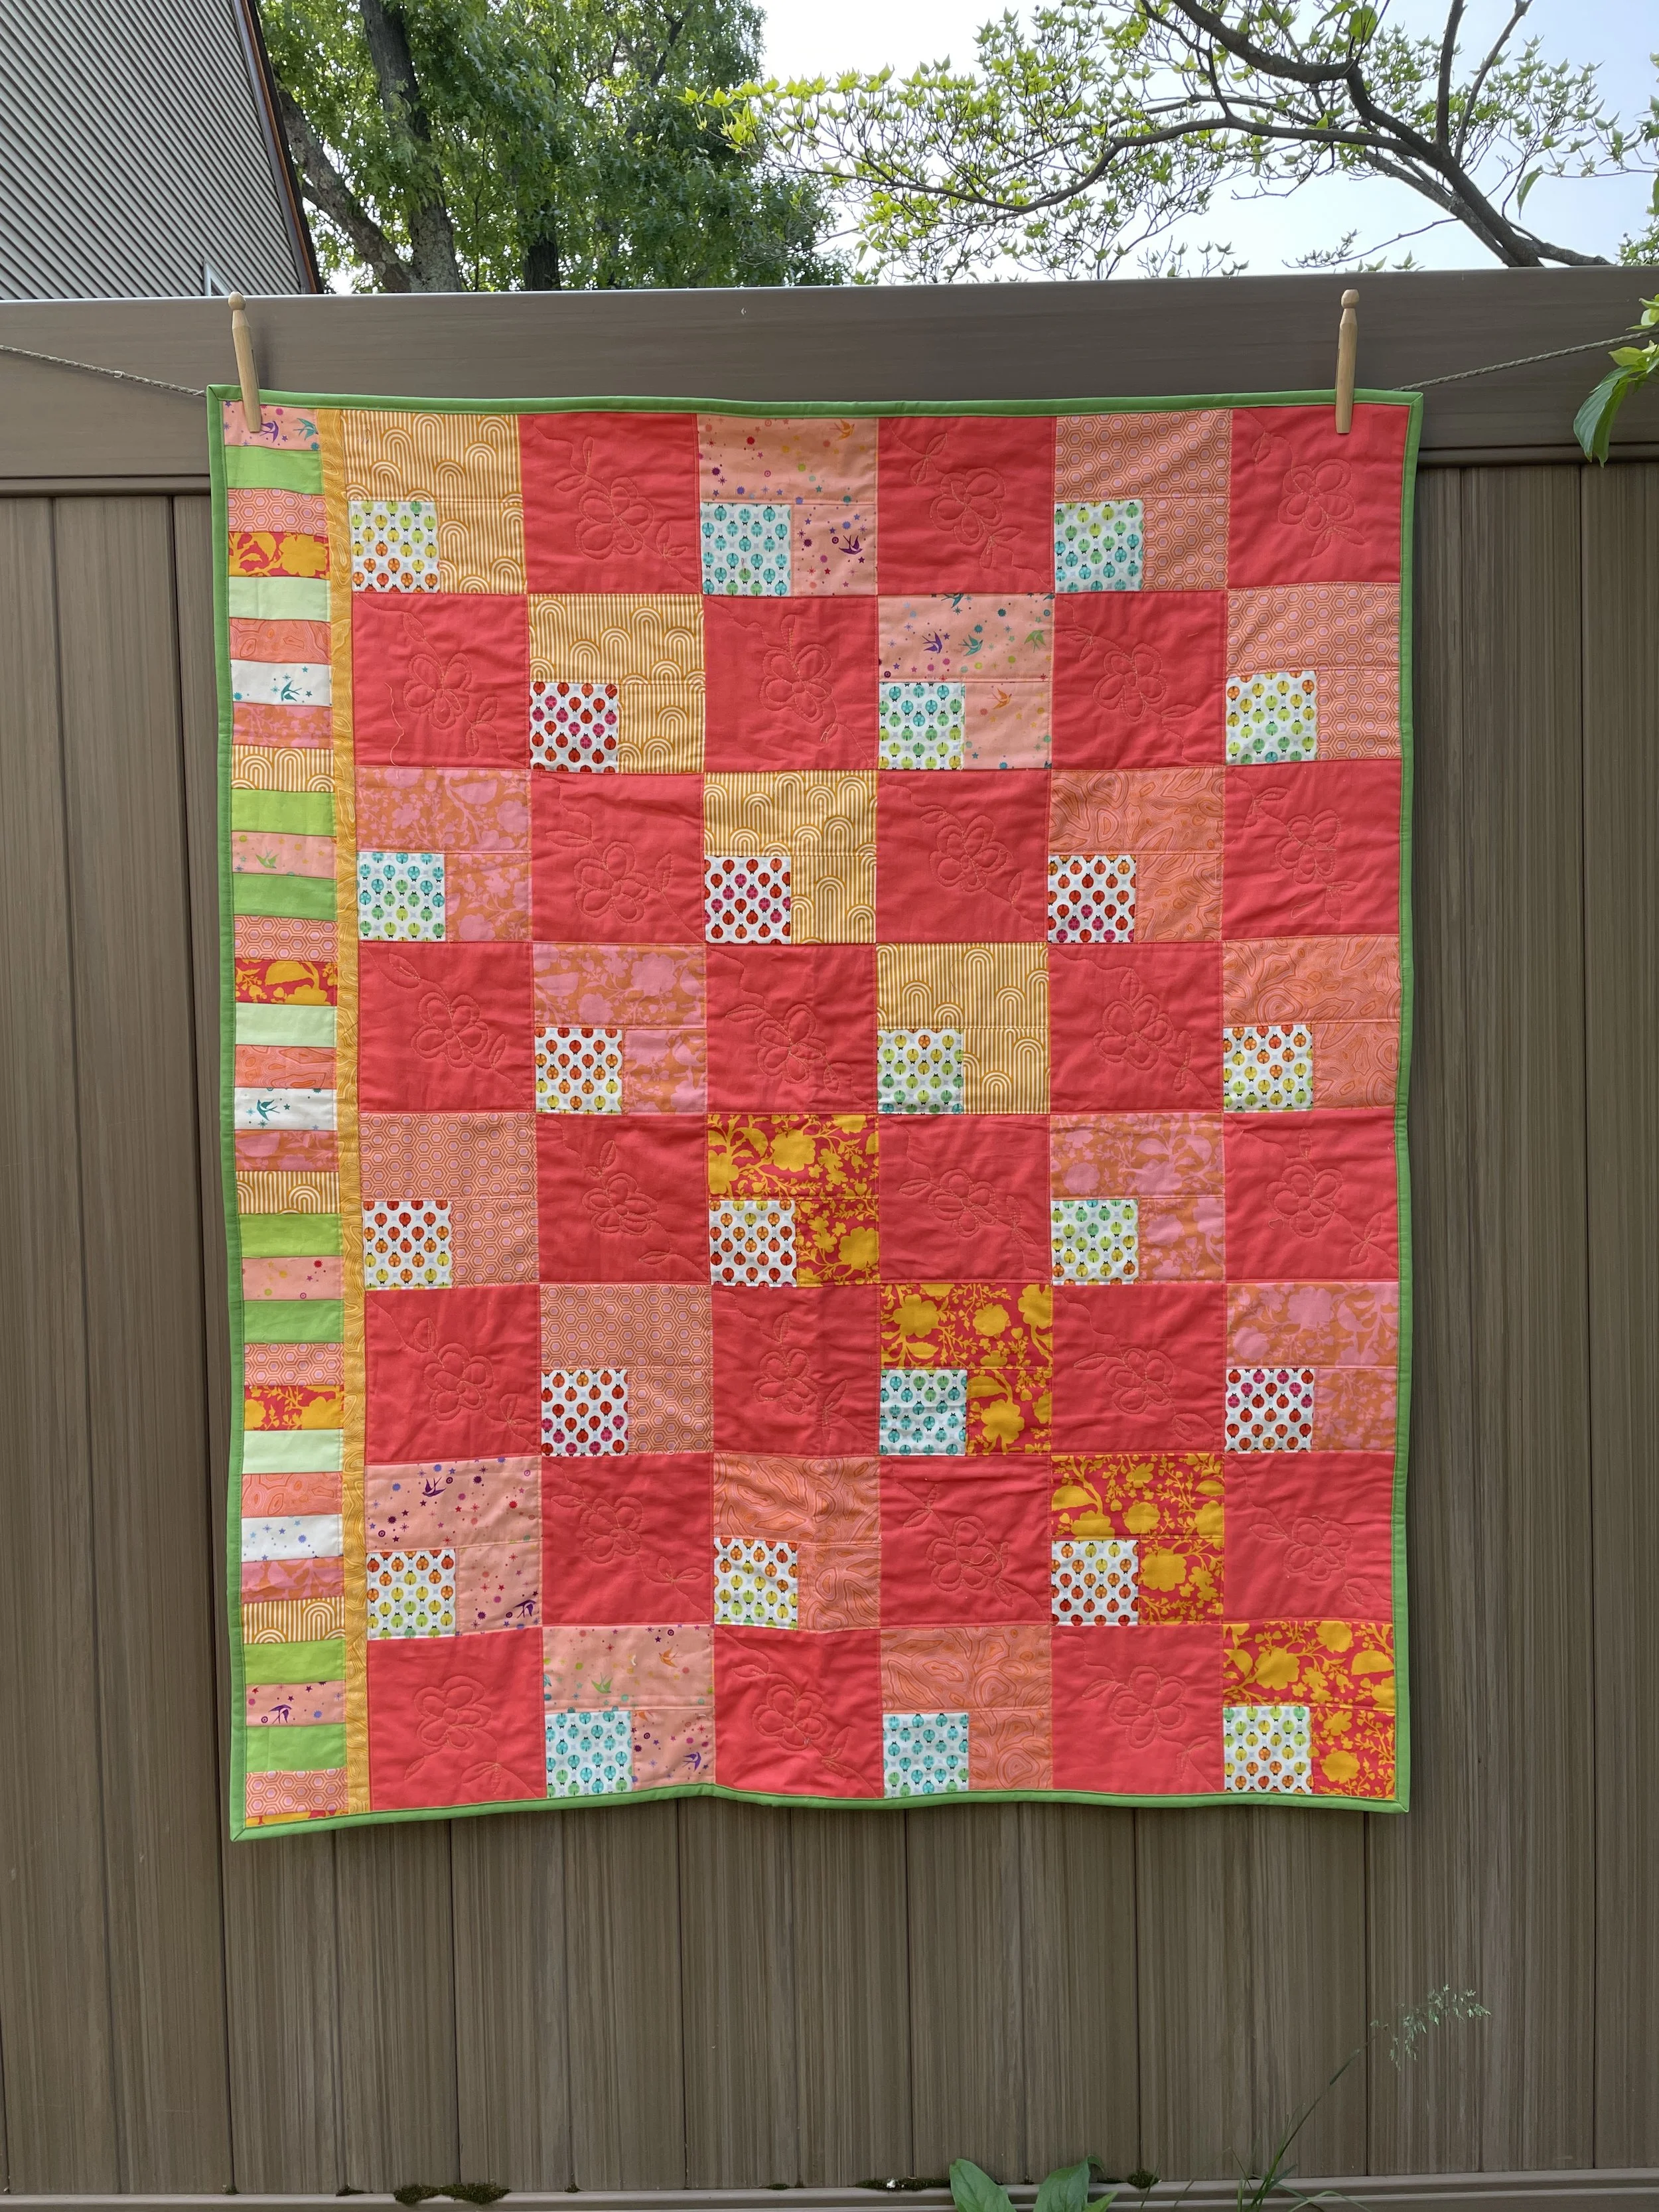
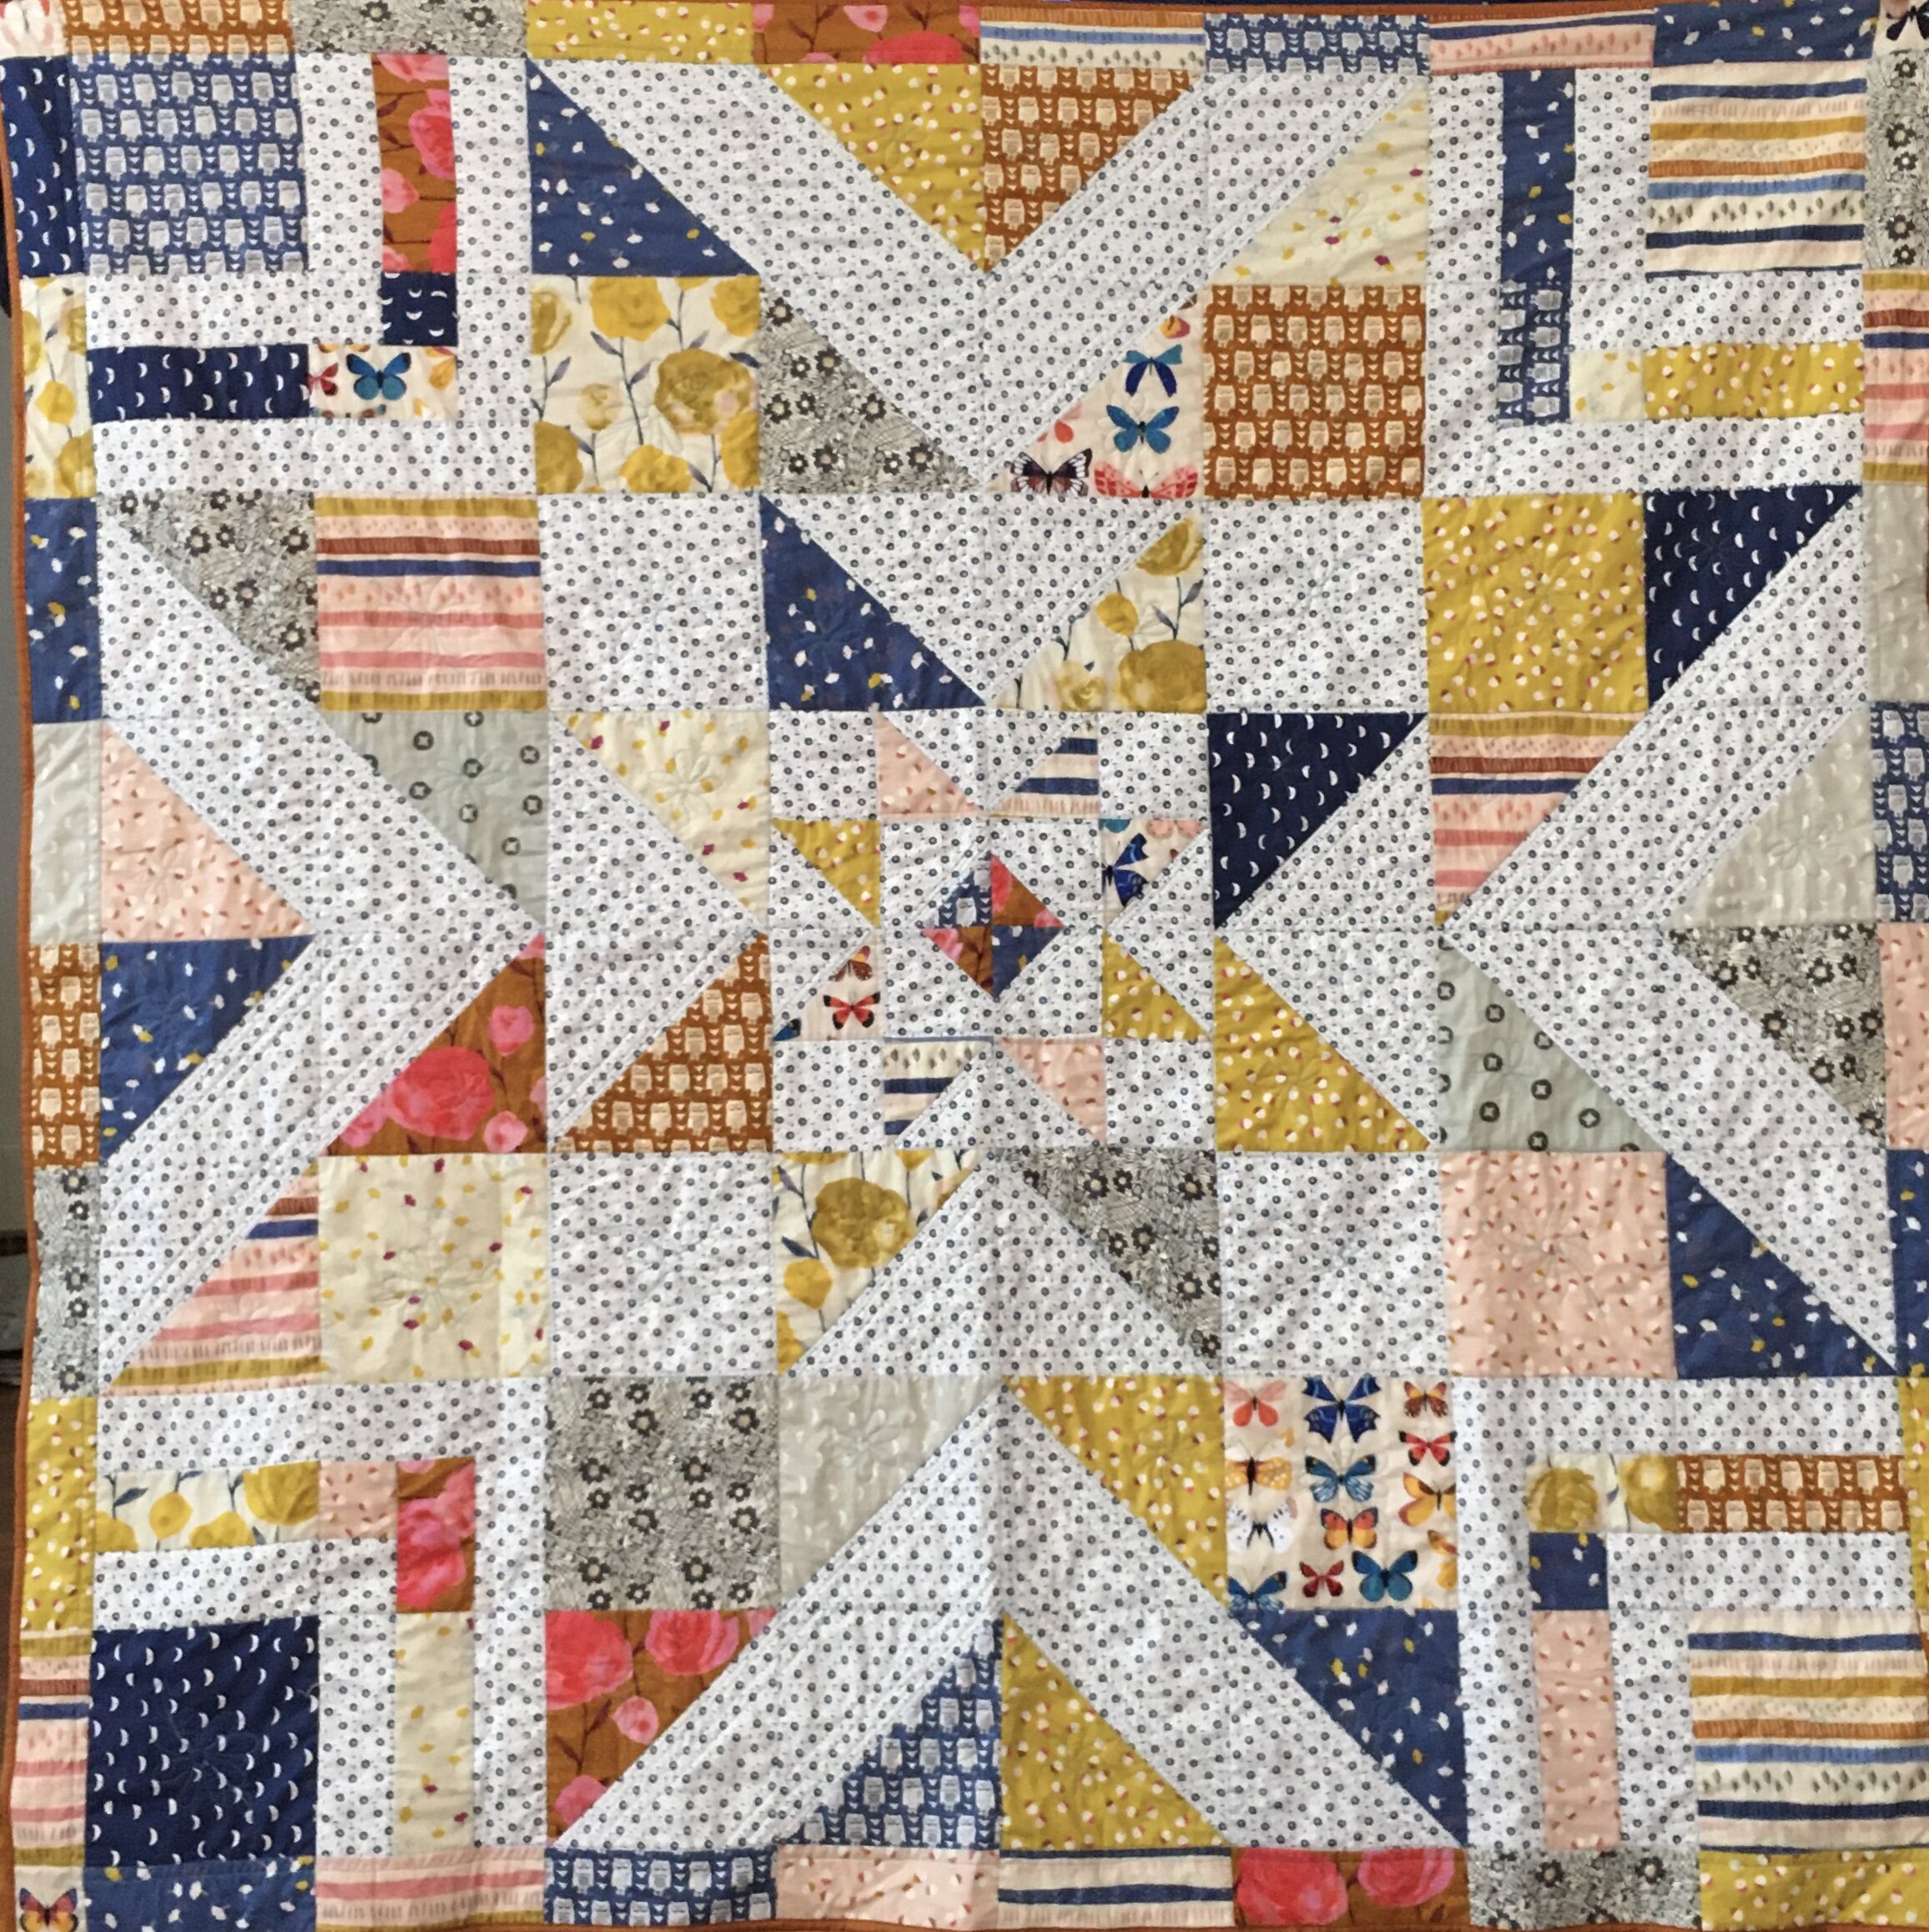
I’ve just finished quilting the “Triple Barnstar” queen size quilt. I used my walking foot and did a lot of linear quilting, But this quilt has a number of large 9 inch blocks and large triangle blocks. Those blocks were still empty when I finished the linear echo stitching around the 3 stars in this quilt.

It’s a bit unconventional to mix walking foot quilting with free motion quilting but it was the right answer for this quilt. (In fact, I often mix these two methods of quilting).

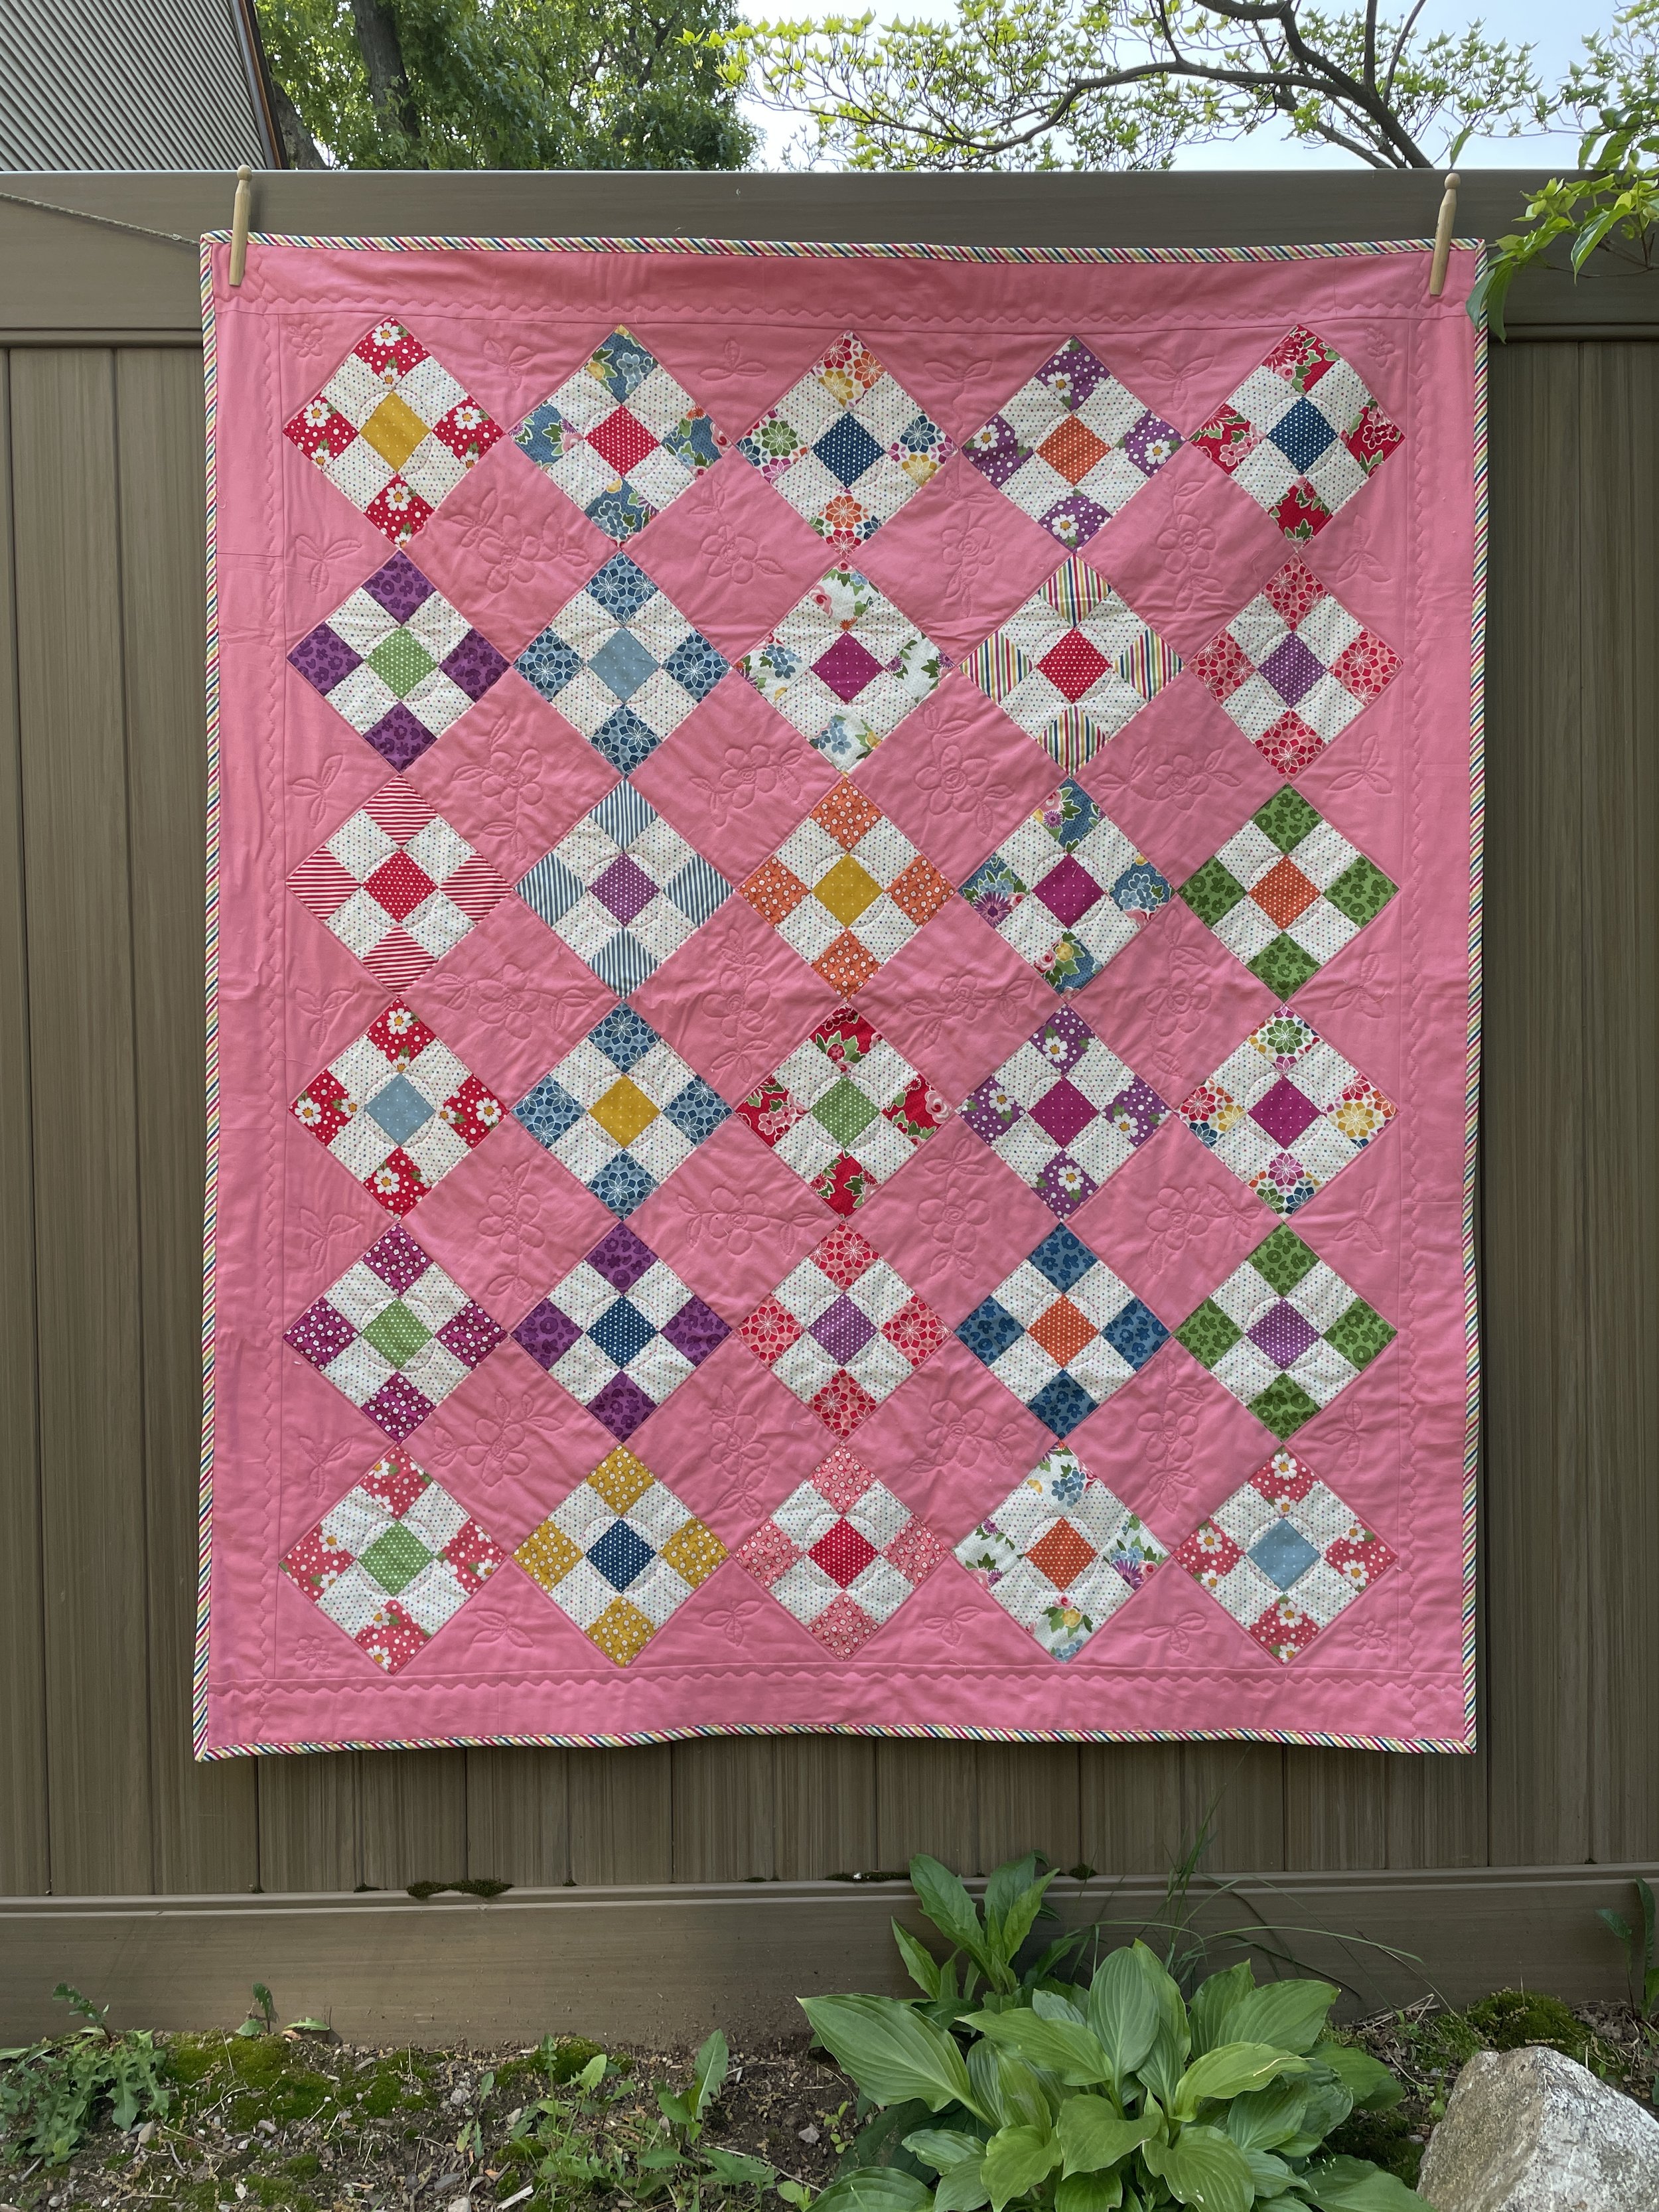
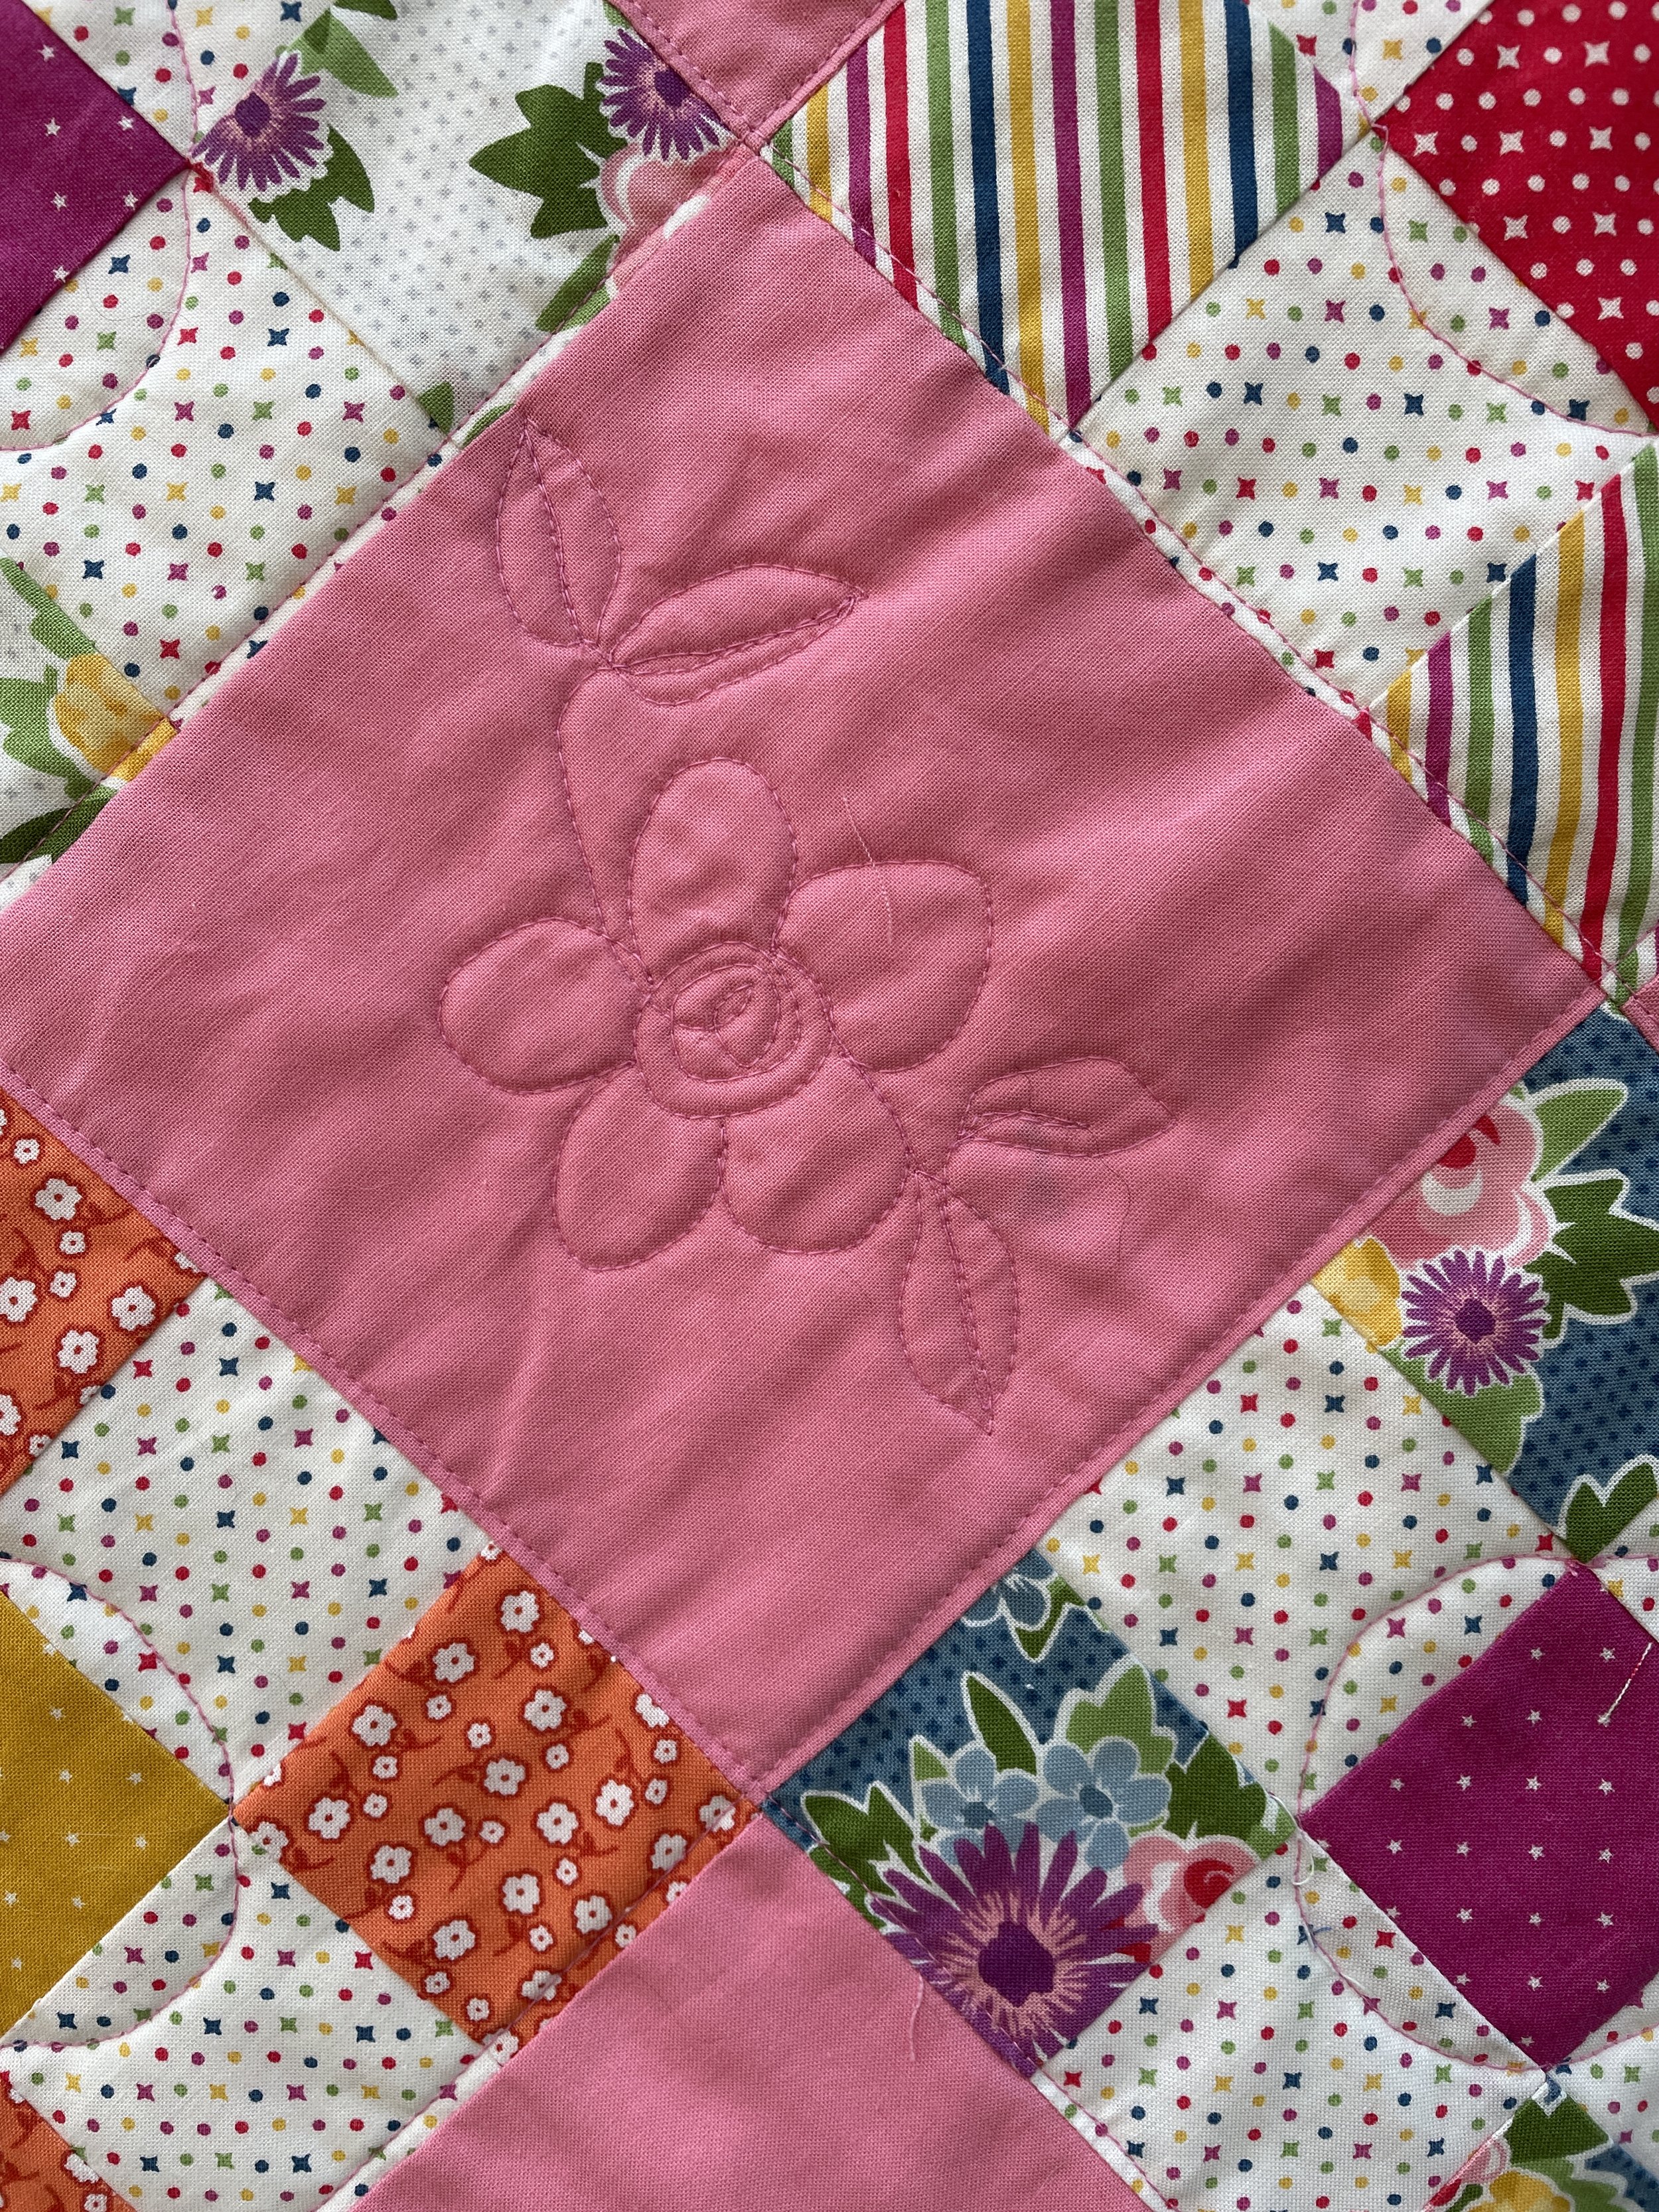
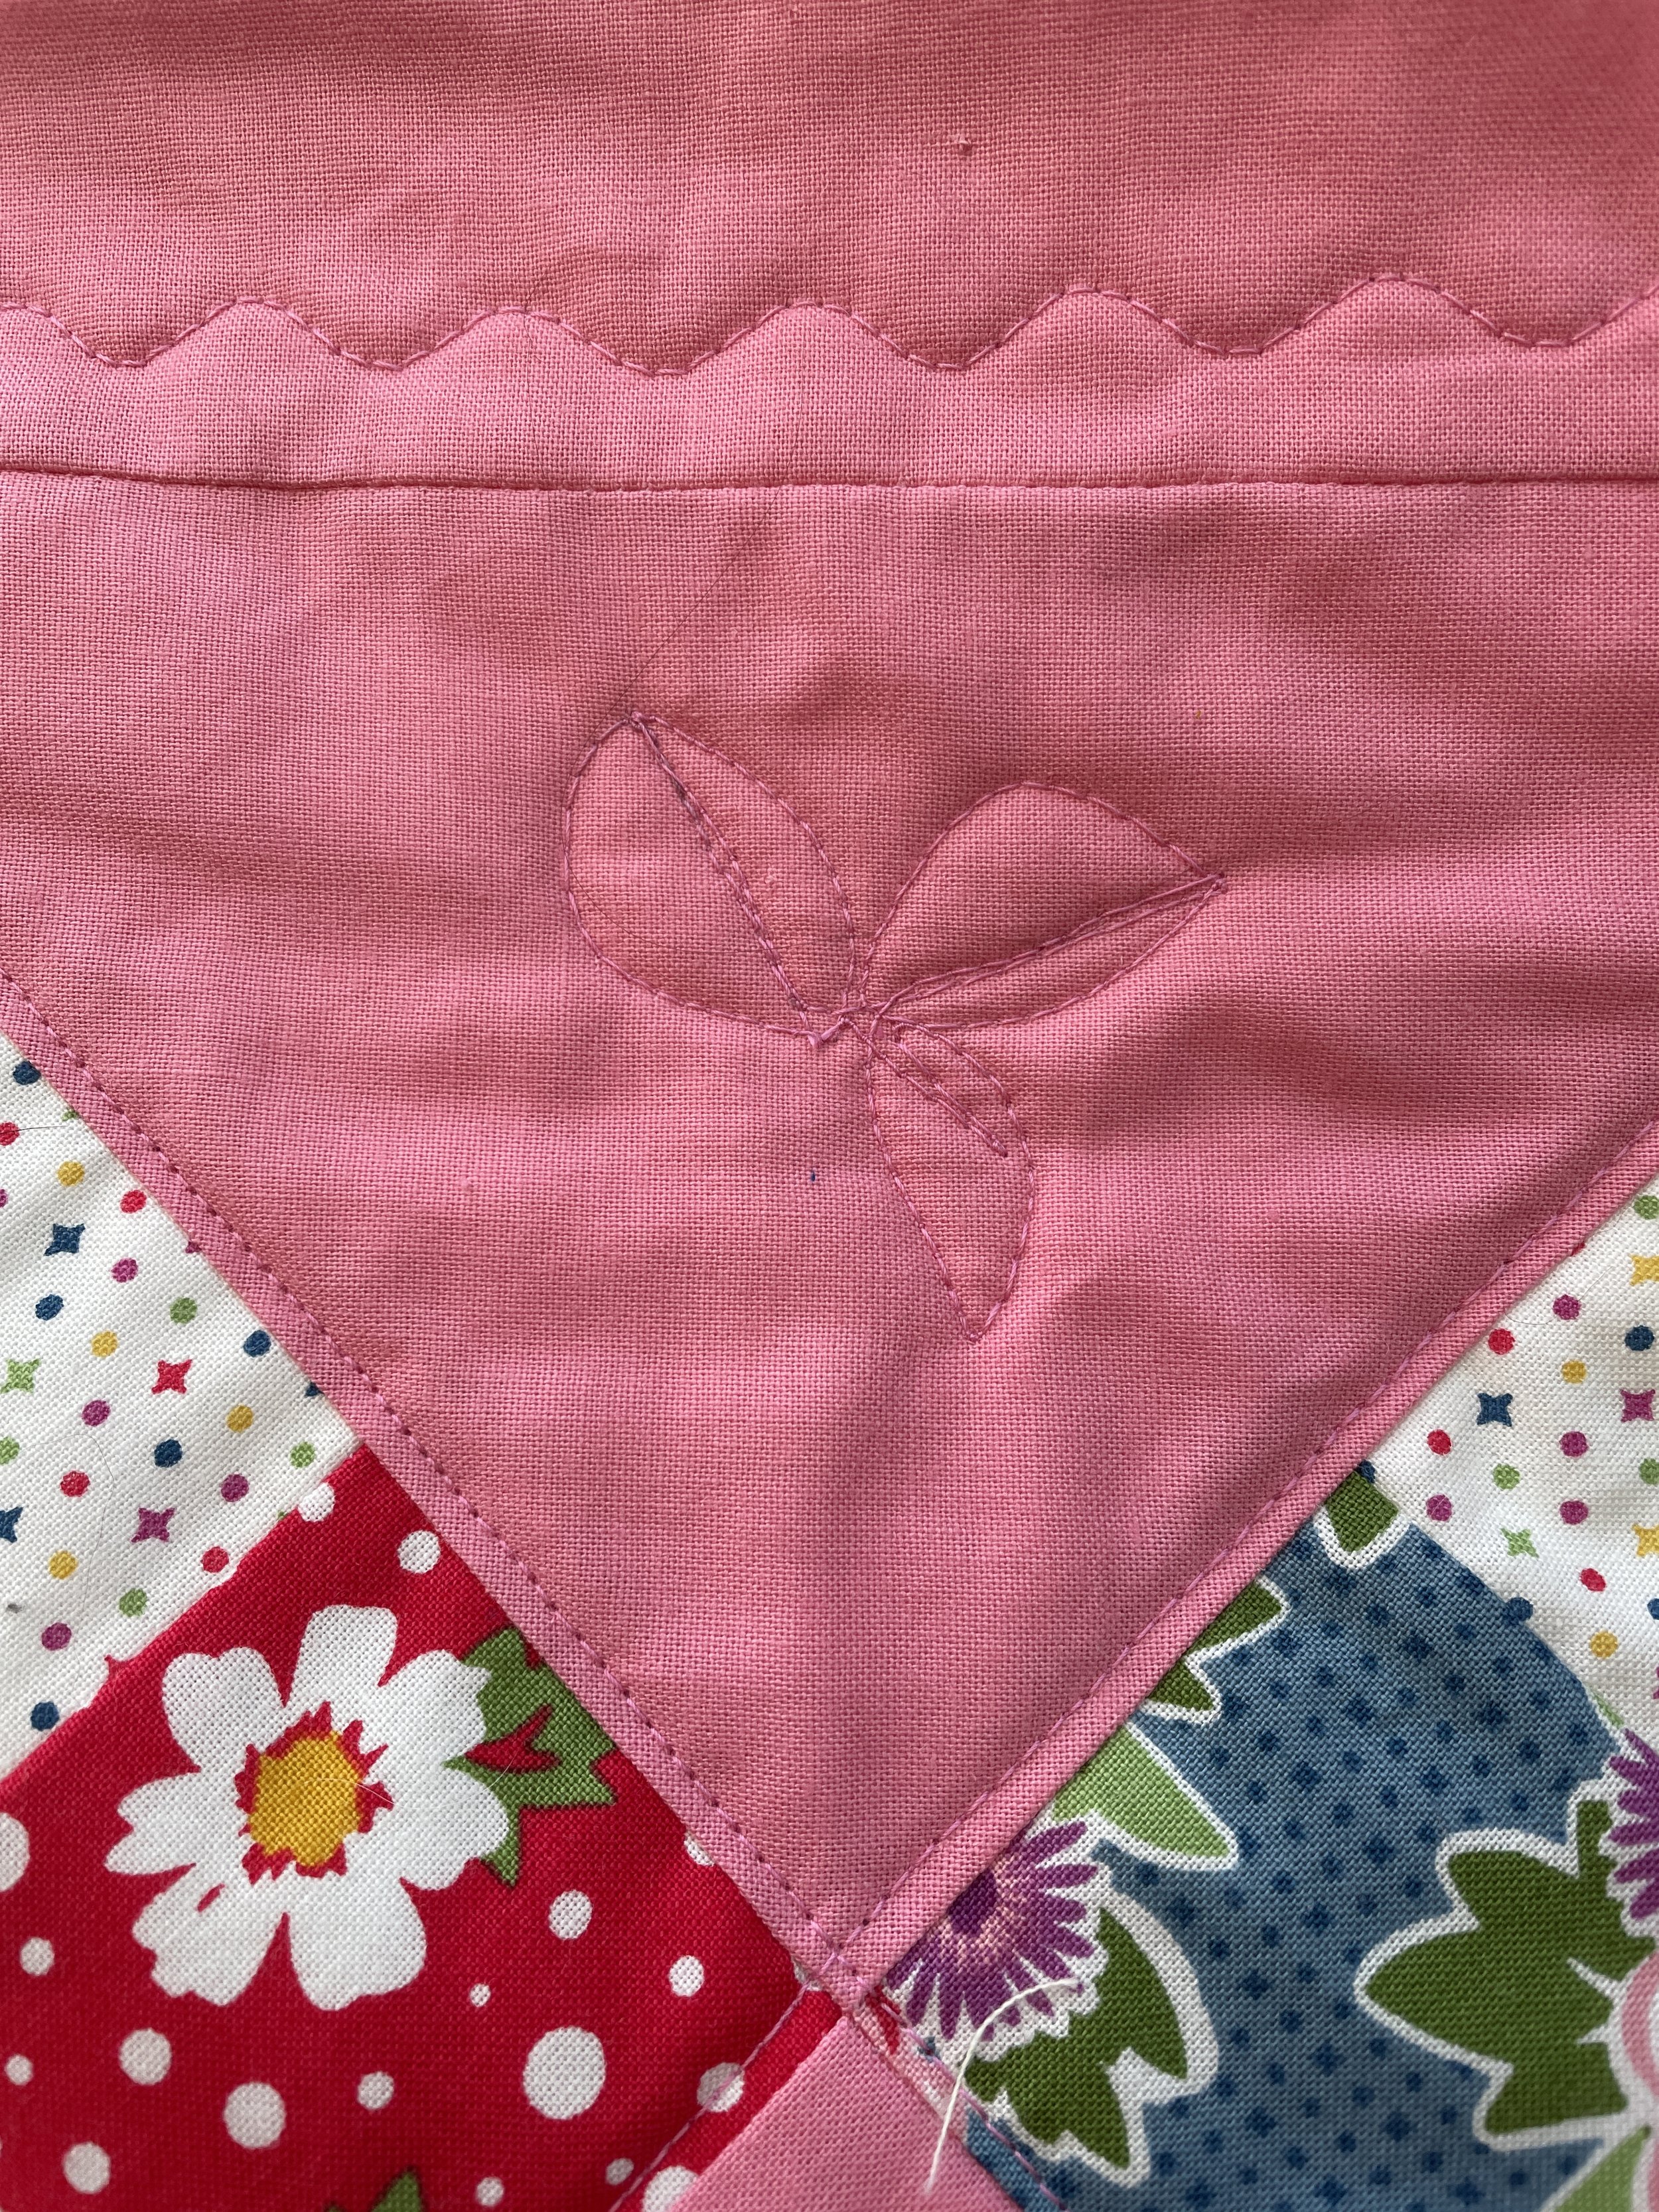
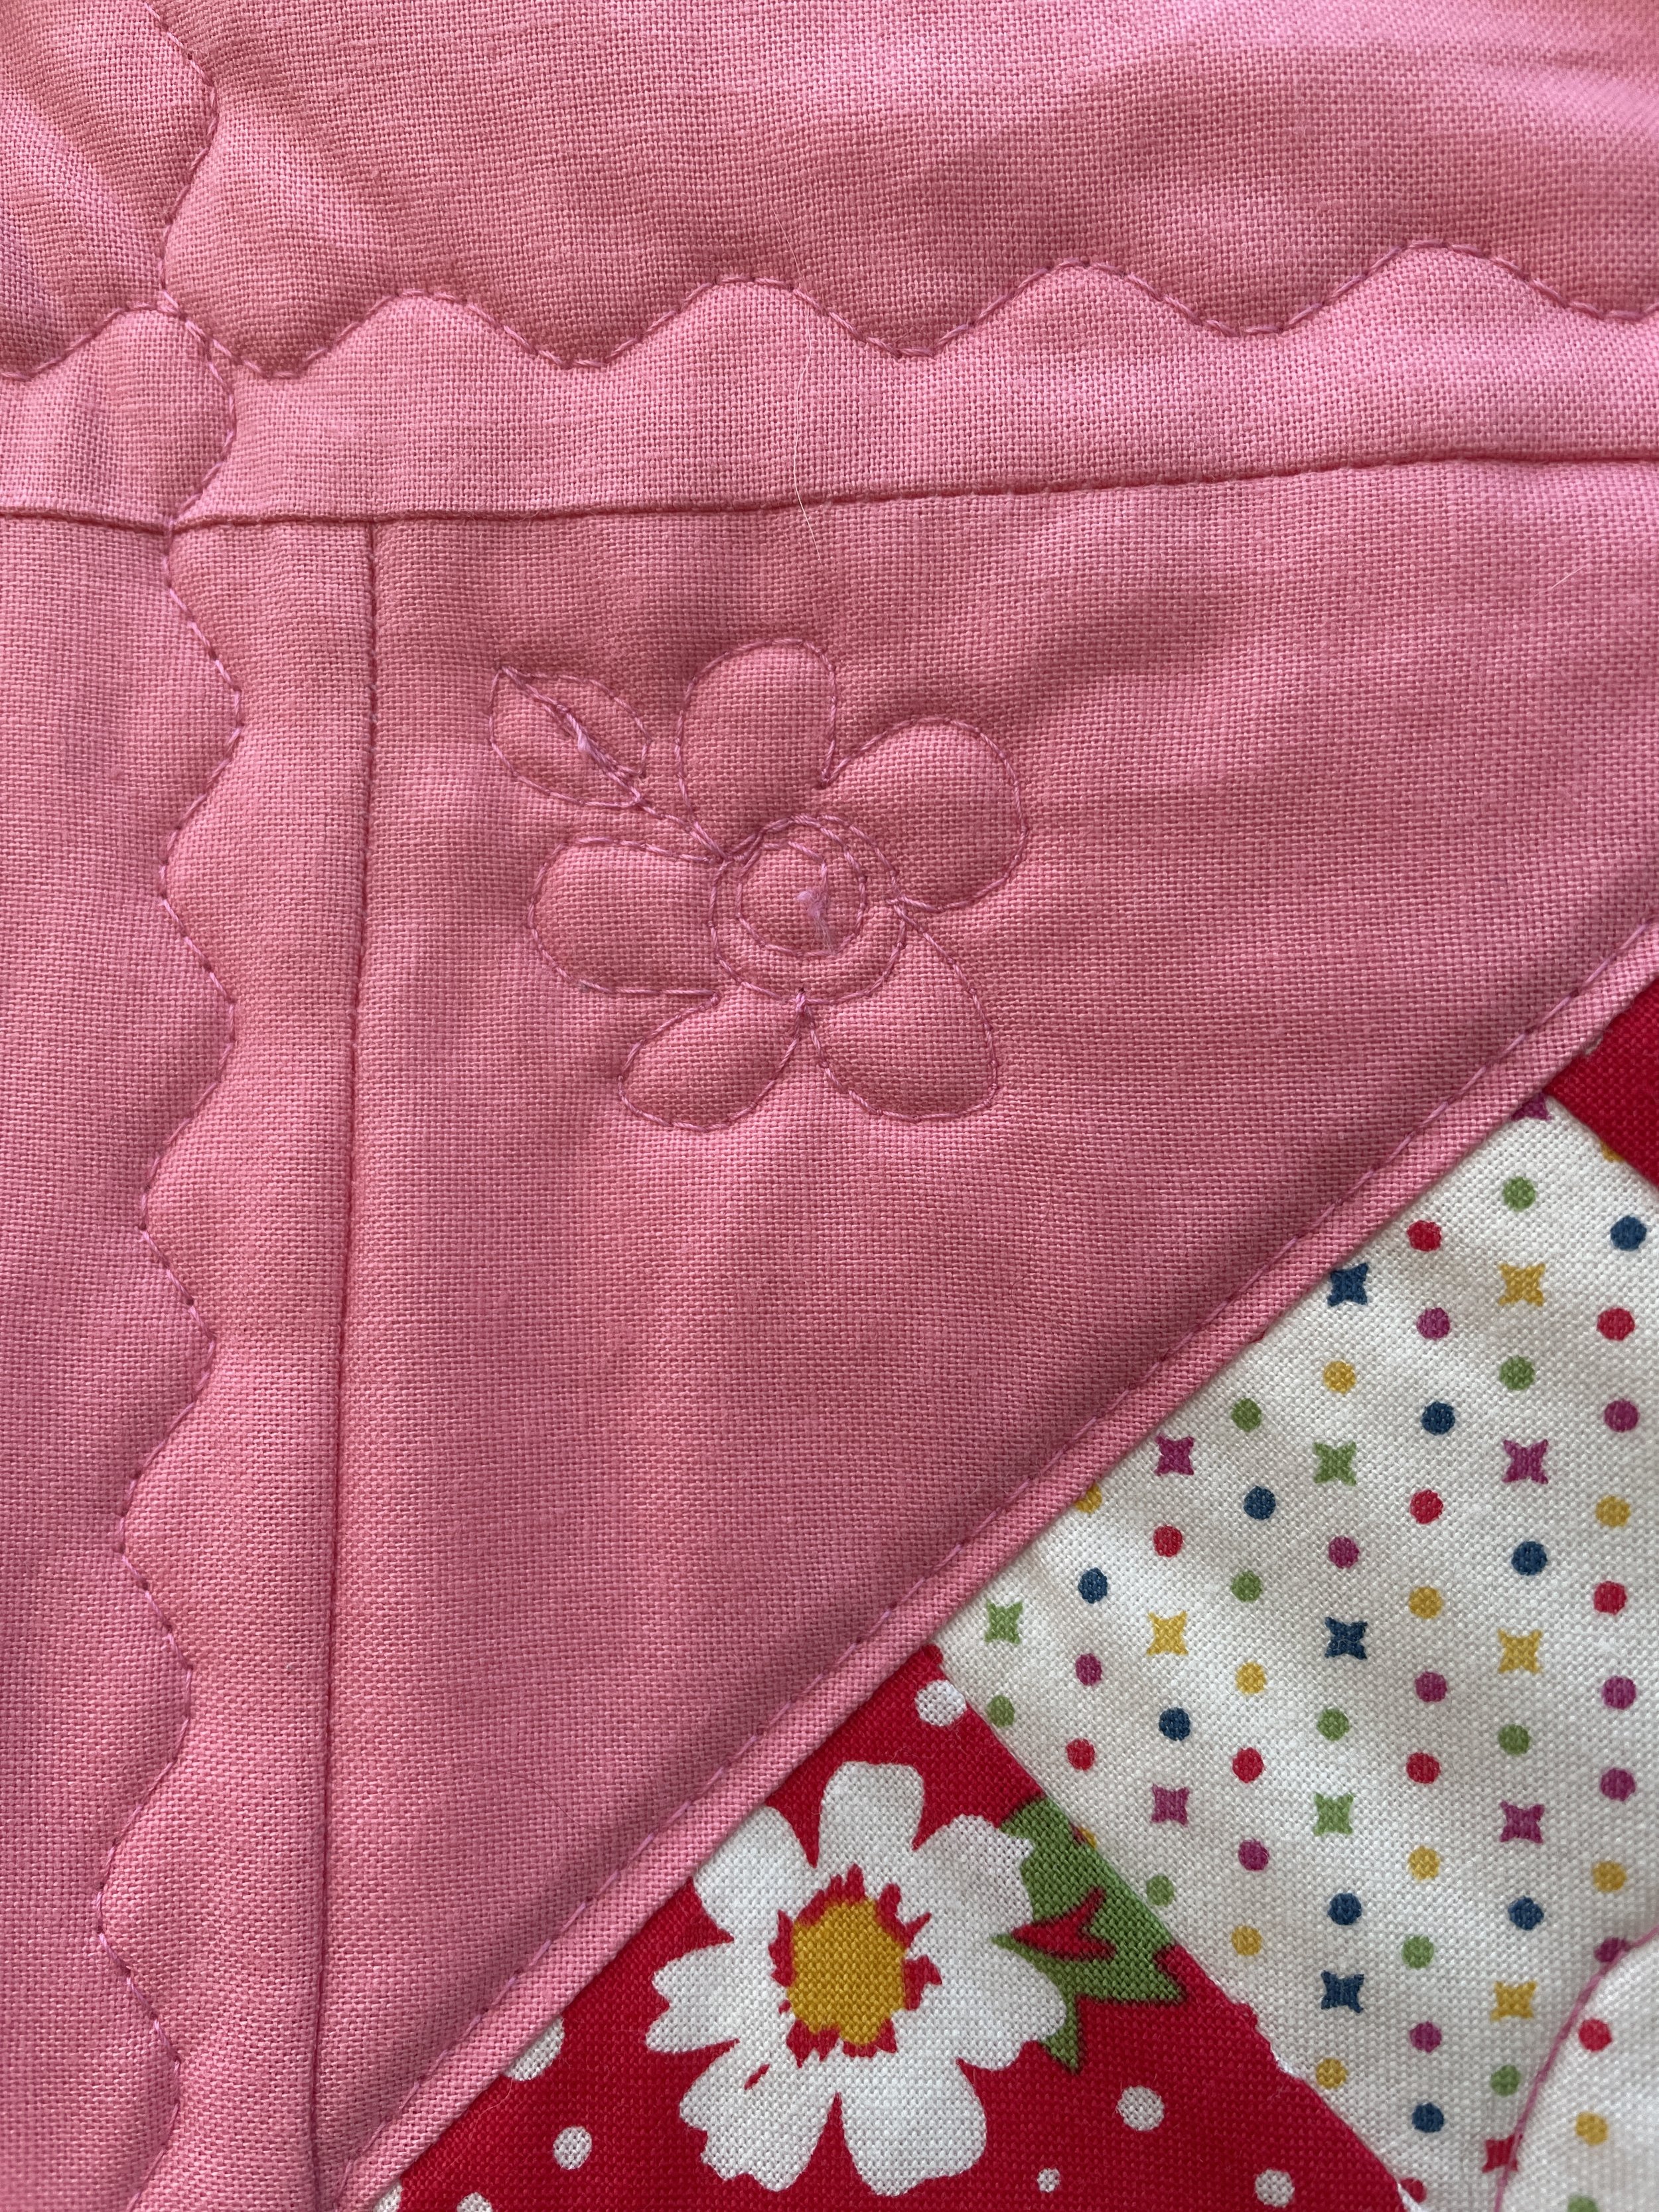
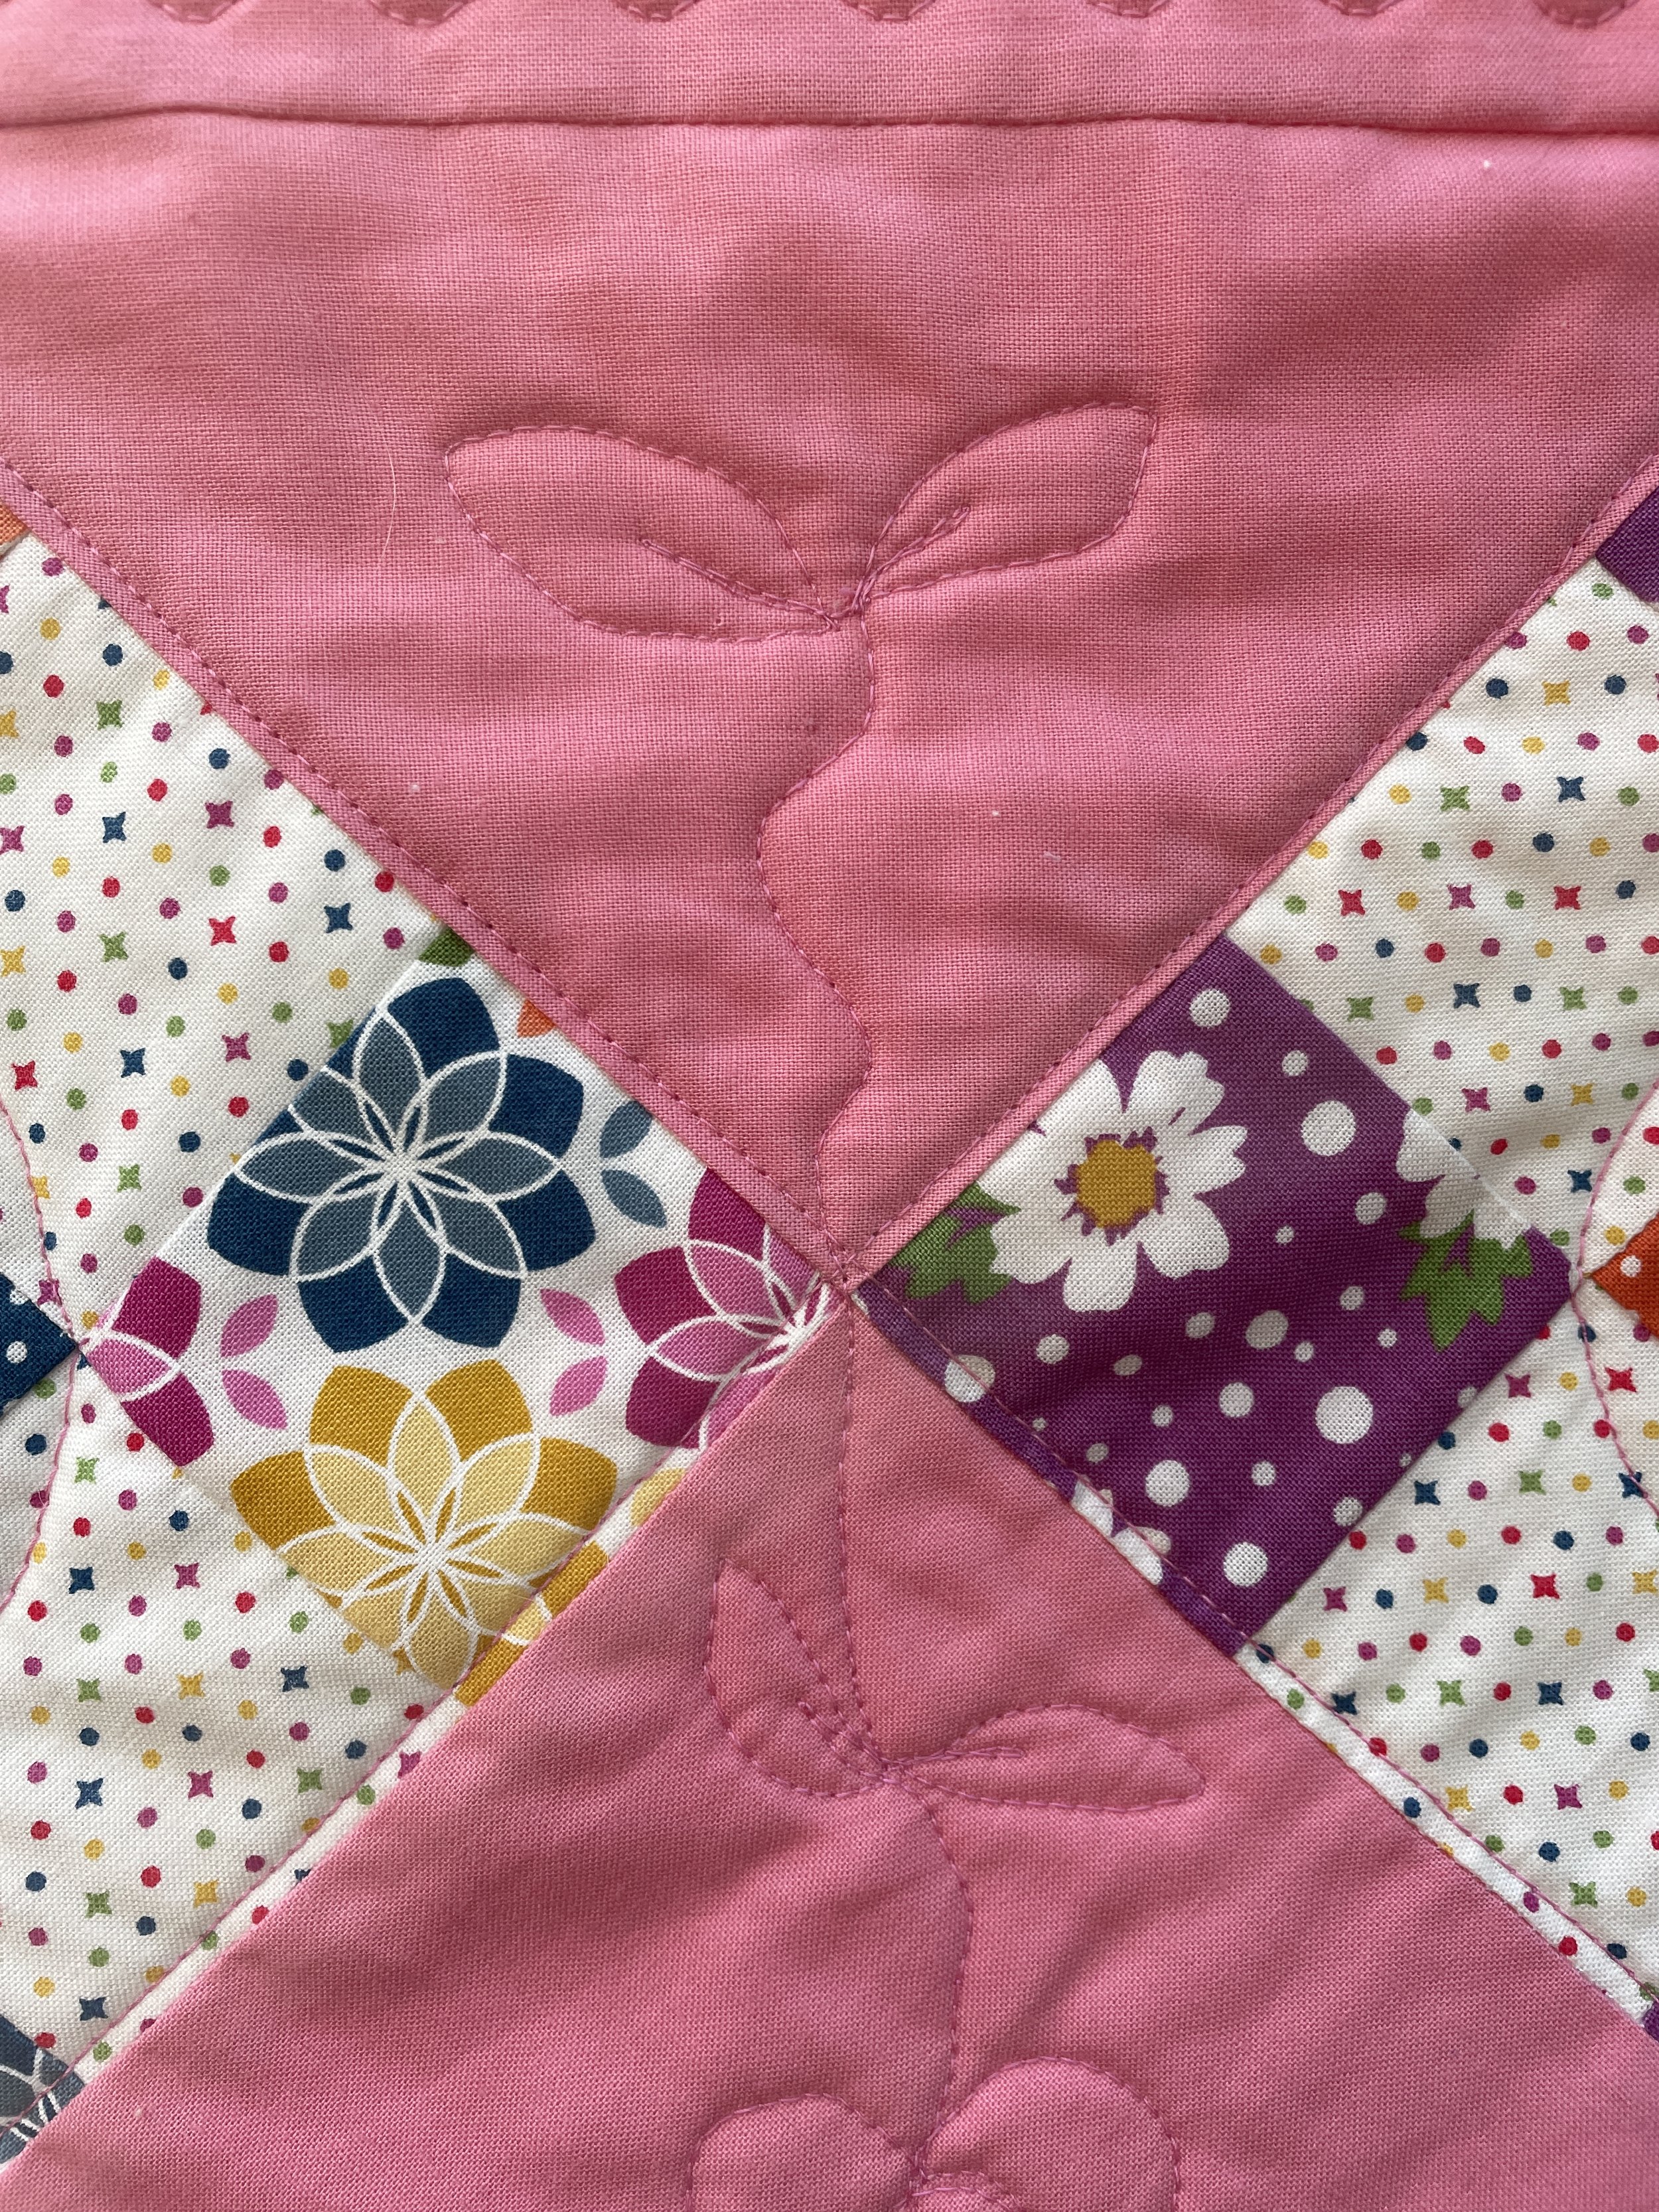
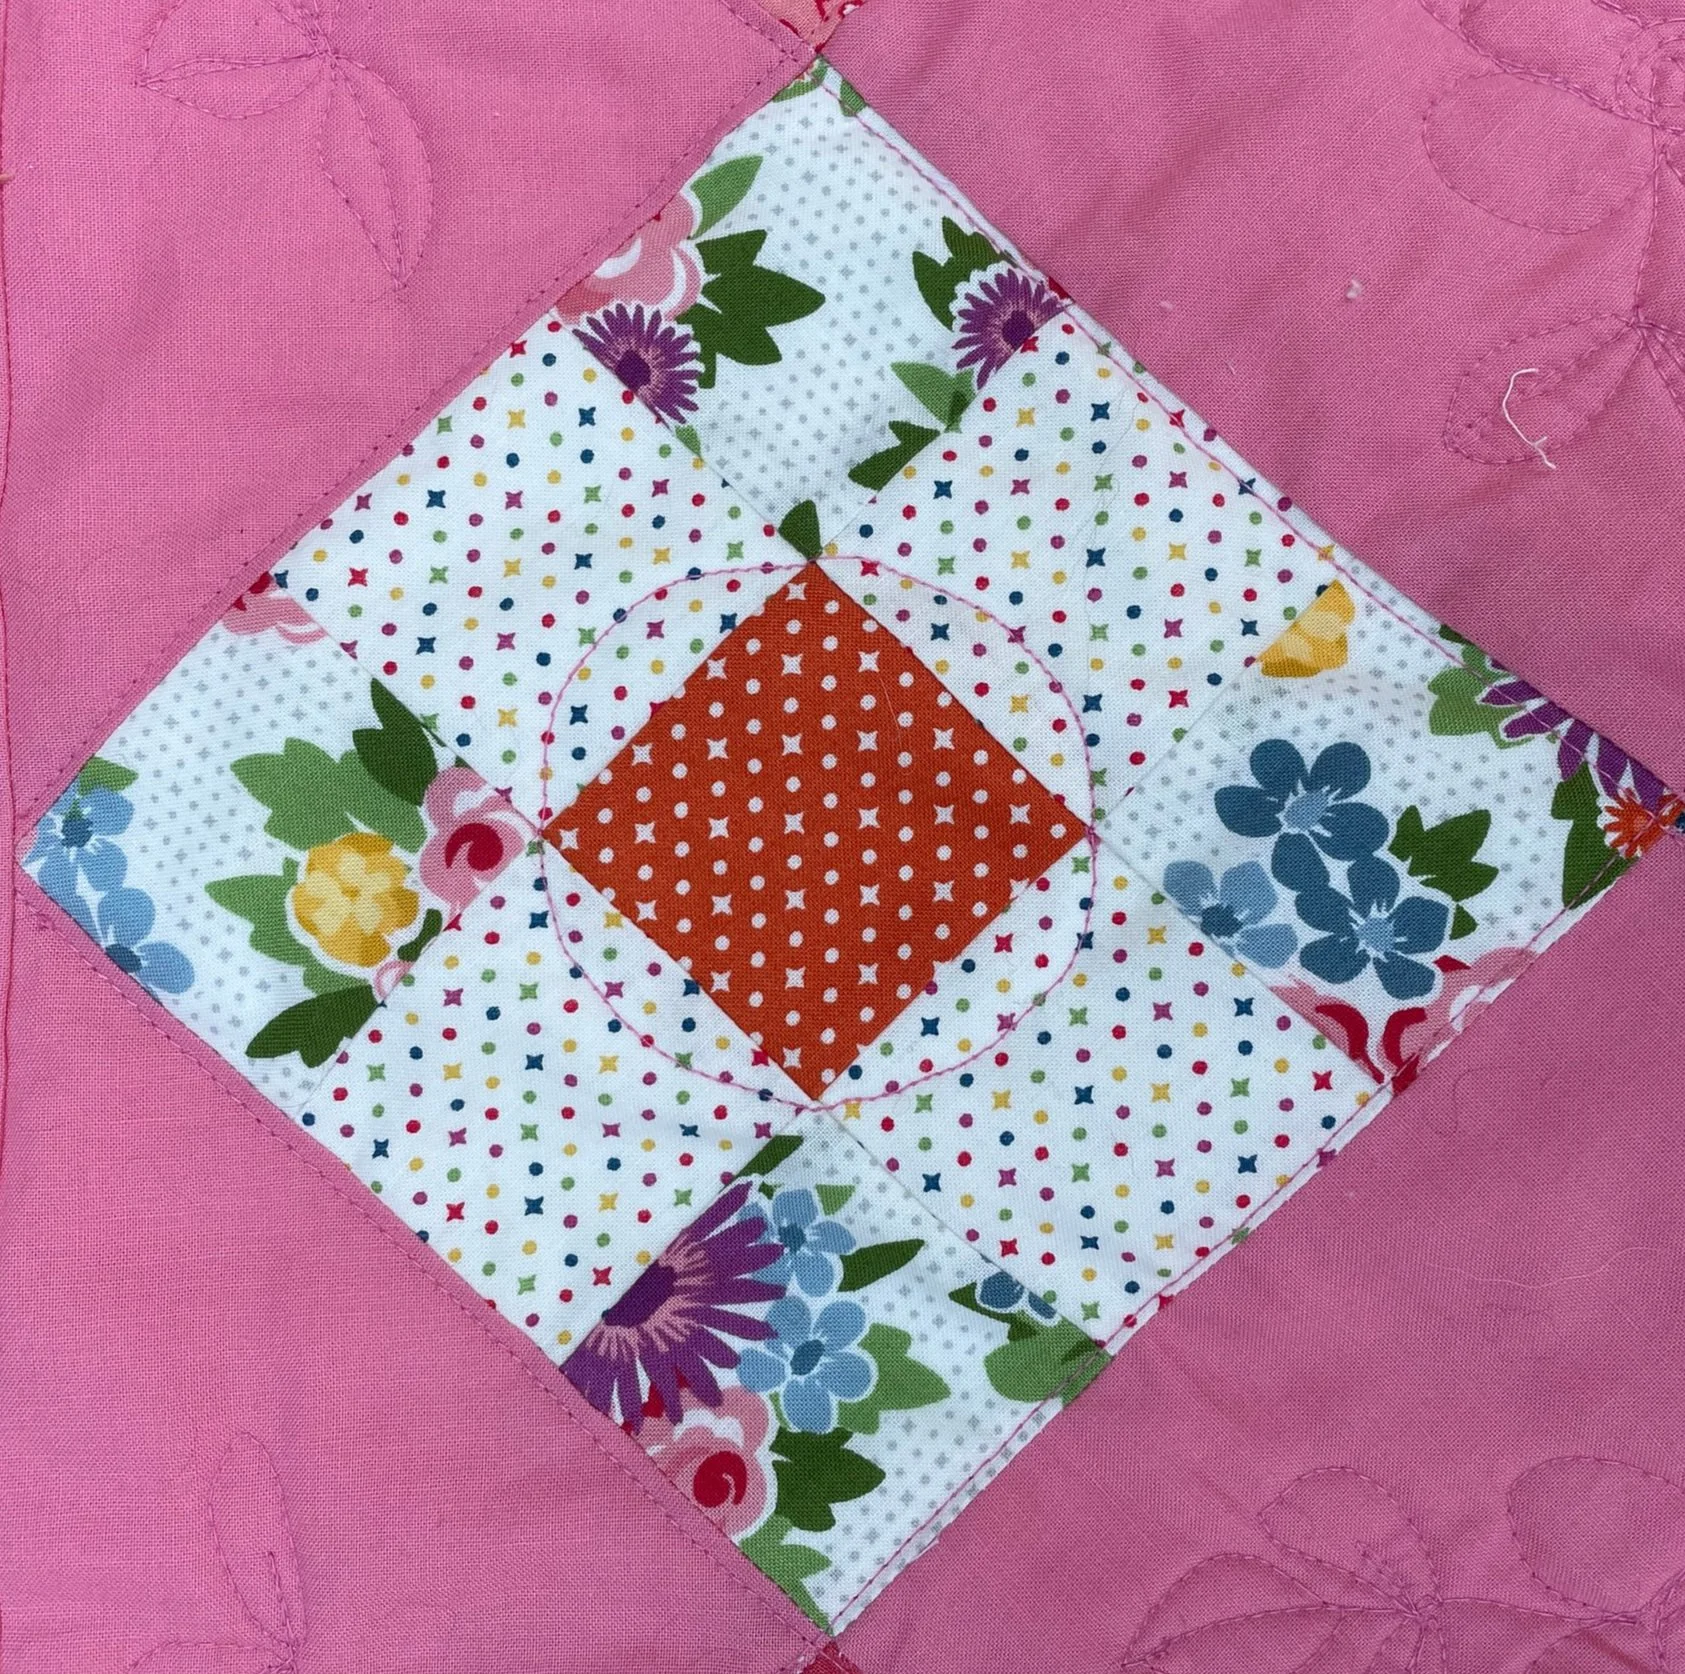
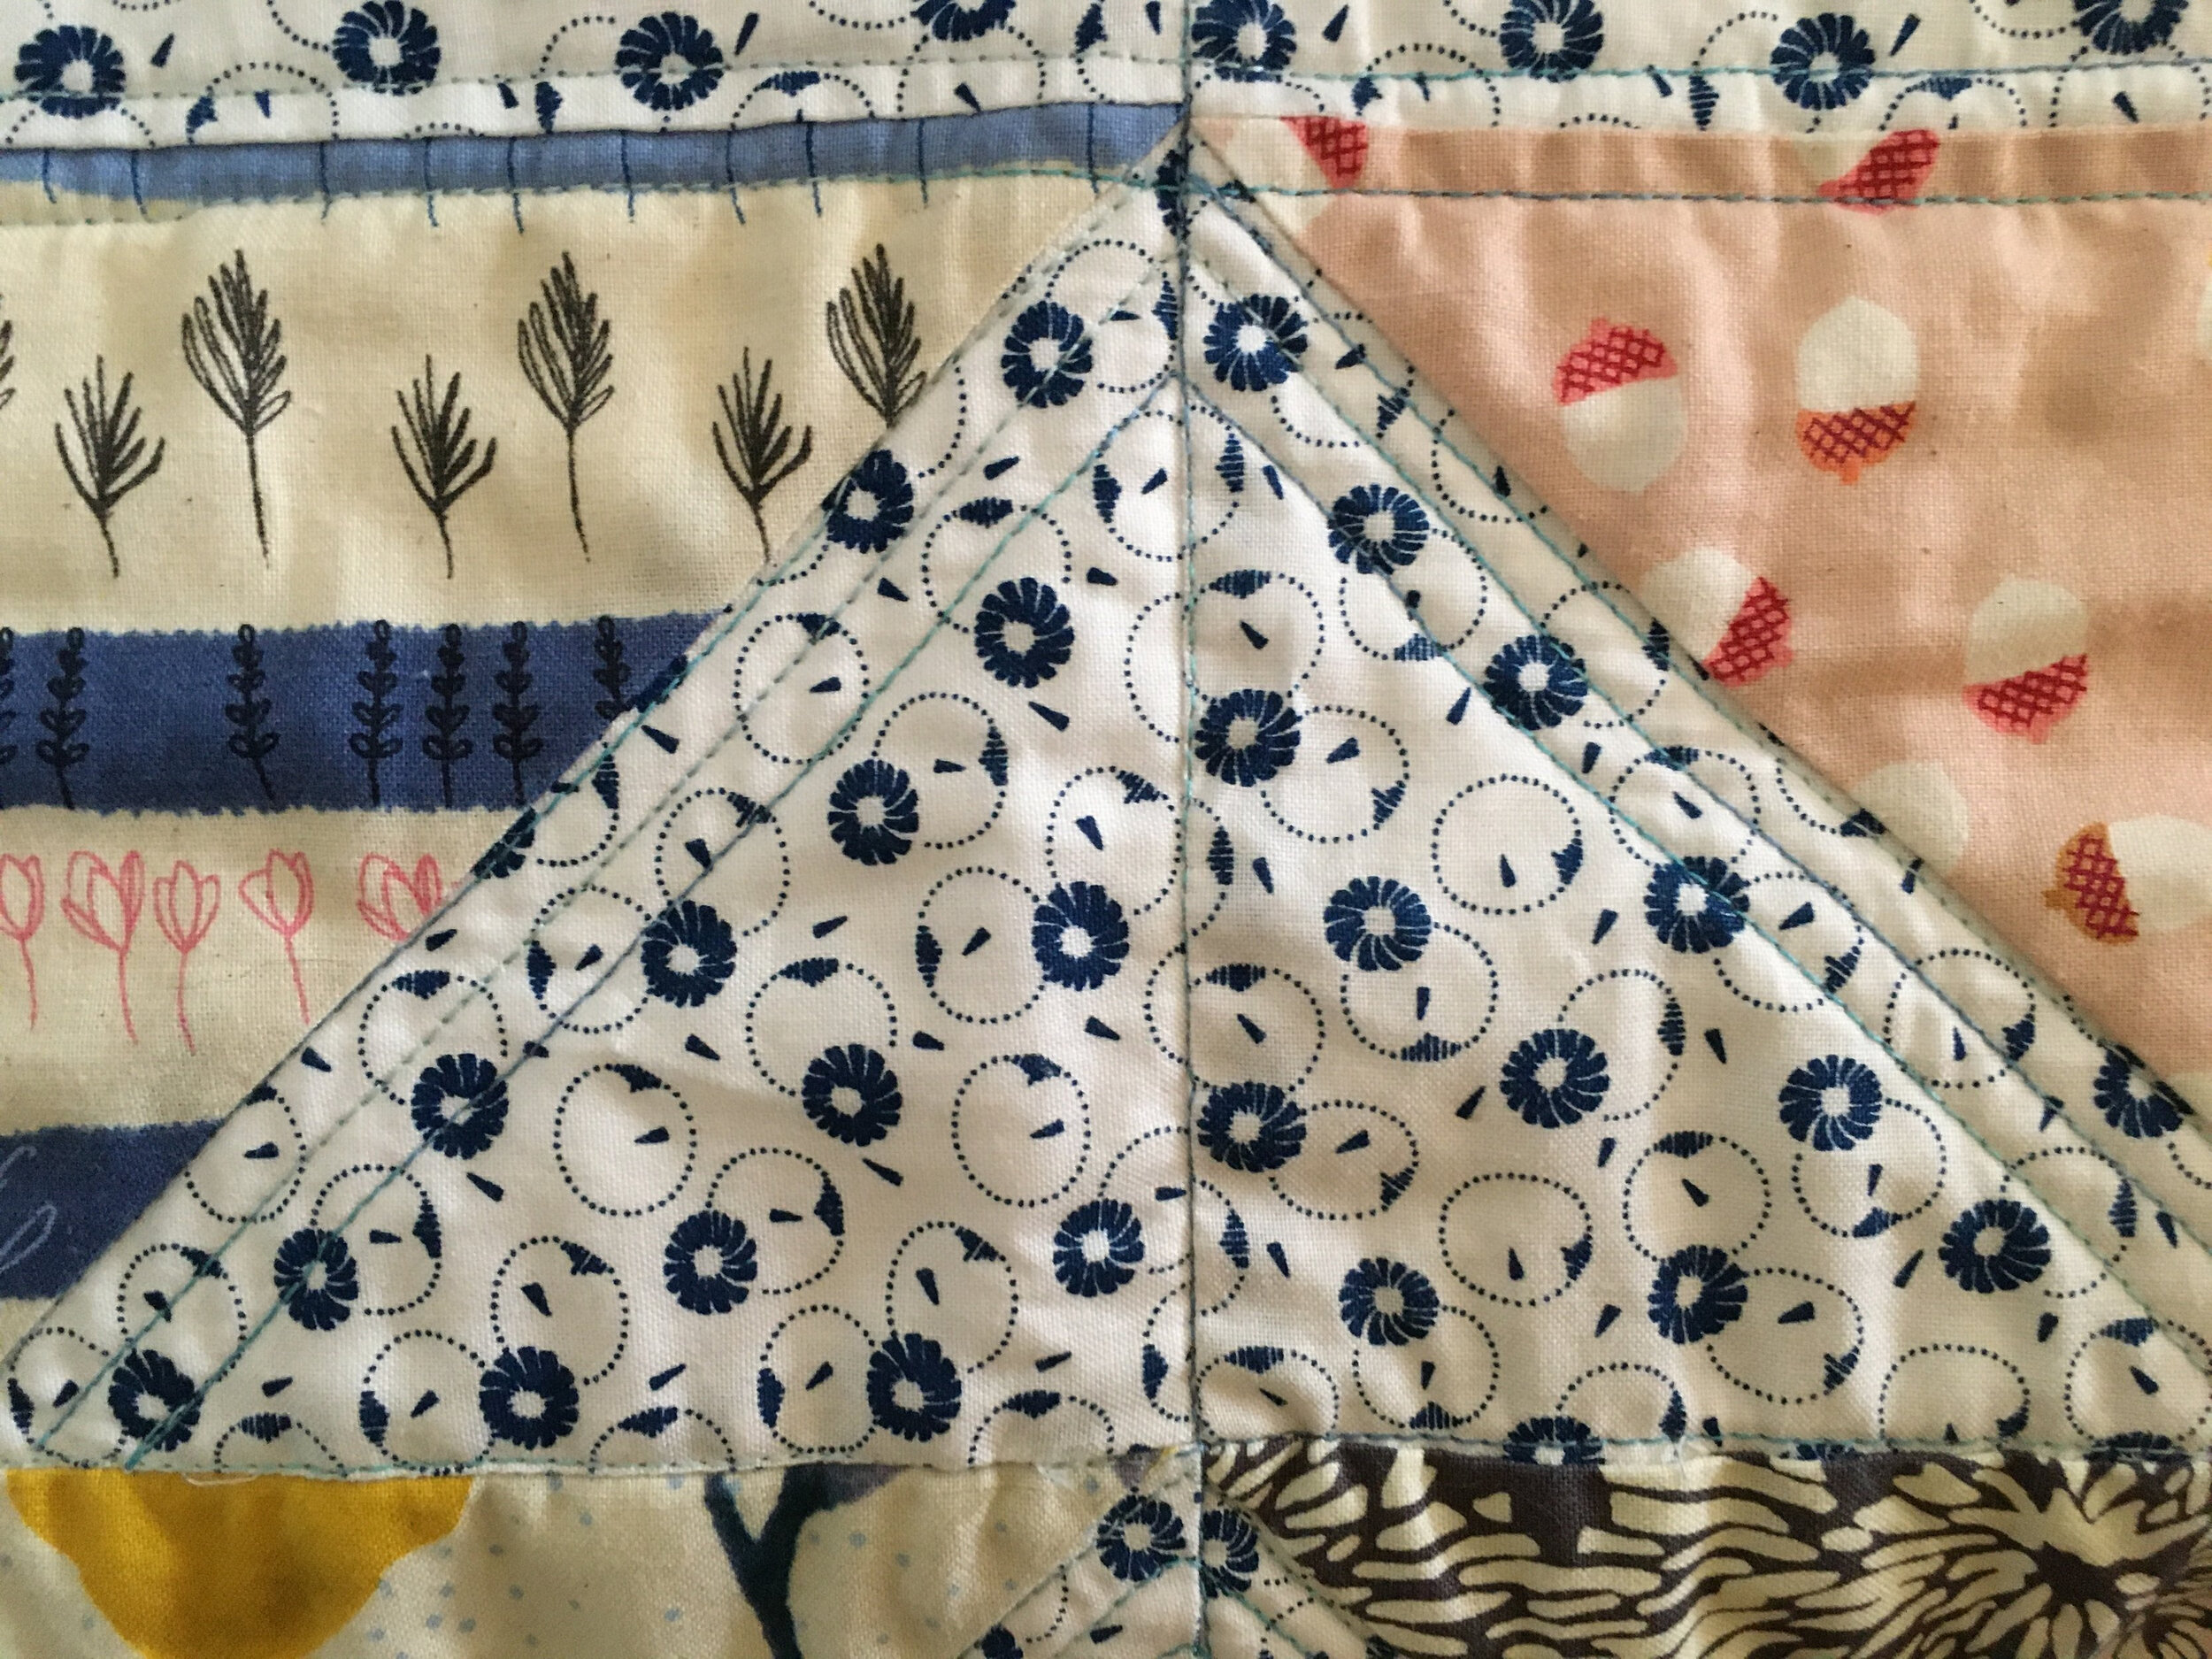
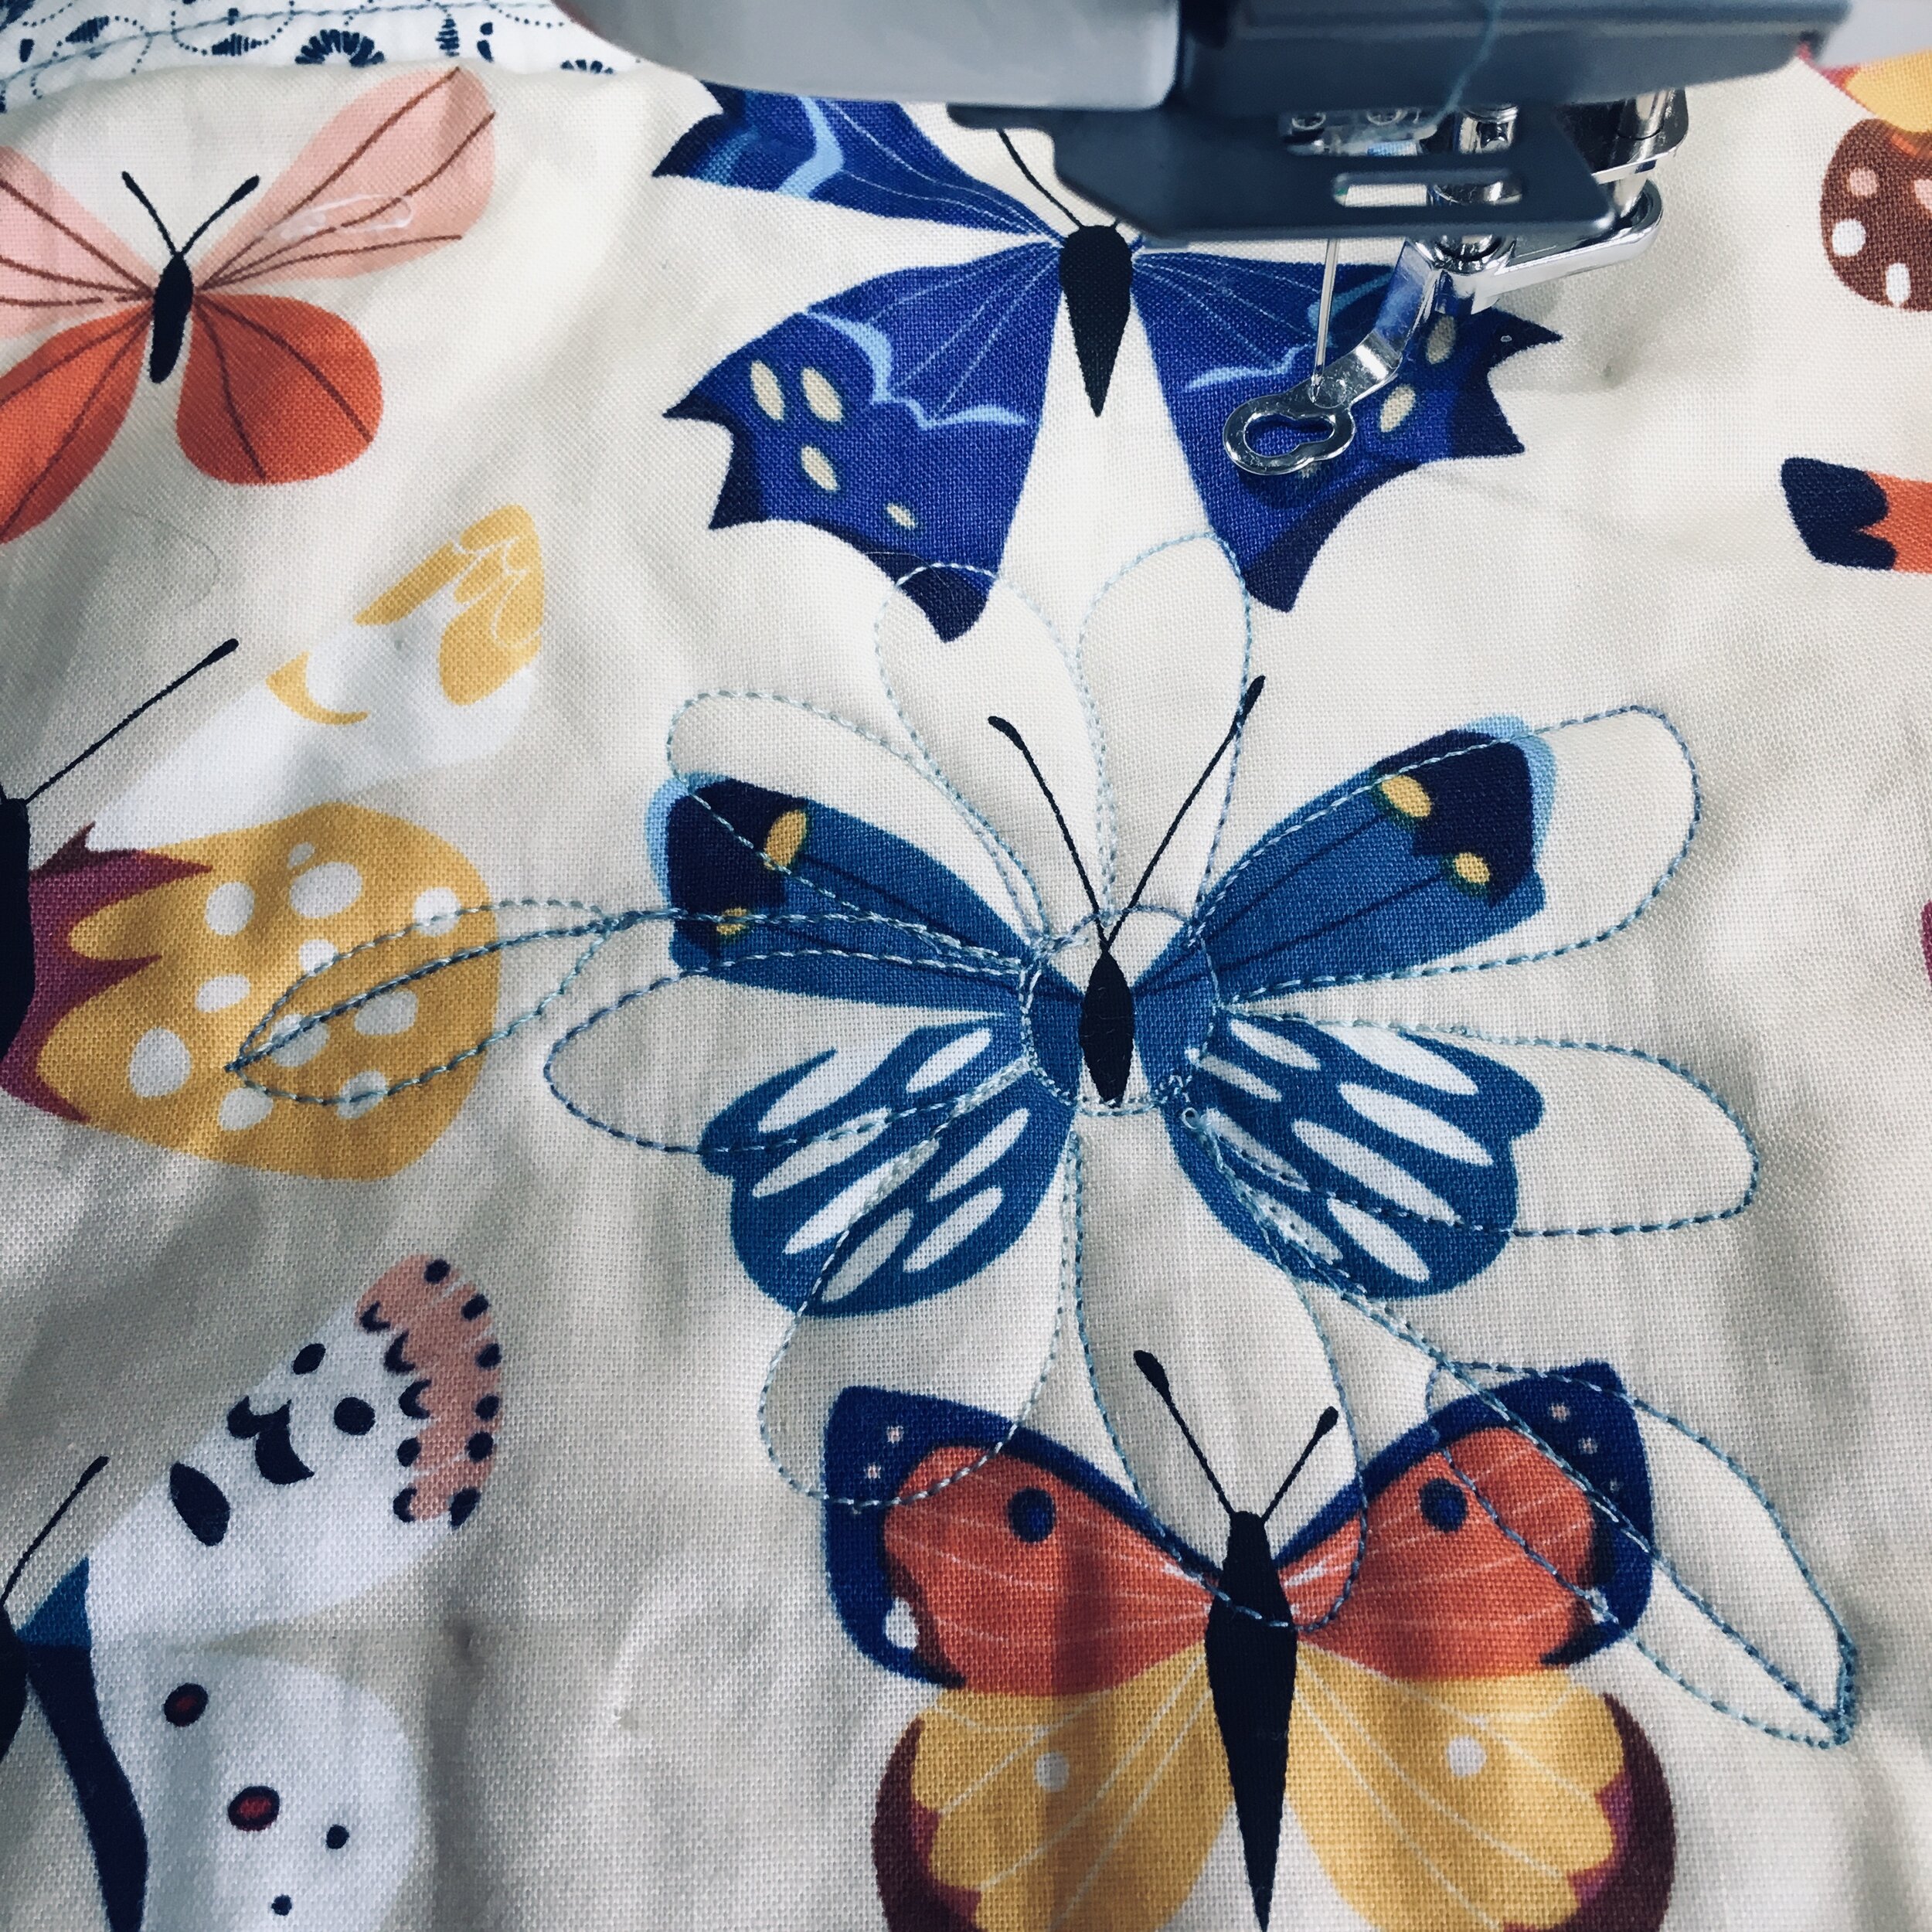
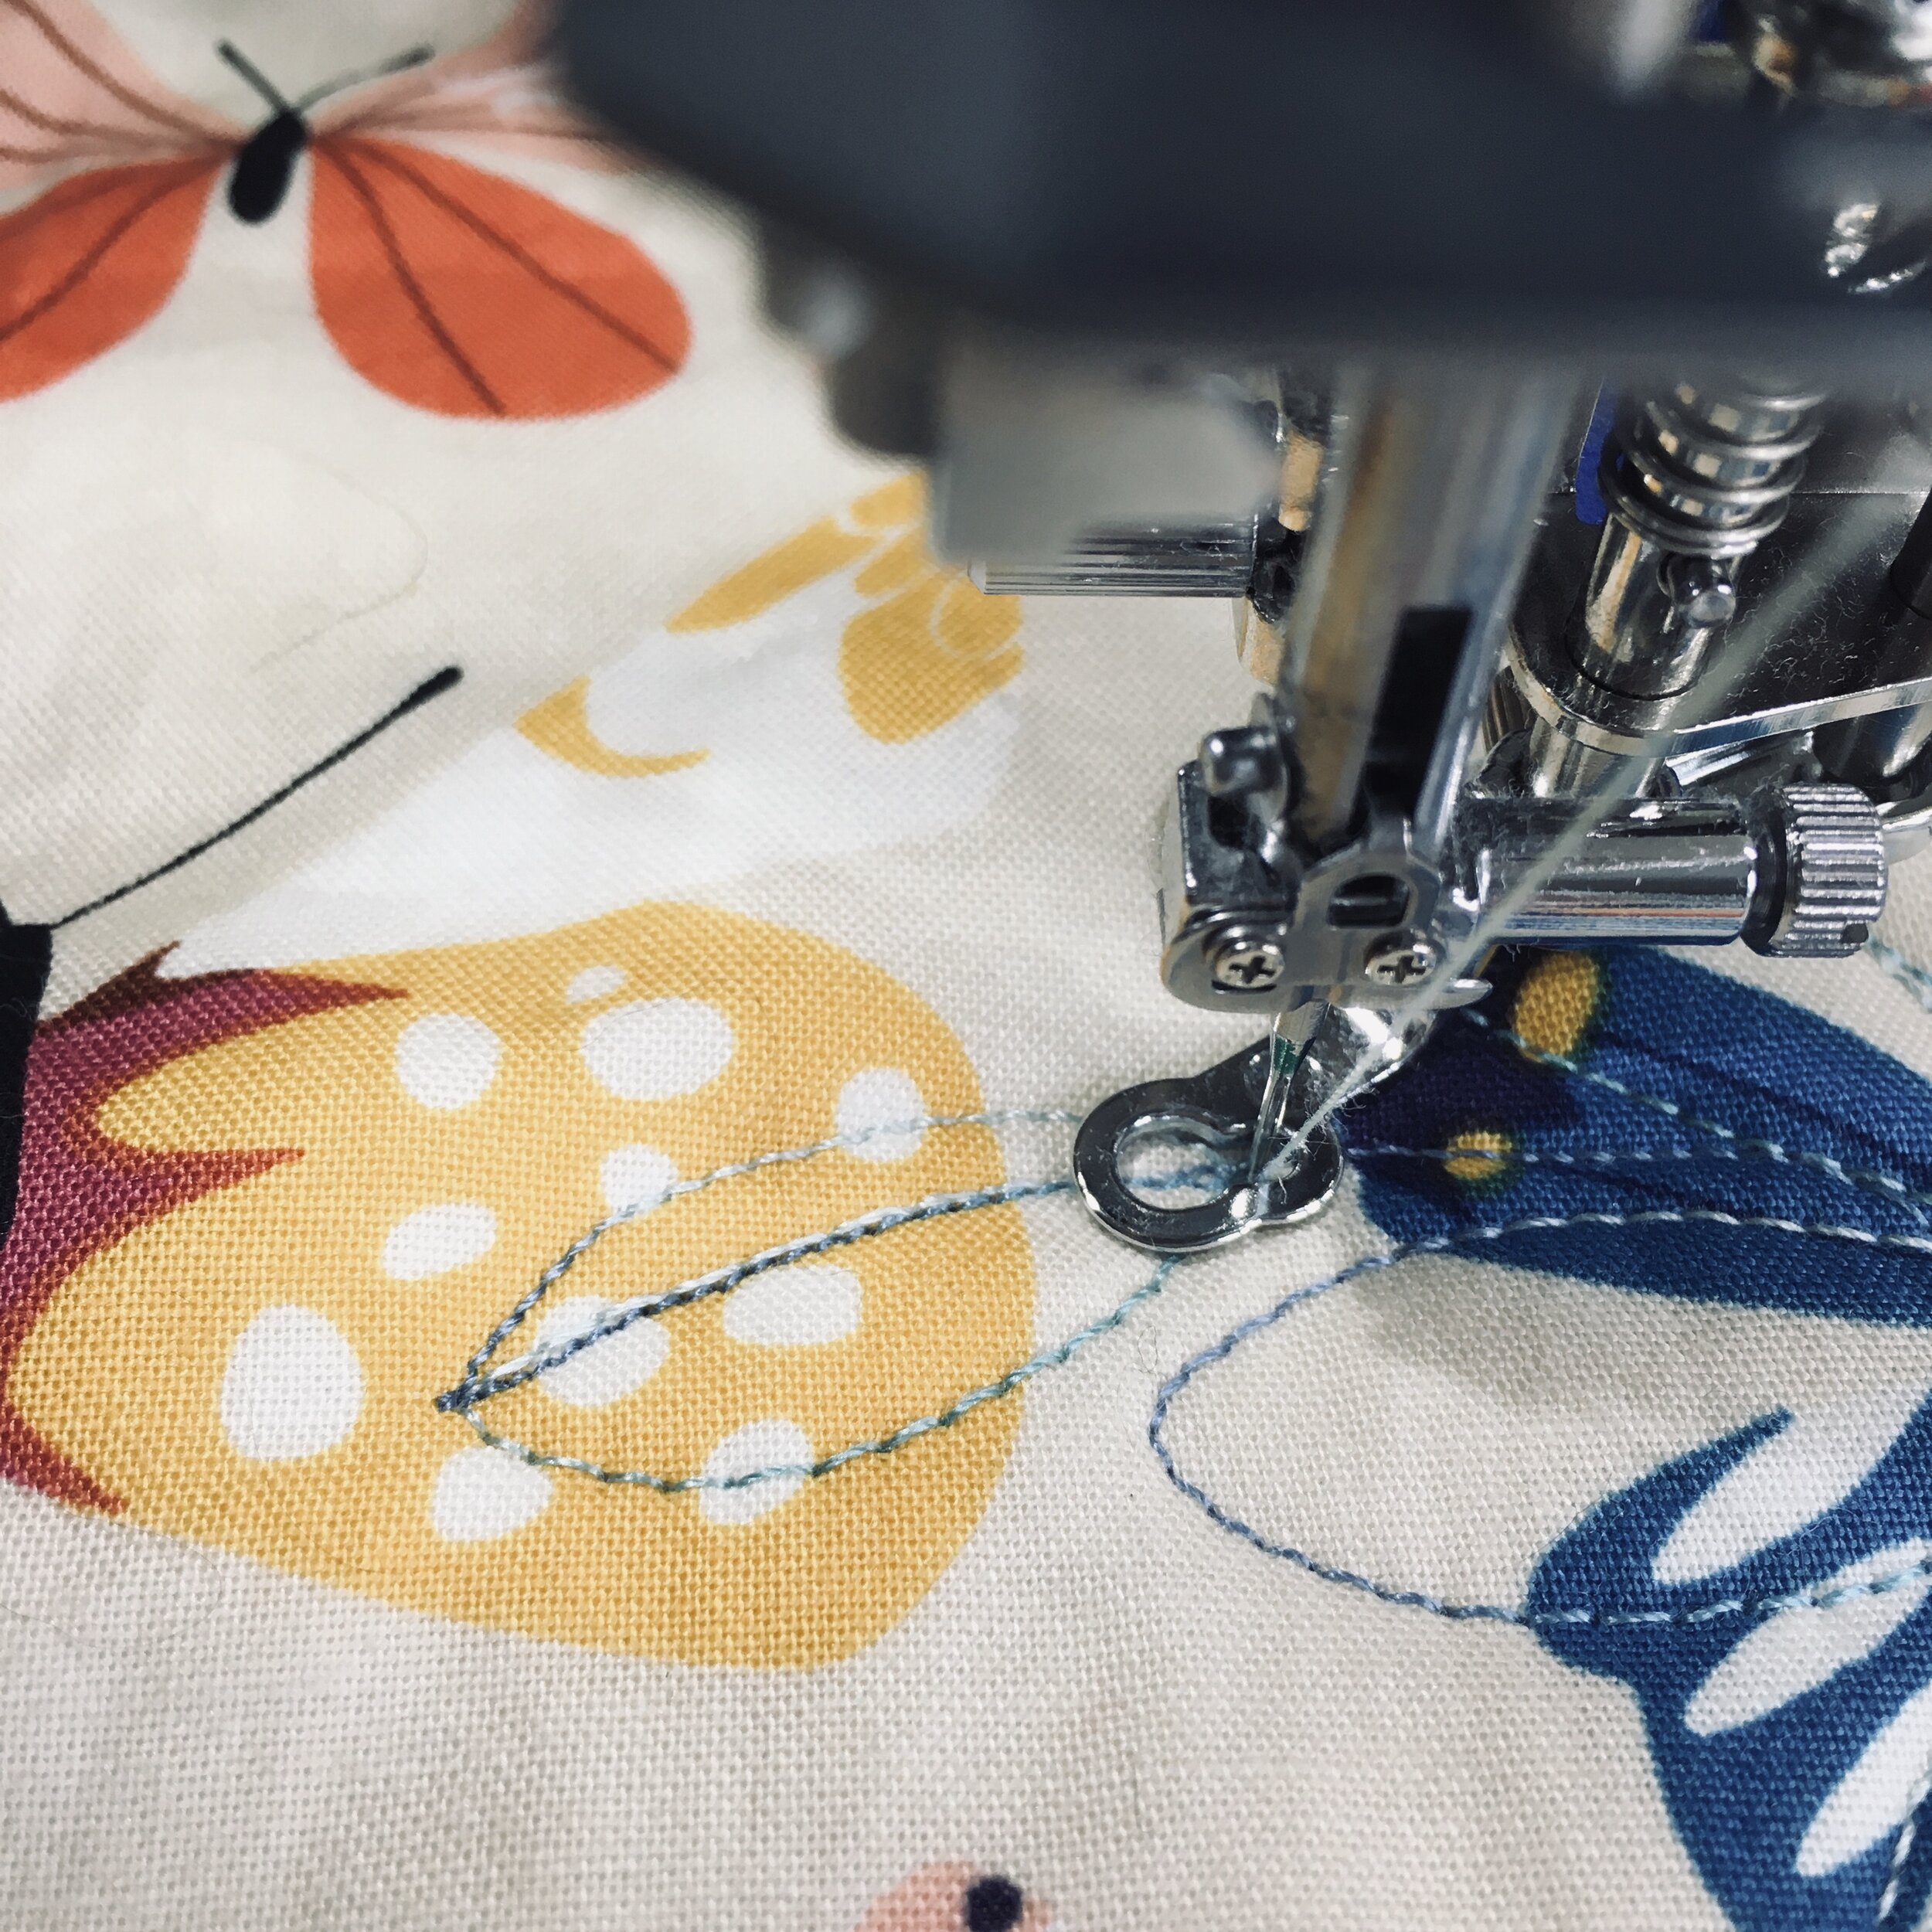
I picked up the aster-like floral design from my background fabric and modified it to get a large daisy flower. You can see that little blue flower in the right hand upper corner of the photo below.

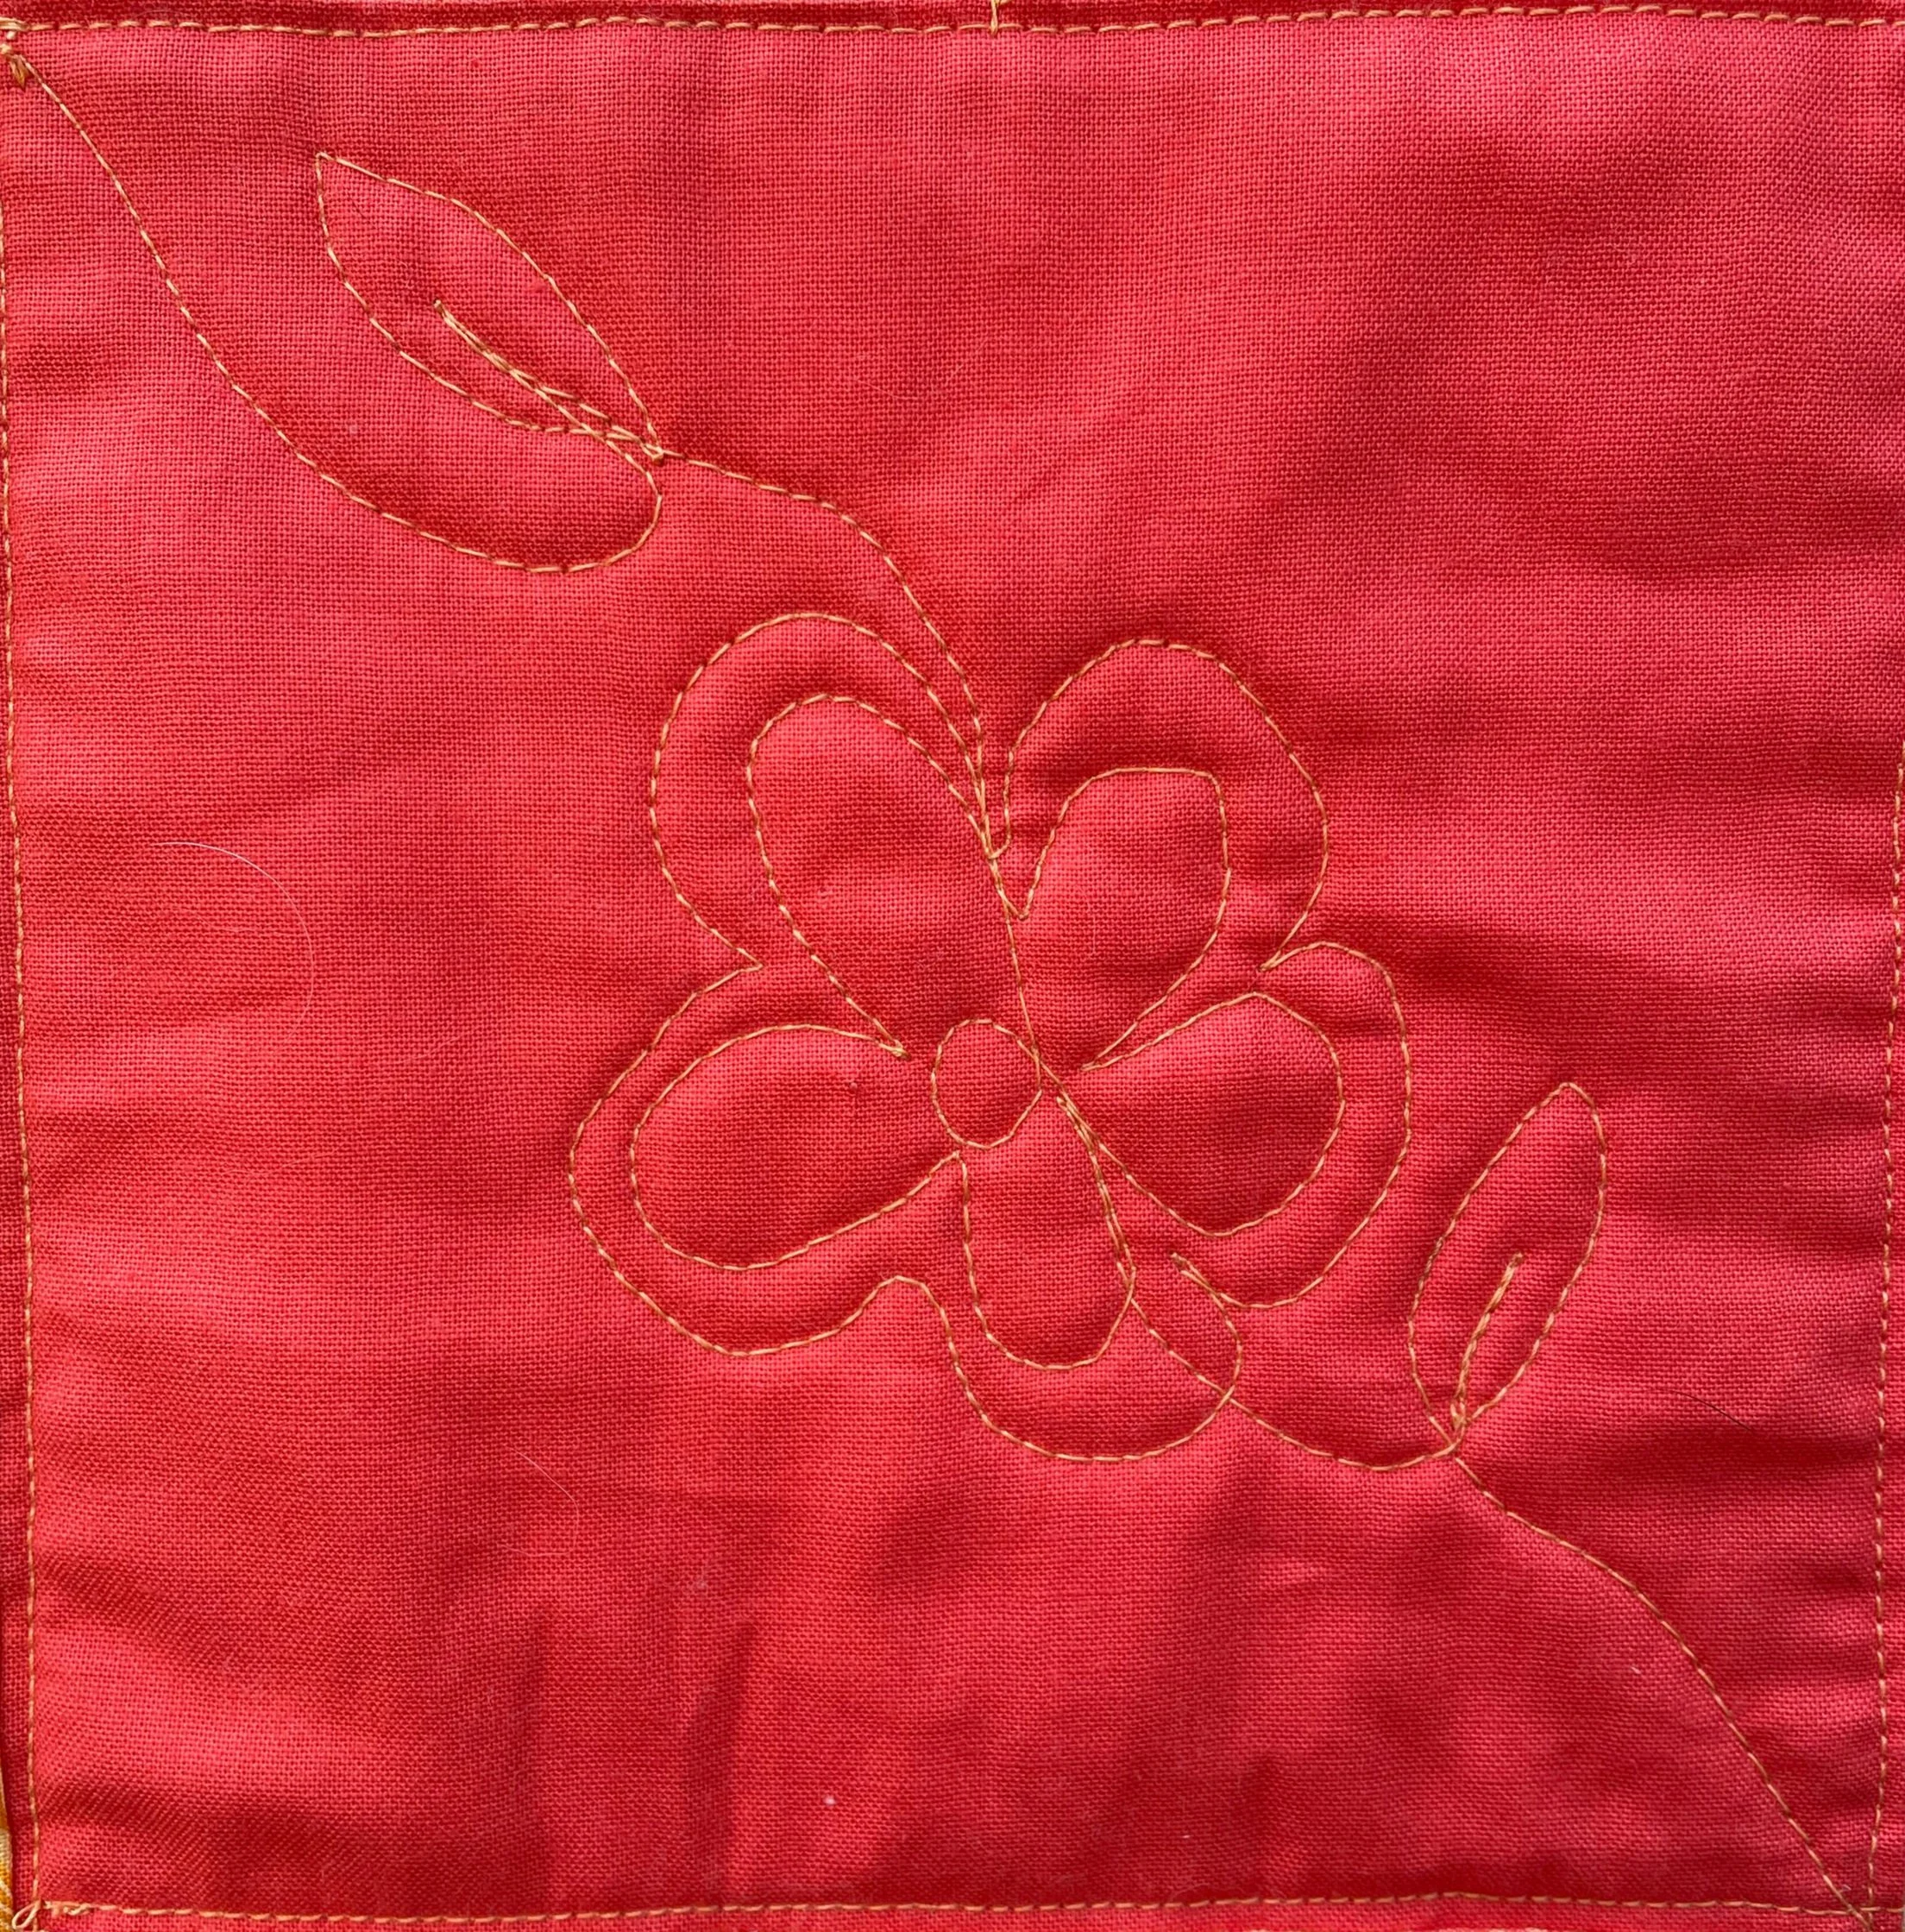
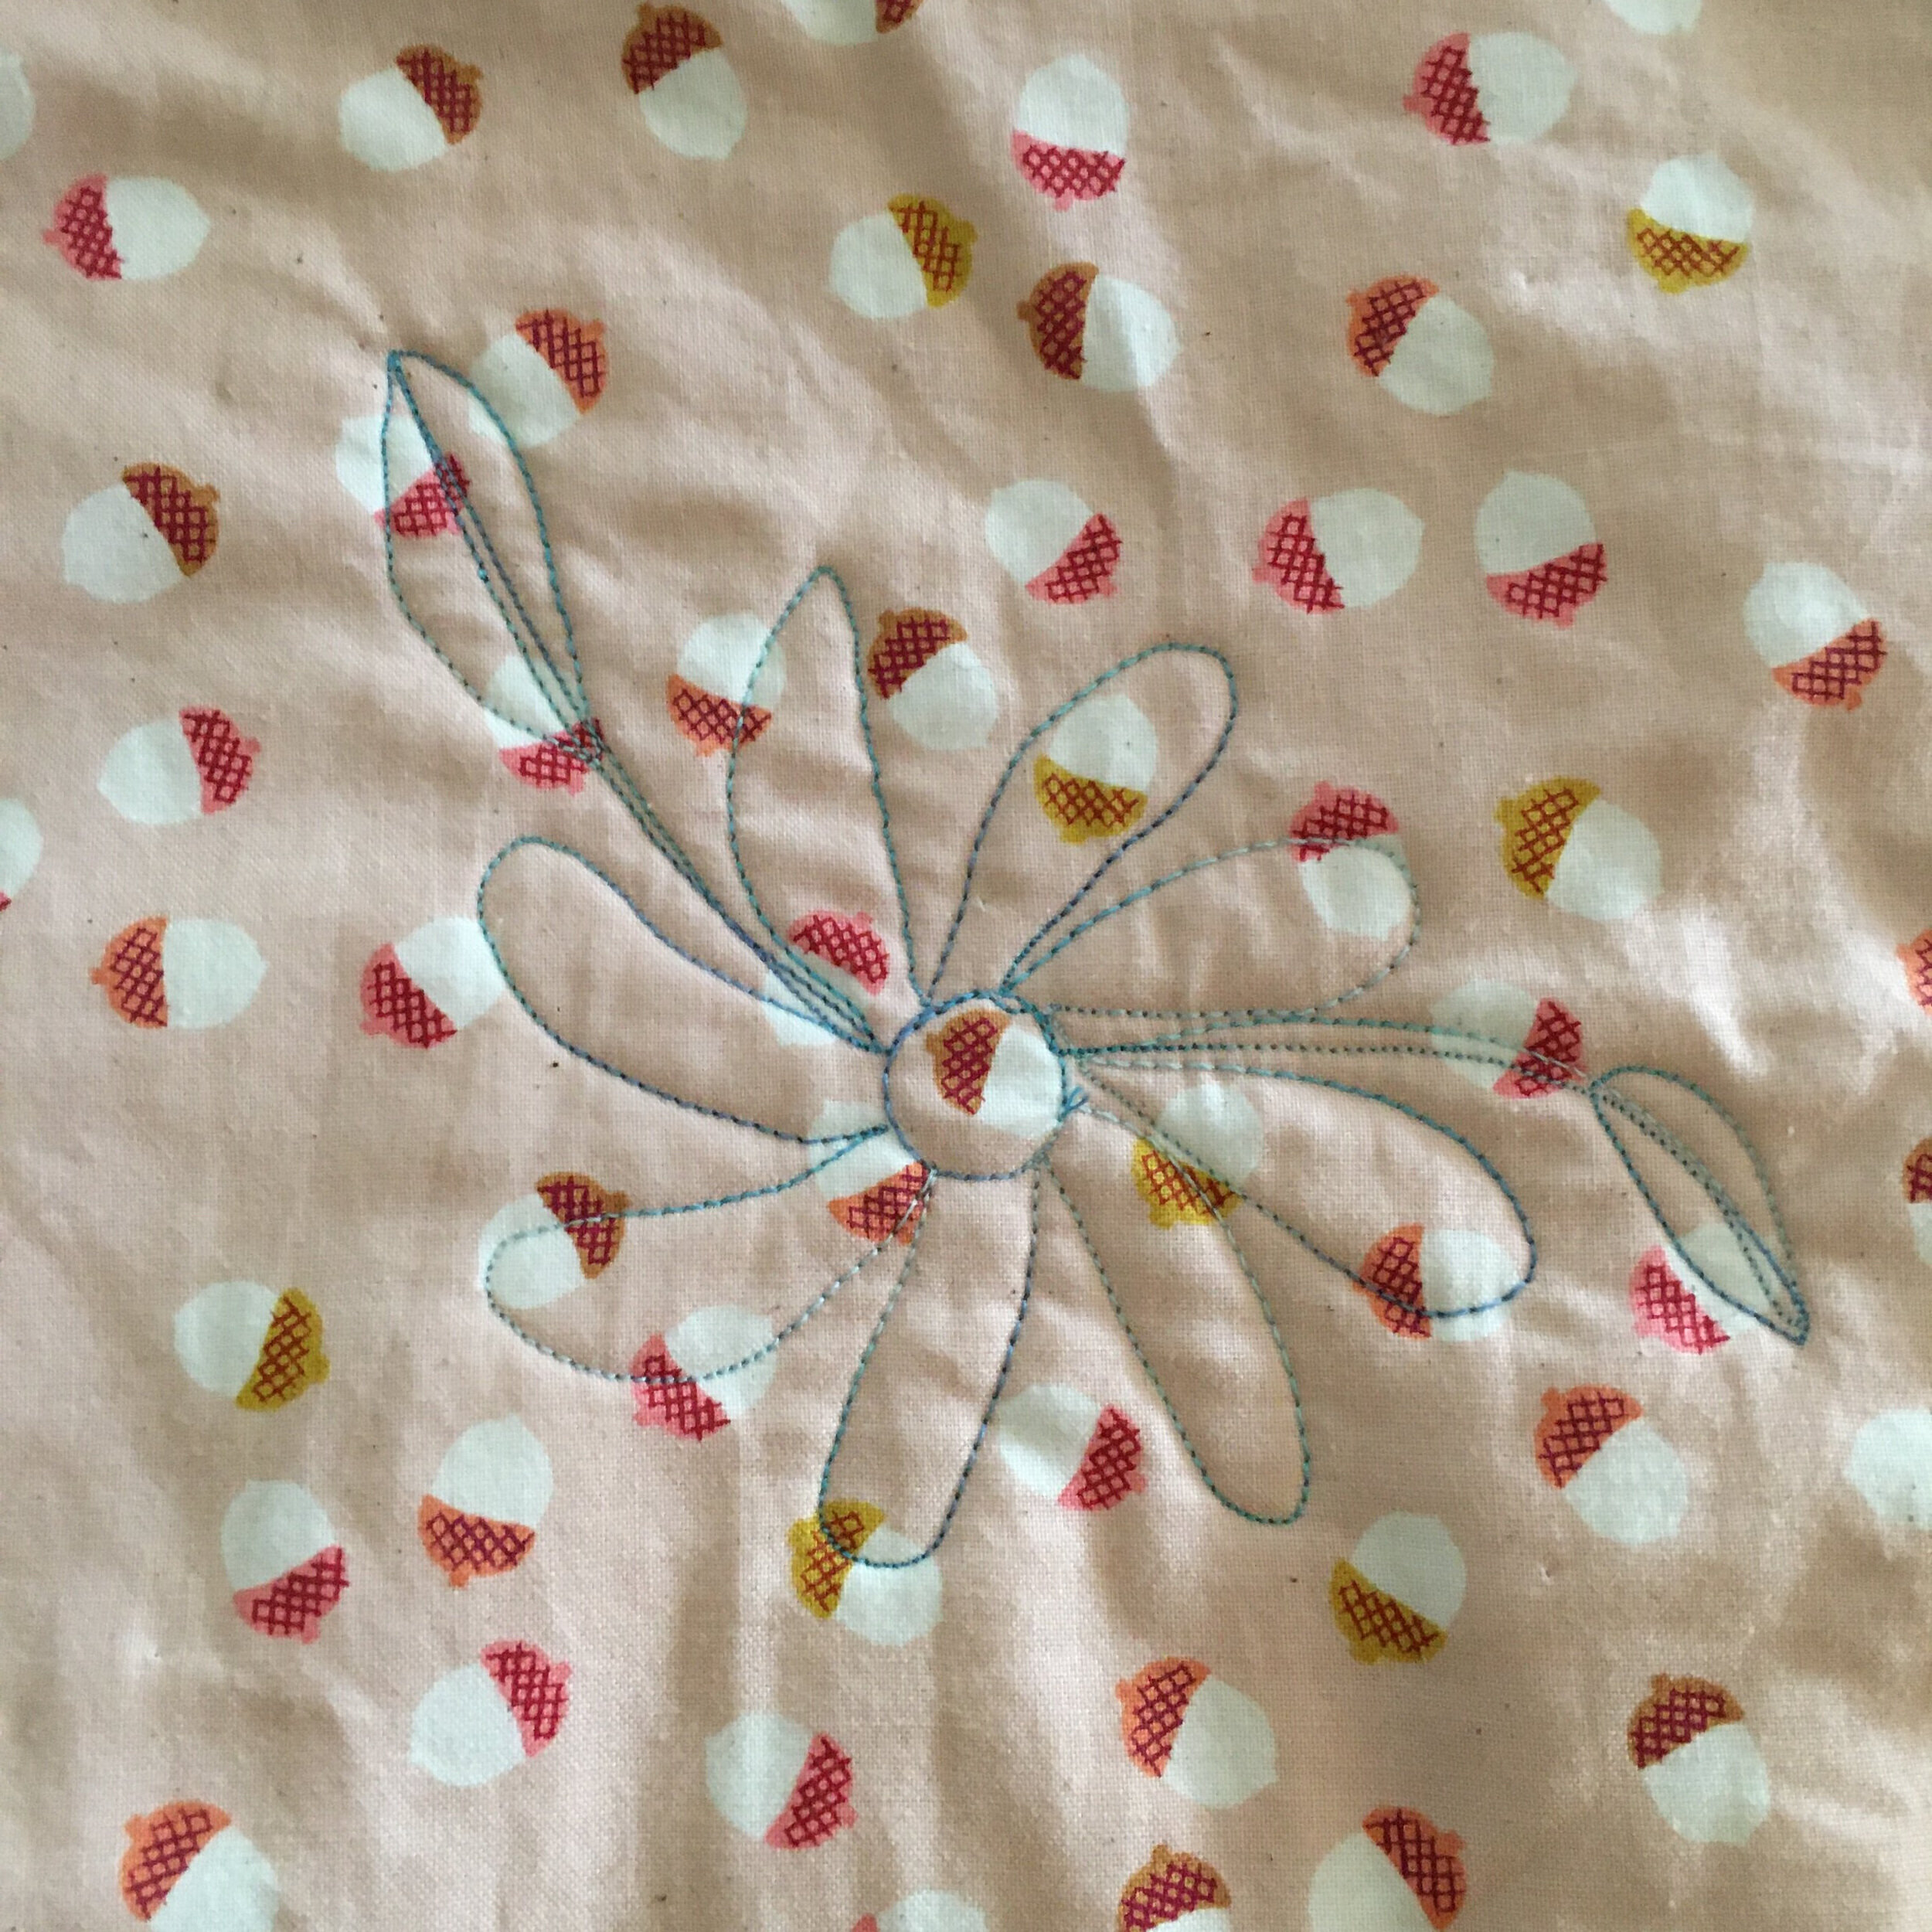
Here is how I stitched out my flower.

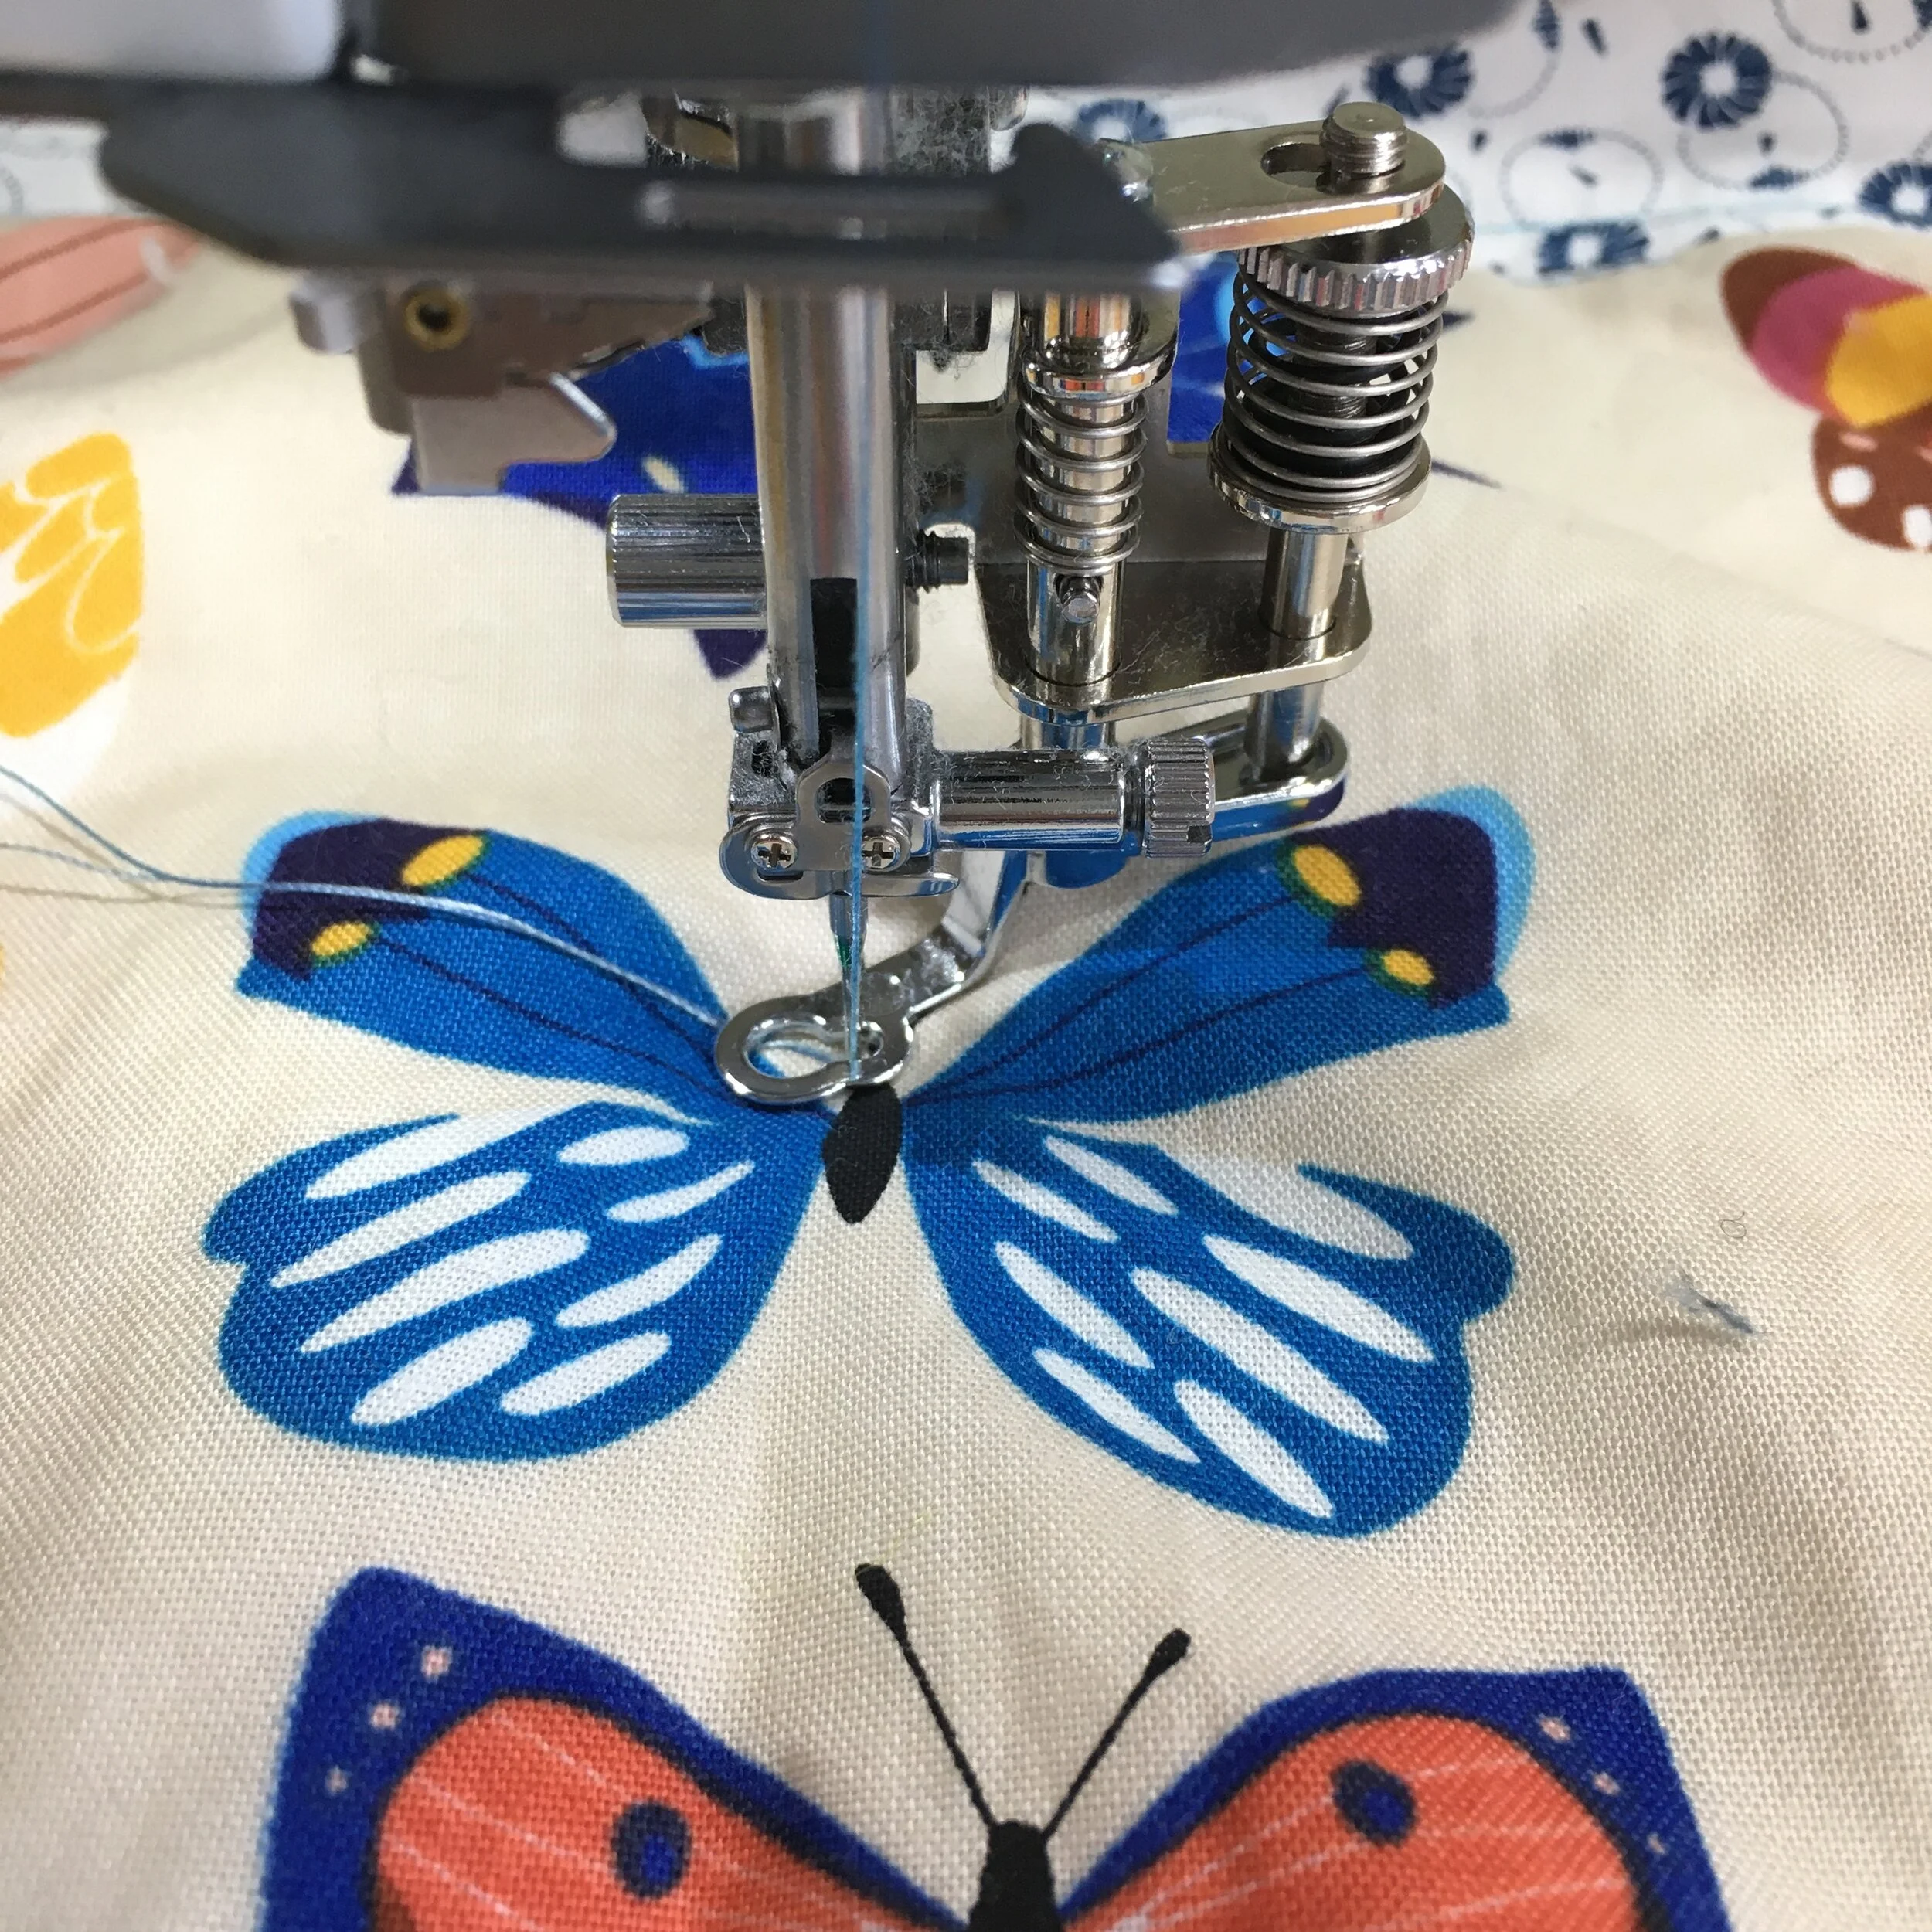
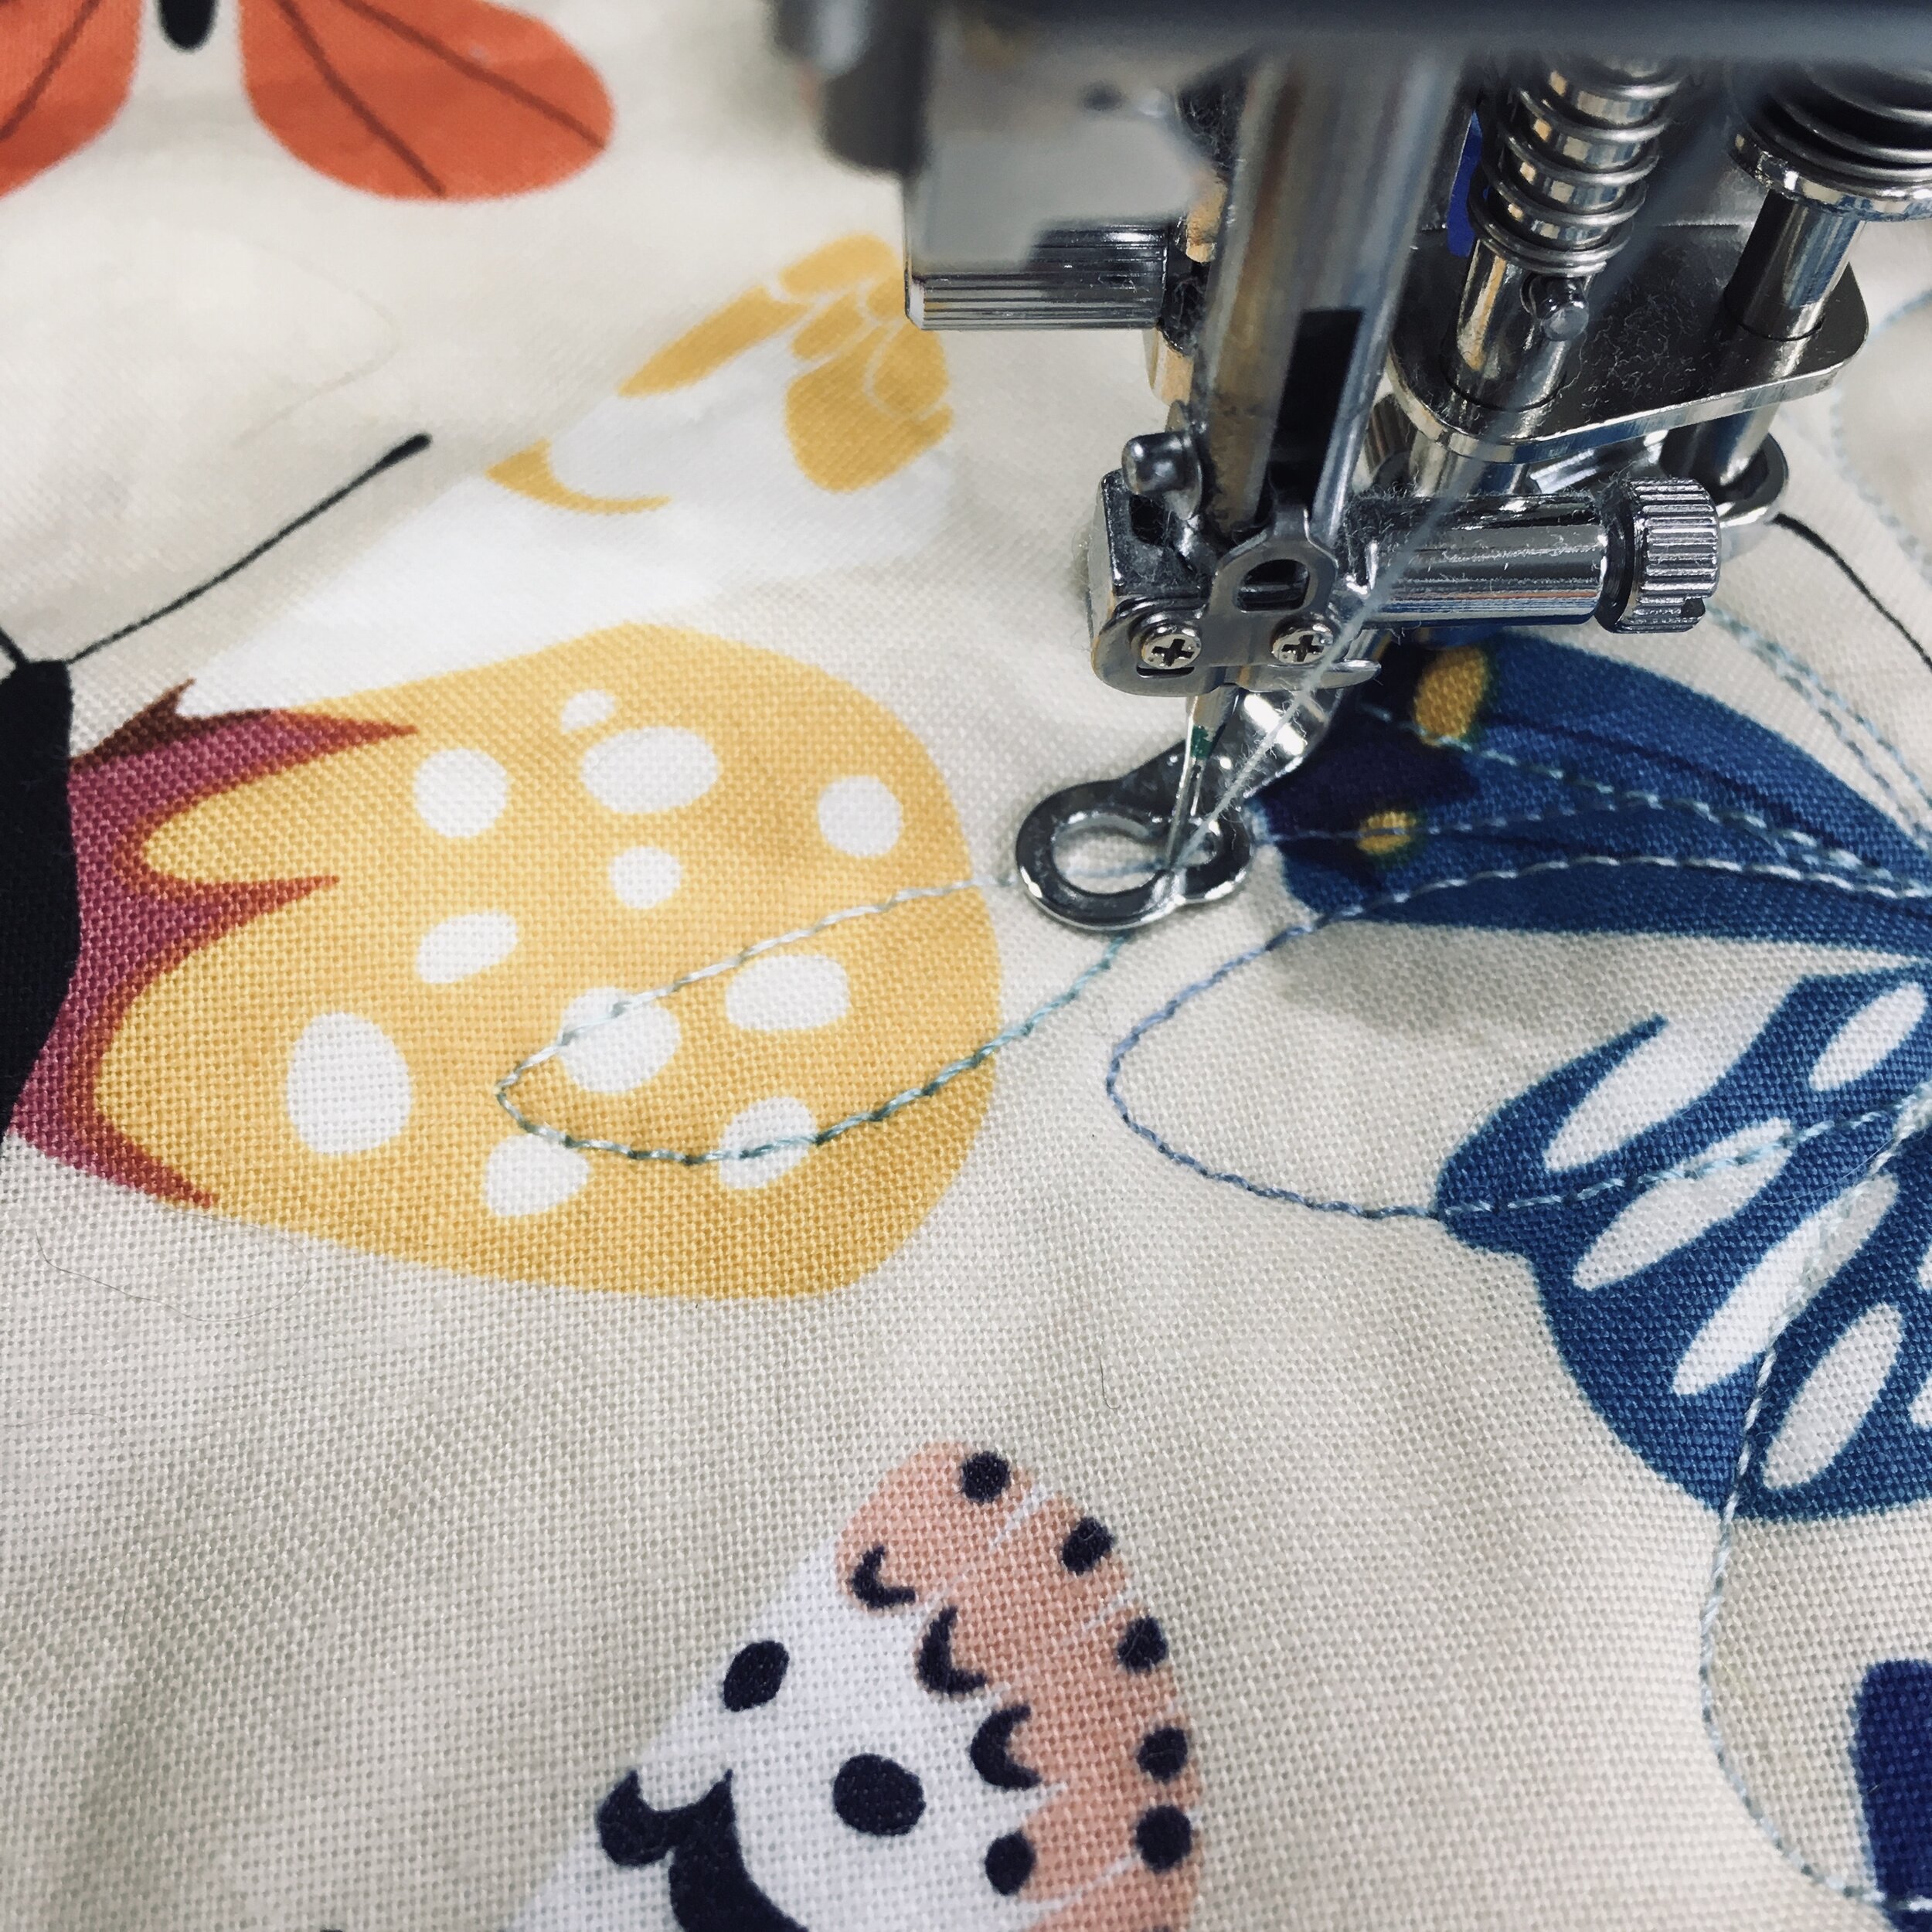
Set up your machine for free motion quilting. Drop the feed dogs on your machine and attach the darning foot. Make sure you are using a sewing machine needle meant to be used for quilting. It helps to have a low friction mat (I use a the regular Supreme Slider), on the table of your machine under the quilt, and pair of quilting gloves or clean gardening gloves with gripper dots to help move the quilt as you stitch. (The bright yellow gloves that you can see in one of the photos below are Dritz Fons and Porter Quilting Gloves. I also really like Machingers Quilting Gloves).

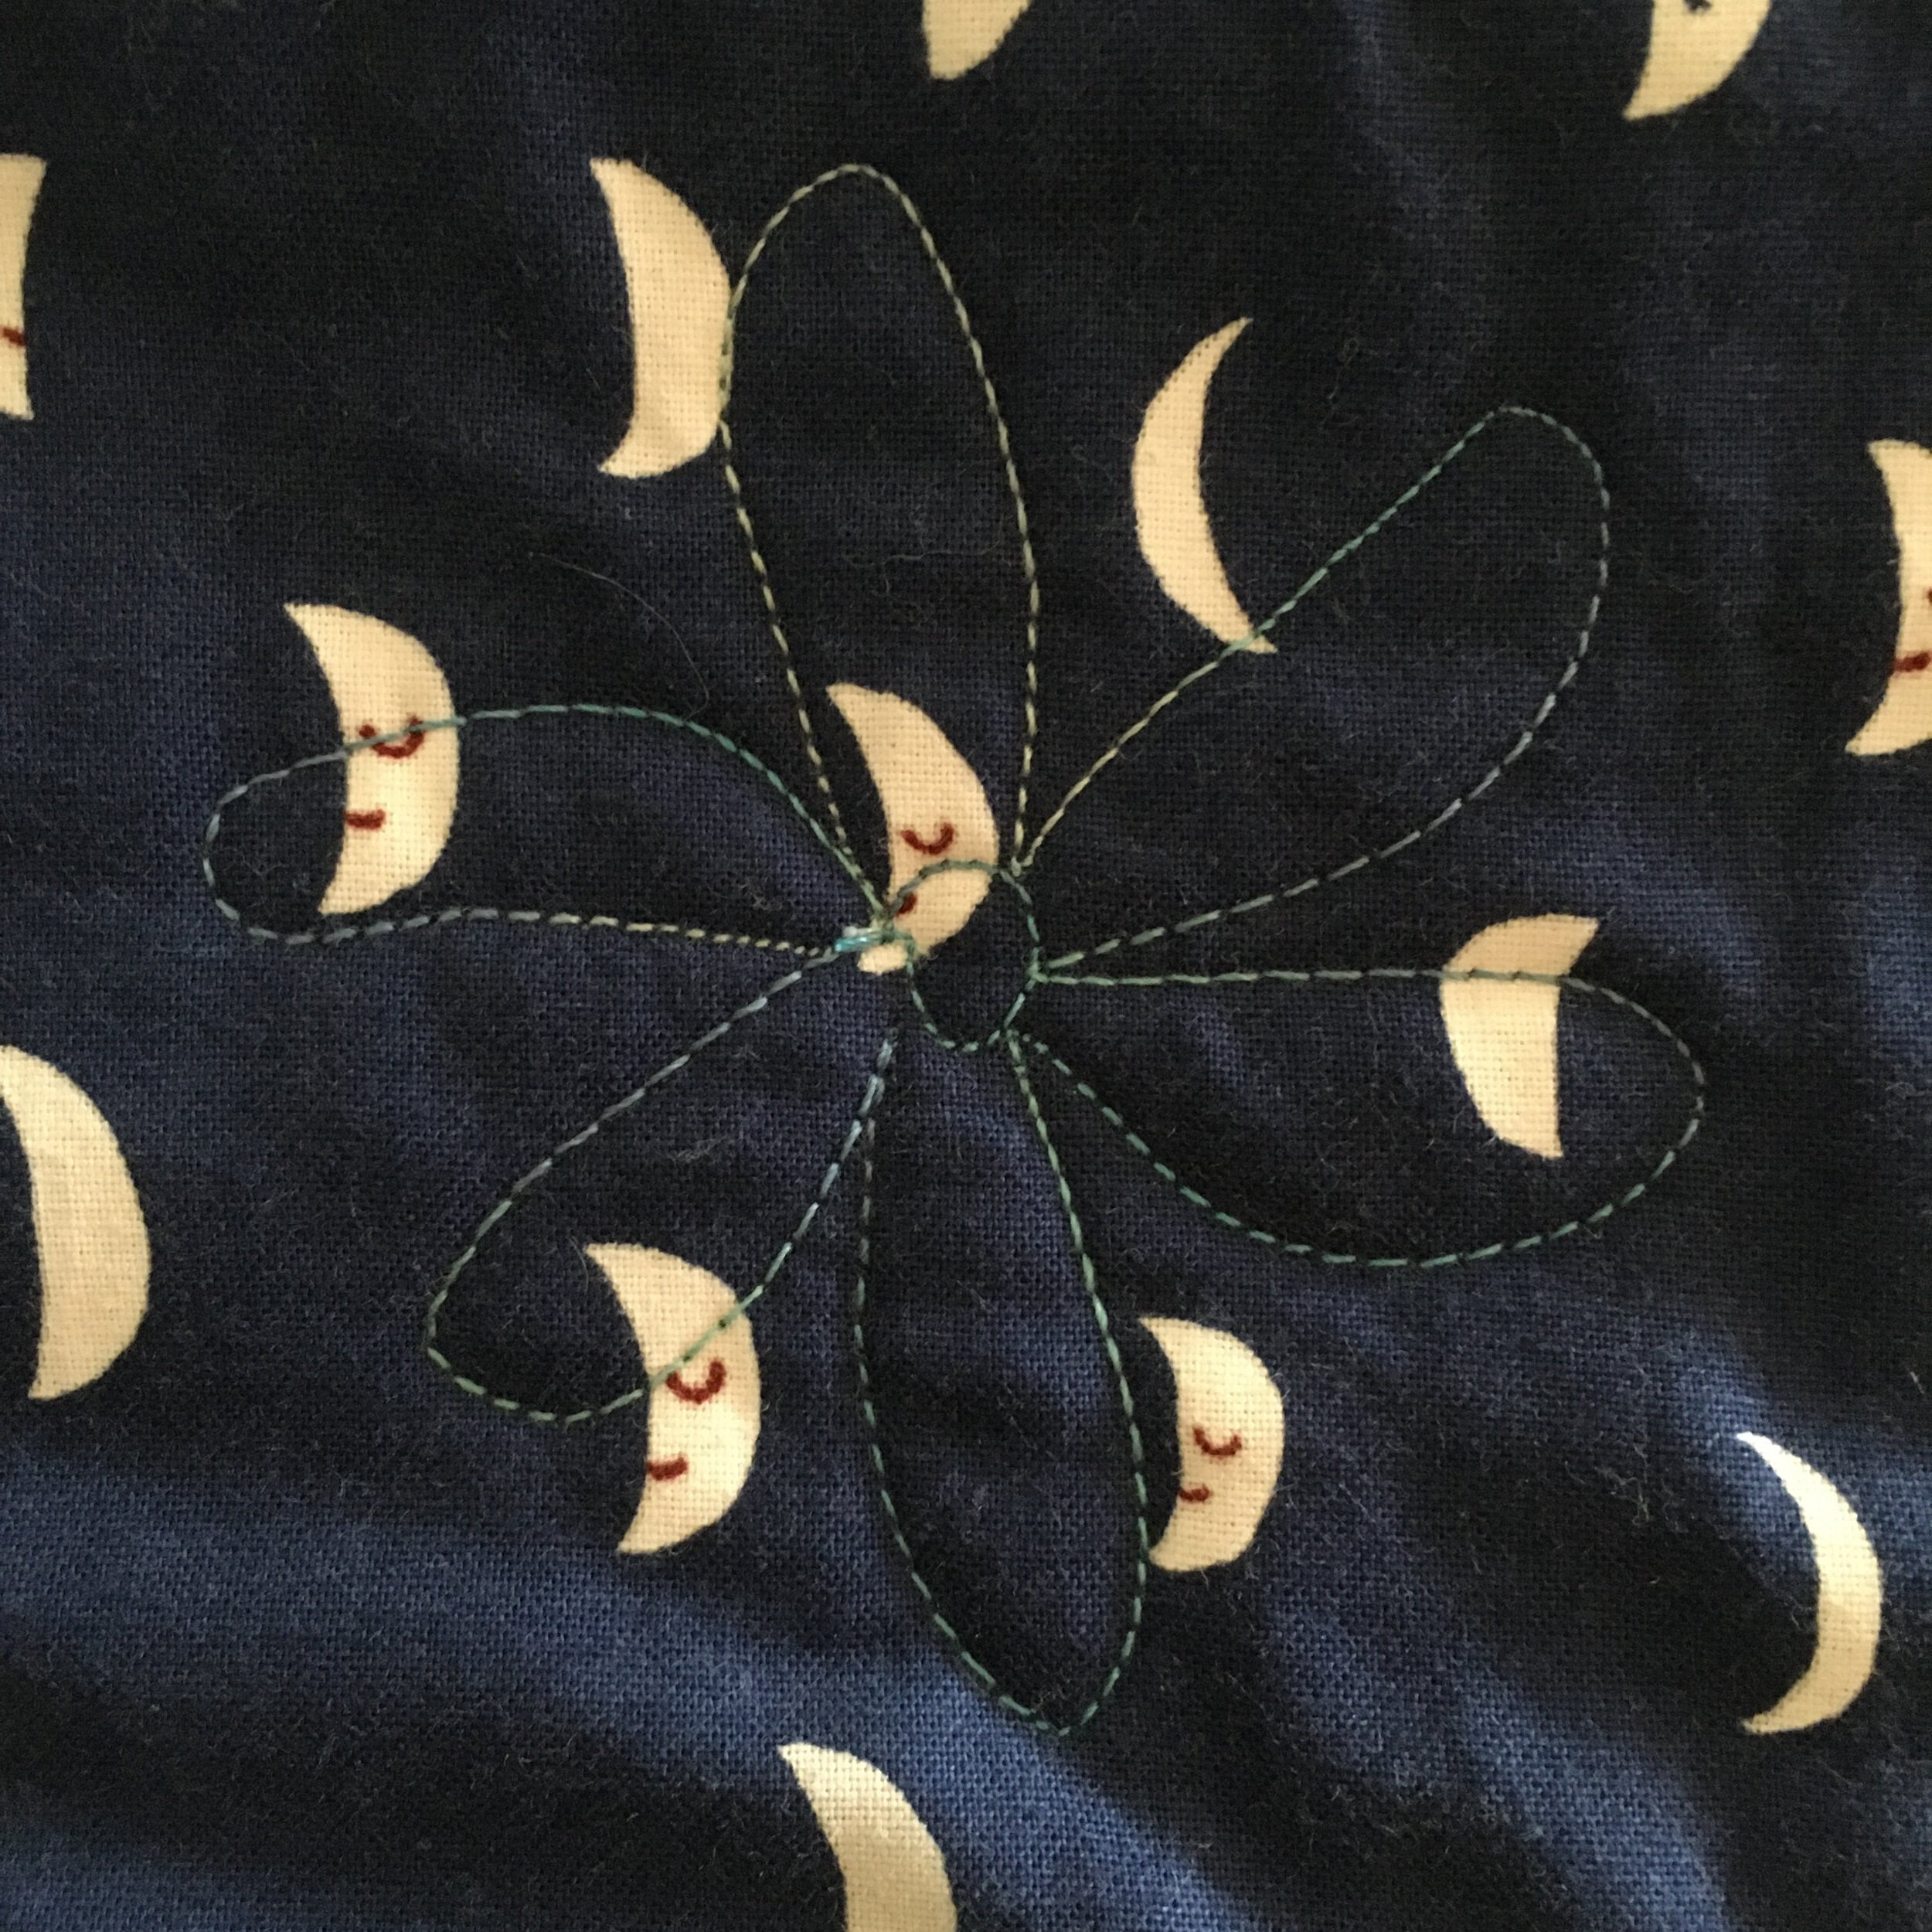
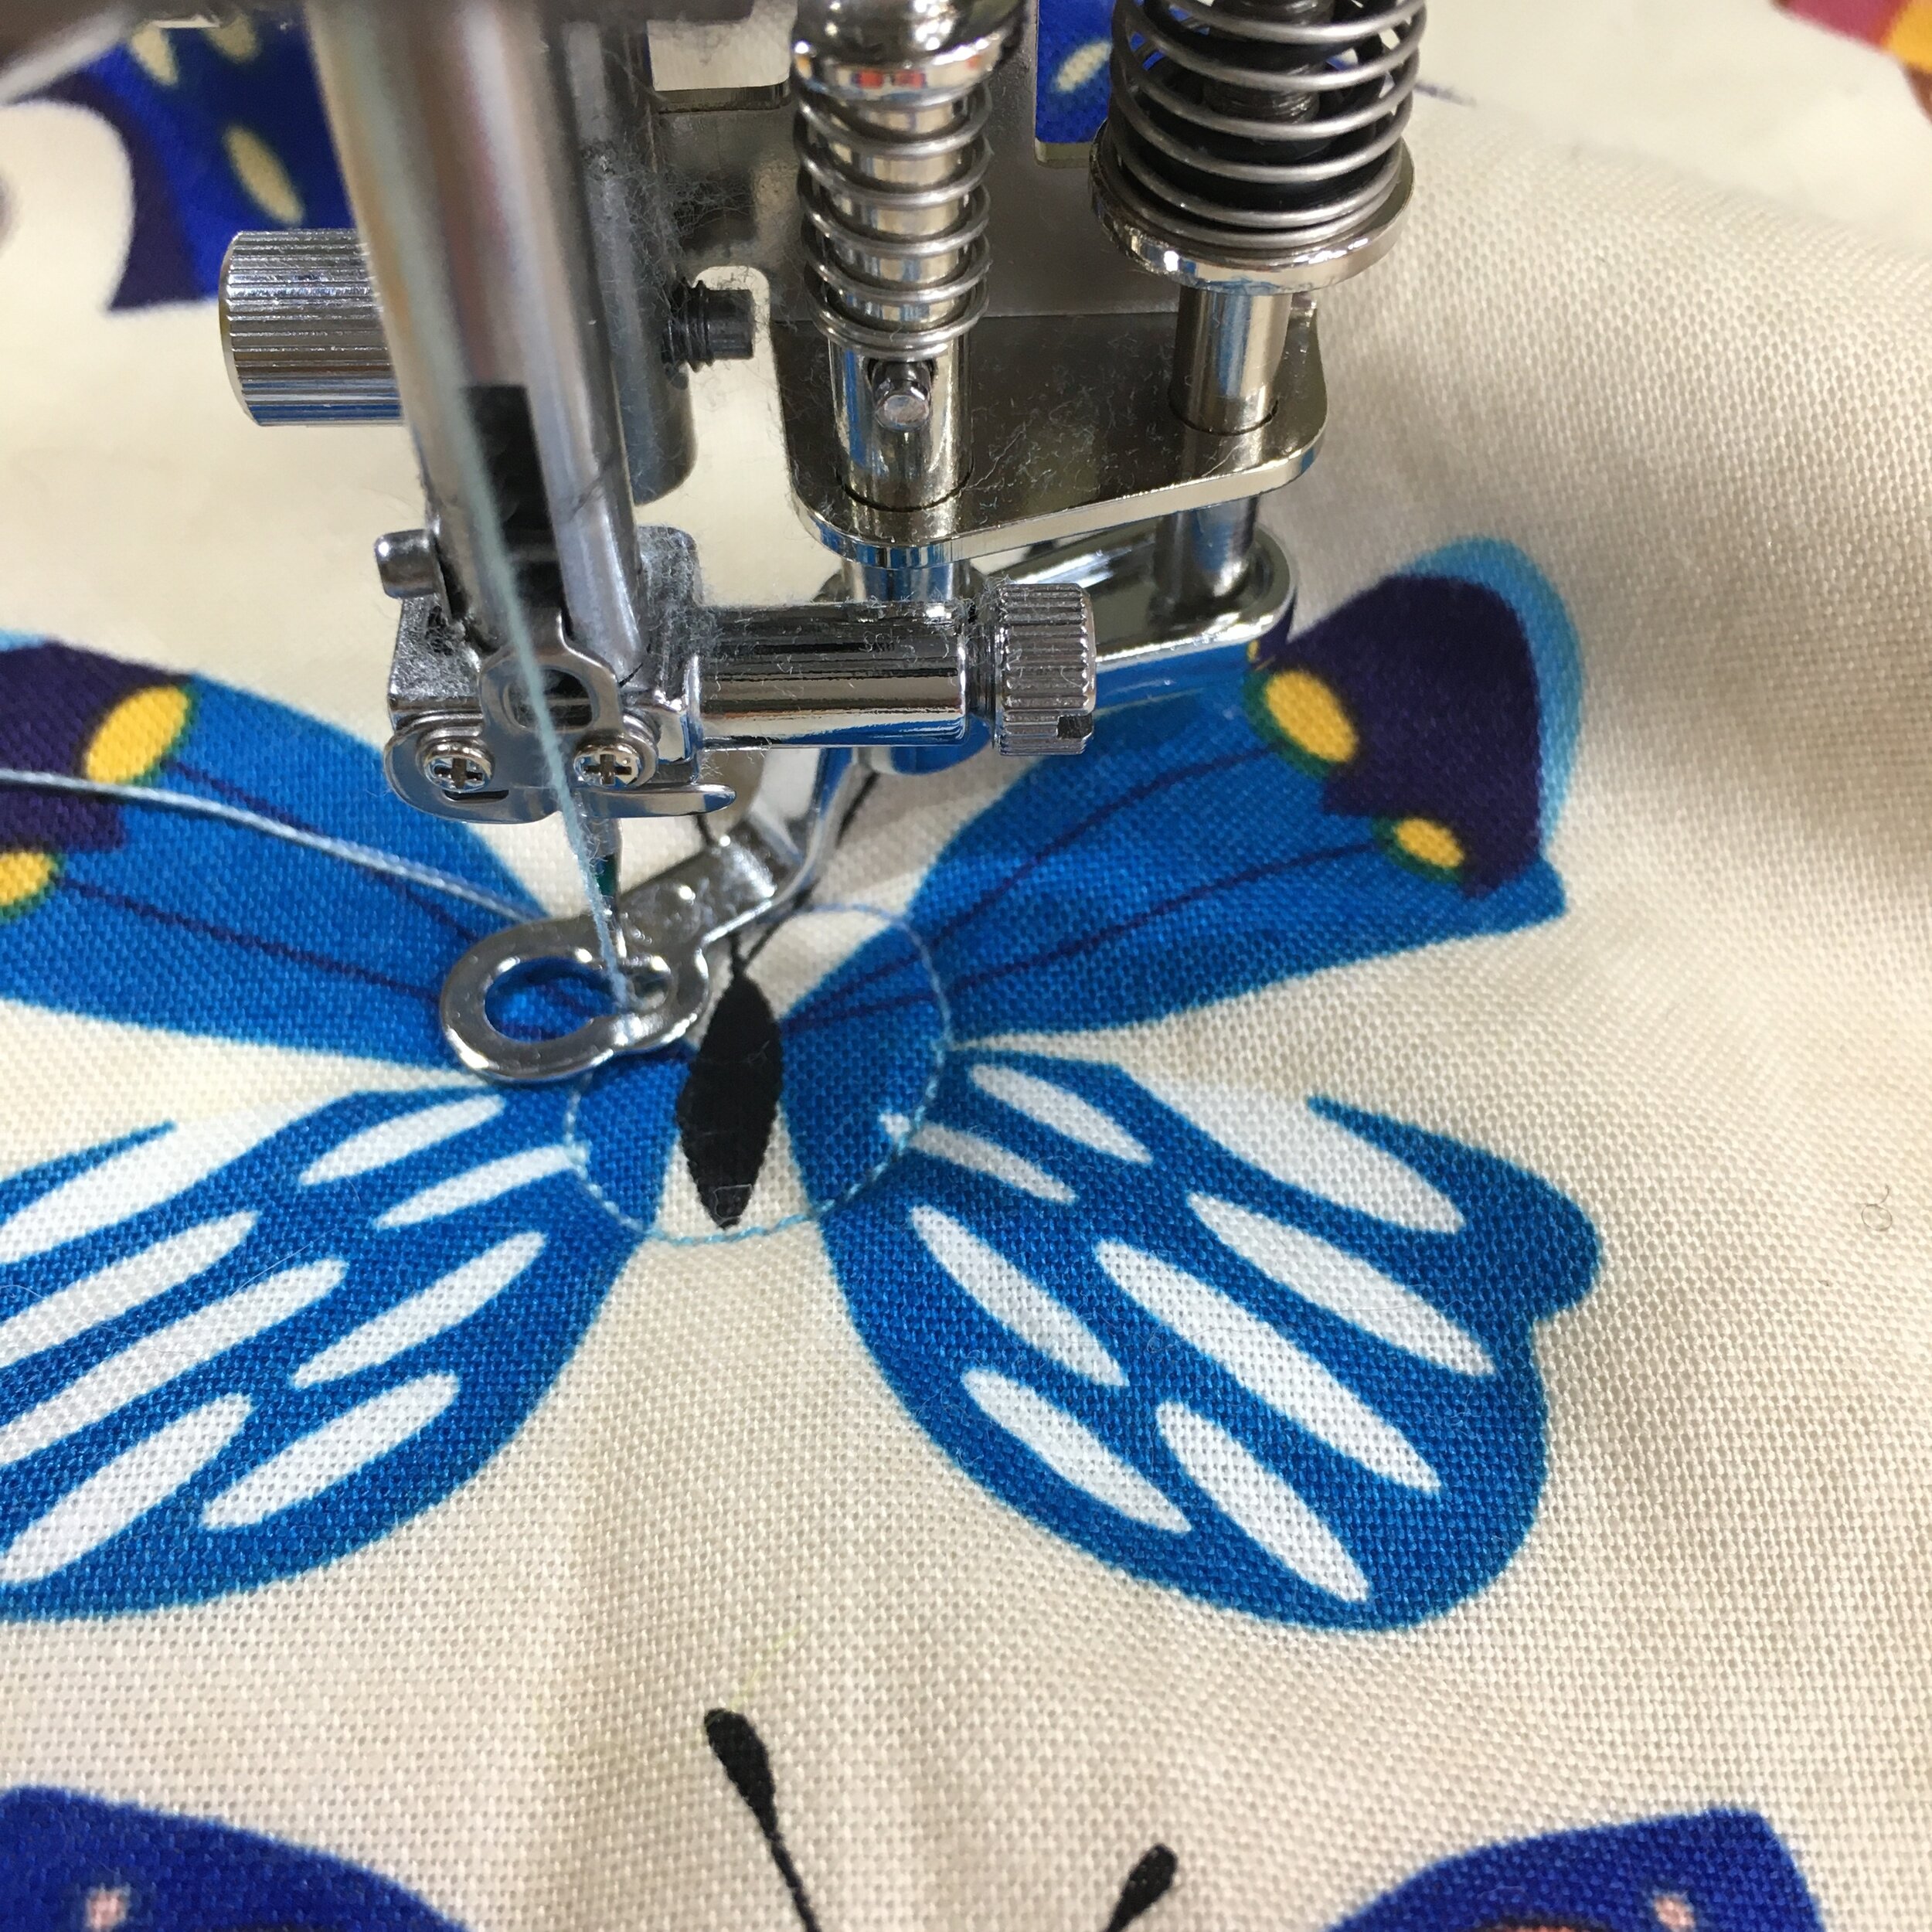
Start in the center of the block. Using the up-down needle needle function on your machine, pull the the bobbin thread from the back of the quilt. Put the needle in the down position.

Bobbin thread has been pulled up from the back of the quilt.  Needle is down, reading to start quilting

Bobbin thread has been pulled up from the back of the quilt. Needle is down, reading to start quilting

Grab the tails of the two threads and stitch a circle, ending a couple stitches over your start point. I clipped the two threads now. If you are quilting a quilt for a show or as an heirloom, you should use a sewing needle to bury the thread ends in the middle of the quilt sandwich.

FreeMotionquiltingFloral center.jpg

Stitch loops around the circle, creating the flower petals. Stitch at an even speed, slower than you normally would sew. It helps to turn down the stitching speed on your machine if you have that option. The slower speed helps to keep your stitch length regular and helps to prevent pulling on the back creating eyelash stitches. They eyelash stitches look like eyelashes. You’ll know them immediately if you see them. Eyelash stitches should be removed and resewn because the stitches aren’t anchored.

Sewing loops off the central circle to make lower petals

Sewing loops off the central circle to make lower petals

Once you have petal stitched all the way around the central circle, stitch a line between two to the petals to create a stem for a leaf.

Starting to stitch a stem for a leaf

Starting to stitch a stem for a leaf

Once the stem is the length you want, stop stitching. This will allow you to get a point on the end of your leaf. Then stitch a curve that will be half the leaf back to the stem stitching.

First half of the leaf

First half of the leaf

Now stitch the the other side of the leaf by sewing a loop on the other side of the stem, ending at the tip of the leaf. Then travel stitch back down the center of the leaf, on top of your initial line of stitches. And the end of the leaf, I usually stop travel stitching and stitch a couple of millimeters away from the first stem stitches to create a more realistic looking stem.

Travel stitching back along the stitches in the center of the leaf

Travel stitching back along the stitches in the center of the leaf

I only made a wider stem on side of this flower. After you reach the center of the flower, travel stitch around the circle and out between two other petals to make another leaf if you want to do that. I initially quilted two flower with 4 leaves each, but then decided I preferred the 2 leaf design better.

CompletedFlower.jpg

Free motion quilting uses “motor memory”—your muscles working with your brain. It takes practice. Some designs, like these flowers come easily to me. Some I really struggle with. I have a friend who loves stitching a paisley pattern. Please don’t ask me to do a paisley design! I’ve learned to stitch what feels right to me, not what someone else can do. And it’s totally fine to create your own designs. In fact, with free motion quilting, I think that stitching designs that come naturally to you is the best way to go.

Notice: This blog is not monetized: I do not use affiliate links. When there are links in a post, they are to give credit to another creative person, because I like or have used a product, or to help the reader easily find supplies for a project.

TAGS: How to free motion quilt, Free motion Quilting, Free Motion quilting a flower design, Step-by-Step free motion quilting a flower design


Powered by Squarespace 7