Search
  • Information
    • About
    • Contact
    • Privacy Policy
  • Blog
  • Subscribe
  • Tutorials
    • Tutorials
    • Doll Clothes: Photos and some Patterns
  • Suggested Reading
  • Quilts: My Original Designs
  • Gallery: Color Studies
  • Gallery: Quilts I've Made
  • Doll Making Blog Posts
  • Recent blog posts
  • Quilts Based on The Improv Handbook for Modern Quilters
Close
Menu
Search
Close
  • Information
    • About
    • Contact
    • Privacy Policy
  • Blog
  • Subscribe
  • Tutorials
    • Tutorials
    • Doll Clothes: Photos and some Patterns
  • Suggested Reading
  • Quilts: My Original Designs
  • Gallery: Color Studies
  • Gallery: Quilts I've Made
  • Doll Making Blog Posts
  • Recent blog posts
  • Quilts Based on The Improv Handbook for Modern Quilters
Menu

Sleeping Dog Quilts

SLEEPING DOG QUILTS

April 6, 2017

Half Square Triangle Embroidered Mini Quilt Completed

by Judy Tucker


HalfSquareTriangleEmbroideredMiniQuilt.jpg

I've completed up my Half Square Triangle Embroidered Mini Quilt. It finished at 12 1/2 x 13 inches.  I'm so happy with these embroidered flower designs which I found in Kazuko Aoki's book, The Embroidered Garden.

I really like the front of this little quilt. As I showed in my last post, some of the threads from the flower embroidery are hidden inside the the quilt. I wanted to use the flower stems as part of this little quilt's quilting. I used two stitches for the stems--the running stitch which has gaps between each stitch and the back stitch. The running stitch looks like quilting stitches on the back of the quilt. The back stitch really doesn't look good.

BackofEmbroideredMiniHSTQuilt.jpg

I'm not unhappy about the back since this is a quilt that will be used as a wall hanging.  But if I were doing it again, I'd just use a running stitch for all the flower stems.

TAGS: Half Square Triangle quilt, half square triangles, Mini Quilt, embroidery on a quilt, Embroidered flowers


November 5, 2015

Improv Quilting Project 4: Score #8 Bias Strip Petals, reconfigured

by Judy Tucker


"Lemonaide" Mini Quilt

"Lemonaide" Mini Quilt

"Lemonaide" Mini Quilt

"Lemonaide" Mini Quilt

It's been a few months since I worked on one of the Scores in Sherri Lynn Wood's book, The Improv Handbook for Modern Quilters--A Guide to Creating, Quilting & Living Courageously.

I decided to tackle the one Score in the book that I was dreading:  Score #8 Bias Strip Petals.  "Seeing with Fresh Eyes".  I have a confession.  I despise bias strips!  Even using a bias strip cutting fabric saving "tube" I feel like I'm "wasting" fabric.  I have no problems sewing on the bias.  I do that all the time. But skinny little strips cut on the bias make me growl!

Starting to work on this challenging pattern, the one Sherri said was the most difficult quilt in the book for her to piece, the day after my last cat died, probably wasn't the best idea. But I figured I that since I can easily piece Drunkard's Path patches that I'd be all right working with this biased peicing.

I should have taken photos as I started making the petals. The first strips on on each side of the oval petal went were nice and flat.  It was all downhill from there.  I tried pinning the bias strip, then not pinning an letting it float pulling on the pieces more and then less as Sherri recommended. The strips just didn't lie flat for me.  Below is a photo of one petal I made just to show here.  In this one, only the first strip worked out. 

Petal with warping bias strip

Petal with warping bias strip

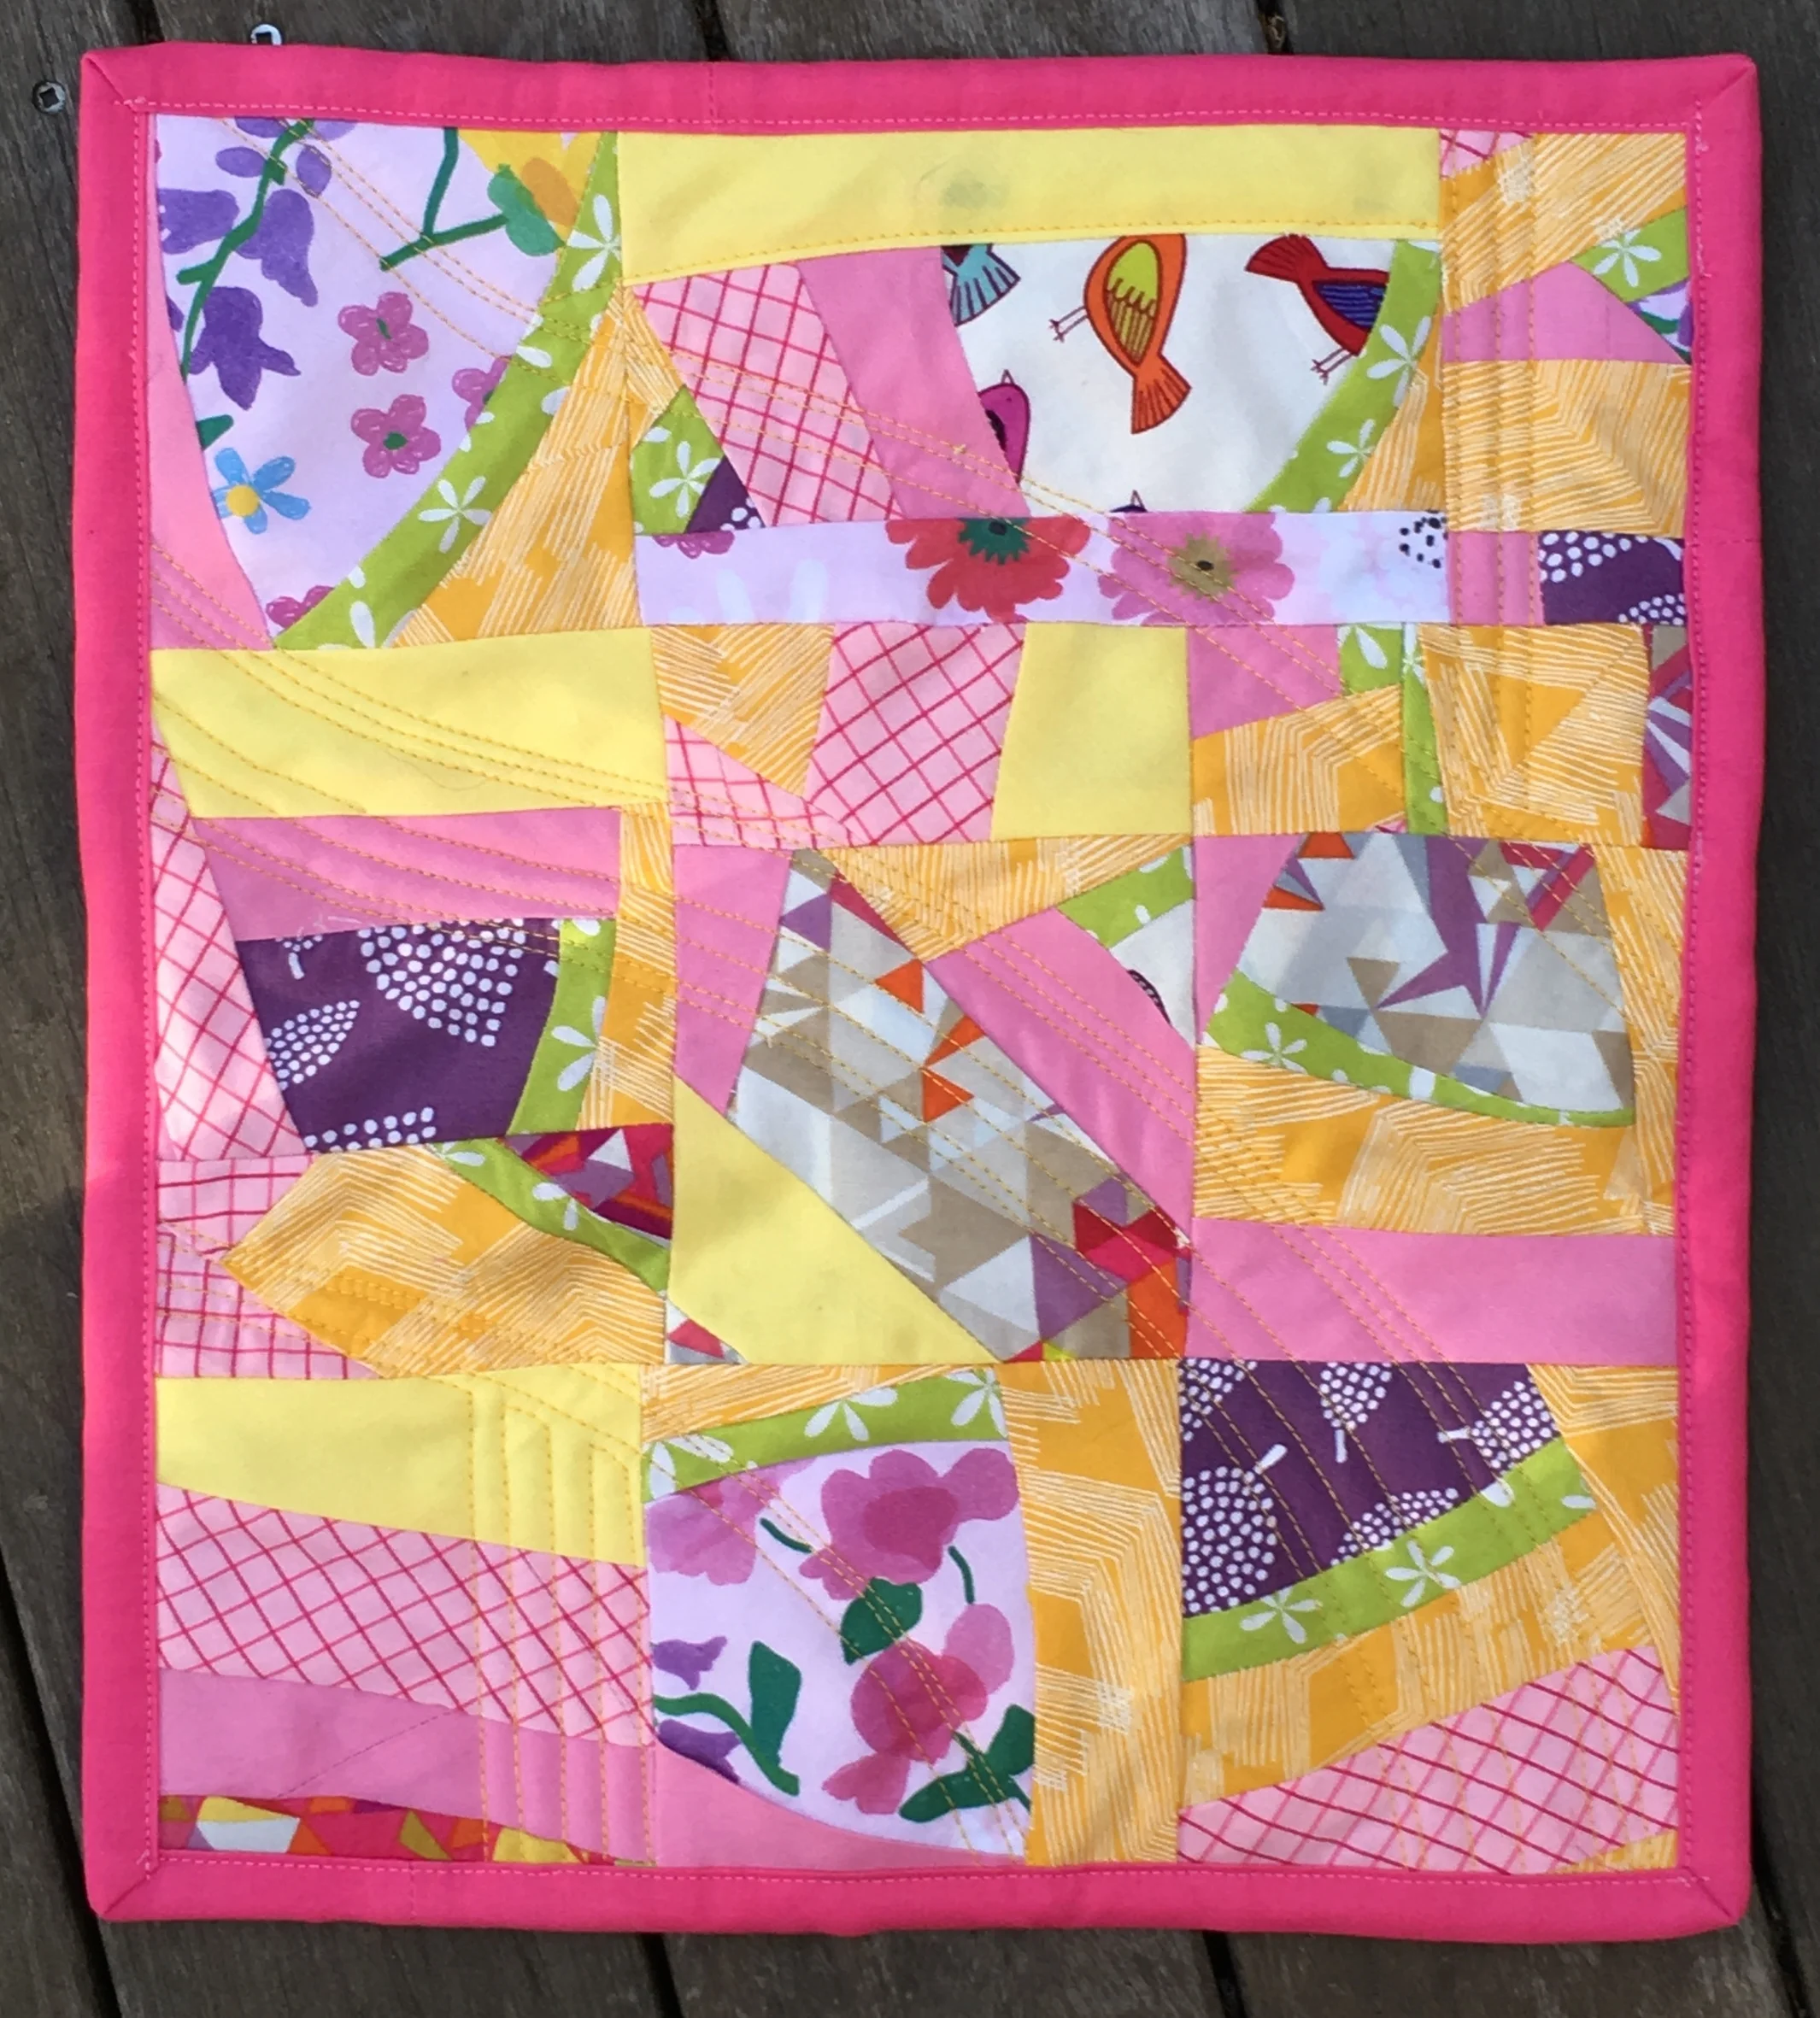
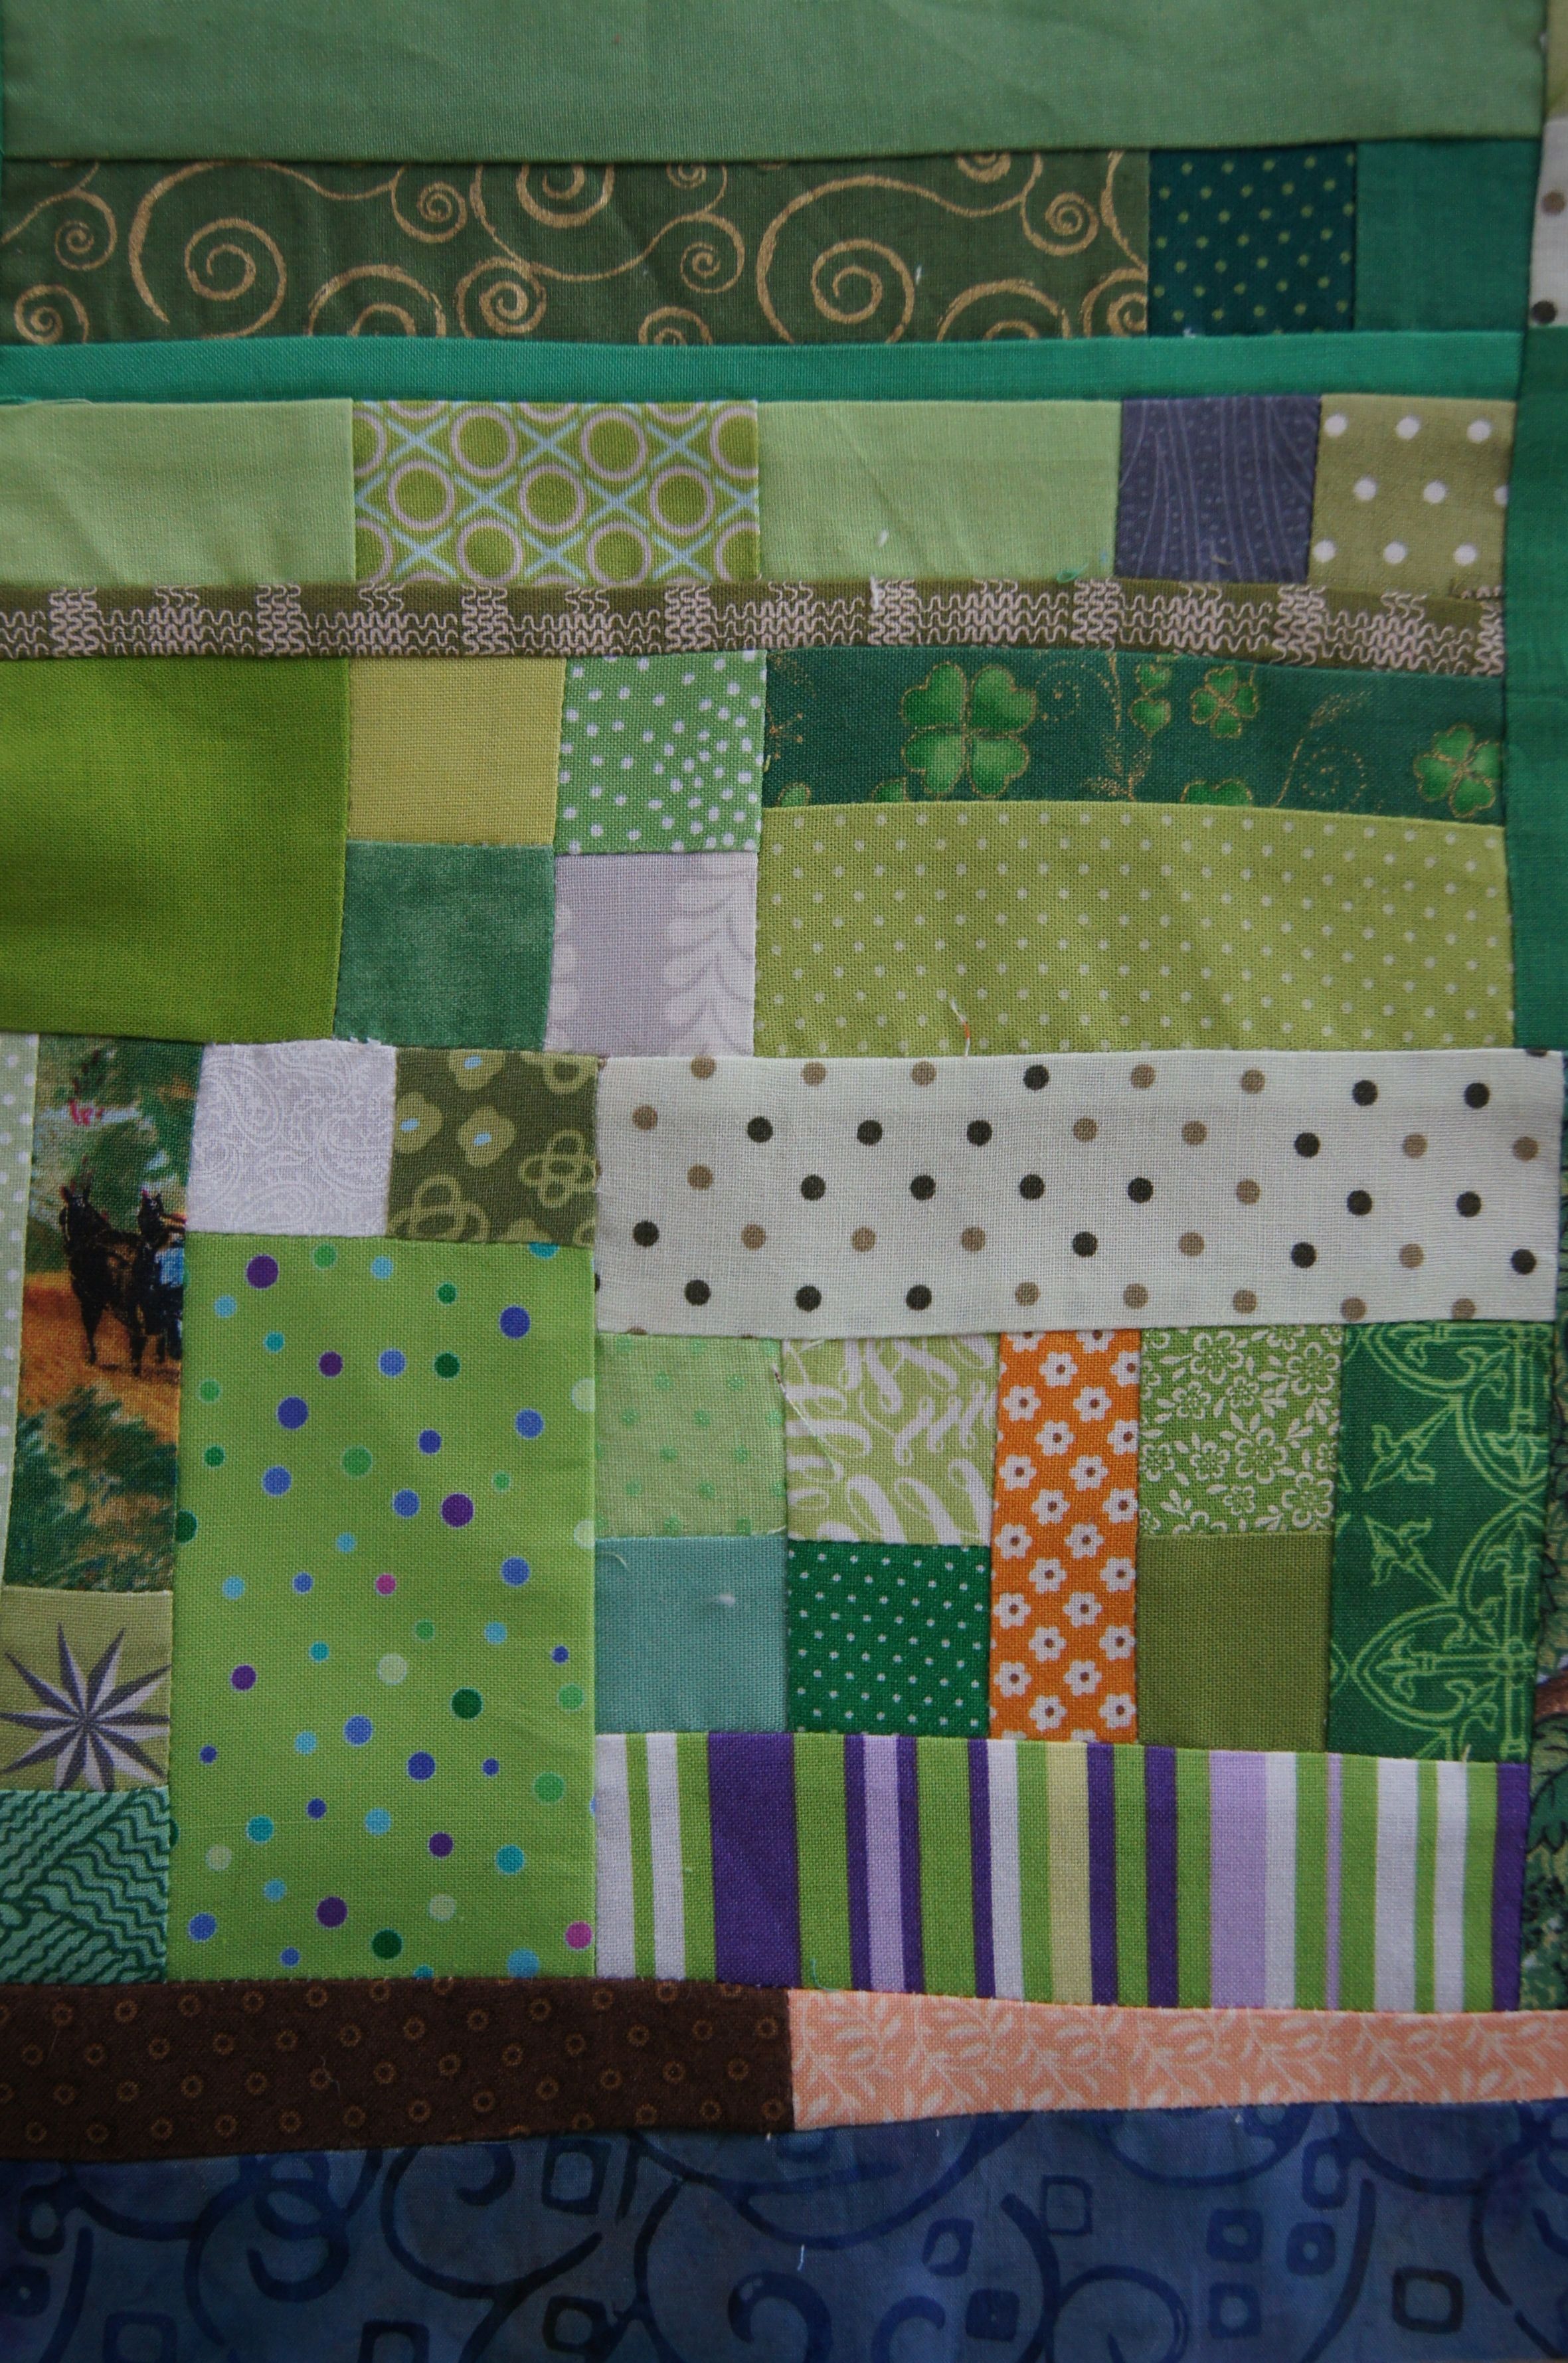
I tried cutting down the bias strips so that they were narrow. I folded the piecing to see if darting would help.  It didn't.  But I realized that HALF of each pieced petal was just fine.  

So I got out my rotary blade and cut all the petals in half. And they were suddenly FLAT!  I added a couple more strips to some of the units and then thought about how to piece them all together. I realized I didn't have the patience to do any complex piecing, so I opted to cut the half petals units into as many squares as possible and then piece those. 

"Big Sigh!" I let go of all the stress of what hadn't worked out.  And suddenly I loved what I was working on!  

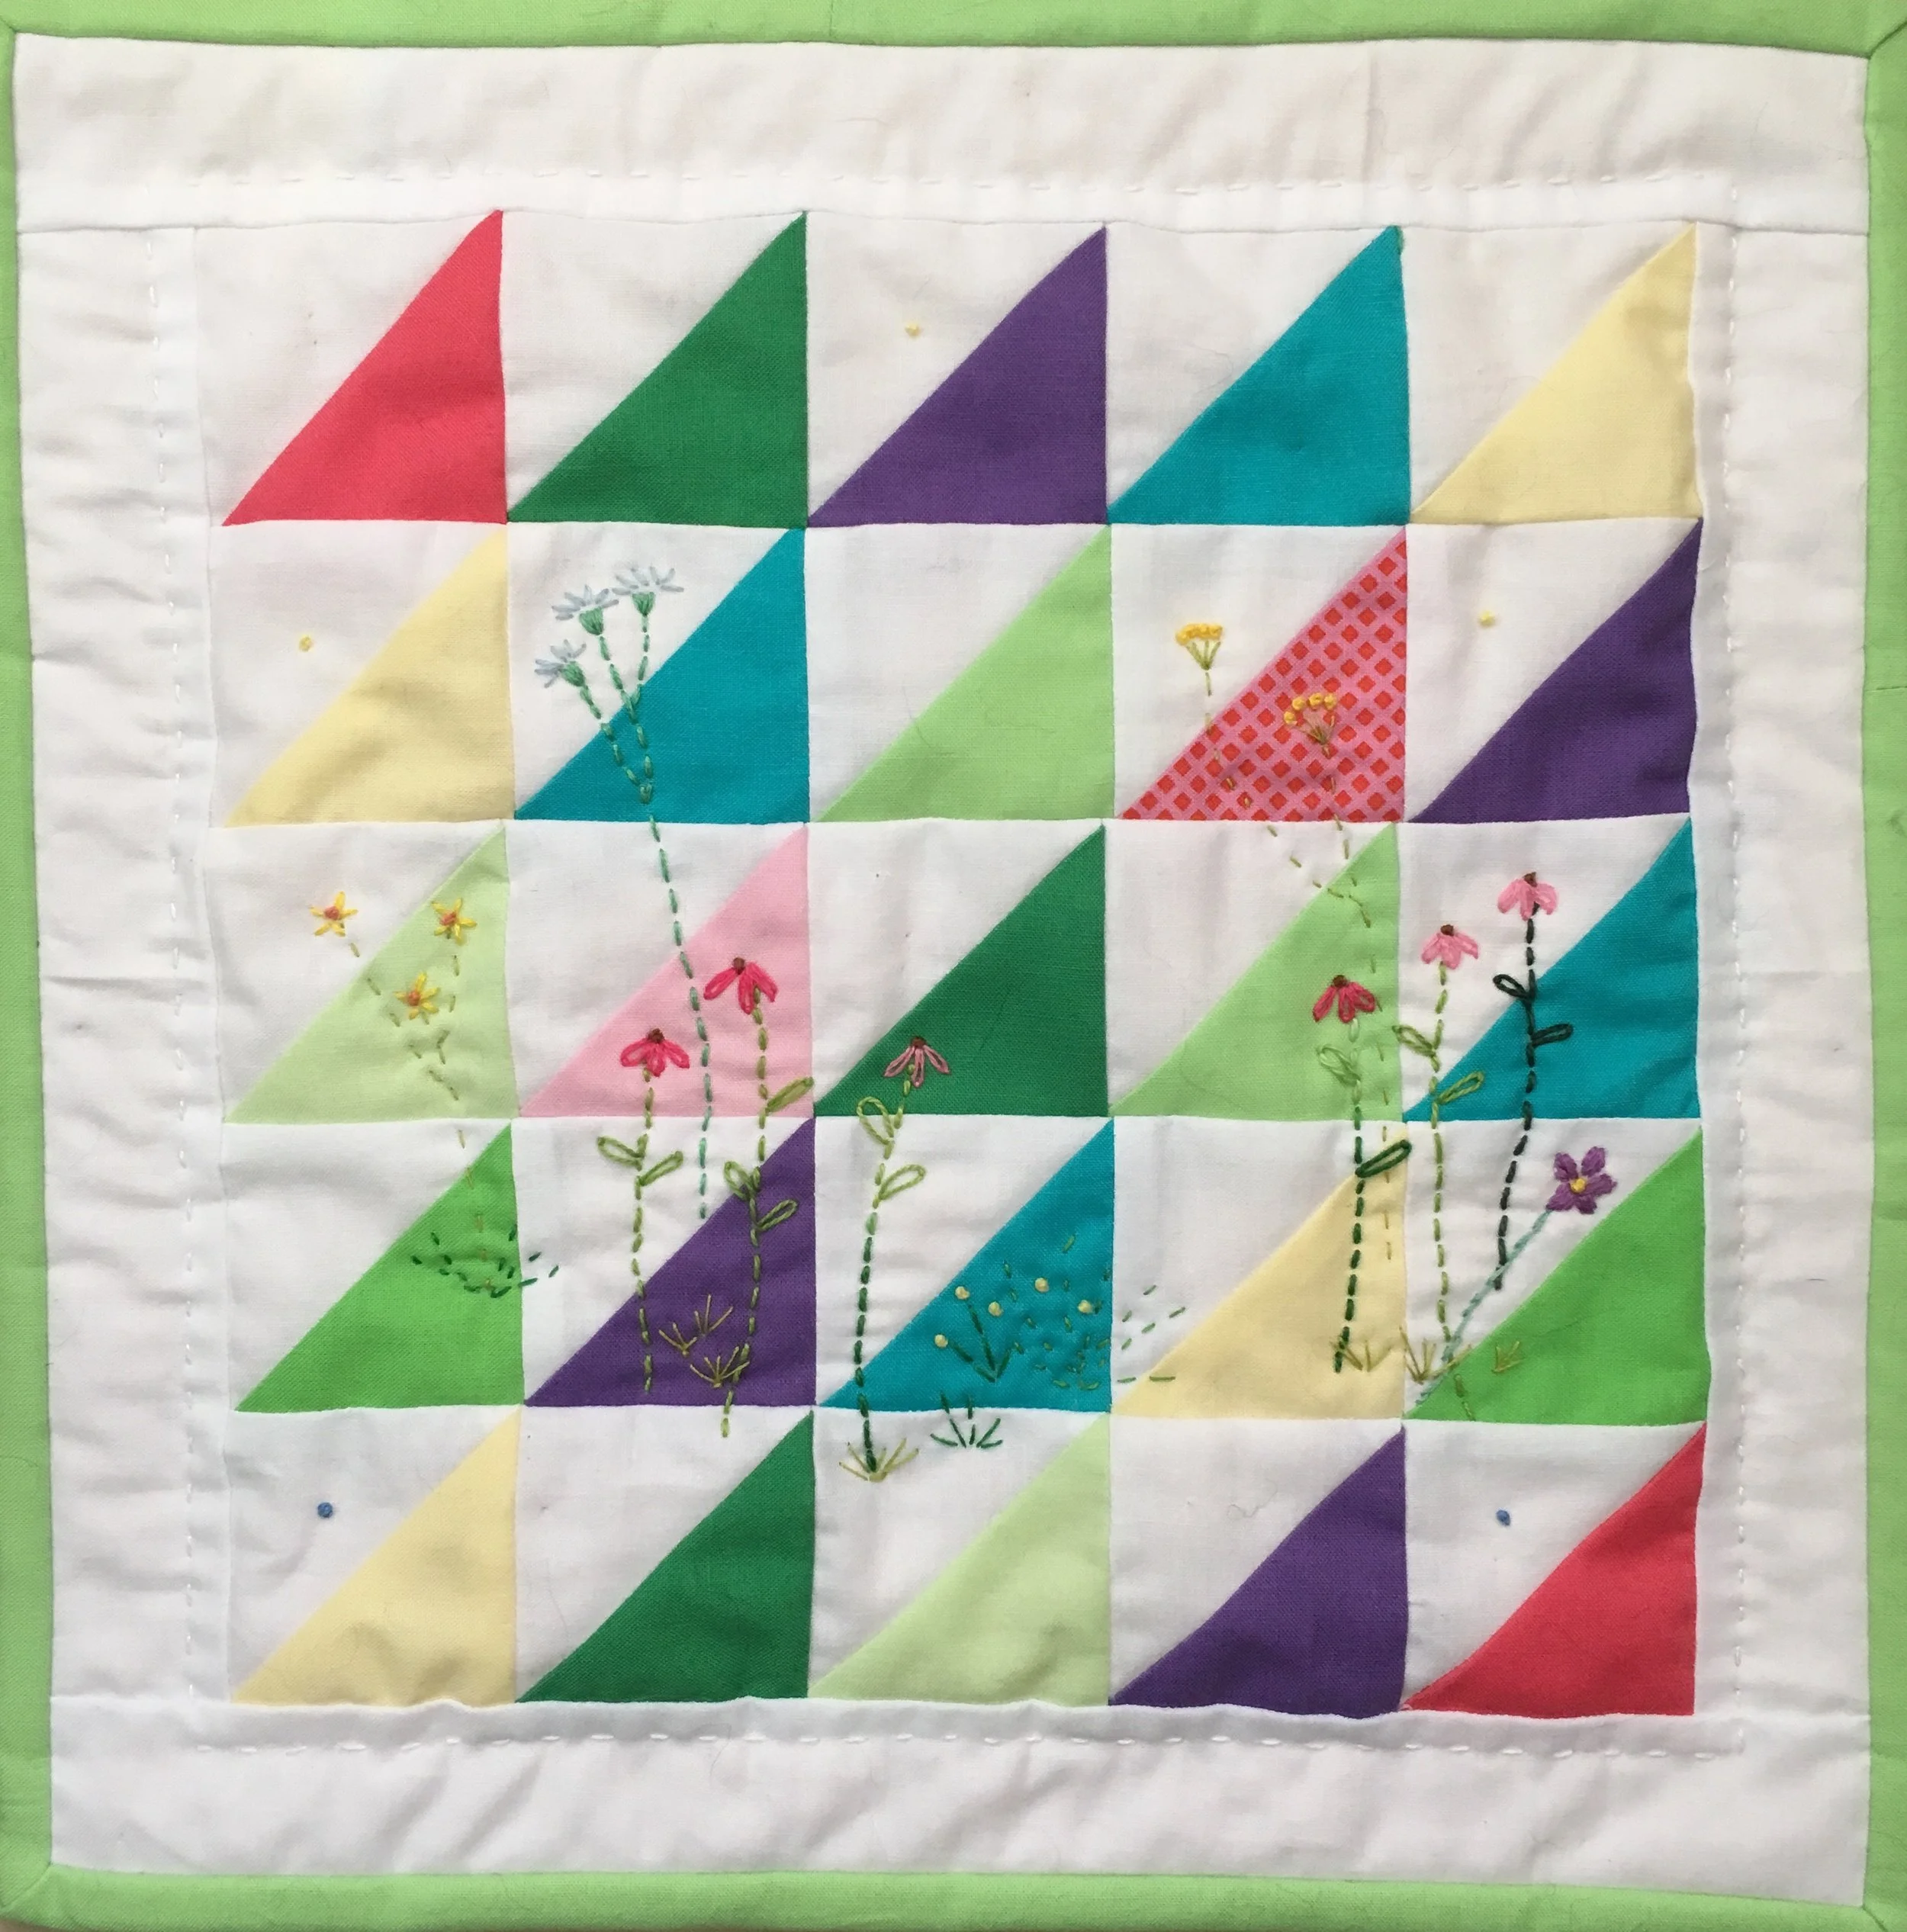
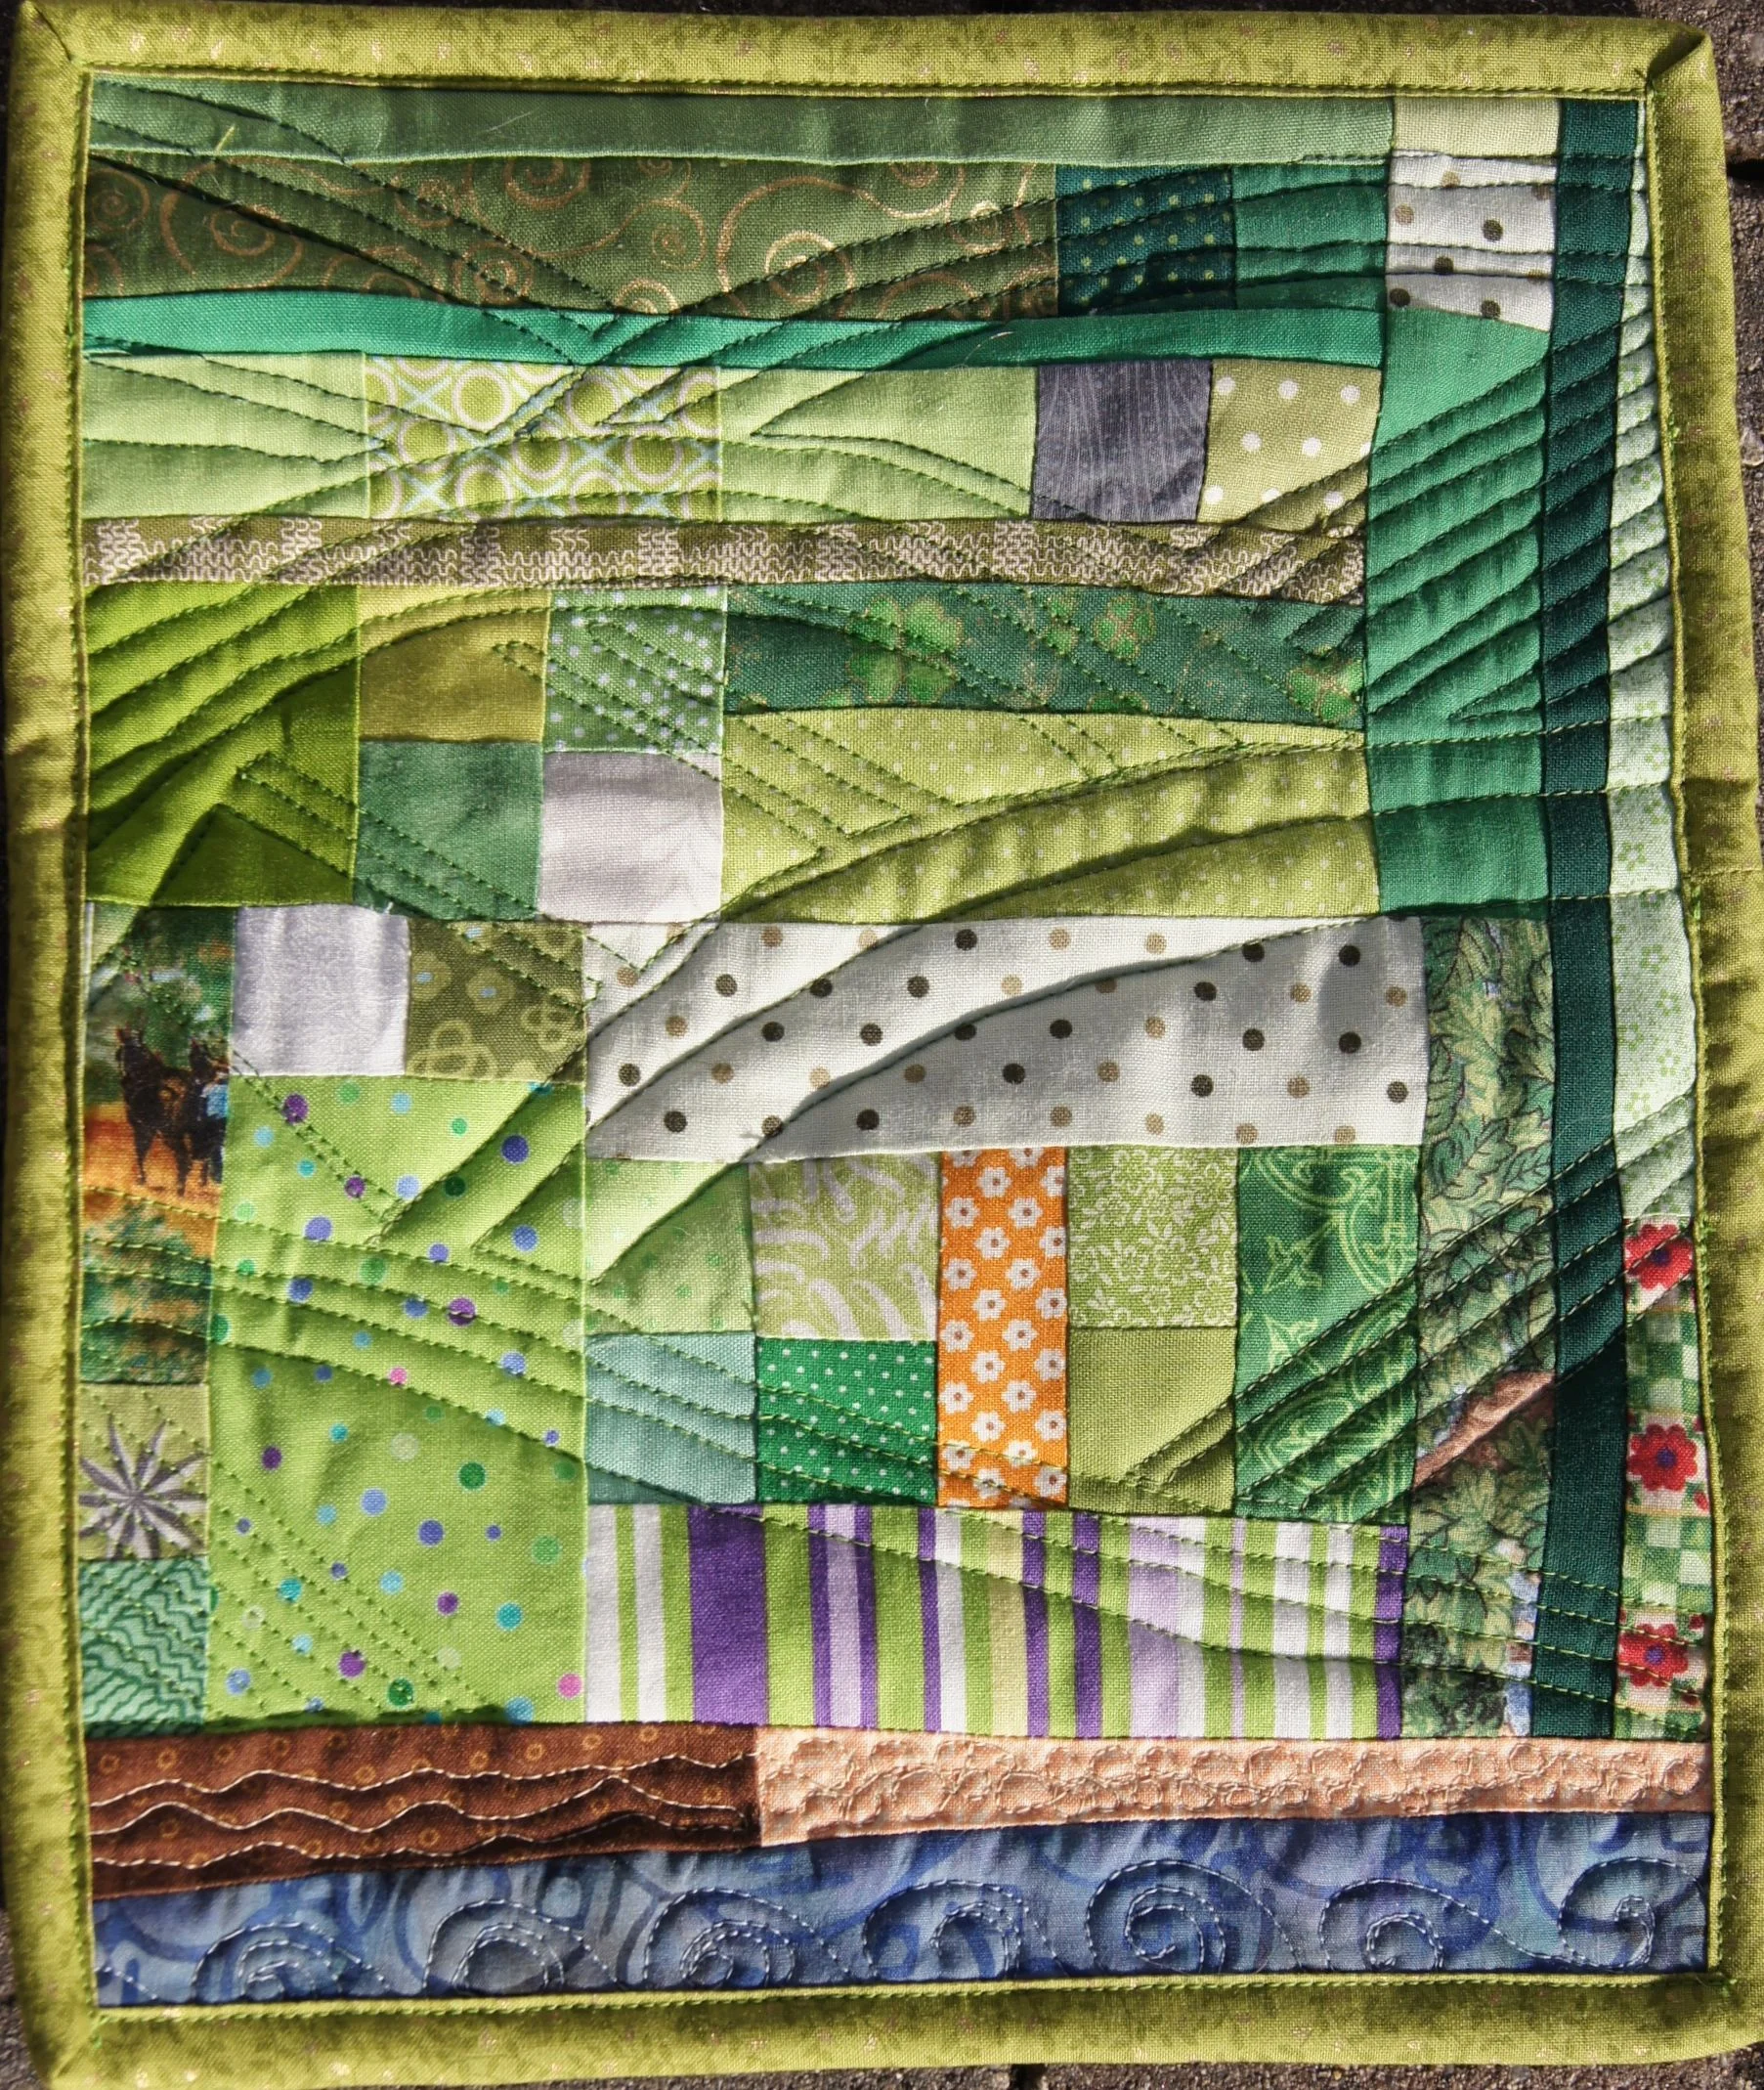
The colors in this mini quilt delight me as does all the movement from the curved piecing.  This little quilt makes SO happy!  It's even the wallpaper on my phone now.  Makes me smile every time I pick up the phone. That adds up to lots of smiles a day!!   : )

Sherri has asked folks posting about quilts made the Scores from her book to share any insights they have about the improv piecing process and/or outcome.  This quilt is named "Lemonaide".  The spelling is non-traditional but the "aide" is spot on for me!  Here are my Insights about working on Score #8.

  • Surprises.  In my case it was NO surprise that working this bias strip pieced score really annoyed me. But when I gave up doing what I didn't want to do and took another path to the piecing, I WAS suprised to discover I was instantly happy with what I was making!  
  • Discoveries.  "Know thyself."  I should have trusted my gut feeling that Bias Strip Petals wasn't the right flower patch for me and skipped it. I'm not sorry I tried Score #8.  There were some seriously un-fun hours working on it but I learned some good stuff in the process. 
  • Satisfactions.  I LOVE the quilt that came together when I started to follow my heart.  
  • Next Steps.  I'll pick a project that sings to my tune next time!  

CALENDAR NOTE:

 The Proper Bostonian Quilters Guild has a Quilt Show starting TOMORROW-- Friday, November 6 and continuing Saturday and Sunday. It's in the Monsignor Donahue Hall, St Theresa School, 40 Saint Theresa Ave, West Roxbury MA 02132.  There will be lots of great quilts, vendors, a Boutique table and a Cafe and a fabulous Raffle Quilt (click the link above to see it!). 2 of my quilts are in the show. Hope to see you there! 

TAGS: The Improv Handbook for Modern Quilters, Modern Improv piecing, Sherri Lynn Wood, Lemonaide, "Lemonaide", Mini Quilt


March 12, 2015

Irish Mini Quilt "40+ Shades of Green"

by Judy Tucker


Irish Mini Quilt   9 3/4" x 11 3/4"  "40+ Shades of Green"  

Irish Mini Quilt   9 3/4" x 11 3/4"  "40+ Shades of Green"  

Irish Mini Quilt   9 3/4" x 11 3/4"  "40+ Shades of Green"  

Irish Mini Quilt   9 3/4" x 11 3/4"  "40+ Shades of Green"  

With St Patrick's Day just around the corner, I made a little Irish Mini quilt.  

Ireland: ocean, beach and green hills. There are three 1 inch blocks in the upper half of the quilt that run almost on a diagonal.  White, light grey and dark grey, these blocks are symbolic sheep on the hills.  There's a realistic horse pulling a wagon on the far left if you look, a couple of shamrocks too!

This mini quilt was totally improv pieced. I pulled most of the fabrics out of my bag of strings. The rest of the pieces came my collection of pre-trimmed scraps, 1 1/2 inch squares and 2 inch squares. 

Because the piecing was truly improv, the completed top was off kilter. (It was more off kilter than shown in the picture below!  The tilt bothered me enough that I only took a detail photo of the top!)  I wasn't at all sure this little quilt was going to work.  But once I started quilting the curves of the hills, it was just fine!

Quilt 40+ shades of Green Irish Mini top.jpg


While the celebration officially isn't until next Tuesday, it's never too early to wish you a Happy St. Patrick's Day!

TAGS: Mini Quilt, Irish Quilt, improv piecing, modern quilt


December 17, 2014

Hanukkah Mini Quilt

by Judy Tucker


Hanukkah Mini Quilt 9 x 15 inches, quilting cotton, flannel and felt

Hanukkah Mini Quilt 9 x 15 inches, quilting cotton, flannel and felt

This weekend I went to a guild holiday party.  There were some Christmas items in the gift grab but nothing for Hanukkah.  I celebrate Christmas so the grab item I took to the party was my Selvage Christmas Tree Mug Rug. 

I realized the strip piecing I used for the tree mug rug could easily be adapted to make a Hanukkah Menorah.  

For this mini quilt I used strips of quilting cotton 1 1/4 inches x 3 inches for the 8 candles and  1 1/4 inches x 4 inches for the central candle.  The background material is flannel.  The strips between the candle strips were cut 1 x 3 inches.  The horizontal strips just above the 8 candles, adjacent to the central candle were cut 1 1/2 inches x width needed for the line of candles.  The other strips I cut to sizes that I thought looked nice.

There is a single selvage in this mini quilt.  It's the selvage from the striped quilting cotton.  I cut the strip to show the numbers from 1 to 8 --the number of days of Hanukkah.

Quilt Hanukkah flames.jpg

The flames are pieces of felt.  I glued a tiny square of the rough side of a hook and loop fastening material on the back of each flame to help it catch and stay on the flannel of the mini quilt.

I put the flames on a piece of turquoise felt  to keep them together until needed. 

With the quilting, this mini quilt is just stiff enough to stand on its own when placed upright in a slightly curved position.  That was an unexpected bonus for this 9 x 15 inch mini quilt!  What fun!


Happy Hanukkah!


TAGS: Hanukkah, Mini Quilt, Selvages


Powered by Squarespace 7