Search
  • Information
    • About
    • Contact
    • Privacy Policy
  • Blog
  • Subscribe
  • Tutorials
    • Tutorials
    • Doll Clothes: Photos and some Patterns
  • Suggested Reading
  • Quilts: My Original Designs
  • Gallery: Color Studies
  • Gallery: Quilts I've Made
  • Doll Making Blog Posts
  • Recent blog posts
  • Quilts Based on The Improv Handbook for Modern Quilters
Close
Menu
Search
Close
  • Information
    • About
    • Contact
    • Privacy Policy
  • Blog
  • Subscribe
  • Tutorials
    • Tutorials
    • Doll Clothes: Photos and some Patterns
  • Suggested Reading
  • Quilts: My Original Designs
  • Gallery: Color Studies
  • Gallery: Quilts I've Made
  • Doll Making Blog Posts
  • Recent blog posts
  • Quilts Based on The Improv Handbook for Modern Quilters
Menu

Sleeping Dog Quilts

SLEEPING DOG QUILTS

September 3, 2020

Peg Butterflies

by Judy Tucker


Peg Doll Butterflies

Peg Doll Butterflies

Peg Doll Butterflies

Peg Doll Butterflies

I was wondering what to do with the little wood peg bunting baby or bee pegs which I purchased from A Child's Dream a while back. Bees were the obvious choice but because I planned to make a mobile, I wanted something else. Butterflies!! That’s the perfect solution.

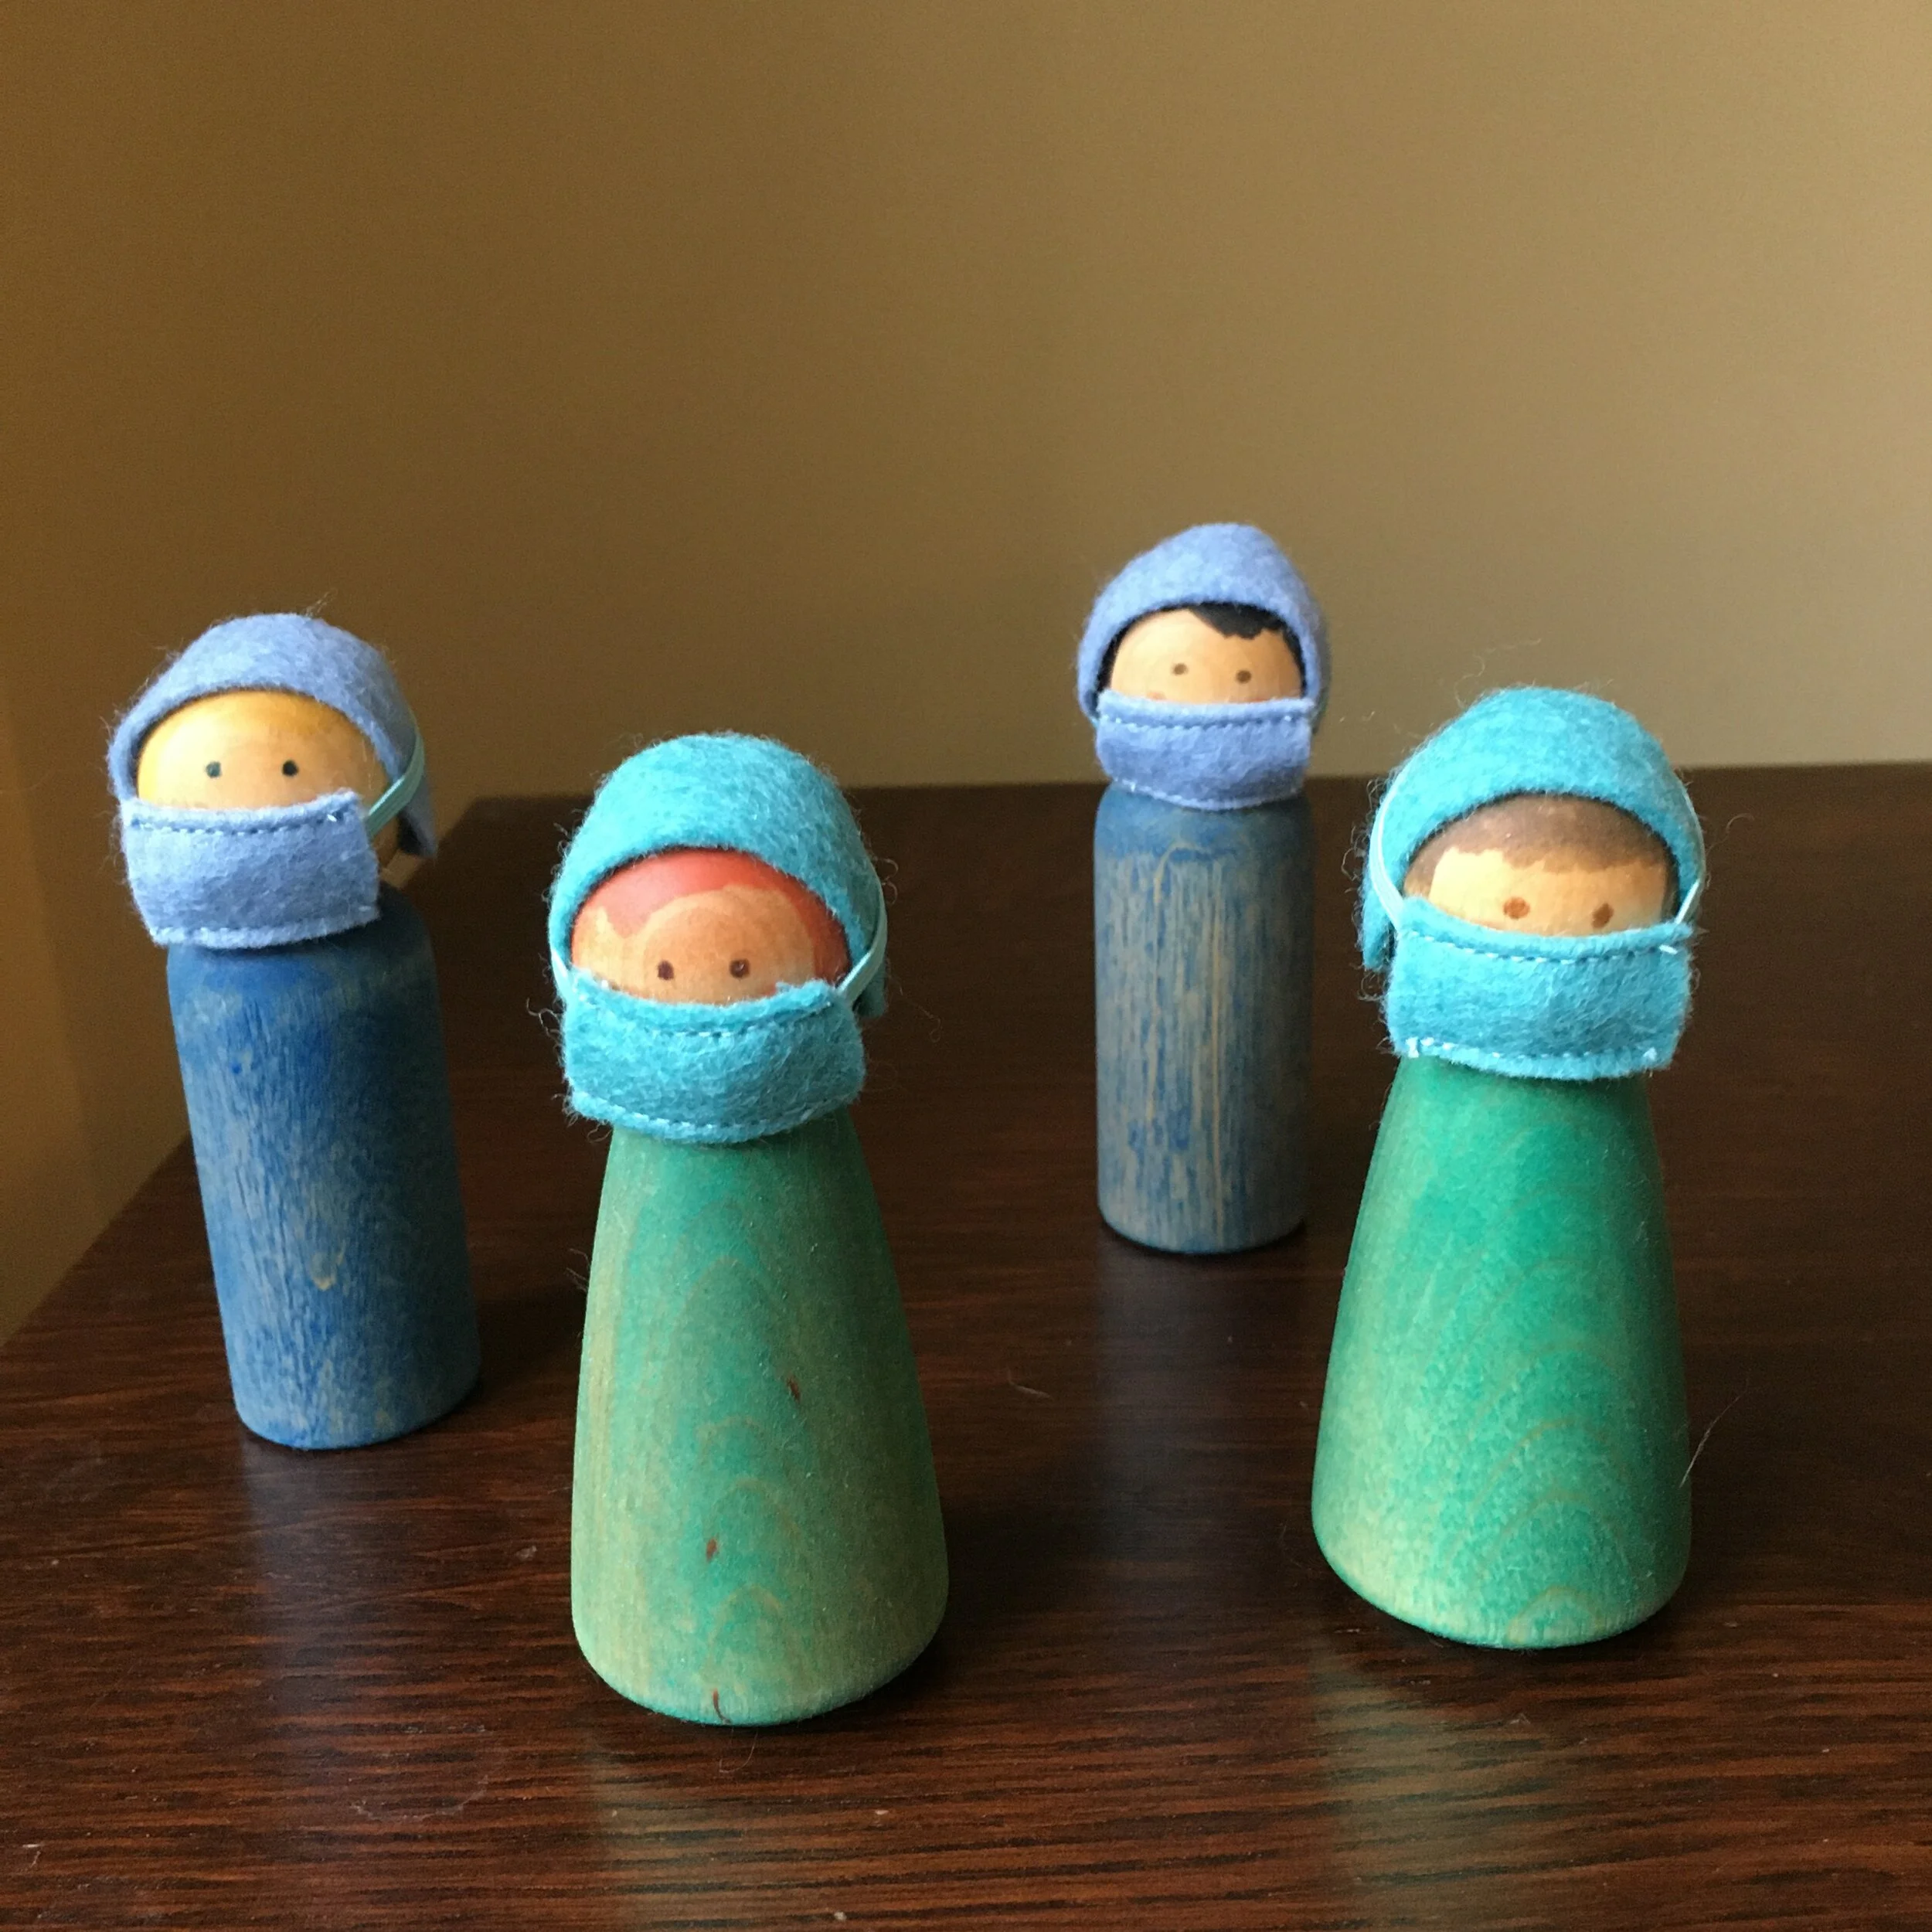
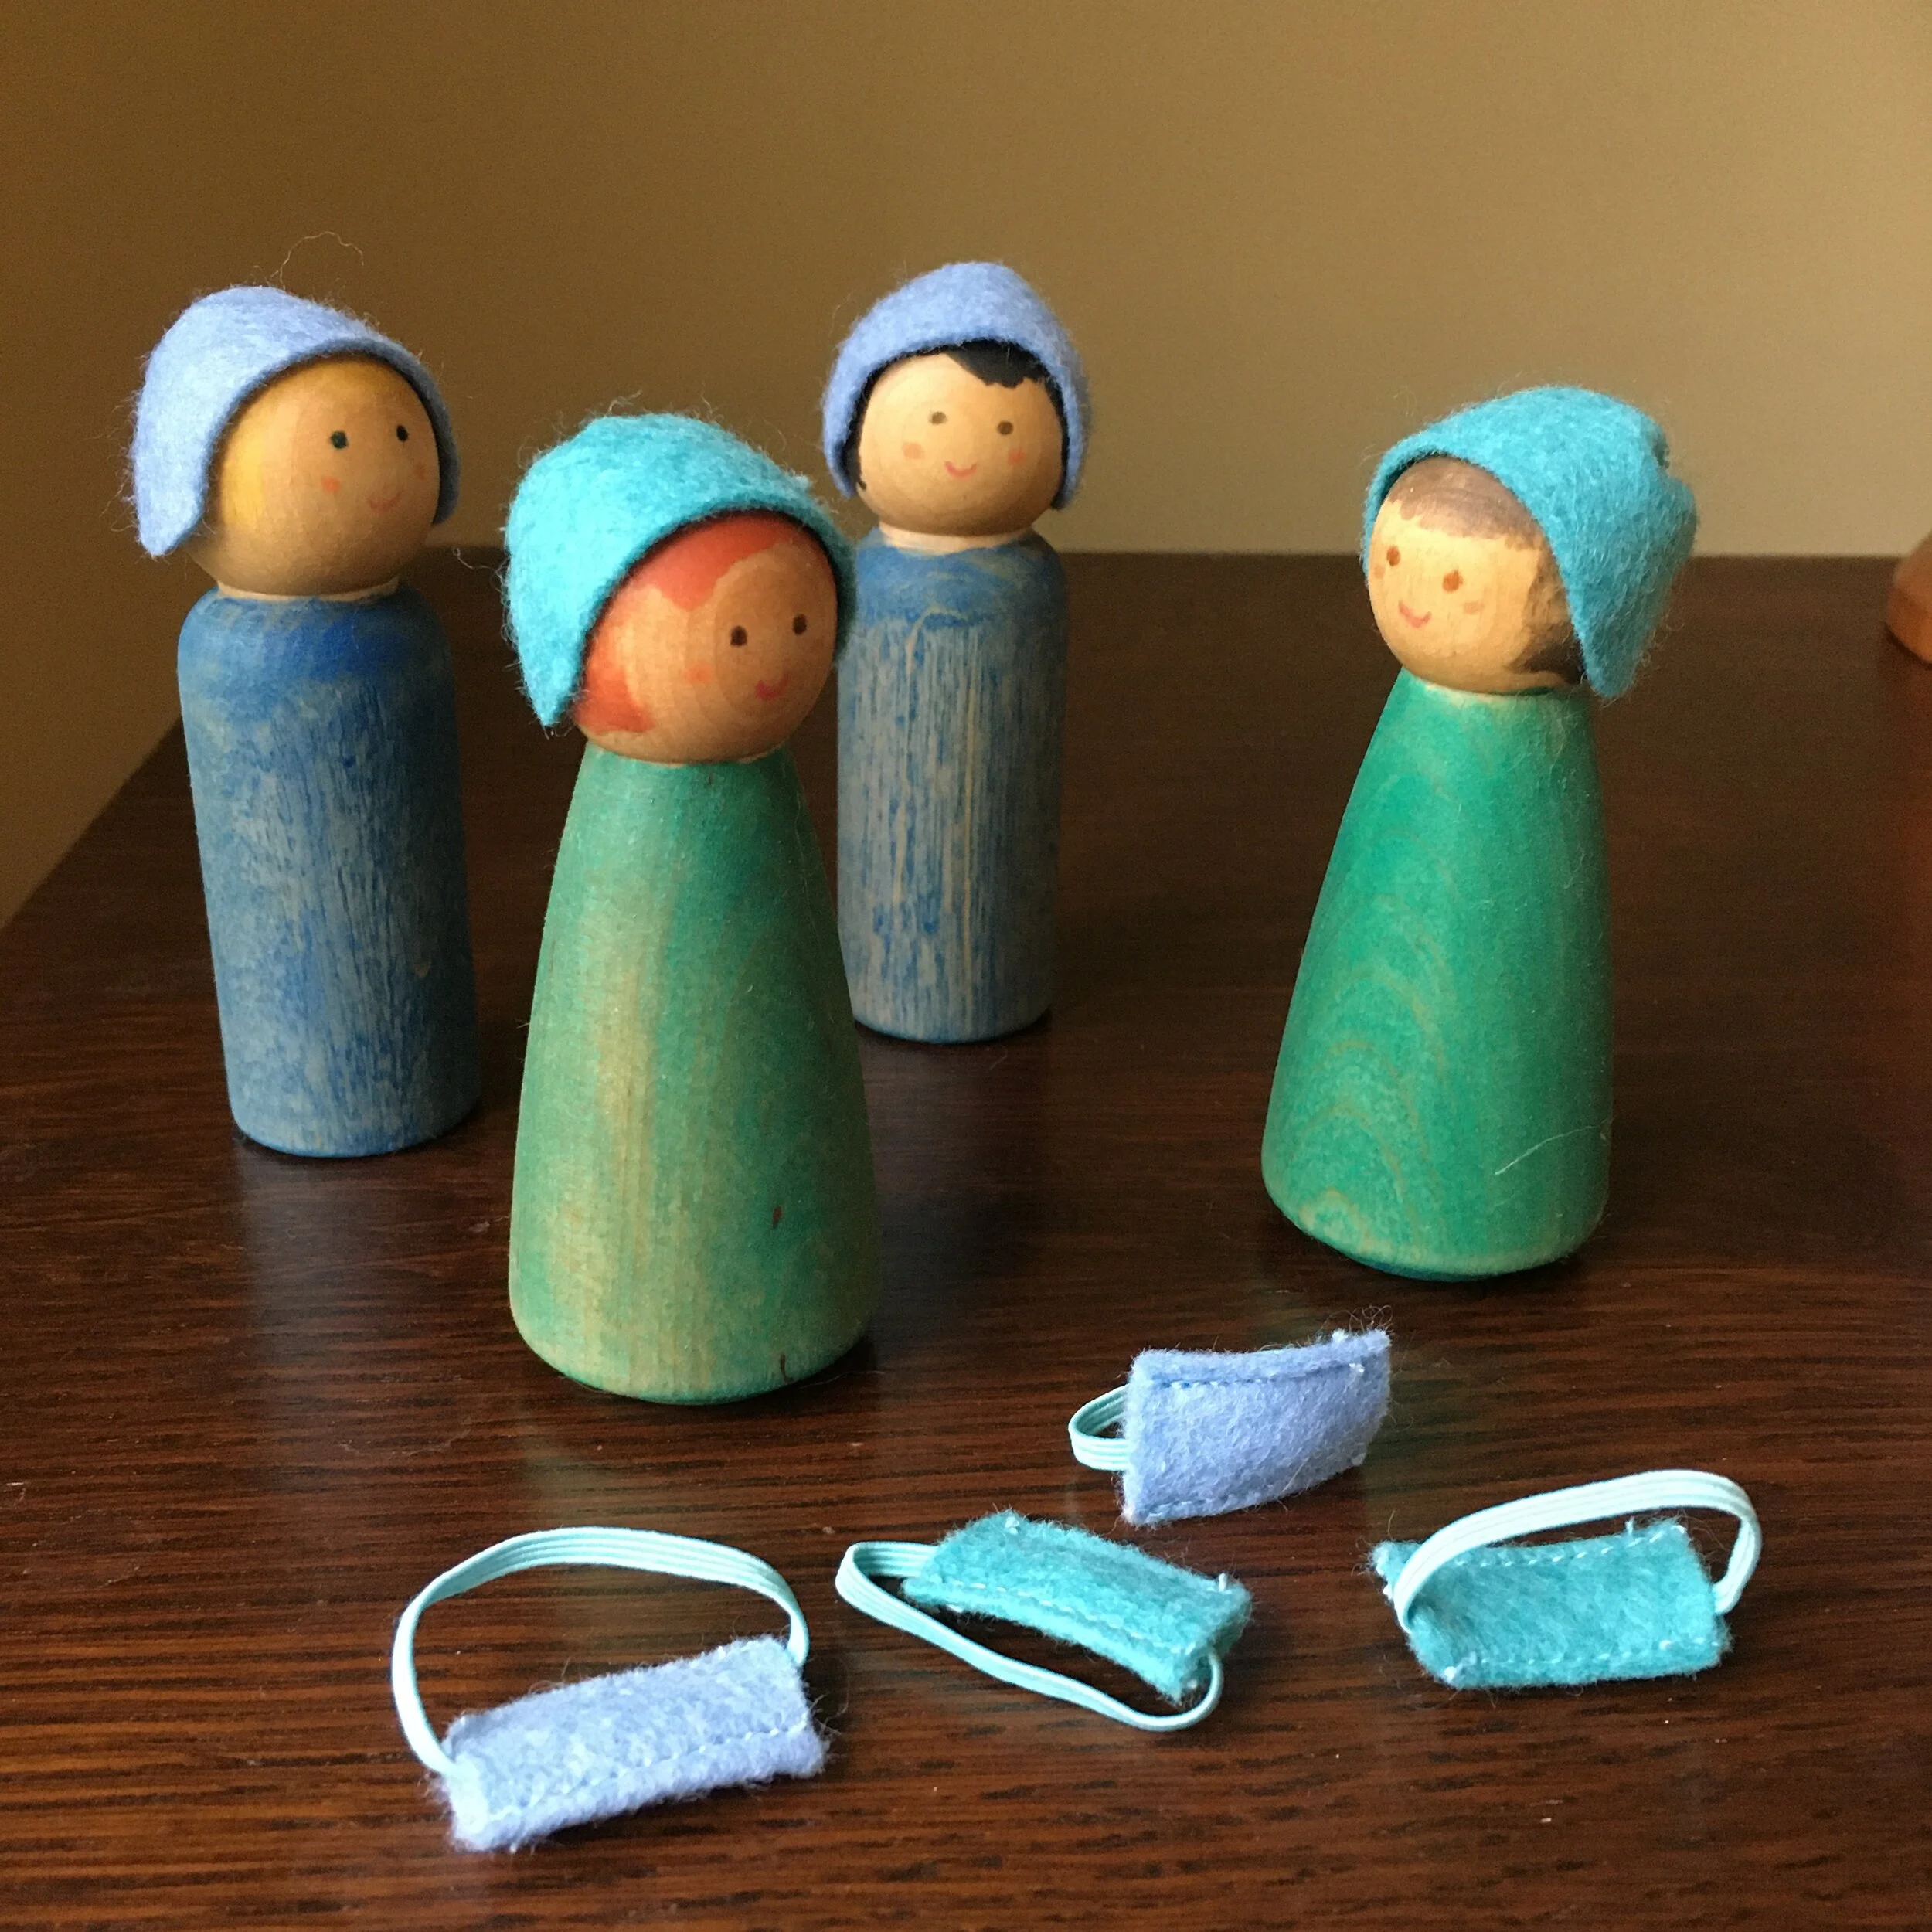
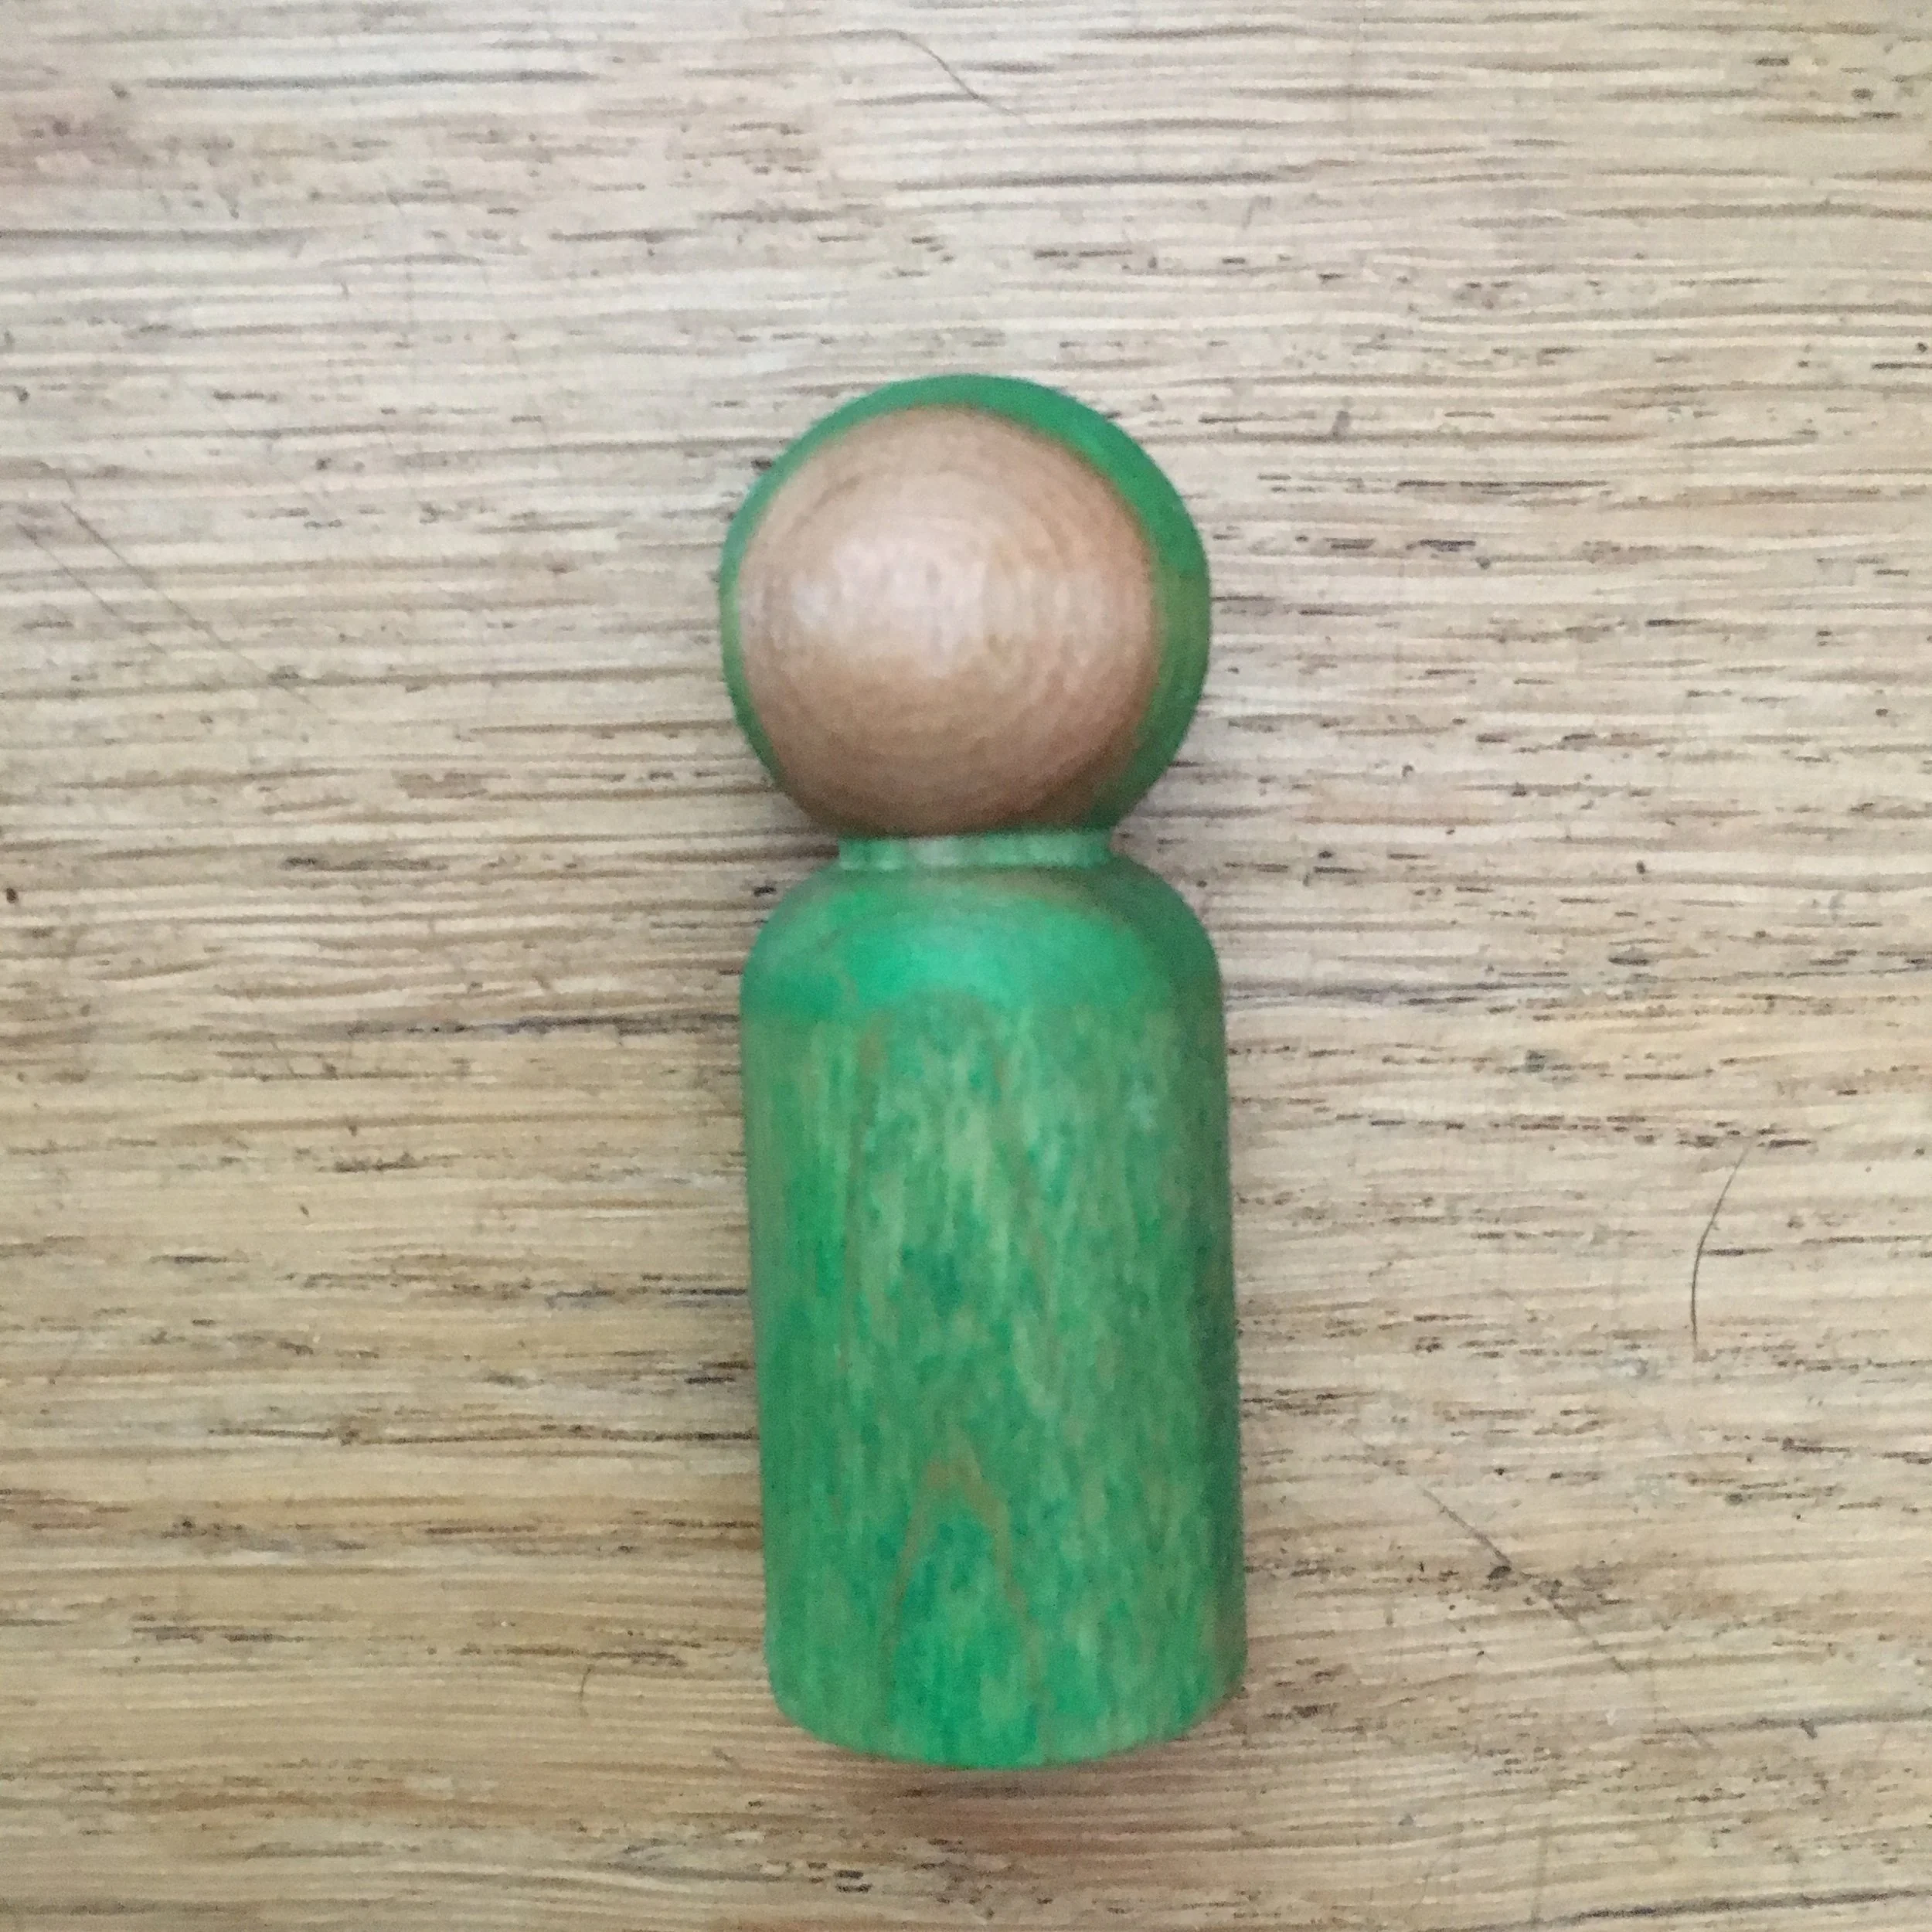
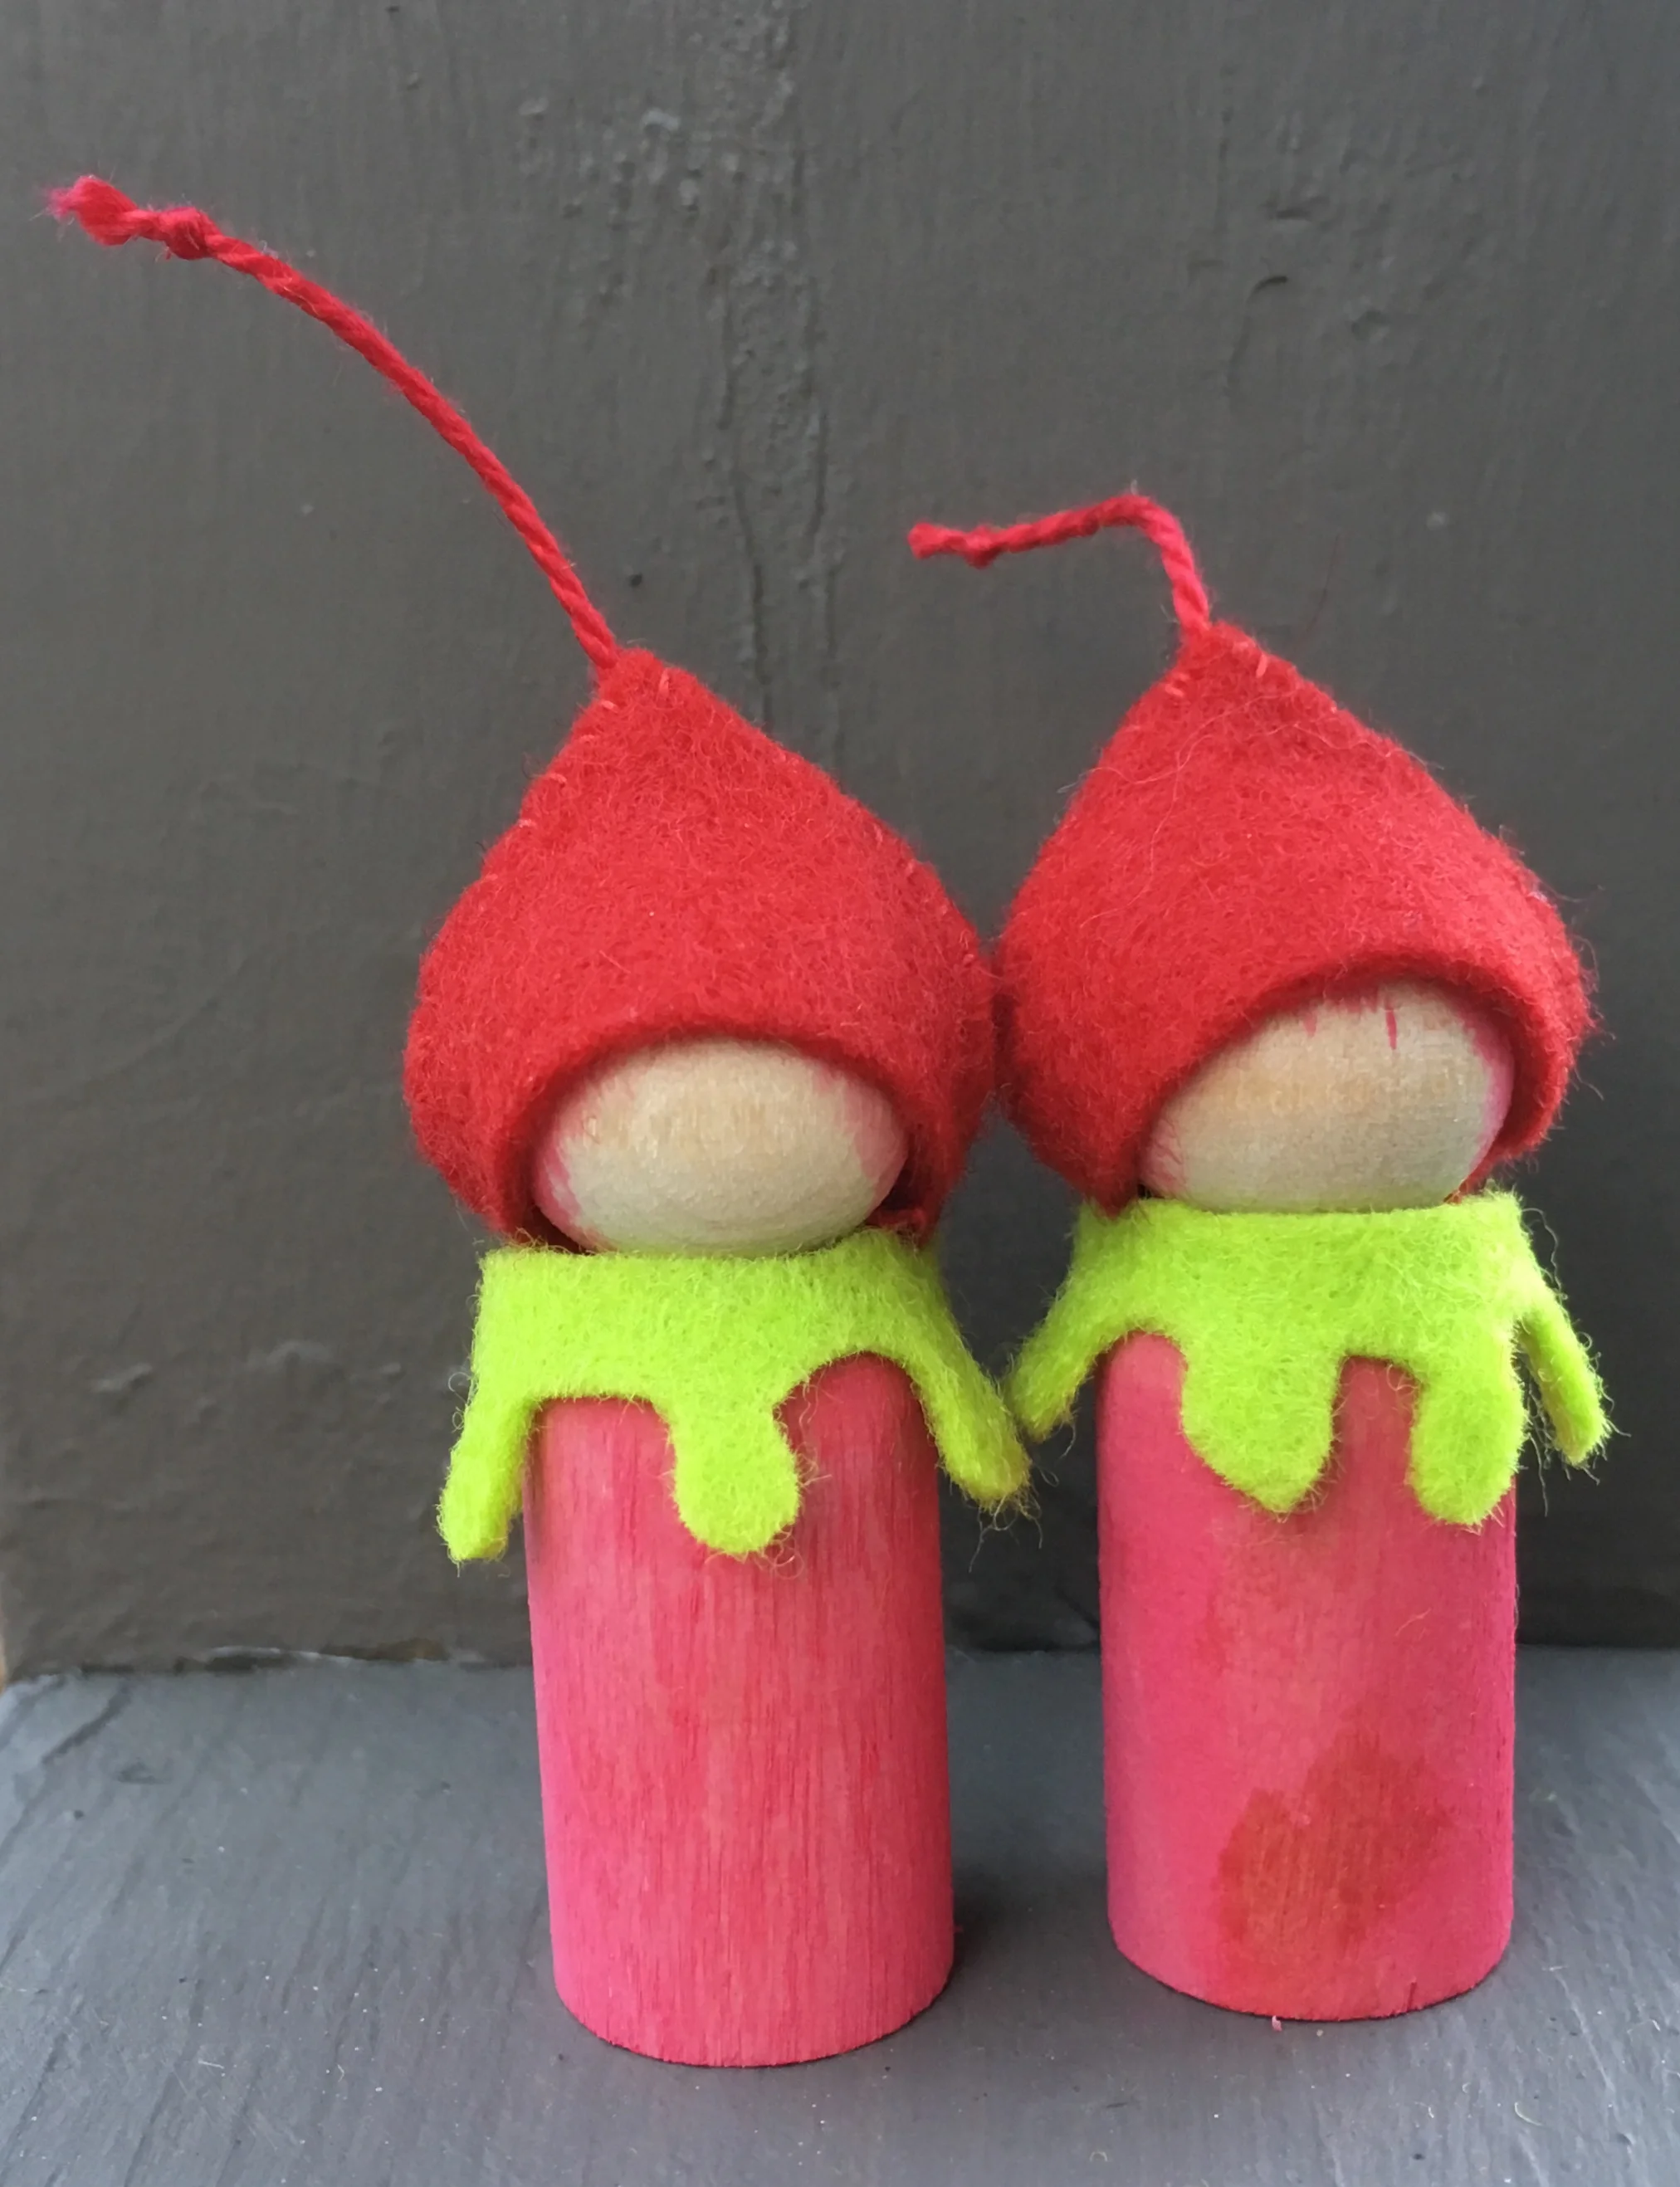
First I painted by body of each butterfly with a different color. The heads are all painted grey. After the paint dried, the wooden peg is sealed with bees wax polish.

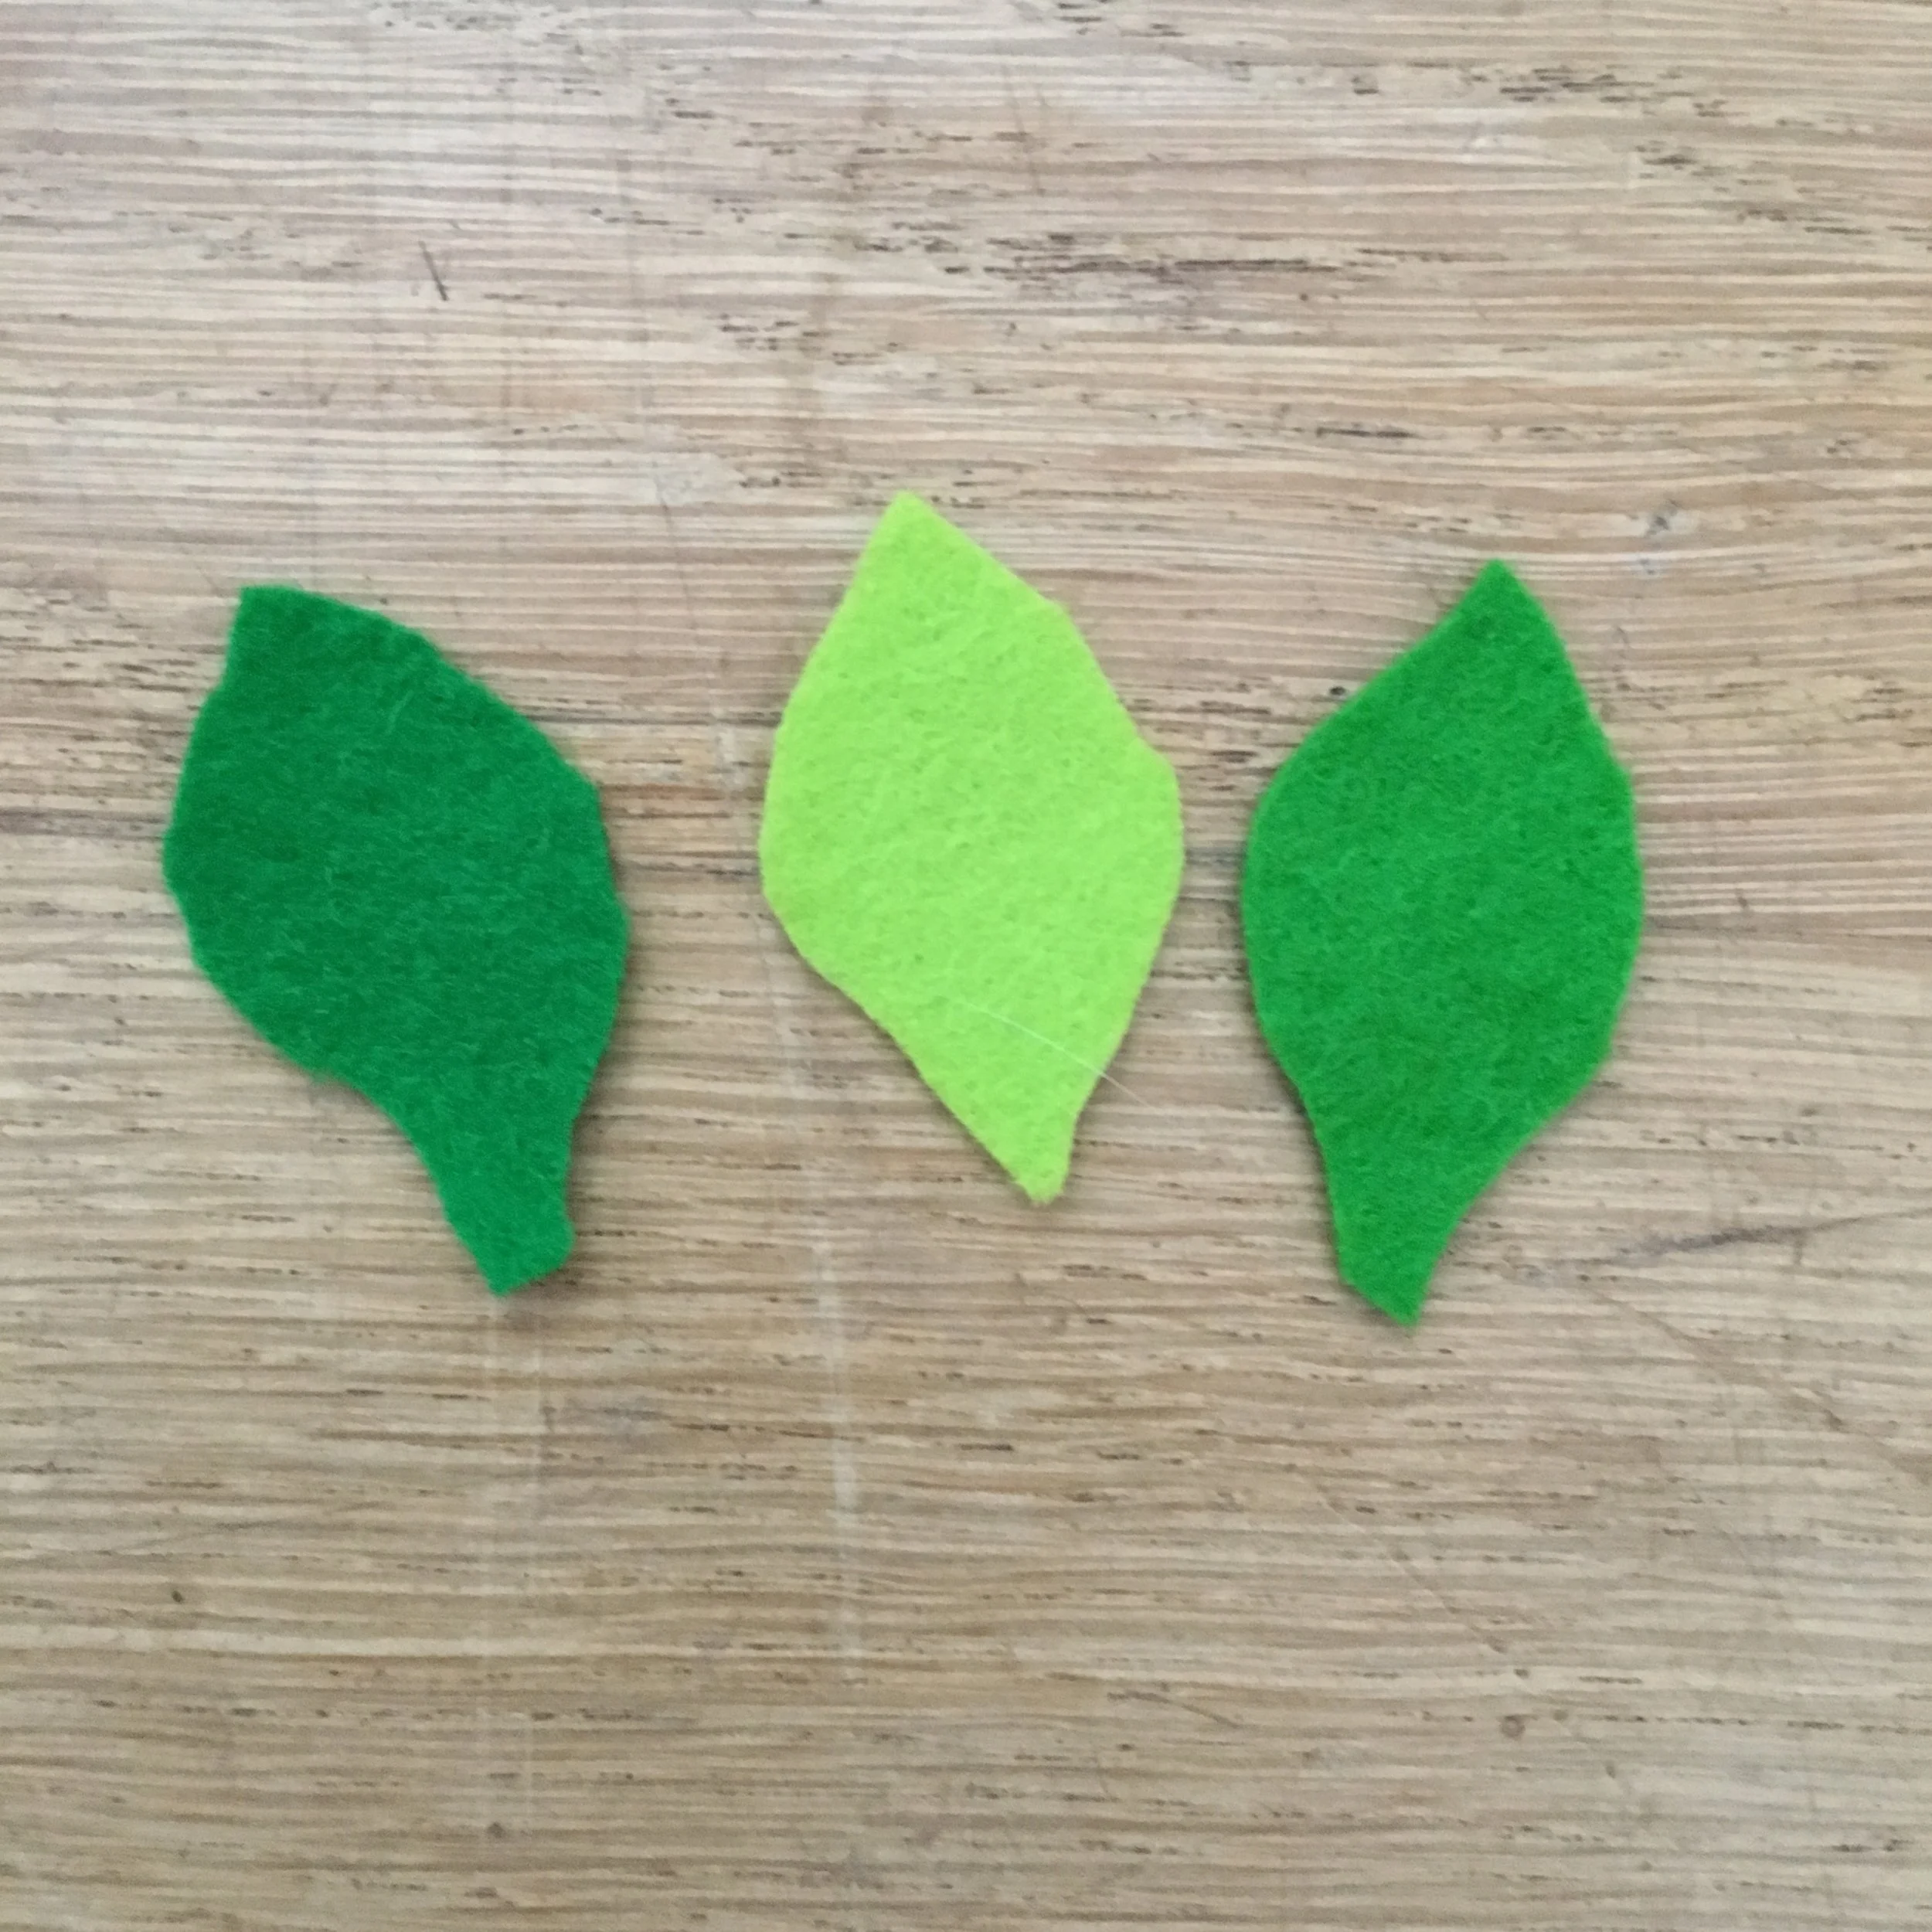
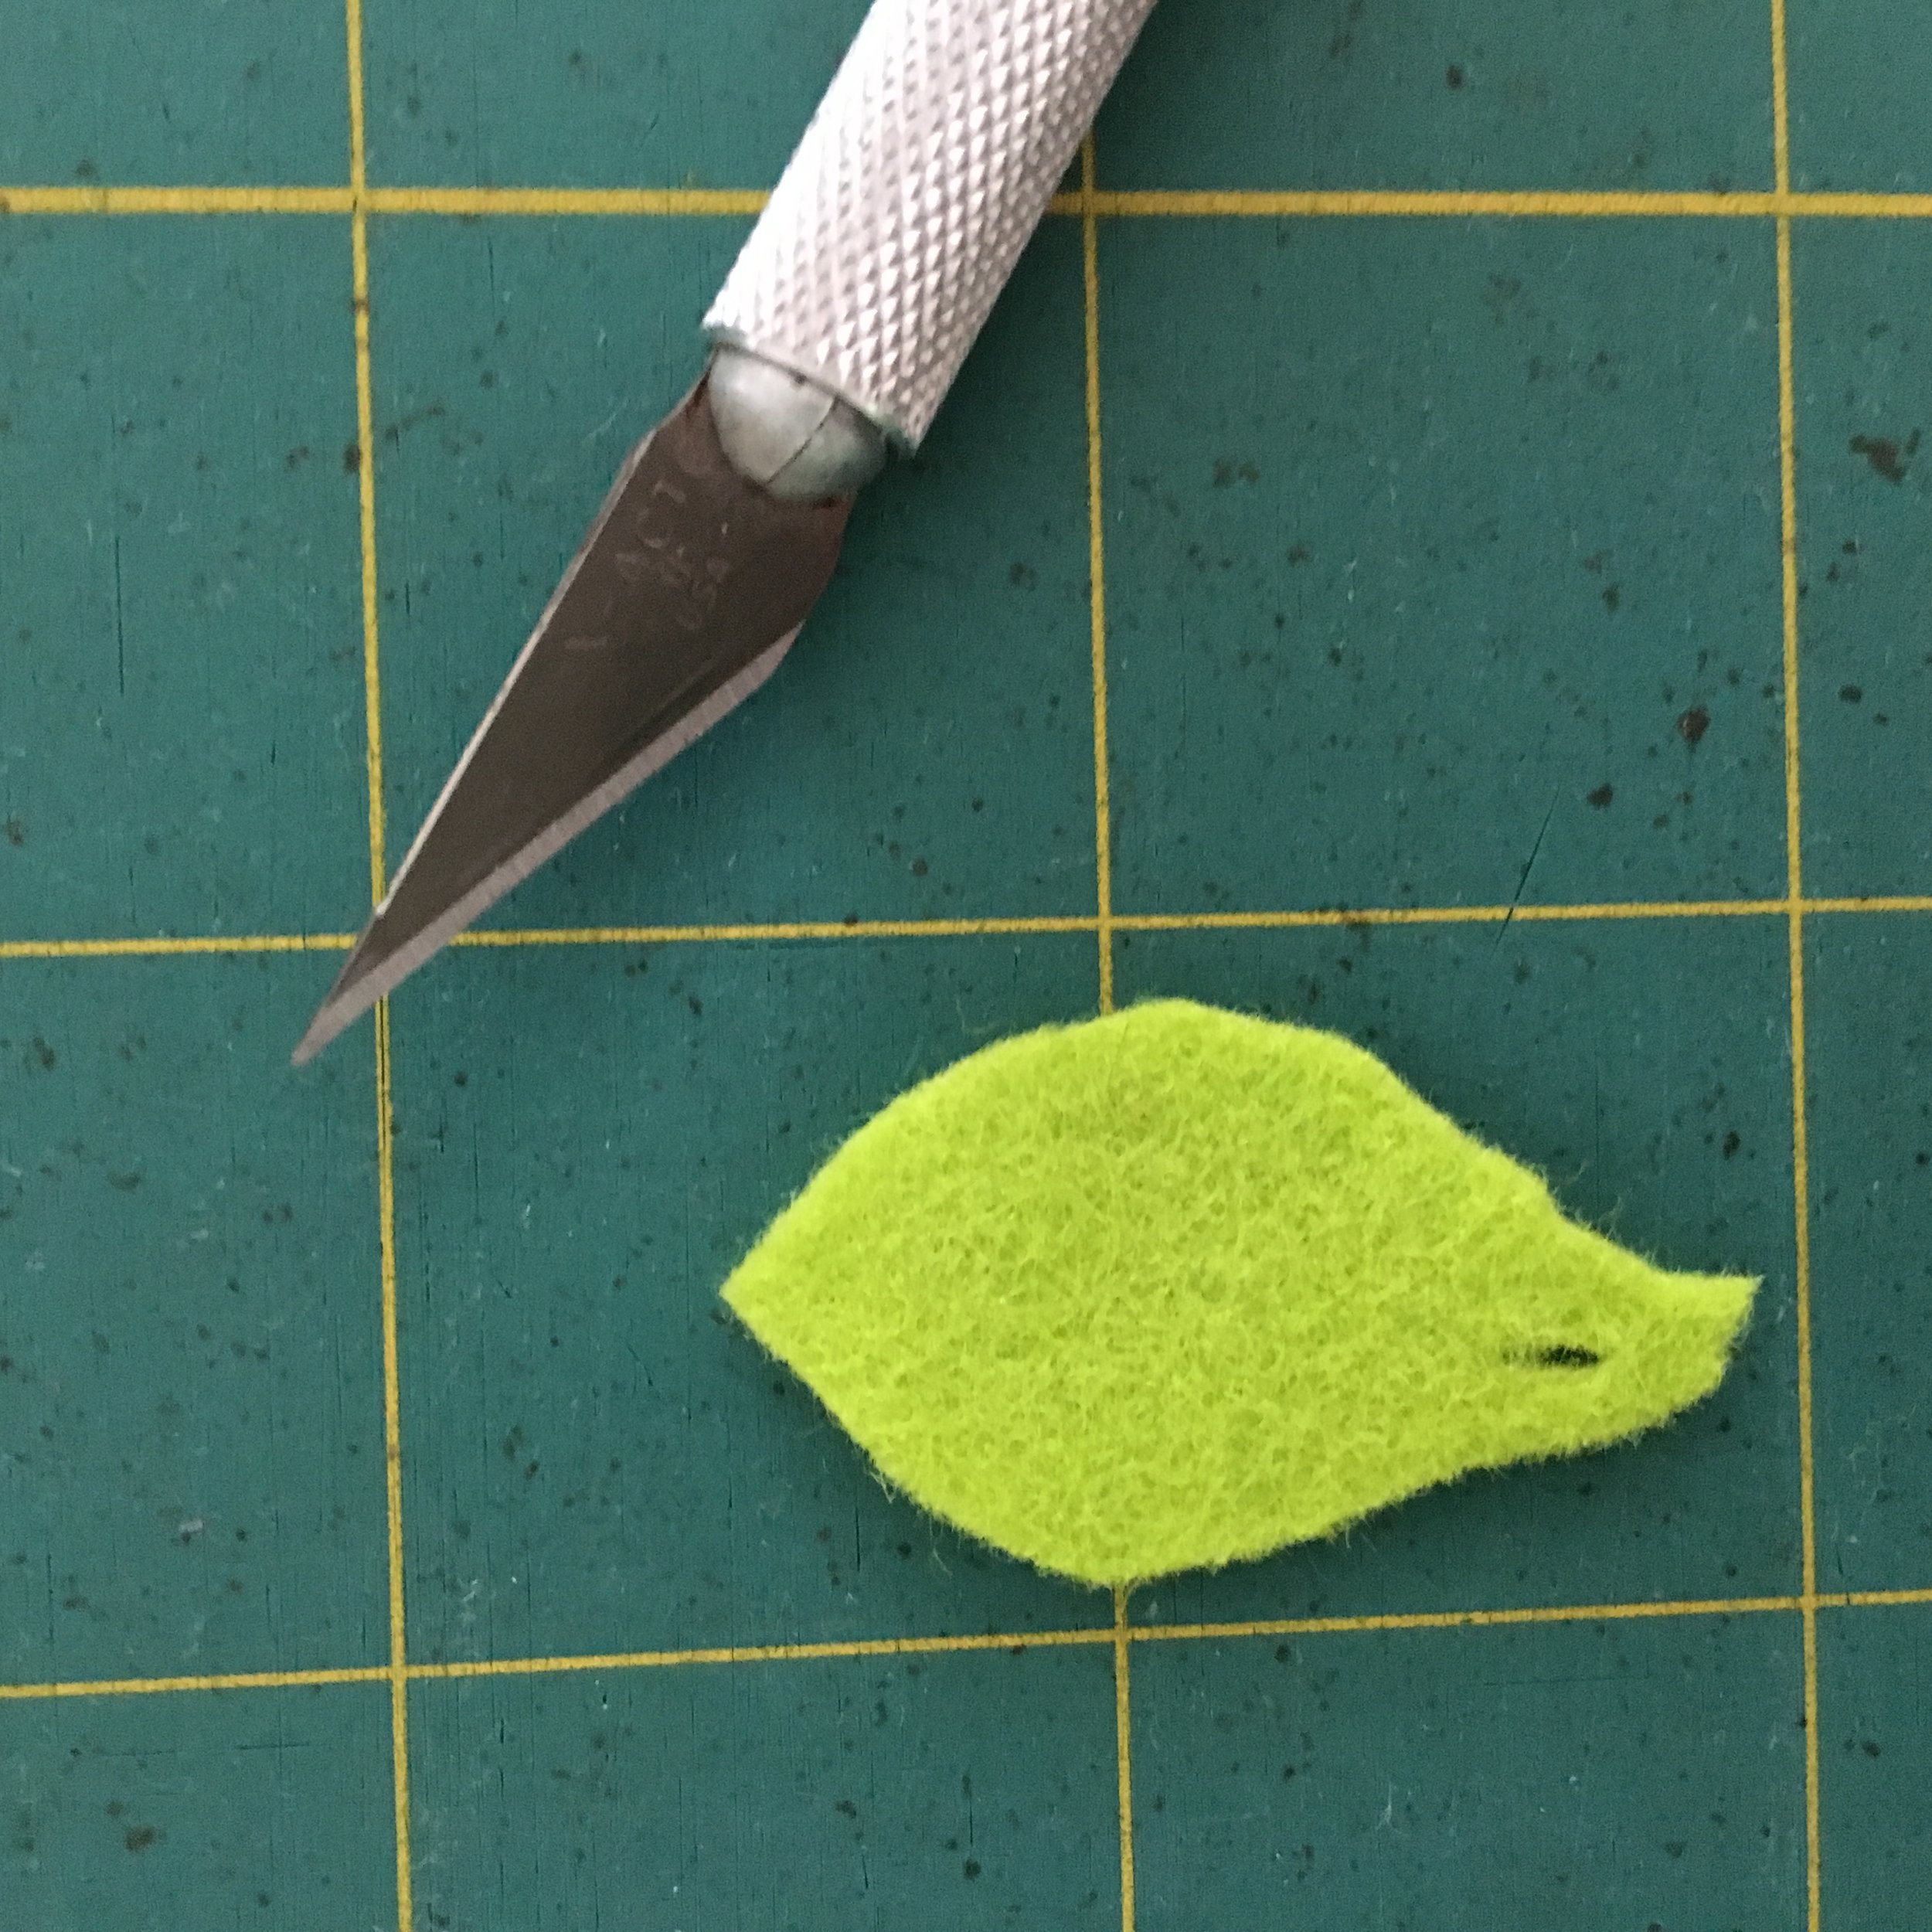
The butterfly wings are cut out of wool felt to match (or coordinate with) the body of each butterfly.

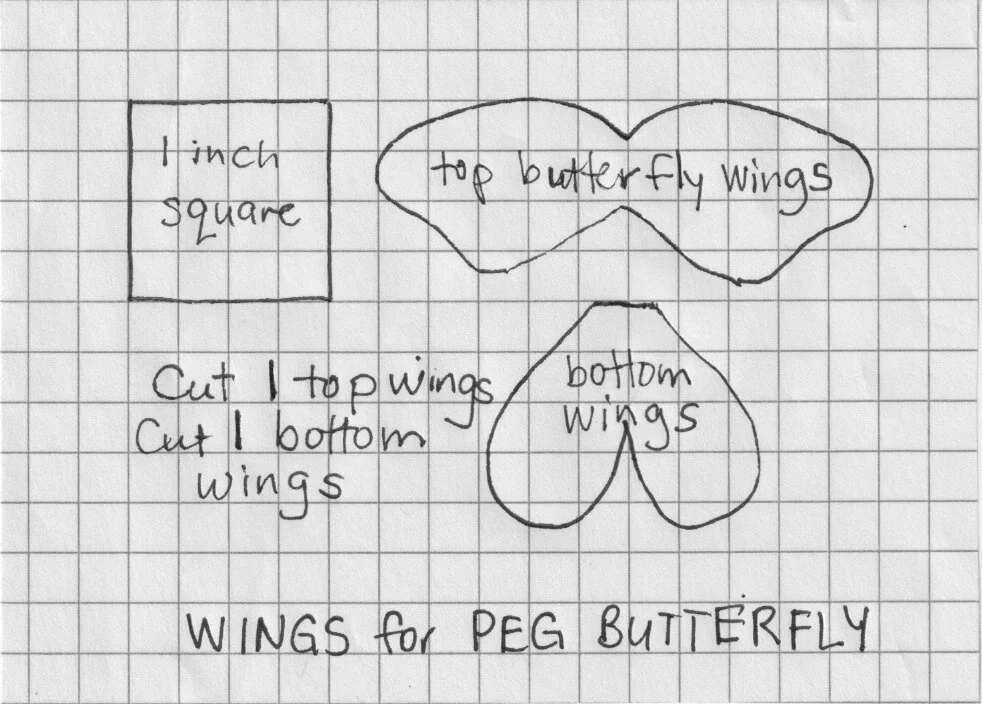
Here are the two pattern pieces to make the top and bottom butterfly wings. Print the pattern at 100% and check the box on your printed pattern to make sure the 1 inch box measures 1 inch.

This is what the pattern looks like. If you don’t have a printer, you can draw your own wings based on this picture.

PegButterflyWIngsPattern.jpg

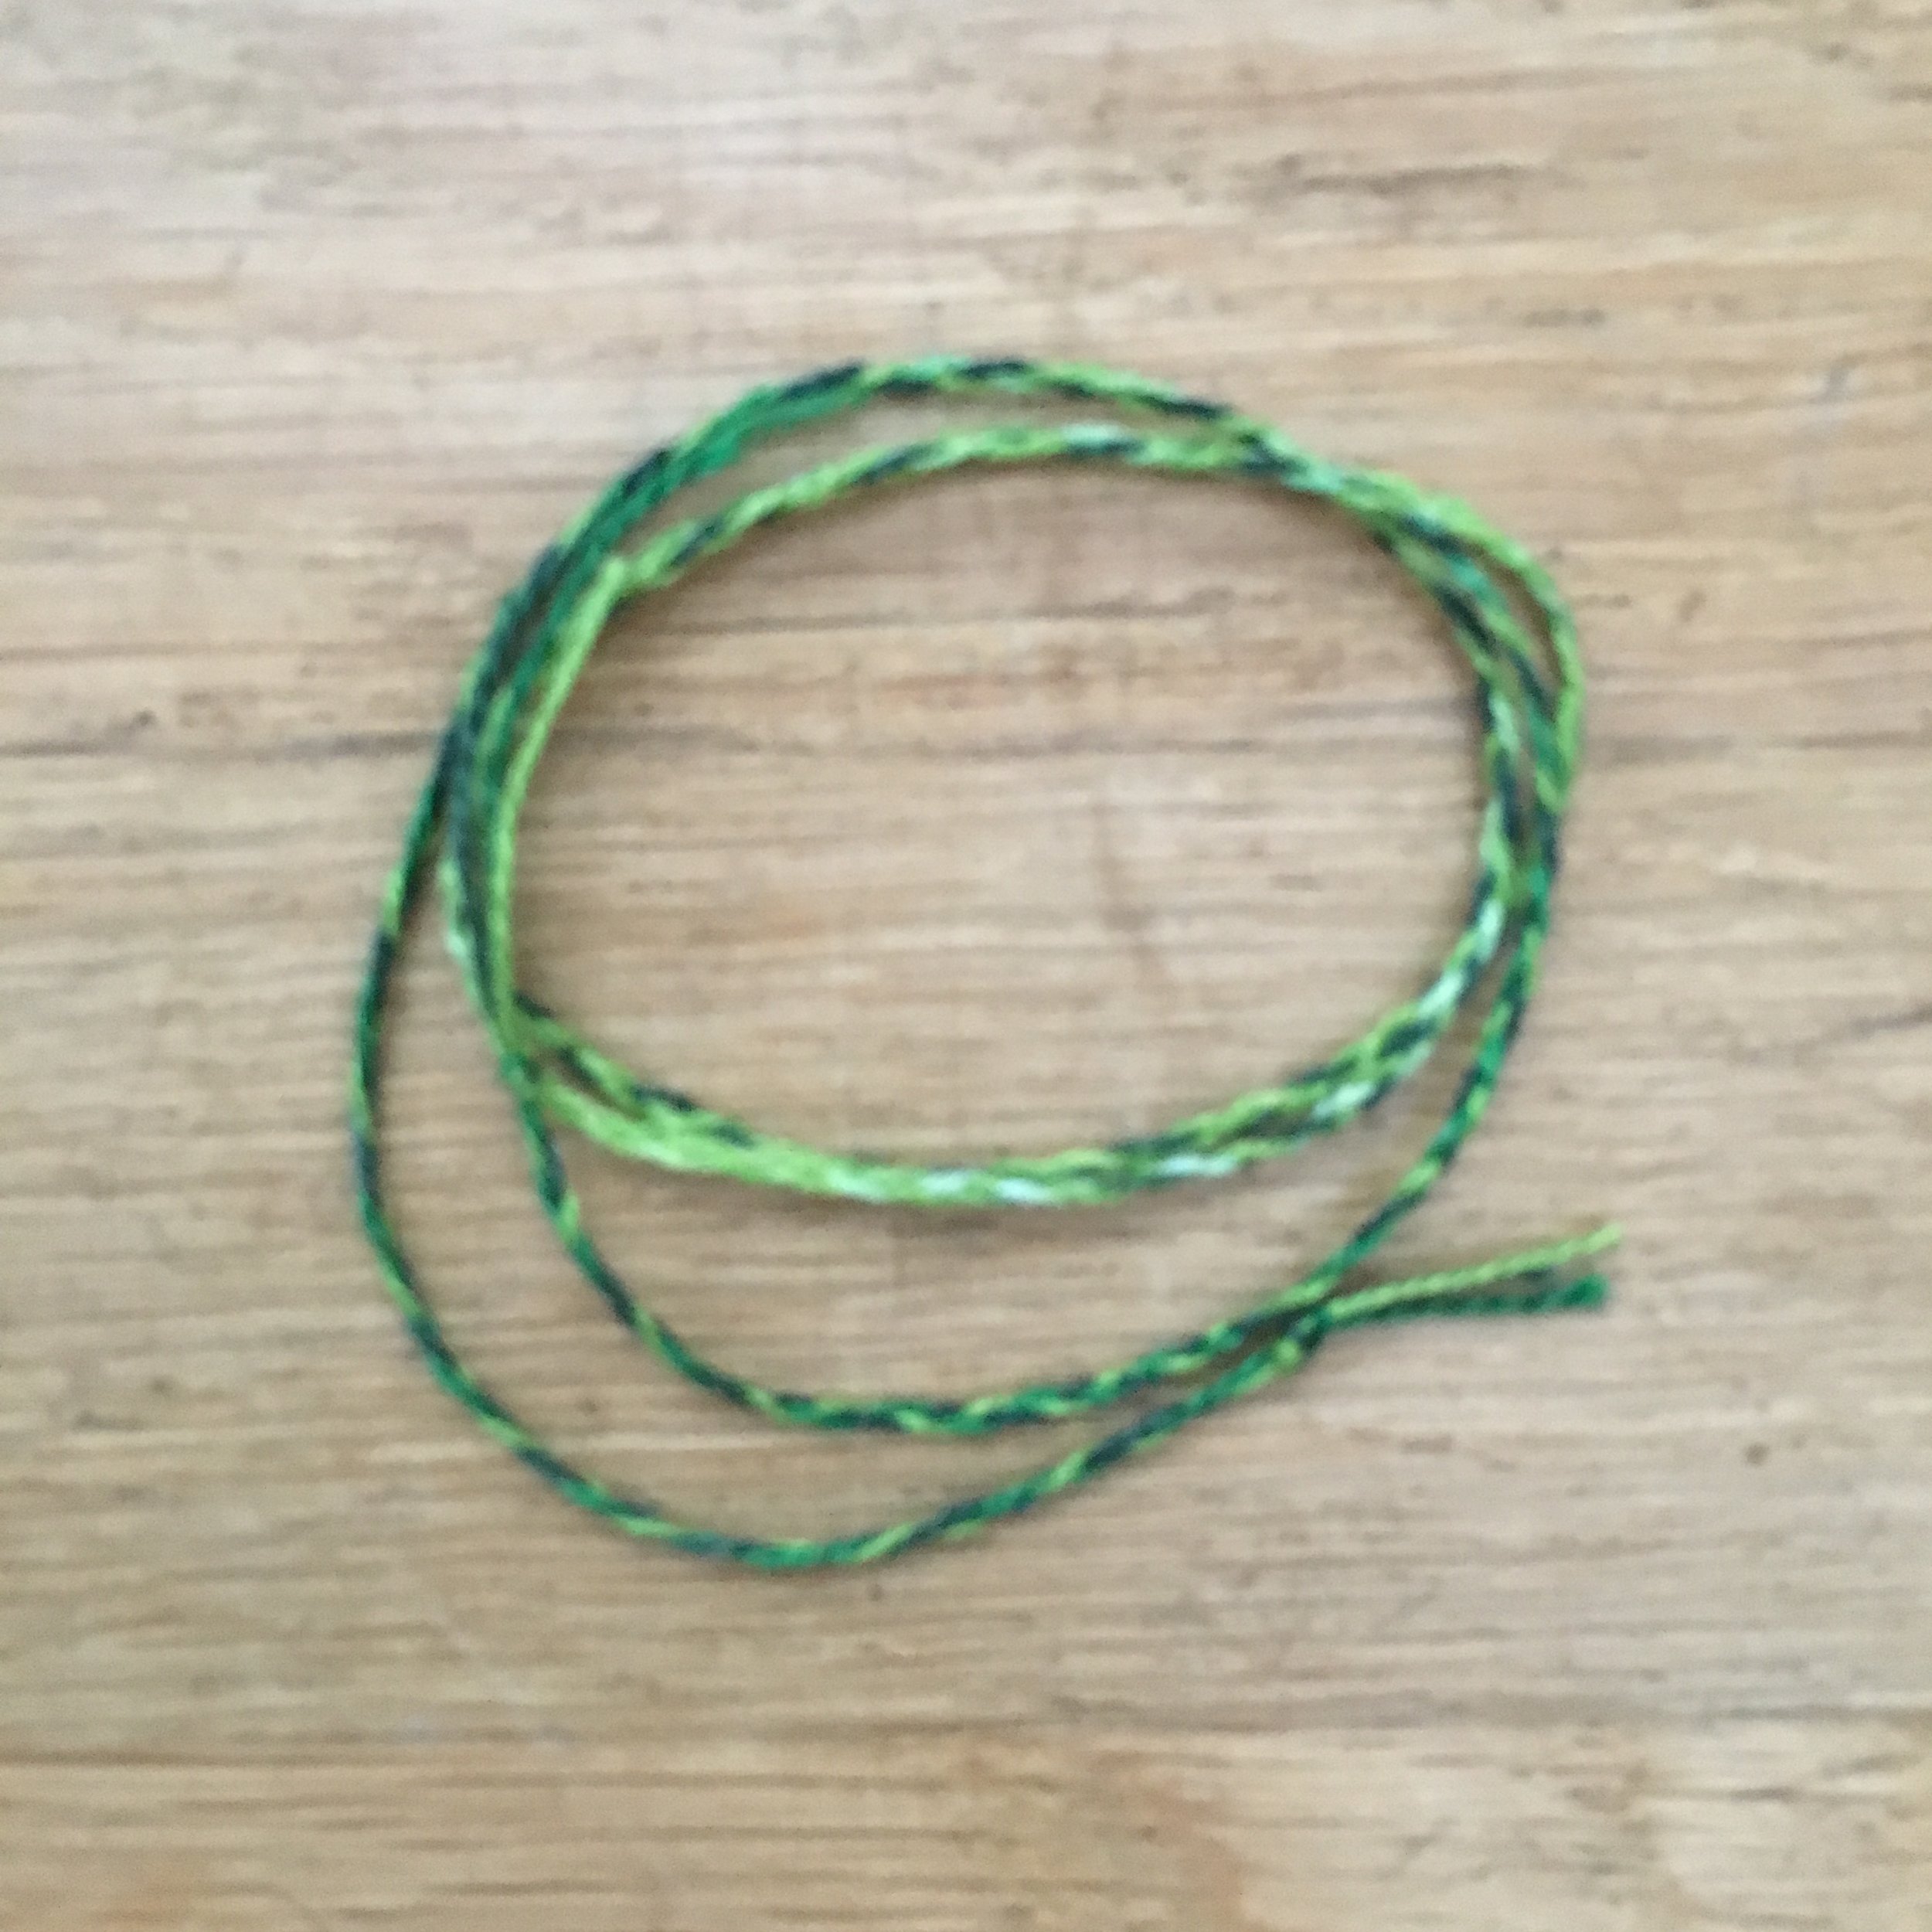
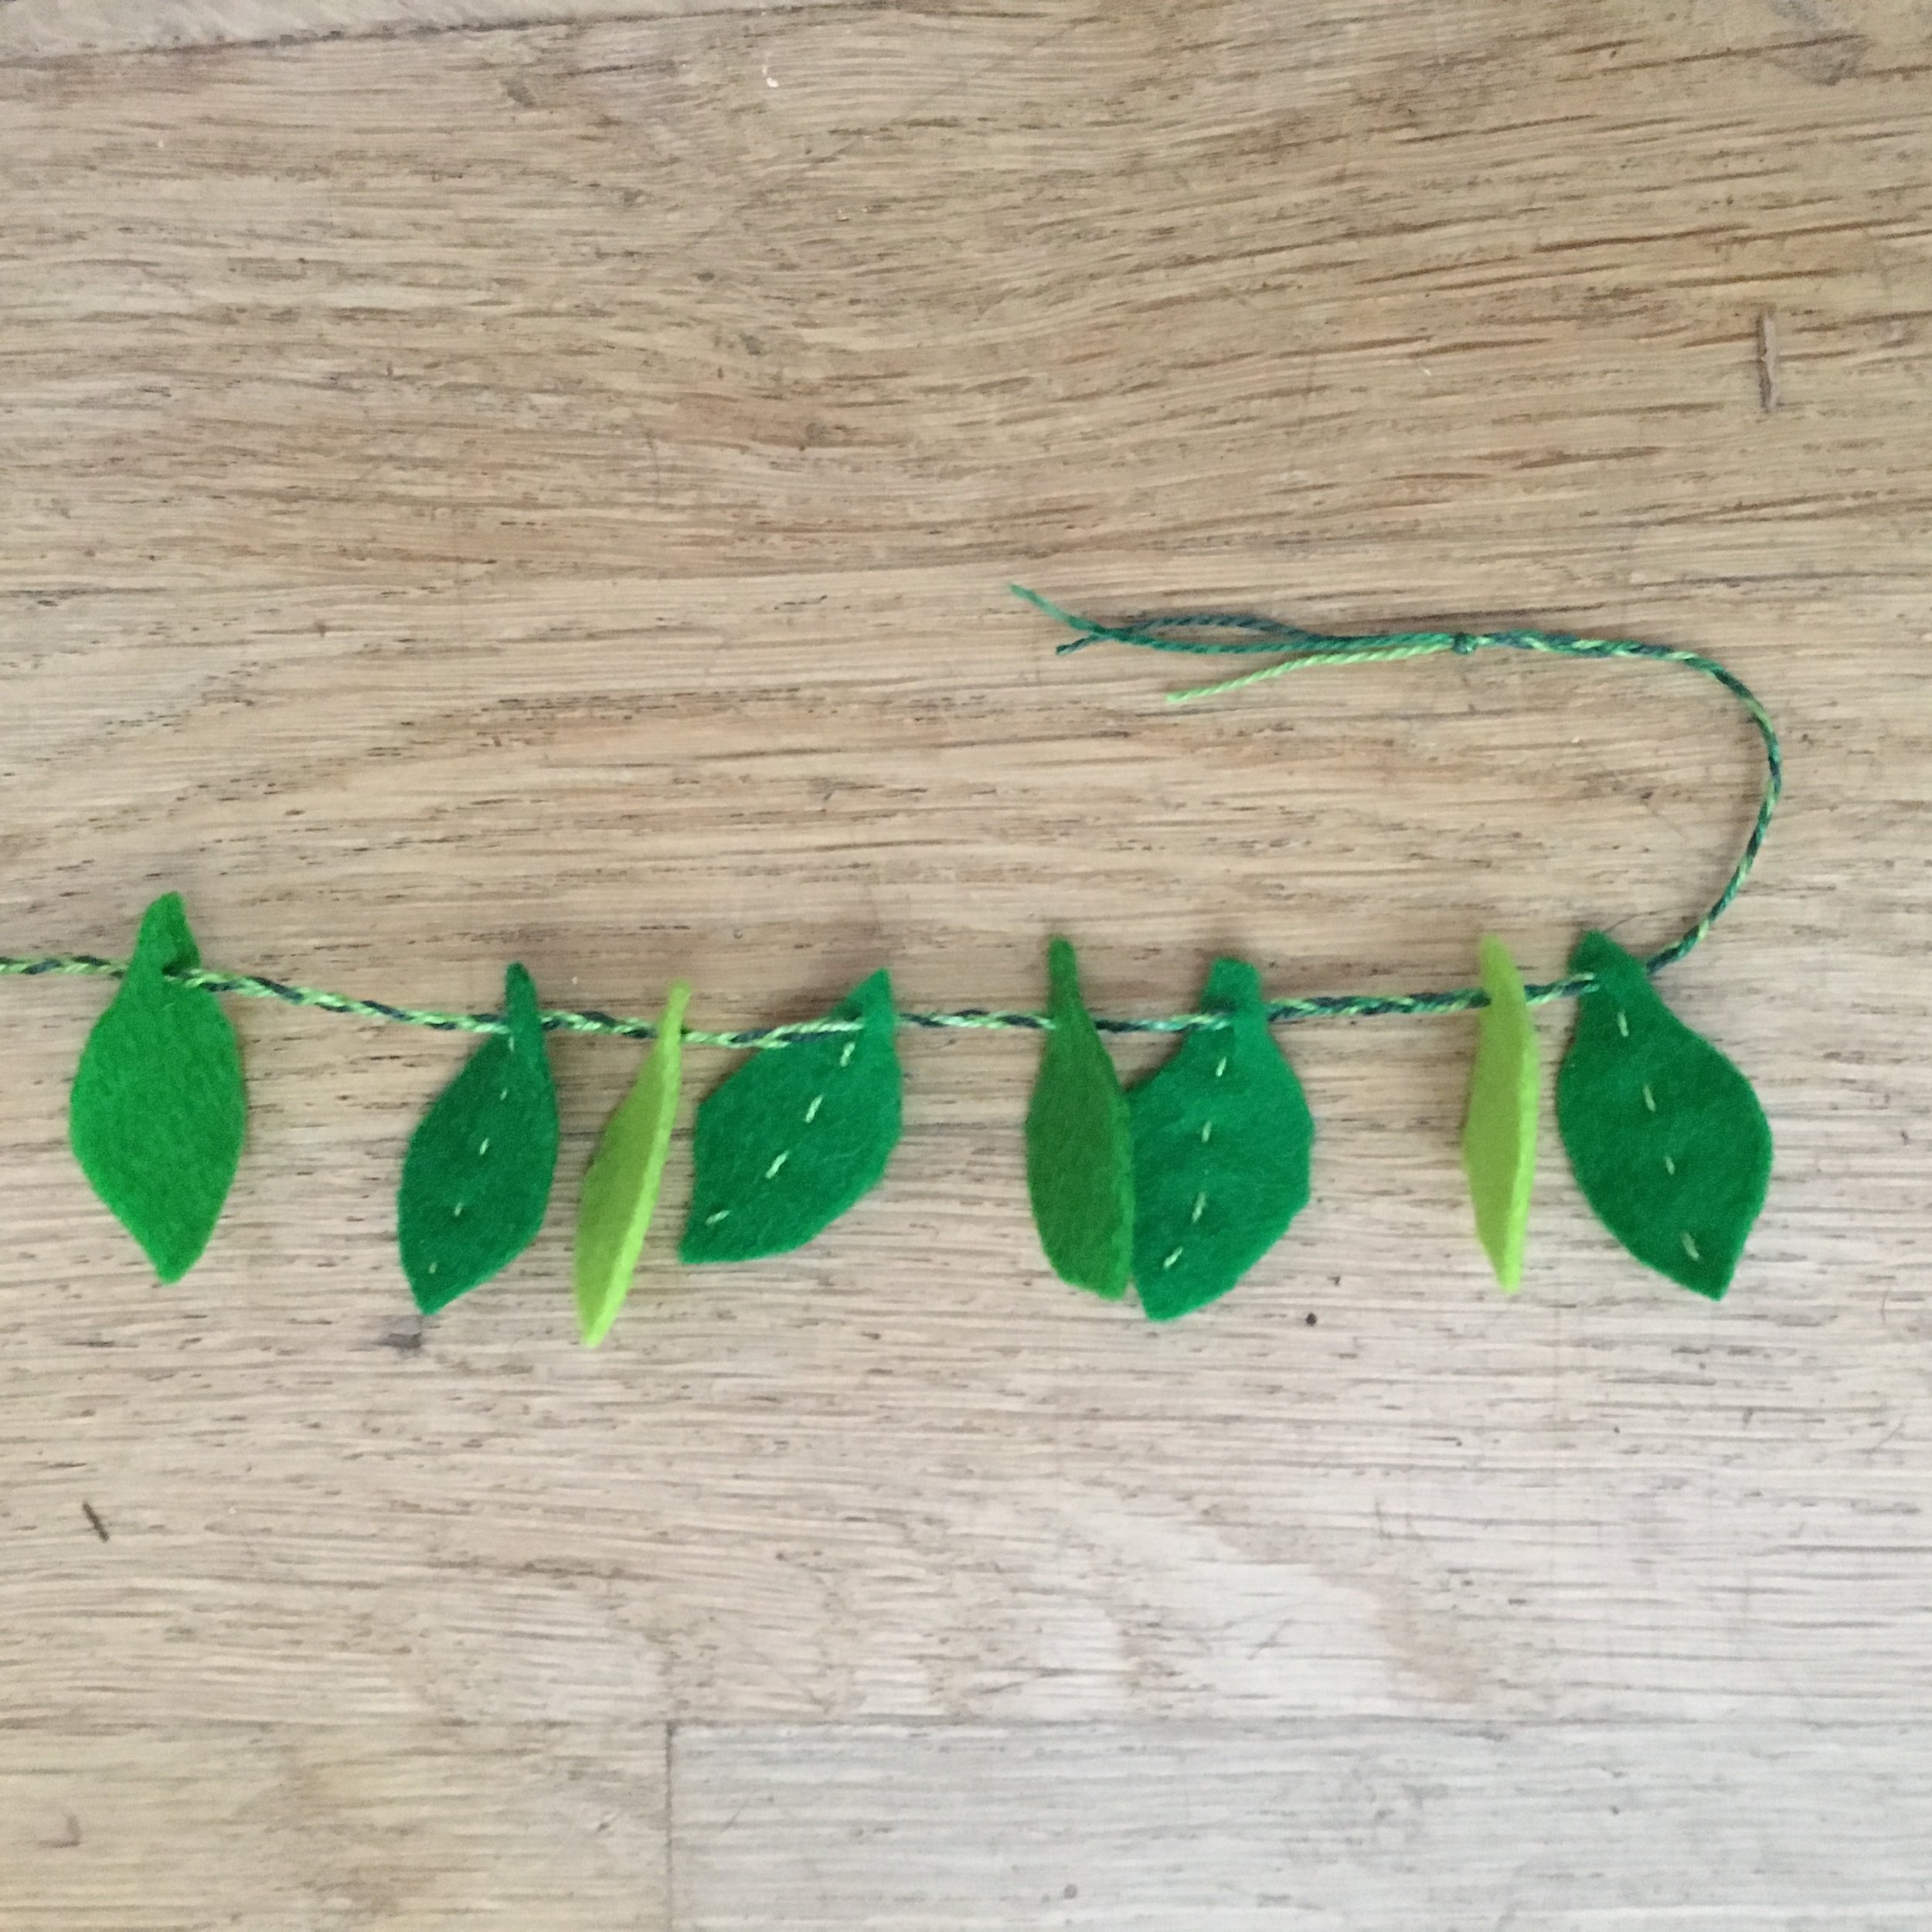
To assemble the butterflies, cut a piece of perle cotton thread (or heavy thread) about 18 inches long. Tie a knot in the thread 3 inches from one end. You will need these 3 inches later to tie the thread around the neck of your butterfly.

Match up the two pattern pieces so that the bottom wings are UNDER the top wings, aligning the flat edge with the upper notch of the top butter fly wings.

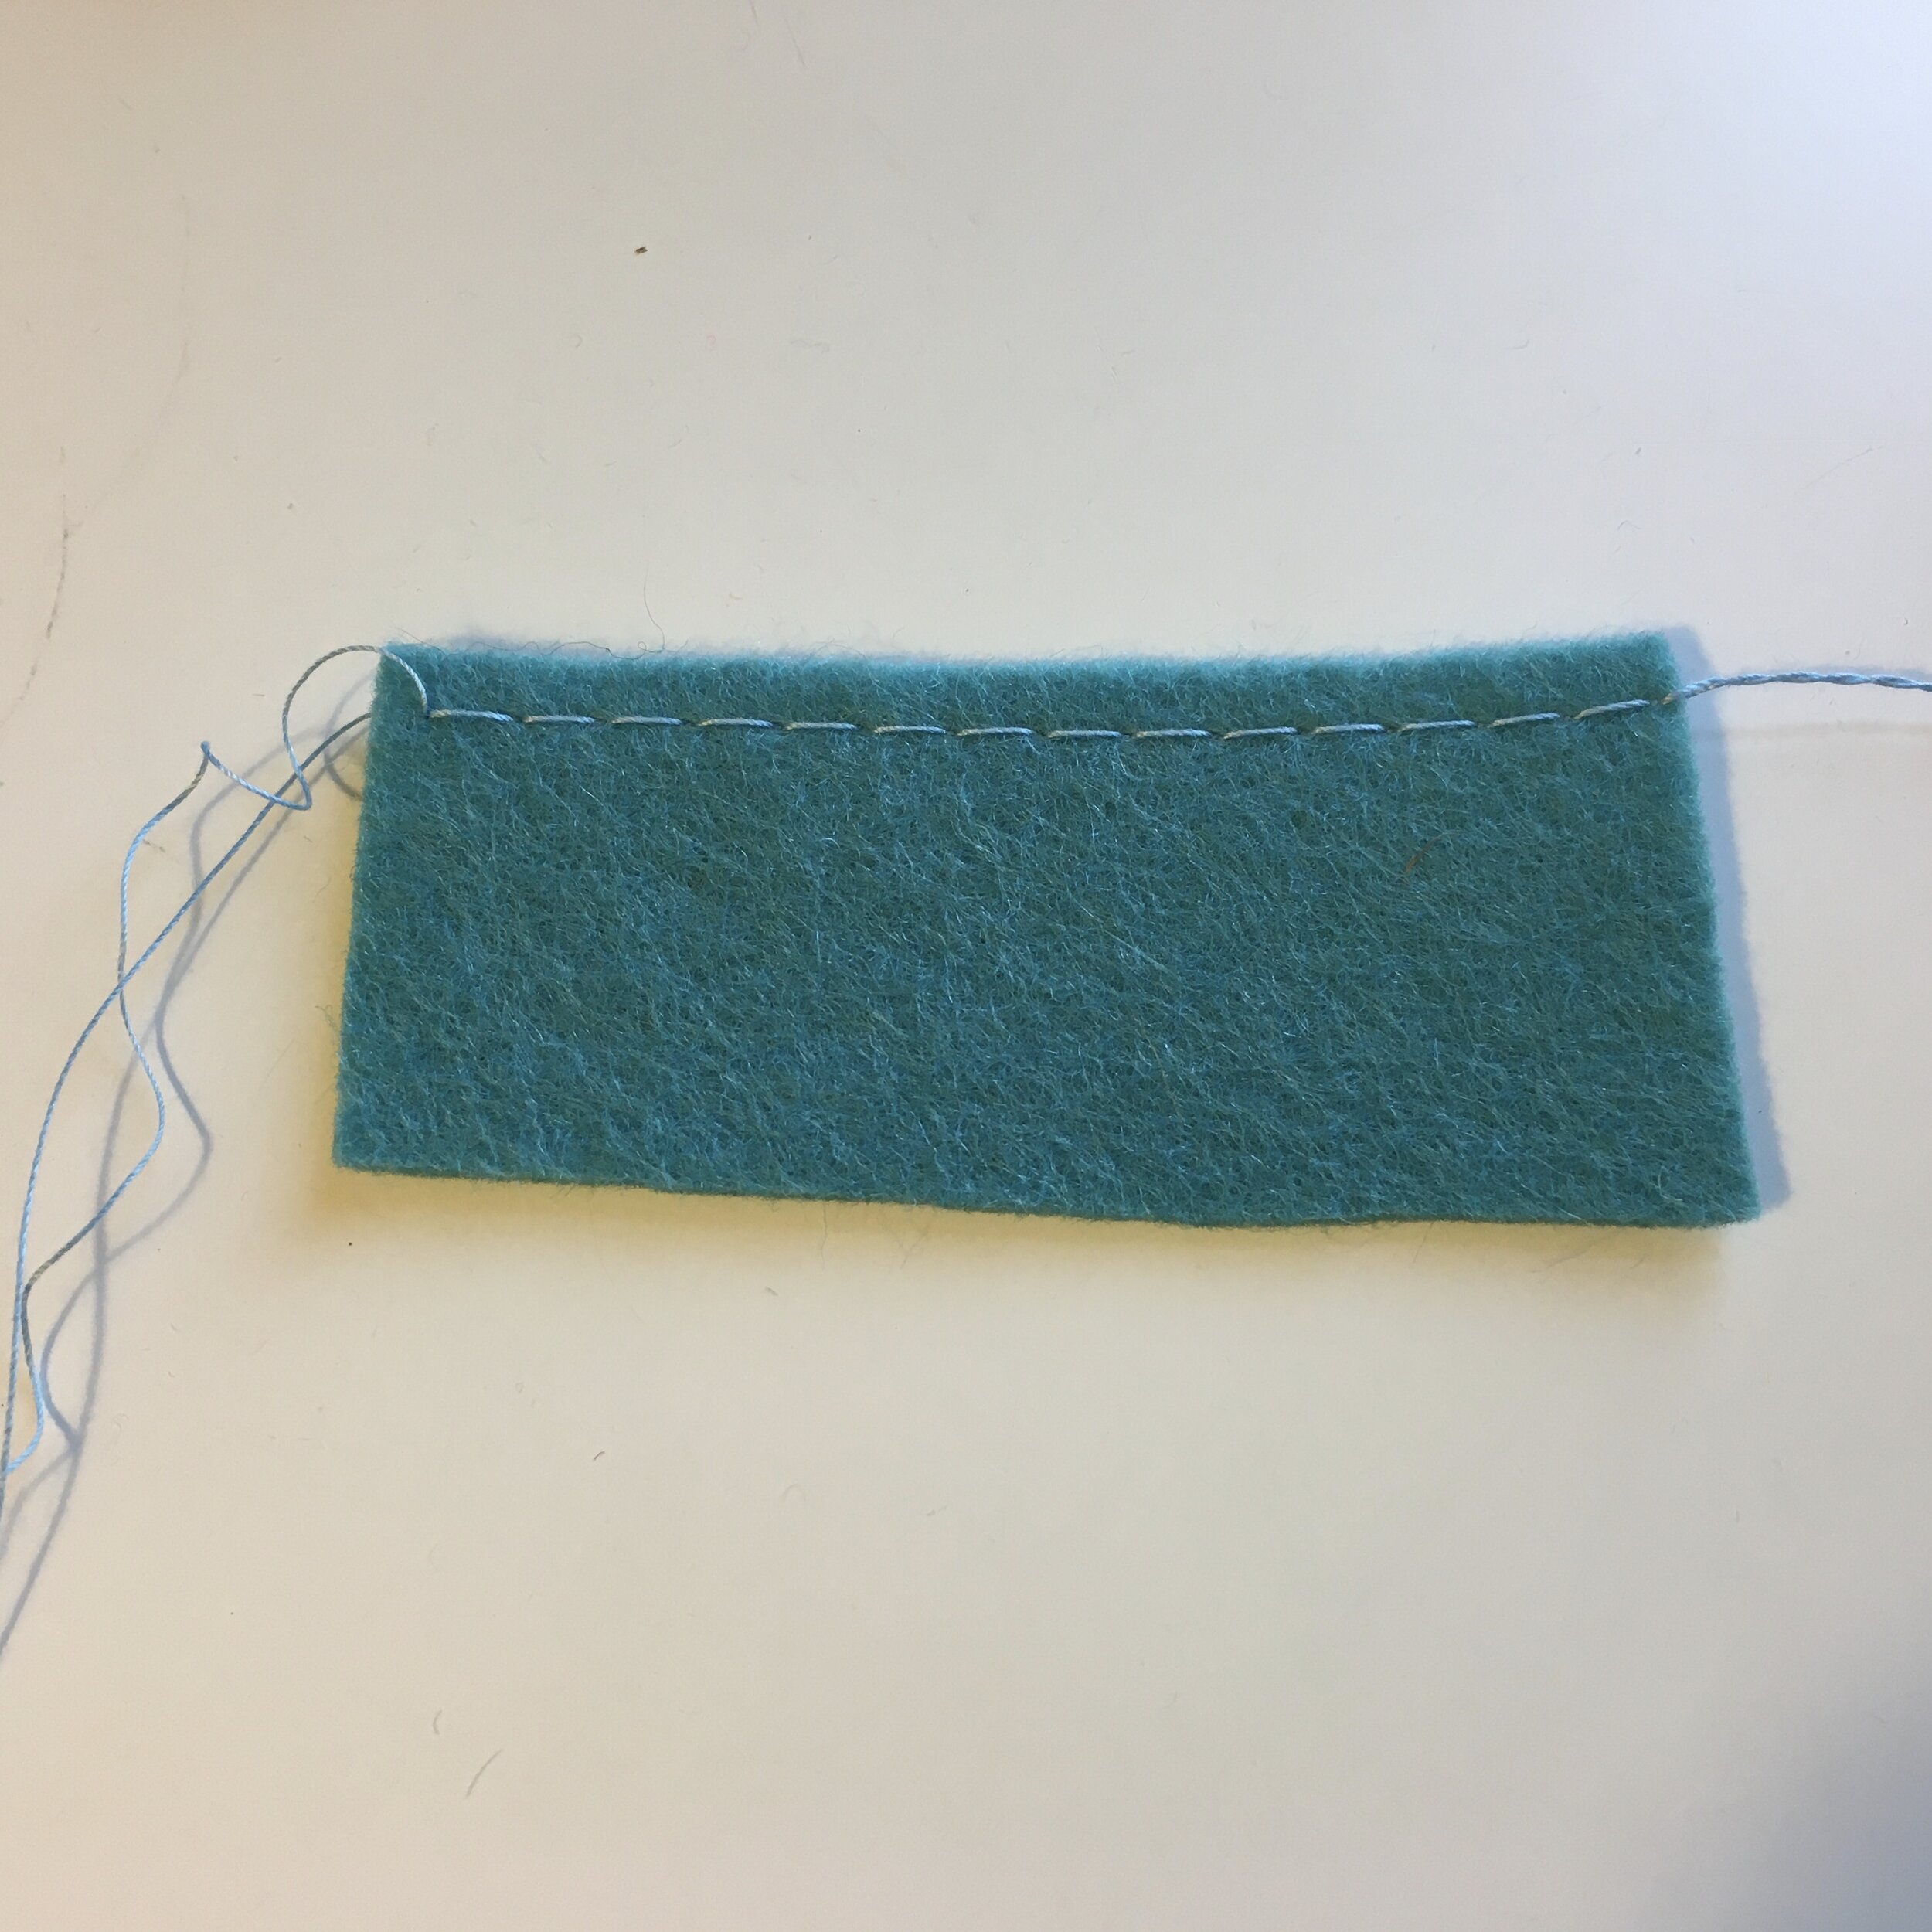
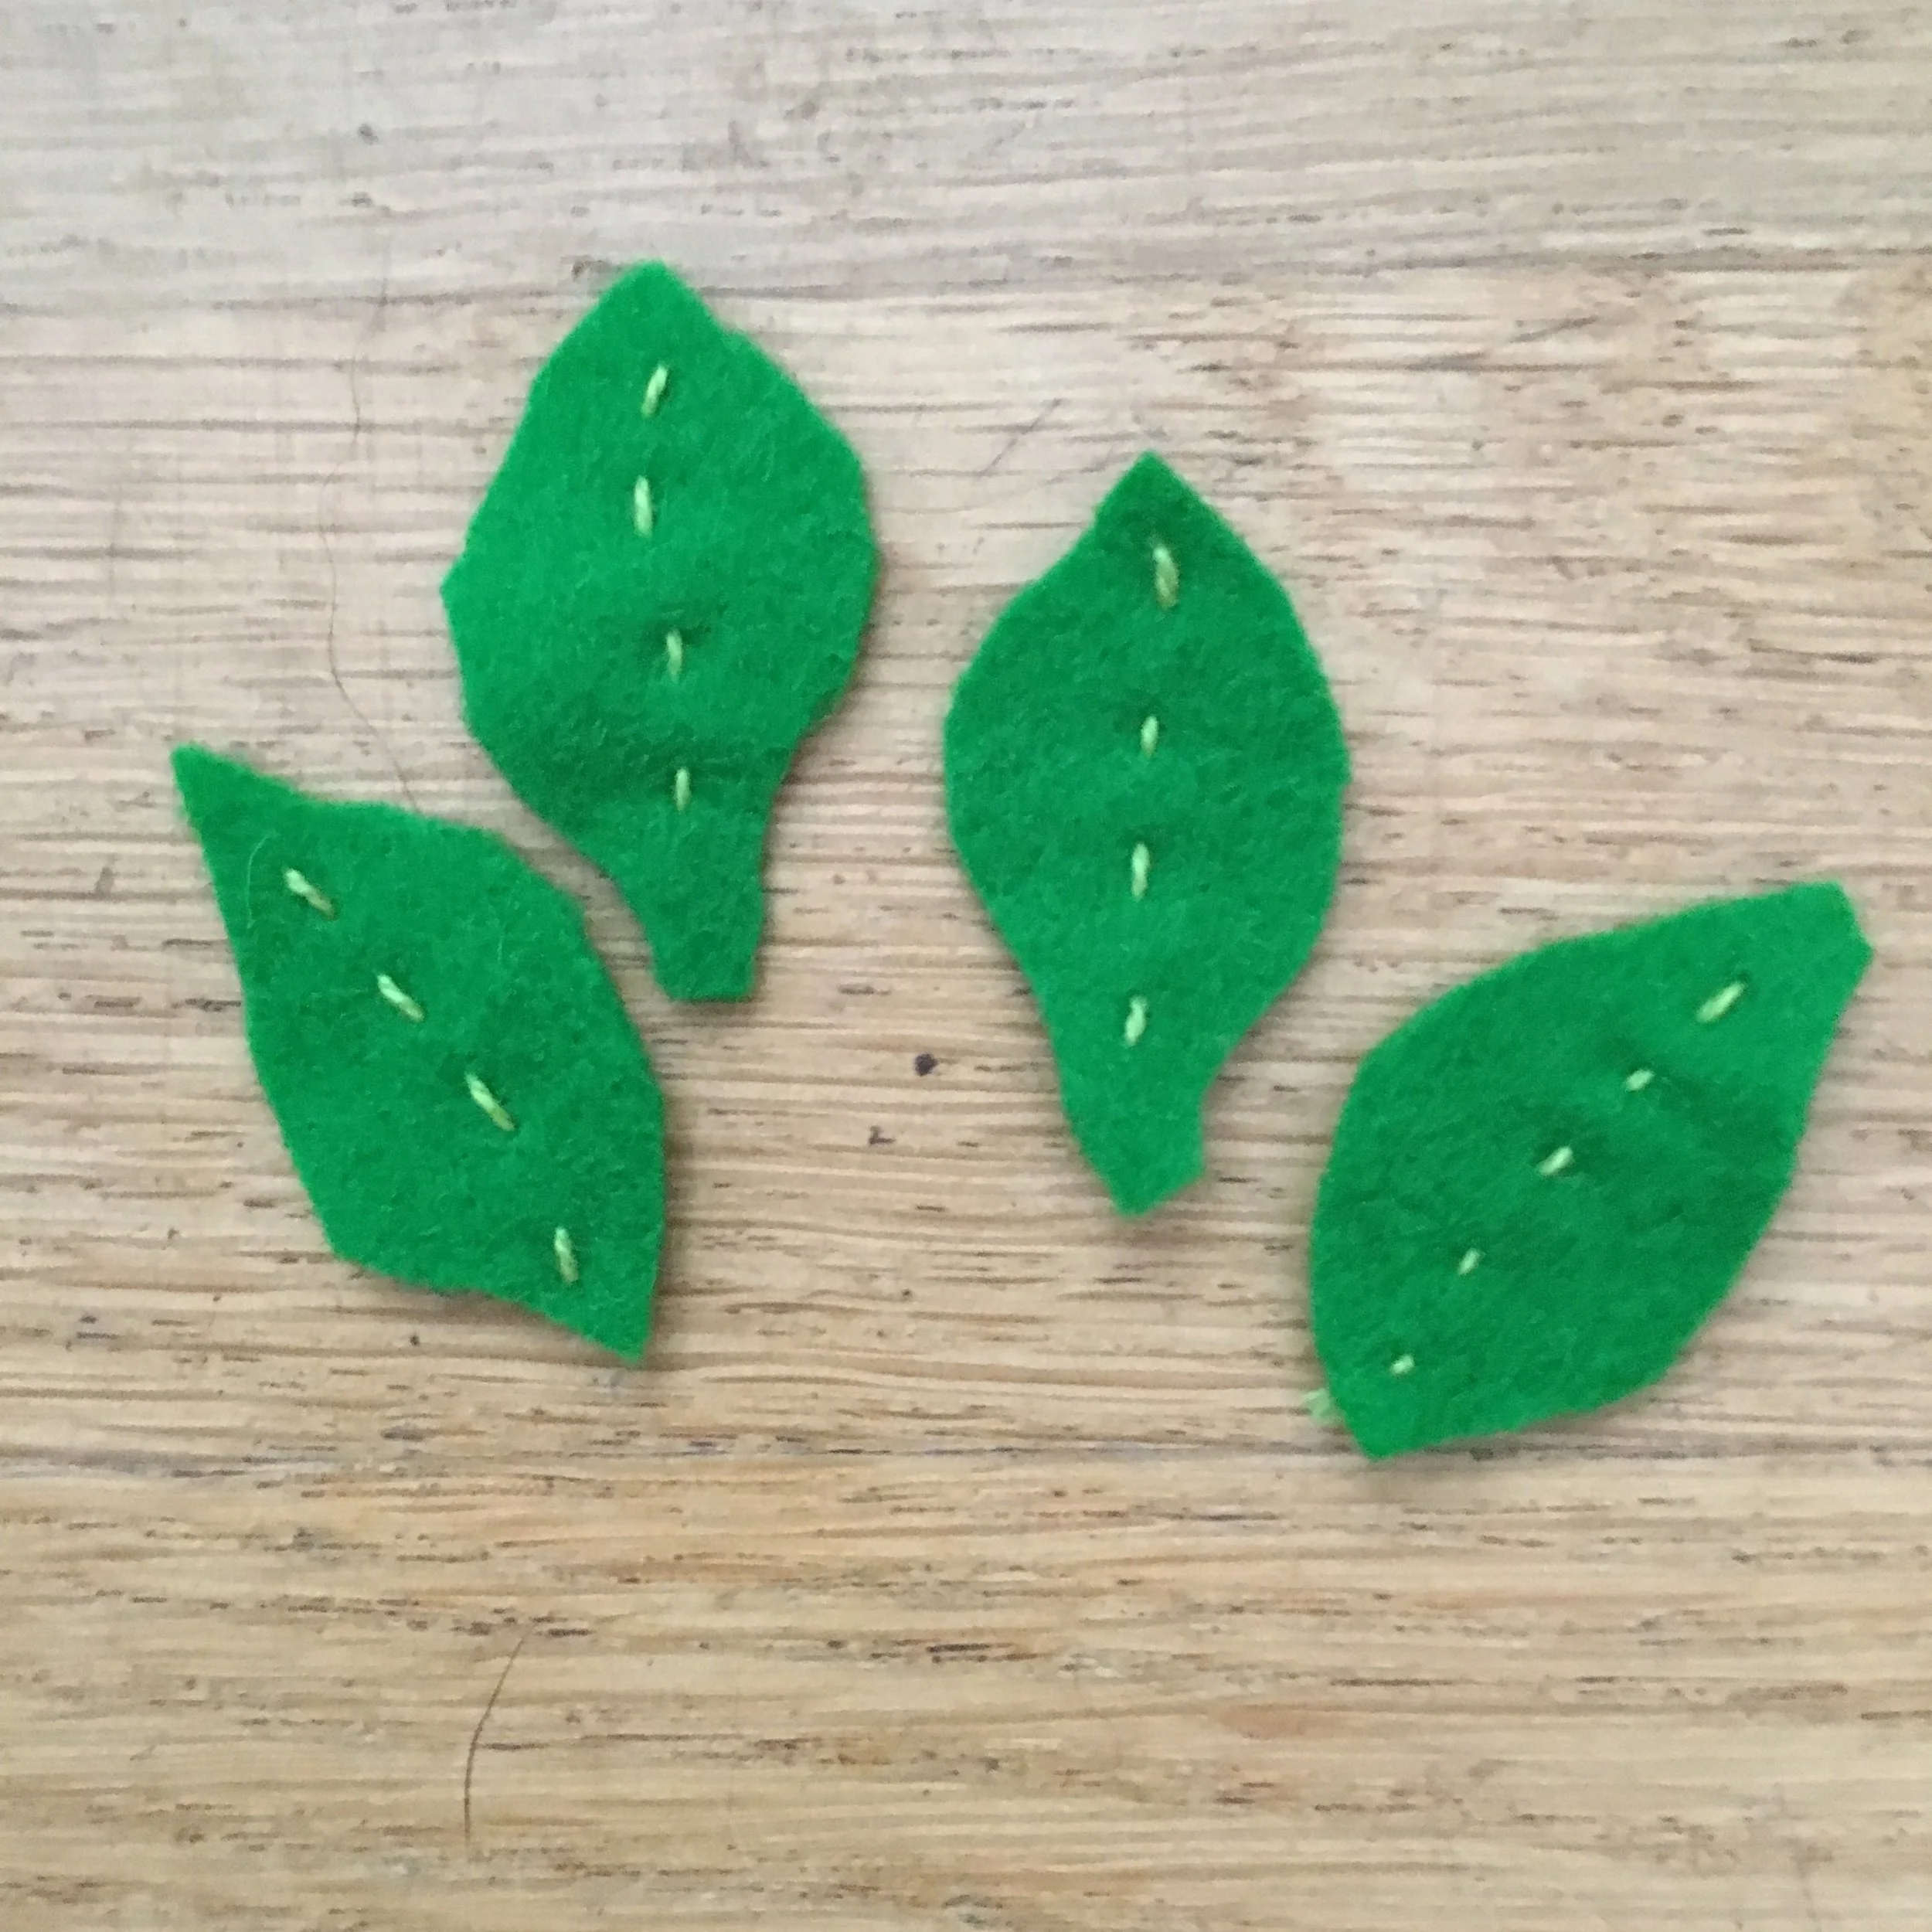
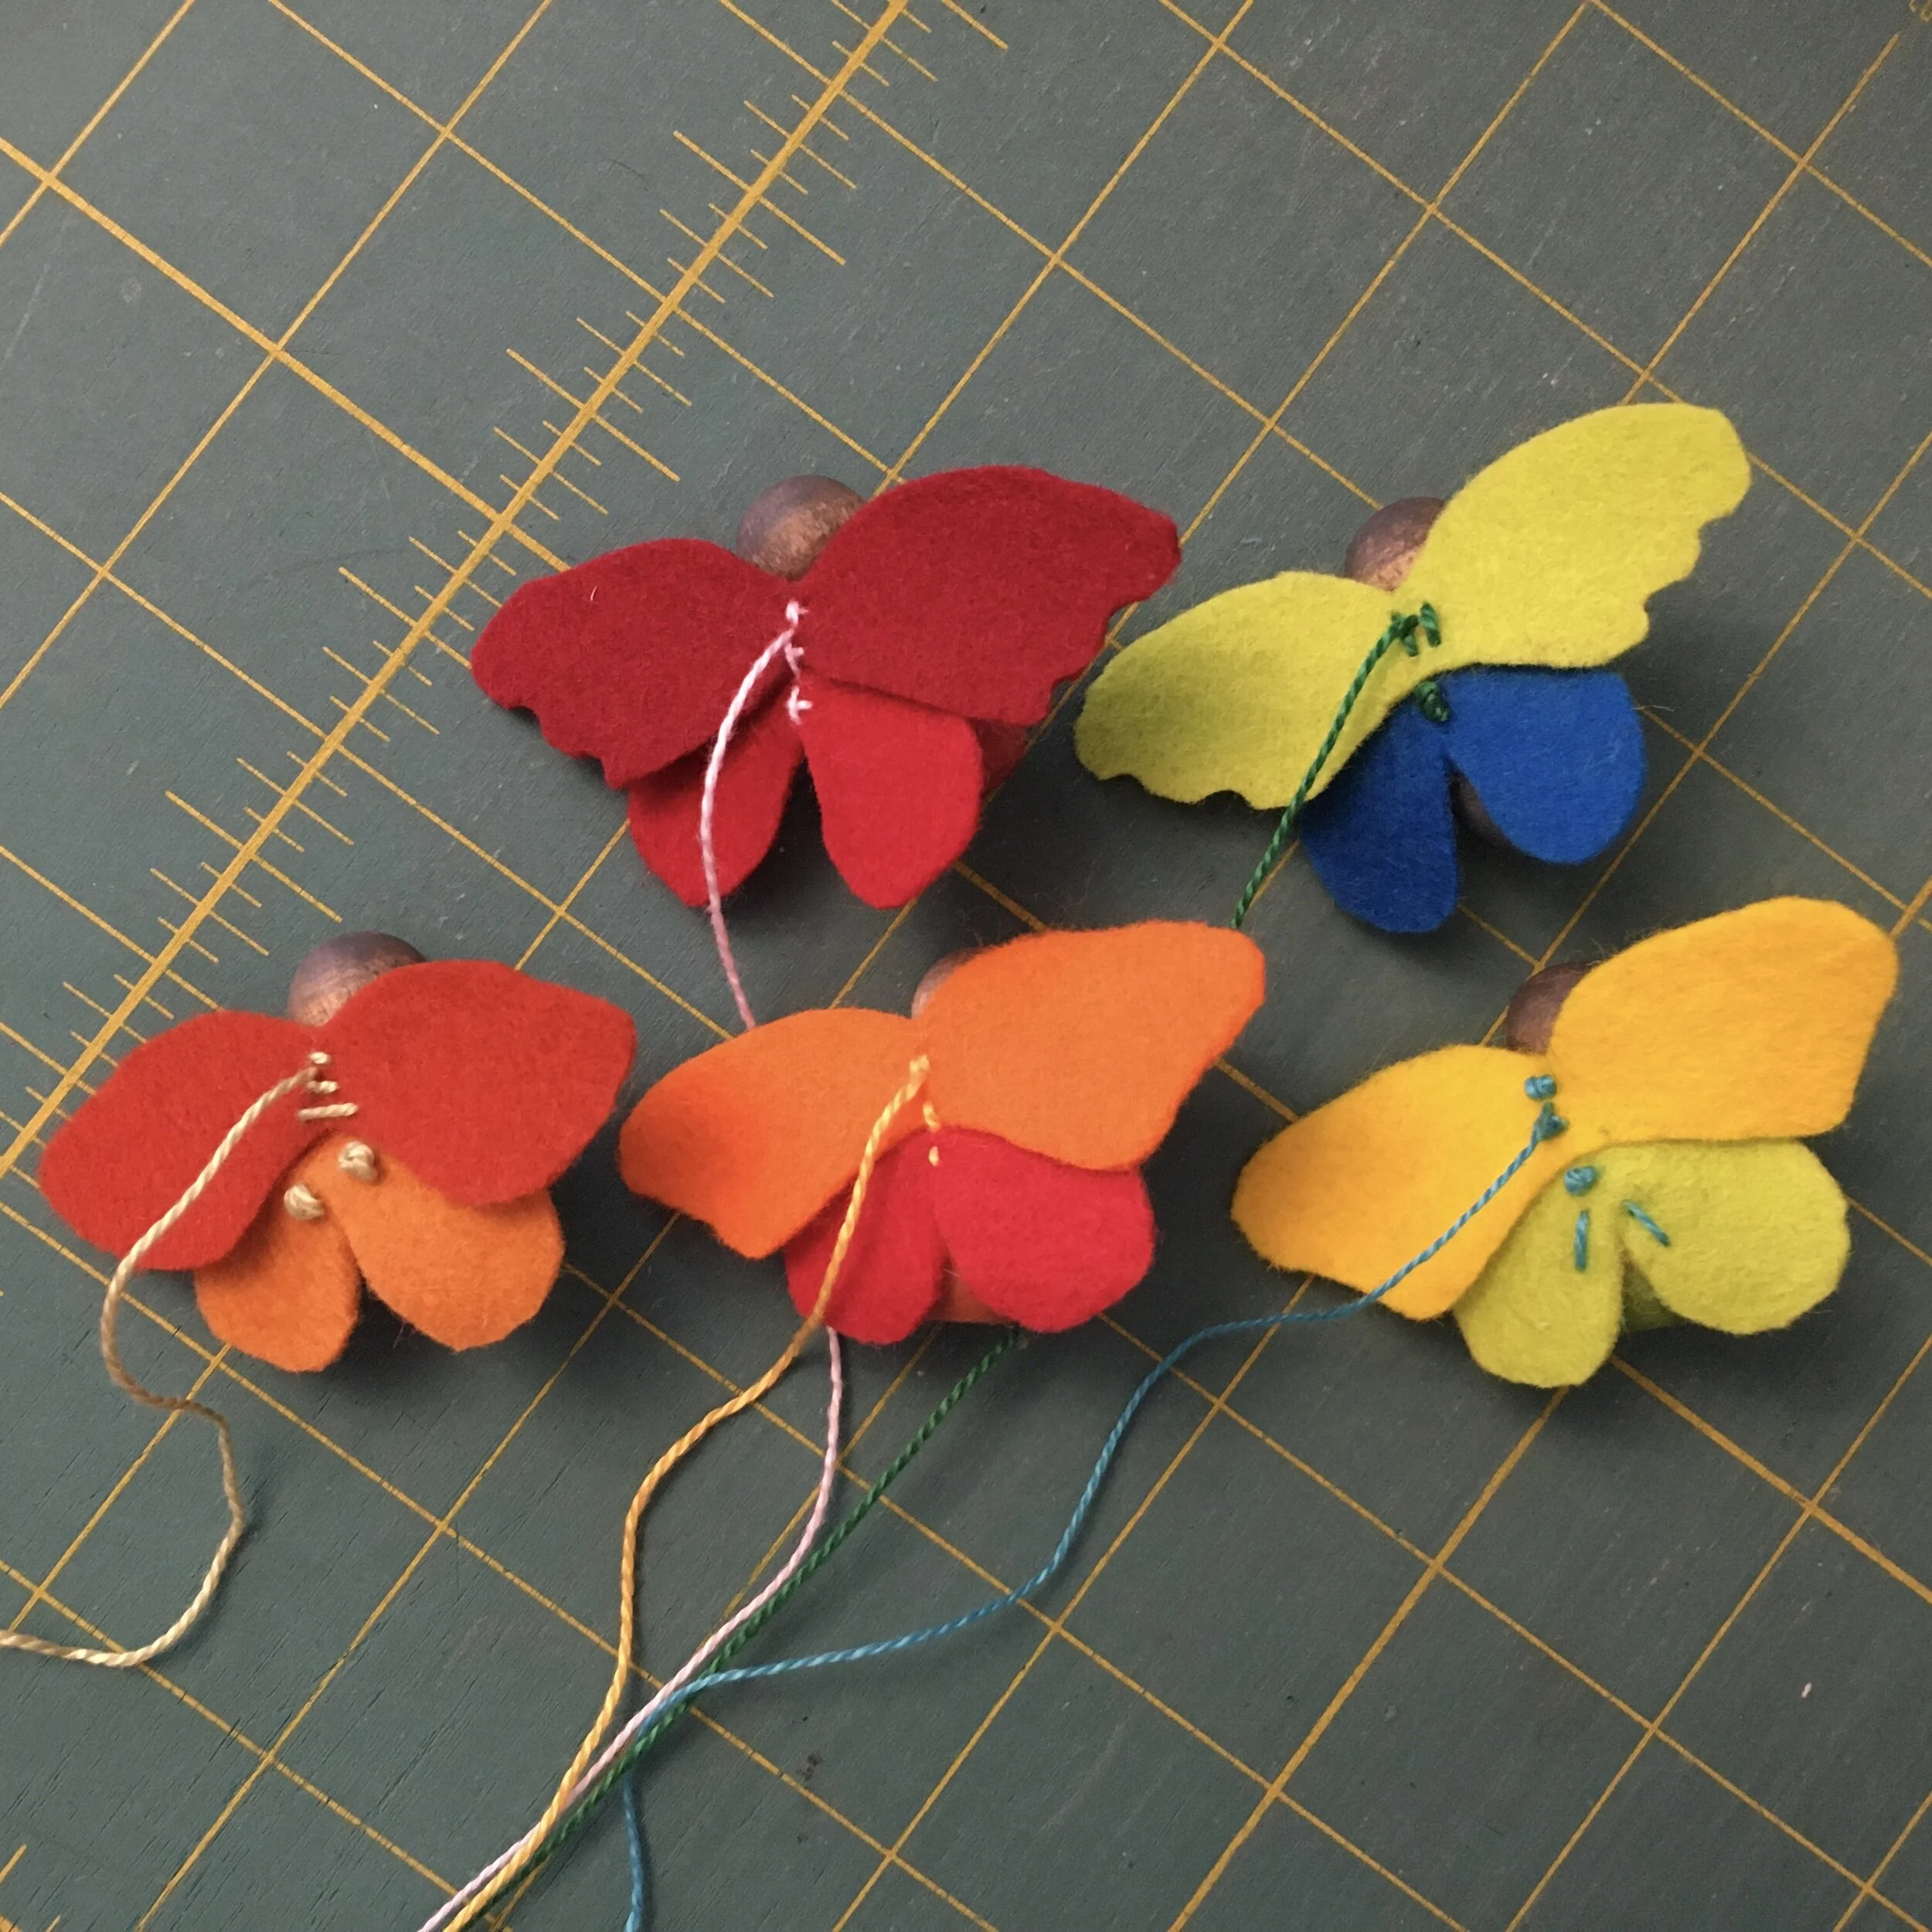
Using your thread, sew the two sets of wings together, starting at the upper notch on the top set of butterfly wings. You can use a simple straight stitch or any embroidery stitch you want to use. I did both straight stitches and French knots.

TopsOfPEgButterflyWings.jpg

When you have sewn the wings together, run your needle through the bottom layer to felt and bring the needle back up to the top layer, next to your first stitch.

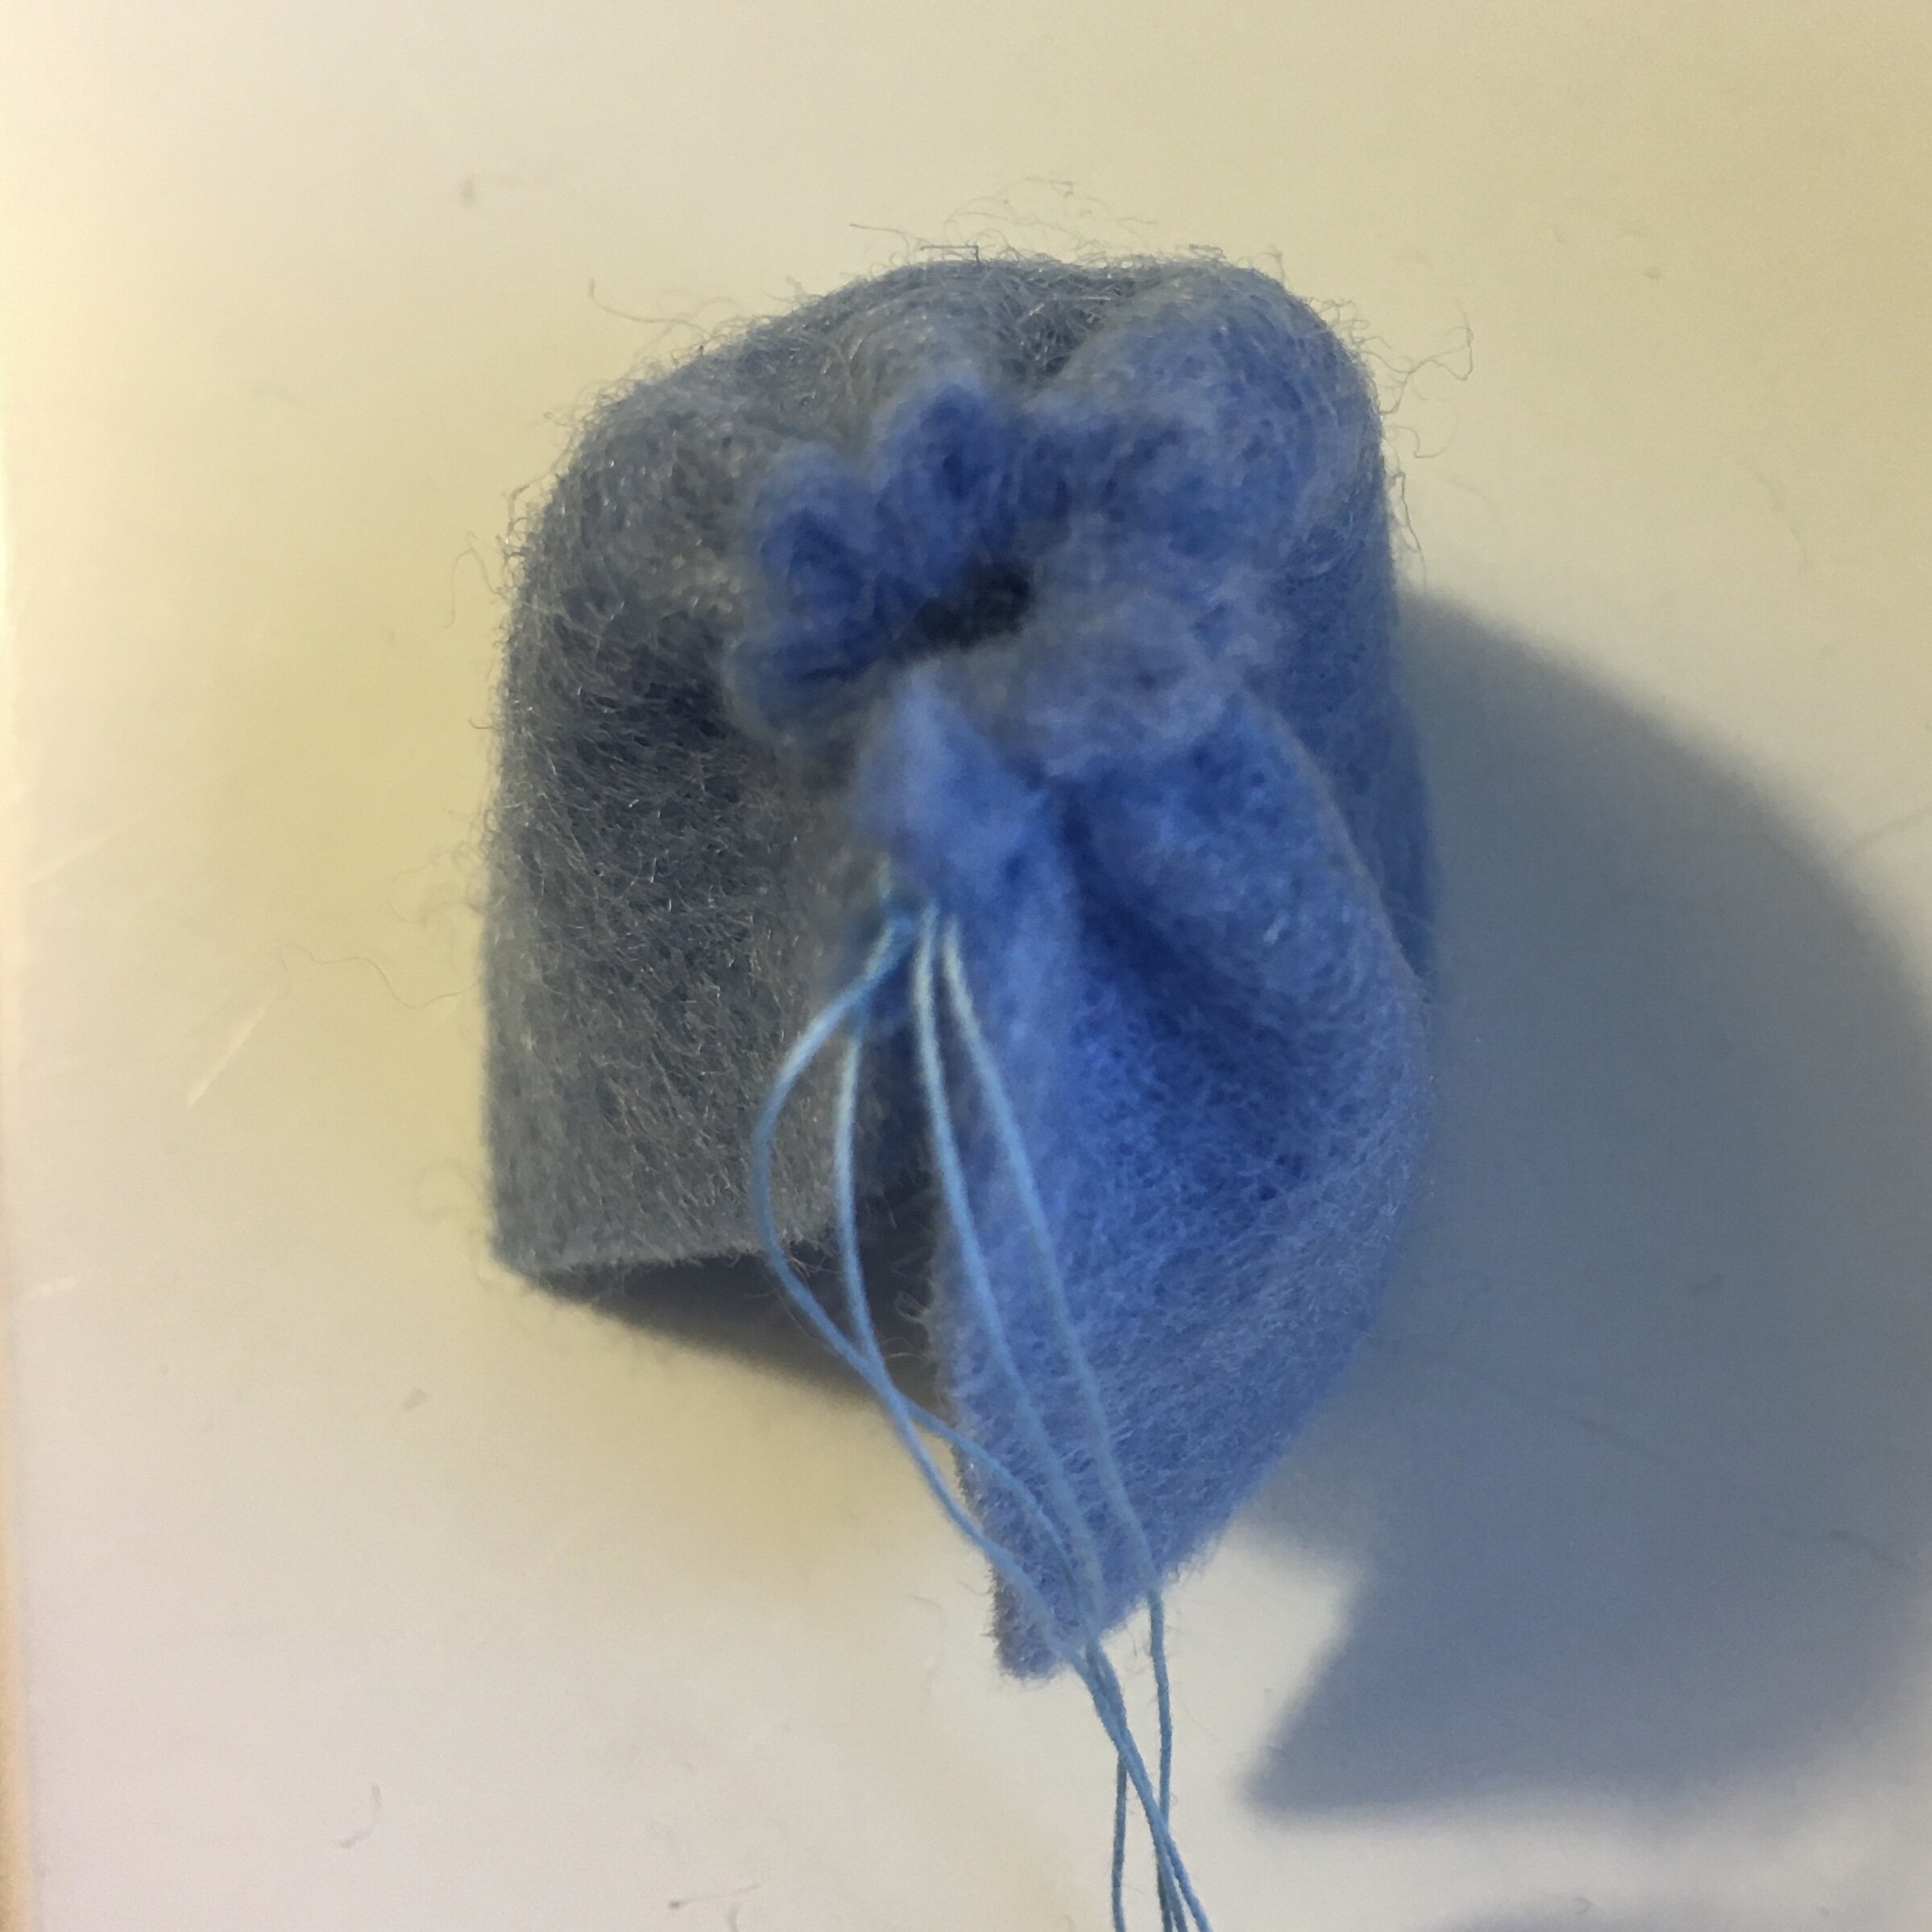
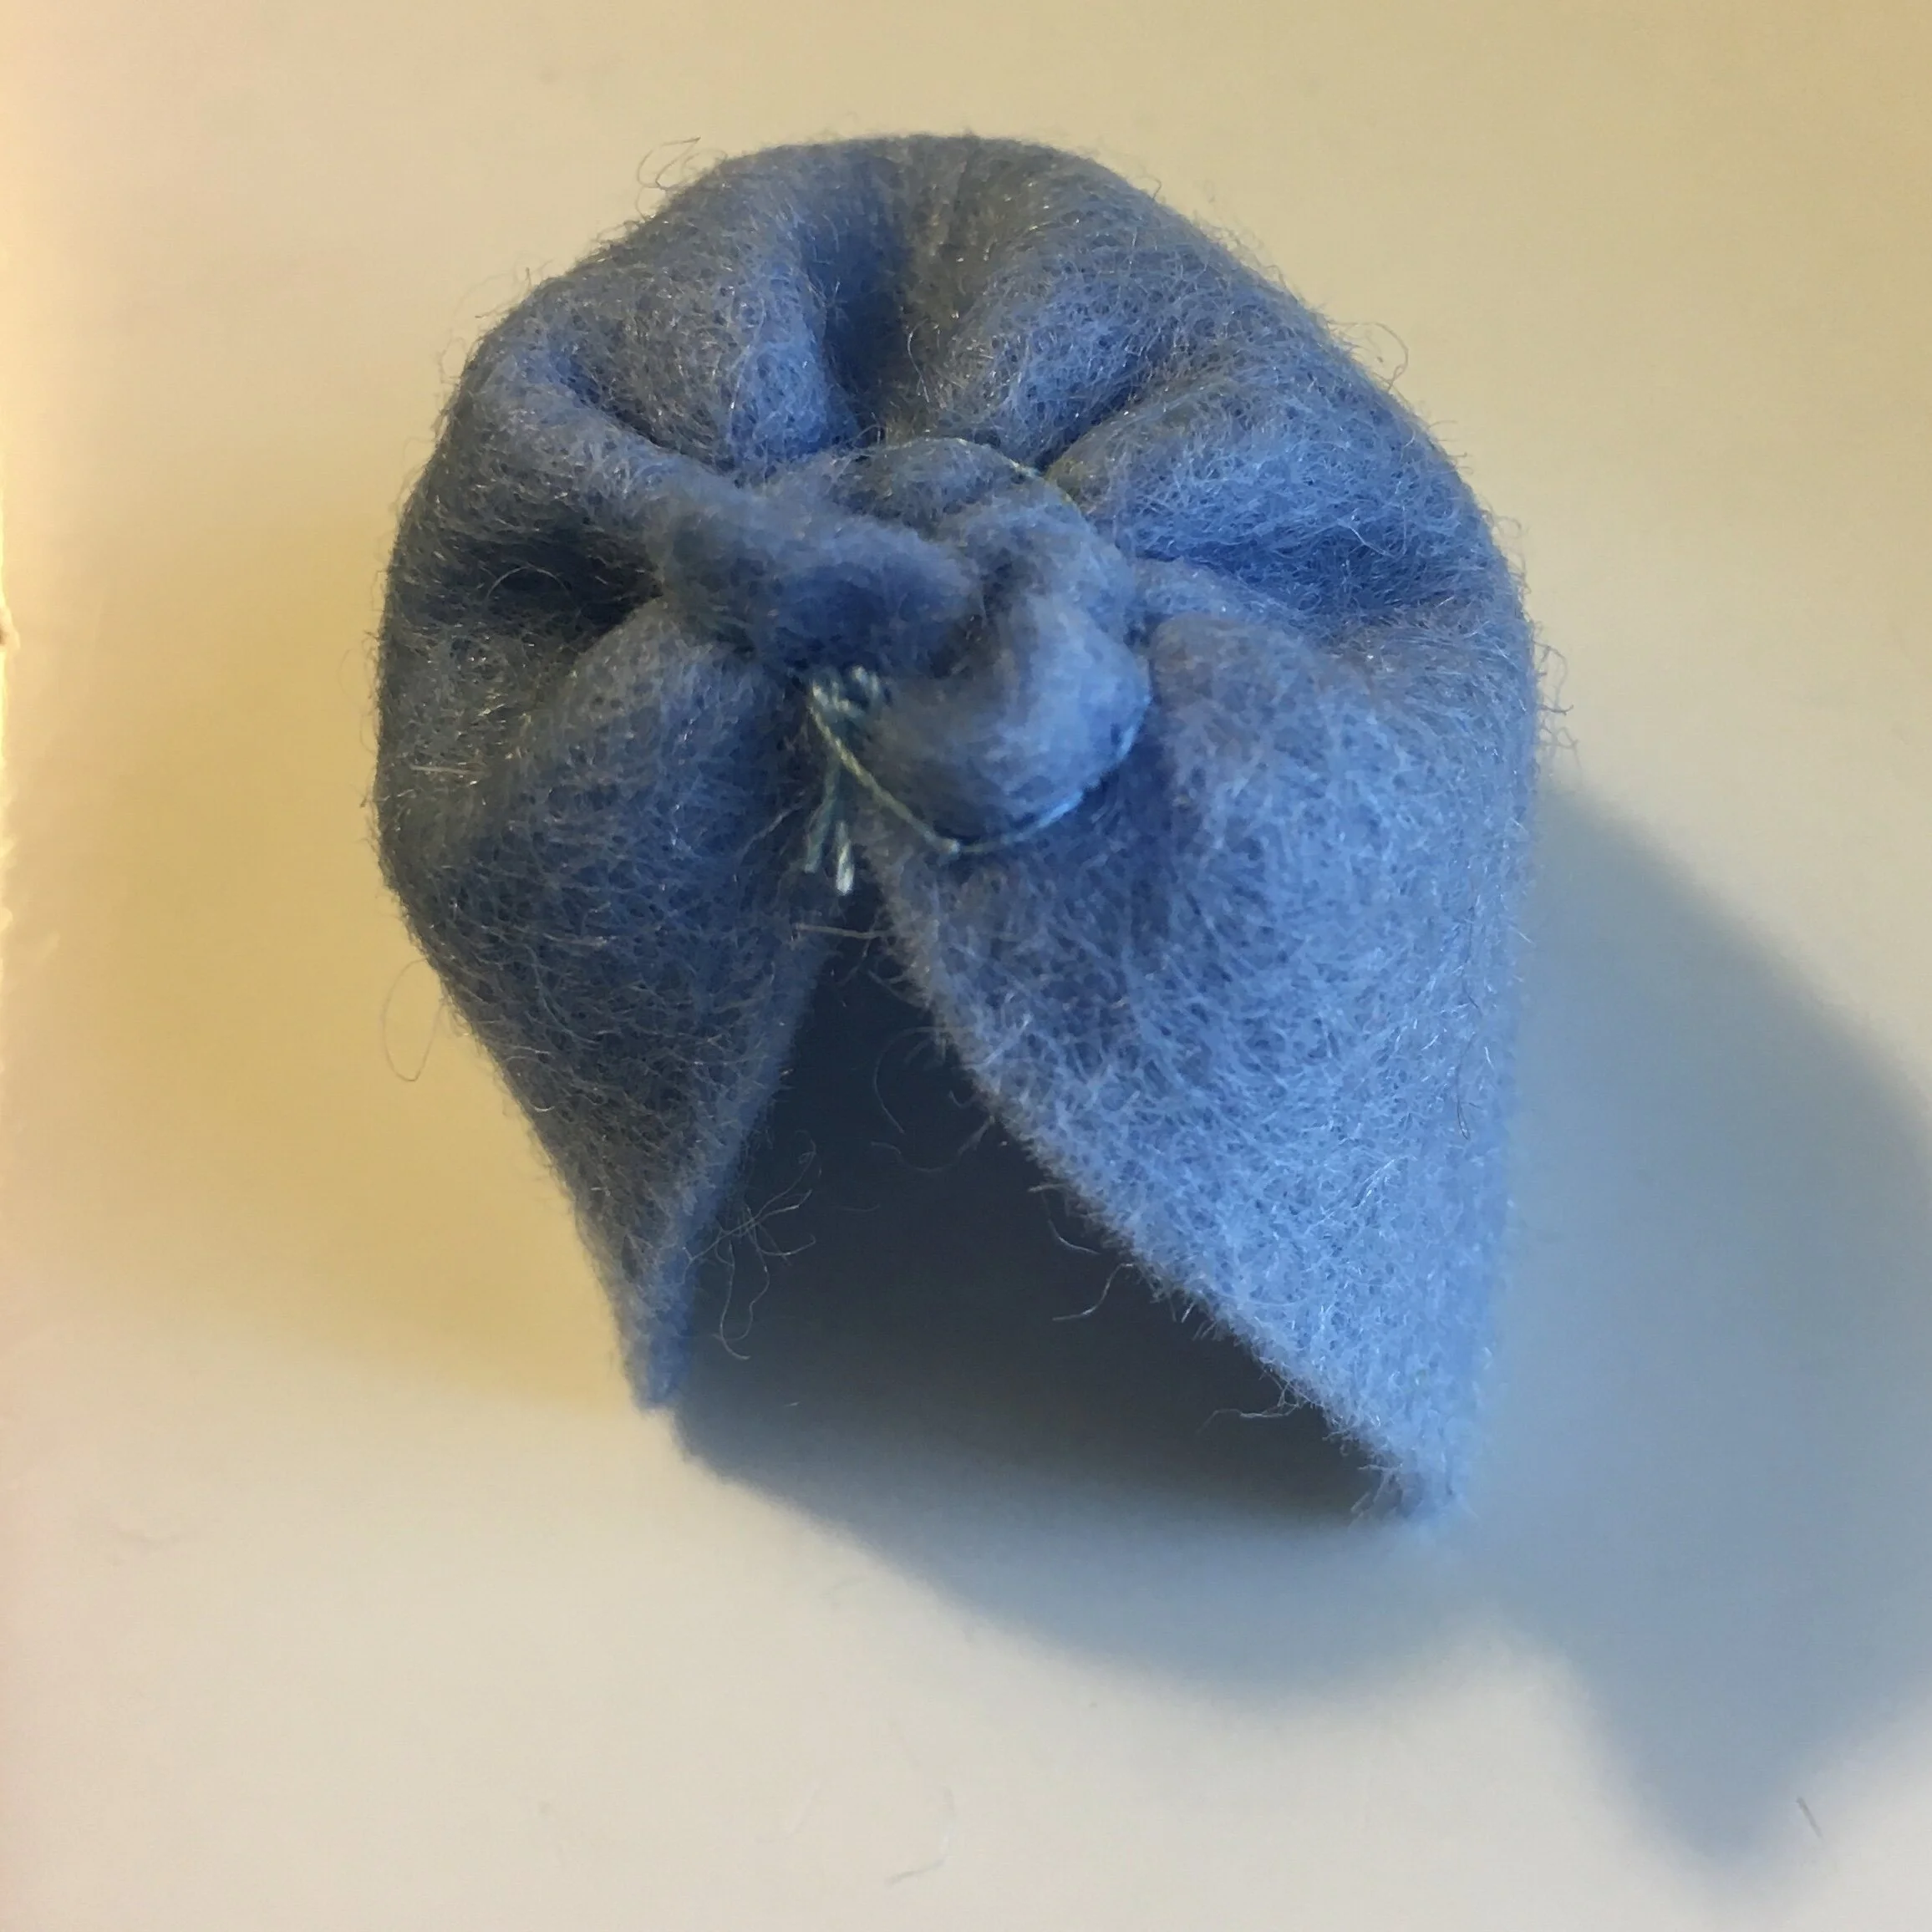
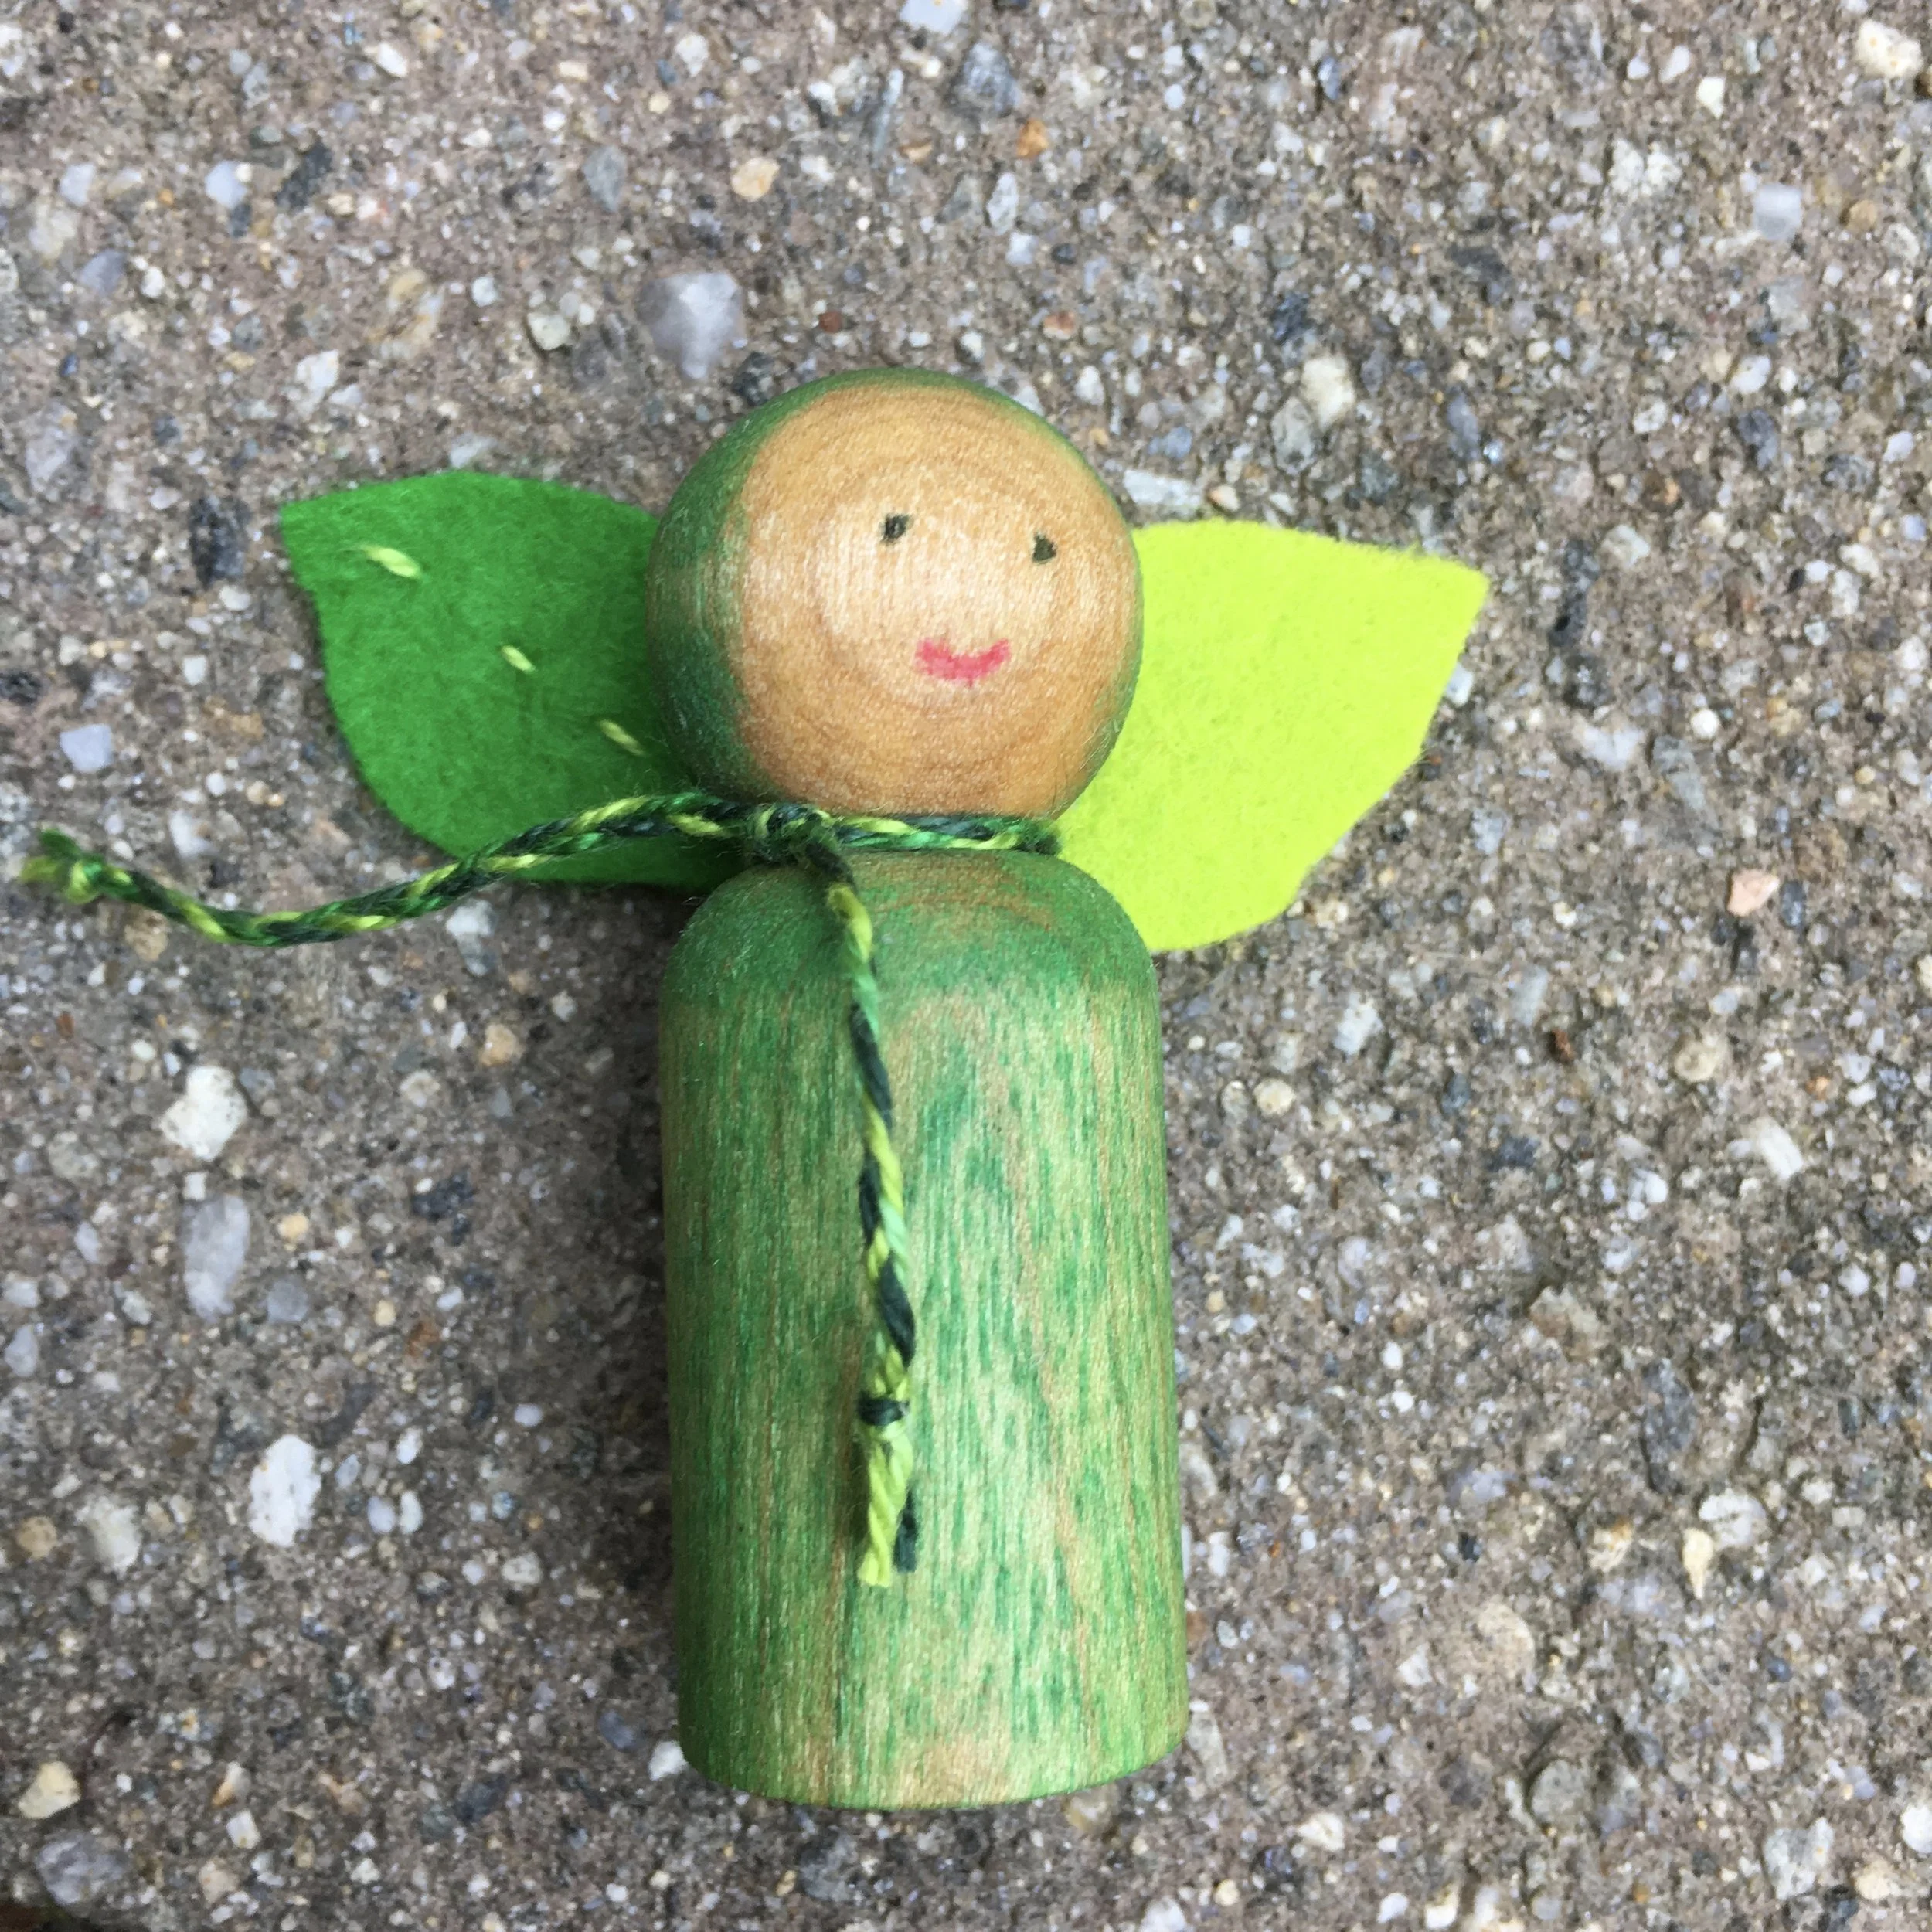
Tie the thread, around the butterfly’s neck, using the loose 3 inches of thread. Make sure you have a tight knot. The take the long thread, still threaded on the needle, back under the butterfly wings and come up in the middle of the top set of wings. You will use this thread to hang up your butterfly. Tie a knot in the far end of the thread you will use to hang up your butterfly. That will keep it from unraveling.

Trim off the excess piece of thread under the butterfly’s neck.

Well done! Have fun with your new butterflies!

In the garden with the marigolds

In the garden with the marigolds

SAFETY NOTE: No NOT give these peg doll butterflies to a child under age 3 years. They are a choking hazard.

Notice: This blog is not monetized: I do not use affiliate links. When there are links in a post, they are to give credit to another creative person, because I like or have used a product, or to help the reader easily find supplies for a project.

TAGS: Peg Doll Butterflies, Peg Dolls, Wooden Peg Dolls


April 30, 2020

Peg Dolls: Front Line Medical Staff

by Judy Tucker


Peg Dolls Medical Staff

Peg Dolls Medical Staff

Peg Dolls Medical Staff

Peg Dolls Medical Staff

Like lots of quilters and sewists during this COVID-19 pandemic, I’ve been sewing cloth face masks. I thought it would be fun to make some for peg dolls too. I initially tried making pleated cloth masks, but they were just too small very difficult to sew. So I switched to wool felt, the traditional material for peg doll clothing.

So here are my new friends. You decide if they are doctors, nurses, respiratory therapists, medical assistants, x-ray techs or whoever else might be.

These are extra large 3 1/2 inch tall peg dolls.

If you want to make some for yourself, here’s how to do that.

Paint the doll with non-toxic paint. Allow the paint to dry completely. See this post for some information on painting wooden peg dolls.

Mask

  • Cut a square of wool felt, 1 inch square.

  • Fold it in half and stitch the long open end closed. I used the sewing machine but hand sewing is fine too. Then edge stitch the folded side.

  • Cut a piece of 1/8 inch elastic 4 inches long. If you squeeze the two long sides together, a “tunnel” will open and the elastic will slip through easily. Tie a square knot and pull it tight. Slip the knot into the center of the mask.

Surgical cap

  • Cut a piece of wool felt 1 inch x 2 3/4 inches. On ONE side, stitch a running gathering stitch. If you machine stitch do NOT lock either end of the stitching.

  • Pull the thread on BOTH ends to gather it as tight as you can. Tie a knot to keep the cap gathered.

  • Turn the cap inside out so that the gathering will be on the inside.

  • Using a doll that has already been painted, glue the hat to the head using a craft glue.

7E906D95-D2F5-46CC-8DC7-E947E97CFF5E_1_201_a.jpeg
90FE1DEA-BB7C-48FE-85BA-F86D50043A63_1_201_a.jpeg
5DB515A0-4F64-4D44-9B3C-A7DE81C5CB37_1_201_a.jpeg

As dedicated as our medical friends are, and as much as they like their work caring for the sick and injured, it’s always good when the shift is over and they can go home to their families.

“Bye!” “See you later!” “Hi to the kids!” “Have a great day off!”

“Bye!” “See you later!” “Hi to the kids!” “Have a great day off!”

Thank you medical staff everywhere!


TAGS: Wooden Peg Dolls, Wooden Peg Medical Staff, Wood Peg Nurses, Wooden Peg Doctors, Peg Doll Face Masks


June 27, 2019

Peg Dolls - Pea Sprouts: A Tutorial

by Judy Tucker in Tutorial


Peg Doll Pea Sprouts

Peg Doll Pea Sprouts

Peg Doll Pea Sprouts

Peg Doll Pea Sprouts

Ever since I planted my sugar snap peas in my kitchen garden at the beginning of April, I’ve been planning to make peg doll Pea Sprouts. And this week, I finally did! While I used a leaf from my sugar snaps to make the doll leaves, these dolls could be almost any kind of seeding. They are really simple to make.

You will need:

  • Peg dolls. These are large regular pegs dolls, 2 3/8 inches tall

  • Fine sandpaper

  • Non-toxic watercolor paints

  • Beeswax polish

  • Green Perle Cotton or Embroidery Thread or 1/8 inch ribbon with a needle with a large eye

  • Green felt. Wool felt is my favorite

  • Markers to draw the face if you want facial features

  • Scissors and an craft knife with a sharp blade. (Safety note: The craft knife should only be used by an adult).

Instructions:

  1. If your pegs feel rough, smooth them with fine grain sandpaper, following the wood grain.

  2. Paint the pegs with the water color paints, leaving an unpainted circle for the face. The wood grain on the peg often can be used as as a guide for the facial placement. I used two different shades of green, applying one green and then the other next to each other on the peg. Allow them to completely dry before preceding.

  3. Apply the beeswax polish to the entire peg, including the face. The watercolors look brighter and deeper in color after the polish is applied. Allow the polish to soak in for several hours, or overnight. Then rub the peg with a soft rag before continuing to assemble the doll.

  4. While you are waiting for the bees wax polish to soak into the wood, cut out out the leaves for the pea shoots. Each leaf is about 1 1/4 inch long and 3/4 inches wide. You can draw a template or just cut them freehand if you feel comfortable doing that.

  5. Using the craft knife, cut a 1/4 inch slit at the base of each leaf so that you can run the braid or ribbon through it.

  6. If you wish, use embroidery thread to embellish the leaves. I used a simple running stitch down the center of half of the leaves.

  7. Cut three strands of the Perle cotton. I used strands about the length of my forearm and that made a braid long enough for 4 peg dolls. Braid the 3 strands of thread. (I you use embroidery thread, use 3 strands for each piece. If you use ribbon, you can cut that the length you want when you assemble the dolls).

  8. Thread all the leaves onto the braid you just made. Pull two leaves the toward one end of the braid, away from the other leaves. Using that end, tie the braid around the doll’s neck, with two leaves behind the head. Cut the braid the length desired and immediately tie a knot in the end on the doll’s side and the new end on the braid with the rest of the leaves. I was worried the braid with unravel right away, but found I had time to tie both knots without any problem.

  9. Complete the rest of the dolls if you are making more than one.

  10. Draw a face on the dolls using makers if desired. I found that the markers don’t run into the wood grain and can still draw well on wood sealed with the beeswax polish.

IMG_9979.JPG
IMG_9975.JPG
IMG_9980.JPG
IMG_9983.JPG
IMG_9985.JPG
IMG_9986.JPG

I wish I could tell you that I’m enjoying eating the sugar snap peas that I planted in April. So far I’ve only harvested 4 delicious sugar snap pea pods. As it turns out, the neighborhood groundhog thought the pea shoots were very tasty and ate the tips off most of the plants. The peas are in the process of recovering. I’m seeing some blossoms, so there is hope if we don’t have a heat wave too soon.

In the meantime, I am enjoying my little Peg Sprouts.

Completed Pea Sprout Peg Doll

Completed Pea Sprout Peg Doll

Notice: This blog is not monetized: I do not use affiliate links. When there are links in a post, they are to give credit to another creative person, because I like or have used a product, or to help the reader easily find supplies for a project.


TAGS: Peg Dolls, Pea Sprout Peg Dolls, Plant Peg Dolls, Wooden Peg Dolls, Painting faces on wooden peg dolls


March 14, 2019

Peg Dolls: Dogs--Springers Spaniels and a Labrador Retriever

by Judy Tucker


Springers painted with acrylics and a Black Labrador painted with watercolors

Springers painted with acrylics and a Black Labrador painted with watercolors

Springers painted with acrylics and a Black Labrador painted with watercolors

Springers painted with acrylics and a Black Labrador painted with watercolors

This was a fun project. These dog pegs are my original designs. I used watercolors to paint the Black Lab so that I could add details. It would have been difficult to add the details if I had painted it with black acrylic paint.

The Labrador has a collar and lead made by braiding 3 strands off varigated hot pink Perle Cotton.

But for the Springer Spaniels, I made one set using acrylic paint and another with watercolors. I like both sets but they are really different.

Watercolor painted springers

Watercolor painted springers

The watercolor Springers have a more fur-like texture. I like the watercolor Springers with just a collar made from a single strand of Perle Cotton. The springers painted with acrylic paint have great color but the paint is flat and doesn’t look like fur. The little cream wool felt ruff adds just the right touch for these dogs!

One of my Springers has a tail. So I put a tail on one of the watercolor Springers. I added a white tip to the tail using two little pieces of white felt attached to both sides of the tail with a felting needle. I attached the white to one side of the tail and then added the second piece.

I painted the dogs I know best. But clearly, the sky’s the limit for peg dogs!


TAGS: Peg Dolls, Wooden Peg Dolls, Wood Peg Dogs, Peg Dogs


March 7, 2019

Peg Dolls: Medieval Fun

by Judy Tucker


Knights, Fair Maiden and the Page Boy on the castle walls and a Dragon peeking around the corner

Knights, Fair Maiden and the Page Boy on the castle walls and a Dragon peeking around the corner

Knights, Fair Maiden and the Page Boy on the castle walls and a Dragon peeking around the corner

Knights, Fair Maiden and the Page Boy on the castle walls and a Dragon peeking around the corner

Knights in fine armor! My knights and the dragon are based on the ones in Margret Bloom’s book, Making Peg Dolls, but I did some things differently. I have a book from my childhood which has a knight running away from a castle, across a snowy field, his white surcoat with flapping behind him. So I wanted my knights to have surcoats too,

Surcoats slip over the head and can be worn over armor—they don’t have sleeves. I made these two sided so they woudn’t fray. It’s not quite the look I wanted, Using light weight voile fabric would have been a better choice.

I ended up taking these surcoats off and painting on their armor. I like the Jerusalem cross but a bit of imagination is needed to see the other knight’s rampant lion!

On a quest. The dragon is peaking out from behind the mountains. The two knights have part of their coat of arms painted on their armor.

On a quest. The dragon is peaking out from behind the mountains. The two knights have part of their coat of arms painted on their armor.

I cut the center of the dragon’s tail and embedded the orange raised ridge, And I skipped the snout in that is sewn to the head piece of the dragon in the book. He’s a very shy dragon. Not causing anyone any trouble! I like him a lot!

While exploring places to buy the unfinished peg dolls, I discovered the wonderful world of unfinished wooden structures, blocks, toys and puzzle figures. The mountains and the castle blocks came from the Etsy shop, ClickityClack that is located in Michigan. They sell the peg dolls and a huge assortment of other items that they design and cut with a jigsaw.

I really like the painted mountains but can’t decide about the castle. I like the bare wood, but can also seen them painted to look like stone walls with roses climbing on them! For now, I’m enjoying them as is!

Notice: This blog is not monetized: I do not use affiliate links. When there are links in a post, they are to give credit to another creative person, because I like or have used a product, or to help the reader easily find supplies for a project.


TAGS: Peg Dolls, Wooden Peg Dolls, Cut out wood shape, Block castle, Peg doll Dragon, Peg Doll Knight


January 17, 2019

Gnome Peg Dolls Based on "The Gnomes' Winter Journey" by Ernst Kreidolf

by Judy Tucker


Attempt at a group photo. The red squirrels were distracted by dog! The Snow Queen is standing at the back.

Attempt at a group photo. The red squirrels were distracted by dog! The Snow Queen is standing at the back.

Attempt at a group photo. The red squirrels were distracted by dog! The Snow Queen is standing at the back.

Attempt at a group photo. The red squirrels were distracted by dog! The Snow Queen is standing at the back.

The Twelfth Day of Christmas has come and gone, yet gnome fever still persists here!

I found a lovely book, The Gnome’s Winter Journey, written by Ernst Kreidolf in 1924. It was just published in English in 2017. It has simple story about a family of Forest Gnomes going to visit their cousin, the Mountain Gnomes. They were looking forward to a big feast with their beloved Winter Queen and having competitive winter games in the snow.

I decided to make peg dolls of the characters in the book so that a child can act out the story line in the book.

IMG_8495.JPG
IMG_8499.JPG

Forest gnomes on the left, Mountain gnomes on the right. Below is a photo of the book cover with some of the dolls in the process of being made. It was so much fun making dolls that they look like the characters in a book. I did change up the mountain gnomes’ outfits….I didn’t have the right brown wool felt for their coats so I used orange instead. (They rather liked them)!

TheGnomes'WinterJourney.jpg

The last photo is of the Snow Fairies. They are really shy! And the Ice Gnome who is grumpy because one the Forest Gnomes were climbing up the icicles and broke one!

They shy Snow Fairies and and Ice Gnome

They shy Snow Fairies and and Ice Gnome

I like my peg dolls to have natural wood faces. But there is a tendency for the paint to run with the wood grain of the peg when adding fine details like eyes to the raw wood surface. Nobody wants a runny eye! Acrylic paint seals the wood so fine details can be added without the paint running. I hunted around a found a clear acrylic gesso that is certified to be free of known health hazards. I paint a very thin layer just on the face of the doll. Then when dry, add the facial features.

For more information on making peg dolls, see my post, Peg Dolls, from December 27, 2018.

Notice: This blog is not monetized: I do not use affiliate links. When there are links in a post, they are to give credit to another creative person, because I like or have used a product, or to help the reader easily find supplies for a project.

TAGS: Peg Dolls, Wooden Peg Dolls, Painting faces on wooden peg dolls, The Gnomes' WInter Journey book by Ernst Kreidolf


December 27, 2018

Peg Dolls

by Judy Tucker


2 3/8 inch Mushroom Peg Dolls

2 3/8 inch Mushroom Peg Dolls

2 3/8 inch Mushroom Peg Dolls

2 3/8 inch Mushroom Peg Dolls

To end out 2018, here’s another type of doll that I’ve been making recently. Peg dolls are made of wood, usually birch or maple and come ready to paint and dress. I rediscovered them when I was searching Etsy.com for gnomes before Christmas.

There are so many fun ways to use the wooden peg dolls. Margaret Bloom has written a great book, Making Peg Dolls, which has lots of wonderful ideas for making dolls and patterns for hats, cloaks and crowns which can be traced. I got the dolls, opaque watercolors, wool felt, pipecleaners, and beeswax polish from the online store, A Child’s Dream.

Here are a few of the peg dolls I’ve made this month. They are all based on dolls in the book recommended above, but I’ve done things differently on some of the dolls.

2 inch Acorn girl and a 2 3/4 inch Gnome

2 inch Acorn girl and a 2 3/4 inch Gnome

The Ginger Gnome, 2 3/4 inches

The Ginger Gnome, 2 3/4 inches

The Radish Twins, 1 11/16 inches

The Radish Twins, 1 11/16 inches

The dolls come in all sizes—from big at 3 9/16 inches to tiny at 1 1/4 inches tall. The largest 3 9/16 inch peg dolls are fine for a toddler.

The smaller dolls are a choking hazard (as are some of the outfits) and are NOT for children under age 3 years old.

None of the dolls shown in these pictures are toddler safe but they are lots of fun for older children, and adults love them too.

I have a box of assorted size pegs. I can’t wait to see who they become!

Notice: This blog is not monetized: I do not use affiliate links. When there are links in a post, they are to give credit to another creative person, because I like or have used a product, or to help the reader easily find supplies for a project.


TAGS: Wooden Peg Dolls, Peg Dolls, Making Peg Dolls by Margaret Bloom


Powered by Squarespace 7