Using sticky notes for as templates to mark a quilt for free motion quilting

by Judy Tucker


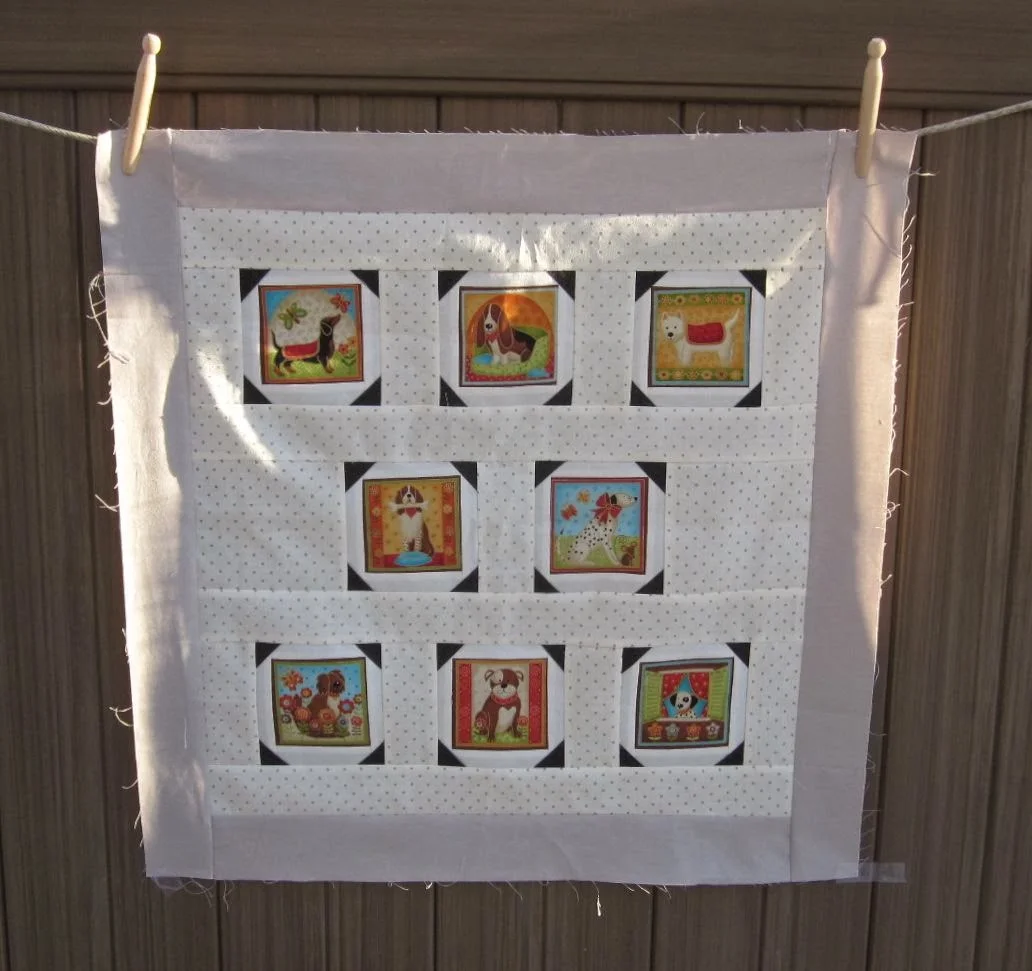
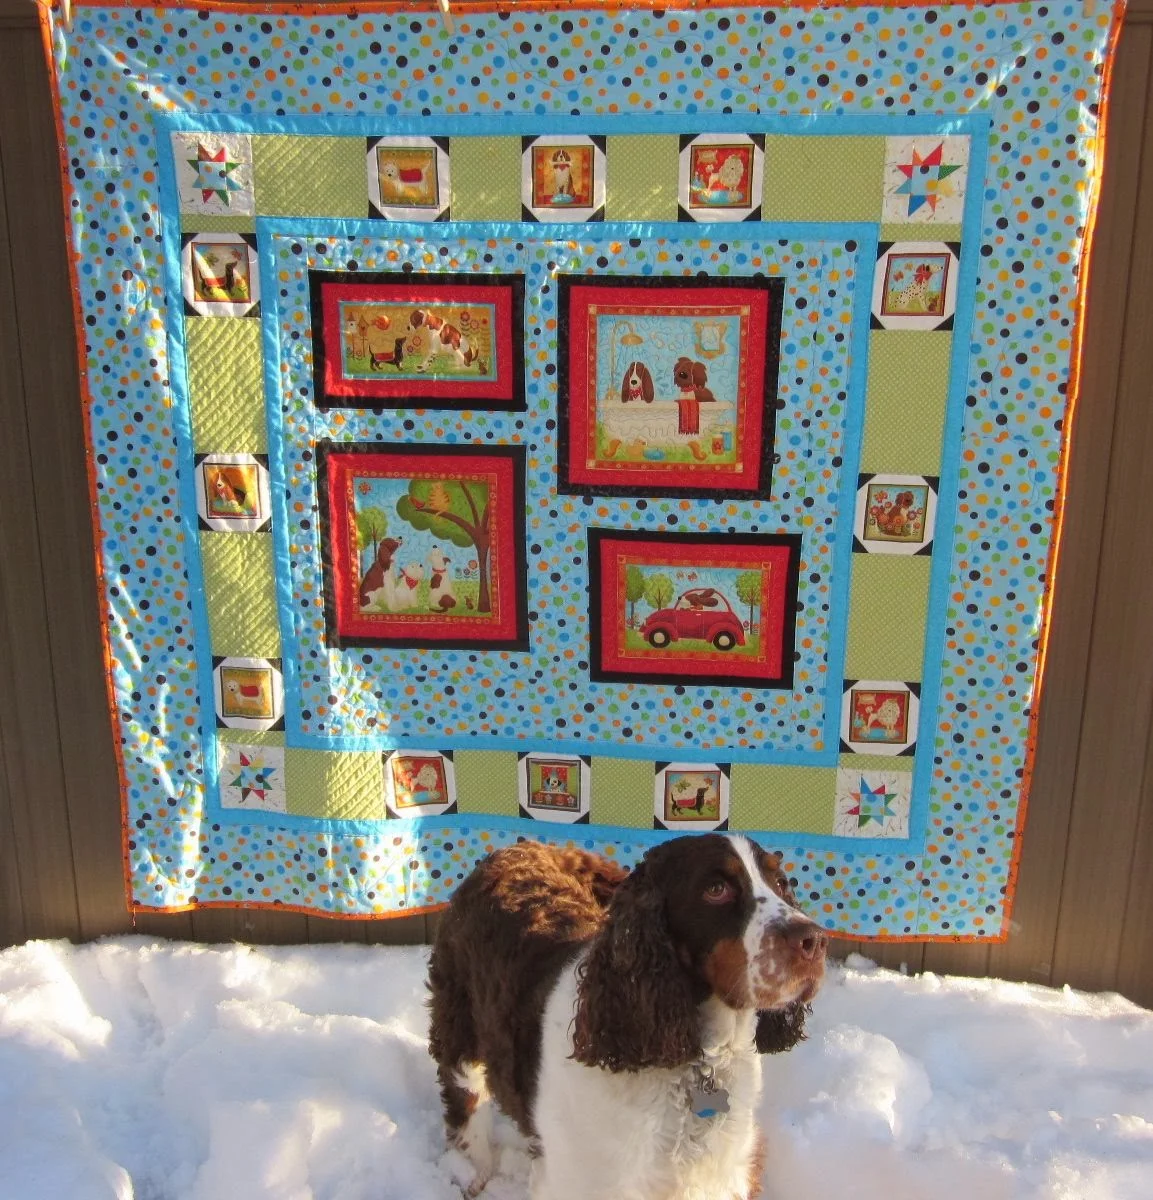
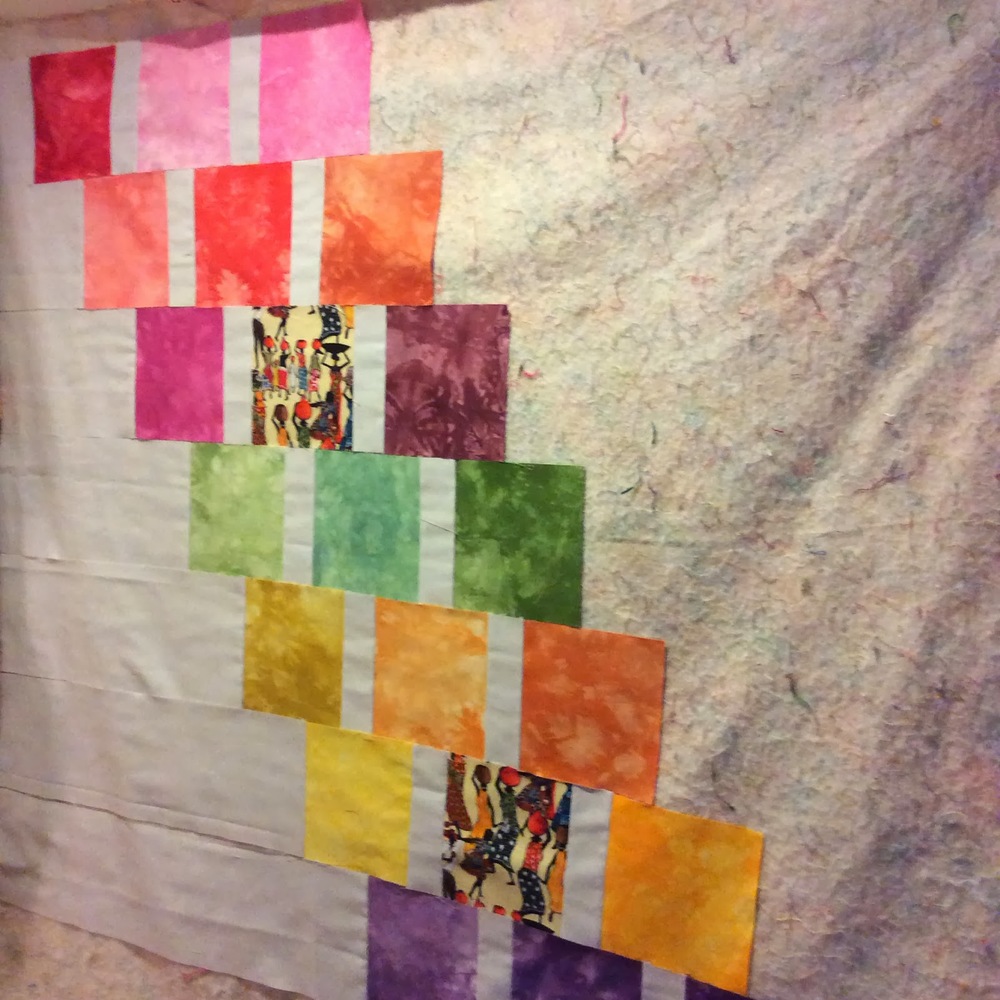
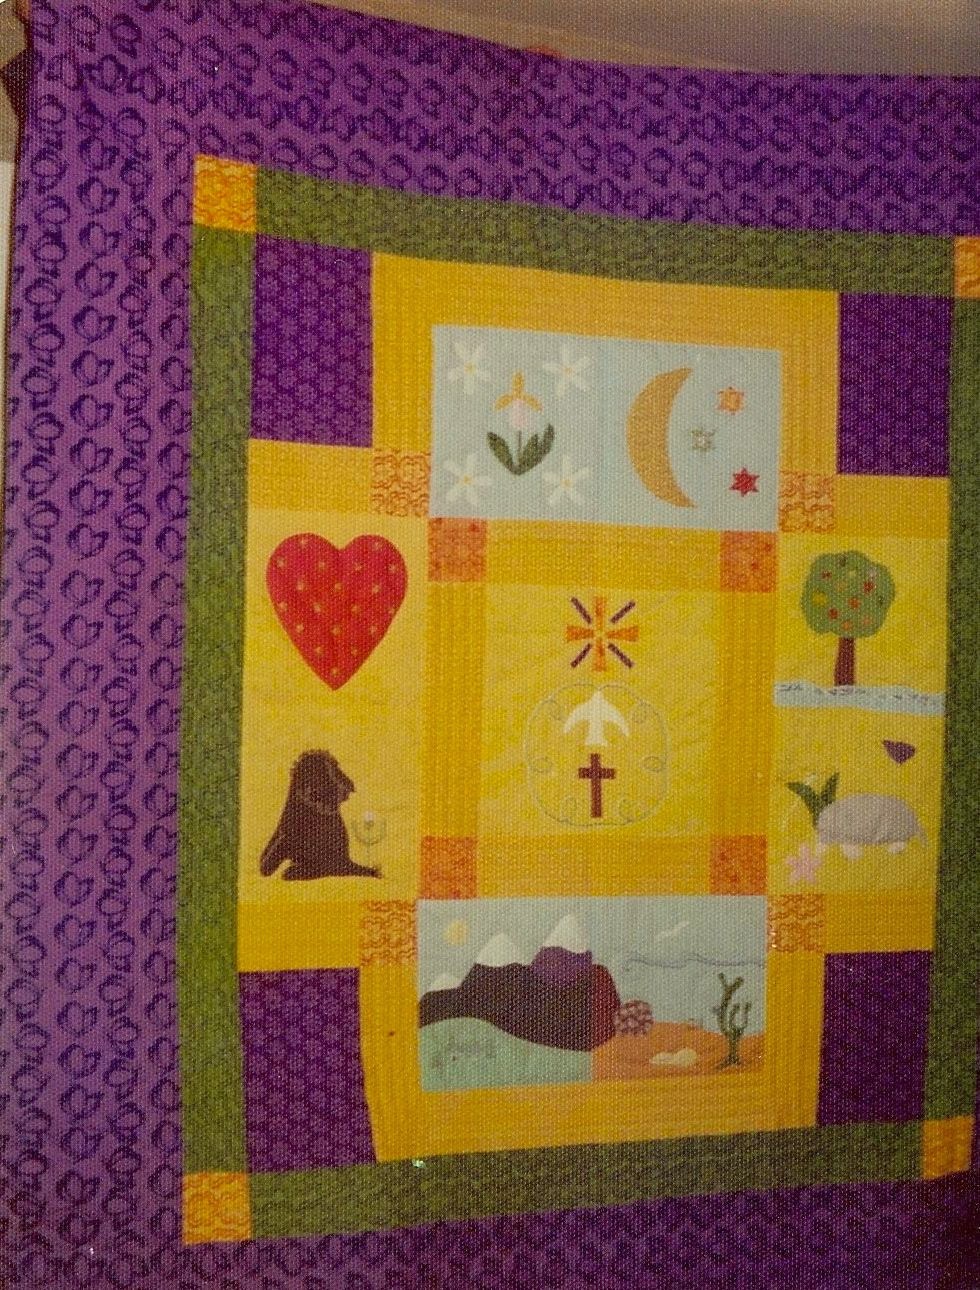
Yesterday I was looking at a wall hanging and thinking about how I wanted to do the free motion quilting on it.  I decided I wanted to put a heart in each of the areas of the wall hanging which had some negative space.  I do a lot of free motion quilting without planning or marking but in this case I wanted my hearts to be symmetric, in the center of the space and the right size.  That just wasn't going to happen with spontaneous quilting.  

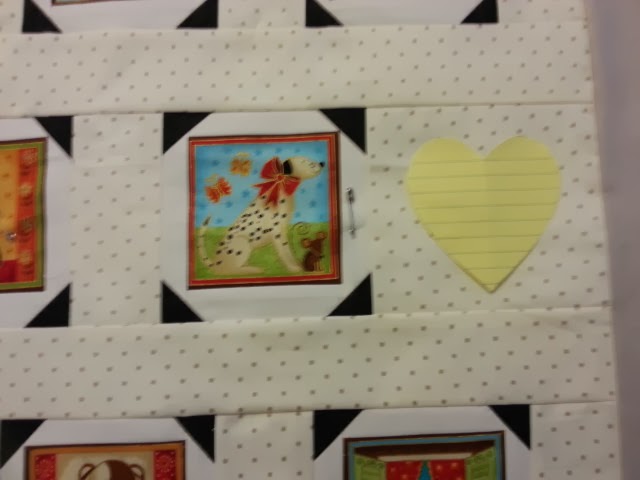
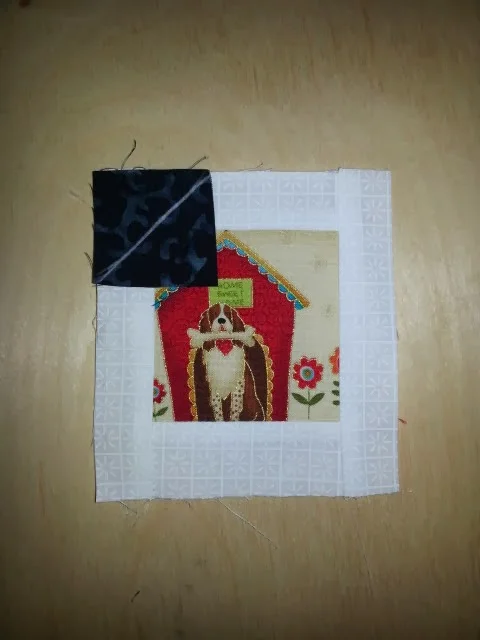
I looked around to see what was at hand to draw my template heart.  There was a pad of sticky notes that looked about the right size.  I drew my heart, cut it out and put it down on the quilt.   And it stayed in place!  The adhesive on the paper was just enough to keep it still so it didn't shift as I drew around the template--brilliant!  Now that's a serendipitous moment!

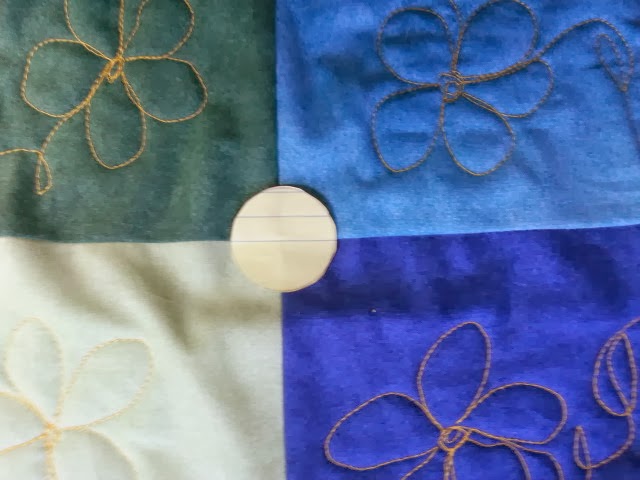
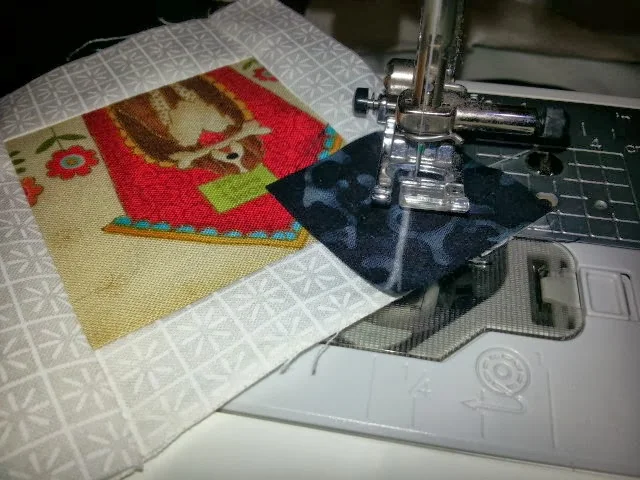
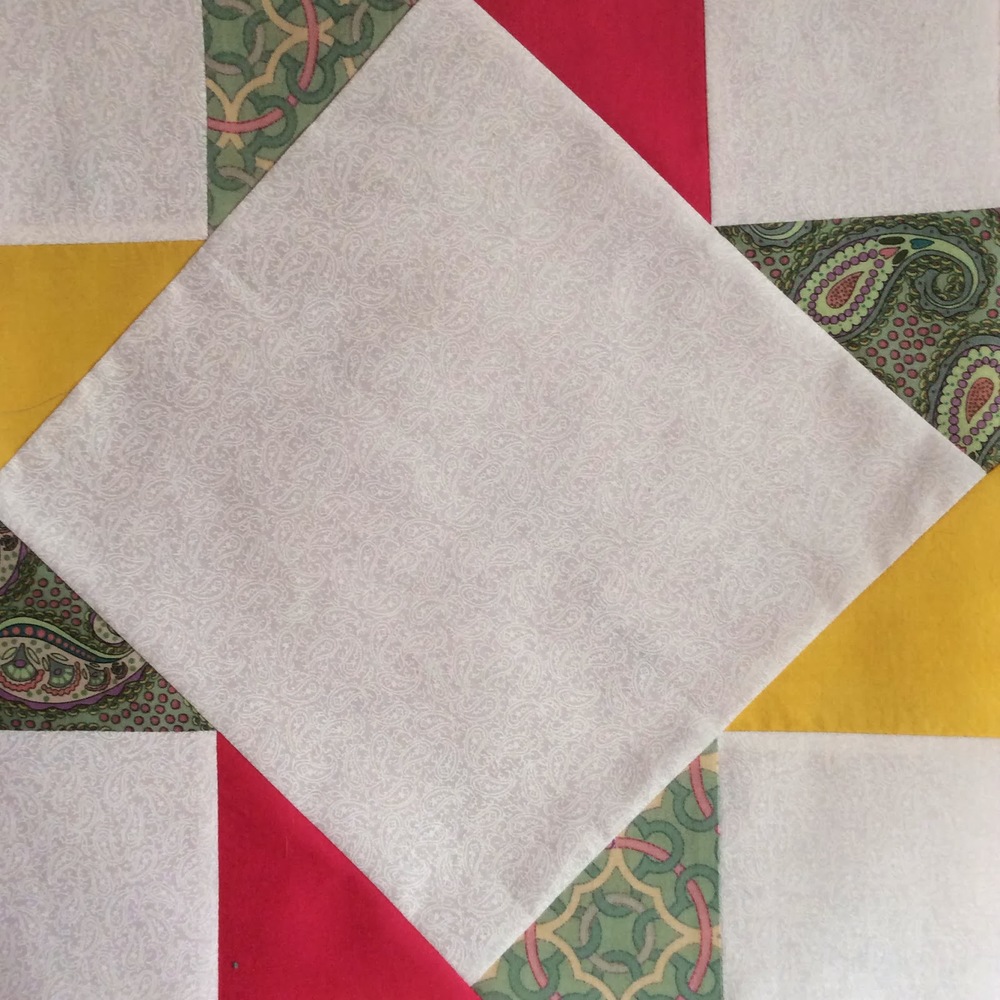
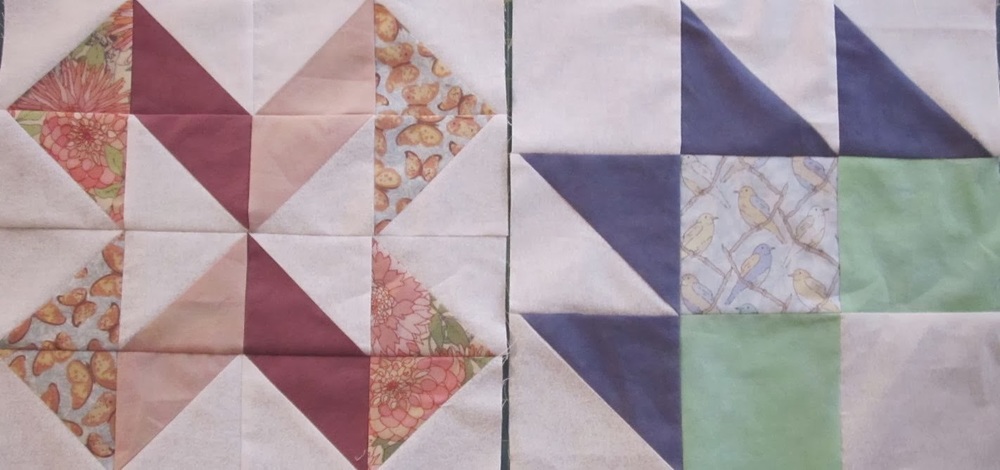
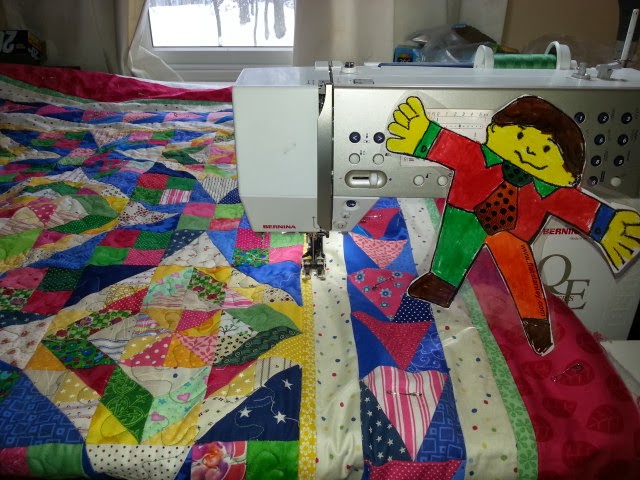
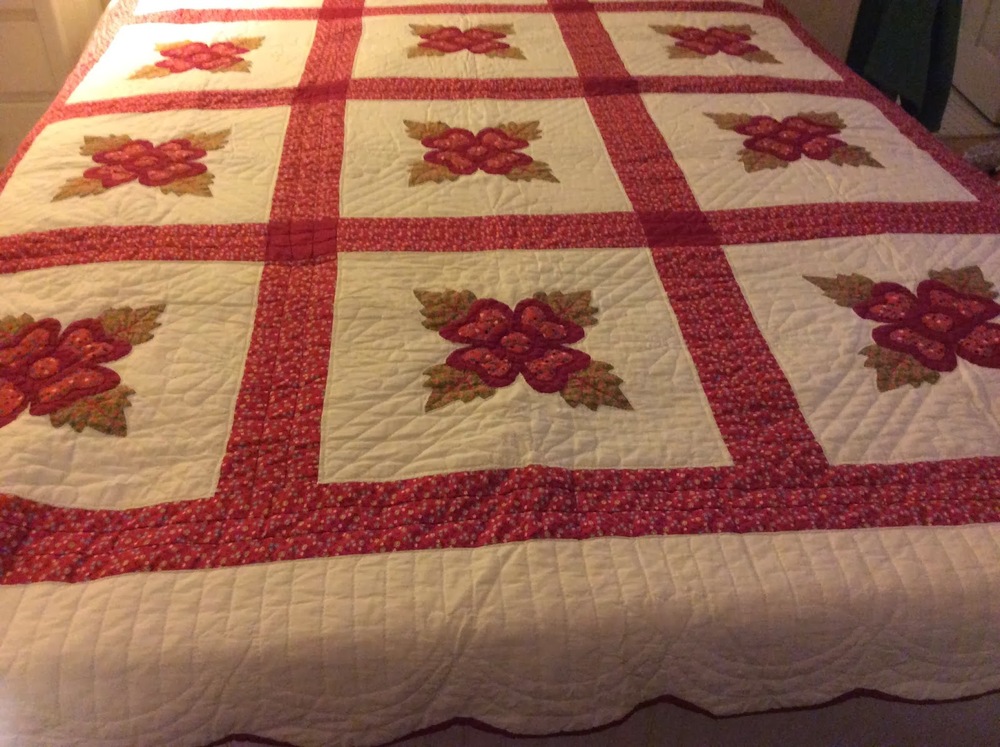
Later in the day I used it again to put a circle at the intersection of 4 blocks in a quilt where I needed to just tack down the quilt a bit more.  I tried sewing around the paper but it wasn't sticky enough to do that.  So, it's great if you just want a template for marking a few designs but not useful as a template during sewing.

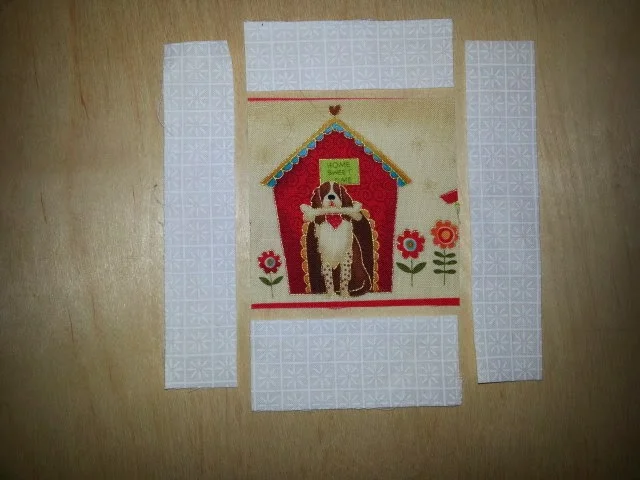
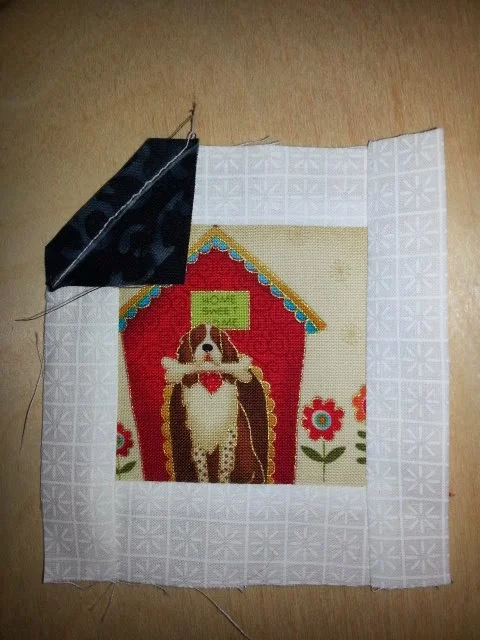
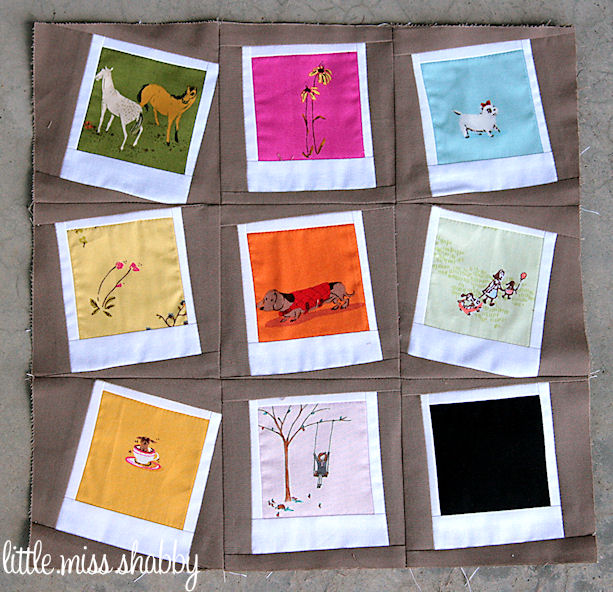
Here's the sticky note template on the quilt.


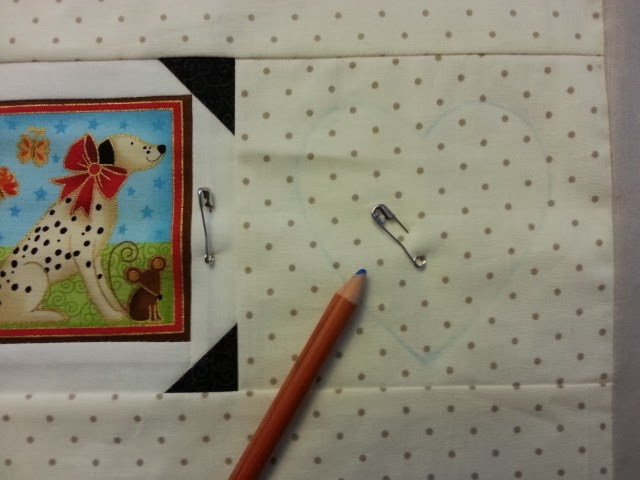
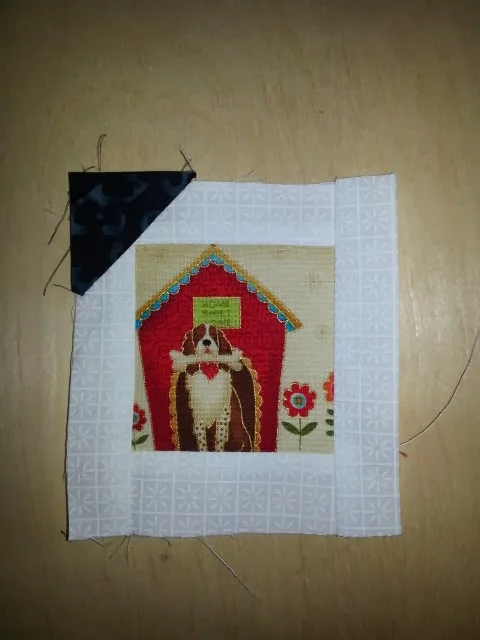
Here's the marked quilt.  I used a blue Dritz pencil.  I don't have a favorite marking pencil. Sometimes I use tailor's chalk, sometimes chalk pencils and sometimes this one.


s
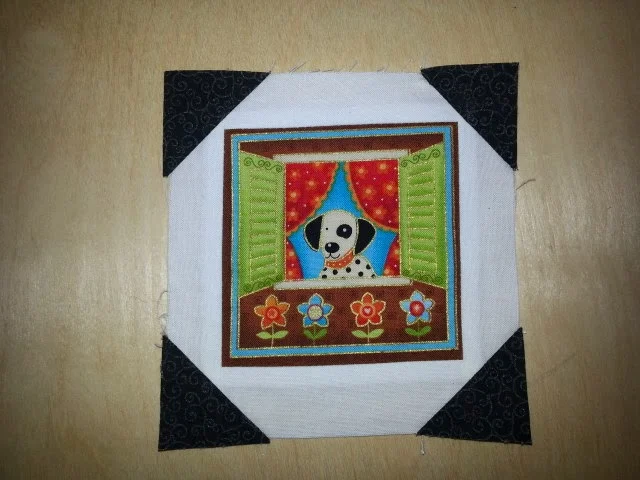
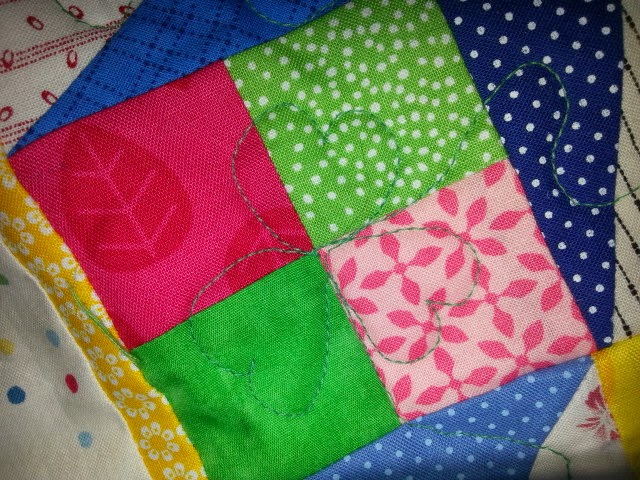
Here is the circle on the other quilt.

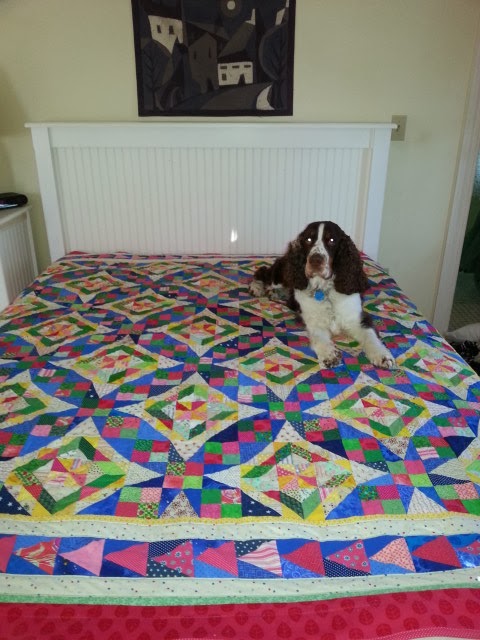
This worked really well for me.  Give it a try!

Book Report: Quilting with A Modern Slant by Rachel May

by Judy Tucker


Are you one of those people who like to read cookbooks and quilting books at bedtime?  Are you active in the Modern Quilt movement or just curious to learn more about it?  Then you are going to really enjoy  Quilting With A Modern Slant, people, patterns and techniques inspiring the Modern Quilt Community by Rachel May. ( Storey Publishing, North Adams, MA 2014).


Rachel May has interviewed men and women who are an active part of Modern Quilting.  She has 1-4 pages  on each person. Each new interview Chapter starts the the heading "Meet…then the person's name" and a subheading giving a clue to what their speciality or interest is.  I love this format--I really do feel like I am being introduced each of these artisans!

One of other layout features that that I really like is green bar at the bottom of some of the pages that has definitions of quilting terms or suggestions about how to do something. It makes me smile because it reminds me of the school closure list on TV on a snowy day!

The book has hundreds of full color photos which run the spectrum of modern quilts. There are patterns for some of the quilts and other projects. And there are tutorials on techniques including finishing a quilt, doing free motion quilting, doing fusible web appliqué and even dyeing fabric in pinks and purples using an avocado pit!

This book is a visual joy and so much fun to read.  Pick up a copy.  You'll be glad you did!


Quilting Along: {Big} City Girl QAL quilt is done!

by Judy Tucker


Last fall I joined the {Big} City Girl QAL, a quilt along group on Flickr.  I heard about the group when our quilt guild, Proper Bostonian Quilters, was given a challenge to make Amy Friend's Boston's Zakim Bridge Block.  If you scroll down that link to her blog, you'll see the block all the great entries submitted by our guild.

Designers from around the globe were asked to create a quilt block that reflected the city were they live.
There were pieced blocks, appliqué blocks and paper pieced blocks.  All the blocks are beautiful.  Some of the blocks were easy to make, some were challenging!  My paper piecing skills definitely improved working on this project!

Group members were invited to create blocks of other cities and share them on the site.  Some beautiful blocks were added by QAL members.  You can see all the blocks at  the {Big} City Girl Flickr site.
Capetown, Pretoria, Istanbul, Melbourne, Munich, Vienna, London, New York were some of the great added blocks. The project ended at the end of November, 2013, but folks are still out there sewing which is awesome.  A beautiful San Francisco block showing the Painted Ladies houses with the Golden Gate Bridge in the background was just recently added.

I'd never made a paper pieced pattern but wanted a block for Rome and a friend wanted a Hamburg block.  Some of the designers used EQ to design their blocks but others designed the blocks by hand.  Seeing how the hand drawn blocks were put together encouraged me to give it a try too. I drew the picture I wanted, scanned it into the computer and then flipped that image horizontally on the computer.   That gave me the mirror image of picture which you need to use to paper piece a block. Then I cut out the pieces pasted them to another sheet of paper and drew seam allowances around the pieces.  The last step was to rescan the cut pieces for my final pattern.  It took a few tries but it worked!  The original Hamburg block is in my quilt.  But the pattern I gave to my friend has the doors open so she cut add a family photo to the doorway!  It was so much fun adding the opening and closing doors and having that pattern work!

I thought I was just going to make a wall hanging of some of the cities where I've lived:  Rome, Boston and Paris.

But the blocks were all so beautiful and so much fun to make that I ended up with enough blocks for a quilt too!  It's finally finished.  I love it.

The cities included in my quilt are, from left to right, Hamburg, London, Vancouver, Tokyo, Warsaw, Berlin, Wellington, Sydney and Alesund.

Here all 3 photos of the quilt taken in different light. They all show different aspects of the quilting.


Outdoors, cloudy day.  This has the best color and is the best overall photo of the quilt, but it doesn't show off the quilting.

Outdoors, late afternoon winter sun.  This shows off the texture from the quilting but it's hard to see the blocks.


Indoor lighting shows the quilting details nicely.  While  Fluorescent light may be good for the environment,  it  dulls and alters the colors of the quilt.


You can still get the patterns for the blocks by going to the {Big} City Girl link on Aylin's blog at Aylin-Nilya.blogspot.de.   Thanks so much to Aylin and Amy for moderating this fabulous QAL and for the amazing designers who contributed blocks of their home town!  I have had the best time working this project!


Vintage Photo Album Block Tutorial

by Judy Tucker


When I first saw Little Miss Shabby's 

Polaroid Quilt Block

 I was really impressed with its modern simplicity and the potential for using it a variety of ways.  But I never had a Polaroid camera so I wondered if I could use the idea of a fussy cut "photo" and take it in another direction.

And then it came to me.  Do you remember those little black picture corners your folks or grandparents used to paste photographs in albums with plain black paper pages?  That was it!

My "photo" has a narrower lower border than the Polaroid Quilt Block since the deep lower border was just found on Polaroid photographs.  I sewed black triangles to make the picture corners.

I've used my Vintage Photo Album block in a couple quilts with fussy cut quilt blocks...mostly dogs "photos"!

Here is a a wall-hanging Work In Progress that I was working on today:

Here's how to make the blocks:

Materials:

   Solid white or light cream fabric for the margin of the photo

   Solid black or black patterned fabric to make the picture corners.  Great way to use those little scraps!

   Fabric you want to  fussy cut or print actual photos onto fabric

Step 1:

--Fussy cut your "photos" or print your real photos on fabric.  

Step 2:

--Cut a 1" wide strip and a 1.25" wide strip

 of white or light cream fabric.

          Cut the 1" wide strip into 1 piece the width of your fussy cut piece. This will be at the top of your photo.

          Cut 2 pieces of the 1" wide strip the length of your fussy cut piece adding 1.75". These will be the sides of your photo.

           Cut the 1.25" strip to the width of your fussy cut. This is the bottom of your photo.

--Cut a 1" wide strip of black or patterned black fabric.  

          Cut this strip into 1" squares. You need 4 for each photo. Theses will be the photo corners.

Step 3:

--Draw a diagonal line on the back of the black squares.  I used white tailor's chalk to draw the line.   This line will be a guide for your sewing.  

--Move your needle 1-2 places 

to

 the right so that you sew just to the right of the line drawn on your black square.

Sew a black square on the first corner of your block

Step 4:

  --Fold back the the inner edge of the square making a triangle.  Press and trim the seam UNDER the new corner to 1/4".  This keeps the block from getting too bulky.

Step 5: 

--Sew a black square on all 4 corners. That's it!  Your Vintage Photo Album Block is 

ready

 for you to use in your project! 

Here's a quilt I made using the Vintage Photo Album Block. It has some "framed pictures" too!

Hope you've had fun and will enjoy using this block. Let me know what you do with it!


Sewing Along: Vintage Quilt Revival

by Judy Tucker


I'm having a great time participating in the Flickr Group Vintage Quilt Revival Block Along which started in January.  The group is making blocks in the book, Vintage Quilt Revival: 22 Modern Designs from Classic Blocks by Katie Clark Blakesley, Lee Heinrich and Faith Jones.   The authors have taken classic quilt blocks and put a modern twist on them.  The book has some stunning modern quilts they made for examples.

The blocks are rated Beginner, Intermediate and Advanced.  The book has photos of quilts made with just 1-2 of the blocks as well as suggestions for 3 sampler quilts.  A CD included with the book has patterns for paper piecing the more complicated blocks and for a couple other projects. I've found the paper piecing patterns have worked beautifully.  There were some typos in the book that affecting cutting the pieces.  Corrections can be found here: Pattern Errata

I'm using my stash for my blocks.  I had some half yard cuts from the Victorian Modern line from Andover Fabric which was designed by Weeks Ringle and Bill Kerr, some small cuts from  Fiber on a Whim which were cut from hand dyed fabric which weren't evenly dyed enough to be sold as yardage.  I've added some odds and ends when I needed some larger pieces of fabric. 

I've found working on a sampler quilt a real challenge.  Each week I have to choose the colors for 2 new blocks from my stack of fabrics so it's like designing a new quilt every week.  And each block has it's own learning curve.  As the weeks go on the learning curve has been getting steeper every week.  But my paper piecing skills are getting better too so it has been totally doable   We are half way through the Block Along.  Here are the blocks so far: 

                                                        This week's 2 blocks with the book.

Blocks from the previous weeks.


Check out the Flickr site to see all the great blocks that other folks are making. I'll post my progress as the project continues.  There are 5 more weeks to go!

Colorful Path to Market Quilt

by Judy Tucker


Last summer I heard about hand dyed fabrics from Fiber on a Whim.  I wanted to see (and touch!) some of their fabric so ordered their Kona Pack 5.5, a stack of 35  5.5 inch squares, all dyed in different colors.  Such fun!  I knew I wanted to make a Modern quilt with them but didn't have a plan when I ordered them.  They have great original Crayon Box Pattern for their Kona Pack available on their website but I wanted to try something else.

I found the inspiration for the pattern I designed for this quilt after seeing Ashley Newcomb's Modern Hexagon Quilt on The Modern Quilt Guild blog.  
I really liked what she did with the cascading hexagons and the outlying blocks.  

I made this quilt is for one of my dog trainers.  She has some African print art work and the African print fabric echoes her art. I was so excited to find it!


Front of quilt


Back of Quilt


SEWING THE QUILT
Sewing the color blocks

                  Color strips all done!

In process on the design wall

COLORFUL PATH TO MARKET  PATTERN                                                                          


Finished size after washing: 54.5 x 65”  (approx. 58.5 x 69 unwashed)

Fabric requirements:
-- 34  5.5” squares.  Use all color blocks or add some patterned blocks if desired
(Note: Charm packs have 5” squares so this pattern won’t work for them).
--3 yards solid light grey for background.
--3 yards for backing
--1/2 yard for binding

I recommend using design wall to keep your strips and steps organized.  If you don’t have one, you can mark the backs of each strip with the Row number and Right or Left to keep them in order.

Cut from grey fabric:
Step 1:
14   5.5” strips WOF (width of fabric).  You will recut these in Step 2 and you will need to use your scraps so save them.
22   2 x 5.5” strips

Step 2:
The quilt is strip pieced. There are 14 horizontal strips in the quilt.  Cut the grey WOF strips from step one as noted below:

Strip 1 AND 14:  58.5” grey strip (use 1 WOF strip and scraps from other steps to get the full length)
Strip 2:  From grey WOF strip, cut one 5.5” piece to use on left side of the color blocks and one 35.5 piece to use on the right side of the color blocks. 
Strip 3:  From grey WOF strip, cut one 8.5” piece to use on left side and one 32.5” piece for right side
Strip 4:  From grey WOF strip cut 11.5” piece for left side and 29.5” piece for right side
Strip 5:  From grey WOF strip cut 14.5” piece for left side and 26.5” piece for right side
Strip 6:  From grey WOF strip cut 17.5” piece for left side and 23.5” piece for right side
Strip 7:  From grey WOF strip cut 20.5” piece for left side and 20.5” piece for right side
Strip 8:  From grey WOF strip cut 23.5” piece for left side and 17.5” piece for right side
Strip 9:  From grey WOF strip cut 26.5” piece for left side and 14.5” piece for right side
Strip 10:  From grey WOF strip cut 29.5” piece for left side and 11.5” piece for right side
Strip 11: From grey WOF strip cut 32.5” piece for left side and 8.5” piece for right side
Strip 12:  From grey WOF strip cut 35.5” piece for left side and 5.5” piece for right side
Strip 13:  Use grey WOF strip, one color block and scraps to make a 58.5” wide strip
Strip 14: Same as strip 1

ASSEMBLE STRIPS
--Sew the color block sections first:
         Color block, 2 x 5.5” strip, color block, 2 x 5.5” strip, color block

--Then attach the grey strips as cut in Step 2. 

--Sew the horizontal strips together in order.  To help keep the rows from warping, sew the even numbered rows starting from the Right side and the odd numbered rows from the Left side.

--Back and quilt as desired.


Copyright 2014 Judy Tucker, SleepingDogQuilts@blogspot.com.  You may use this pattern for your personal use only. 


Finish them February: Part 1

by Judy Tucker


I think it's great that Lee, who blogs at Freshly Pieced Modern Quilts, hosts WIP (Work in Progress) Wednesday and Amandajean, who blogs at Crazy Mom Quilts, runs Finish it up Friday.  Both are Linky parties that encourage folks to keep working on their quilts and then link up to share their photos.

So...
At the beginning of the month, I declared that this month is going to be my Finish them February!
I had a stack of quilt projects that I had bumped last fall so I could work on the Bonnie Hunter Celtic Solstice Mystery Quilt and to have time to finish some presents for the holidays.  Some of the quilts were partially pieced and others needed to be sandwiched and quilted.  The stack of UFO projects on top of the dog's crate was looking more and more like the leaning tower of Pisa!  Not good!

It has been very cold and snowy since the beginning of February which has really helped my progress!  The month is half over and the news is good.  All the piecing is done and only one more quilt needs to be sandwiched.  Here is my stack of quilts waiting to be quilted.


My First February Finish was my Bonnie Hunter 2013 Celtic Solstice Mystery Quilt.  My quilt has a slightly different color combination than the one suggested in the pattern.  Bonnie's color way was orange, green, blue and neutral shirting fabric.  I switched out the orange (not my favorite color) for hot pink.  I've named my quilt My Irish Rose.  It is very rosy!

Flat Stanley was here visiting me from my nephew's second grade class while I was working on the quilt.  We had a big snow storm so he helped me with the quilting!


There is a shamrock free motion quilted in each of the 4 square blocks.


Somewhere in the quilt there is a single 4 leaf clover.  I have no idea where it is!  I love the idea that there is  hidden treasure in the quilting!

Here is the finished quilt.  It didn't take long before Taffy found it on the bed!  This is a great project and I'm thrilled how it turned out!


I'll keep you posted as I continue make progress on Finish them February!  Post a comment if you get some of your own February Finishing done!

Applique quilts from the early days

by Judy Tucker


I got some great lessons in quilting while I was a college student in the upper Midwest.  The grandmother of one of my college roommates taught us both how to do hand quilting with the quilt on a large quilting frame.  That was so much fun. She taught us how to hide our knots and how to keep our stitches small and even. 

I didn't have a sewing machine of my own until I started to work after college, so mostly I did hand appliqué with turned edges.  I spent a lot of time doing appliqué at the laundromat!  Come to think of it, I stopped doing hand appliqué once I got a washing machine in my apartment! 

I drew my own patterns for the appliqués on both of the quilts below. 

Here's my godchild's well loved Winnie the Pooh theme baby quilt. It was a mix of cotton calico and cotton-poly broadcloth. The broadcloth has survived but the cotton calico has worn thin and shredded. 
I am thrilled it was used so much that it has gotten worn out!


This quilt was a wedding present a friend. The appliqués are all things that were important and special to the bride.  The bold prints are hand prints from Marblehead Handprints which was in a small fabric company in Marblehead Massachusetts in the 1970s.  I remember many happy hours of sewing in the laundromat working on this quilt, as well as the fascination of the other customers!


So that's it for my introduction. 

These days I mostly am making pieced or paper pieced quilts, but occasionally I will do a fusible appliqué. For the past 2-3 years I've been making about 2 quilts a month. 

I have lots of projects in the works and ideas for a lot more!  I enjoy making both traditional and Modern quilts.  I do use patterns but I love creating my own designs too.  It's color that I find really exciting.  Solids, '30s prints, modern prints, they all make me happy!  

So welcome! I hope you enjoy following along on my quilting and sewing adventures.  


How I began quilting

by Judy Tucker


So why do I quilt?

College and quilting are totally linked together.  On a tour of colleges through Pennsylvania my Mom and I drove by a house in the country with had a little sign "Quilts for Sale" on the front lawn.  Very uncharacteristically, we stopped and knocked on the front door.  2 Mennonite sisters had a trunk full of quilts.  They were all the same appliqued flower pattern done in a variety of colors.  I fell in love with a red and green quilt.  Mom hemmed and hawed but finally said yes, we could buy it.  It cost $55.  As the years went by, Mom often said she wished she purchased more than one!
This quilt is still a beauty!
It stayed at home when I headed off to college in Minnesota.   
My classmates at college were from small towns and farms in Minnesota and North and South Dakota. They all had homemade quilts on their beds.  I was from the East Coast...no quilt. That required remediation and so began my quilting education!