Search
  • Information
    • About
    • Contact
    • Privacy Policy
  • Blog
  • Subscribe
  • Tutorials
    • Tutorials
    • Doll Clothes: Photos and some Patterns
  • Suggested Reading
  • Quilts: My Original Designs
  • Gallery: Color Studies
  • Gallery: Quilts I've Made
  • Doll Making Blog Posts
  • Recent blog posts
  • Quilts Based on The Improv Handbook for Modern Quilters
Close
Menu
Search
Close
  • Information
    • About
    • Contact
    • Privacy Policy
  • Blog
  • Subscribe
  • Tutorials
    • Tutorials
    • Doll Clothes: Photos and some Patterns
  • Suggested Reading
  • Quilts: My Original Designs
  • Gallery: Color Studies
  • Gallery: Quilts I've Made
  • Doll Making Blog Posts
  • Recent blog posts
  • Quilts Based on The Improv Handbook for Modern Quilters
Menu

Sleeping Dog Quilts

SLEEPING DOG QUILTS

October 13, 2022

"To the Point" Brown Bag Mystery Quilt 2022: Dog Theme

by Judy Tucker


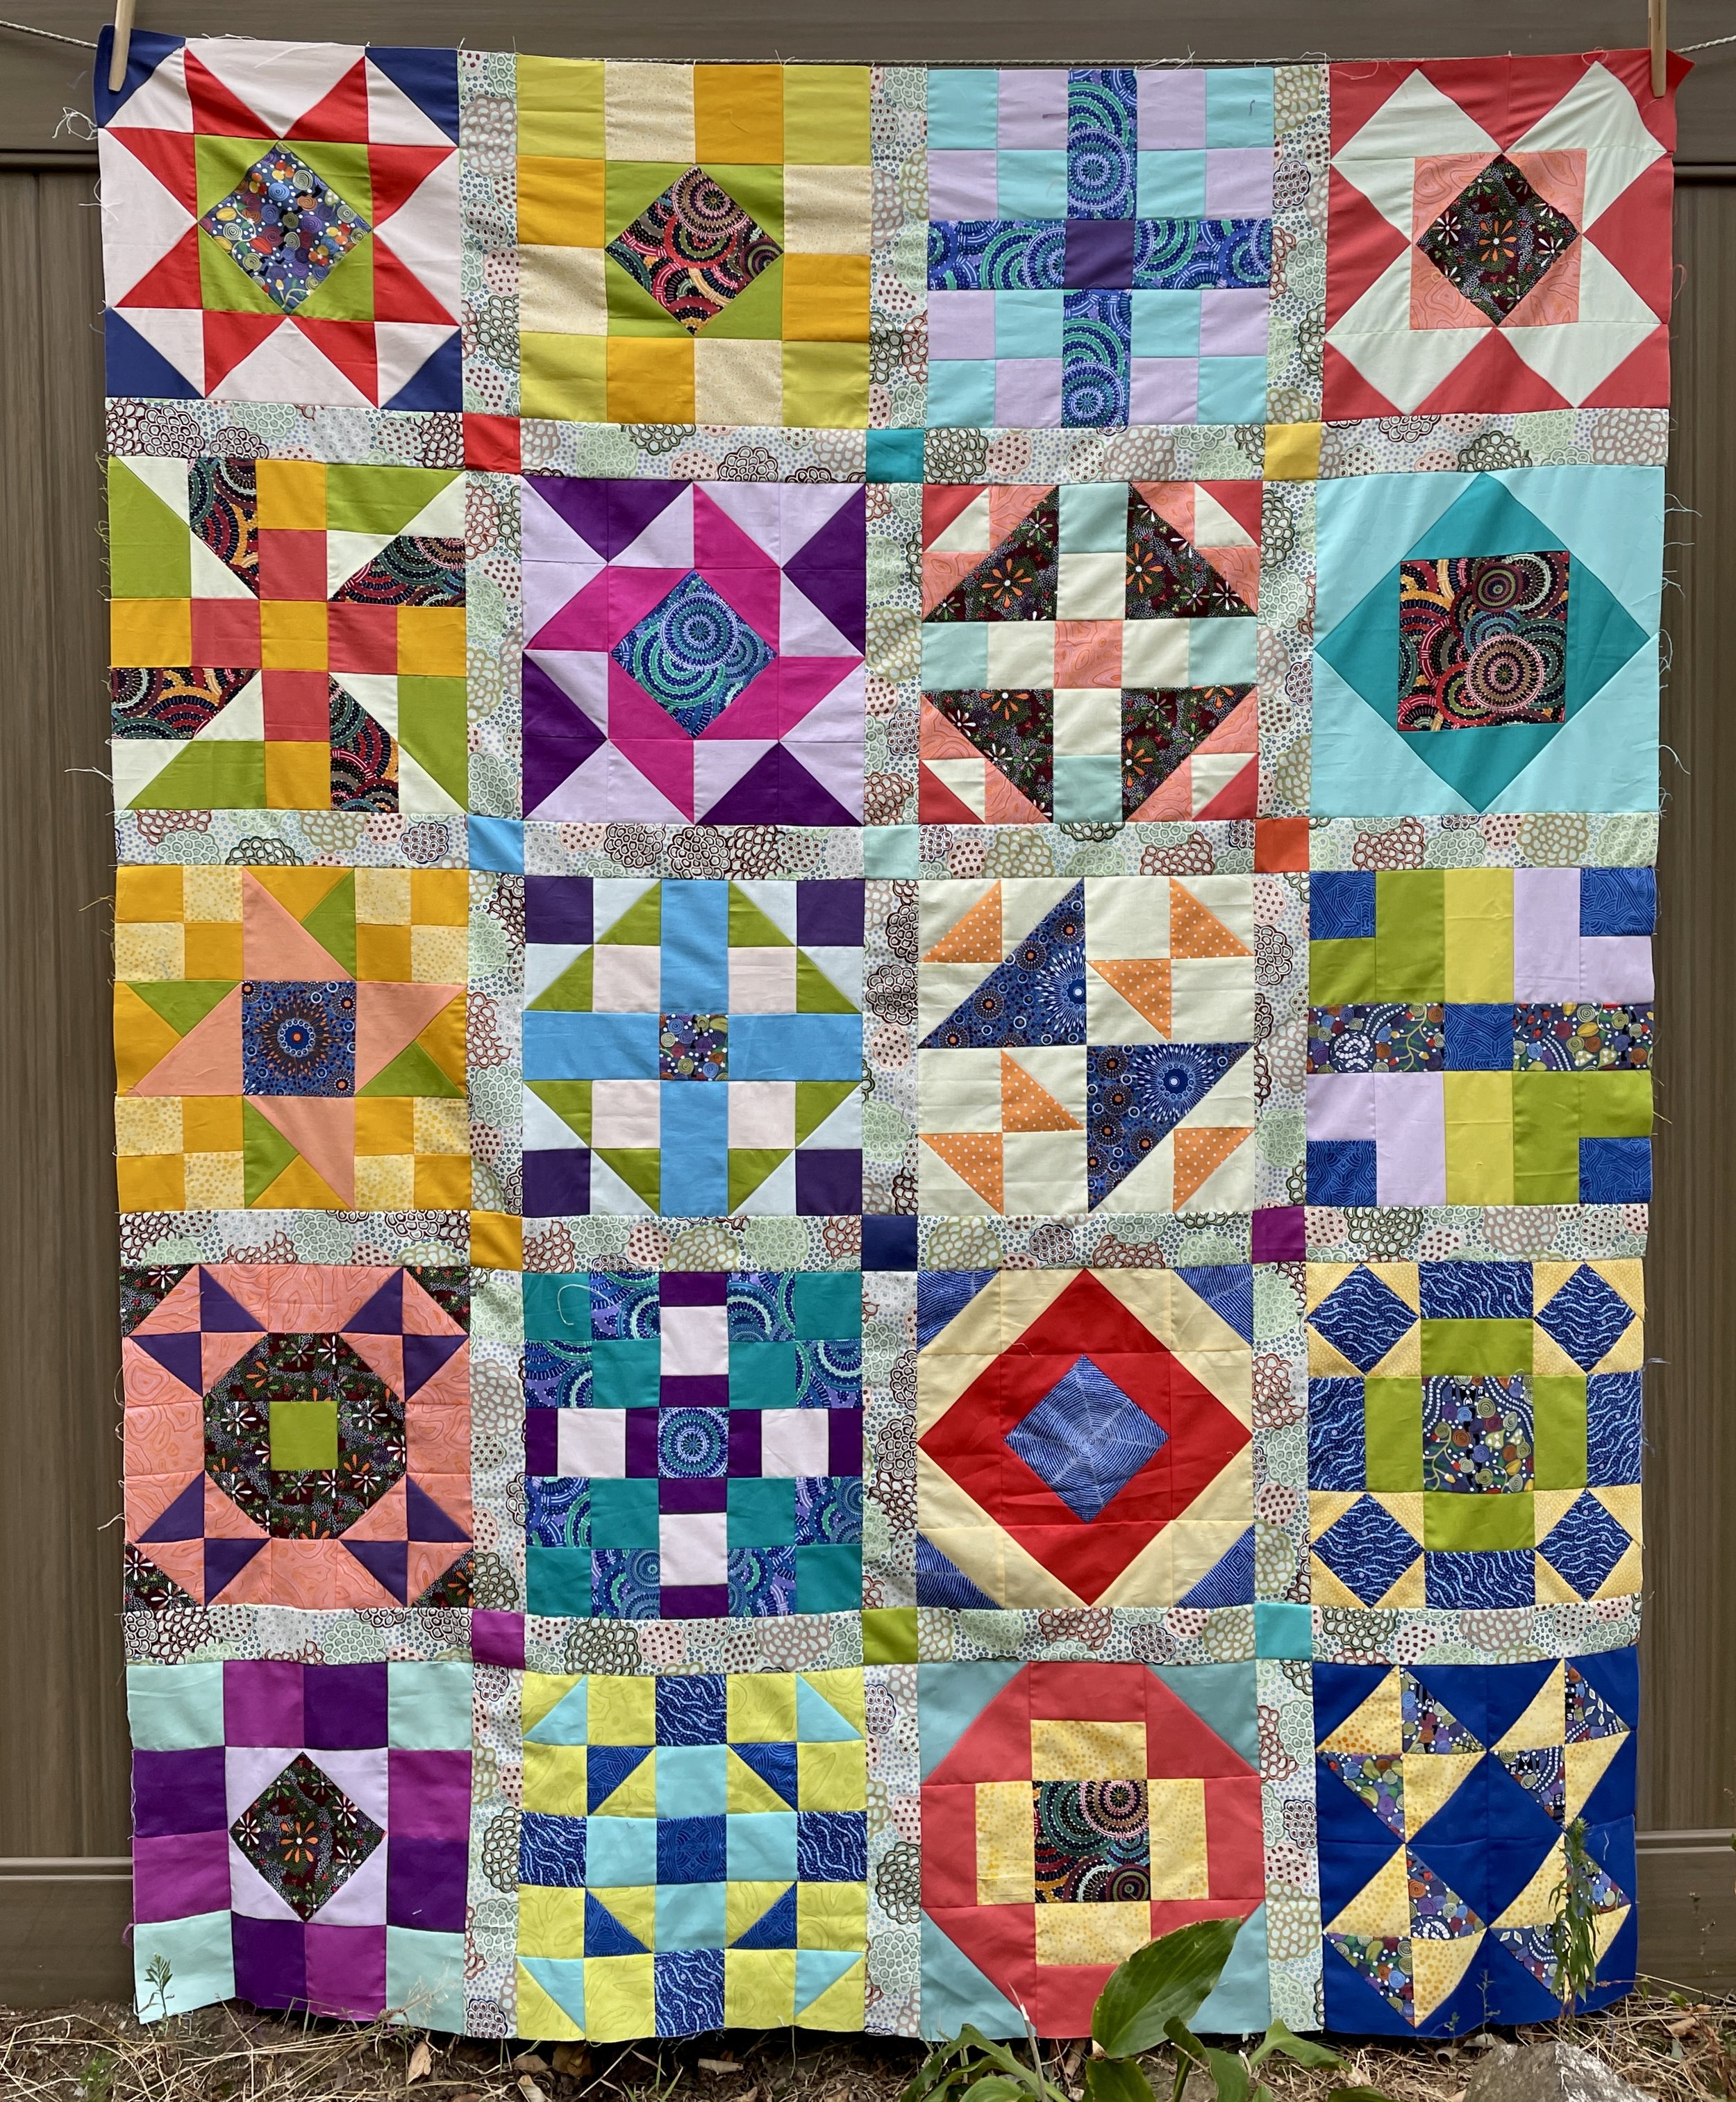
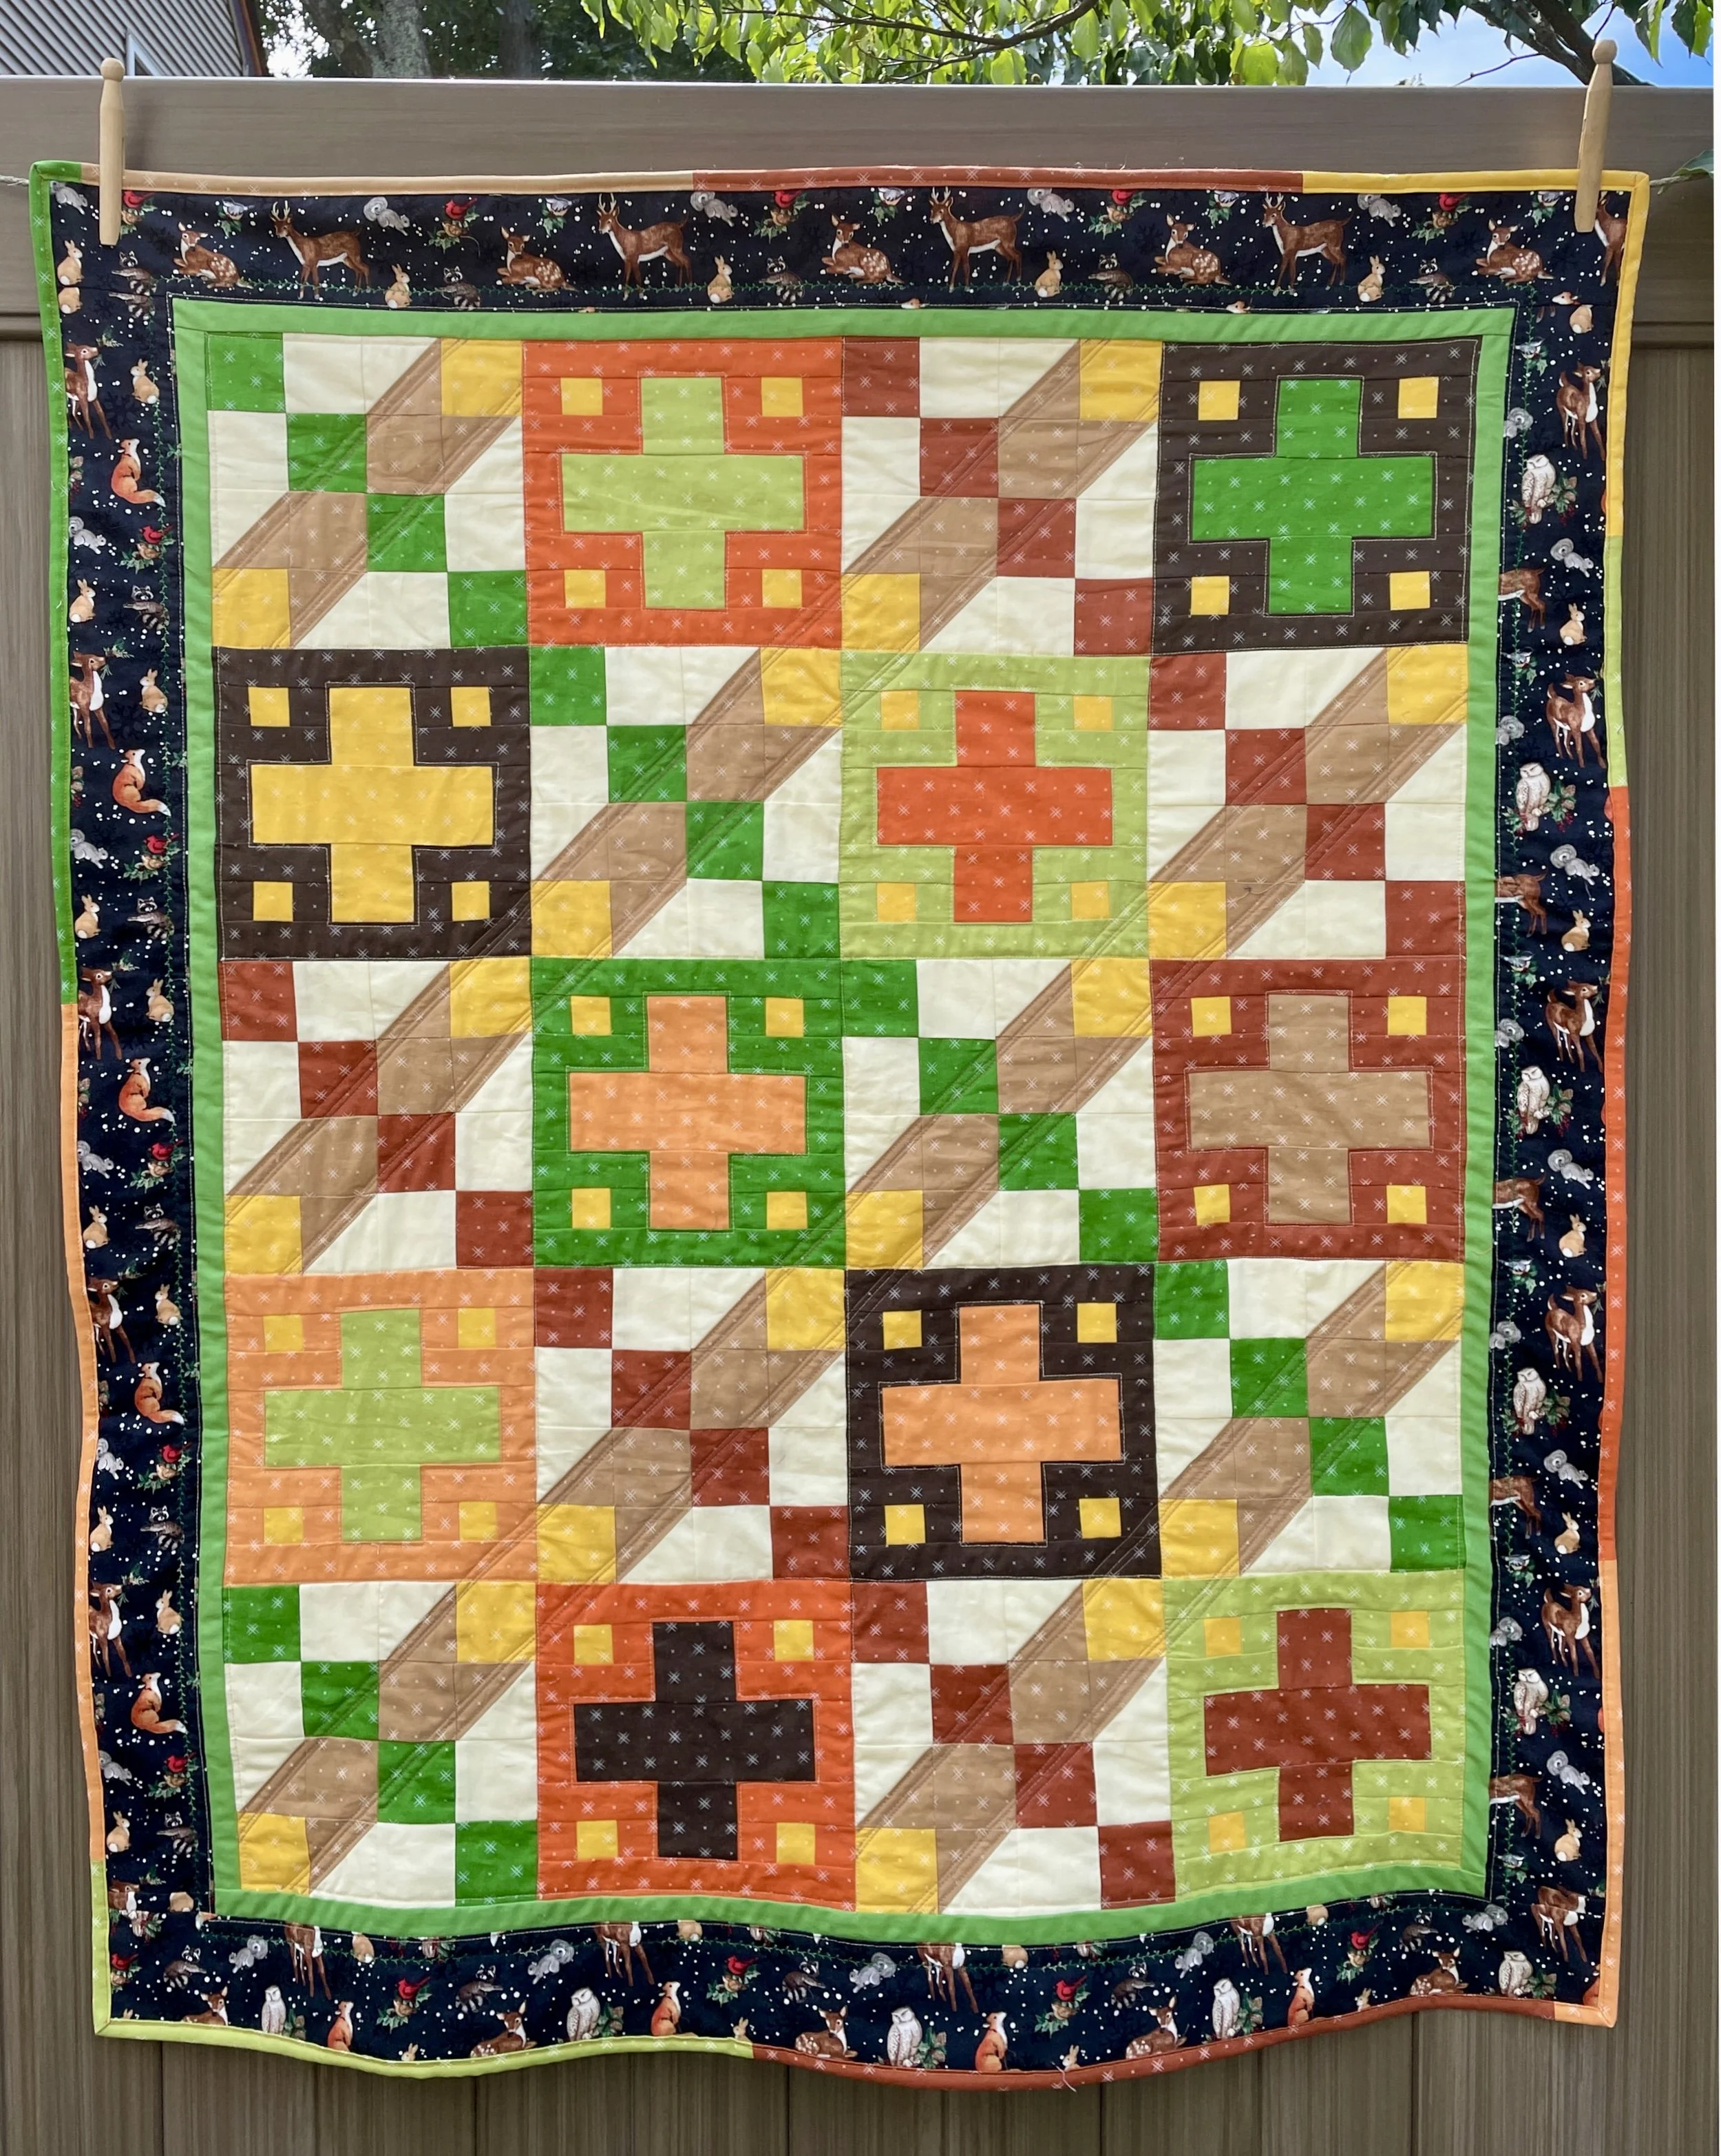
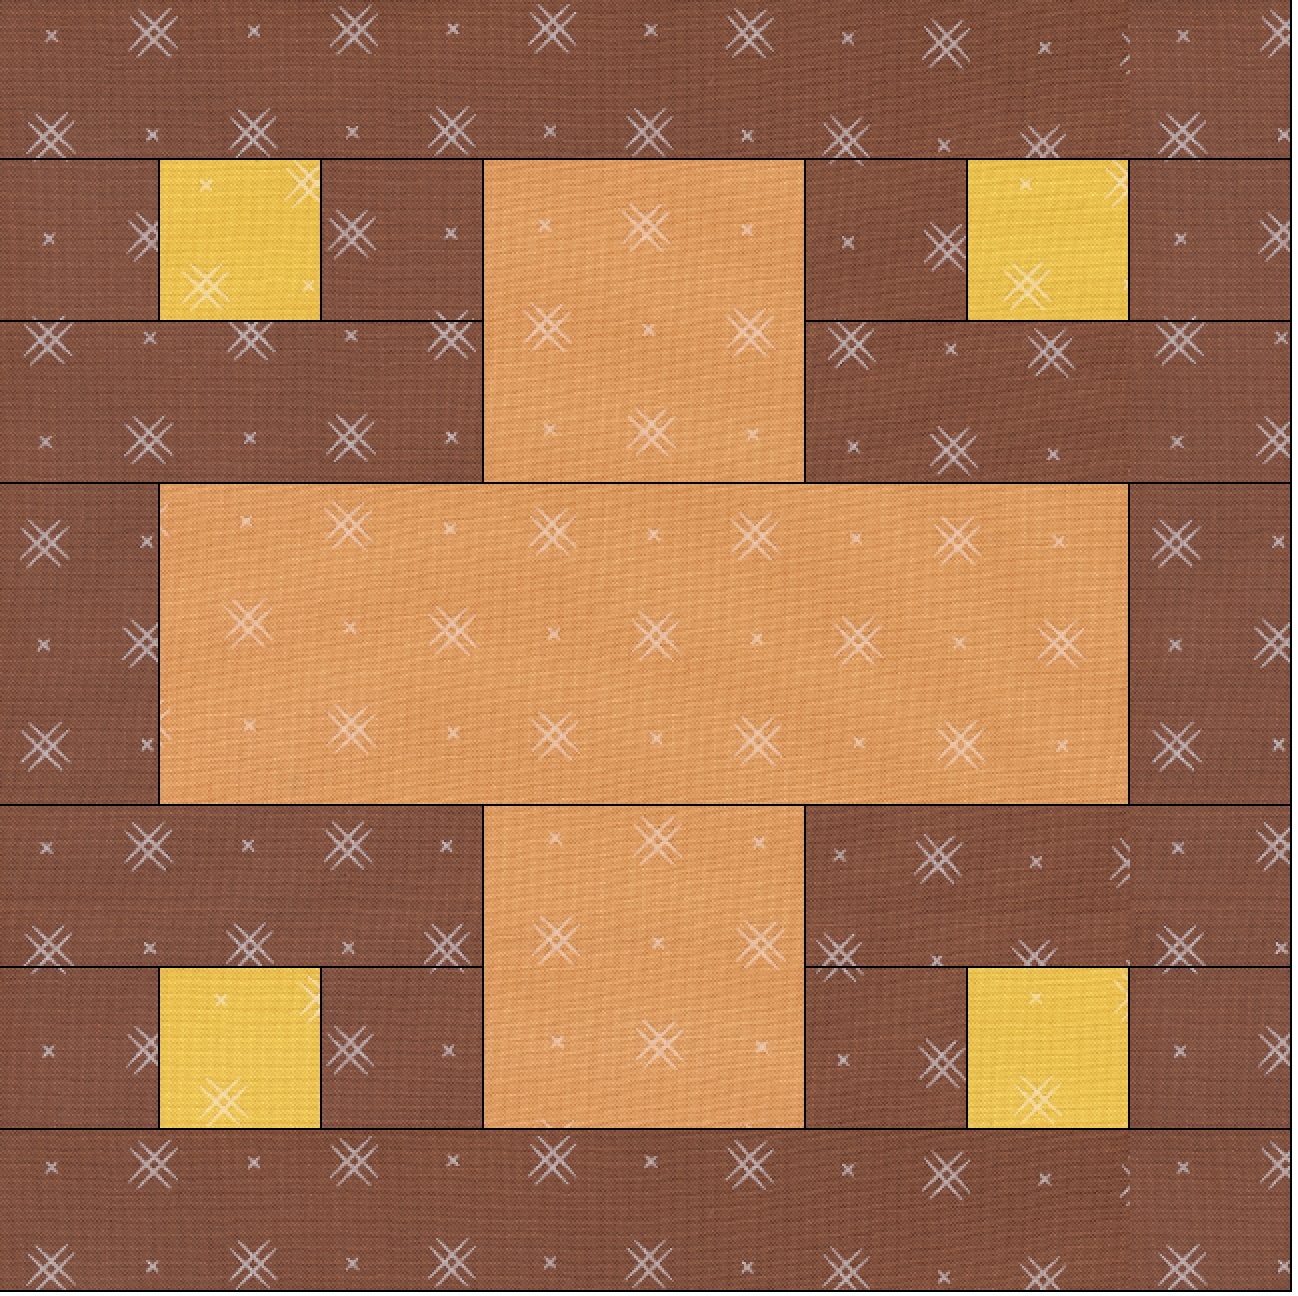
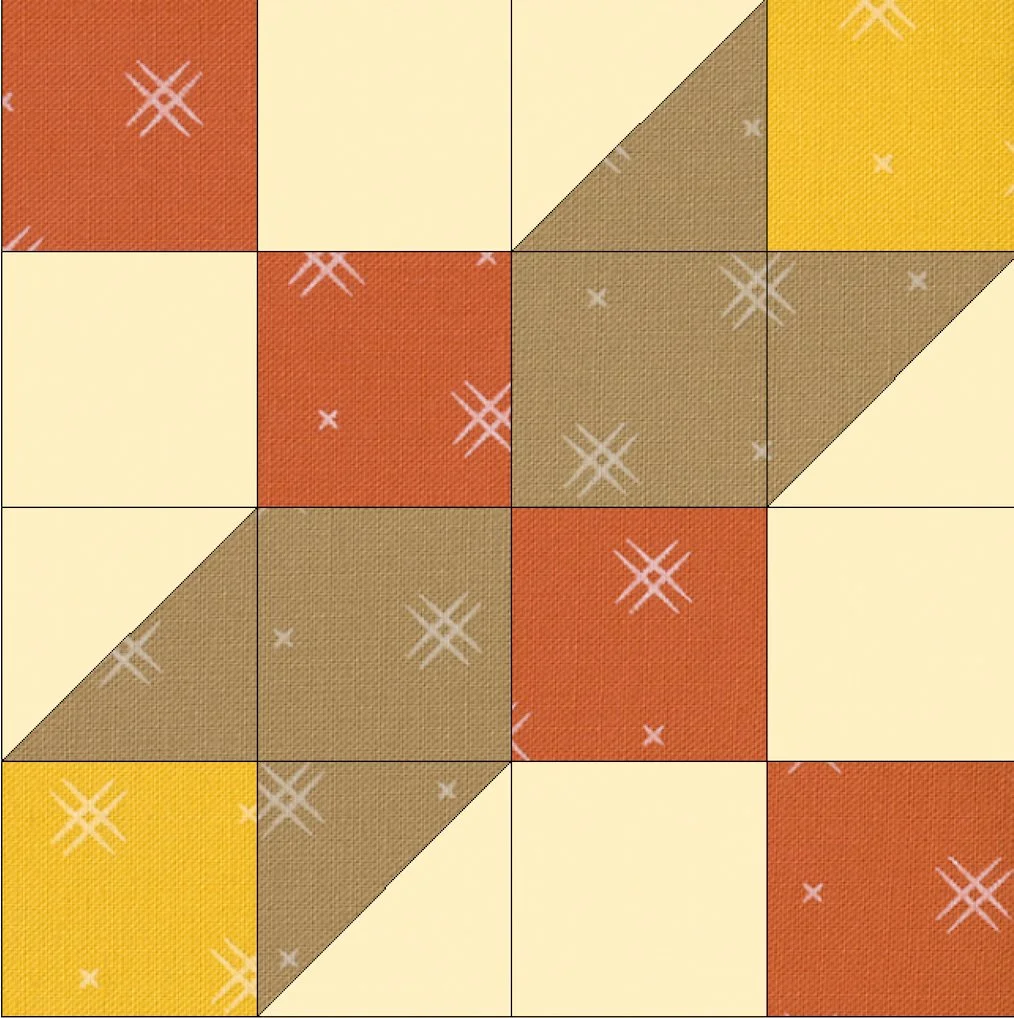
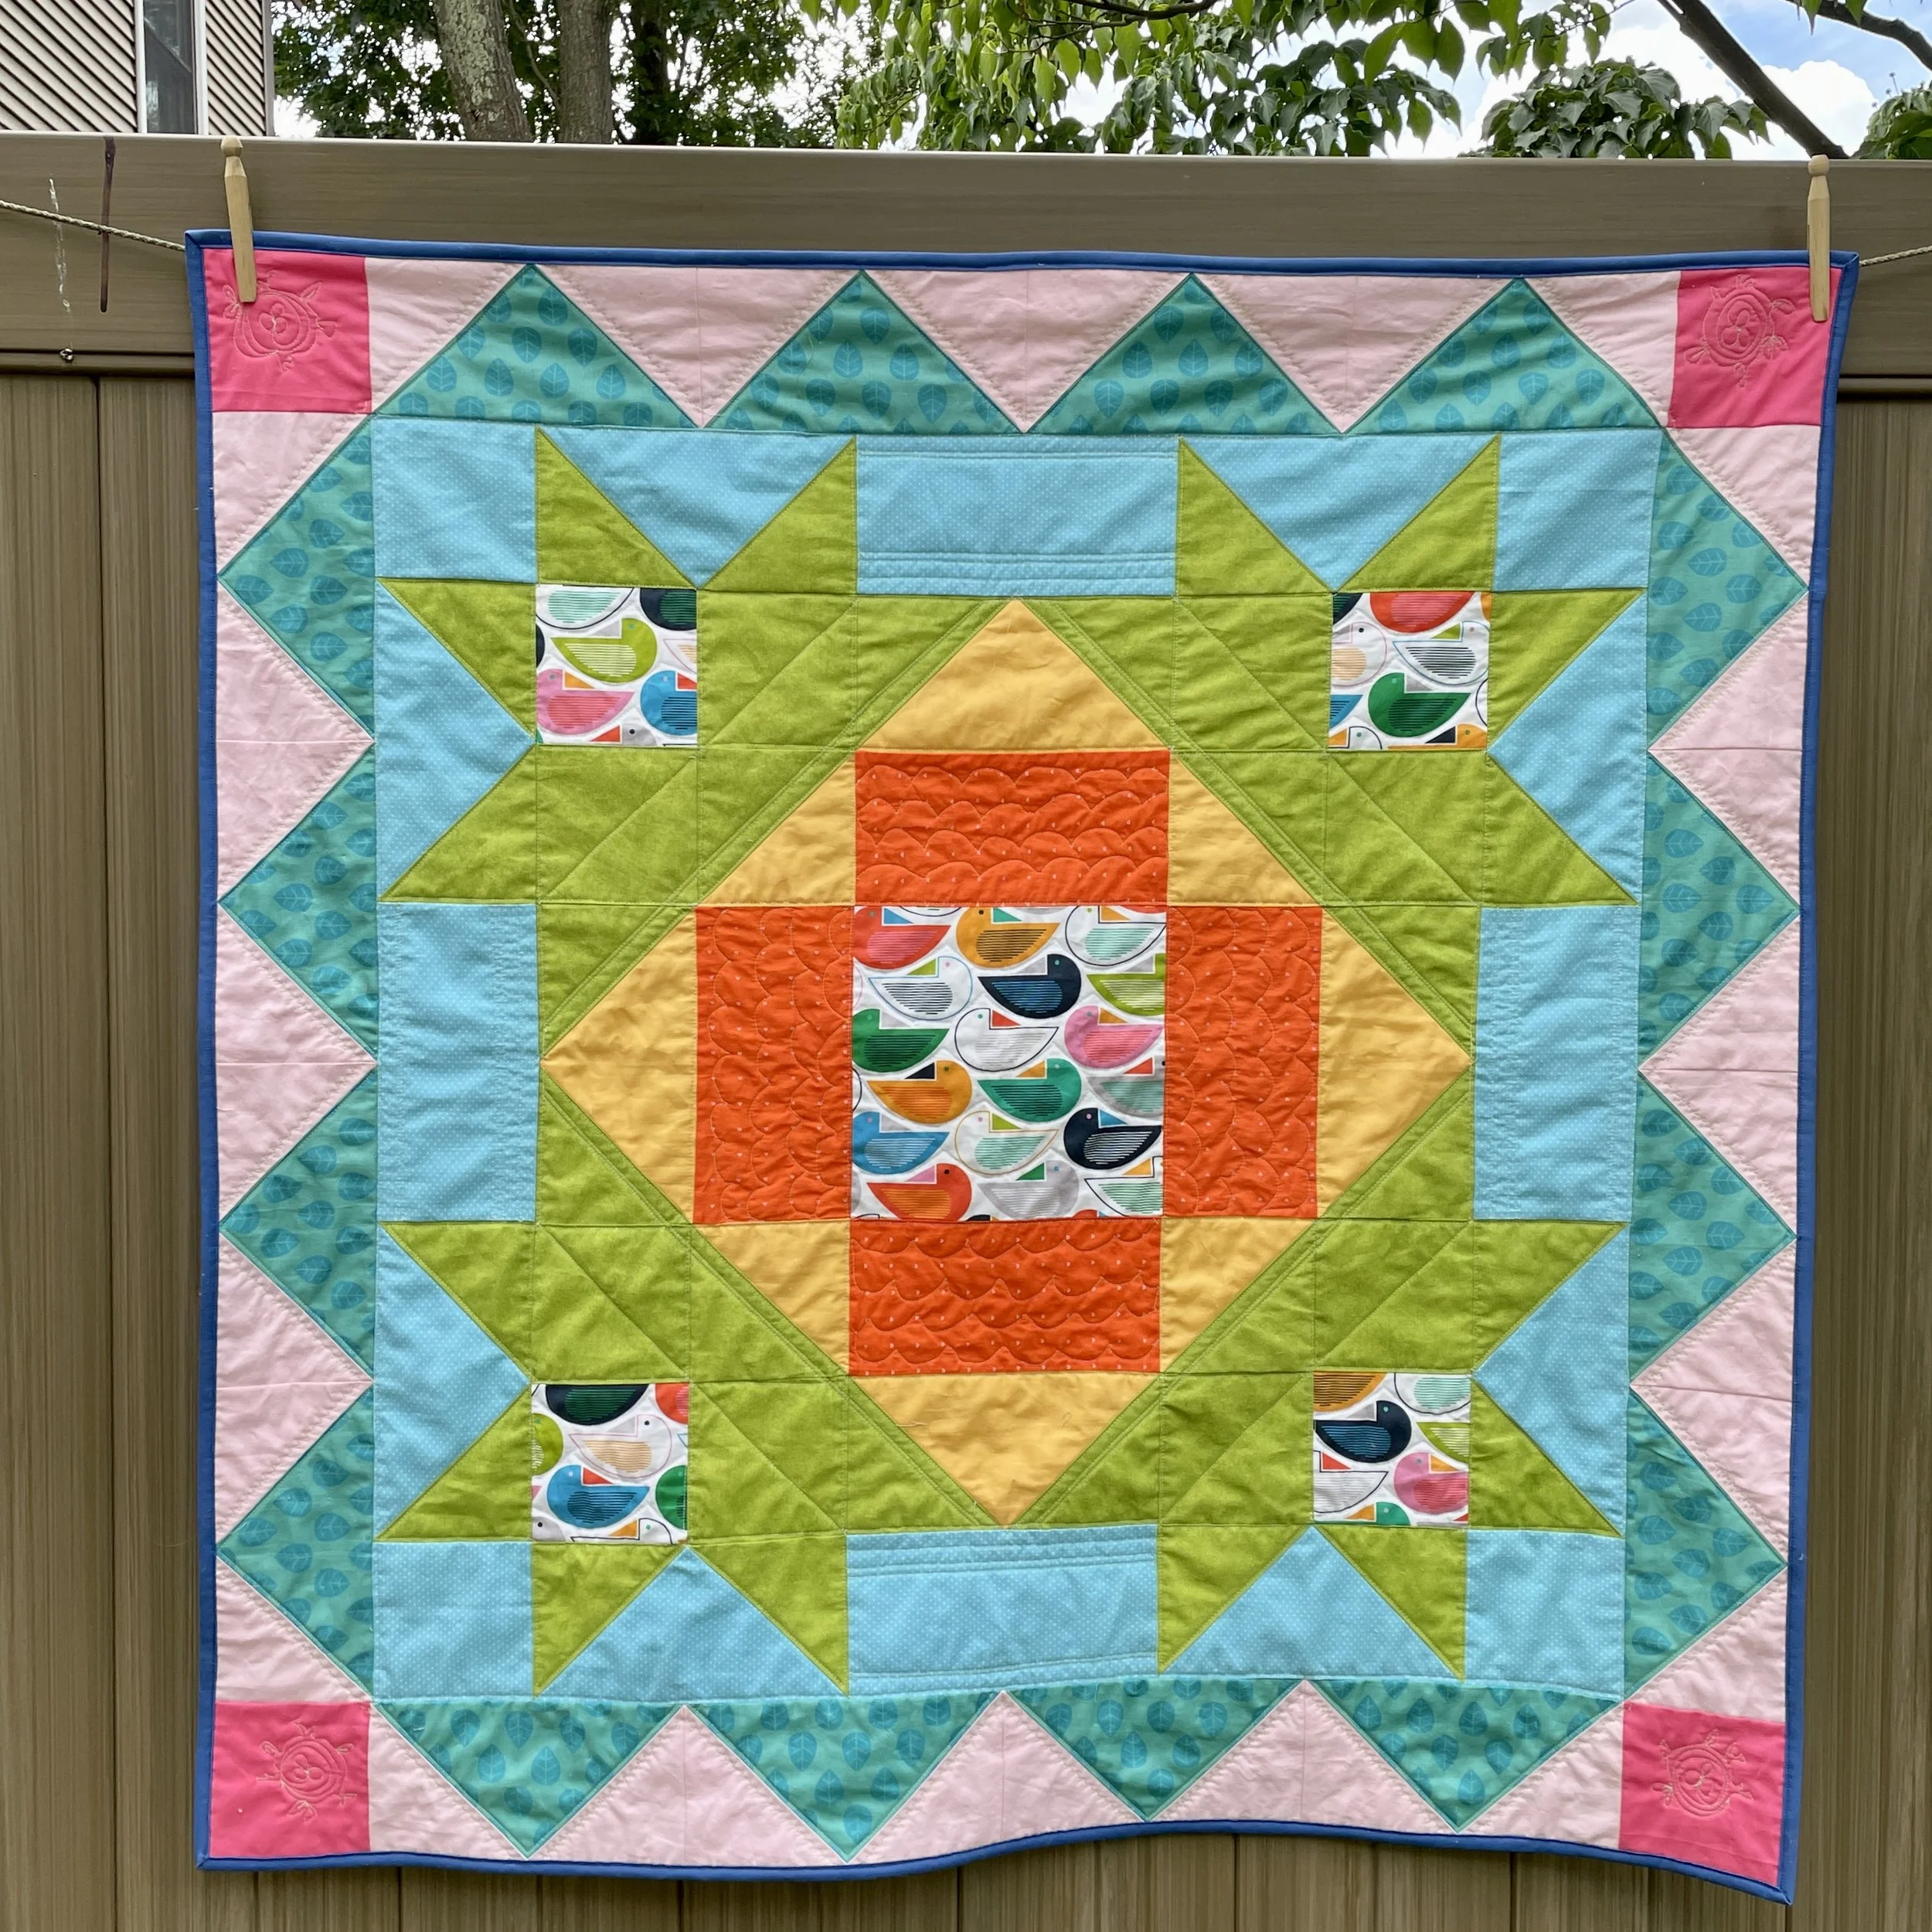
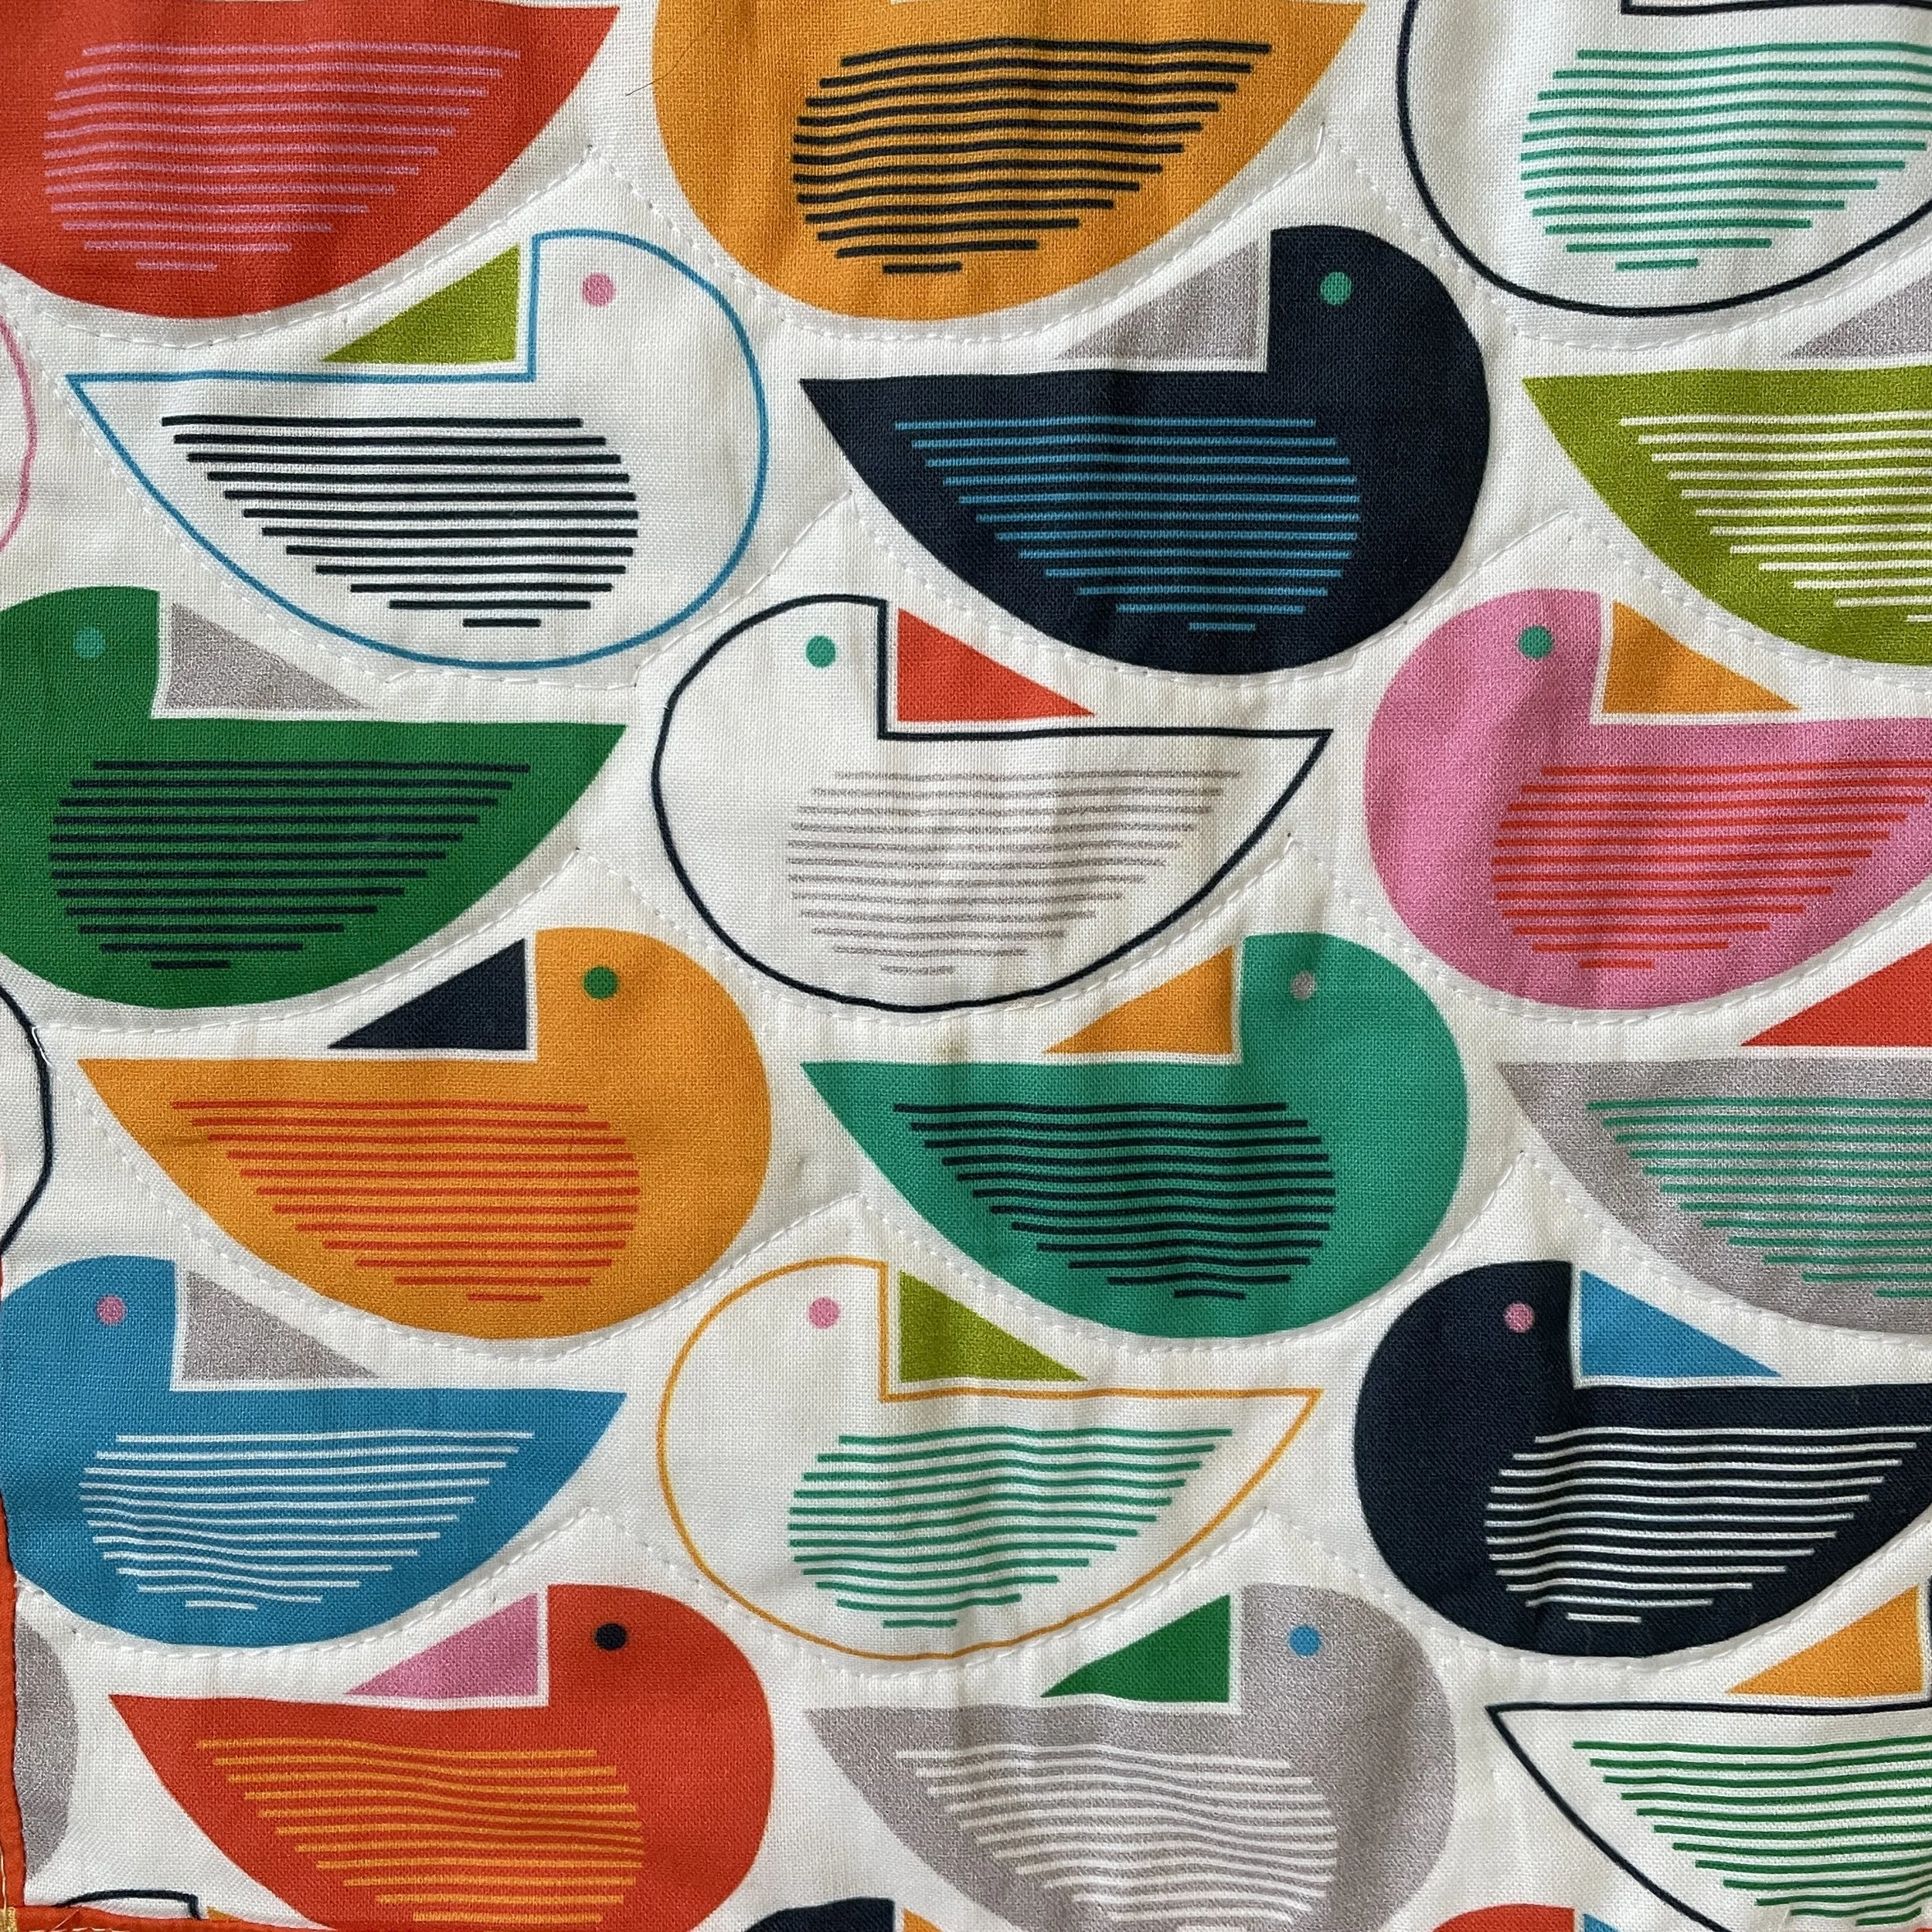
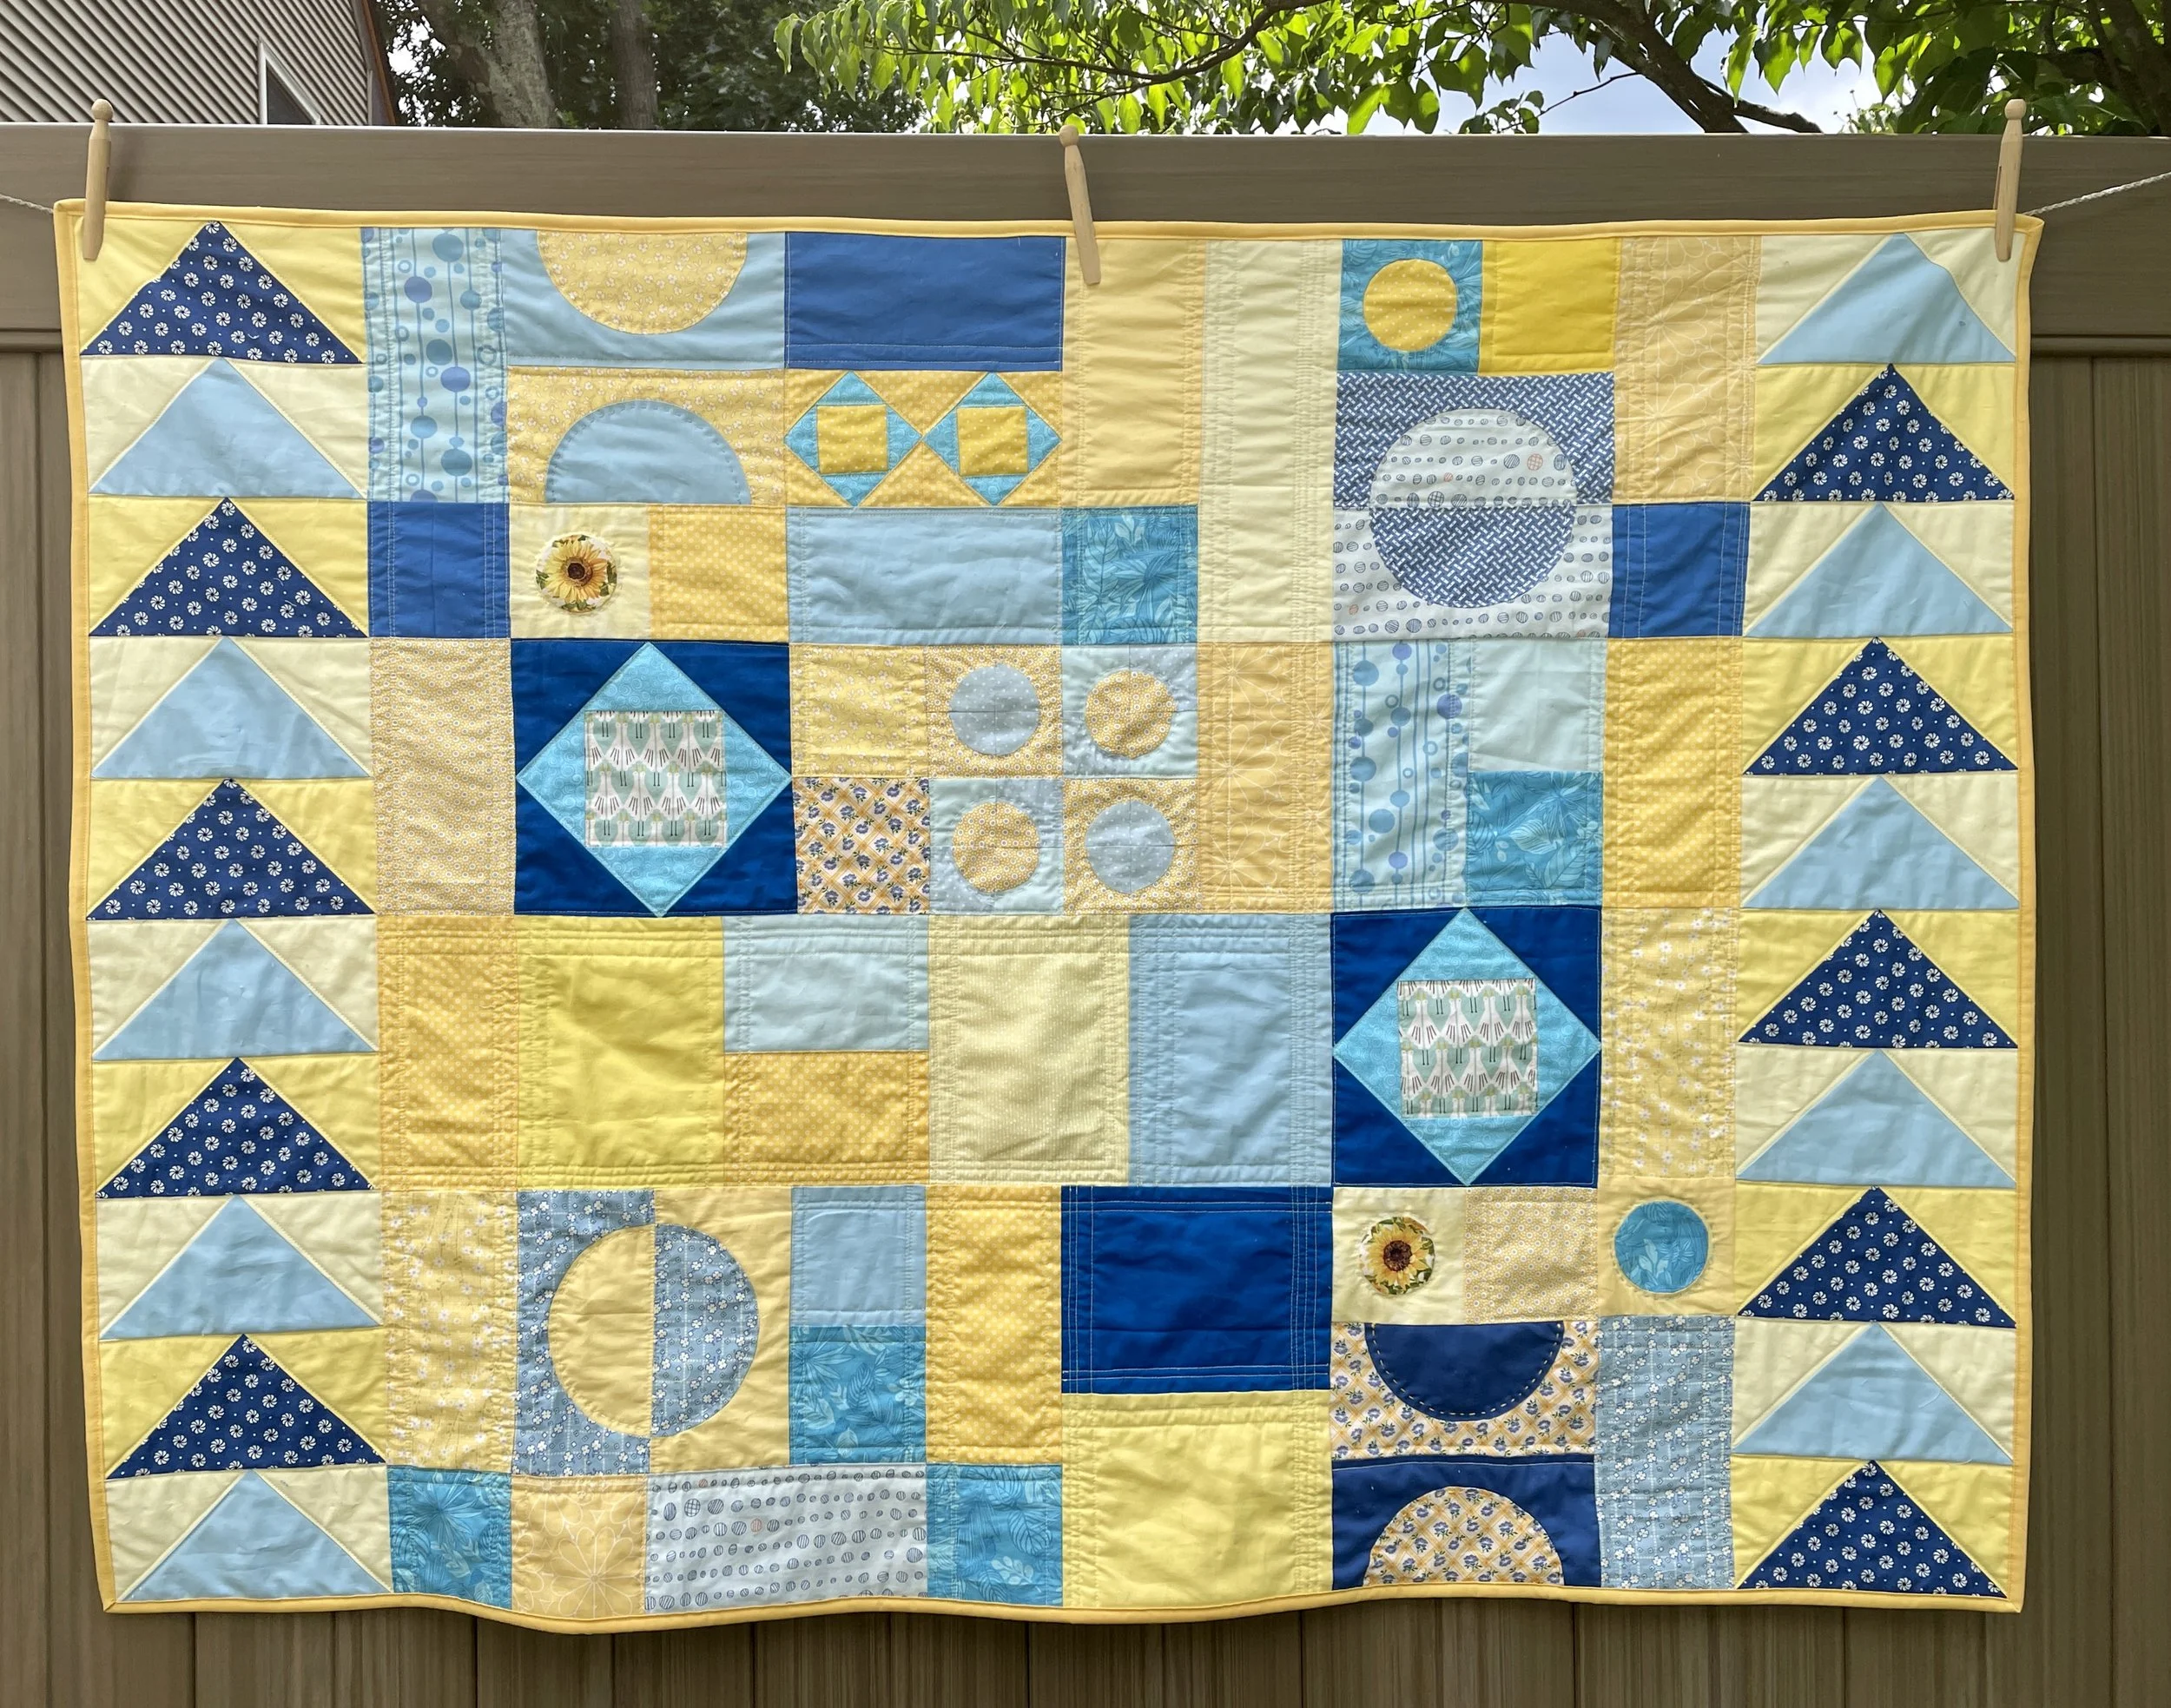
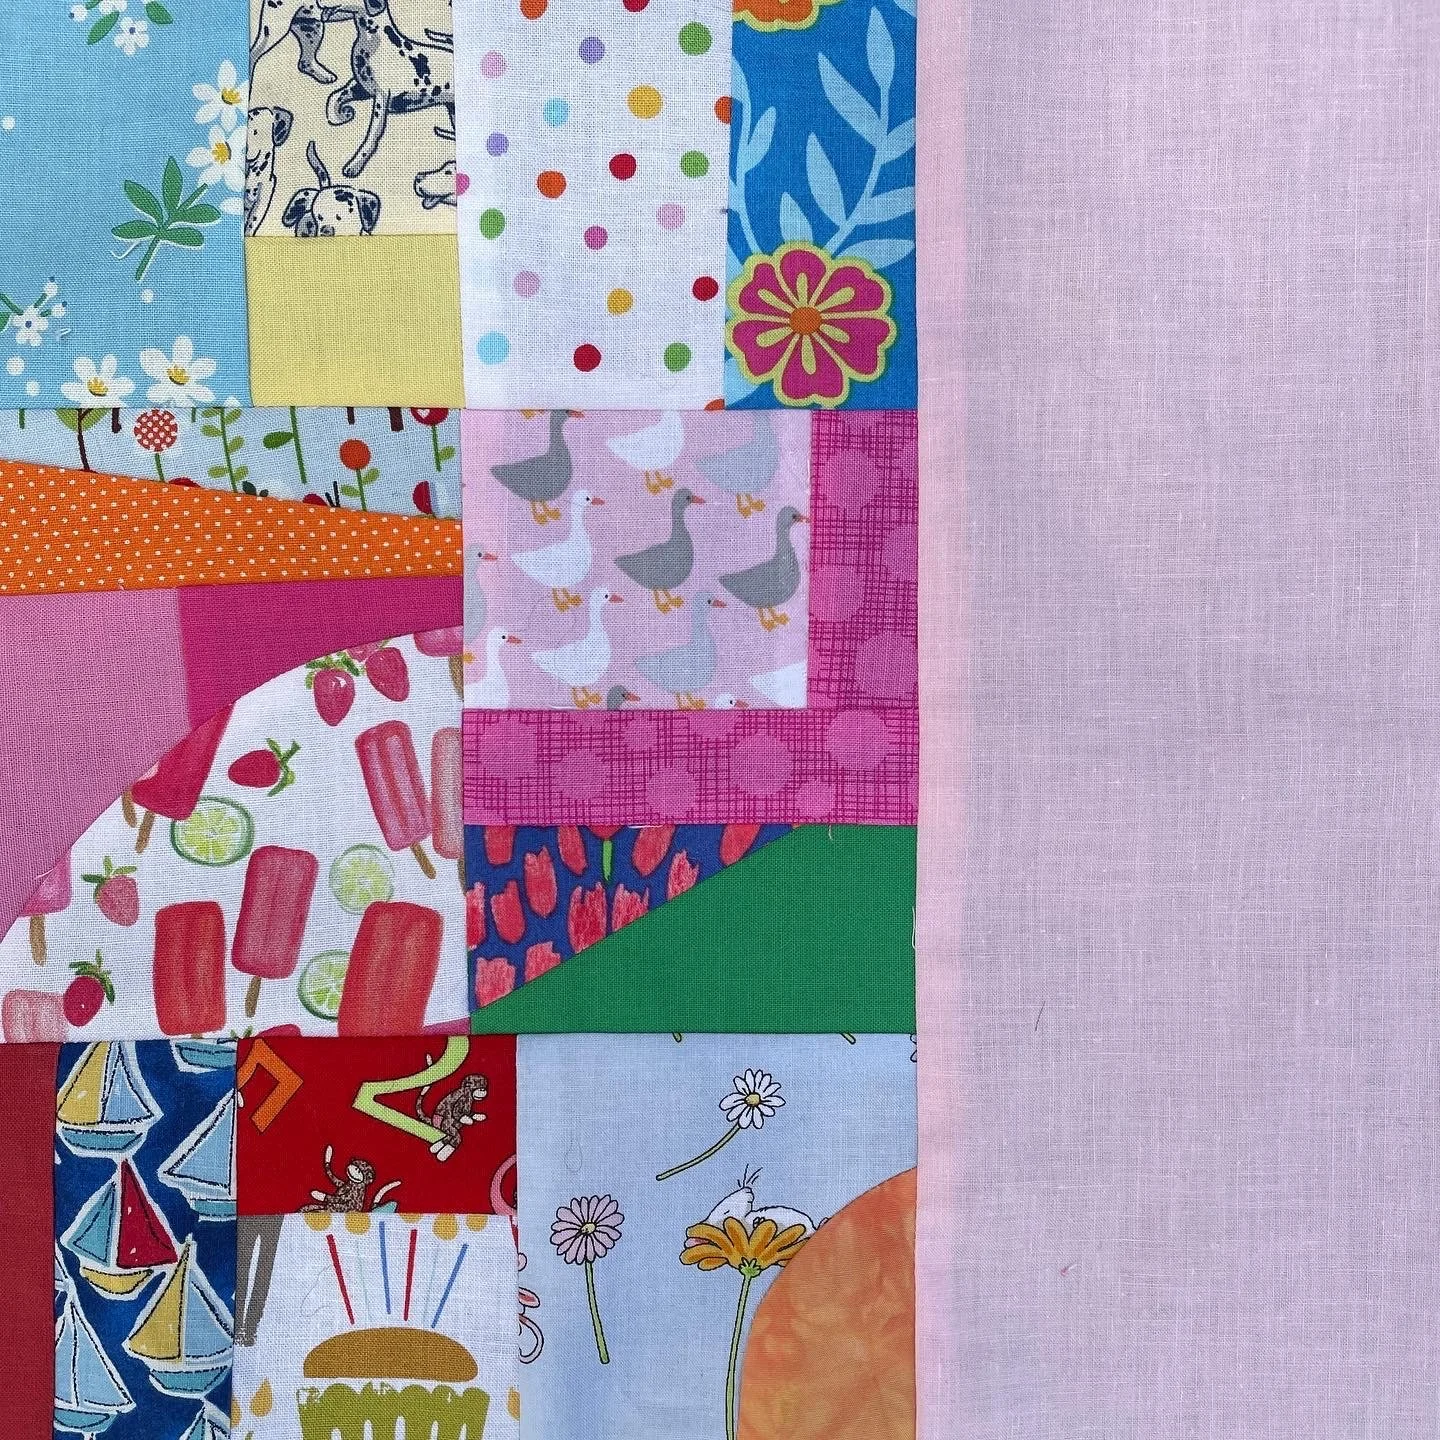
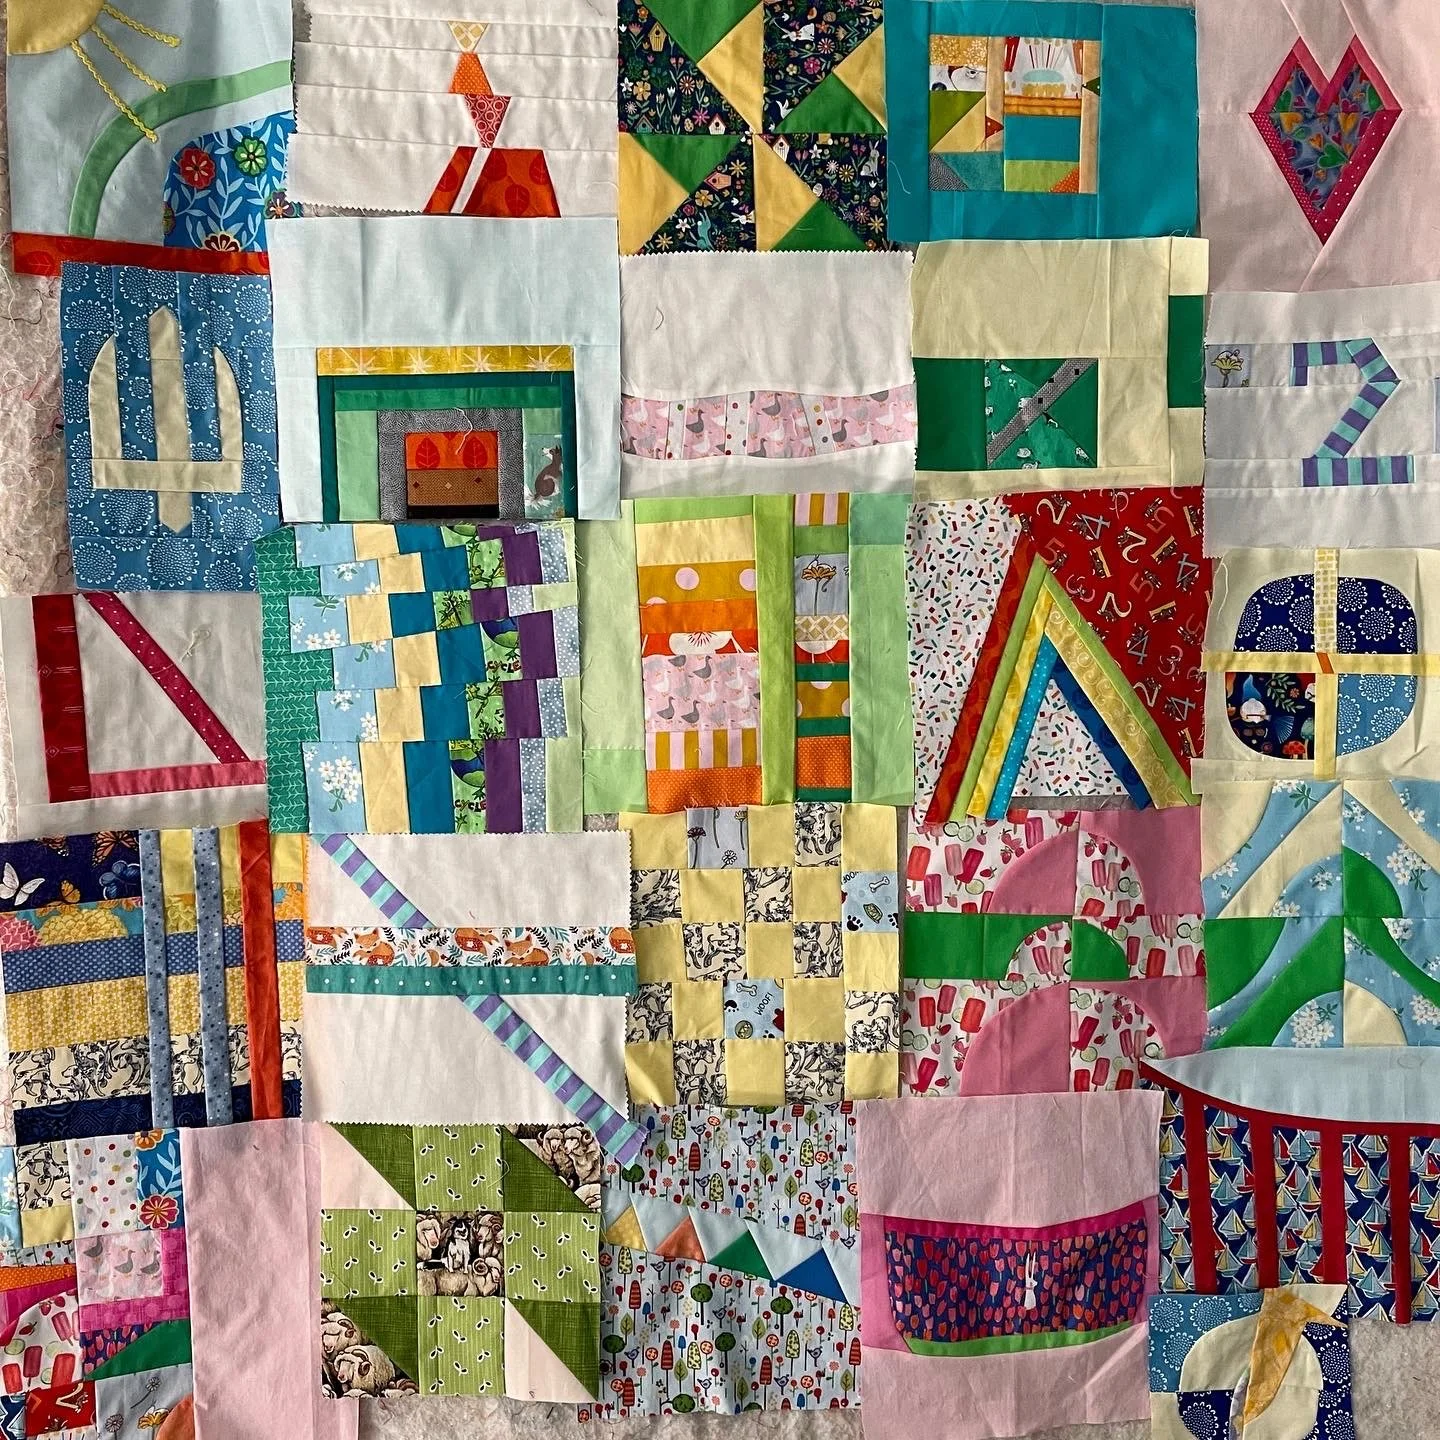
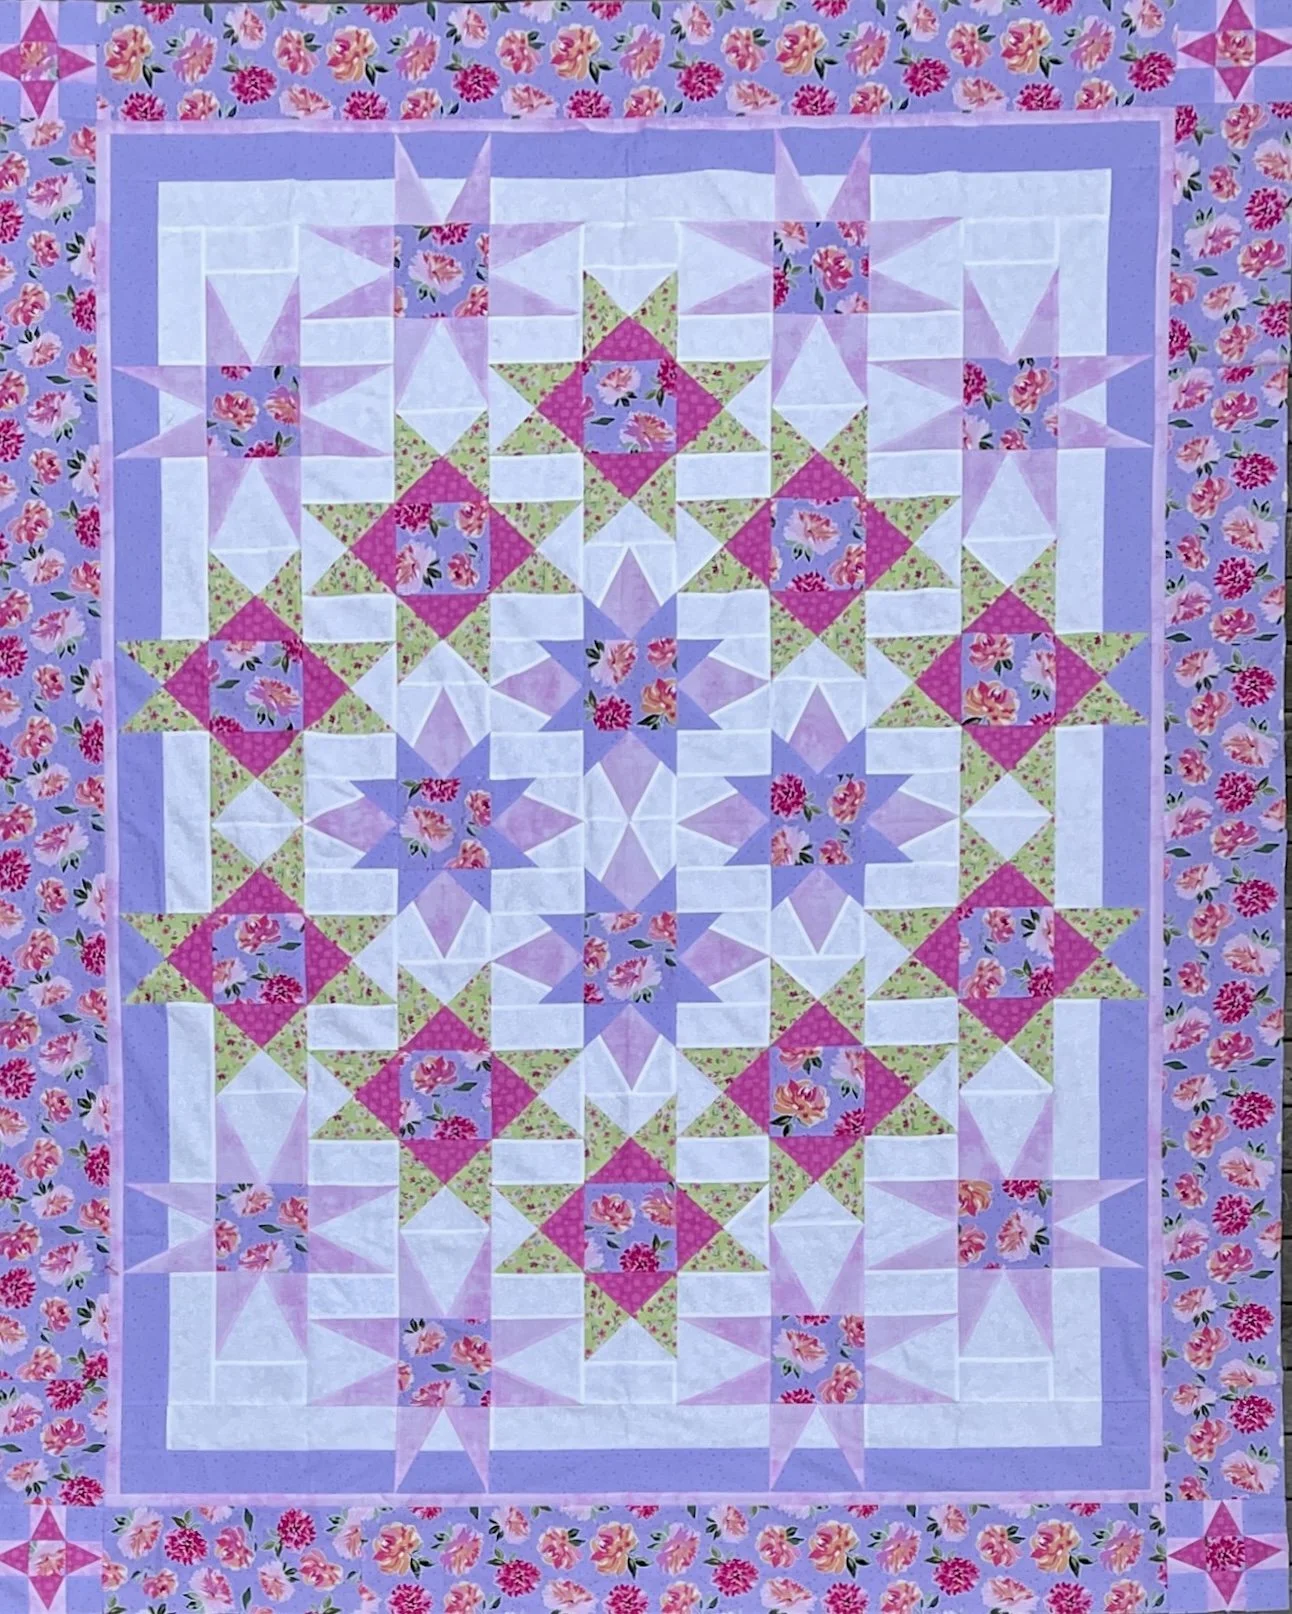
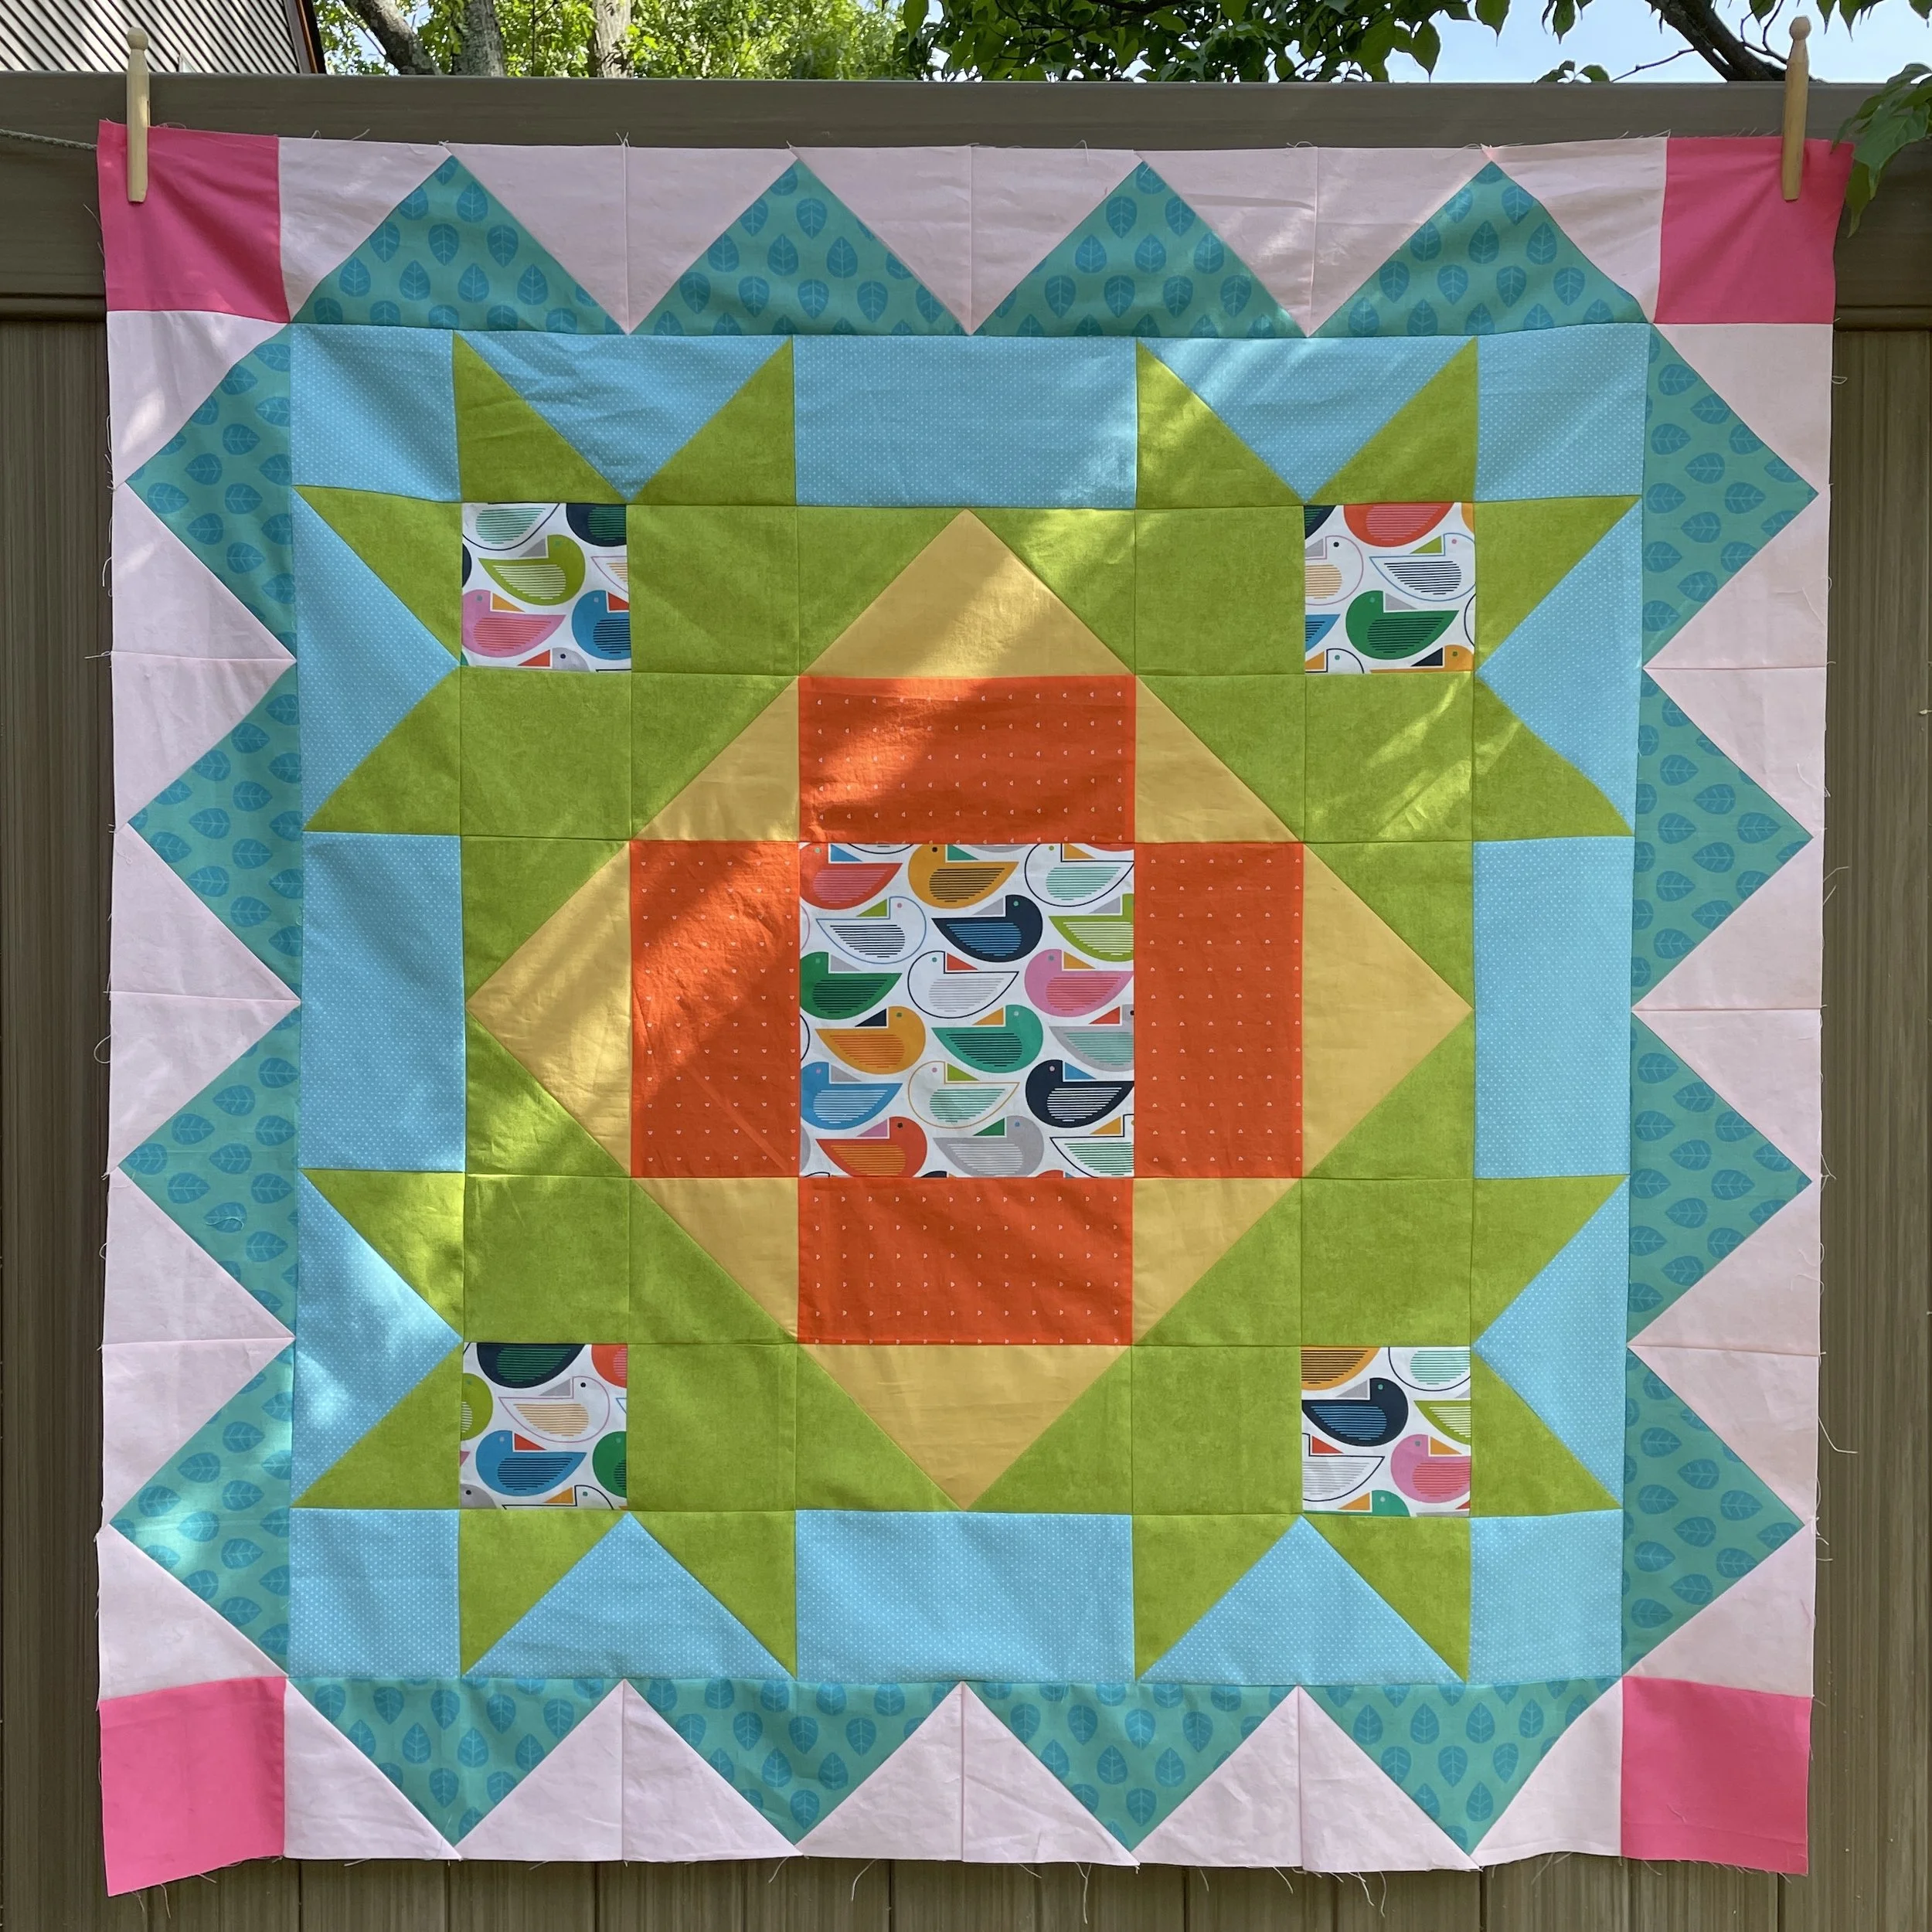
This quilt is all done…and already in use! This is my “unofficial” “To the Point” Brown Bag 2022 Mystery Quilt. This pattern is from Karen Montgomery. (See my posts from March and June for more information about this year’s Brown Bag Mystery Quilt). The fabric for this quilt came out of my stash and wasn’t purchased as a Brown Bag fabric collection, which is the reason for my saying this is an “unofficial” BBM quilt!

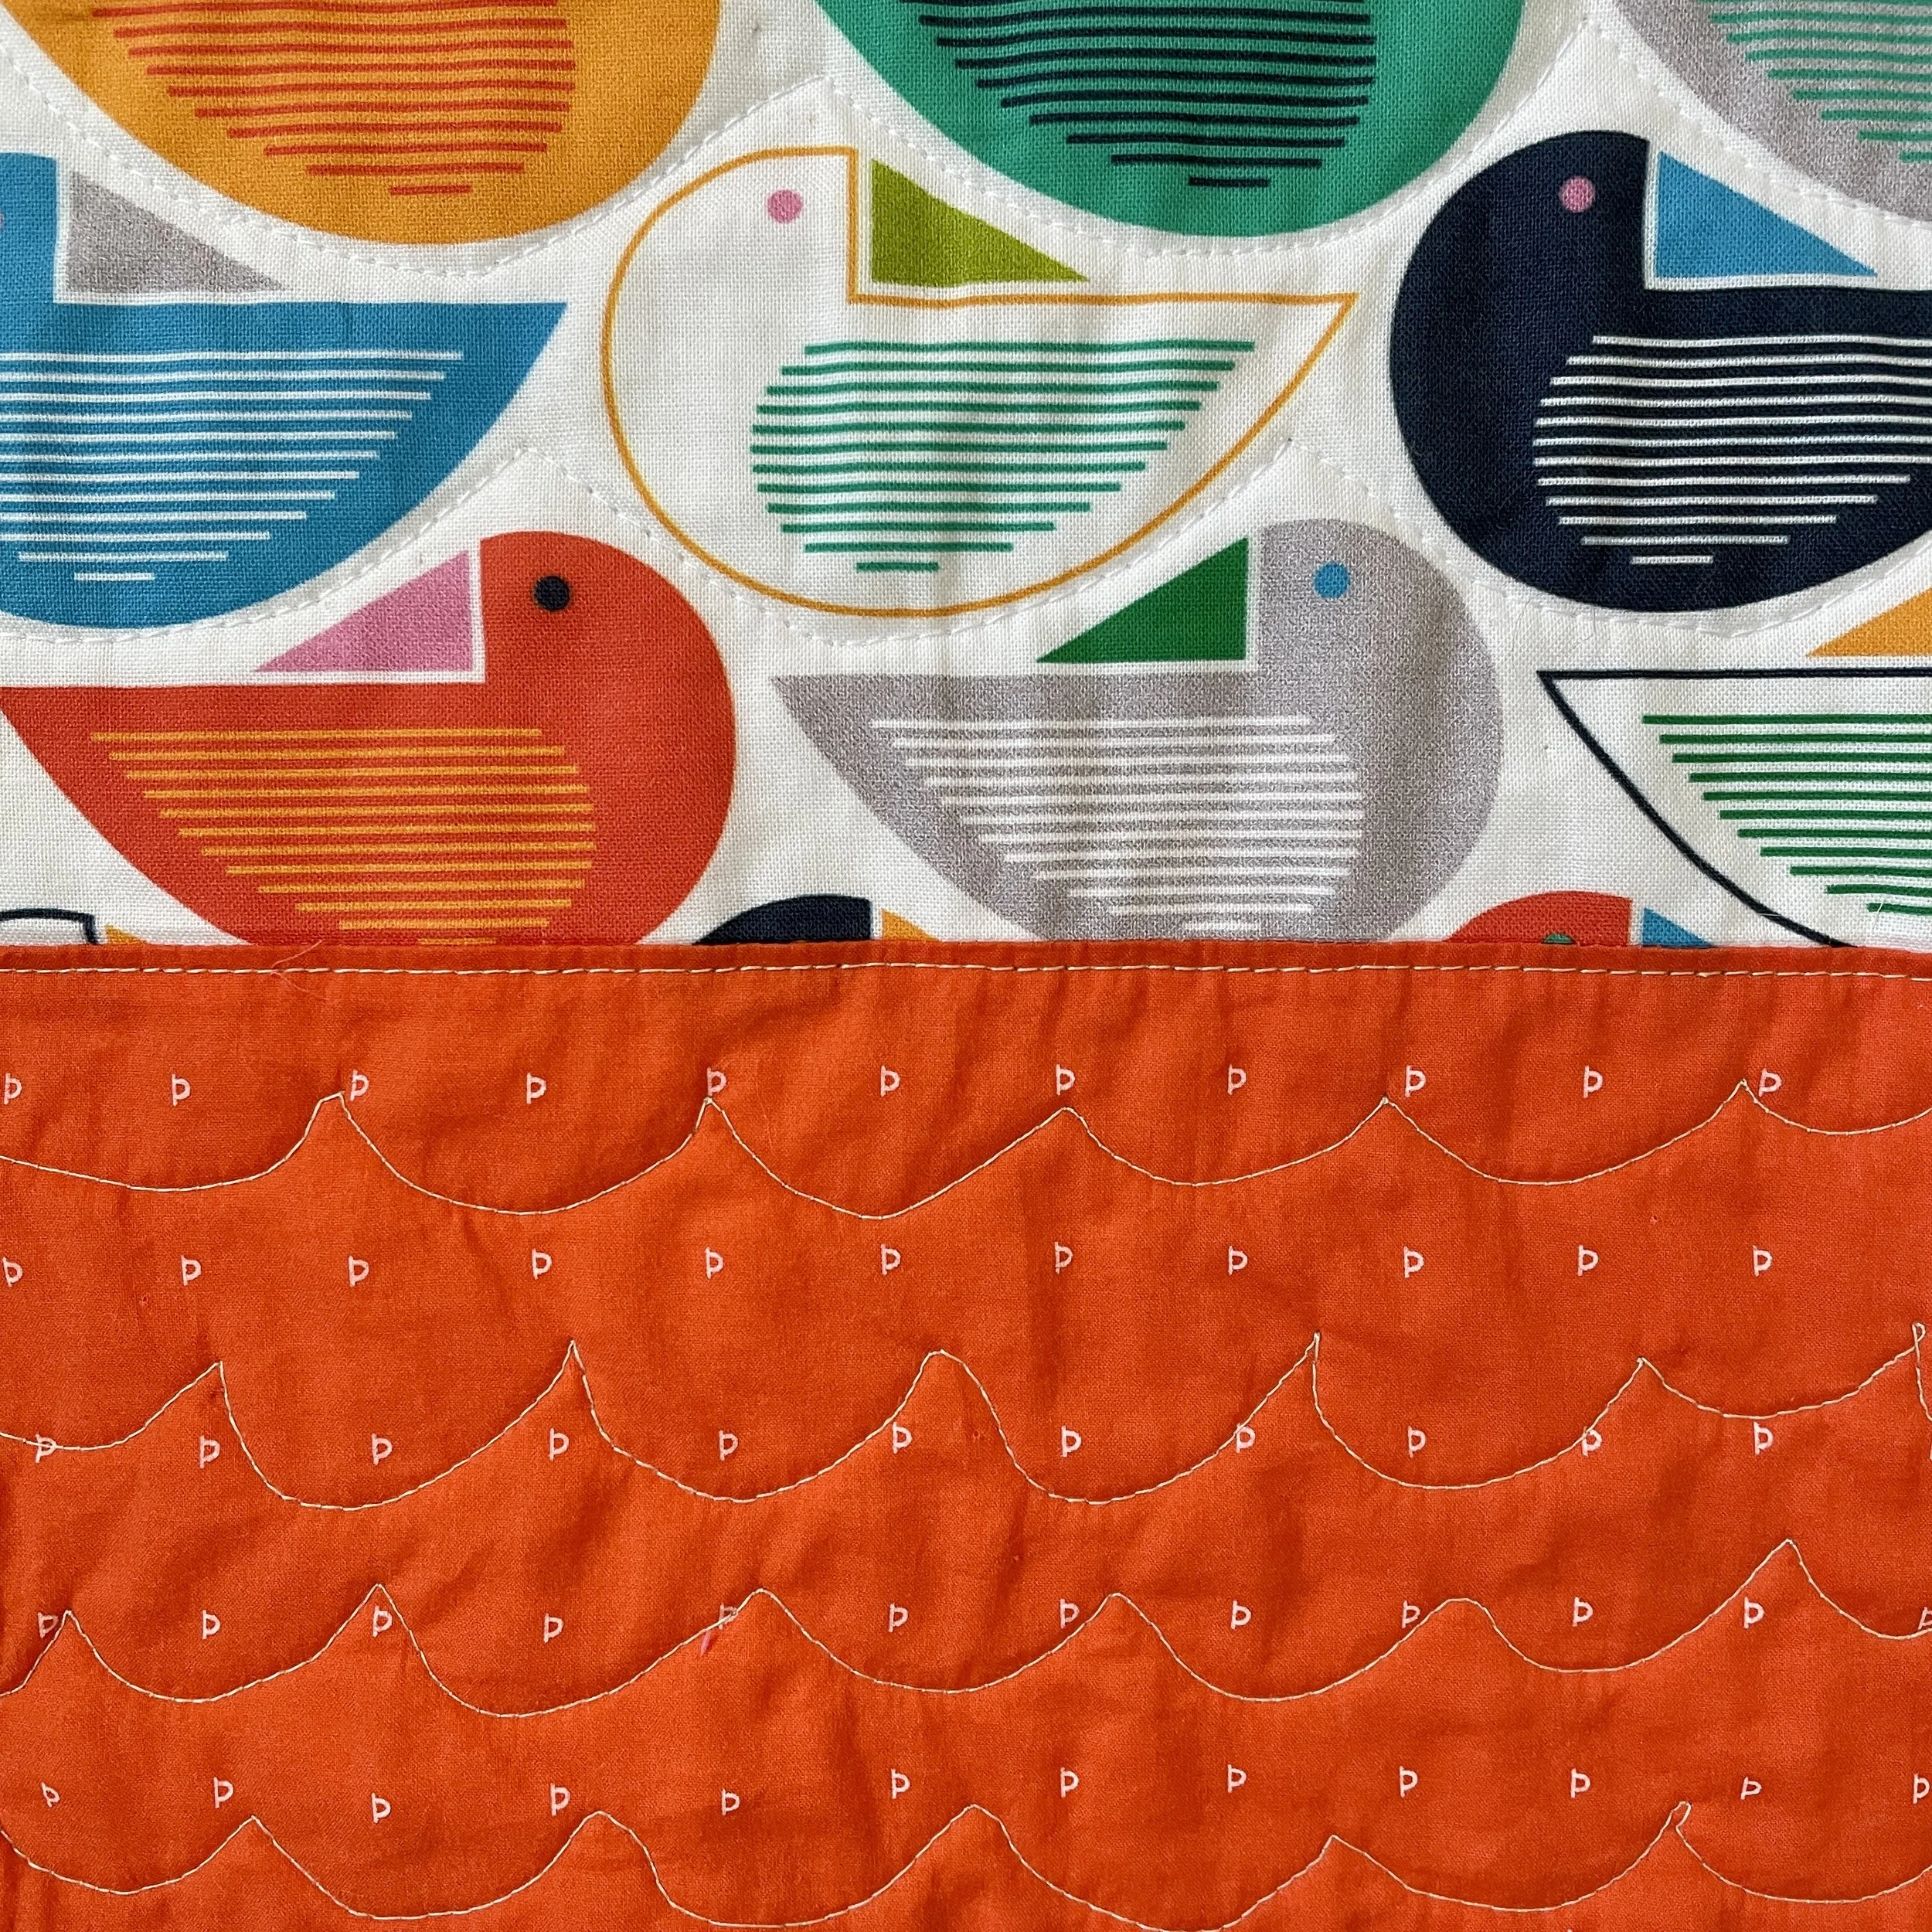
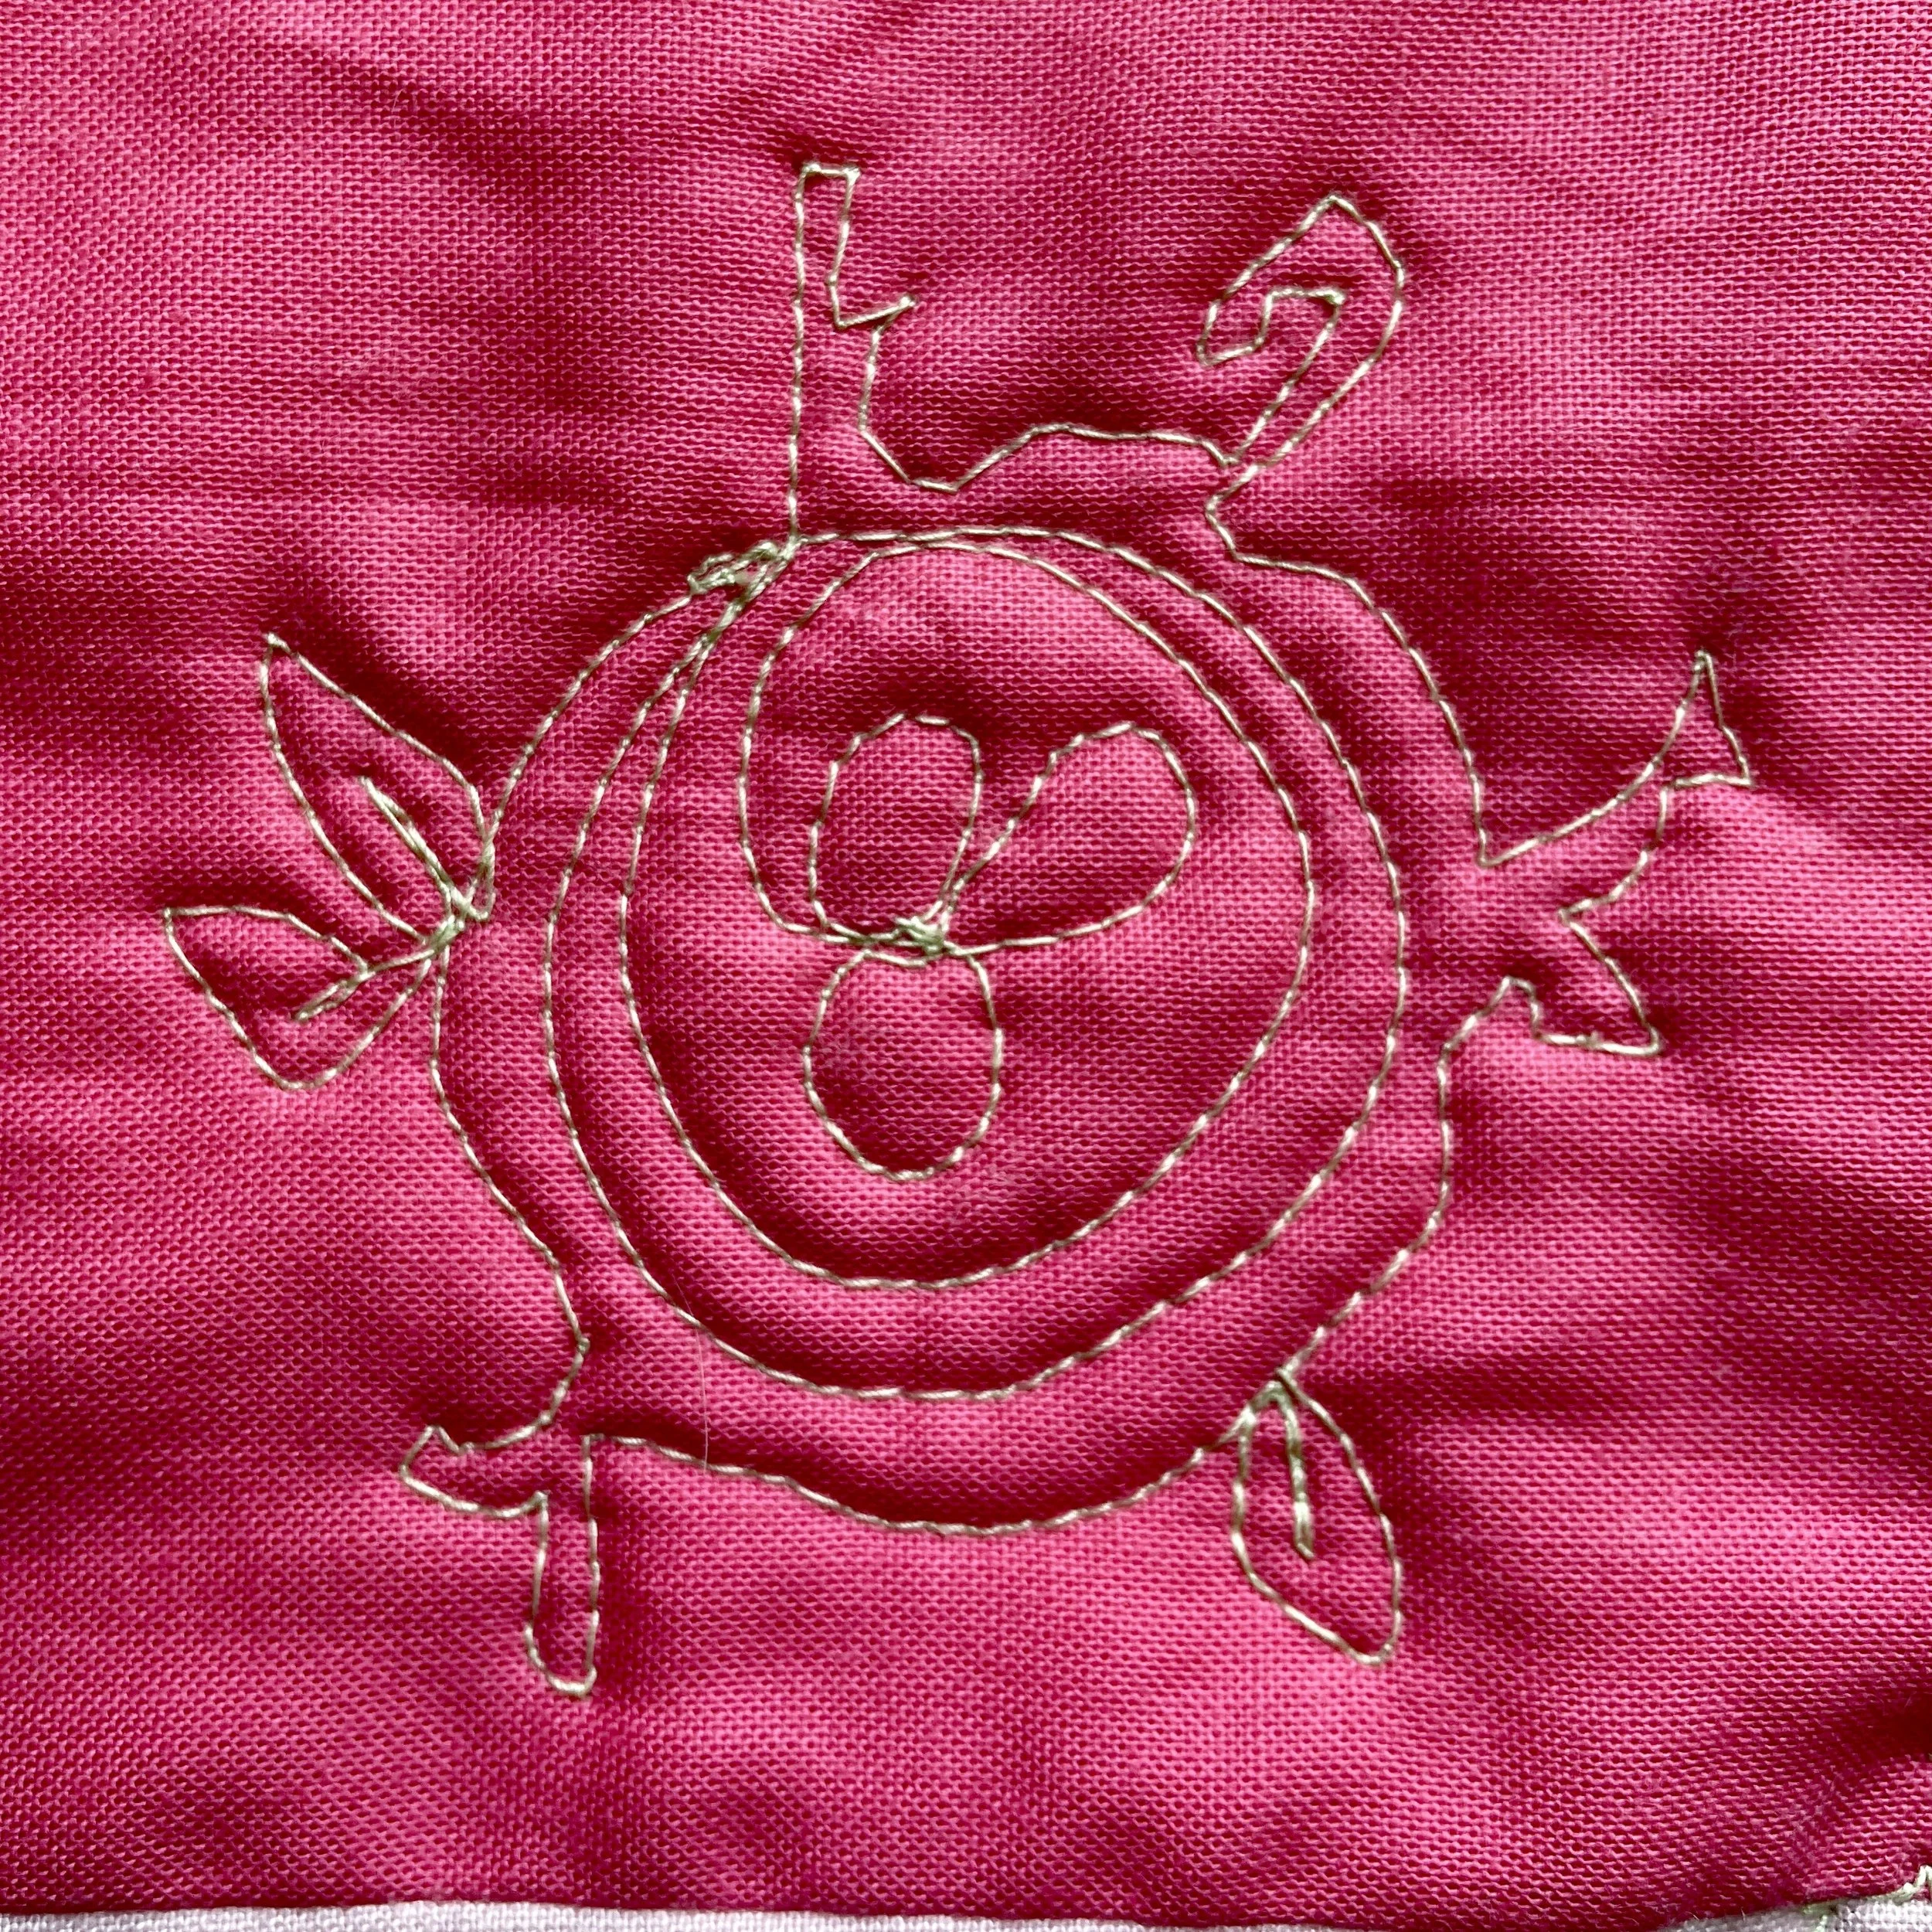
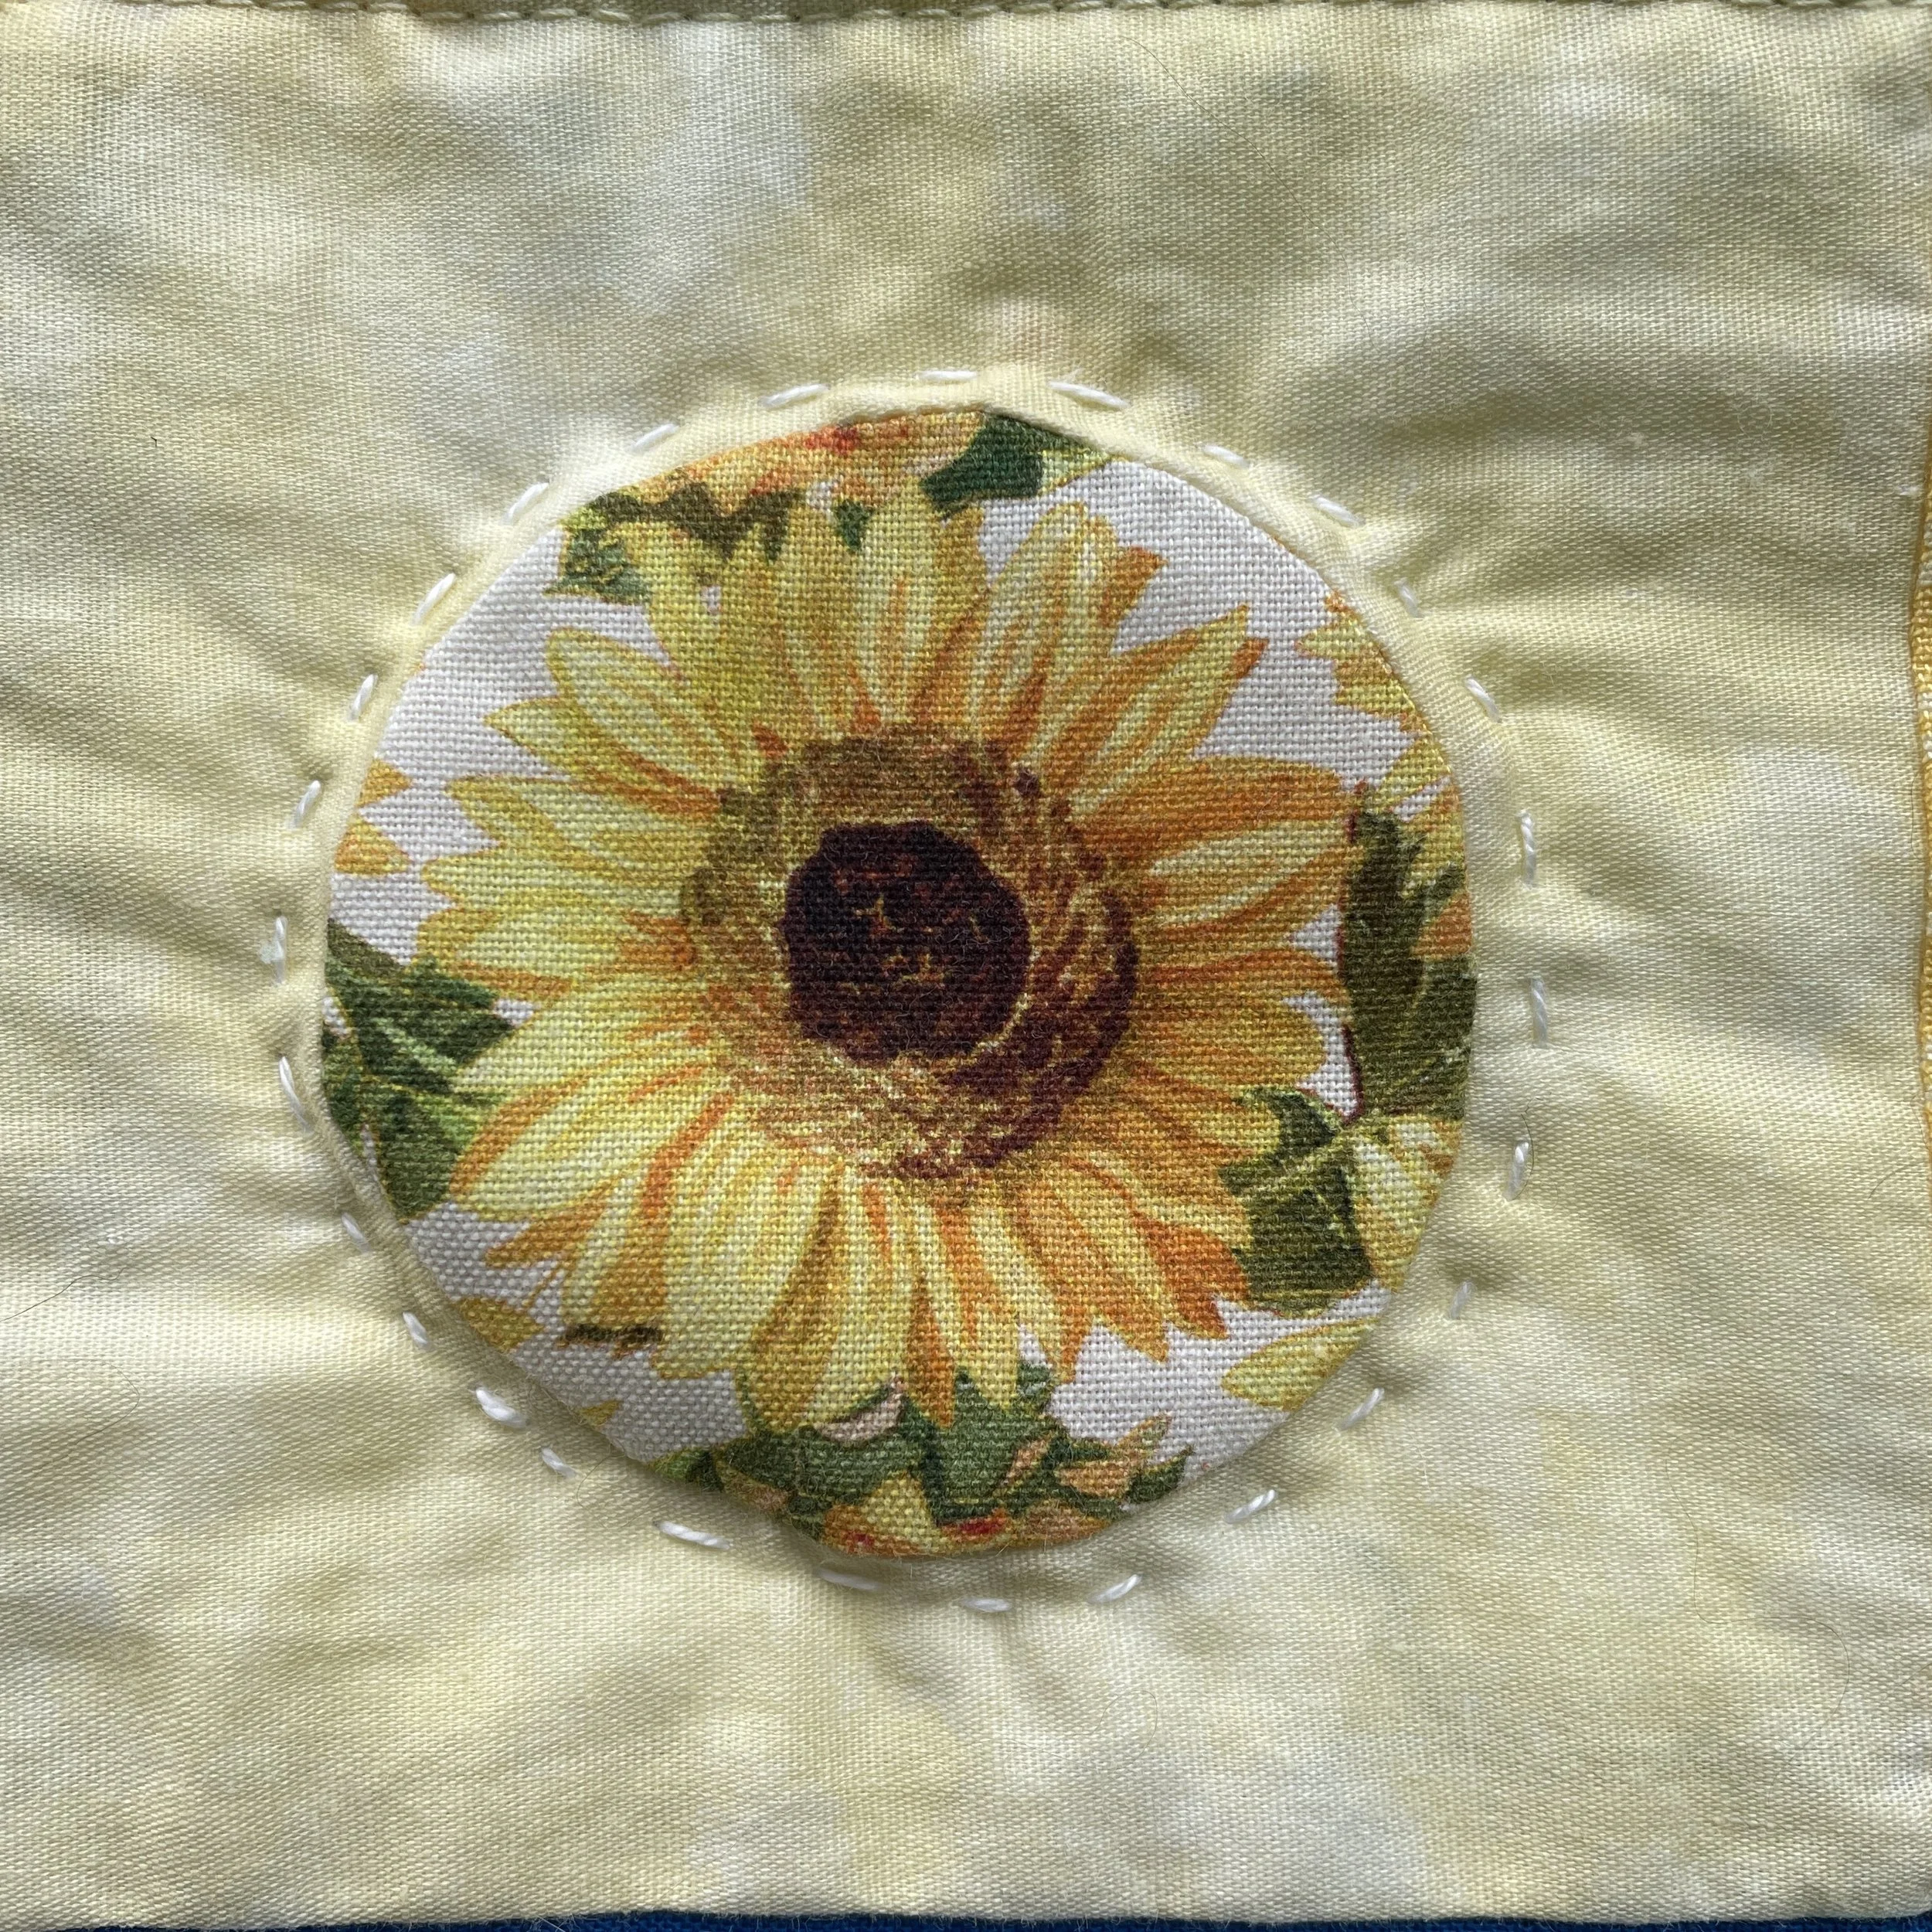
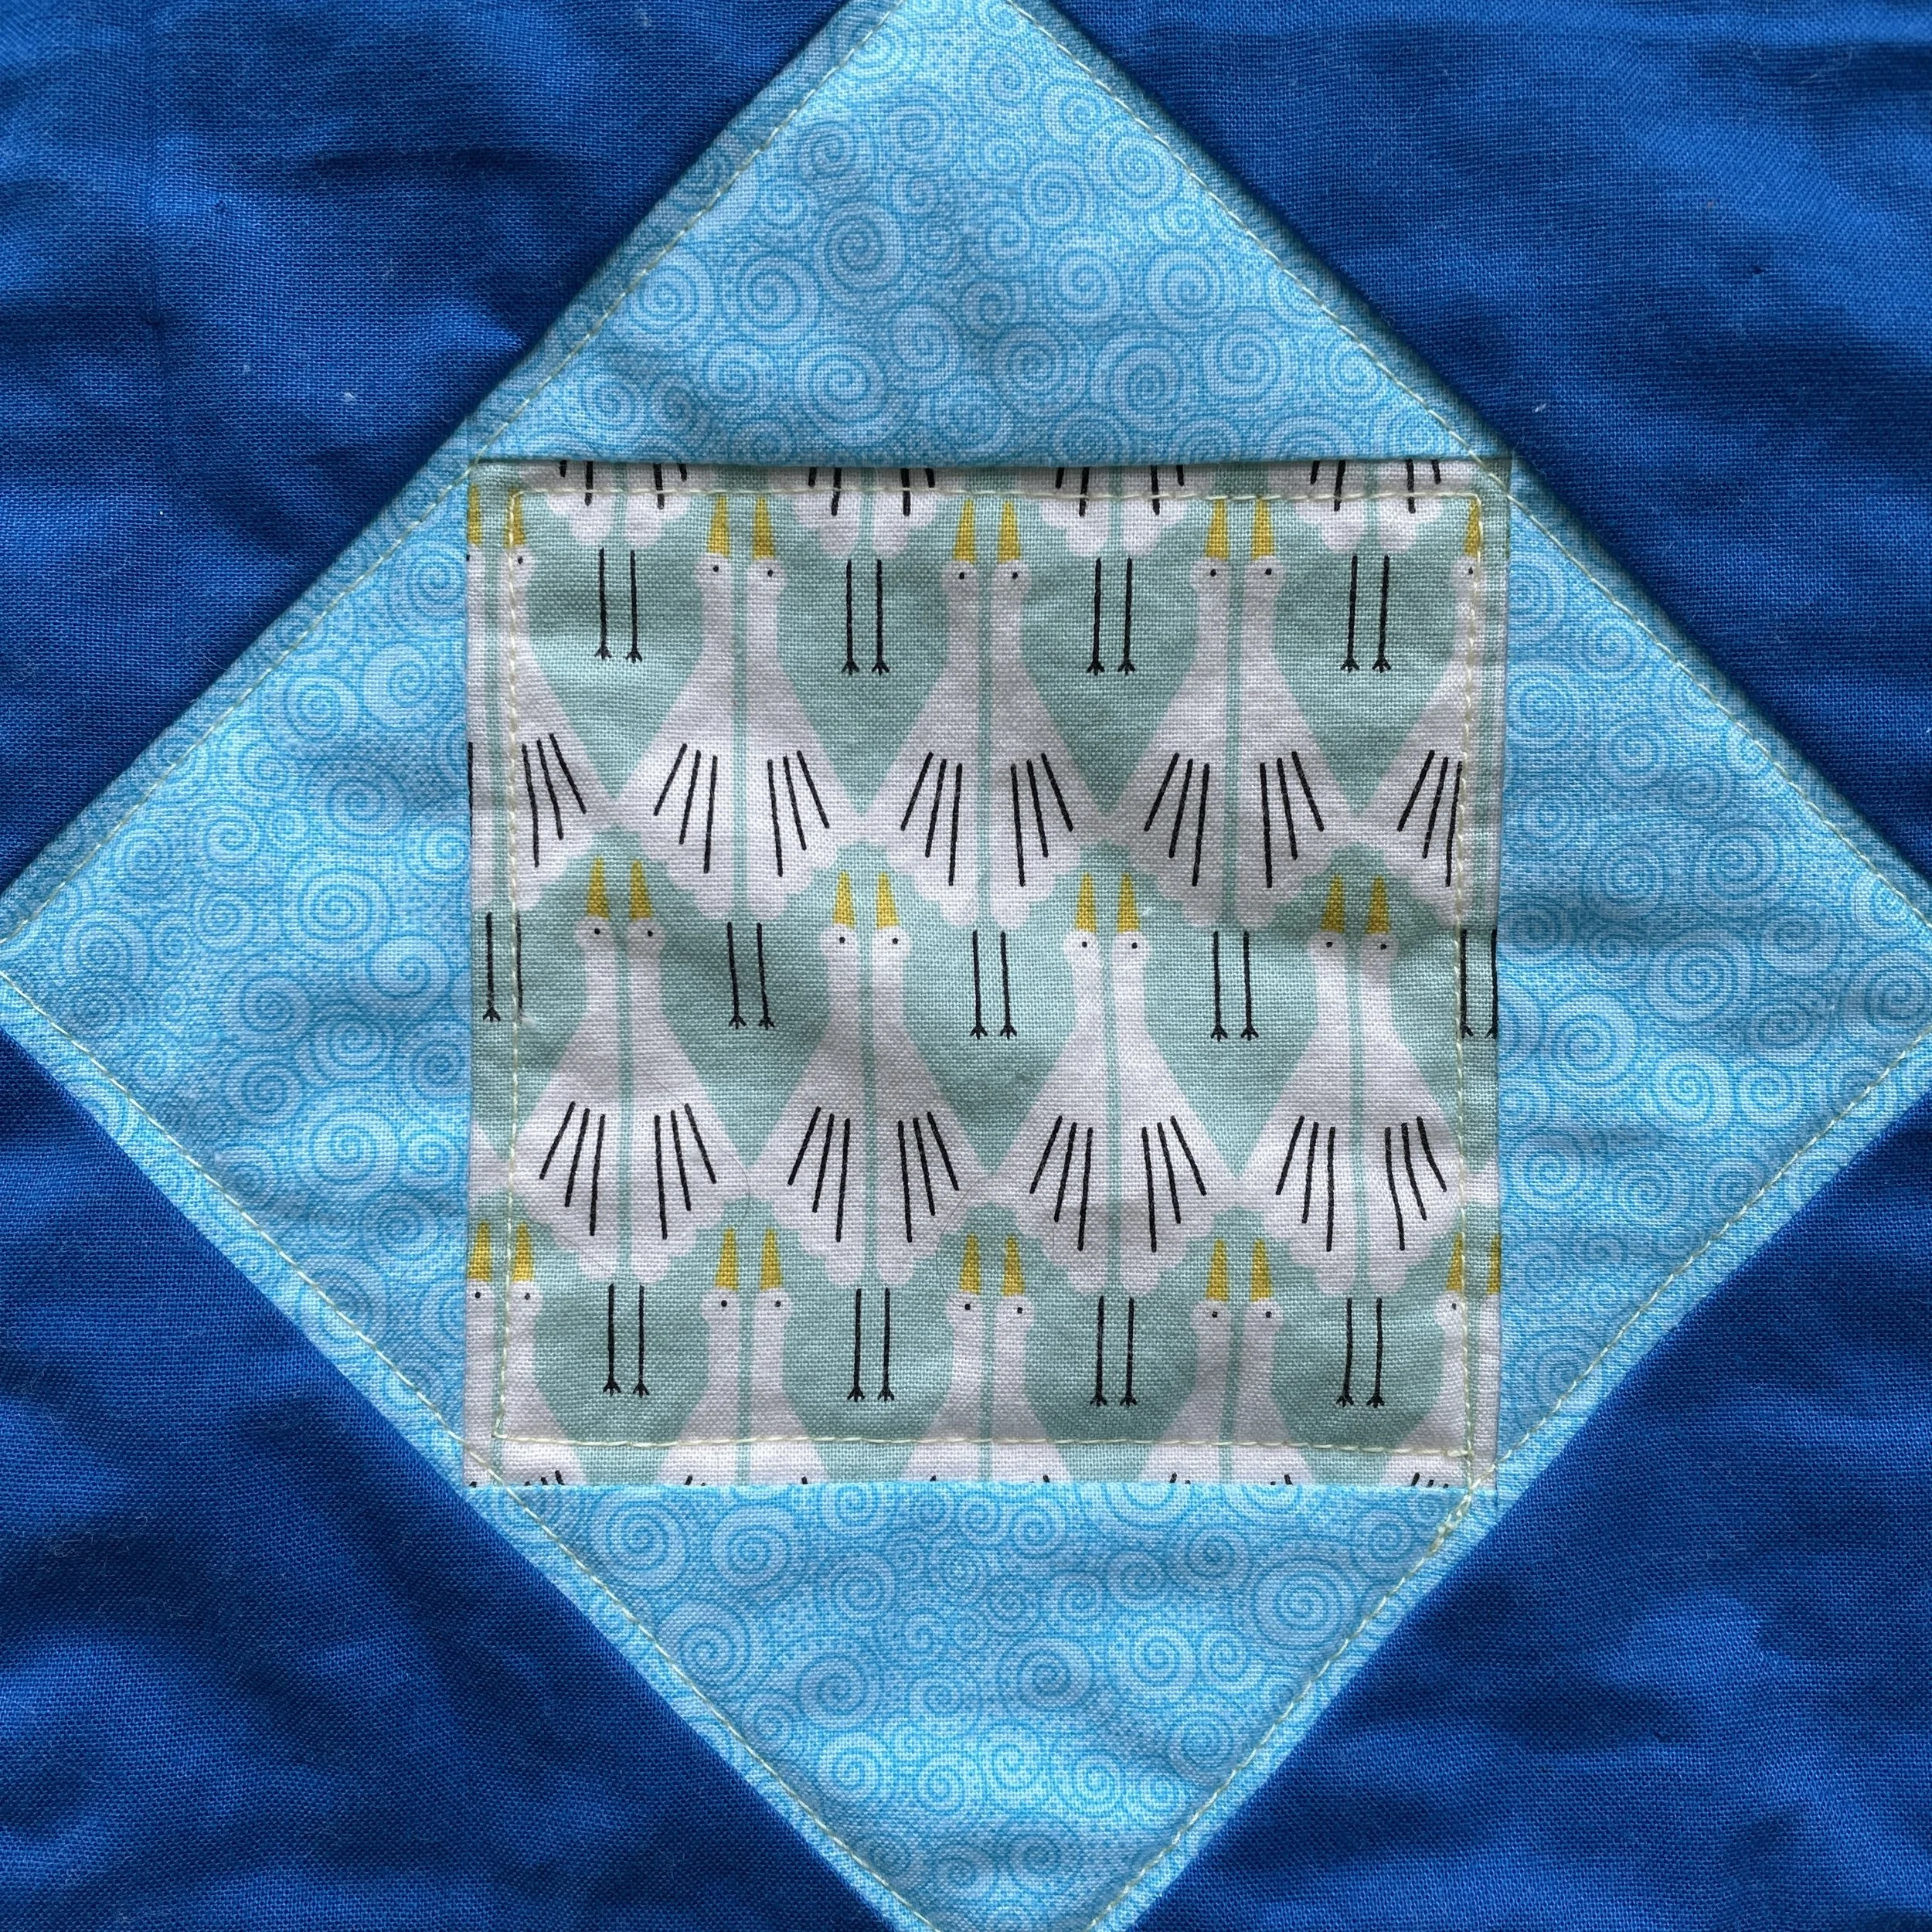
I finished assembling the quilt top in June, but it was just too hot over the summer to quilt a twin sized quilt on my domestic sewing machine. So, the weather started to cool down last month. i did free motion quilting on the body of the quilt. There is walking foot stitching on the borders and big stitch hand quilting using sashiko thread around the focus fabric in the center of each star.

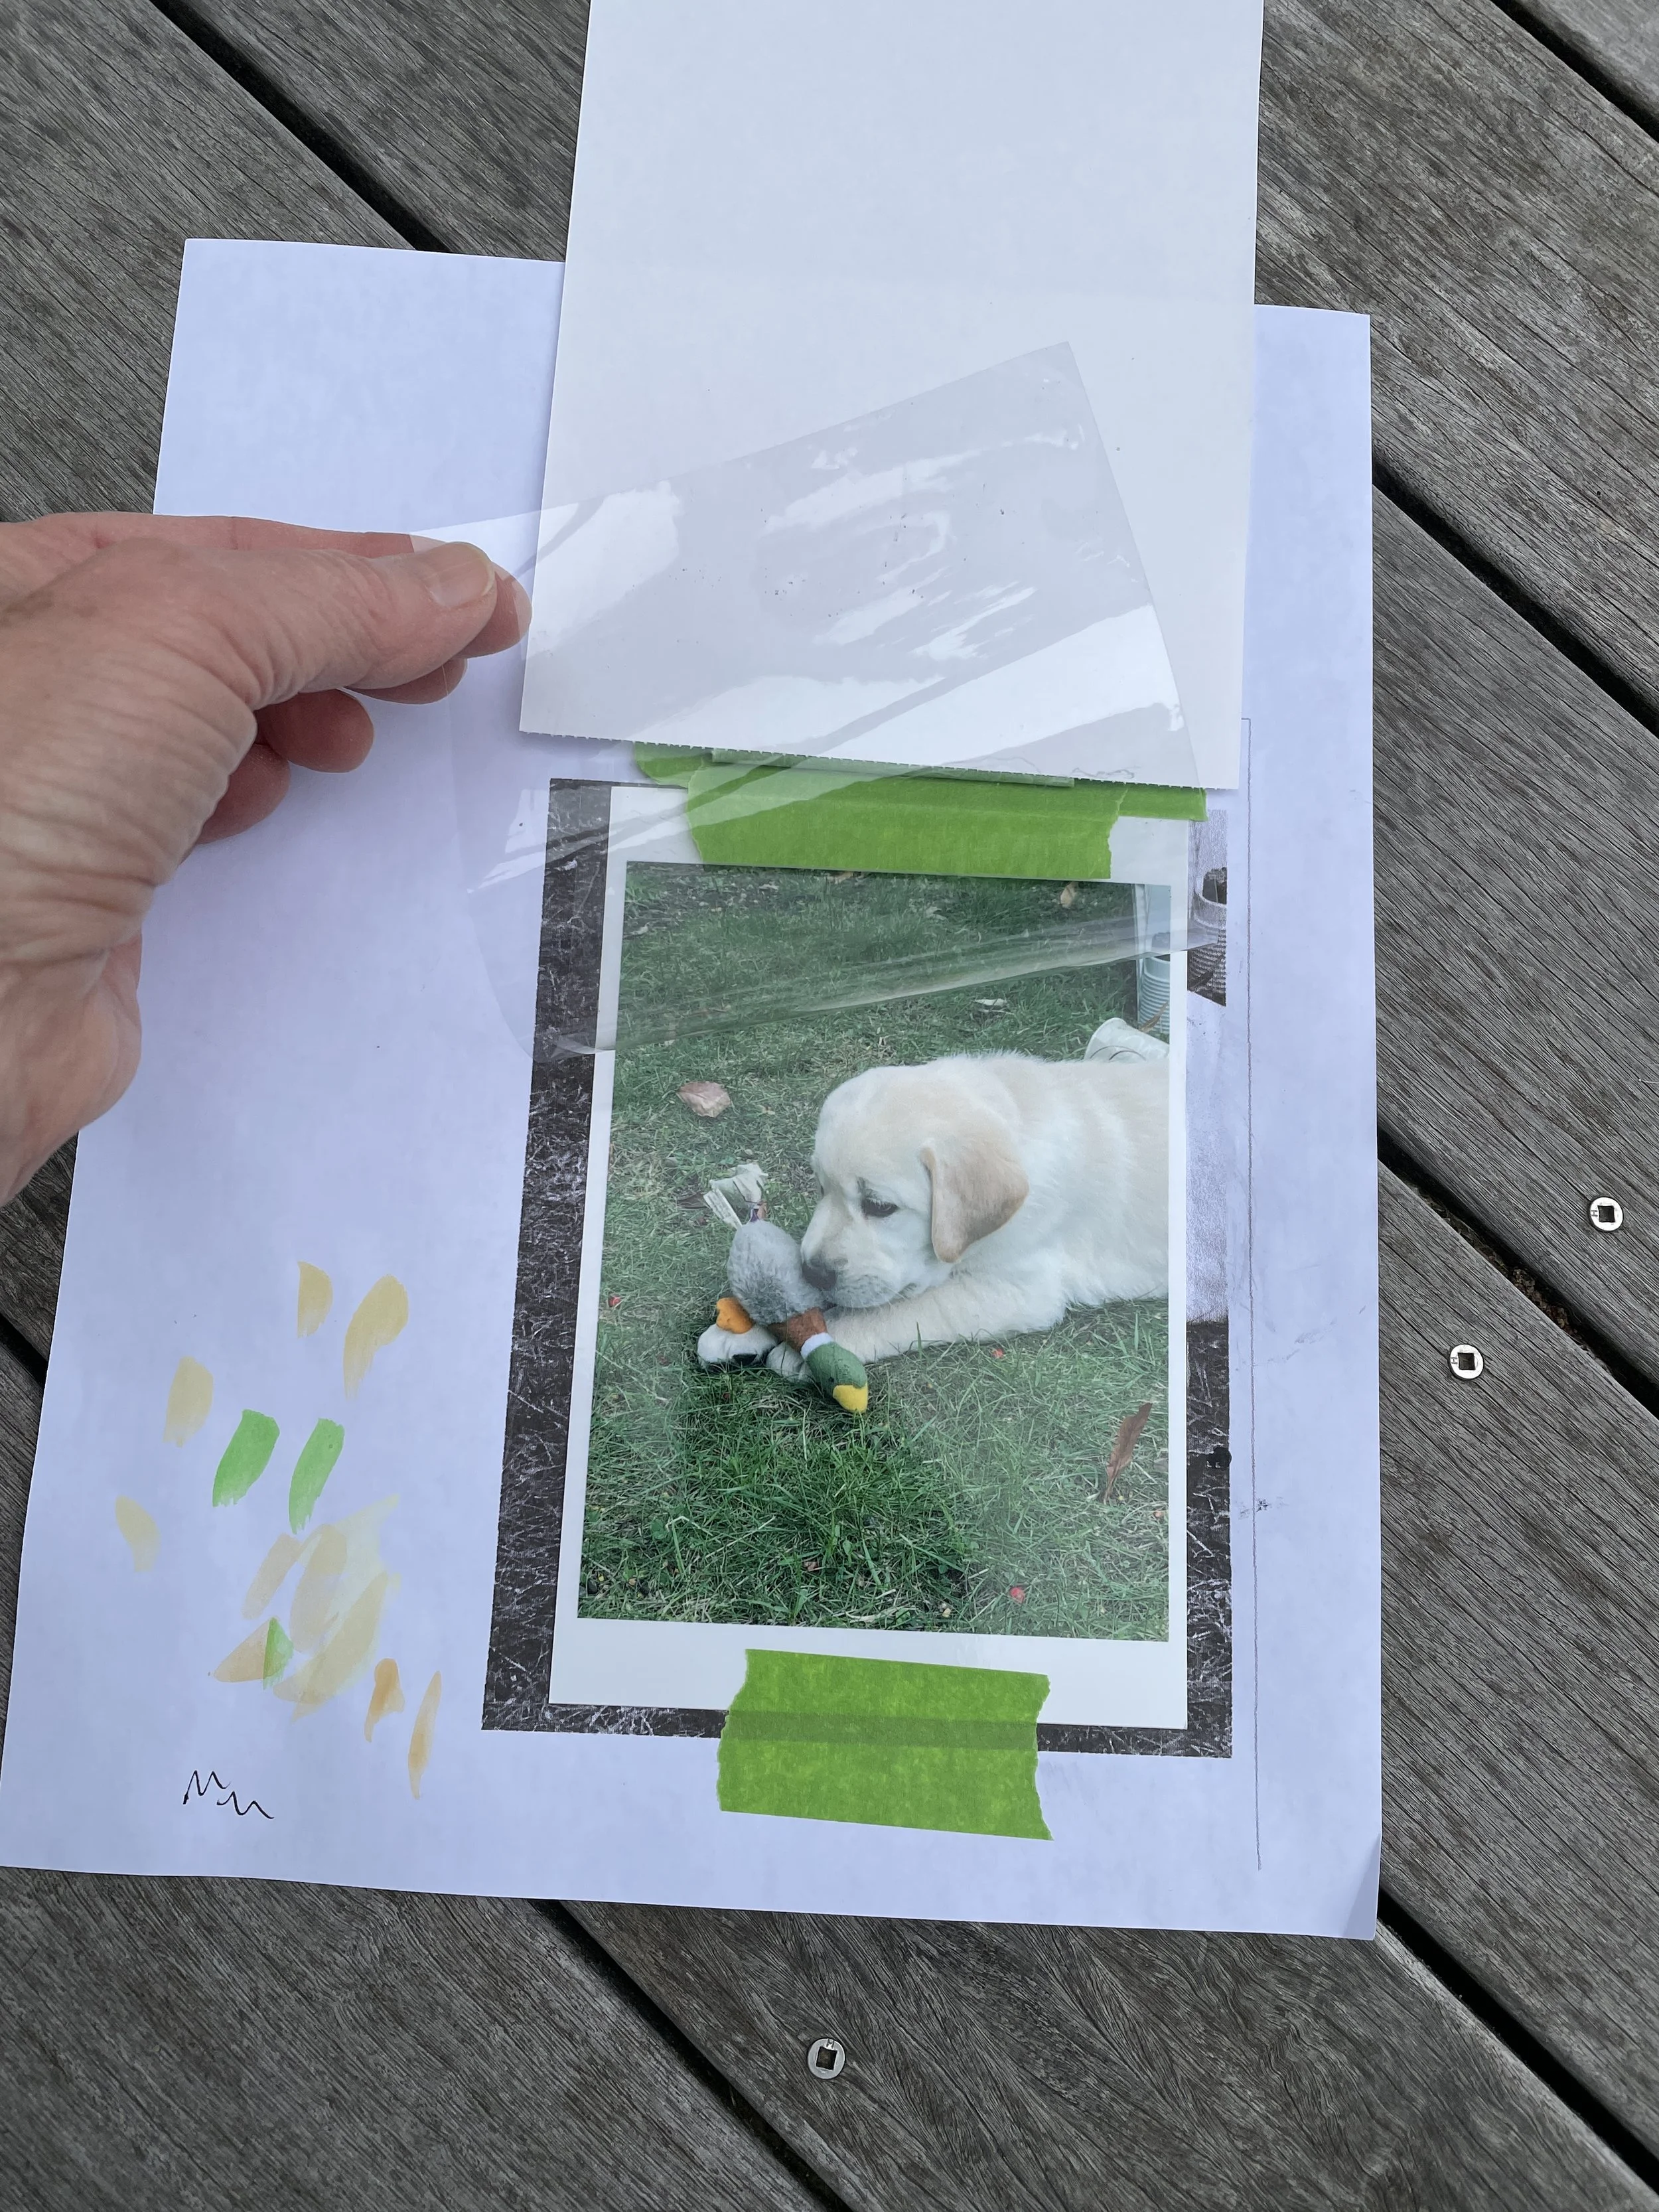
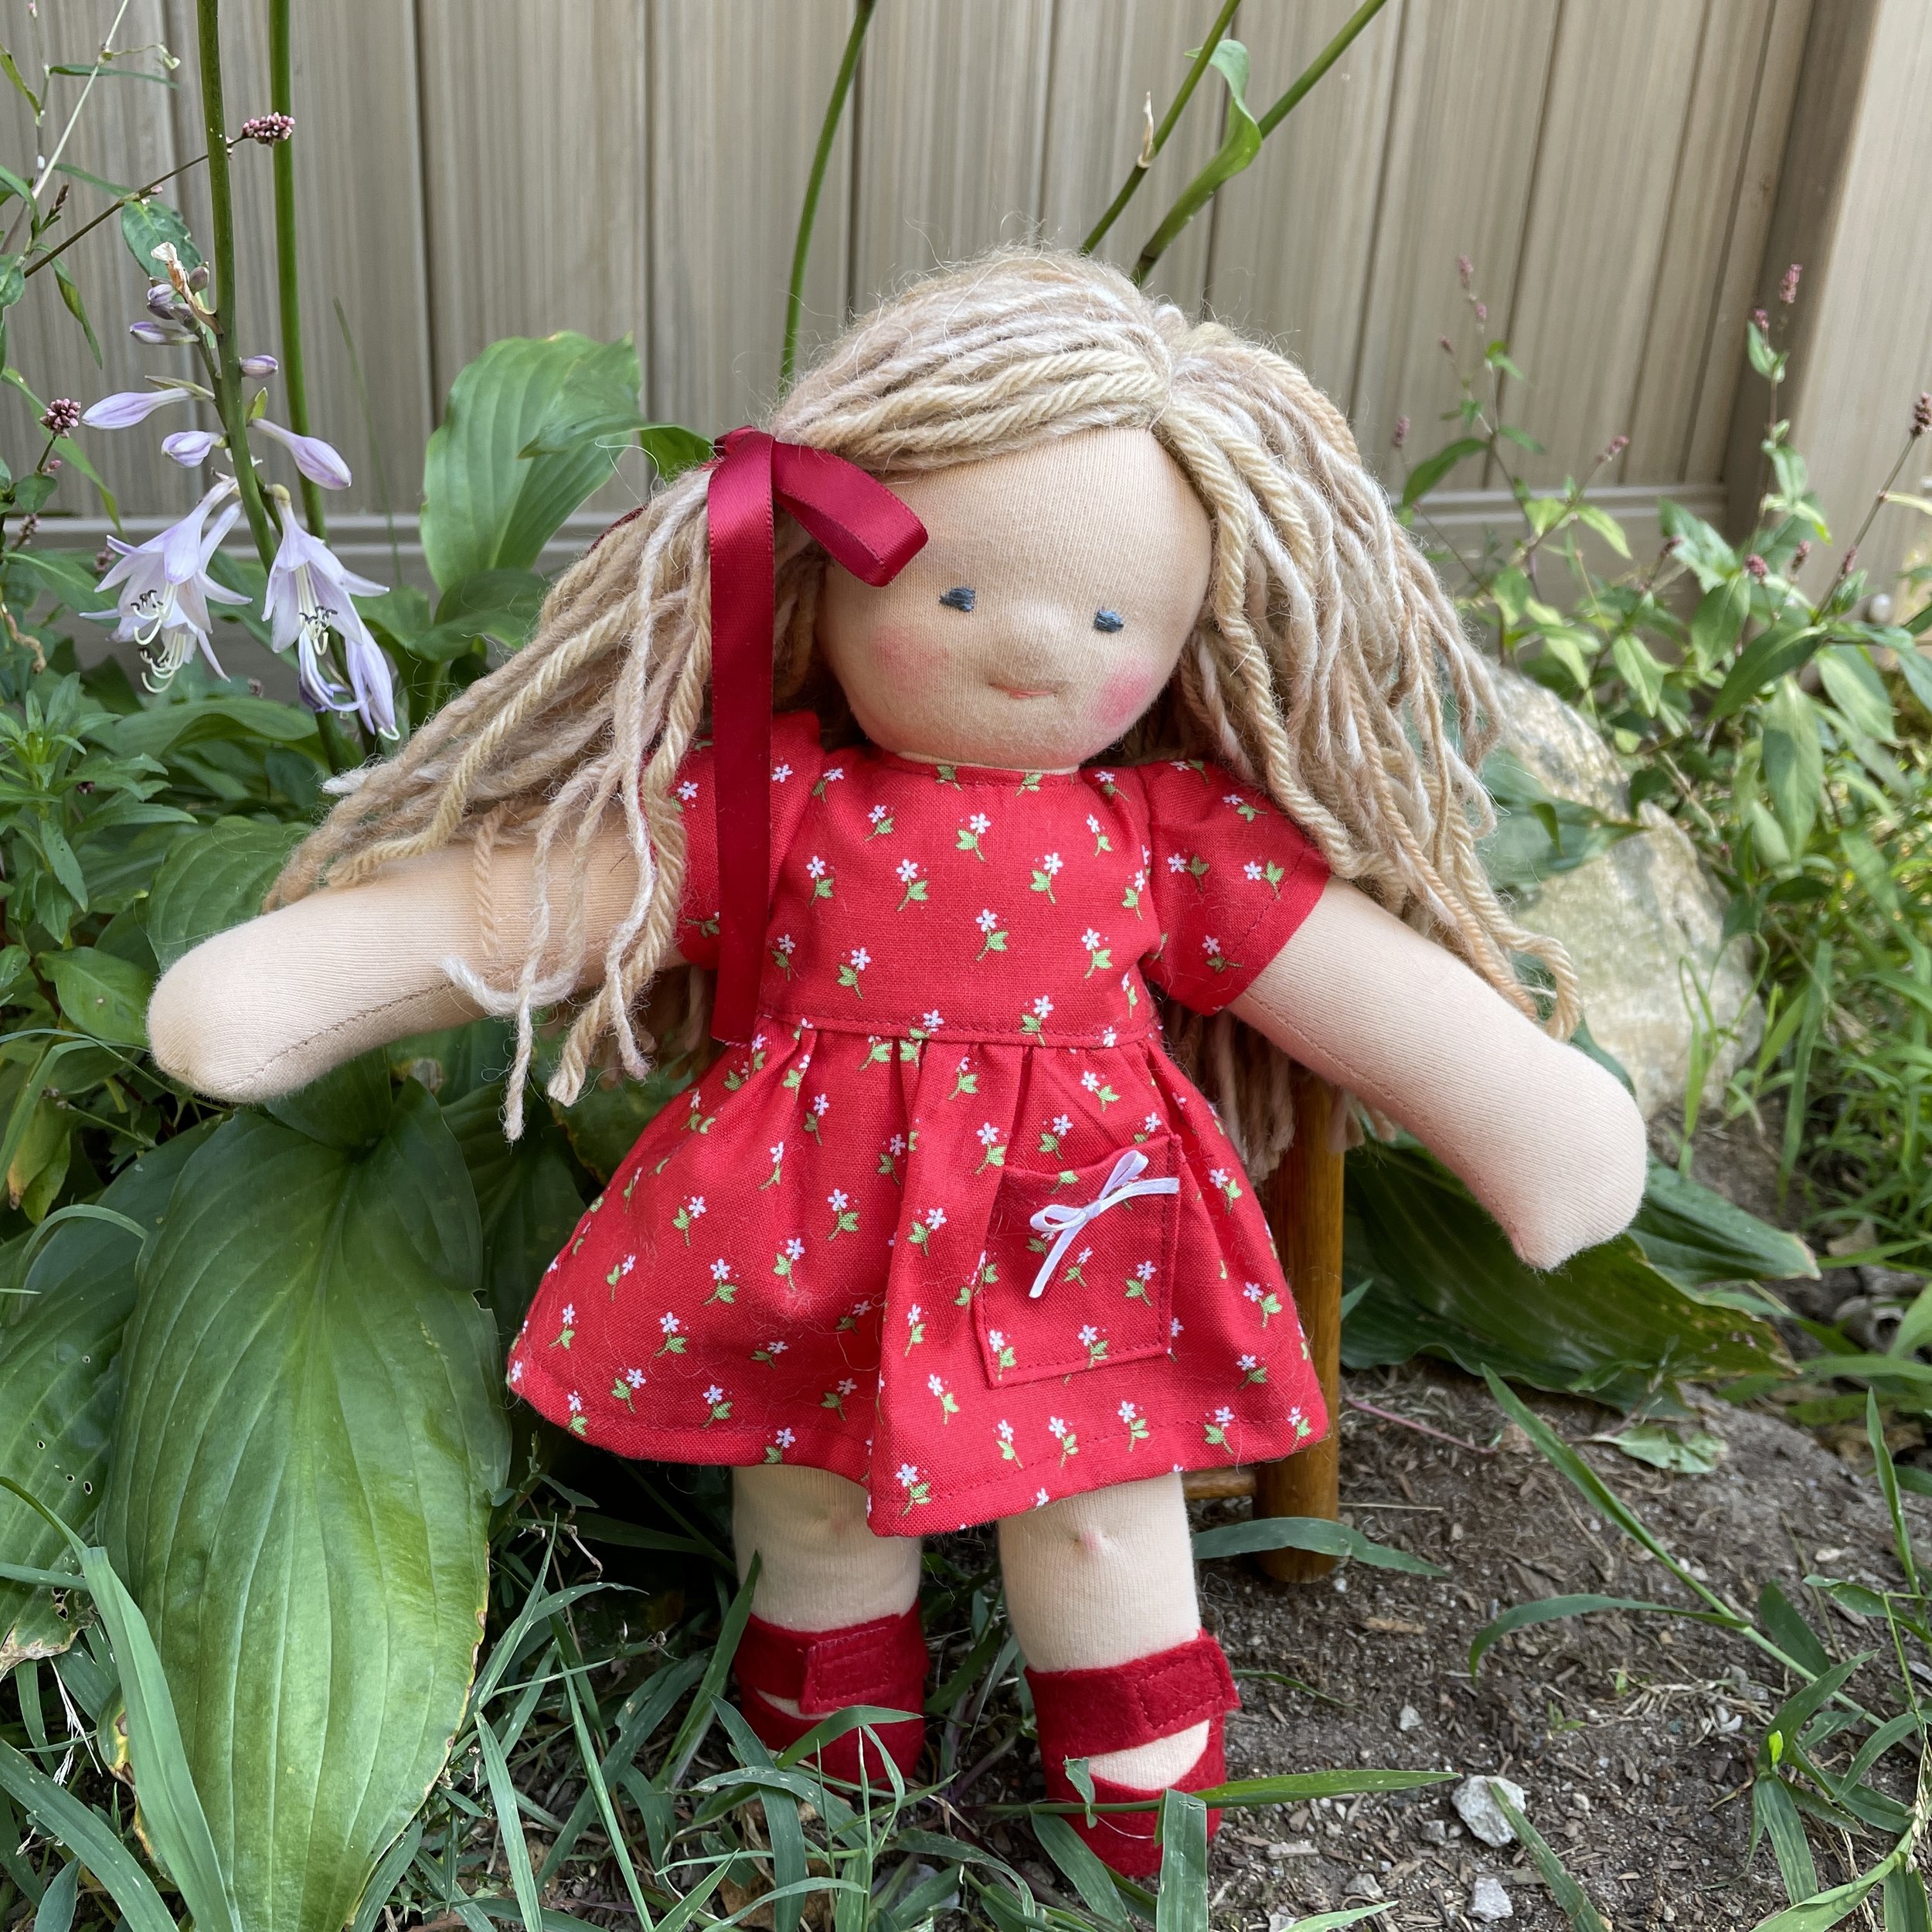
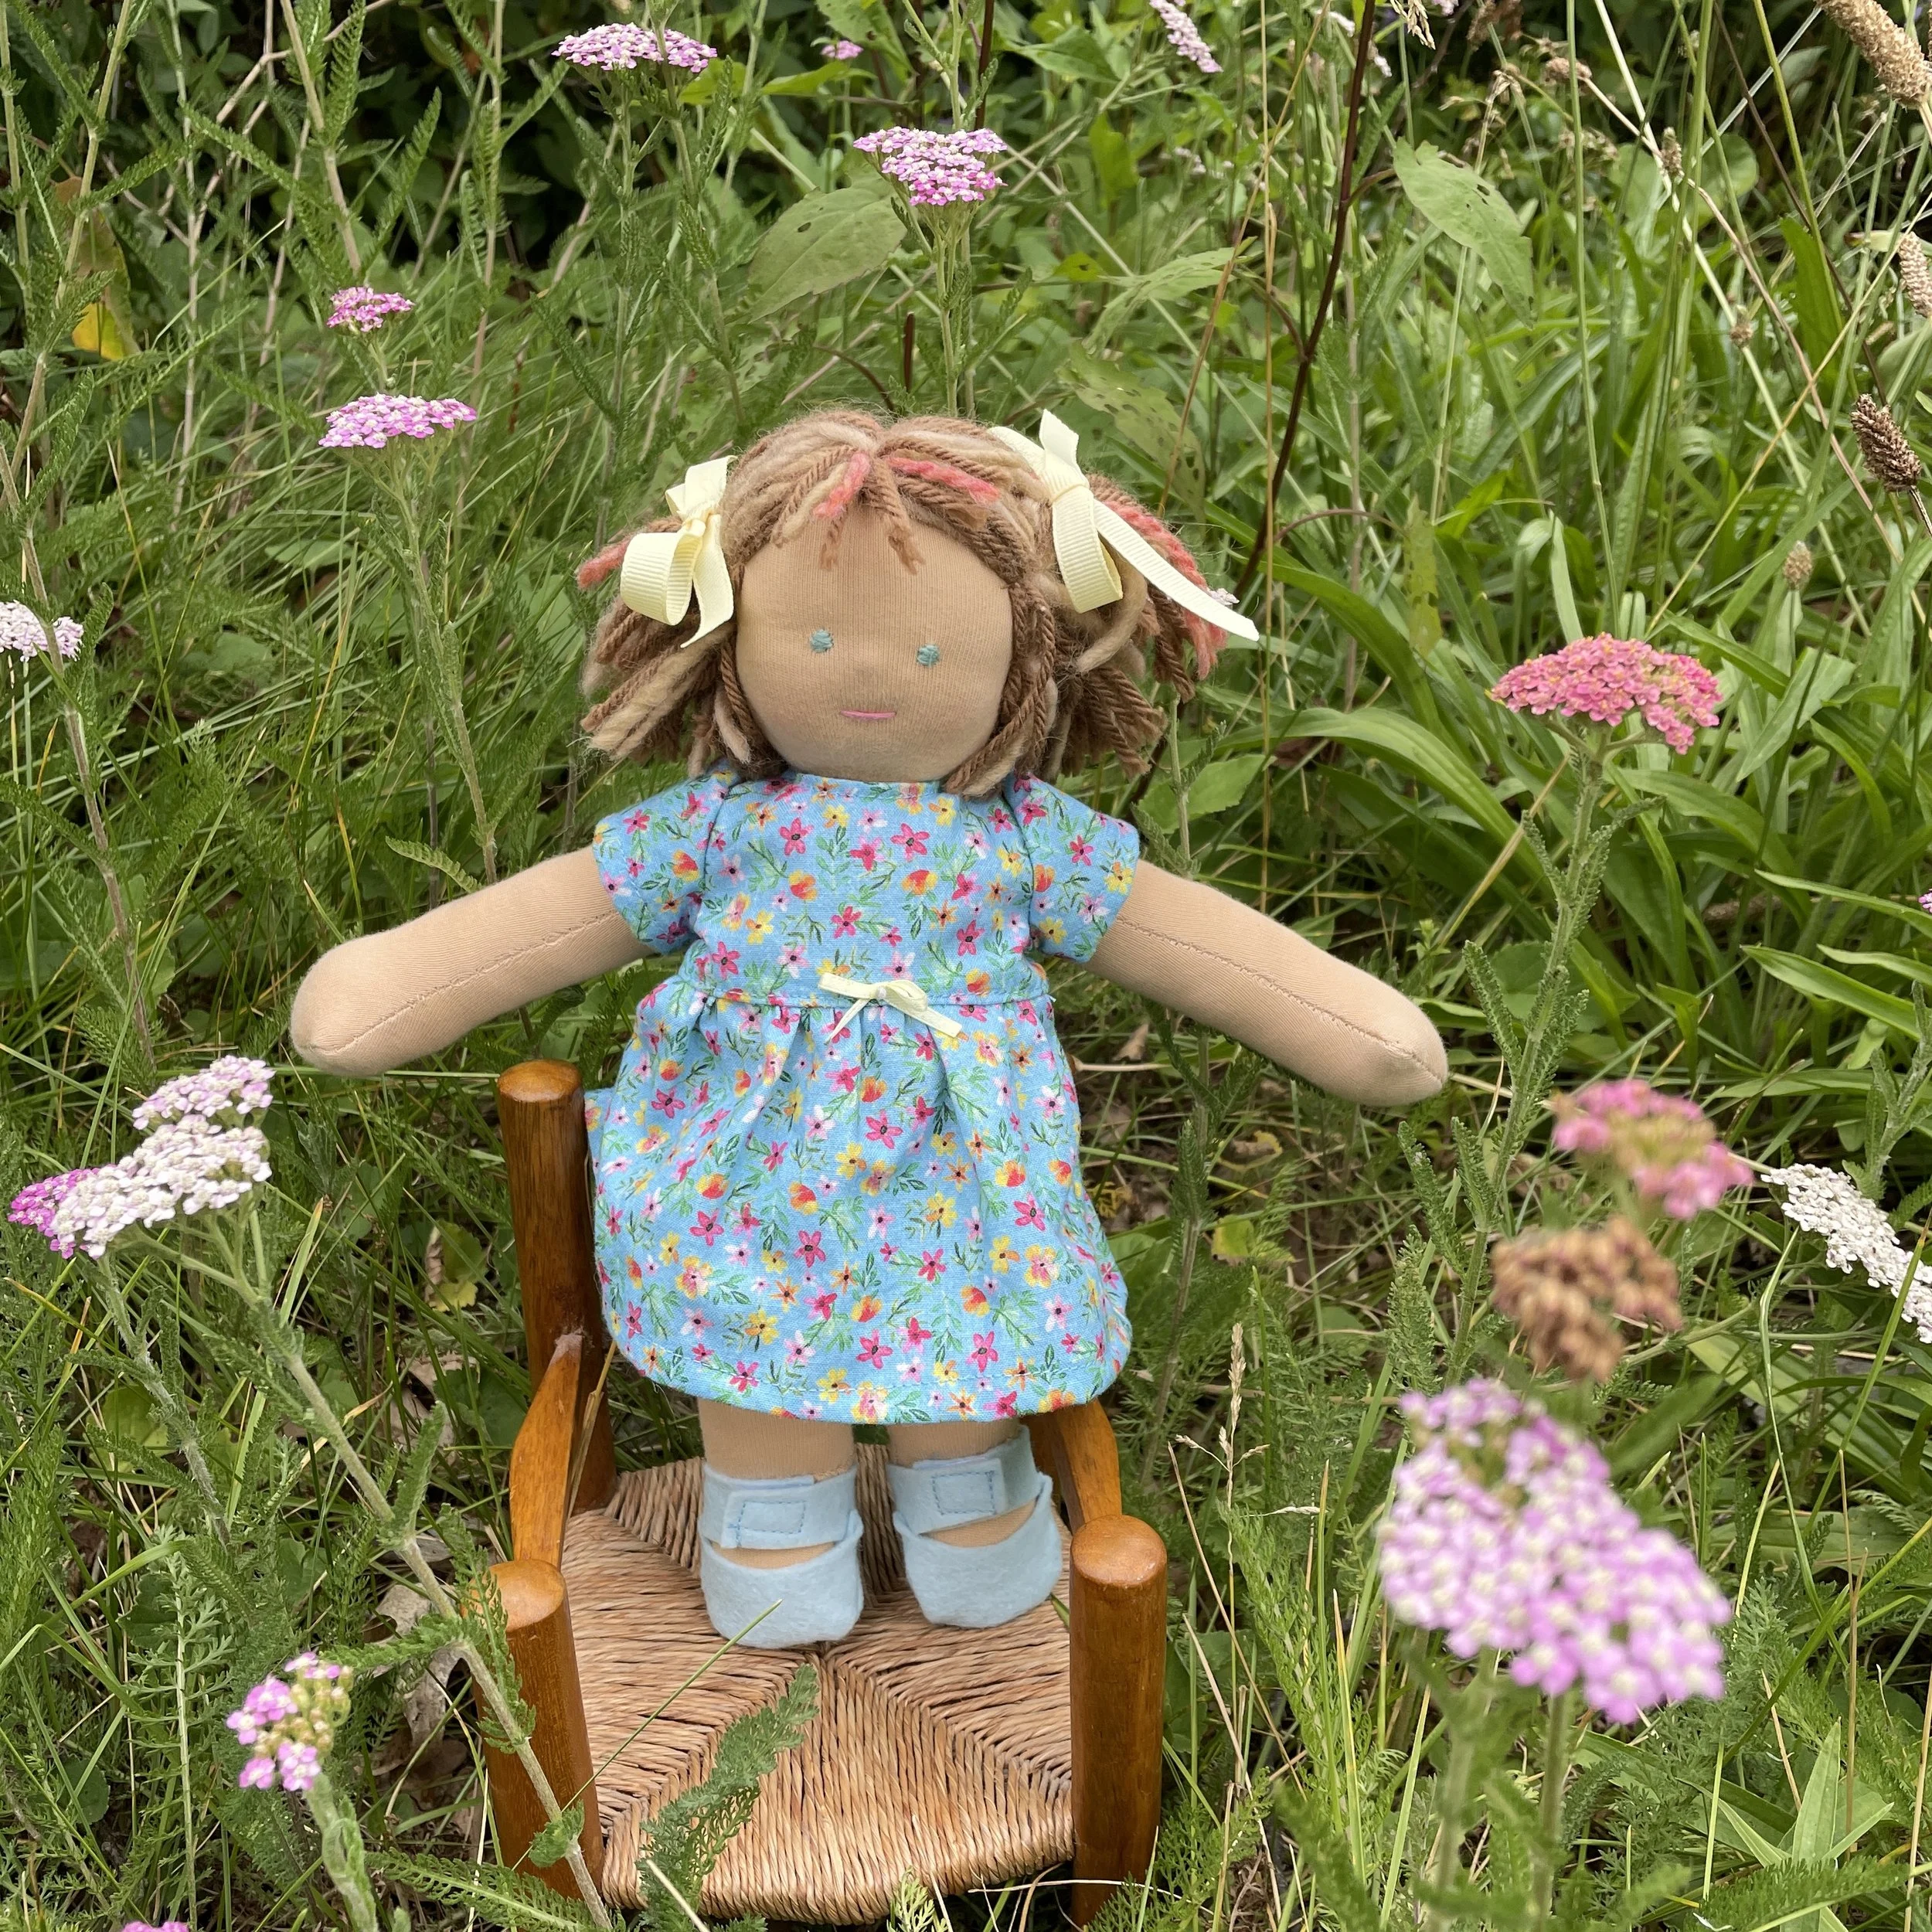
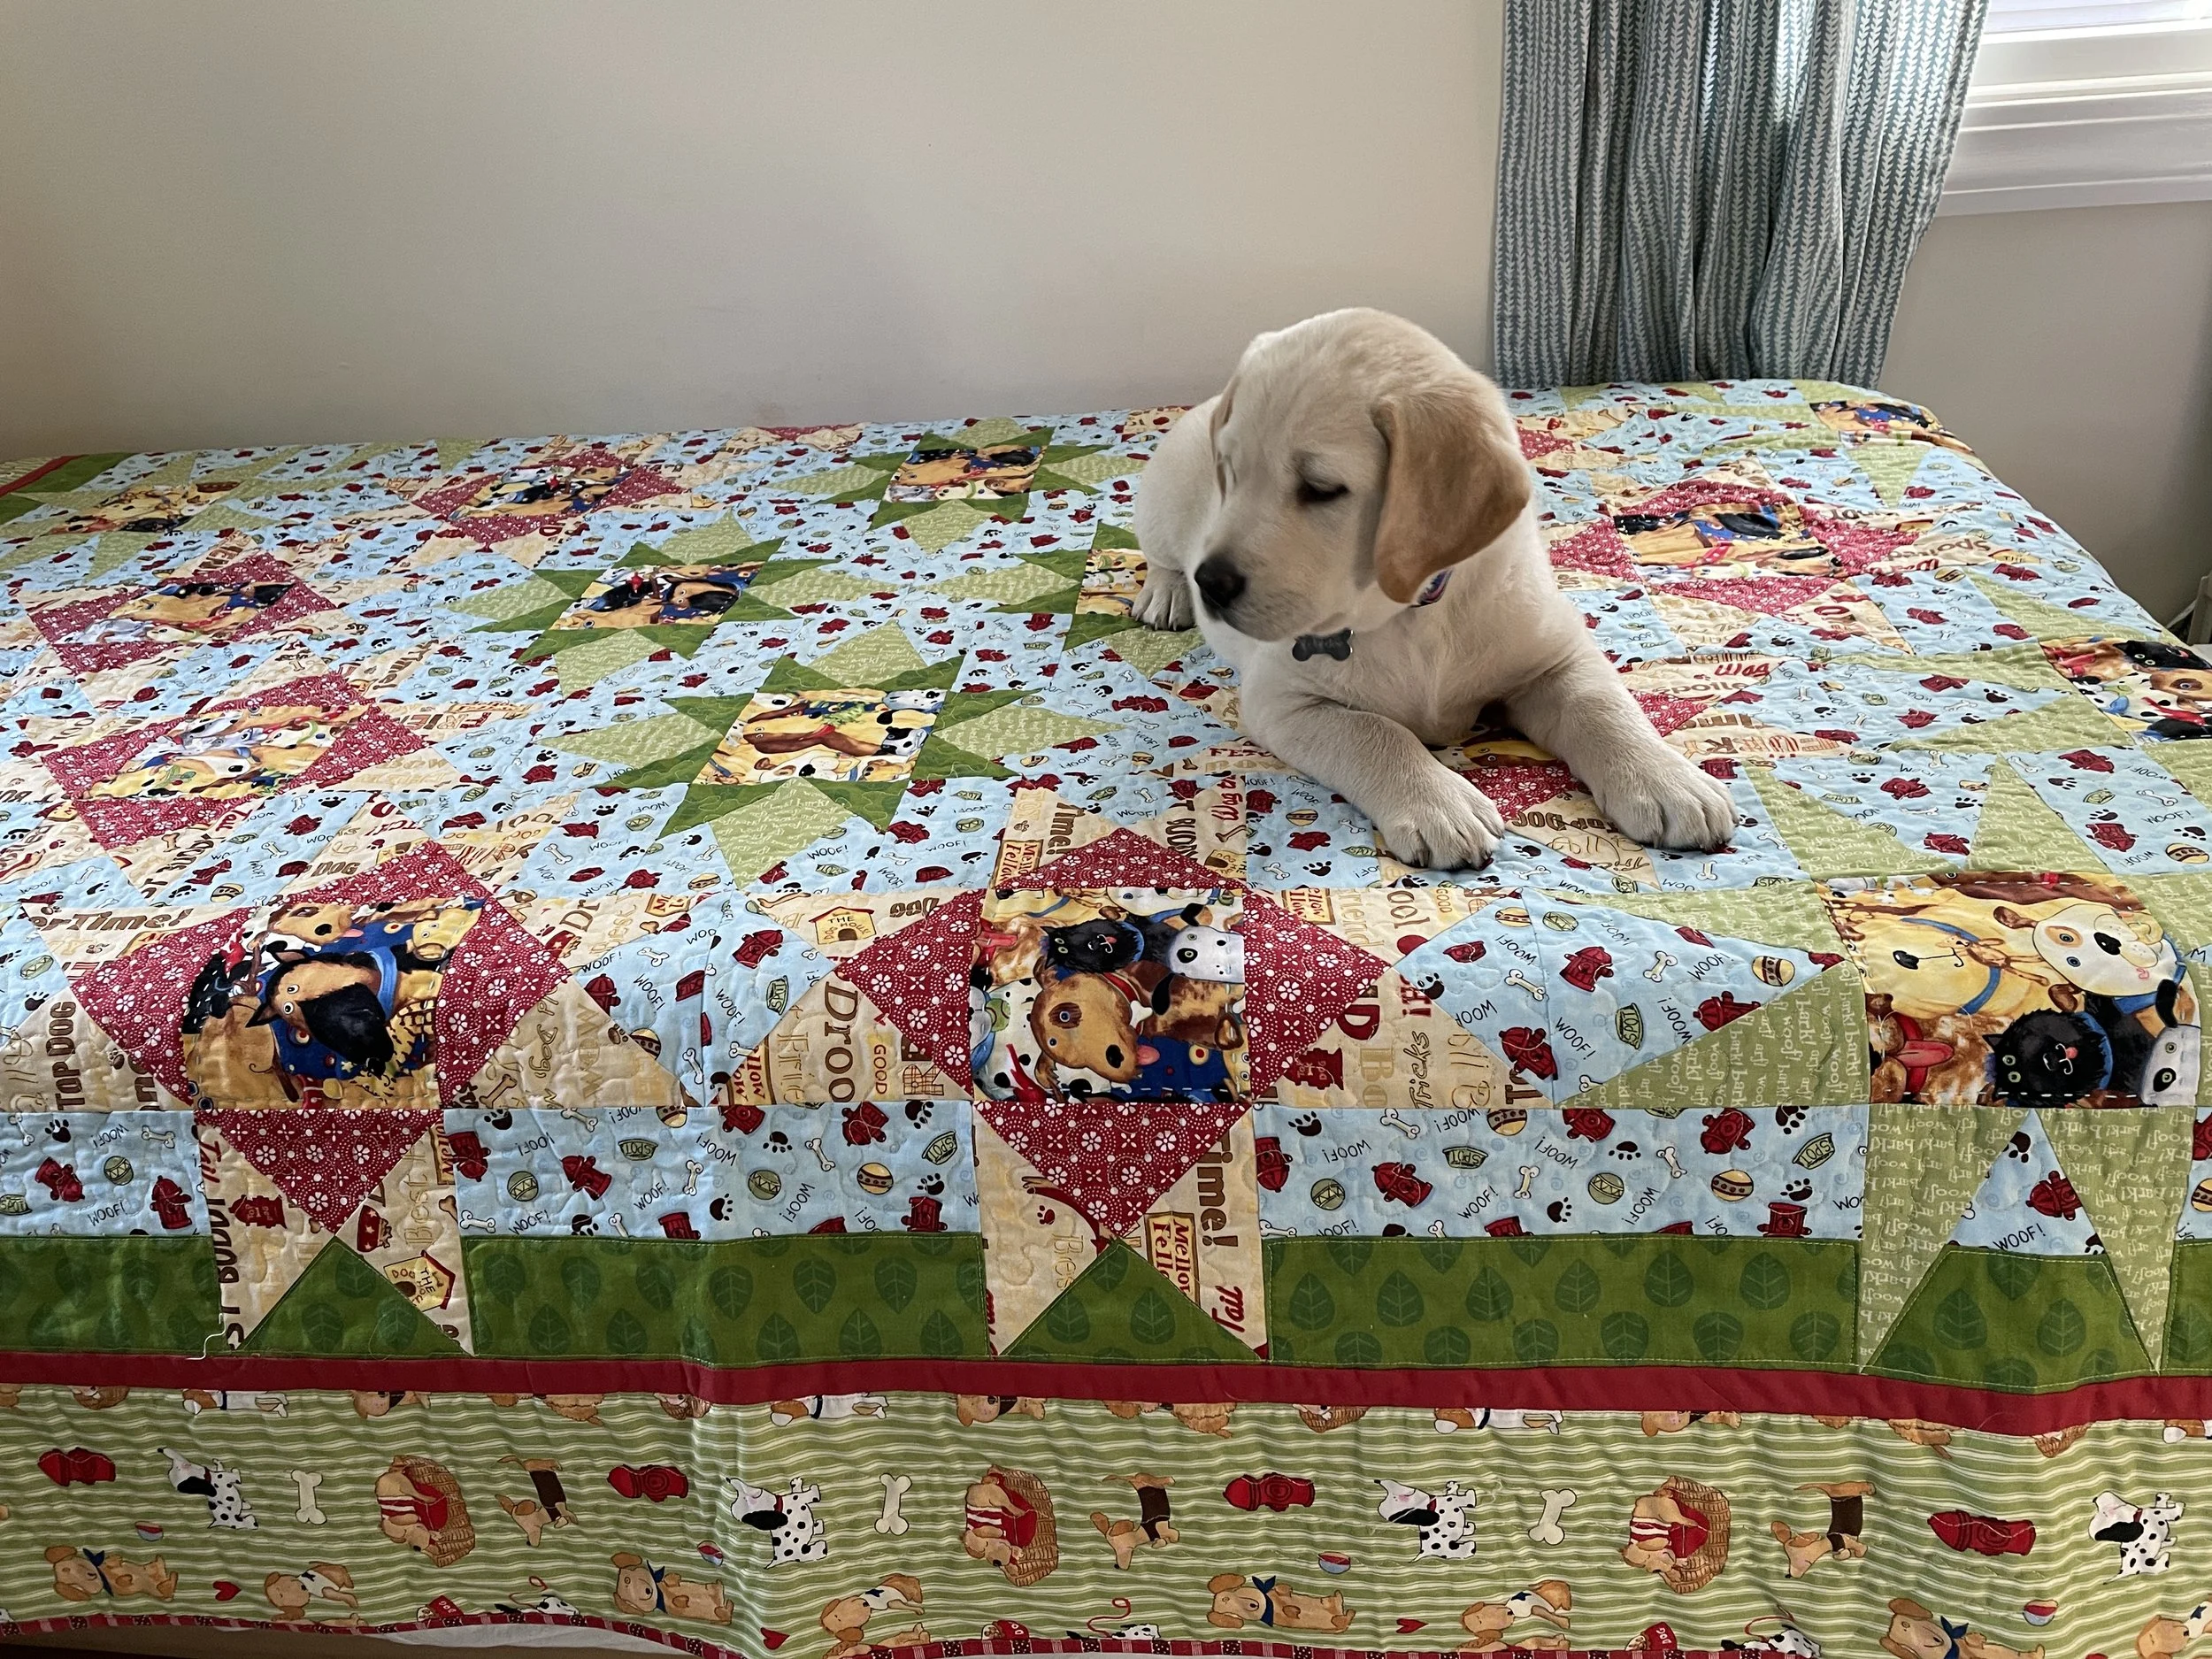
The Quilt Inspector is a new addition to the family! Not the first quilt he has cuddled up to, but definitely his first formal inspection. He found it quite interesting…but actually had no idea about what he was looking for!

I’m really happy with the quilting on this quilt. I looked at my official BBM quilt, which has a white background, and got cold feet about quilting that one myself. There is just no hiding wobbly stitching on white fabric! So it’s currently in queue at the long arm quilter’s. I’ll definitely do a post on that quilt when I get it back in November.

Meanwhile, I have a puppy who is keeping me rather busy. And speaking of which, I expect I won’t be very productive for the next couple months. So don’t be alarmed if I don’t post regularly. It’s just because I don’t have any handwork to blog about!

TAGS: "To The Point" Brown Bag Mystery 2022, Mystery Quilt, Dog Theme Twin Quilt


October 6, 2022

Monoprints with Watercolor

by Judy Tucker


Three Monoprints from the same photograph, 4 x 6 inches

Three Monoprints from the same photograph, 4 x 6 inches

Years ago I learned how to make monoprints and made a number of prints. It’s essentially tracing from a photograph, drawing with a nib pen and ink.

I made one of my long-gone Black Labrador done using photos taken when she was two different ages, scanned the print and and printed it on fabric at spoonflower.com. You can see 2 different photos of my labrador print by clicking the shop tab at the top of the page or clicking this link to my spoonflower shop.

Creativebug.com has a Daily Practice using monoprints this month, being taught by Courtney Ceruti, called Artober: 31 Days of Inky Monoprints. Her class inspired me to take out my pen, ink and acetate sheets and make some more prints. (FYI: Creativebug offers free trials so you can check out this great class and platform before you commit to a monthly fee).

My old ink was totally dried out, so I followed Courtney’s suggestion and purchased some FW Acrylic Ink. This ink dries very quickly so it’s possible to color the print with watercolors almost immediately. But it always means you need draw quickly or the ink may dry before it’s printed.

Here’s my set up. A photograph, a cut-down piece of clear acetate (great because it works well and is made from wood chips and is compostable) and a sheet of mixed media paper for the print. In one photo the acetate is overlying the photo, with the sheet of paper to be printed flipped up and in the second, I’ve lifted the sheet of acetate. Everything is taped down with Frogtape Painters tape to keep the registration.

D1DD4250-7935-4395-A1F2-374F23EE658F.jpg
8685A1D3-1463-4086-8A5E-CF3AF68651DB.jpeg

The prints always are the mirror image of the picture being used. If you need to keep the item facing the same way as the original, scan the image and flip it 180 degrees digitally.

For detailed instructions on making monoprints, and a supply list, check out Courtney’s class on Creativebug.com. I do recommend a nib pen with a very fine tip…I tried several nibs and everything except the fine tip left a trail of thick inky blobs, and unusable prints. The nib I like has the number 003 on it.

As you can see from the 3 prints at the top of this post, each monoprint is unique. I love them all for different reasons. The one with the printing, got rather a blobby duck, but I kept the print because the puppy looks great and the duck is still cute!

I think I’ve made monoprints of things other than Labrador puppies. I just don’t remember any of those! That probably says something!

TAGS: Monoprint, Dog monoprint


September 29, 2022

Australian Aboriginal Sampler Quilt Top

by Judy Tucker


I finally got the blocks from my Australian Aboriginal Sampler Quilt sewn together. It took me the longest time to decide just how I was going to unite them. They really didn’t look good when placed side by side, so I knew I needed to add sashing.

It thought about solids but no particular color appealed to me with all this disparately colored blocks. I actually purchased a turquoise fabric with a swirly, marbled appearance. A lovely fabric and a great color, but I decided I could do better.

So I went off to the local quilt shop. Much to my surprise they have added a couple shelves of Australian Aboriginal print fabrics. Several were good options, but I decided on this soft sea-foam colored fabric which incorporates many of the colors in the blocks.

Then I cut solids I used in the blocks to make the cornerstones in the sashing.

Was planning to add a border but was amazed to find that fabric I used for the sashing just dulled down the entire quilt when used as a border. Nobody says quilts have to have borders, so this is where I’m stopping with this one!

I have a really busy pastel butterfly wideback fabric to use for the backing, so I expect this quilt will be done in the not too distant future…..

TAGS: Australian Aboriginal Print Sampler Quilt, Australian Aboriginal Print Fabrics, Australian Aboriginal Fabric Sampler Quilt, My Monday Block Project


September 22, 2022

Celtic Panel

by Judy Tucker


Celtic Knots Log Cabin Wall Hanging 17 x 17 1/4 inches

Celtic Knots Log Cabin Wall Hanging 17 x 17 1/4 inches

If you are ever asked to join a cat-care co-op, just say yes! Years ago several of us with cats, lived near each other and we all took turns caring for each other’s felines (and now some of my dogs) when one of us was traveling or needed help. And with free cat care, comes great thank-you gifts. It’s a win-win all the way around!

So, recently one of these friends returned from Ireland with a Celtic fabric panel which had an assortment of knots and crosses. A real gem.

I couldn’t wait to cut it up and start making small projects.
The one at the top is a keeper. It’s hanging in my hallway, and is now be one of several little pieces which I change seasonally.

It’s a traditional, log cabin quilt block design, going around each knot counter-clockwise adding one strip at a time.

This is quilted by machine, using a walking foot.

I also made a small wall hanging using one of the Celtic crosses. For this one, I chose to use the Courthouse steps variation of a log cabin block. In this version, strips are added to each side, then to the top and bottom, adding strips until the desired size is achieved.

In this piece I used one set of strips from of coordinating fabric which was also part of the cat-sitting thank you present.

For this little piece, I quilted it by hand using fine # 12 perle cotton.

I’m thrilled to have been given this fabric gift!

TAGS: Celtic Cross wall hanging


September 15, 2022

O'Sewpersonal Color Wheel Summer Challenge Quilt Completed

by Judy Tucker


And here it is! My 2022 O’Sewpersonal Fabric Shop Color Wheel Summer Challenge quilt. This was so much fun to make. (See my post on August 11, 2022 for details about this quilt challenge).

I especially like the diagonals created by the Road to Oklahoma blocks. They also make the cross blocks I designed appear to pop forward.

When I got the quilt blocks all sewn together, i decided I wanted it to be a little bit larger. So I looked in the stash and found this woodland Christmas fabric. Not only does it echo the colors in the quilt, it will also extend the time the quilt can be out on display! Now it’s a Autumn quilt and a Christmas quilt!

The backing is a beautiful fox fabric that I love but never quite got around to making into a quilt! This fabric is the Cotton and Steel “Magic Forest Foxes” designed by Sarah Watts. It’s so awesome!

1854AC21-34F2-49AC-8D3A-6F7EBDD714C9_1_201_a.jpeg

TAGS: O'Sewpersonal Color Wheel 2022 Summer Challenge Quilt, Cross block, Road to Oklahoma block used in a quilt


September 8, 2022

"Brooklyn Preschool" Quilt

by Judy Tucker


Brooklyn Quilt Block, colored 2 ways

Brooklyn Quilt Block, colored 2 ways

The Brooklyn quilt block is really 2 blocks for the price of one. If the X in the center of the block is a white or light color it looks like a block doing a careful balancing act with it’s pieces. if the central X is a dark color it reads an X, or a neighborhood with 4 houses!

Used together, these blocks create a really interesting quilt.

I made this quilt, which I call “Brooklyn Preschool” out of fabrics I had in my stash. The grey fabric with white dots was a bit stretchy so the blocks aren’t as true as they should be. (Starching the fabric before cutting it would have helped prevent much of the stretch). I had a stack fabrics in primary colors sitting out and it reminded me of crayons, which made me think of preschool/kindergarten. And the news has been full of talk about the price of school supplies this year. So a school quilt it became!

“Brooklyn Preschool” Lap (nap?) Quilt

I plan to use this quilt in a guild project this year so I chose to accent the block with all the white fabric, pairing it with the hot pink fabric to make it really pop, helping to really show the difference in the two blocks.

The binding was a collection of left-over binding pieces so that was a win! I purchased a tossed school supply fabric and added the alphabet/number fabric which was a long scrap strip left from a prior quilt.

Quilt backing

Once I’ve used this quilt as my example, I expect it will replace a battered quilt that is on the chair by the window that the dogs like to sit on!

TAGS: "Brooklyn Preschool" Quilt, Brooklyn Quilt Block


September 1, 2022

Sailing at Sunrise/Sunset

by Judy Tucker


10 3/4 x 11 1/4 inch quilt block

10 3/4 x 11 1/4 inch quilt block

This is block # 34/52 of the Quilters Playcation Adventure SewAlong #qpadventuresewalong being offered on Instagram, Tuesdays at 12 noon EDT by Cheryl Arkison. The theme for the week of August 23rd, 2022 was Sunlight. I decided to make a different block than the sun block Cheryl designed as I already have a sun with rays in my block #11.

I search images online of sunlight on water and sunlight through leaves. This free photo in pxhere.com stopped me in my searching tracks. I had a stack of solids just these colors near my sewing machine.

Image from pxhere.com

I initially just sewed strips of color together to make a block that looked just like the photo. But then decided that it would be a much better block if I added one white sail to the foreground. So I picked out the seam of the bottom blue strip and added the white triangle. Due to the additional seams around the sail, the block got smaller, but the blocks in this improv quilt are all different sizes, so this size of this block doesn’t really matter.

What does matter is that the block changed from a just OK block to a beautiful one! And that’s what matters.

It the perfect block to say Good-bye Summer!

TAGS: Sailboat quilt block, Improv sailboat block, Sunrise/sunset quilt improv quilt block


August 25, 2022

Traditional 11 Inch Waldorf Doll

by Judy Tucker


Traditional 11 inch Waldorf Doll with pinched knees

Traditional 11 inch Waldorf Doll with pinched knees

In my last post, I had a Waldorf doll head in search of a body. This week I had a body in search of a head! I had just enough fabric in this color doll skin to make her a matching head. In fact, I had to add a strip of fabric to the neck pouch to make it long enough so I could close it up tightly. But that’s in the doll’s torso, so I hadn’t hadn’t just told you, nobody would ever know i did that!

This time I decided to “pinch” the doll’s legs to give her knees. It’s just a matter of running a double-threaded needle thorough the top area of the leg and after a two passes, pulling the thread taut. Then run the needle and thread back and forth a couple more times to strengthen it and take a couple tiny stitches to keep it secure. Finally run the needle and thread down the leg and out, and pulling tightly and cut the thread near the doll skin. The thread’s end will disappear back into the doll’s leg. (This same technique in used to “bury” thread in quilting!

Doll’s going to little girls need jammies. So here is this little one, sitting quietly in her chair in the garden, all ready for a bedtime story.

All ready for a bedtime story!

TAGS: Waldorf type doll, Waldorf doll 11 inches, Waldorf Doll with Side Part


August 18, 2022

Classic Waldorf Doll "Wood Sprite"

by Judy Tucker


13 inch Classic Waldorf Doll, my Wood Sprite

13 inch Classic Waldorf Doll, my Wood Sprite

Expecting a stretch of really hot weather in early July (which amazingly didn’t materialize), I took some time off from quilting to make 3 Waldorf dolls.

I’ve been wanting some type of a fanciful doll but not a gnome. I decided to make a Wood Sprite. And here he is! He’s a medium size (13 inch) classic Waldorf doll, based on the pattern in Maricristin Sealey’s book Making Waldorf Dolls.

Because he’s a sprite, I needed to give him real ears. That was a first for me. I rather like how they turned out. And he has a cowlick at the back of his head that just won’t stay down!

Look! He’s got ears!

I gave him “pinched” knees and elbows and rouged them up a bit since I’m sure his knees get a lot of friction from his hiking and climbing in the woods! (See my previous post for instructions on pinching limbs to create knees and elbows).

His socks are recycled SmartWool® socks which I’d worn until the heels were threadbare. But there was still a lot of usable sock left. I got both his socks out of one of mine! And I gave him hiking boots, which he definitely needs! He has a special arboreal seat which is growth on this oak’s trunk. When he climbed up to sit in his seat, he took his boots off to show you his socks.

He also took me to his favorite place to pick low bush wild blueberries to see how they are coming along. This was the second week in July. It’s still a couple weeks too early to pick any blueberries. if you look very closely, you can see a cluster of immature green blueberries and one just starting to purple up. The blueberry season was just about perfect about 2weeks ago now that it’s the middle of August.

5C65E55C-600C-4F61-A1C4-FD622C56D395.jpeg
B30F4F6E-417F-4DE6-AC52-5AFAAB5152DC_1_201_a.jpeg

As he showed me around his woods, he started peeling off the “extra” clothes he was wearing. Such a boy! At least he kept his shirt and shorts on! He thought he wanted to climb this rock in his bare feet but then decided to just sit and enjoy the dappled sunlight.

2DF15EF6-74FE-4527-894C-9CE889B56027_1_201_a.jpeg
A84A0B81-0B9A-4230-B71A-5290882081E8_1_201_a.jpeg

Two more photos, closer to my home. He wanted to be sure you got to see the gingham bunny shirt I made him. He’s starting to outgrow it. The paper airplane shirt I just made is a bit larger so it should fit him for a long time!

768269D2-F0E8-4B1D-82F1-DE1085DF510C_1_201_a.jpeg
1FBCD7F8-30BC-4A97-9596-1313220A907A_1_201_a.jpeg

My Waldorf Wood Sprite is a one-off, and a keeper. He’s staying with me so you maybe you’ll see him again some other time!

TAGS: Waldorf Doll Wood Sprite, Waldorf type doll, Classic Waldorf Doll


August 11, 2022

Eight Color Summer Challenge

by Judy Tucker


The “Autumn” OSP Summer Challenge Colorwheel

The “Autumn” OSP Summer Challenge Colorwheel

O’Sewpersonal Fabric Shop is a business with two shops…one in O’Fallon, Missouri, in the other in Collinsville, IL. Kelly, the owner, saw some amazing challenge quilts out in Utah when she was at a workshops given by the long-arm manufacturer, Handi-Quilter. She decided it would be fun to set a challenge for her customers.

The shop is well known for the “Color Wheels”, sets of 8 fabric fat quarters. They offer at least one Color Wheel in their Comment Sold Facebook Sale every Monday night. Sometimes they are 8 fabrics from a fabric line, sometimes they are an assortment of 8 fabrics all the same color. For this challenge, the shop decided to make several sets of color wheels from 2 different fabric lines.

I wasn’t going to do this as I had the Blue and Yellow Summer Challenge for my guild but since I finished that one up in June, I jumped on the OSP bandwagon and purchased one of the few remaining Color Wheels, “Autumn”. These fabrics are from the “Beyond Bella” line designed by Annie Brady for Moda Fabrics.

Here are the contest rules:

  • You must use each of the colors in the color wheel. Just a tiny piece will satisfy this requirement

  • It has to be completely done and submitted in person or via photo by September 2, 2022.

  • It can be a quilt, a bag, or any other project that uses the fabric. Any pattern, or no pattern, is fine.

  • You may add any other fabrics that you want to, as long as the 8 Color Wheel Fabrics are used.

I think that’s the list!

I decided to design a block…it’s a cross block and I added the little squares in each corner. And I’m using the “Road to Oklahoma” from the Electric Quilt 8 Block Library as the alternate block.

Screen Shot 2022-08-04 at 3.38.55 PM.png
Screen+Shot+2022-08-04+at+3.40.13+PM.jpg

I also designed the quilt in EQ8. One of the great things about this computer quilt program is that you can upload a fabric line from the manufacturer’s website and use it to color the blocks in the quilt you are designing. So you can see the quilt as it will actually be, not just in similar, substitute colors. It’s a extra step, but sometimes it’s so worth the extra effort. And it certainly was worth it this time. Because I only had the 8 fat quarters, I needed to know that my design didn’t need more fabric than I had. And EQ8 can do that!

The only fabric I will need to add is the pale yellow background in the Road to Oklahoma block.

NOTE: Since Kelly posted this Color Wheel Challenge, her shop in O’Fallon, MO was flooded by the historic July rains across the plains and Southeast US. She was on vacation in Alaska at the time, without any cell phone connectivity, so didn’t know what was happening back home. The shop did have water damage but she’s grateful it was just ground water and not also from the roof. Her employees all rose to the challenge. She reports that they did an amazing job, mopping out water daily and getting as much of the inventory safely up, high and dry, as they could. It’s a good thing that a lot of fabric is shelved at off the ground, but still, they couldn’t rescue all the fabric.

If you want to support the shop, O’Sewpersonal sells online on Facebook every Monday evening starting at 8:00 PM Central time. It’s always a really fun show. They also do a bit of online sales through their website, osewpersonal.com. The fabric online is all sale fabrics. You really need to do the Facebook Comment Sold sales on Monday to purchase what’s new and exciting!

TAGS: Electric Quilt 8, O'Sewpersonal Fabric Shop Color Wheel Challenge 2022


August 4, 2022

Traditional 11 inch Waldorf Doll Remake

by Judy Tucker


Traditional 11 inch Waldorf Doll

Traditional 11 inch Waldorf Doll

This little sweetie has been waiting in a bin for years to become a real doll. Must have been 6 or 7 years ago when I originally started making her. I think I’d actually almost finished the doll when I decided the head just wasn’t good enough. She had a lot of wrinkles around her neck. I knew they shouldn’t be there but wasn’t a good enough doll maker to be certain how to fix the problem. So I picked out the stitches and made a new head. But this face was sweet, so I put her in the doll-making bin for another time.

I do know how to make nice tight wrinkle-free necks now. The key is in the pouch of wool tied off just under the head. That pouch needs to be tightly enclosed with the skin fabric from the head and so that the pouch is literally pushed up toward the head. Then the neck string can be tied around the doll’s neck—which will be wrinkle free!

I didn’t take any photos while I was working on this doll, but here are a couple of mine from way back. In the first you can see the wool stuffing, the stockinette covering the wool head and the doll skin which will enclosed everything. In the other photo you can see the closed pouch—-not a great example because it wasn’t stuffed tight enough and there are wrinkles below the neck string. Those wrinkles will be hidden the doll’s torso but a well-made head will have NO wrinkles.

IMG_5281.JPG
IMG_6701.JPG

So I picked out the stitches on the pouch, stuffed it a bit more resewed it and then retied the head. Perfection on this go-round.

I needed to make her a new body and decided to go with the traditional Waldorf one-piece trunk and legs. I’ve designed my own Waldorf doll patterns but the traditional pattern in Maricristin Sealey’s Making Waldorf Dolls is my favorite doll body at the moment. Only one problem…I needed to match this older skin fabric on the doll’s head with something in my collection of doll skins. That turned out to be very difficult.
I thought I’d found a good match and sewed up the arms and torso. But in different light on a subsequent day, they didn’t match very well.

So, I set that body to one side and tried again. This time I found a small amount of doll skin that was a perfect match. In short order, the doll had a new matching body and a dress. I debated making shoes…they are almost always taken off and just tend to get lost.

I had the perfect 3 year old friend to welcome her home! And, true to form, the first thing she did was remove the doll’s shoes and toss them on the floor! But her Mom is great. They will be tucked away in a safe place for the day the doll HAS to have shoes!

Not a neck wrinkle in sight! (Or out of sight either)!!

Next week I’ll share the doll who got the body that didn’t match today’s doll!

TAGS: Waldorf type doll, Waldorf doll, 11 inch Waldorf Doll, Making a Waldorf Doll Head without neck wrinkles, Fixing wrinkles in a Waldorf doll neck


July 28, 2022

One Block Baby Quilt Completed: Birds Roosting

by Judy Tucker


Birds Roosting Baby Quilt, 45 inches square

Birds Roosting Baby Quilt, 45 inches square

My One Block Baby Quilt, “Birds Roosting” is all done. It was lots of fun to quilt. Here are some of the details.

  • There is scalloped quilting under the birds so it looks like they are sitting on a nest…or a hammock!

  • There are uneven scalloping “feathers” in the orange blocks around the central focal square.

  • There are free motion quilted bird nests in each of the hot pink cornerstone squares.

  • Tracking around the turquoise leafy triangles in a stitch built into my Bernina that always reminds me of bird tracks!

286812F1-92A9-4963-A85E-0B0EDE17B073_1_201_a.jpeg
5C3BBAB5-3988-4AEC-91E5-B72EAF571127_1_201_a.jpeg
320C468A-63FC-4FD2-8D5F-375D0D259FAA_1_201_a.jpeg
B7CF01C0-62BD-4DF1-A4C5-F01B52EED91C_1_201_a.jpeg

I wasn’t sure i could stitch out the four nests but drew a quick diagram and realized that it was totally doable…not that different from the free motion flowers I stitch often! All four nests are a little different…but then they would be in real life!

The backing in an airy leafy fabric I had in my stash from last summer which is just perfect!

I don’t know if the baby is a girl or a boy. With all the colors, I think the quilt is really gender neutral, but I put on a blue binding to balance off those hot pink cornerstone blocks and the light pink triangles at the edge of the quilt.!

For more information about this quilt and the focus fabric “Roosting Place” see my post from June 9, 2022.

I’m super happy with how this quilt came out!

TAGS: Baby quilt, Free Motion Quilting Bird Nests, One Block Baby Quilt


July 21, 2022

Embroidering a Dress for Hazel Village's Returning Guest, Ivy

by Judy Tucker


Hazel Village’s Ivy Goat wearing a HV Iinen dress I embroidered

Hazel Village’s Ivy Goat wearing a HV Iinen dress I embroidered

In June this year, the amazingly creative Hazel Village brought back Ivy Goat, one of their guest animals who is not a permanent resident in their shop. I didn’t buy Ivy the first time she was a guest animal, but they changed her ear fabric and in my opinion, she’s a lot cuter now! And Arthur Lamb wanted a friend!

I was out mowing the lawn when Ivy launched on the Hazel Village website. (Mowing is a garden chore best suited for a goat I think)! So I missed the lovely green linen dress that was part of her launch. I really liked the dress but I have other Hazel Village linen dresses, so that was fine.

Checking the basket, I found 2 white linen dresses so decided to embroider some summer flowers on one of them. I attempted to stitch out the purple blues that are next to Ivy in the photo about…with a modicum of success. Not quite how I envisioned it, but close enough! And I added a tiny little ladybug too. The ladybug is so tiny I had to make single loop French knots which were a first for me! But it worked!

Ivy is sitting in the shade, but happily wearing both the bonnet and and blue polka dot bloomers which were part of her Hazel Village wardrobe. It was fun taking a few minutes to embroider a dress especially goat-worthy. I’m sure she thinks LUNCH! when she looks at it!!

TAGS: Embroidered doll dress


July 14, 2022

Blue and Yellow Quilt with Circles

by Judy Tucker


Blue and Yellow Quilt, with Circles, 56 1/2 x 40 1/2 inches

Blue and Yellow Quilt, with Circles, 56 1/2 x 40 1/2 inches

Here’s another blue and yellow quilt I just completed which will probably go to a refugee from Ukraine at some point in the fall. Like the Hachi Quilt made using Ukrainian blue and yellow fabric which I made this spring, this quilt includes sunflower flowers and storks. The sunflowers are reverse circles peeking through to the top of the quilt and the storks are in the center of both the big Economy Quilt Blocks.

AB045CE7-70C6-4726-9E4A-6802397F424D_1_201_a.jpeg
2D8C7A14-DD06-4B82-83D1-37B185A4FF88_1_201_a.jpeg

I took the template from one of favorite quilts, “Flying Economy” quilt and adapted it to add reverse circles, circles made using quarter circles blocks and semi-circles. The “Flying Economy” quilt I made in 2018 was inspired by a quilt designed by Sam Hunter called “Fourteen on Point”.

Most of the quilting in this quilt is straight line quilting done with a walking foot. But I know that I’m not any good doing free motion echo quilting around circles, so I hand quilted the circles using perle cotton #12 and a bit of #8 since I only had the bright yellow in the thicker thread.

This rectangular quilt is a nice size to wrap up in, hang on the back of a sofa, or to fold and place at the foot of a bed.

TAGS: Ukrainian blue and yellow quilt, Reverse Circles, Quarter CIrcles making a circular block, Semi-Circle blocks, Economy Block, Flying Geese Blocks


July 7, 2022

My Take on the Quilters Adventure Playcation Sew Along: Midyear

by Judy Tucker


Block 26/52 Half way there!

Block 26/52 Half way there!

In January I started doing the weekly improv blocks offered by Cheryl Arkison every Tuesday at 12 noon EST on Instagram. Each week she designs a new improv block and then demonstrates how to make it. When the project is done, we will have 52 improv quilt blocks.

Above is block 26/52. On the left side are scraps made from the blocks we have already sewn. The plain pink patch on the right side signifies the 26 blocks to come.

A few of the blocks have been representational—the Ukrainian Tryzub, the heart on Valentine’s Day, the 2 for 2/22/2022, a span of the the Golden Gate bridge and a smile. But most of the blocks are just modern improv quilt blocks.

Here are all 26 blocks on my design wall. The lighting isn’t great but if I’d laid them out on the deck they would likely have blown off!

Block 1-26/52, NOT in chronological order.

I really didn’t have much of a plan when I started in January. I thought I would use a stack of 10” Kona® white squares and scraps. But after I saw what other folks were doing and what the blocks were like, I opted for a more colorful quilt and started adding novelty fabrics. So this is going to be a one-of-a-kind modern improv I Spy quilt when all is said and done! The blocks are not a uniform size so I will be adding strips of fabric as needed so that the blocks can been sewn together in strips.

This is a whole lot of fun! I can’t wait to find out find out what the next 26 blocks will be.

It’s not too late to join. Check out @cheryl_arkison on Instagram.

TAGS: my quilters playcation adventure sewalong blocks 2022


June 30, 2022

"To the Point" Brown Bag Mystery Quilt 2022, With Fabric from My Stash

by Judy Tucker


Last week’s post (June 23, 2022) was about my “official” purchased “To The Point” Brown Bag Mystery Quilt created my Karen Montgomery. The steps seemed quick and easy so I decided to hunt through my stash of fabrics and come up with enough fabric to make a second quilt.

This quilt has gone to the dogs!! One of the fabrics had 2006 date on the selvedge so that gives you an idea about how long these fabrics have been stashed!

Because this was a mystery quilt and I had NO idea what the final quilt would look like, pulling my own fabrics was sort of a double-dare! I took my clues about feature fabrics and color values from the fabrics in the official brown bag I purchased. (See my last post last week and the March 17, 2022 post).

Folks in the Brown Bag Mystery Facebook group were always reassuring others that the fabric requirements for the project were very generous. So I took a risk and used the red banana fabric which was theoretically ample but actually had had a couple pieces cut from it for another project. I did have JUST enough in the end! Whew!!

The dogs in the focus fabric at the center of each star have the goofiest expressions. They make me laugh!

This quilt is a generous twin size. It’s a bit larger than I really like quilting at home, but I’m going to try quilting this on my domestic sewing machine. I have an idea for a bouncing ball free-motion design.

Don’t hold your breath! Could be a while before it’s complete. Summer is not a great time of year to quilt a largish quilt!

TAGS: "To The Point" Brown Bag Mystery 2022, Mystery Quilt


June 23, 2022

"To the Point" Brown Bag Mystery Quilt 2022

by Judy Tucker


“To the Point” Brown Bag Mystery Quilt

“To the Point” Brown Bag Mystery Quilt

Earlier this year I posted that I was going to make the 2022 Brown Bag Mystery Quilt designed by Karen Montgomery. Both the pattern and the fabrics were unknowns when I signed up. All I knew was that I’d picked a fabric colorway from the O’Sewpersonal Fabric Shop that was pink, lavender and green. That’s a risky business—you really need to trust the folks in the quilt shop to know now to coordinate colors. The folks at OSP definitely know how to do that! I regularly watch their Monday evening Facebook Live sales, so I knew what I purchased would be great. And it was!

The biweekly clues that Karen Montgomery posted for the Brown Bag Mystery on a closed Facebook Group were great. She also posted a how-to videos for each clue. The participating shop where participants purchased their bag also mailed a handout for each step. I was able to finish each step just by watching the video, so by the time the hard copy arrived I was already done.

I’ve done other mystery quilts were you needed to spend several days (or more) to sew each step. But the steps in this year’s BBM were usually completed in a morning. It seemed so easy, that I dug through my stash of fabrics and pulled enough to make a second quilt. (See my post next week for that quilt).

The instructions for the mystery quilt end with the lavender border with the embedded star points. We were encouraged to buy fabric for additional borders when we purchased our bags, but what we did with additional borders was left entirely up to us!

I added a 3/4 inch pink border from fabric left over from the quilt and I used Creative Grids® Triangle Squared ruler to make the 4 point stars cornerstone blocks with a fussy cut central flower. The outer floral border is the same fabric that is in the center of the stars in the quilt.

I had no idea what the final layout of this quilt would be until we were almost done. Then it seemed likely it would include a star—but I was surprised to discover there were 3 different stars in the final reveal! Pretty amazing.

The only step I struggled with was the final layout of the quilt. It was assembled in strips which really didn’t have any regular pattern. Even though I doubled checked each block with the chart, more than once I turned a pair upside down, and now and again I thought I’d added one of the rectangular bricks…but hadn’t. Each the blocks is small, so it was easy to unpick the mistake and correct it. I carefully checked each strip before I sewed it to the next, so that prevented a very long error!

This is a really pretty quilt. I’m not sure yet how I will quilt it—on my domestic or take it to a longarm machine. I think I might try quilting my stash-fabric version first to see out that goes.

This is my first time doing this mystery but I have to say Karen Montgomery does an excellent job with her annual Brown Bag Mystery quilts. Her instructions are excellent. She calls for ample yardage so there is plenty, and then some, to make the quilt. The final quilt is spectacular!

TAGS: 2022 Brown Bag Mystery Quilt top, Mystery Quilt


June 16, 2022

Fairy Peg Dolls and an Accordian-Folded Fairy's Book: Getting Ready for Midsummer's Night

by Judy Tucker


Four Peg Doll Fairies playing under flowering Mosses

Four Peg Doll Fairies playing under flowering Mosses

Midsummer’s night will soon be here! Which brings to mind fairy folk dancing the the summer moonlight. So I decided I’d make some fairy peg dolls—3 girls and one boy. The wings are part-wool, part synthetic felt which I purchased several years ago. It was sitting in a box, all rolled up. Not necessarily good for the felt, but it allowed these fairy wings to gently curve around their bodies, a detail which I really love!

Here’s a photo of my fairy wing pattern. Yours could be cut differently. At any rate, cut them to whatever shape you like. Think about butterflies and dragonflies. Or perhaps a certain Disney-created friend of Peter Pan!

A6E34670-36BA-4F6F-828D-24A3C7160F34_1_201_a.jpeg
0C91BB70-4991-44B4-A851-87F1CCF8EC5A.jpeg

A young friend was recently telling me that she was on the hunt to find a fairy. She really wants to find some fairies, though I’m quite sure any fairies would be duly, and rightly, alarmed to learn they were being hunted! She asked me what I knew about looking for fairies. Here’s what I told her.

  • Fairies are rarely seen. Never by grown-ups, but maybe a small person might see one.

  • They are only out WAY after bedtime.

  • So it’s unlikely that she’ll ever actually see a fairy. But she might find something that would that would indicate a fairy had been there.

She wanted to know WHAT she might find. Hmmm. On the spot, I said that I couldn’t really tell her. It might be something a fairy dropped accidentally or perhaps left behind on purpose. But that if she ever did find a fairy treasure, she’d know.

Thinking about that later, I knew I just couldn’t resist this challenge. What treasures might a fairy collect? Here’s what I came up with.

  • Shiny, sparkly items

  • All things sheepish

  • Flowers and interesting plant items

  • Buttons lost by humans

I decided to make a tiny accordion book. Next to my paper cutter I found some tiny painted rectangles I’d painted but never used and some leftover strips of paper. The cover of the book is about 1 3/4 inches wide and maybe 2 inches long.

9F1E11A9-20E4-446E-80DA-46B6E1F7C452_1_201_a.jpeg
7AC77F5A-5CA0-46A9-9E12-493CB9E069D9_1_201_a.jpg

The inner pages of the book can be seen in the photo on the left (or the first photo on a mobile device) and the front, back and two other pages in the other photo. The book contains these items.

  • Paper flowers from a greeting card with tiny, clear glass “jewels”

  • A curly piece of wool

  • There is a round silver button marked with a circular sun design in the pocket with the sleeping fox

  • A tiny red maple whirligig and a little lavender heart button

  • A regular green maple whirligig seed

  • A secret message written using real Ogham letters, a Druid alphabet based on the names of trees, but spelling out English words, and a colored pencil drawing of forget-me-not flowers!

The book is folded up and closed with a yellow star shaped paperclip. It was sent off to a responsible adult, with instructions that the little book should be dropped in a location where the fairies might have been dancing on Midsummer’s Night Eve!

More fun than Santa at Christmas! At least from my perspective!

More Information

For more information on how I make my peg dolls, see my post about about making Pea Sprout peg dolls.

Click this link see other Summer Solstice Fairies Peg Dolls I’ve made.

TAGS: Peg Dolls, Fairy Peg Dolls, Fairy accordian-folded tiny treasure book


June 9, 2022

One Block Baby Quilt Top

by Judy Tucker


One Block Baby Quilt Top, 45 inches square

One Block Baby Quilt Top, 45 inches square

I saw this quilt block (the central square which finishes with the light blue) on an online Shop Hop a few weeks ago. It was supposed to be a 12 inch bloc which is really a good size for a block this complex. But I looked at how many patches it had and decided to turn it into a 36 inch block with a 4 1/2 inch outer border and make a one block quilt instead!

The delightful bird fabric was designed by Kate Rhees. It’s called “Roosting Place” and is available at Spoonflower.com. I used a fat quarter to make this quilt, and still have enough left to make a coordinating doll quilt. All the other fabrics came out of my stash!

I have a few other projects in the works at the moment, so I’m not sure when I’ll get this quilted. But I’ll show it again when it’s done.

TAGS: One Block Baby Quilt, One Block Quilt, Spoonflower.com


June 2, 2022

More fun with a Spoonflower Swatch

by Judy Tucker


Radish cut from a Spoonflower Swatch

Radish cut from a Spoonflower Swatch

I purchased two Spoonflower.com swatches for the Garden Patch quilt I made recently. Unfortunately they were 1/4 inch too small on all 4 sides for that Hachi style quilt. So I turned one into the doll quilt which I wrote about in my April 28, 2022 post. For these two shirts project, I used an 8 inch swatch of “Vegetable Pattern White Fabric” by flaxlynx.

I fussy cut the vegetables in the design to applique onto the clothing. As you can see, there is a radish on the 0-3 month baby T-shirt above and beets on the pockets on pocket of a T-shirt I made for myself.

Applique on a T-shirt pocket

I found out one thing working on this project. Iron-on adhesive products don’t last forever! I looked at the product I had and thought it didn’t look right, but I decided to use it anyway. It did fuse to the vegetable fabric but once I tried to fuse to the garment, it wouldn’t stick. I ended up using a school glue stick which worked well enough for me to get to my machine to do the stitching. While the school glue worked this little applique I wouldn’t suggest it for a more complex one. So, if you plan to use an iron-on adhesive product and it looks bubbly wait on your project until you can get a new sheet to replace it!

Resources used for these shirts:

  • Both the snap baby T and the adult T were purchased at Primary.com.

  • I used the pocket template from the DIY Embellished Pocket Tees Tutorial on www.polkadotchair.com

  • “Vegetable Pattern White Fabric” on by flaxlynx Spoonflower.com.

  • I do like Heat ‘n Bond Lite Iron-on Adhesive and have had great results using it. Just replace it after 5 years or so!

Notice: This blog is not monetized: I do not use affiliate links. When there are links in a post, they are to give credit to another creative person, because I like or have used a product, or to help the reader easily find supplies for a project.

TAGS: Applique baby T Shirt, Appliqued T-shirt pocket, Fussy Cut Applique


  • Newer
  • Older

Powered by Squarespace 7