
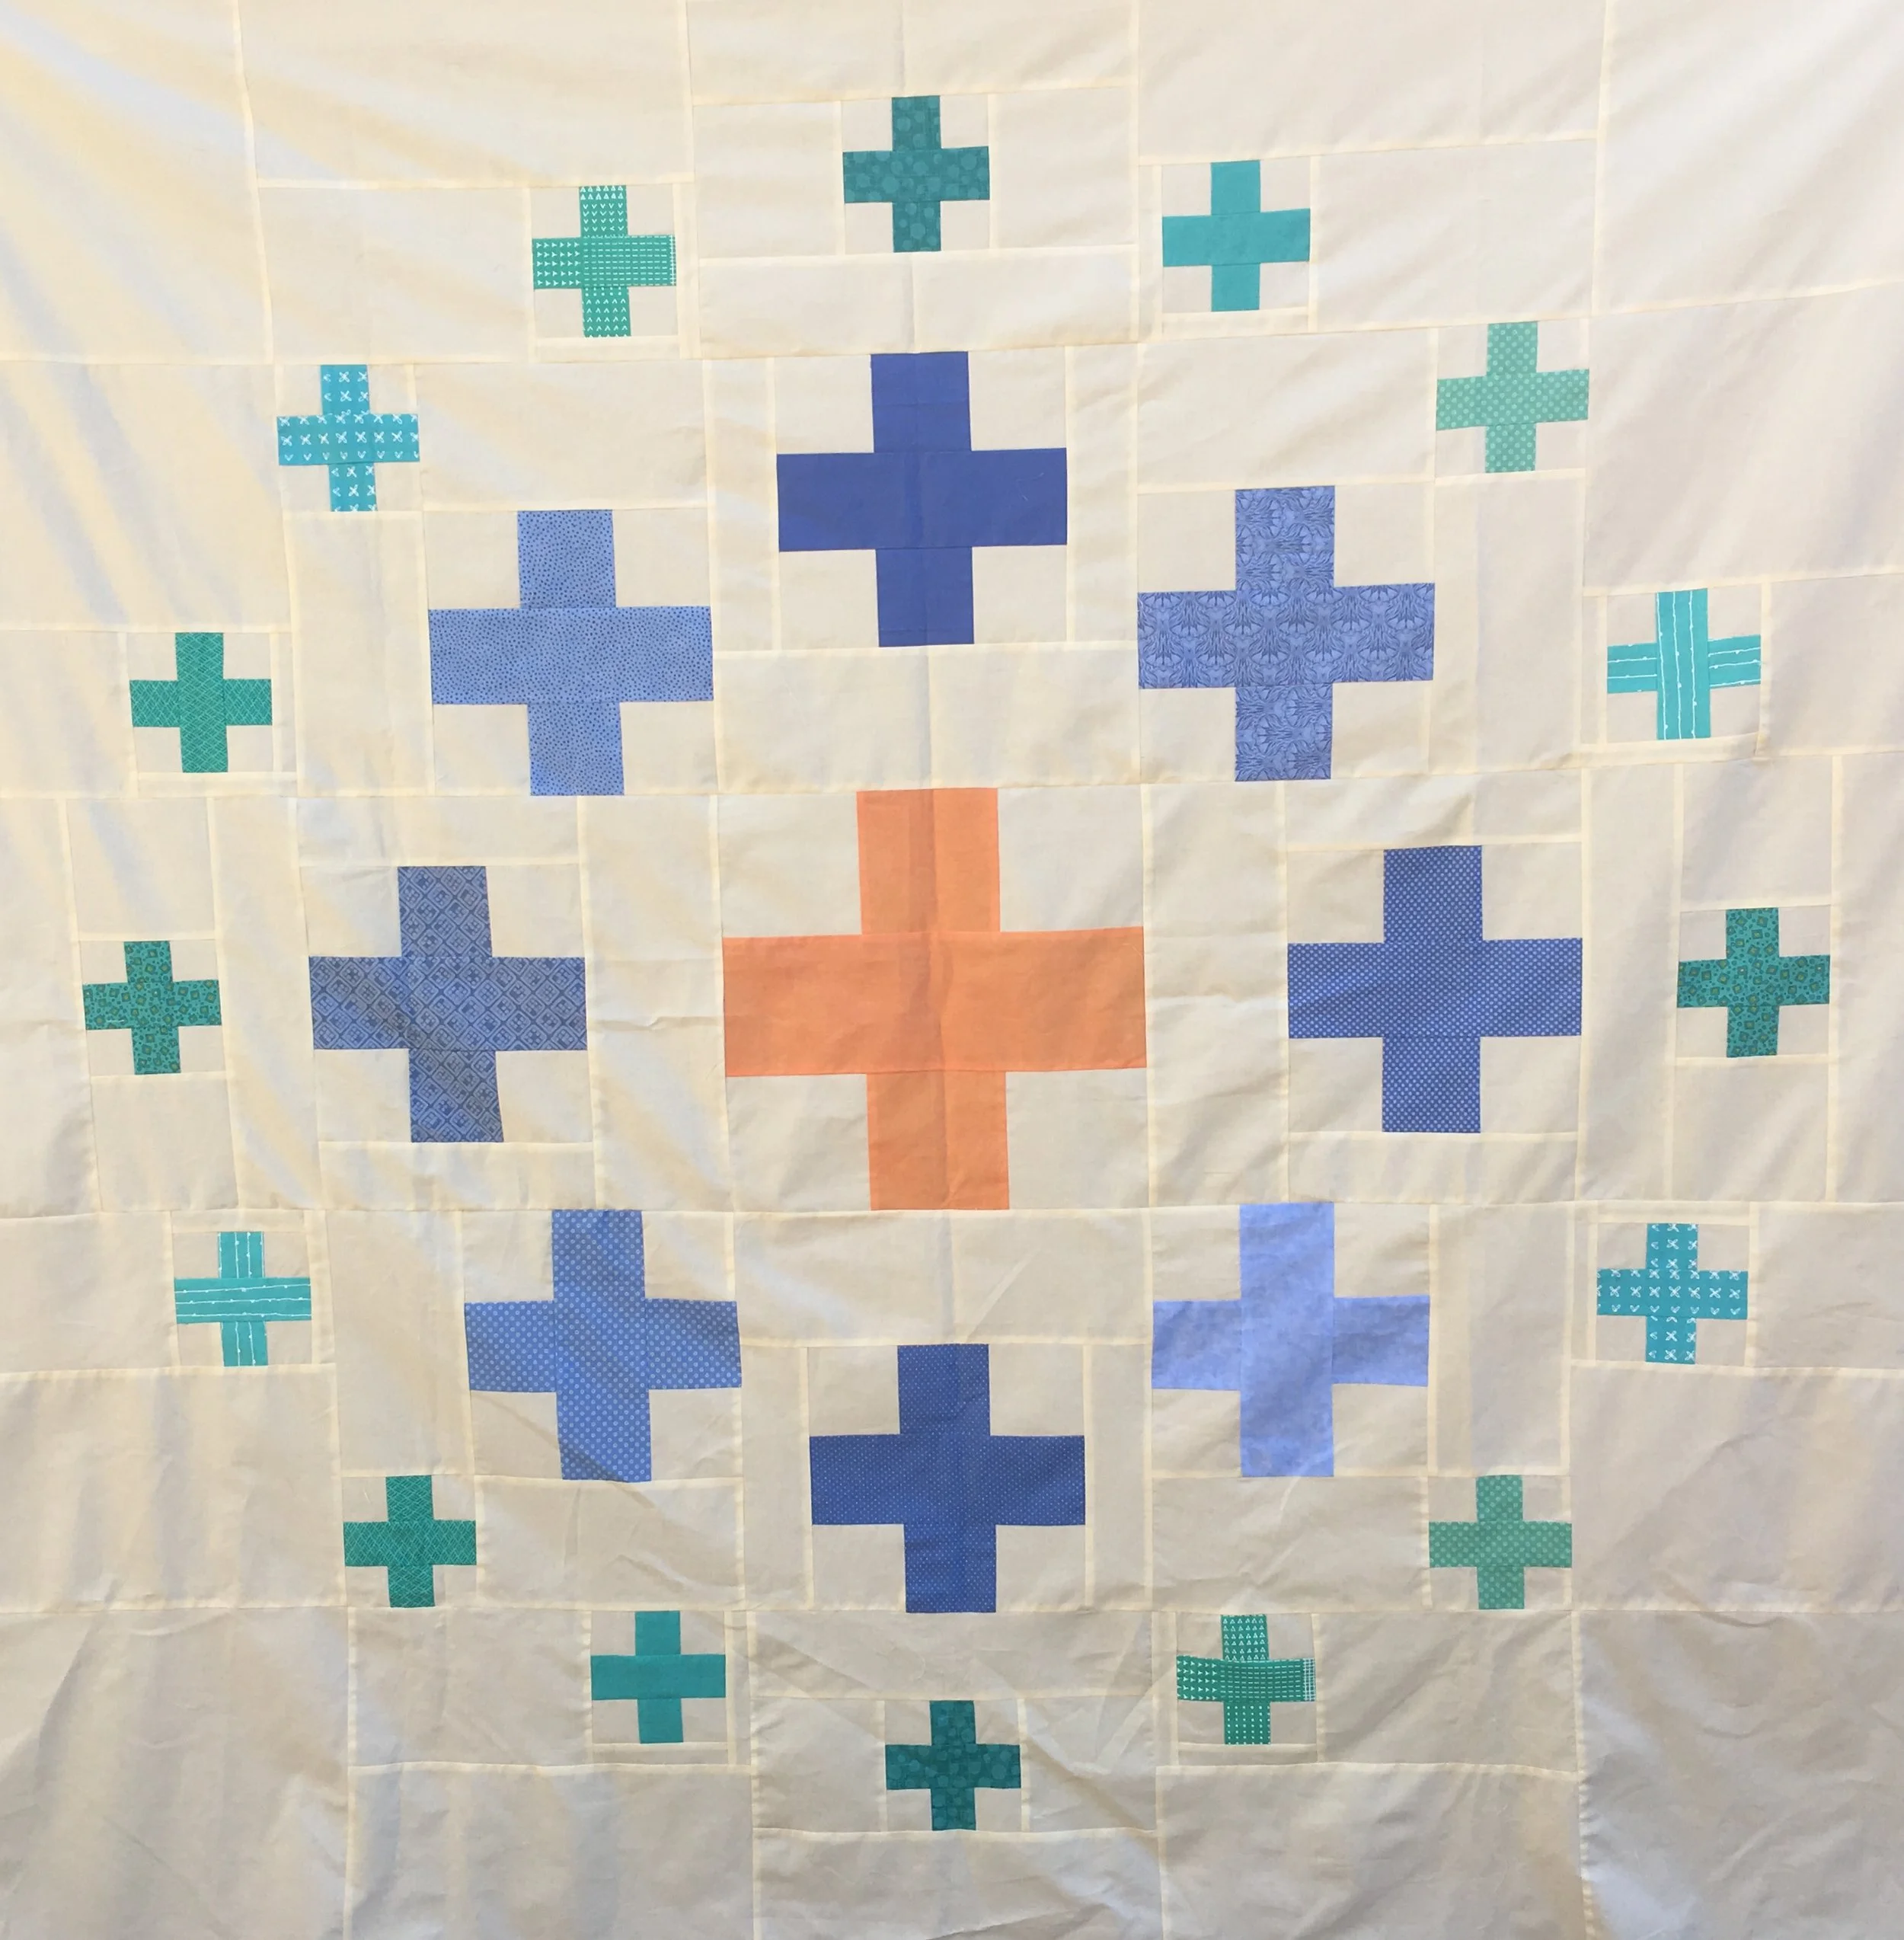
Scrappy "Plus Surround" quilt top
Isn't this scrappy version of "Plus Surround" from the new book, Modern Plus Sign Quilts by Cheryl Brickey and Paige Alexander, a great quilt top? I had so much fun making it!
The pattern calls for all solid fabrics. I had the solids, but looking at my stash I realized I had enough small/subtle fabrics of similar color and shades to make a scrappy quilt. I thought it might be more interesting to see some slight color gradations in the finished quilt. But that made the quilt significantly harder to make! Fortunately, only one of my fabrics had clearly directional design. I chose to turn that directional fabric 3 ways intentionally so it wouldn't matter which way this square quilt is used.
The plus signs directions in the book are all strip pieced. Obviously that won't work if you chose to make a scrappy quilt. I'm sharing the cutting instructions to make a scrappy quilt but you will need a copy of the book to make the quilt. You need to really pay attention when piecing this quilt. I was really trying to be careful but I still to do a bit of un-sewing!
These cutting instructions are only for the plus signs, not the finished blocks.
Each of the middle size blue plus signs in my quilt are a different fabric so the plus signs will be pieced individually, not strip pieced.
- for the colored portion plus sign, cut one strip 3 1/2 x 7 inches and two 3 1/2 inch squares
- for the background of the midsize plus sign, cut 3 WOF strips and divide that into 3 1/2 inch squares
I made two identical small plus signs from each of the blue green fabrics in the quilt. These can be strip pieced.
- for each pair of plus signs, cut cut 1 strip of colored fabric 2 x 16 inches and two 2 x 5 inch strips
- for the background, cut 3 WOF* 2 inch strips. Cut those into 2 x 16 inch strips to make a strip pieced set with the colored fabric.
- Strip piece the 2 x 16 inch colored strip with two 2 x 16 inch background strips.
- Cut the strip pieced sets into 2 x 5 inch segments as shown in the book's diagram
Assemble the blocks per the instructions in the book.
Hope these cutting instructions are helpful if you make your own scrappy "Plus Surround" quilt!
* WOF is width of fabric