Search
  • Information
    • About
    • Contact
    • Privacy Policy
  • Blog
  • Subscribe
  • Tutorials
    • Tutorials
    • Doll Clothes: Photos and some Patterns
  • Suggested Reading
  • Quilts: My Original Designs
  • Gallery: Color Studies
  • Gallery: Quilts I've Made
  • Doll Making Blog Posts
  • Recent blog posts
  • Quilts Based on The Improv Handbook for Modern Quilters
Close
Menu
Search
Close
  • Information
    • About
    • Contact
    • Privacy Policy
  • Blog
  • Subscribe
  • Tutorials
    • Tutorials
    • Doll Clothes: Photos and some Patterns
  • Suggested Reading
  • Quilts: My Original Designs
  • Gallery: Color Studies
  • Gallery: Quilts I've Made
  • Doll Making Blog Posts
  • Recent blog posts
  • Quilts Based on The Improv Handbook for Modern Quilters
Menu

Sleeping Dog Quilts

SLEEPING DOG QUILTS

July 12, 2018

Improv Scrappy Block Project 2017 Completed

by Judy Tucker


Improv Scrappy Block Project 2017

Improv Scrappy Block Project 2017

Improv Scrappy Block Project 2017

Improv Scrappy Block Project 2017

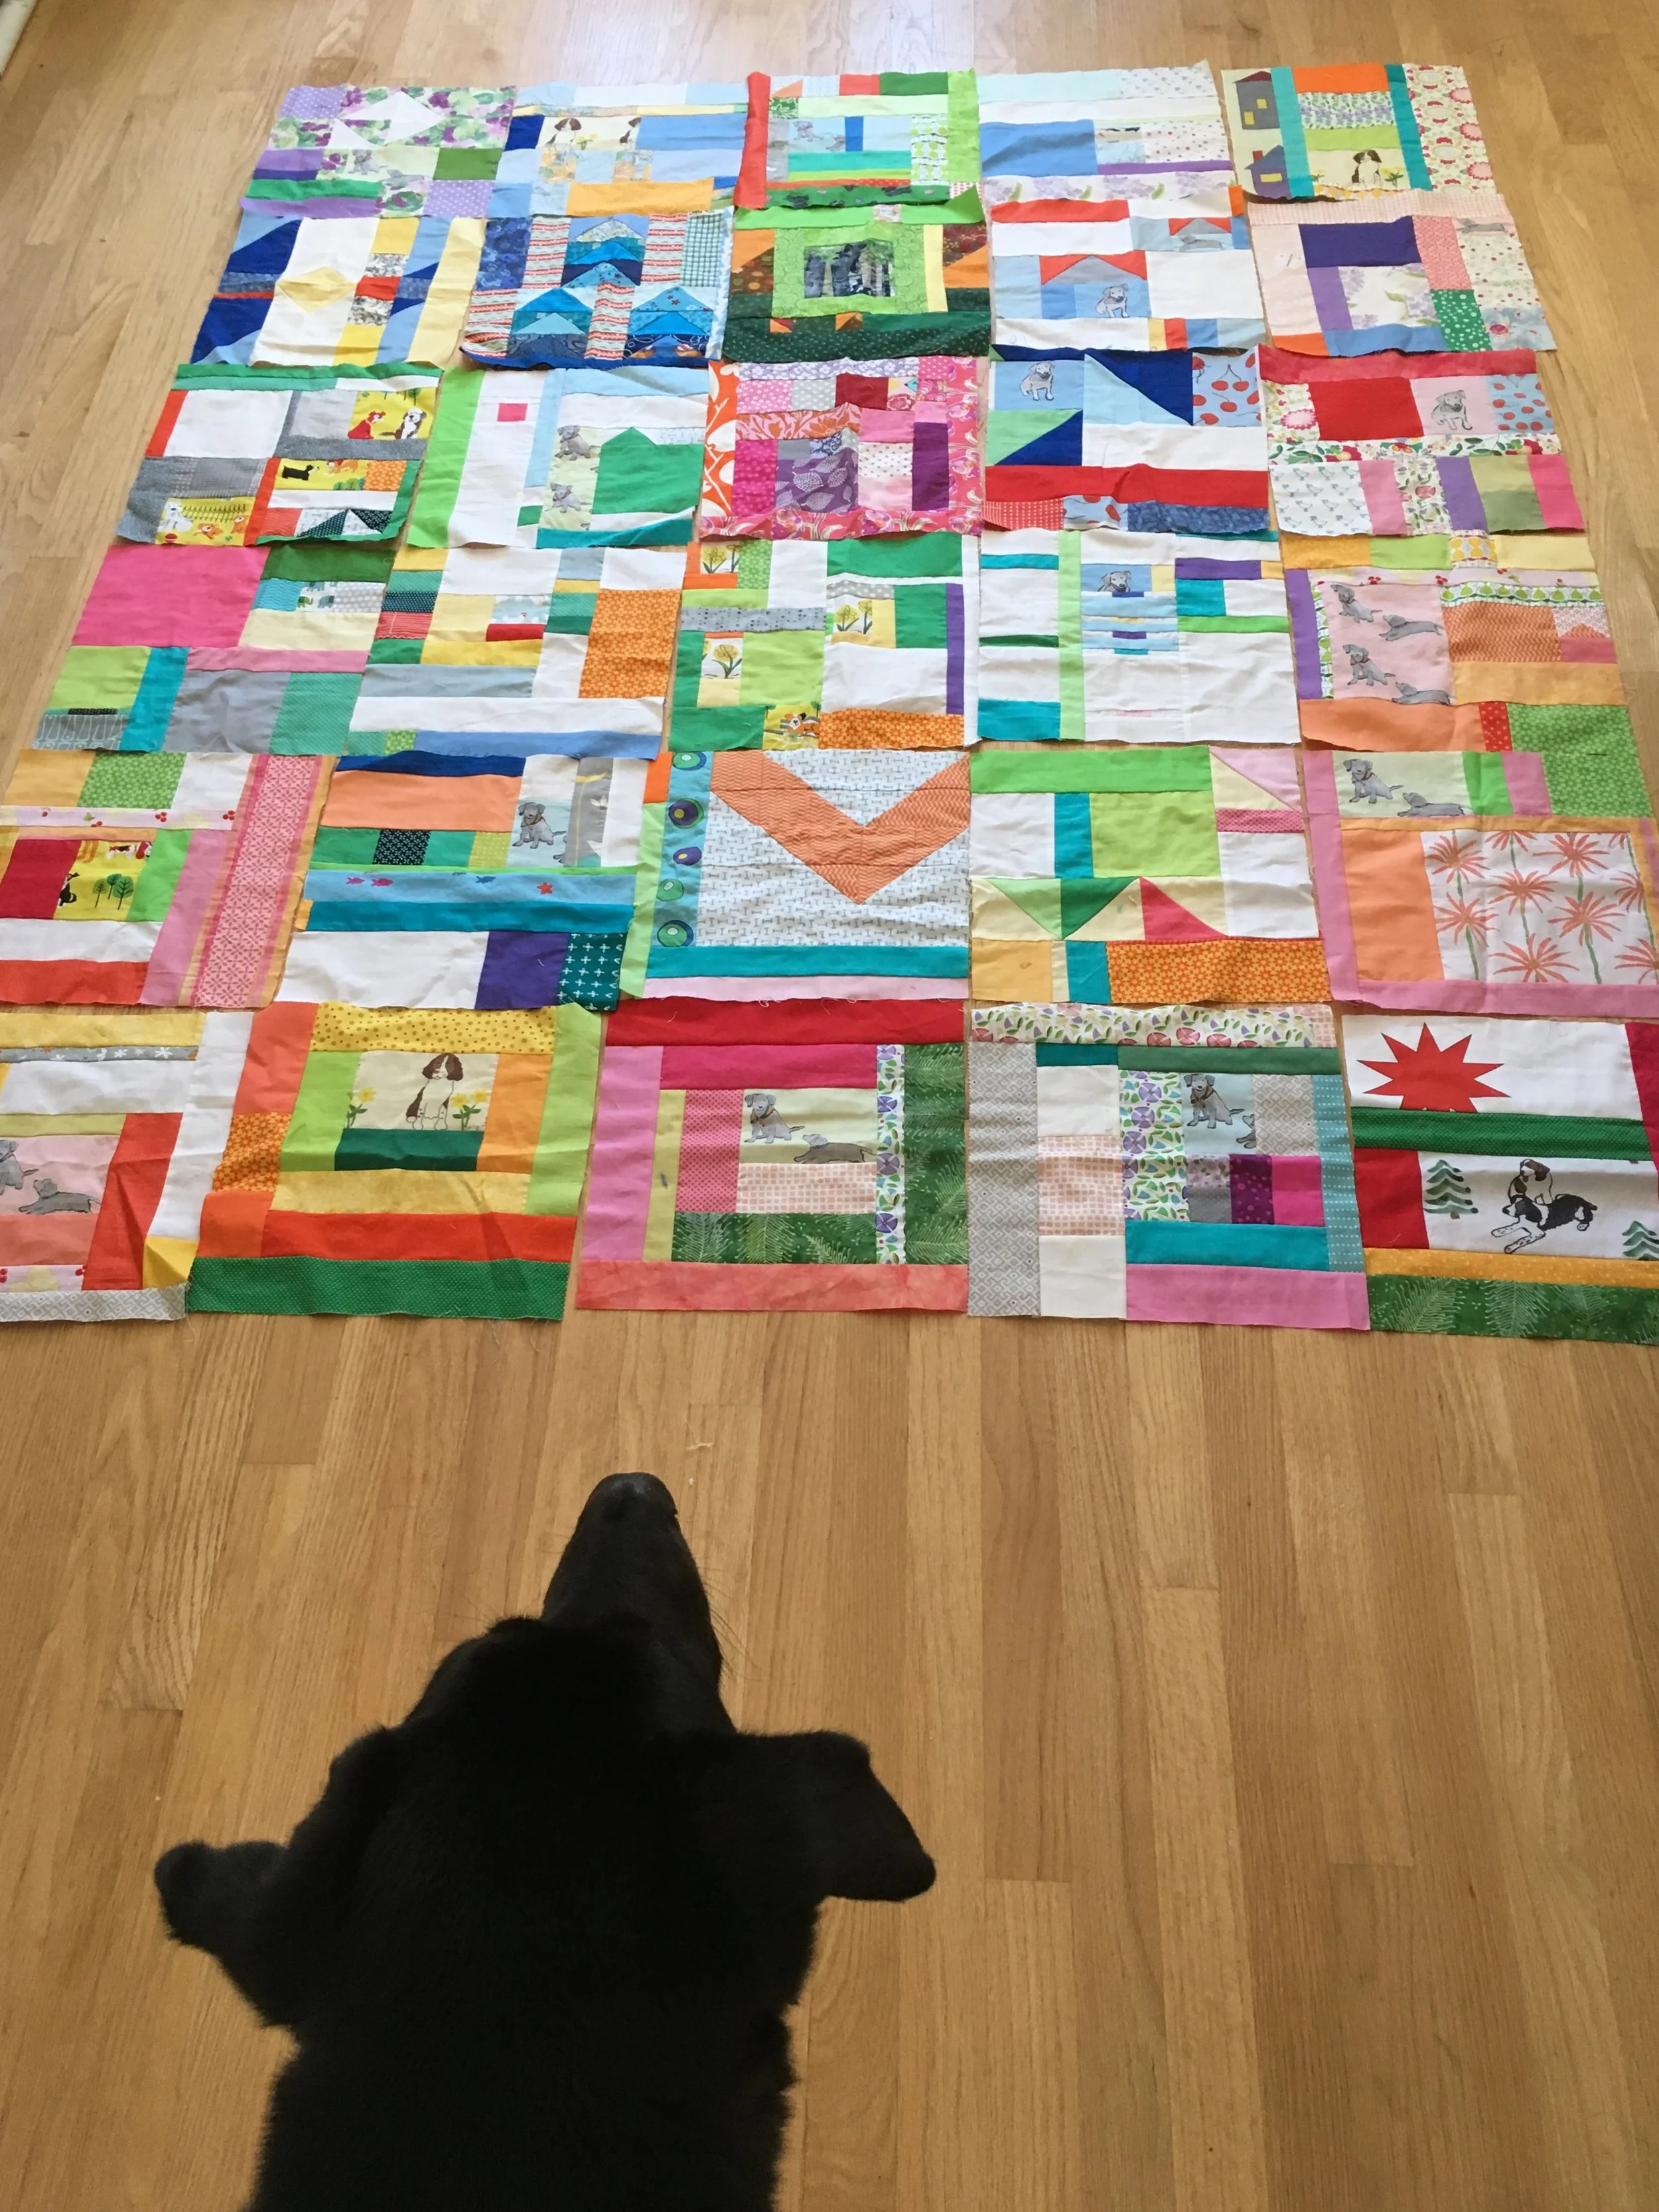
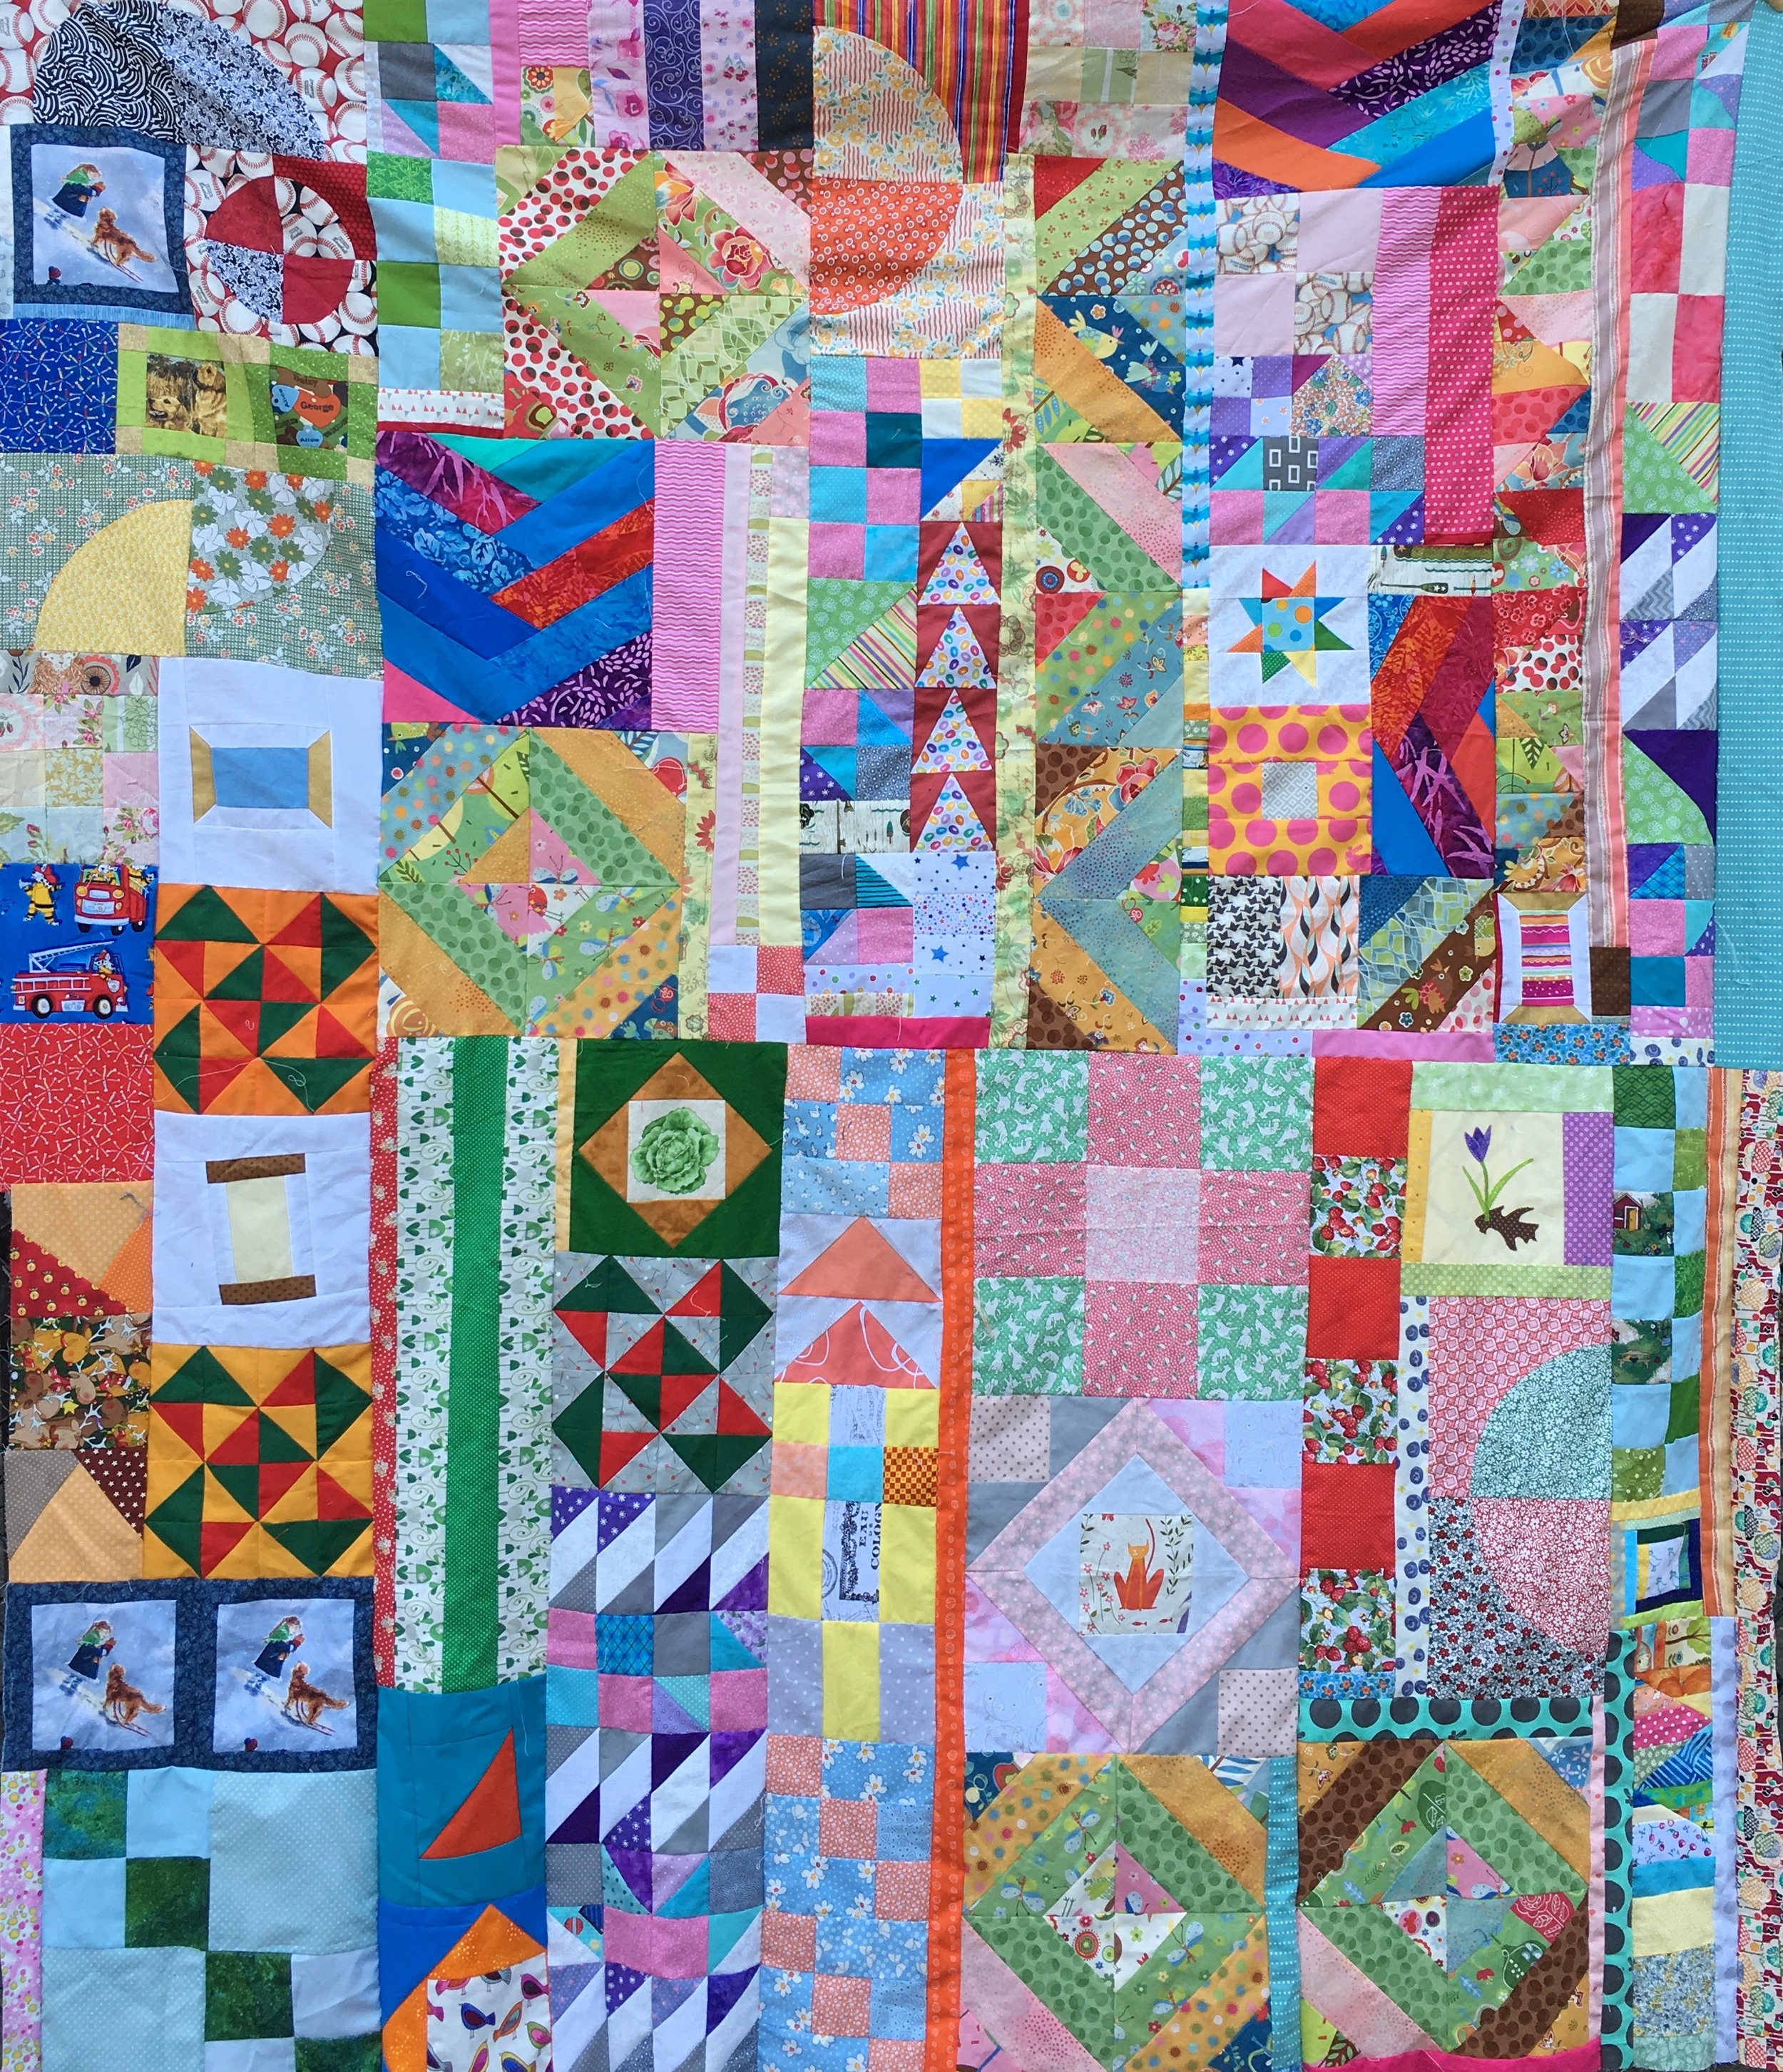
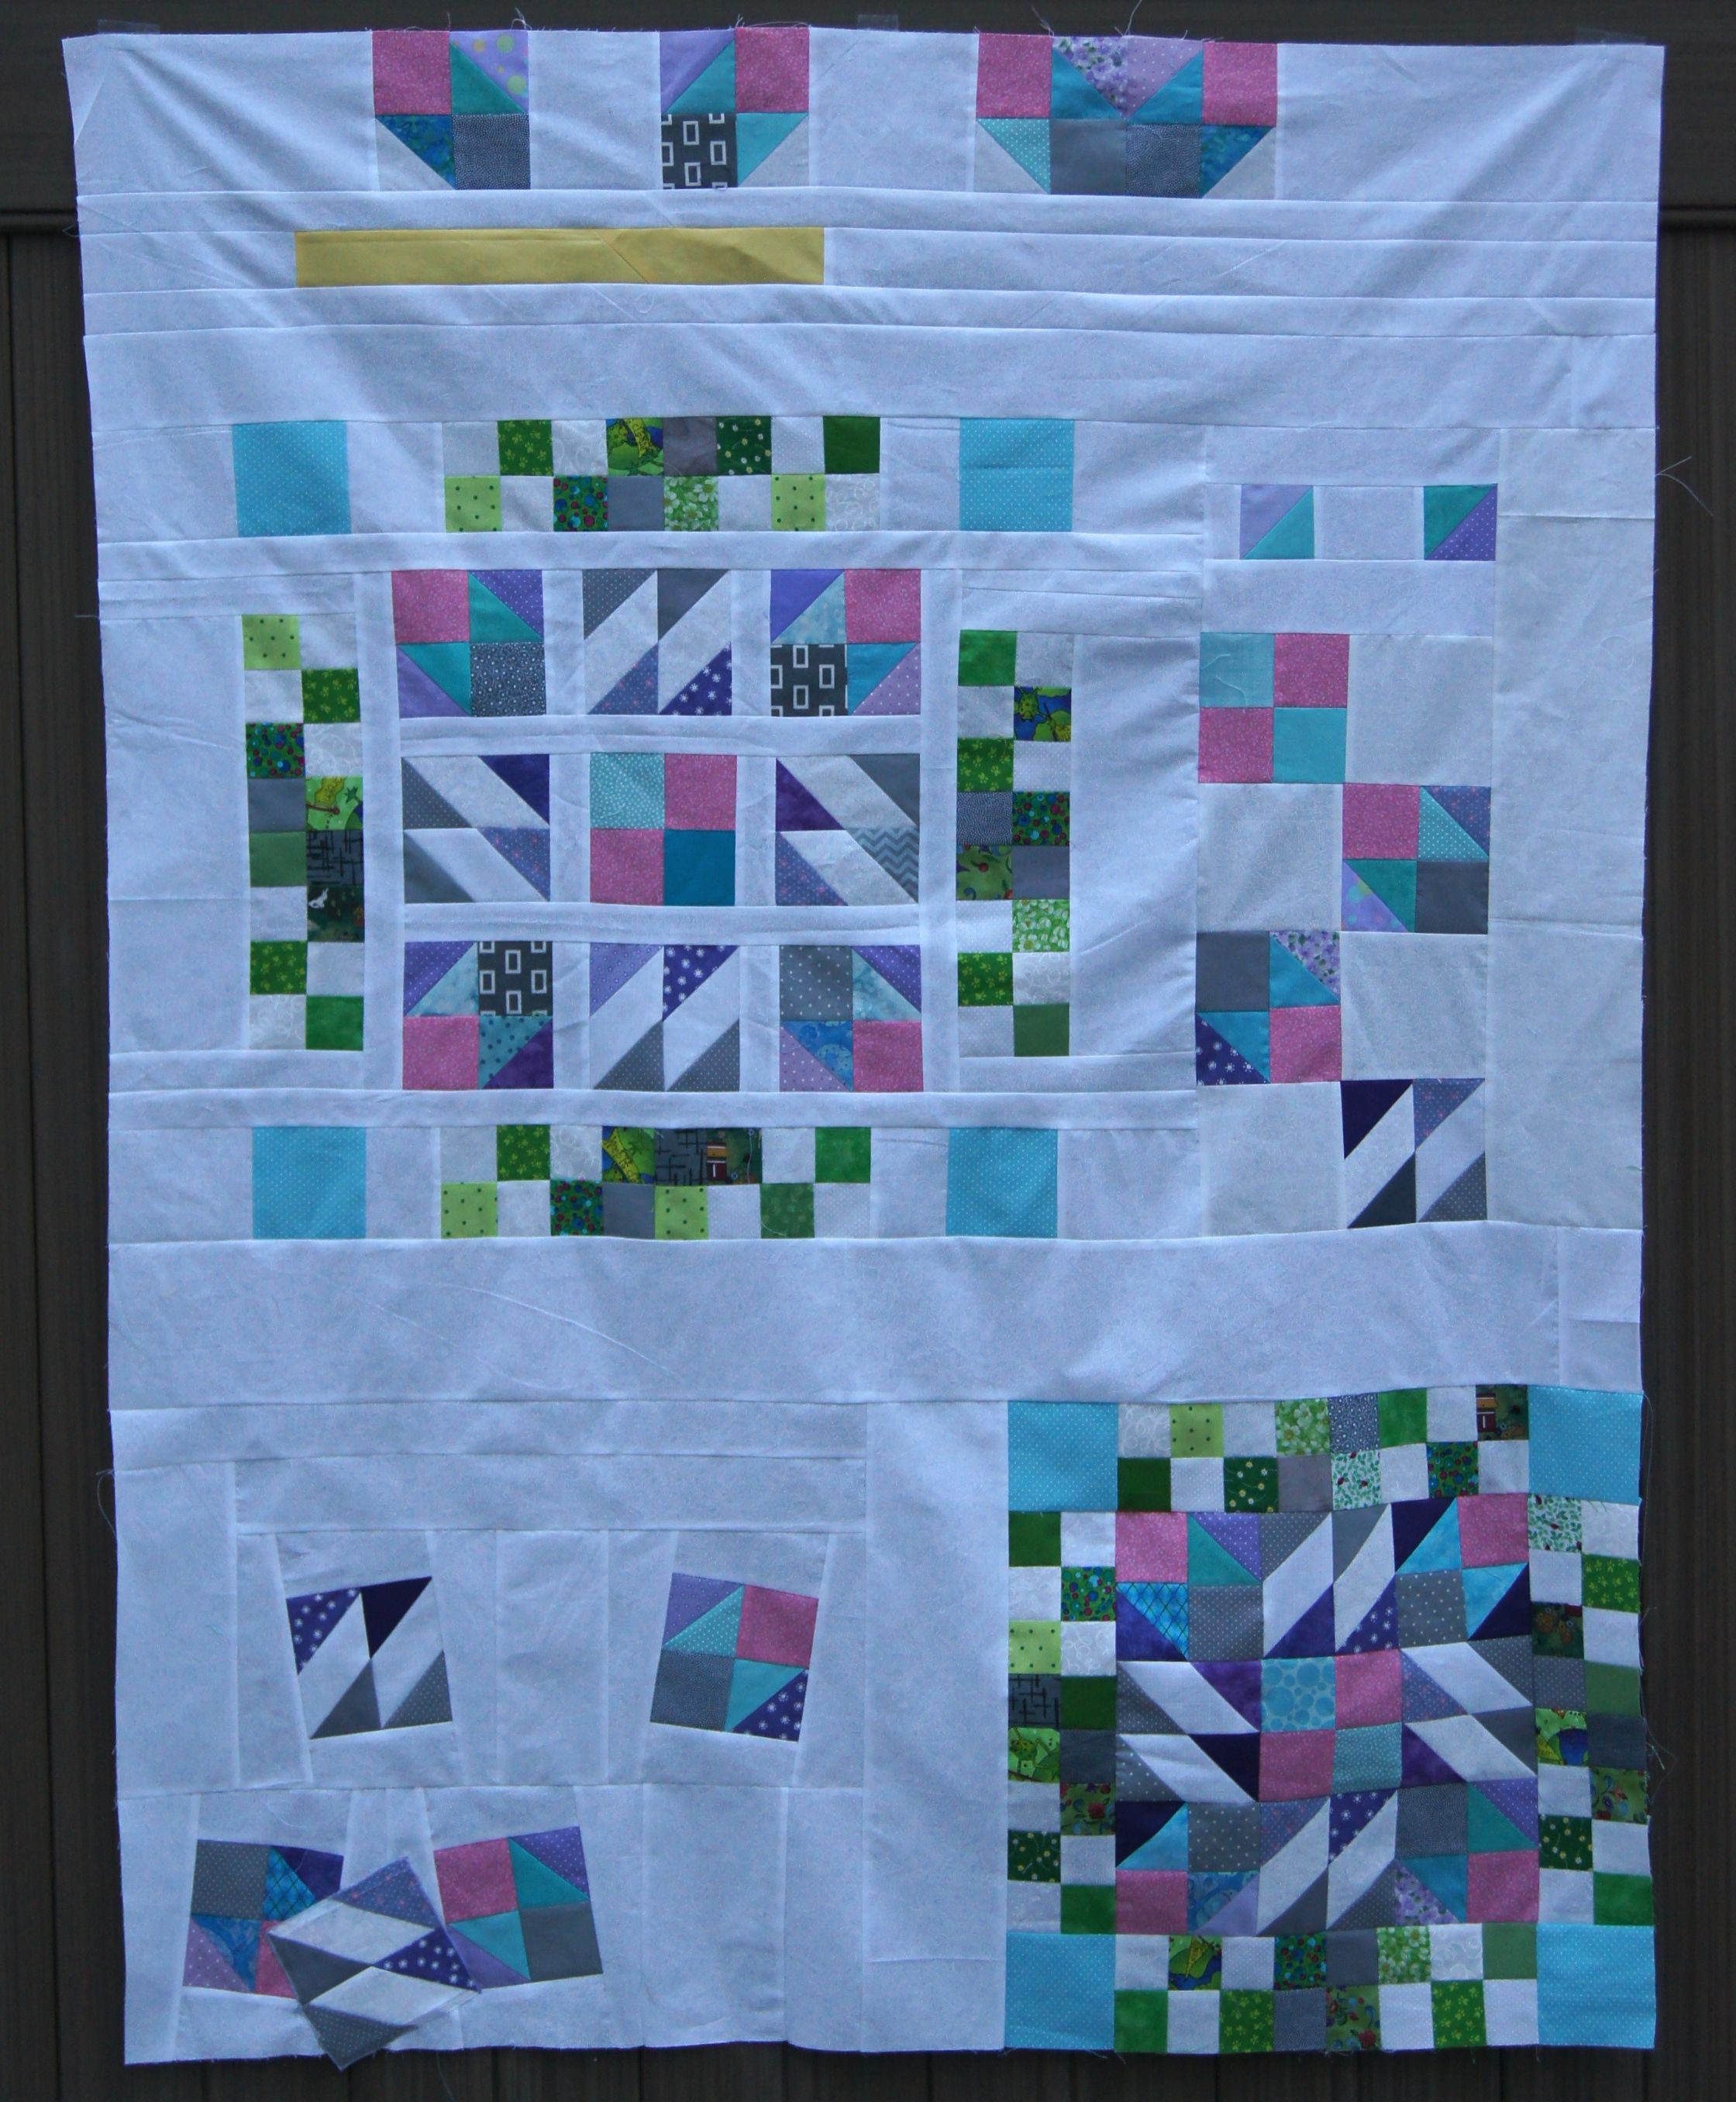
It's (finally) done:  My 2017 year-long Scrappy Block Project!  Every month last year I sewed 2-3 improv blocks from two bags of odd scraps I had collected. At the end of the year I had 30 blocks that were 12 1/2 inches square.

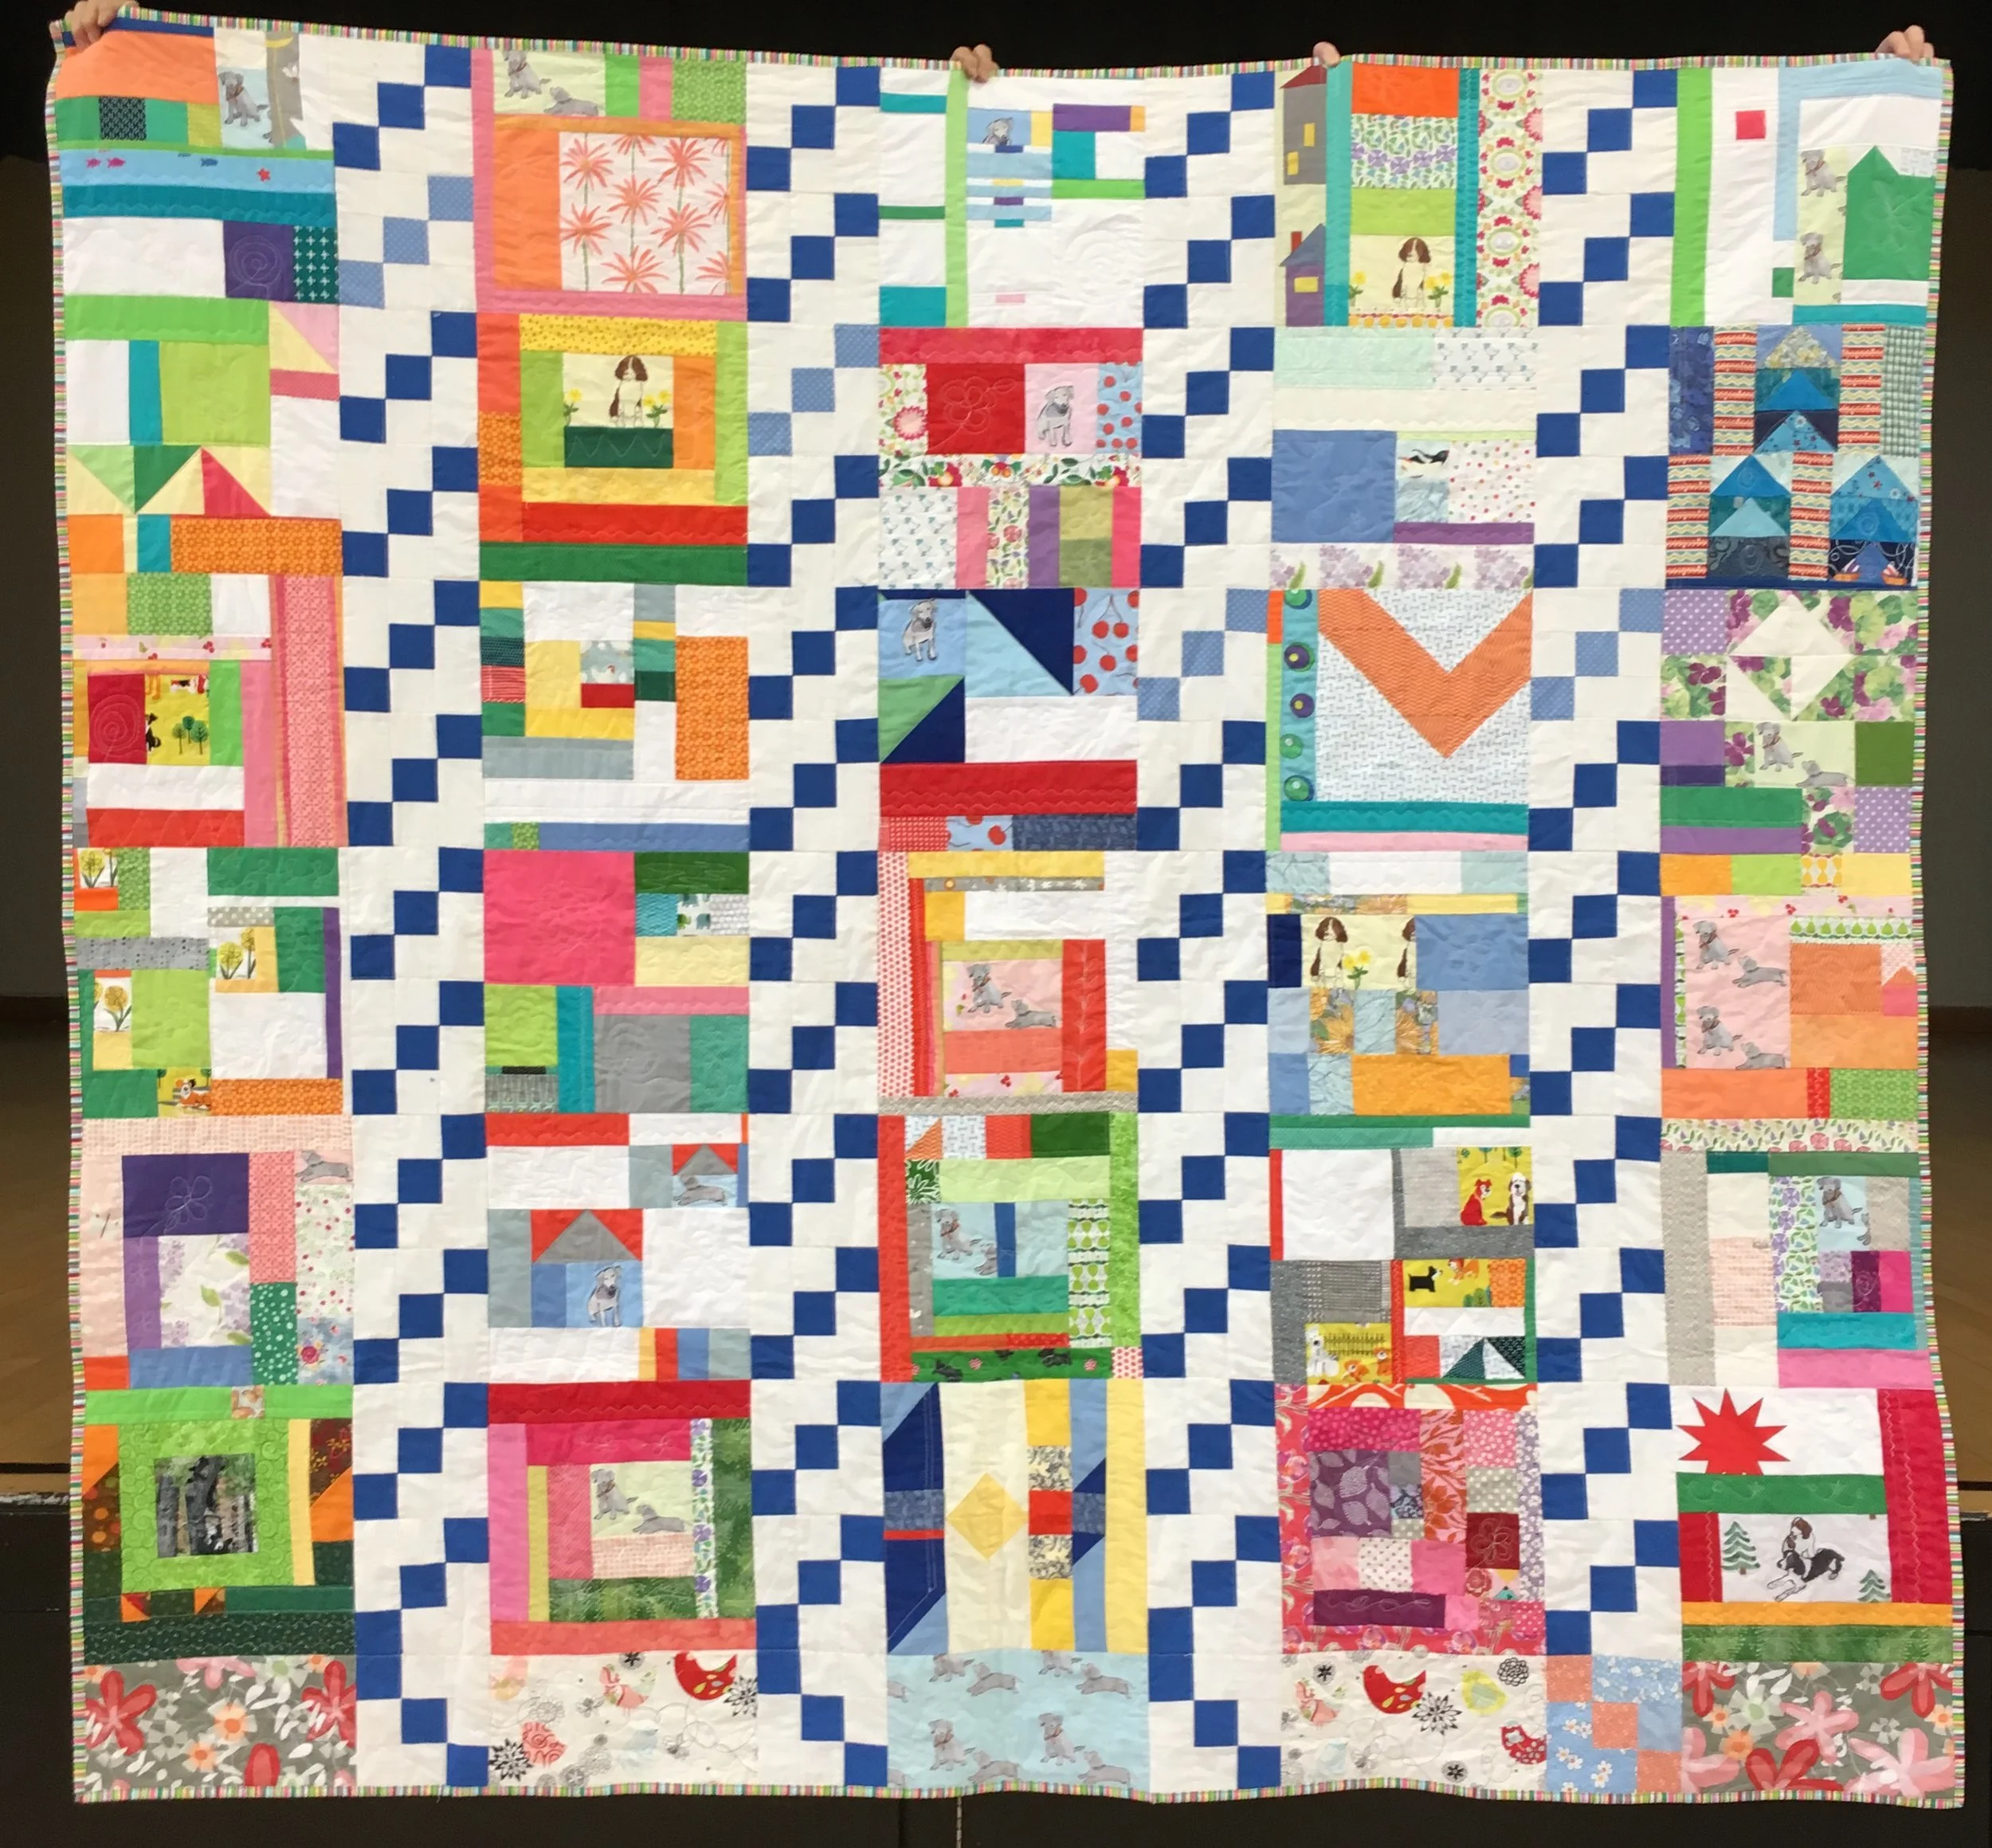
I set the improv blocks between rows of blue and white blocks which were "orphans" from another quilt which I never made. The result is a bit wacky, but this is a quilt that is going to be used and definitely not too precious for the dogs for the dogs to sleep on it!!

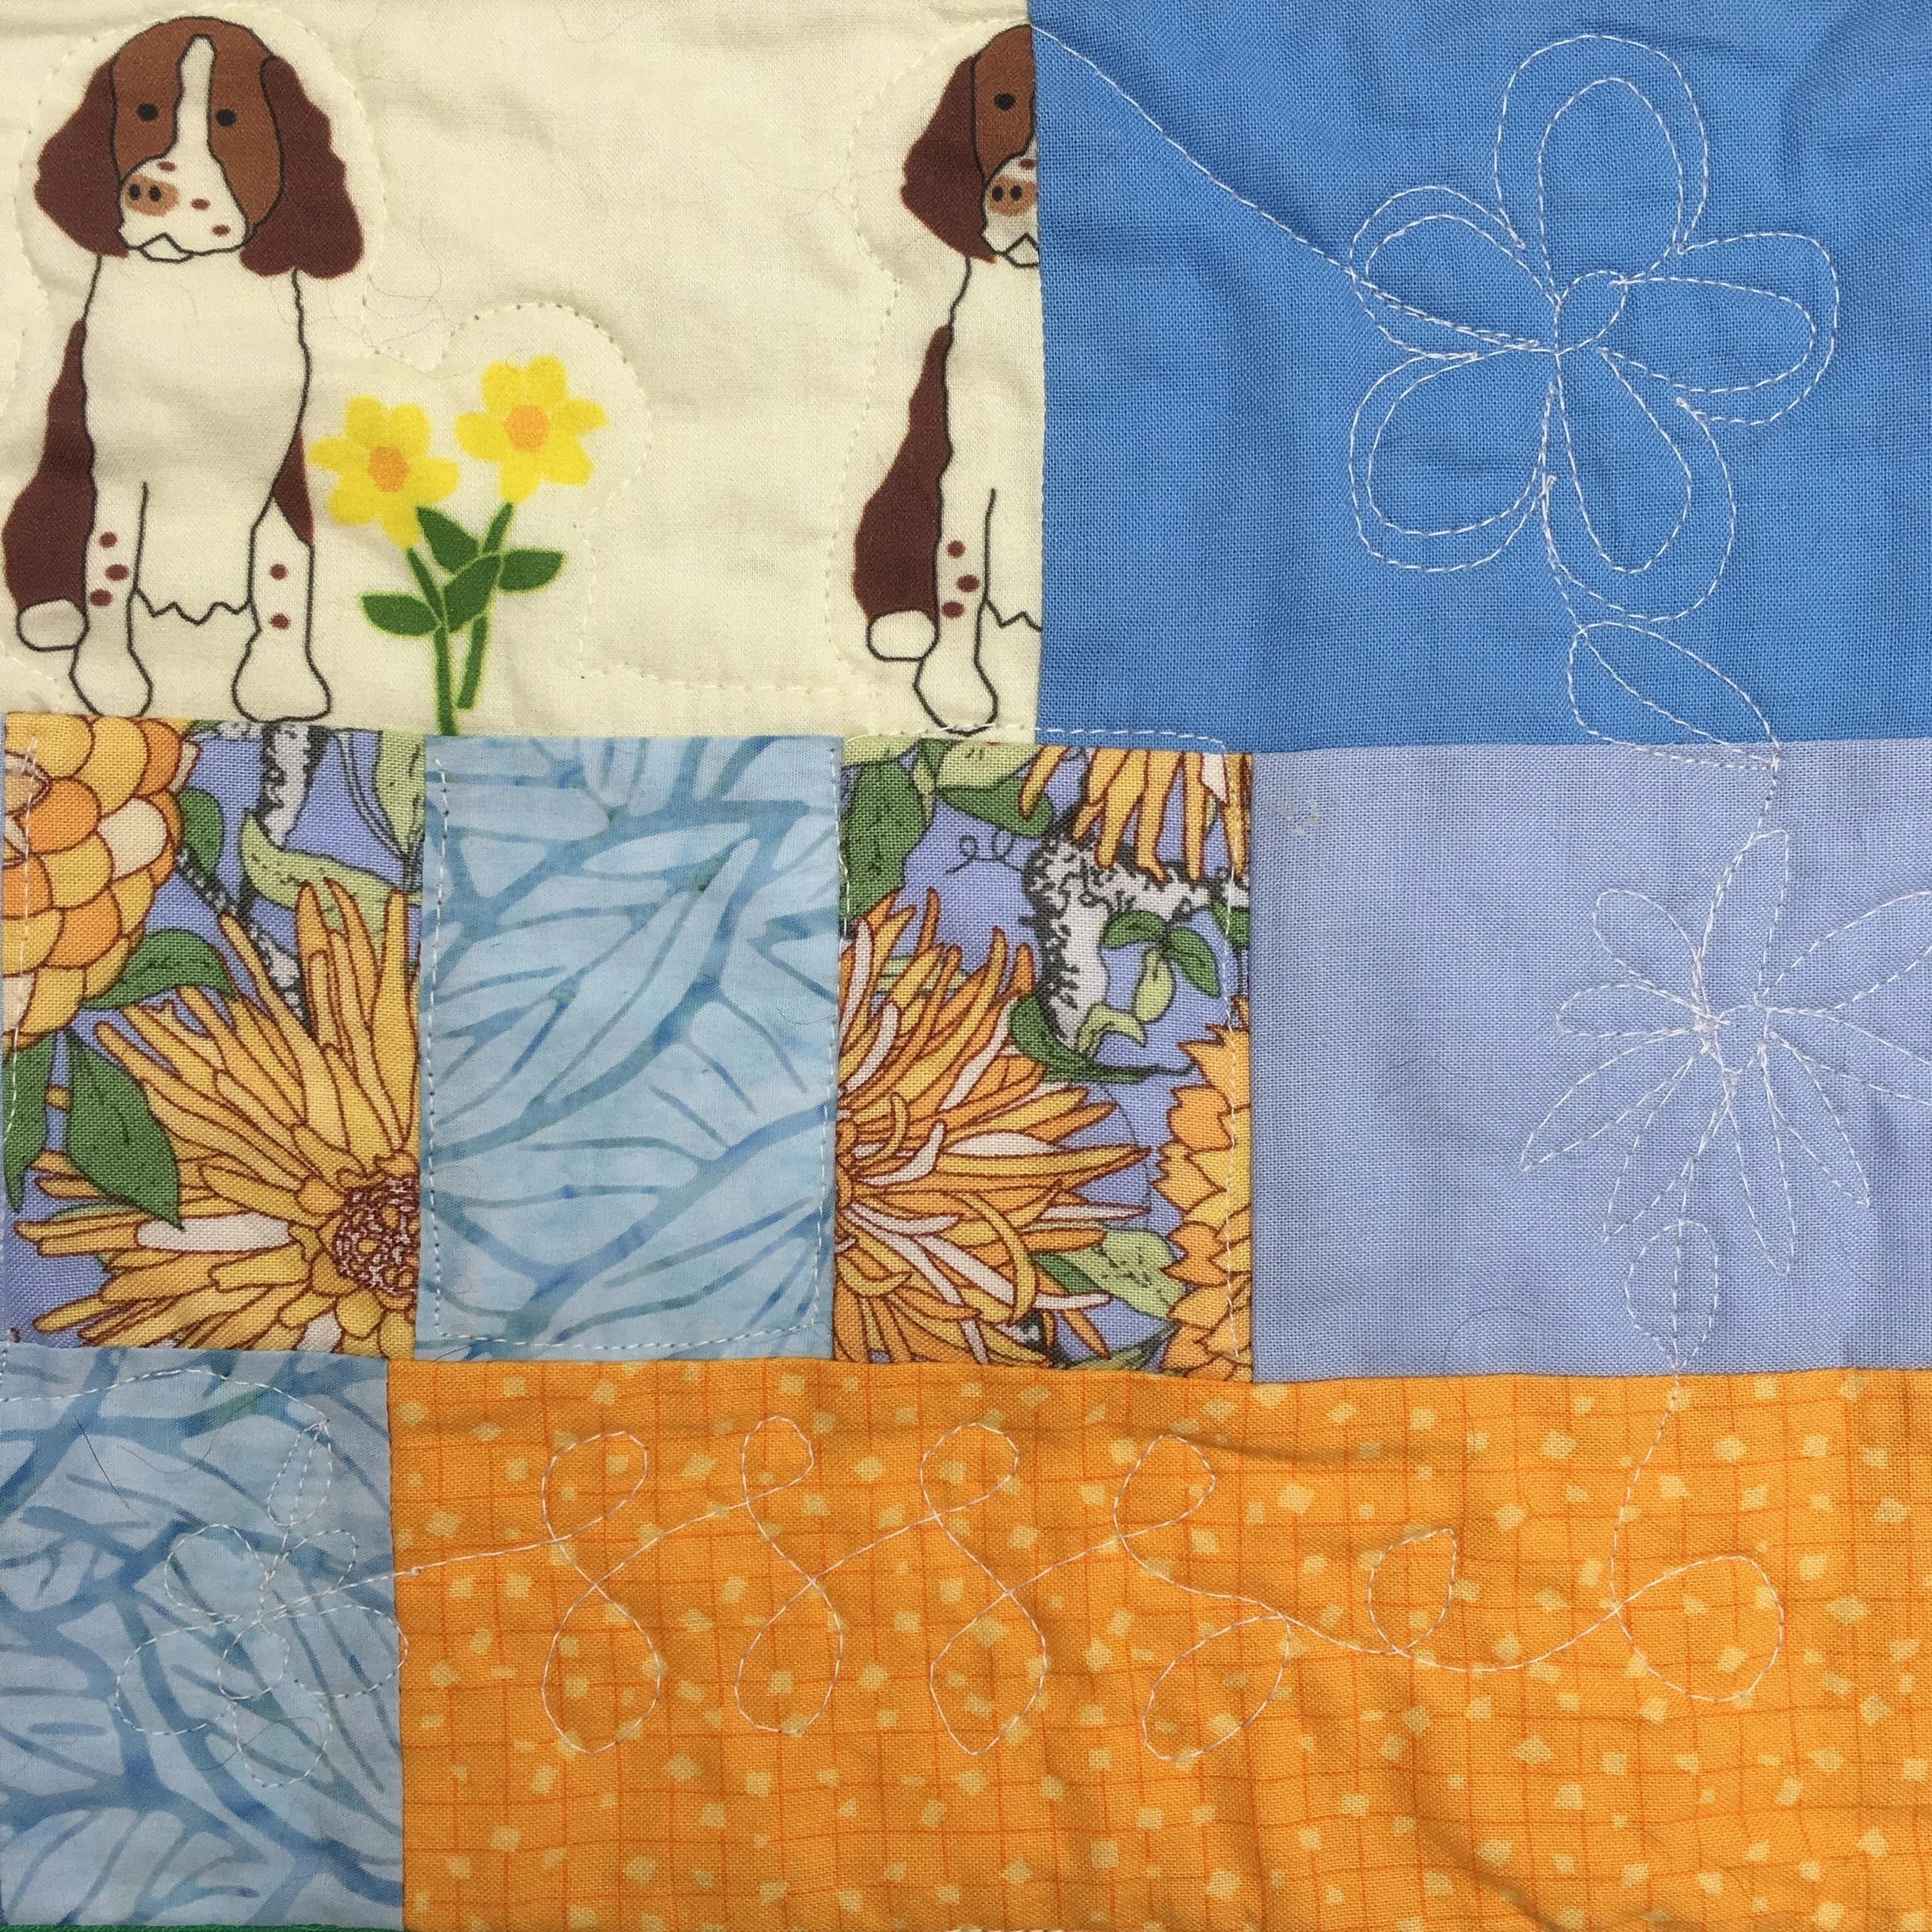
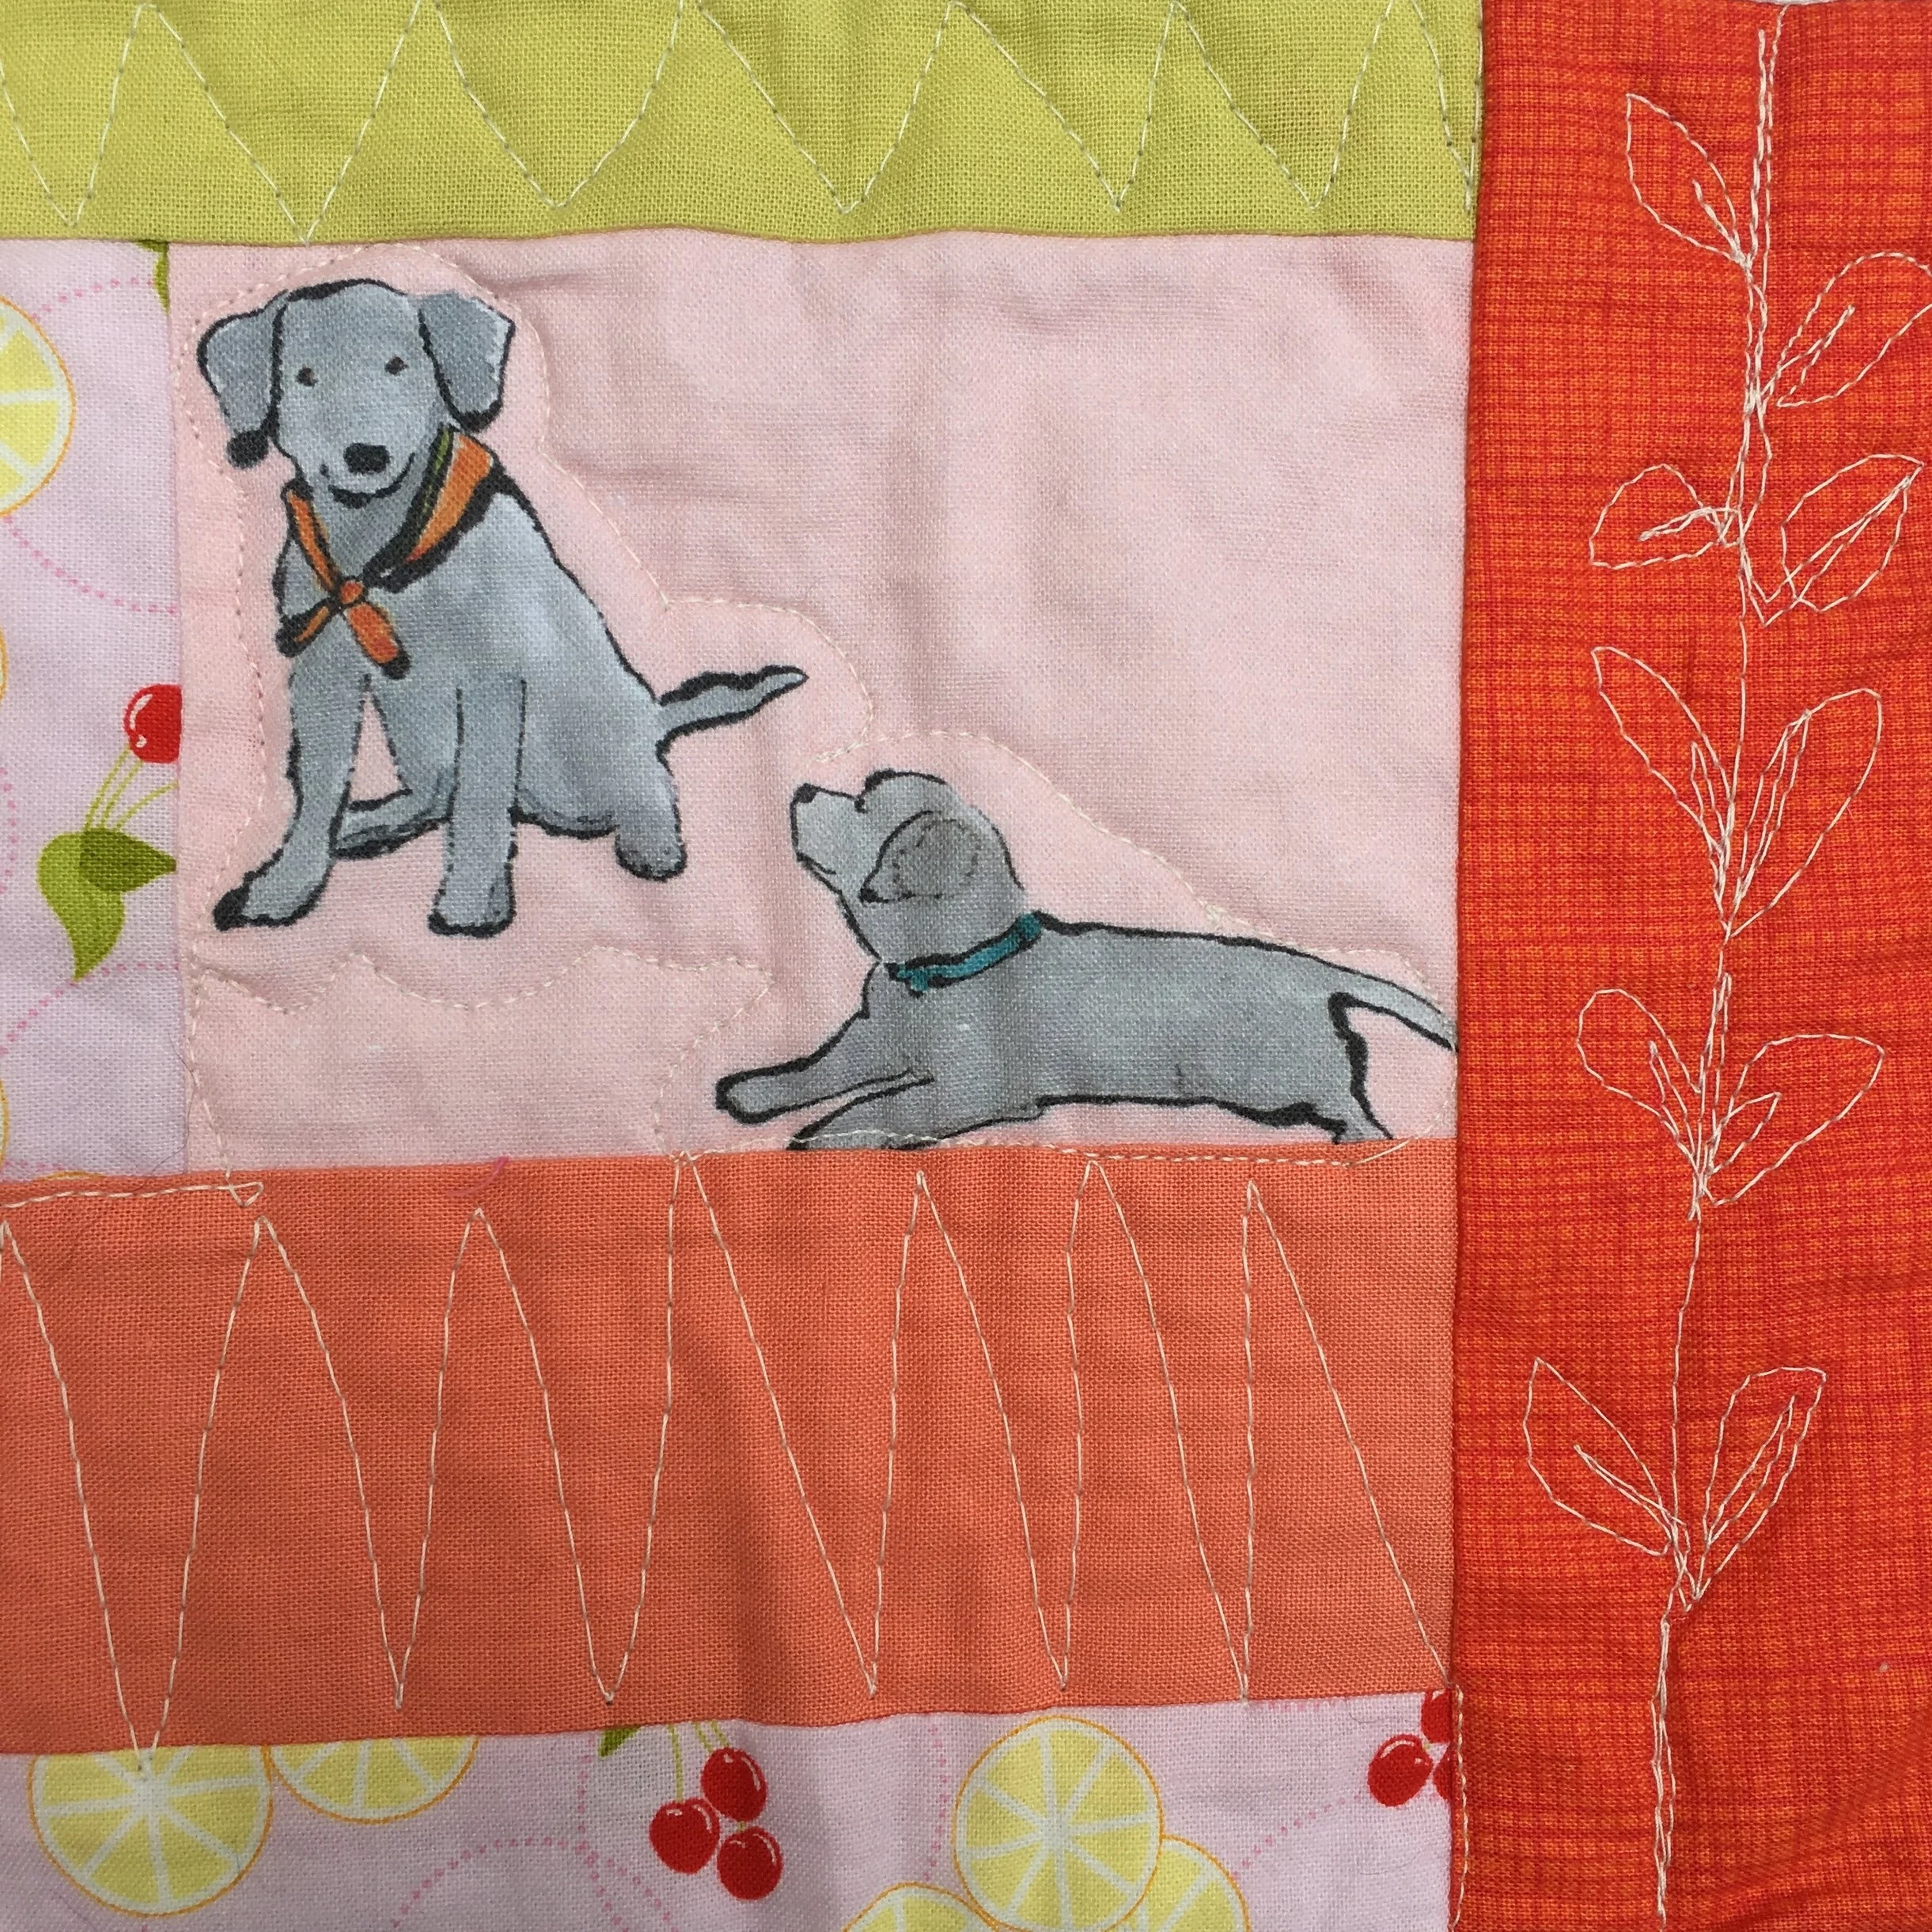
The quilting is as improvisational as the blocks themselves!  I took my clues for the quilting from the composition and the fabrics in each block.  The quilting is a mix of straight line walking foot stitching and free motion quilting.  It seemed to take forever!!  But I had a good laugh when I was done and put it on a bed....I'd forgotten how big this quilt is!  I had thought I was quilting a twin size quilt, when reality it's a good size queen!  No wonder the quilting seemed never ending!!

Here are a couple of close-ups of the free-motion quilting in this project. 

IMG_7198.JPG
IMG_7199.JPG

TAGS: Improv Scrappy Block Project 2017, Improv Scrappy Blocks, Free motion Quilting, Orphan blocks


December 28, 2017

Improv Scrappy Block Project 2017

by Judy Tucker


the 30 blocks of my Improv Scrappy Block Project 2017, with Hazel looking on

the 30 blocks of my Improv Scrappy Block Project 2017, with Hazel looking on

the 30 blocks of my Improv Scrappy Block Project 2017, with Hazel looking on

the 30 blocks of my Improv Scrappy Block Project 2017, with Hazel looking on

2017 is coming to and end and so is my Scrappy Block Project 2017.  My goal was to make at least 2 blocks a month for a year. I ended up with 30!

Other than using scraps and left over components of quilt blocks, I really didn't initially have a plan for these 12 inch blocks. As time went on, I started putting an animal or other feature fabric somewhere in each block. Some months I also added plain white blocks which I really liked. I wish I had done that more consistently. In this busy quilt, those white patches offer a resting place for the eyes.

At 5 block wide and 6 blocks long, quilt will be long enough but I want it a bit wider.  I found some orphan blocks from a project that just didn't work and there are enough blocks to add sashings between the vertical rows. The orphan are a bit bold, but I like them!  I'll post a photo of the completed quilt sometime in 2018!

sashingforScrappyBlockProject2017.jpg

So that wraps of this year long project.  And what happens when a project is done?  A party of course!!  (Though I had to do some canine management to prevent the party from starting before I had all the photos I needed for this post)!

Dog Party!  Hazel and Tipper playing among the blocks

Dog Party!  Hazel and Tipper playing among the blocks

Happy New Year!!


TAGS: scrap quilts, Improv Scrappy Block Project 2017, improv piecing, Orphan blocks


July 7, 2016

Orphan Blocks and a Few Fabric Strings Make a Quilt Top

by Judy Tucker


Approx Twin size!

Approx Twin size!

Approx Twin size!

Approx Twin size!

I've been putting orphan blocks in a plastic bin for the past several years.  Some of the blocks are one time trial blocks or color studies, some are a few extra blocks from a project, some are from downsizing a quilt and there is a least one section of strip piecing I never cut into blocks!

All together they are bright, vibrant and create interesting activity in the quilt top.

It's still very much a work in progress. There are hundreds of loose threads that need to be clipped. These blocks that have been sitting around are messy!  And I'm trying to decide if I want to put a border on it to make it a better twin size quilt. I'm still not sure what I want the final quilt to look like!

TAGS: Orphan blocks, Scrappy Quilt Top, Orphan Block Quilt


February 1, 2016

Orphan Block/Scrap Stash Toddler Quilt top

by Judy Tucker


PictureAlbumDogOrphanBlocksQuilttop.jpg

About every 2 years the Proper Bostoninan Quilt Guild supplies nap quilts for a local daycare. I've been sorting my stash this month.  I found a stack of orphan blocks from other projects and realized I had just enough of the picture album dog blocks to use as focus blocks for a toddler quilt. 

I also found two sixteen patch blocks I made as an exercise for Weeks Ringle's Craftsy class, Designing Modern Quilts.  You can see them paired with the two large dog blocks in "picture frames" in the quilt top above.  They fit in beautifully and I was so happy to use them!

All the blocks came out of my stash of charm squares and 2 1/2 inch strips. I needed to trim some fabrics but was able to make this whole quilt top without cutting any fabrics!

I  found a dog print in my stash for the back.  I needed to make it a bit wider for the quilt but found a scrap strip just the right length to do that!  

It was a fun challenge making this scrappy quilt. All the experience I got making Improv Quilts last year really helped me as I put this quilt top together. 


2 Comments

TAGS: Craftsy Classes, Designing Modern Quilts with Weeks Ringle, Orphan blocks, Toddler Quilt, scrap quilts


January 12, 2015

Modern Twist on Bonnie Hunter's Grand Illusion: "Construction Zone!"

by Judy Tucker


Lap Quilt 41 x 55 1/2 inches "Under Construction"  A Modern Take on Bonnie Hunter's Grand Illusion

Lap Quilt 41 x 55 1/2 inches "Under Construction"  A Modern Take on Bonnie Hunter's Grand Illusion

Lap Quilt 41 x 55 1/2 inches "Under Construction"  A Modern Take on Bonnie Hunter's Grand Illusion

Lap Quilt 41 x 55 1/2 inches "Under Construction"  A Modern Take on Bonnie Hunter's Grand Illusion

Bonnie Hunter's Grand Illusion Winter 2014 Mystery Quilt was designed to be a queen size quilt.  As I was assembling the quilt I decided to make a twin size quilt by omitting one of the vertical rows of blocks.  That left me with lots of partially completed orphan blocks.

I had toyed with the idea of changing the quilt to try to give it some modern aesthetic, but decided that was just too difficult to do with a mystery quilt.  I wasn't willing to wait until the reveal to start sewing. 

However, my stack of orphan bits, pieces and blocks gave me the perfect opportunity to create a Modern Quilt.   I call this design "Construction Zone."  I took the elements of the Grand Illusion quilt and laid them out the way you see them when you are sewing a Bonnie Hunter quilt together. 

On the top row are the component blocks for the outer border on the left and the border unit on the right. 

Below that is the inner border, yellow on my quilt.

In the middle of the quilt on the left are the units set out they way the final block and it's green checkered border will be sewn together.  In the middle right are some of the individual components of the focus block.  

The completed focus block with its border is at the bottom on the right. On the left are block units falling off the sewing table and piling up on the floor! (It always happens at some point in a project this complex)!! One of the fallen blocks is attached by machine appliqué. The corner of that block will extend over the border of the finished quilt. 

This was so much fun to make.  I put the pieces up on the design wall but the assembly was all improv.  I sewed pieces together, measured and cut and sewed some more.

I'm giving away the "real" Grand Illusion quilt so it's great to have this lap size quilt to keep.  And it makes me smile!

Quilt Grand Illusion Finished top.jpg
Quilt Grand Illusion Modern!.jpg


TAGS: Bonnie Hunter's Grand Illusion Mystery Quilt, Modern Quilting, Orphan blocks


Powered by Squarespace 7