Polar Medallion Quilt, Step 9
In the previous 3 posts there are instructions for building this crib/lap size medallion quilt. In today's post, the quilt top as I've made it, will be finished. But feel free to continue adding to the quilt if you want to make it bigger!
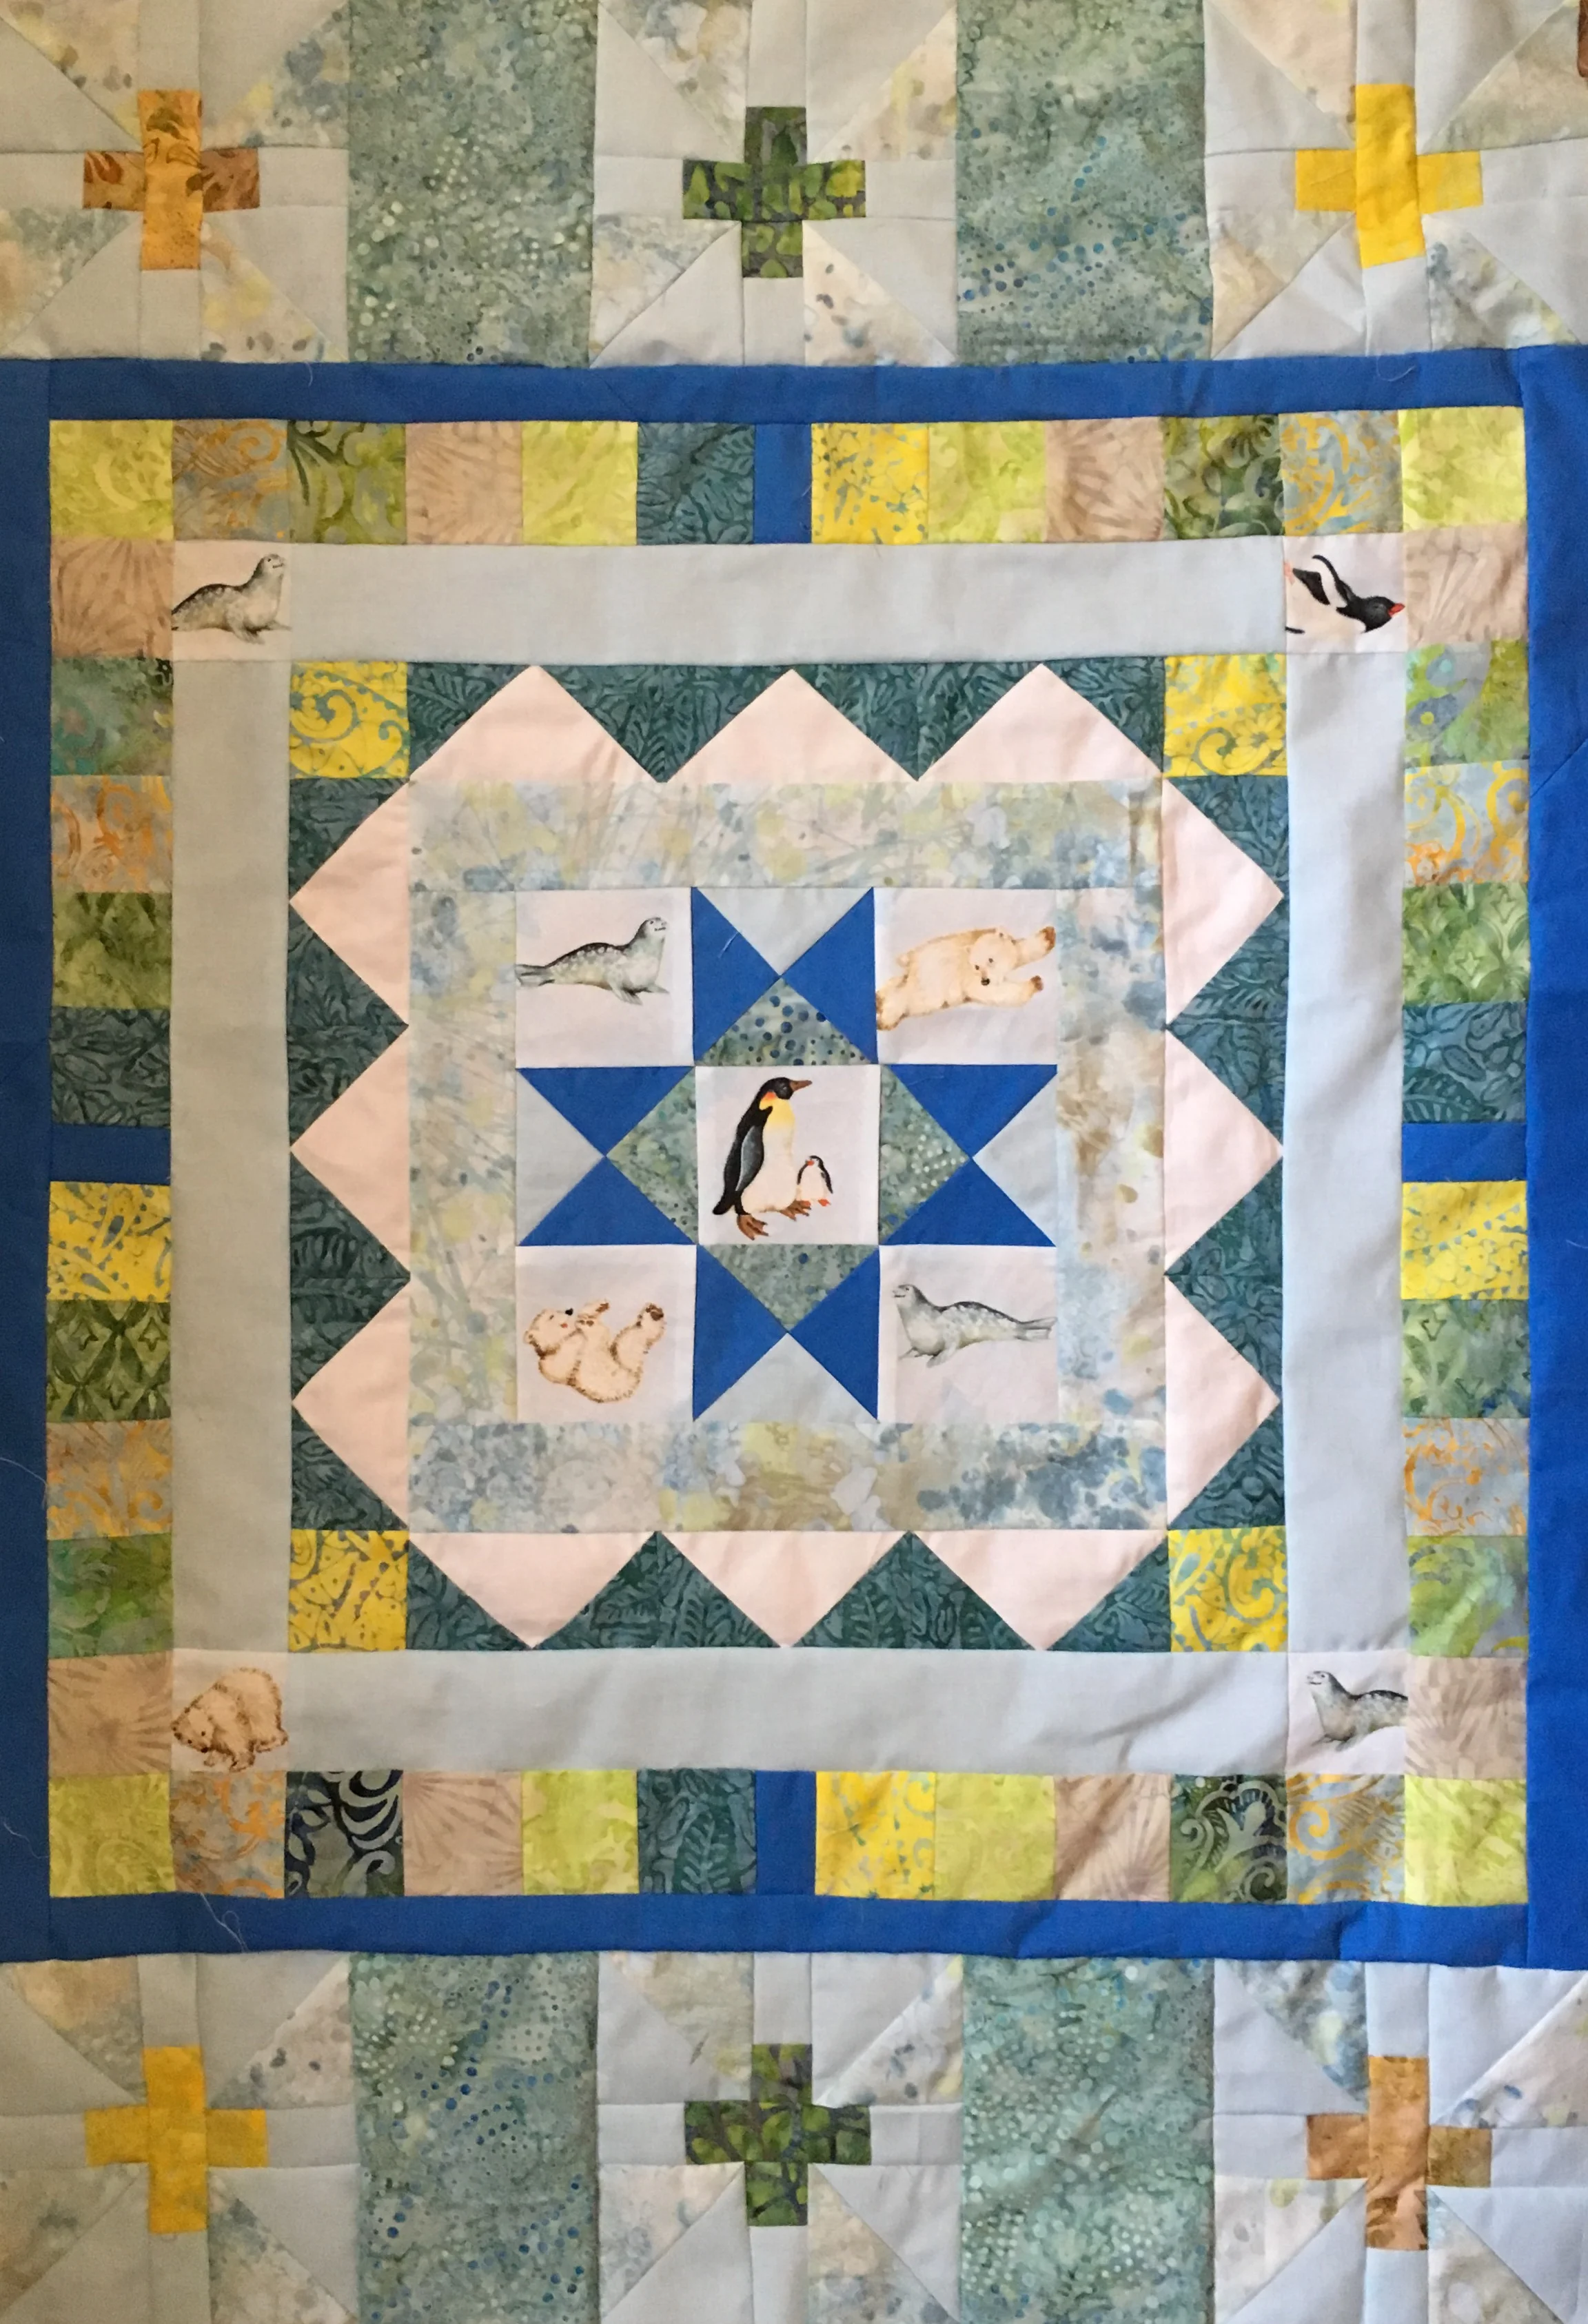
Step 9: Adding plain border strips
I add plain borders every couple rounds as accents or to give the eye a place to rest since this is a busy pattern.
- Cut (2) 34 x 2 1/2 inch strips from a solid color
- Cut (2) 38 x 2 1/2 inch strips from the same color
- Sew 38 1/2 x 2 1/2 inch strips to the sides of the quilt. Press.
- Sew the 34 x 2 1/2 inch strips to the top and bottom of the quilt.
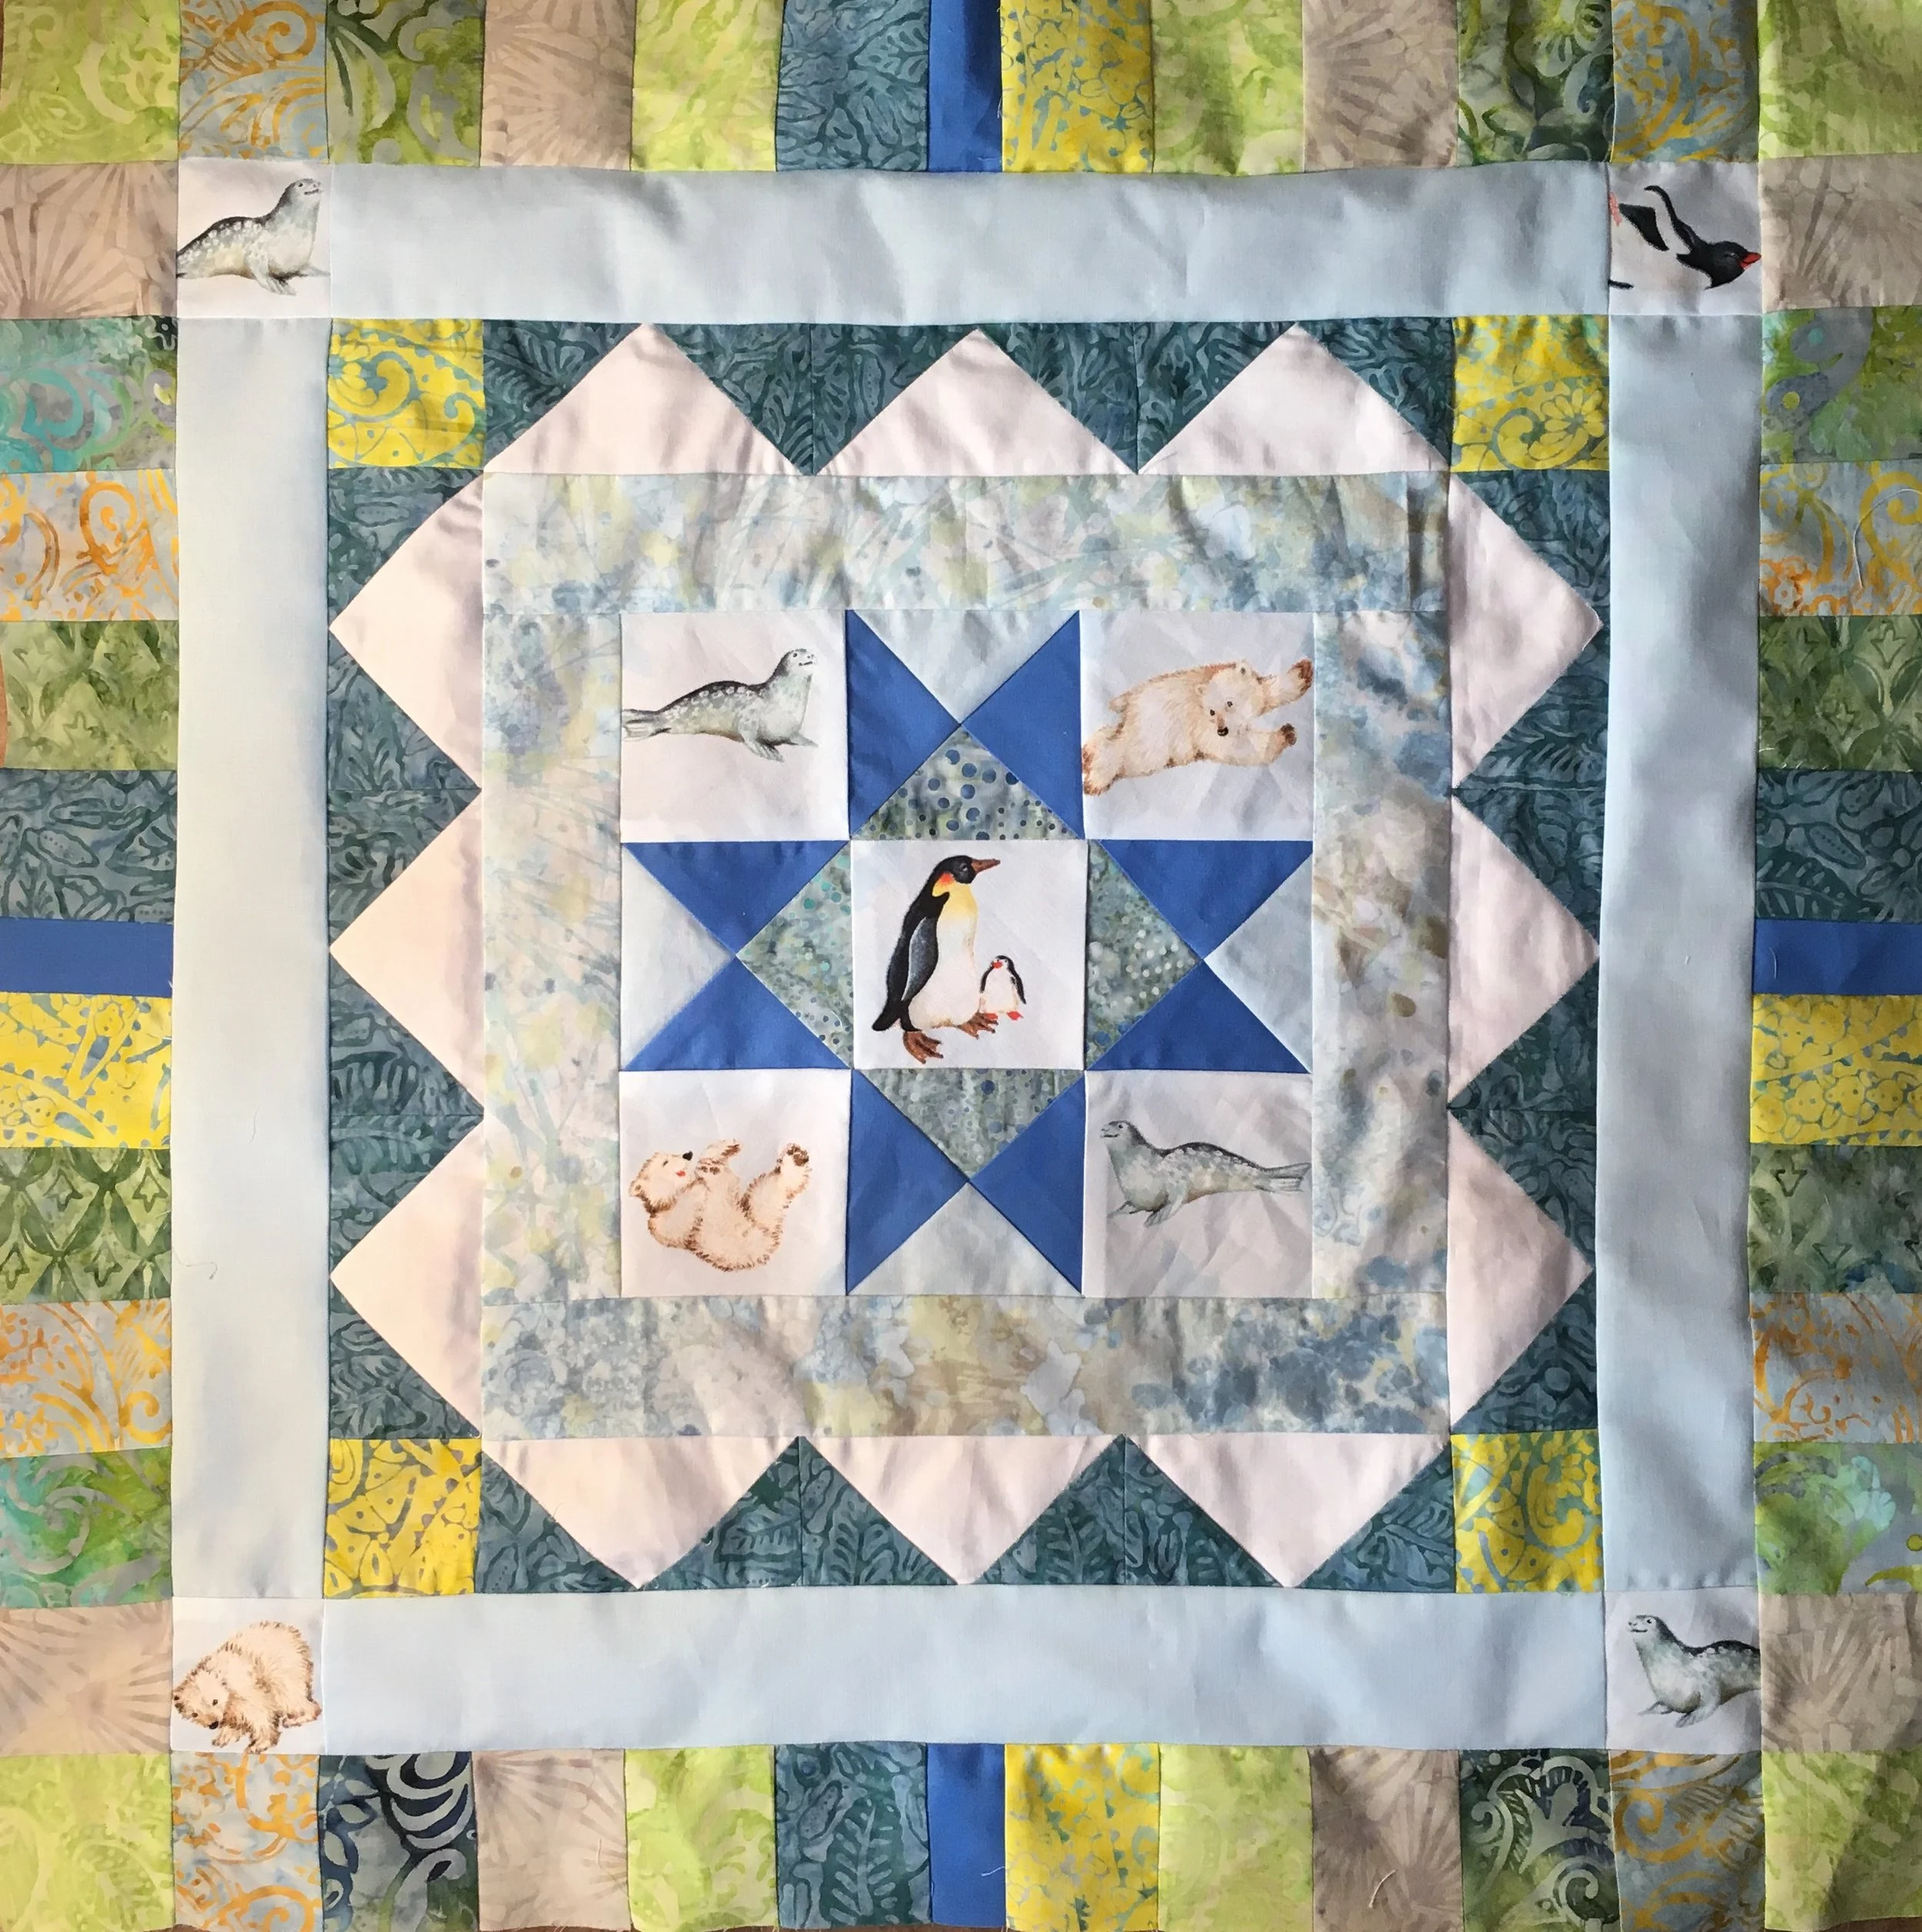
Step 10: Narrow Piano Key borders
Use a variety of the jelly roll strips for this step
- For the side strips, Cut (40) 3 1/2 x 2 1/2 rectangles from the jelly roll strips
- Cut (2) 3 1/2 tall x 3 3/4 wide spacer blocks from the sidestrip sets. I used fussy cut patches for these spacer blocks.
- For the top and bottom strip Cut (32) 3 1/2 x 2 1/2 rectangles
- Cut (2) 3 1/2 tall x 4 inches wide spacer blocks. As for the sides, I fussy cut these patches from the novelty fabric
- Fussy cut 4 corner blocks, 3 1/2 x 3 1/2 inches from the novelty fabric.
- For the sides, sew together (4) strip sets of 10 3 1/2 x 2 1/2 inch patches. Note: Sew the patches together on the longer 3 1/2 inch sides.
- Sew one 10 patch strip to the side spacer block, 3 1/2 x 3 3/4. Then attach a second 10 patch strip
- For the top and bottom strips, sew together (8) 3 1/2 x 2 1/2 inch patches. Make (4) of these 8 patch strips.
- For the top strip, Sew a 3 1/2 x 3 1/2 inch fussy cut corner block to an 8 patch strip. Attach the 3 1/2 x 4 inch spacer block. Attach another 8 patch strip and a final 3 1/2 x 3 1/2 inch corner fussy cut patch.
Repeat for the bottom strip. If your fussy cut patches have directional designs make sure you check to make sure the design will be upright in the strips.
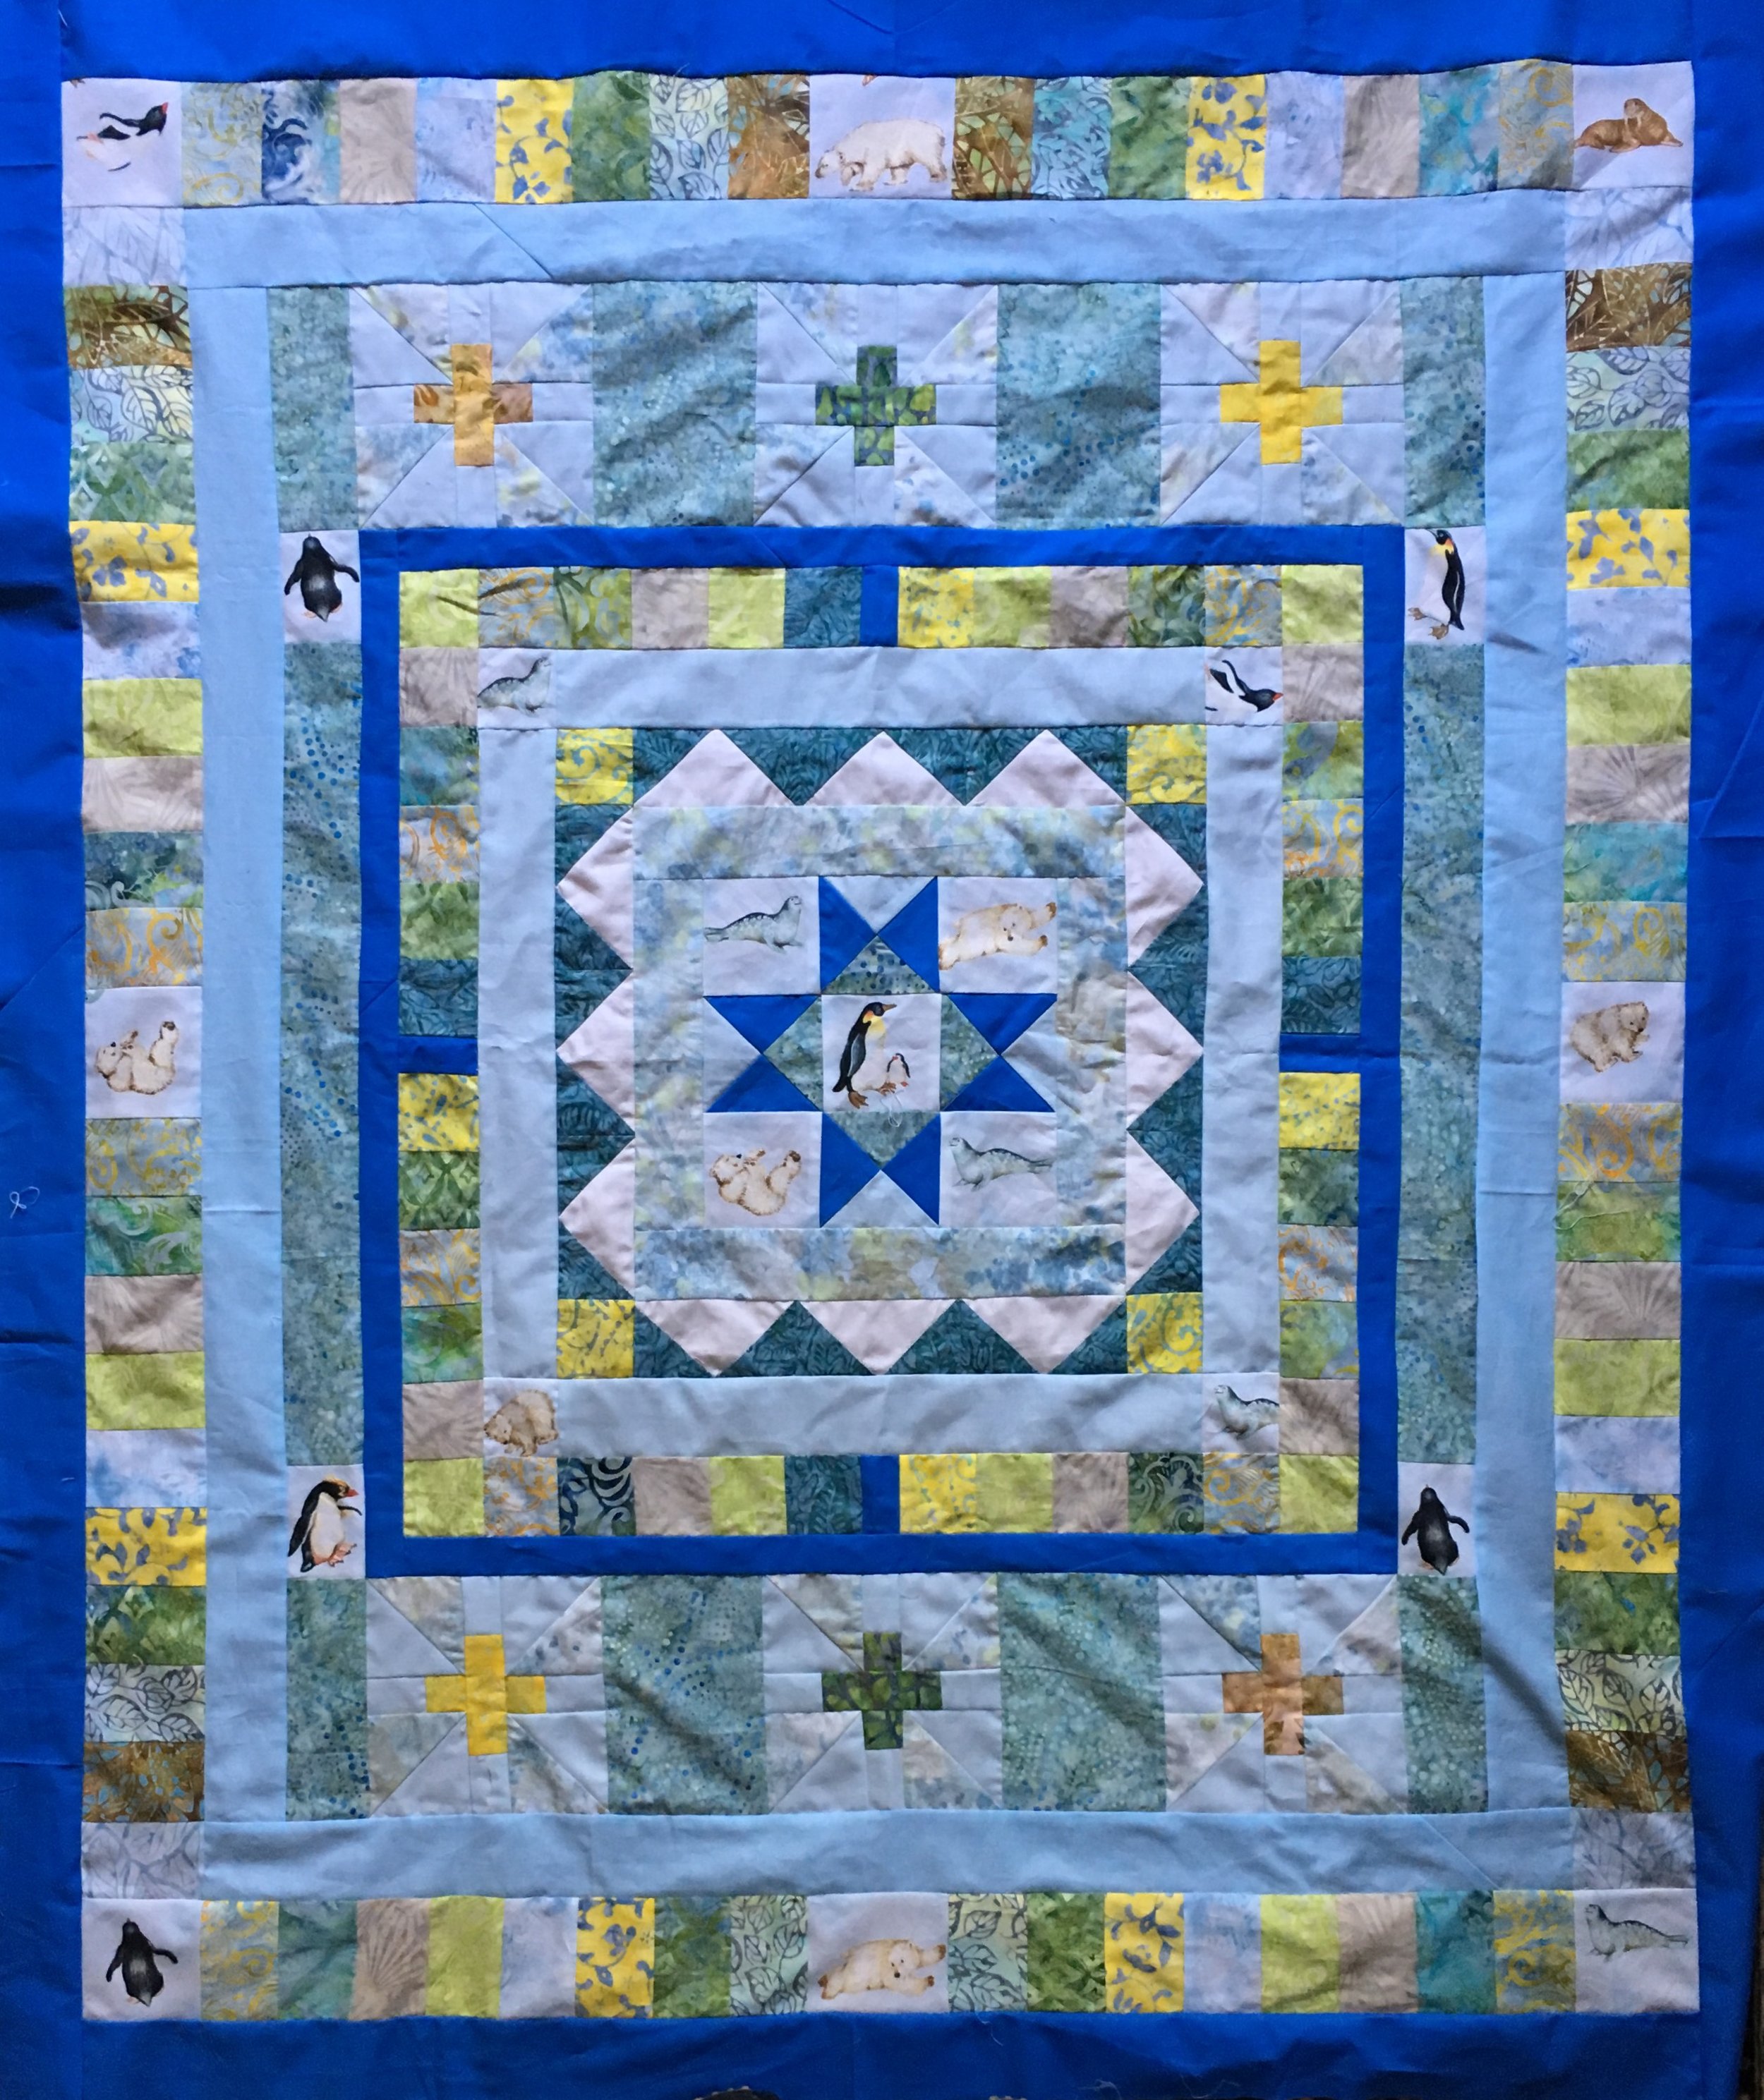
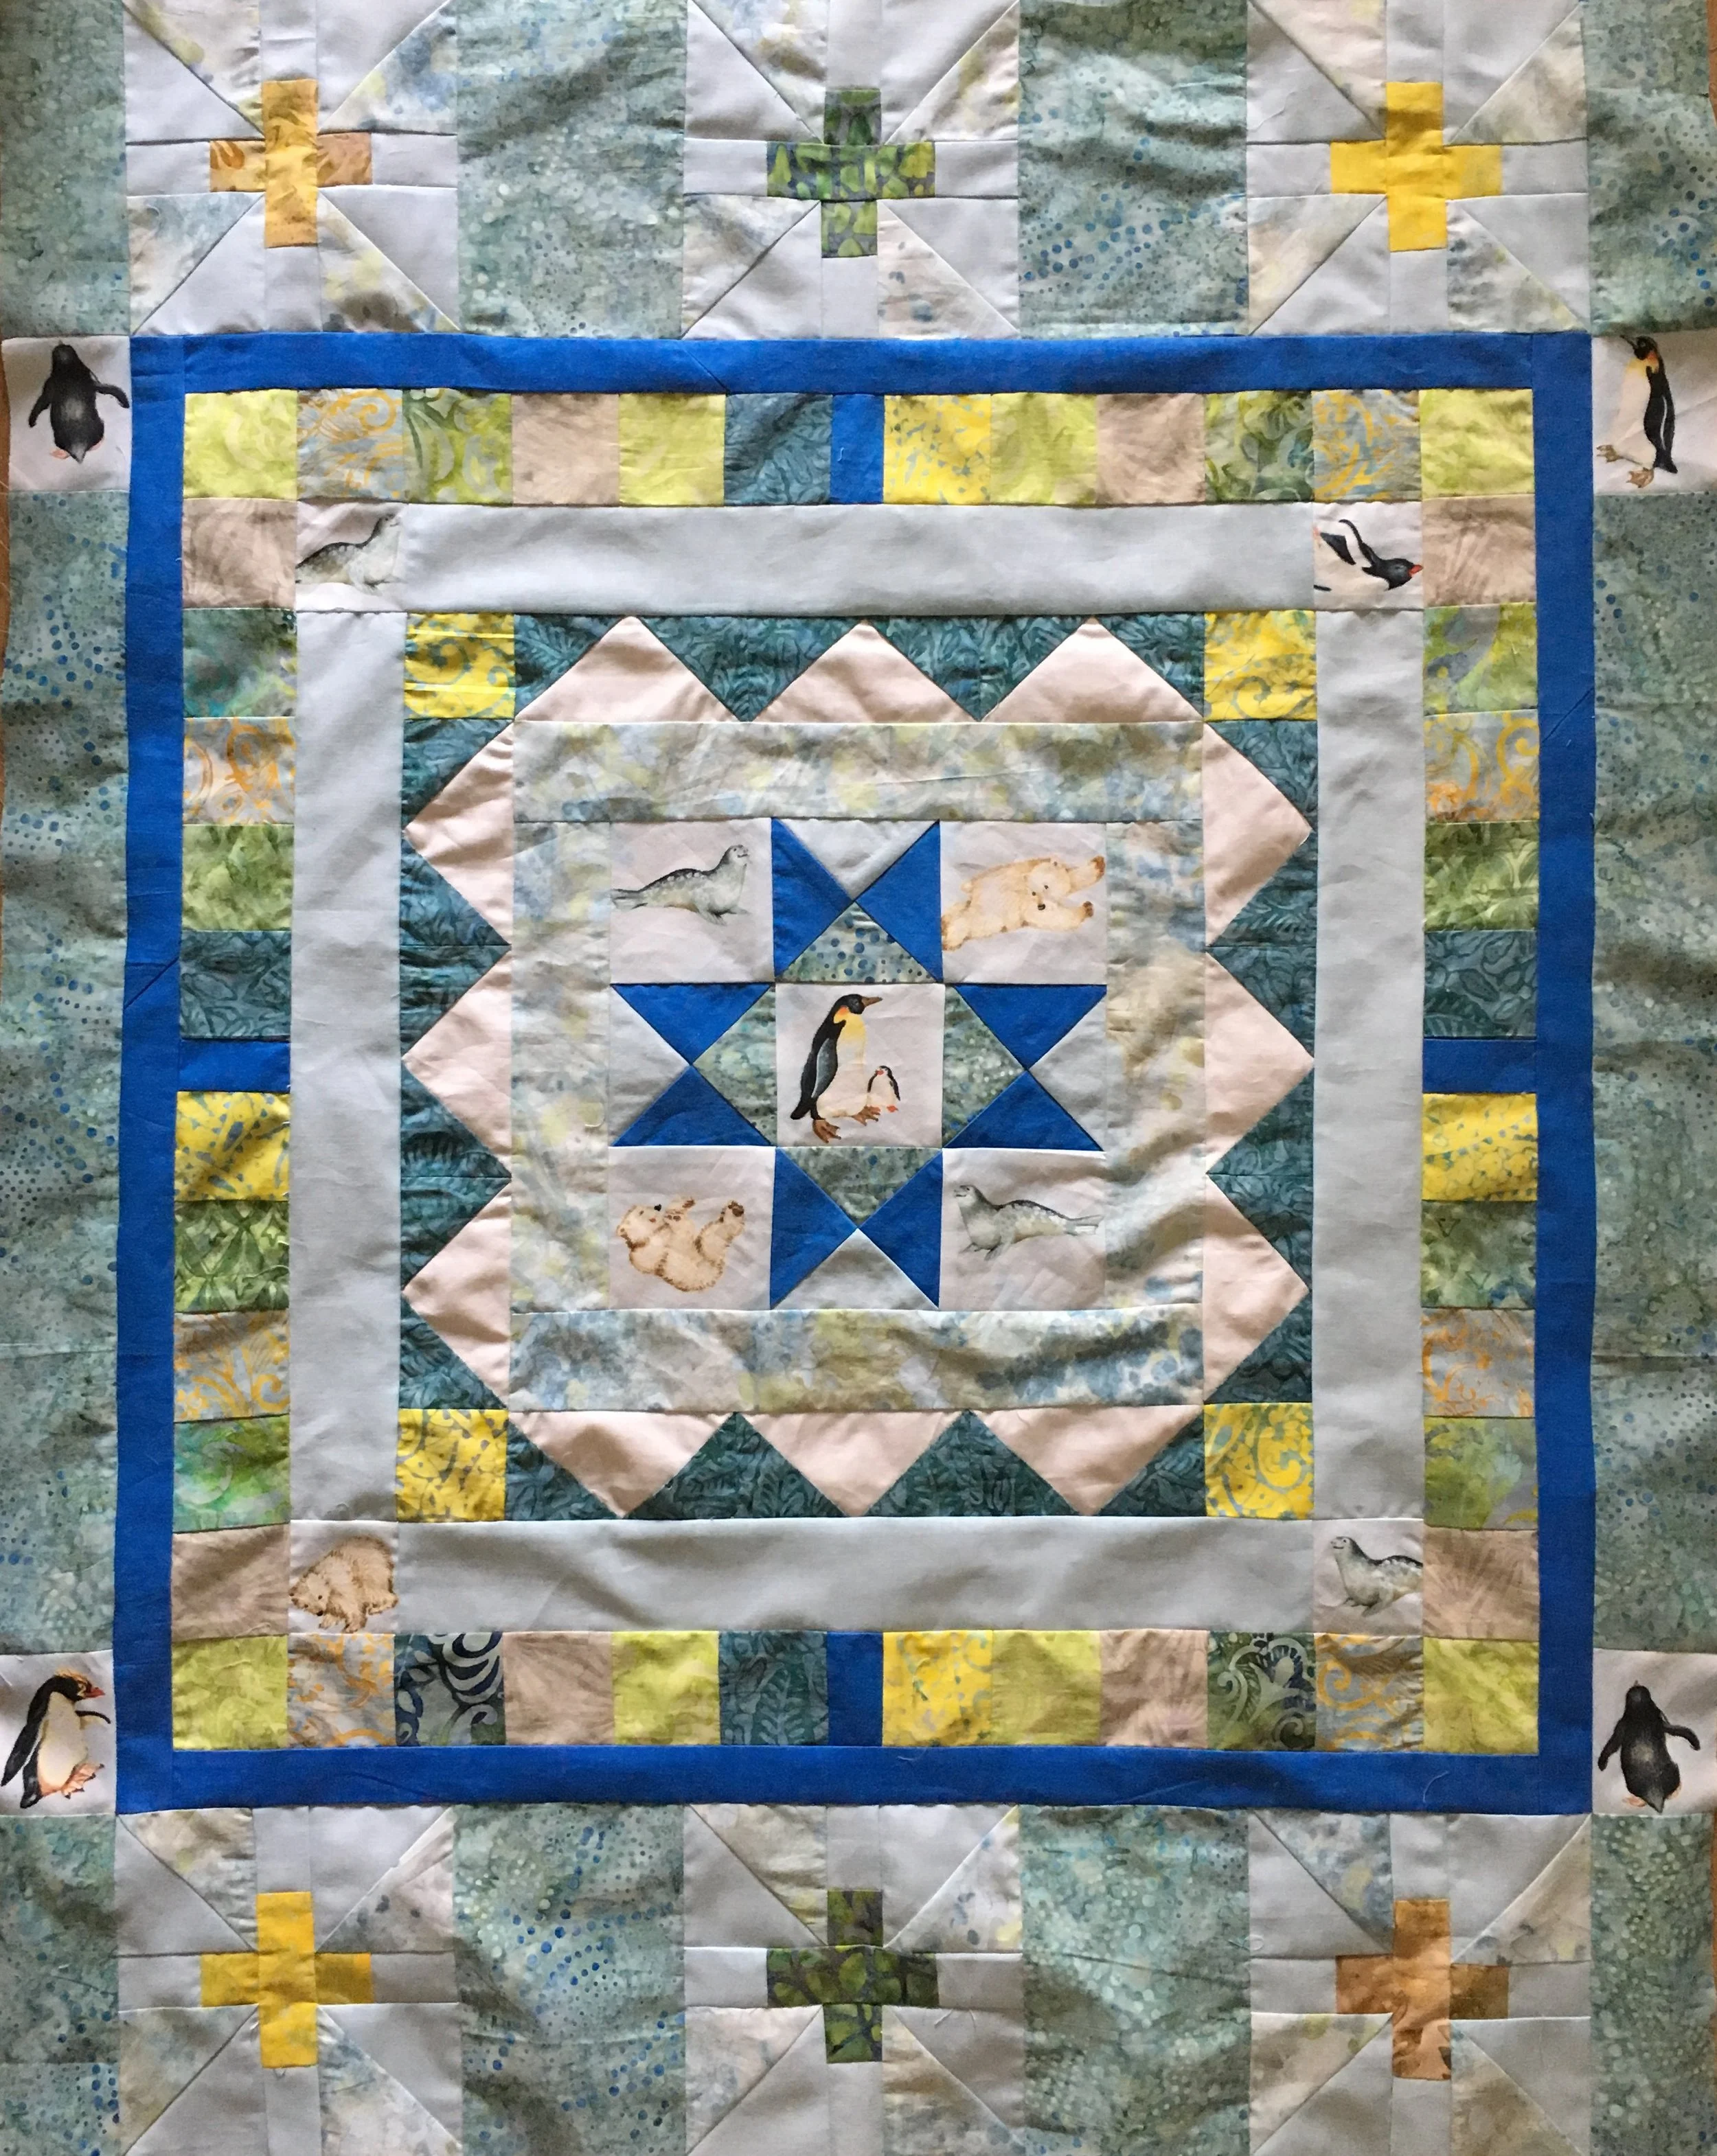
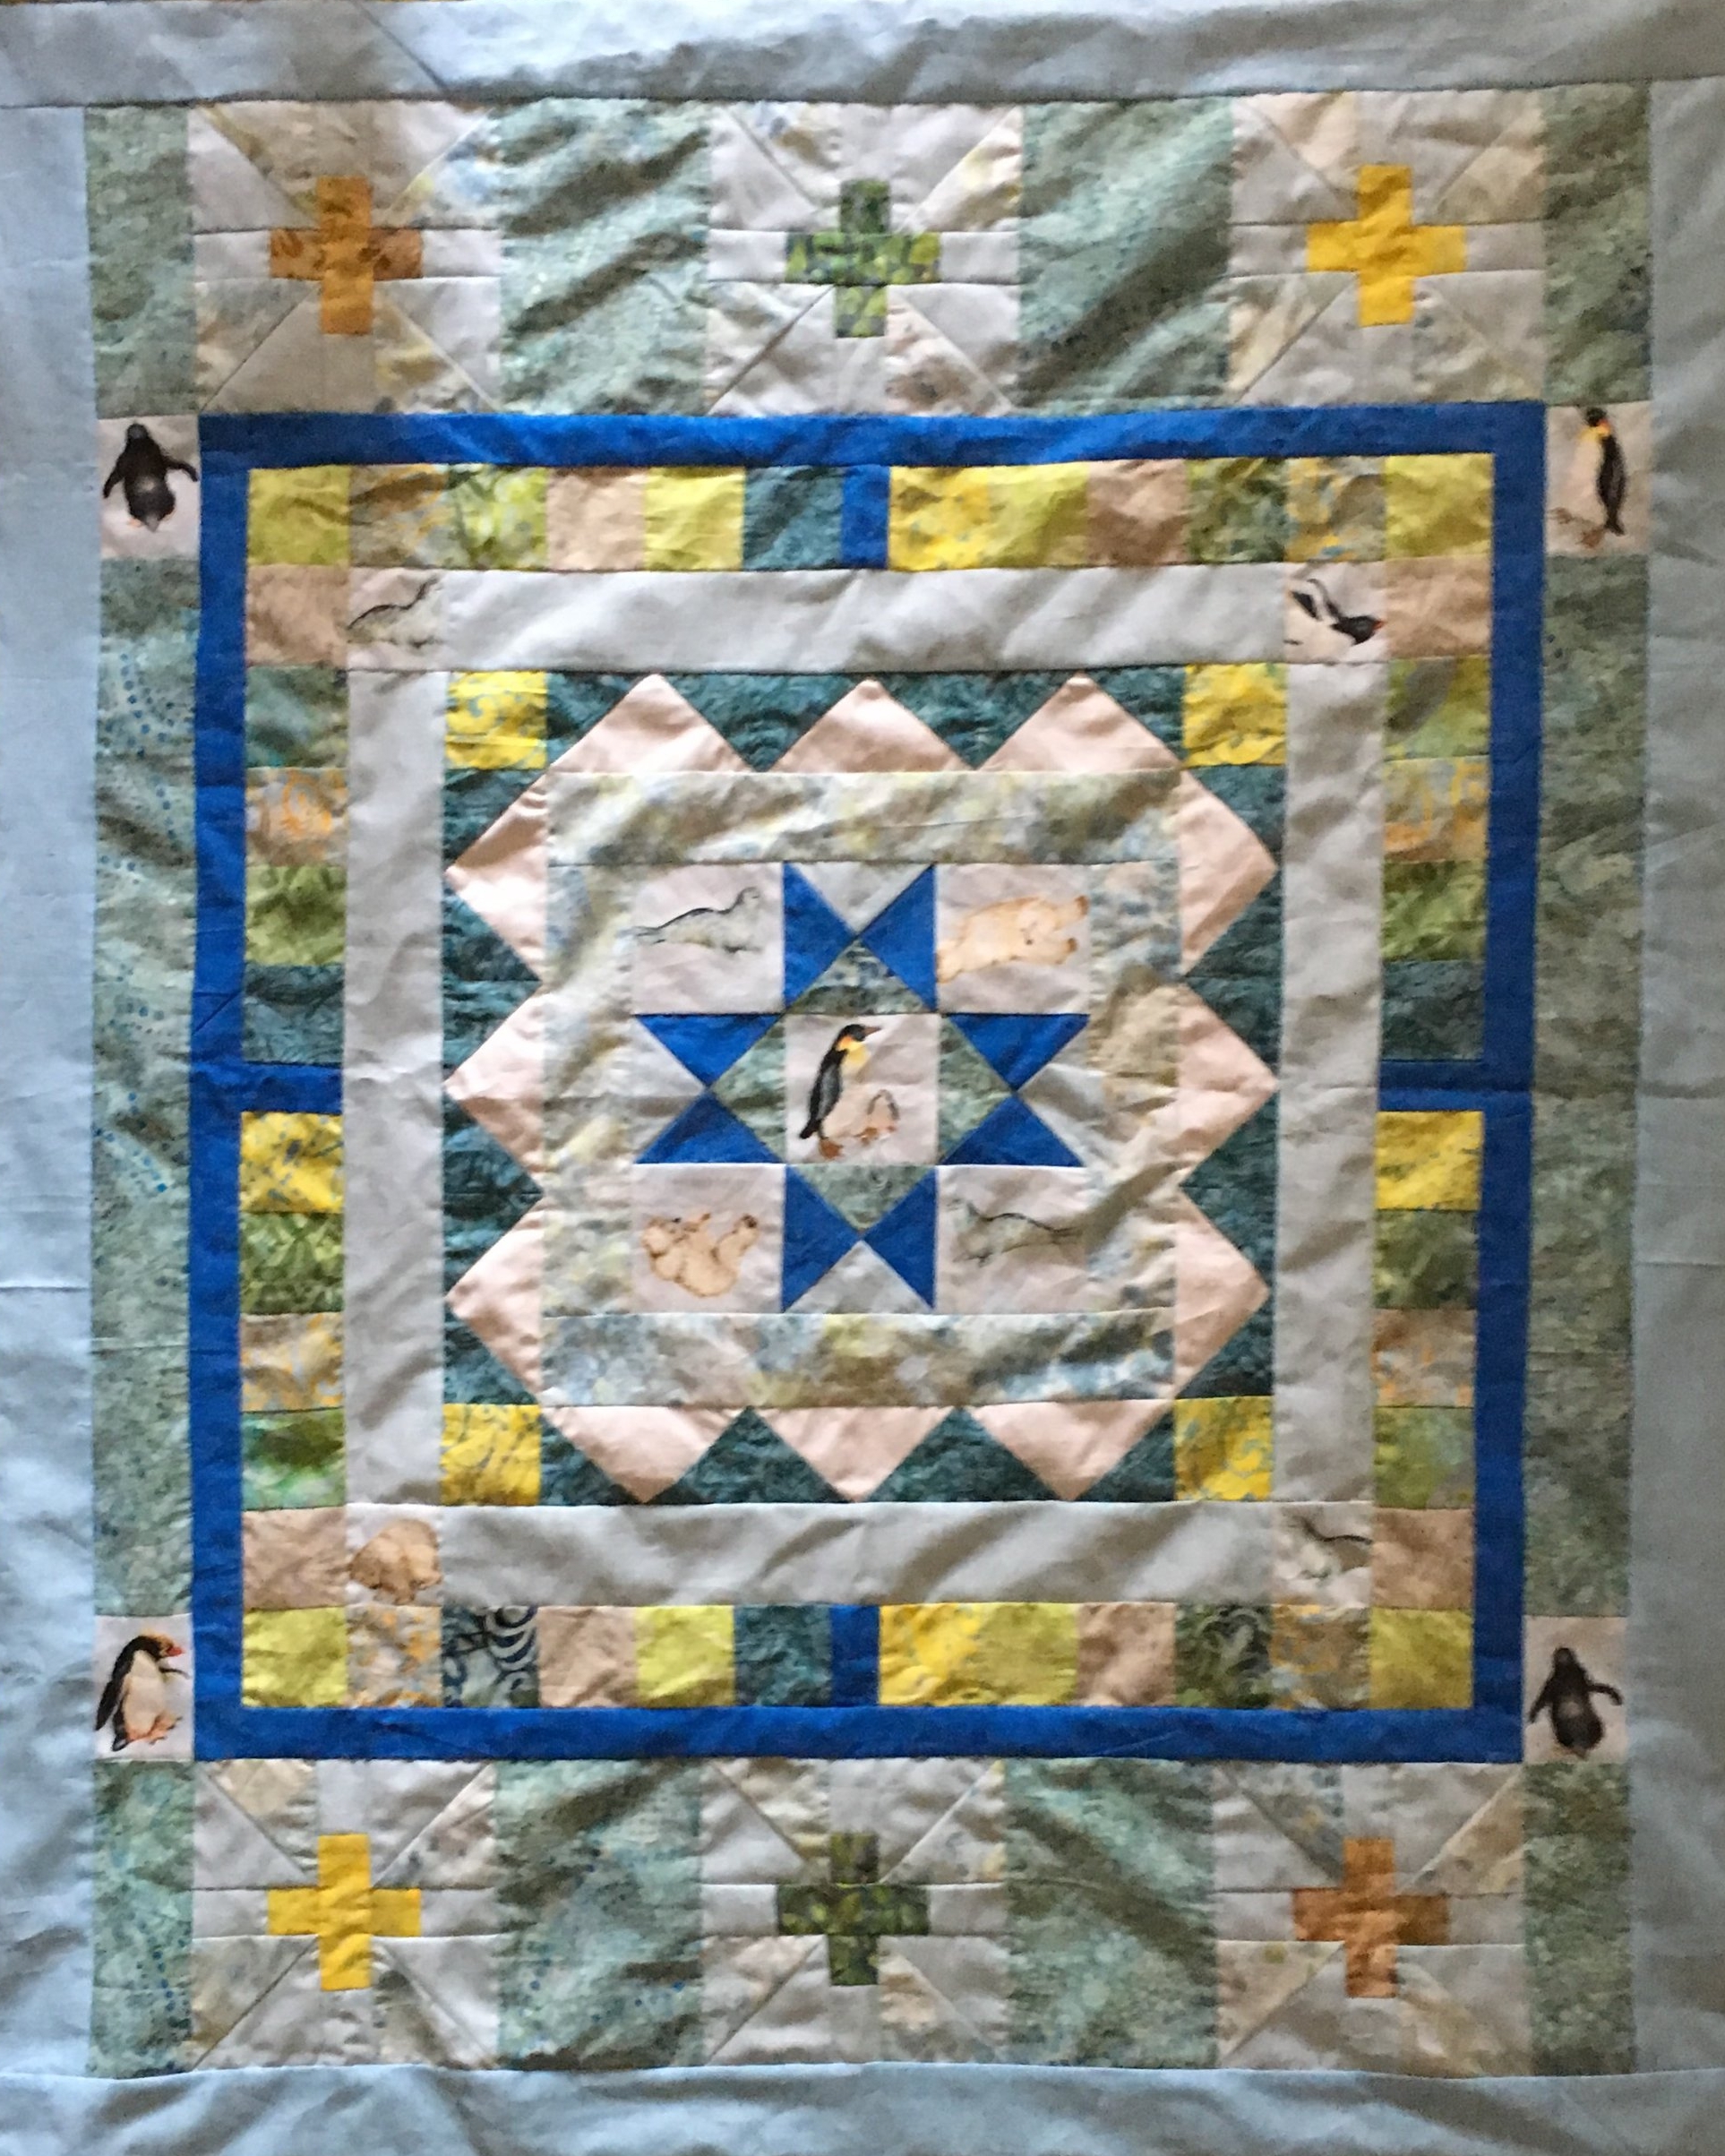
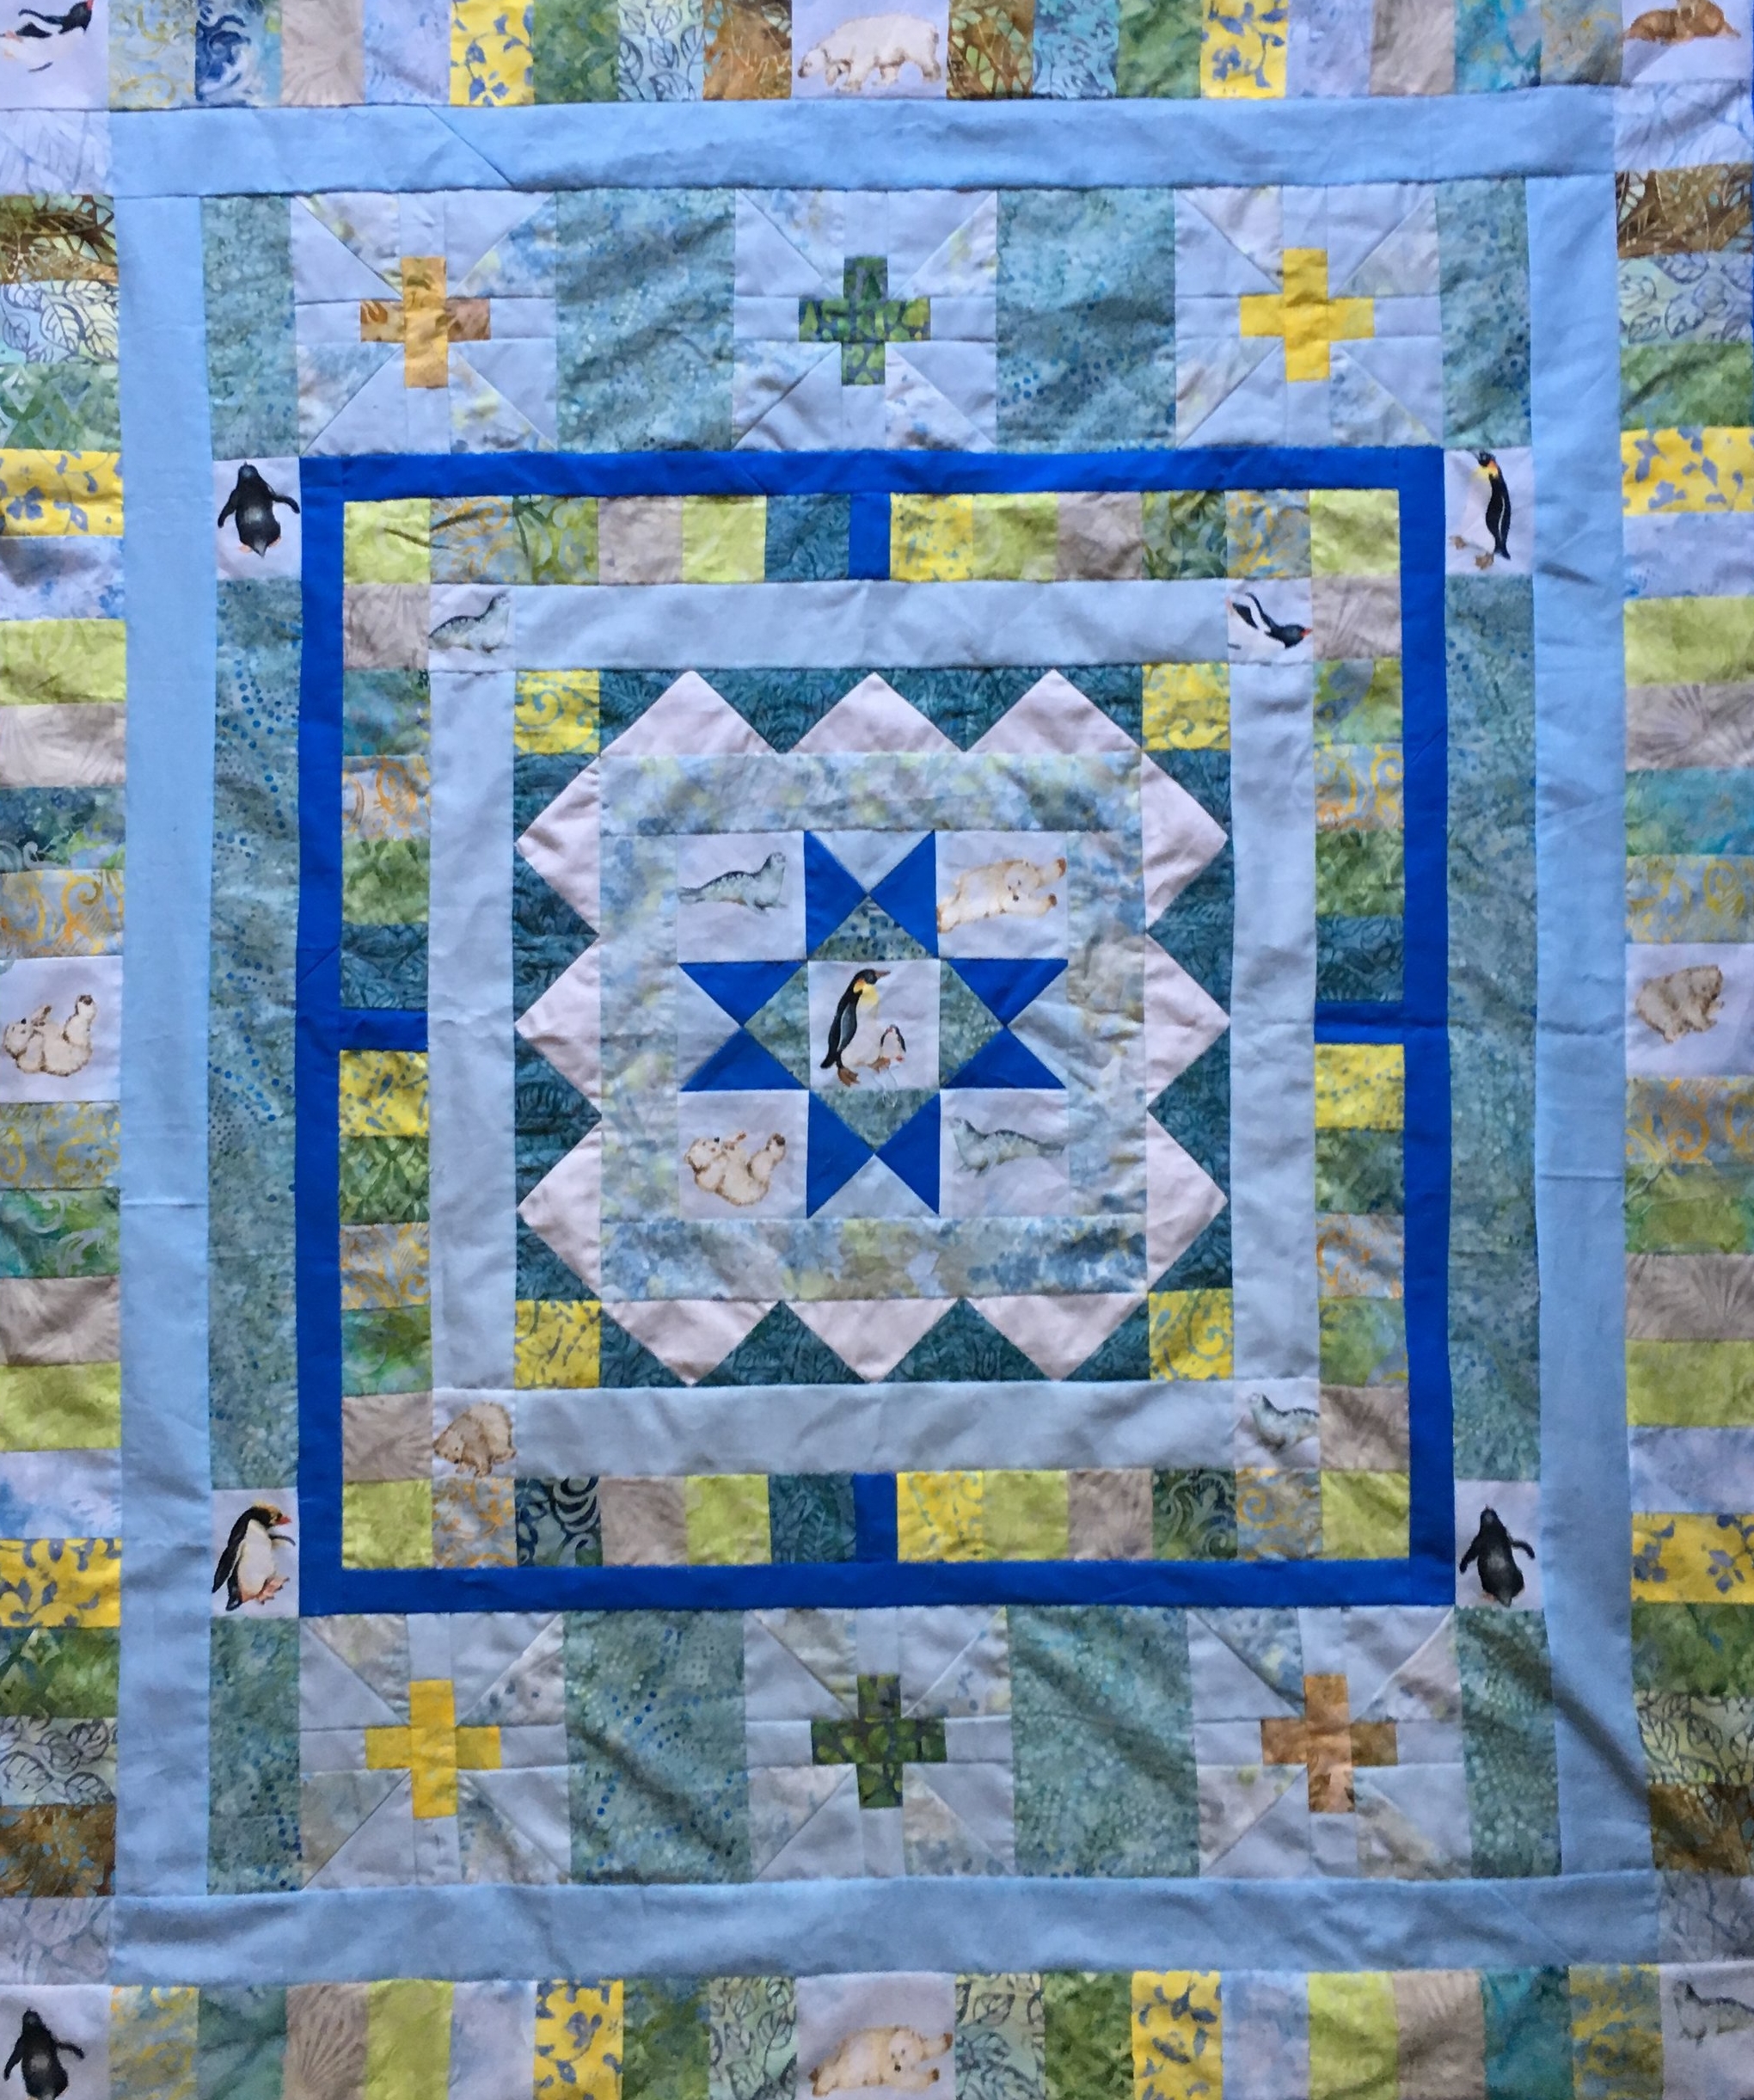
The finished Polar Medallion Quilt Top
Step 11: Final Solid Border Strips
- Cut (2) 2 1/2 x width of fabric from contrasting solid fabric.
- Sew one to the top of the quilt and one to the bottom.
- Cut (3) 2 1/2 x width of fabric from the contrasting solid. Sew these 3 strips together either straight or on the diagonal. Sew to one side of the quilt. Then cut and sew the left over strip to the other side of the quilt.
- For greater accuracy in cutting, measure the length and width of the quilt in the center of quilt rather from the ends or sides. Use those measurements from the middle of the quilt side and top to cut the last border strips.
That's the completed Polar Medallion Quilt top! If you've been using these directions to make a similar quilt, I hope you had fun. Please let me know if you find errors in the instructions.
In my final Polar Post, next week, I'll show my finished quilt and give some recommendations for books about Medallion quilts.