Update on the Charity Quilt for the Somerville Homeless Coalition: It's coming right along!

by Judy Tucker


Janet got the blocks for the charity quilt for the Somerville Homeless Coalition all sewn together while she was up in Maine at the Proper Bostonian Quilt Guild spring camp!   Here is a photo of quilt on the design wall.  Janet, thanks for spending part of your time away at Quilt Camp working on this project. Much appreciated by all!   Thanks also goes to all the PBQ Guild members who helped with the arrangement of the blocks!  It looks great!


Yesterday Janet started work on the borders.

Janet, happily sewing on a rainy June day


Here is the quilt is with the first border.  That bright turquoise border really brings the quilt together beautifully.

PBQ members, Janet (left) and Ginny (right) with the quilt
One more wide border to be added, then the it will be ready to be quilted.  This is very exciting!


EQ7 Jump Start Quilt Along: Block 3

by Judy Tucker


Yesterday we got the third lesson in the EQ7 Jump Start Quilt Along.

Twin Star Variation

This week was a lot of fun.  Jenny taught us how to take a block from the EQ Block Library,
Twin Star this week, and edit it to create a new block with the EasyDraw Block Worktable.

Twin Star block from EQ Block Library


I had done some block designing with EQ7 on my PC.  This is the first time I tried to design with the new EQ7 version for Mac.  It worked beautifully!   No mouse needed, so I find the program is actually easier to use. It's more like drawing using a finger vs. using a mouse.  Yeah!
We added 4 lines.  Then we took out 4 lines which made the center square larger and the block slightly simpler.


Twin Star variation created in 3rd lesson


The first week we were asked to print from the Rotary Cutting Pattern.  Last week was template week.
This week we used the Foundation Pattern.  EQ7 orders the pattern with letters for each section and numbers indicating which order to sew the pieces to the pattern.

The program allows you to re-section the block and re- number it manually if you want to.  I have found that it usually does a pretty good job automatically.

More importantly, EQ7 allows you move around the Foundation Pattern pieces for printing.  My experience has been that I usually can move a pattern piece so it will fit on a piece of 8x11 inch printer paper. This which saves trying to tape pages together to make block section.


This week I  echoed peachy pink stars in the center bunny block in my polka dot peachy pink star points.  I auditioned the red orange in this week's bunny's vest for the star points but it was just too bright next to the blocks that were already made.


Here are the three completed blocks altogether.


One more week to go in the EQ7 Jump Start Quilt Along.  I wonder what we'll do next week?

Cheddar: The Color, not the Cheese!

by Judy Tucker


Left: Quebec 3 year old cheddar,  Right: Cotswold Cheese (not a cheddar)
Front Center: Irish Vintage Cheddar


The quilts in the Pilgrim Roy Collection at Boston's Museum of Fine Arts have me thinking about color again.  The first 2 quilts as you enter the "Quilts and Color" exhibit are a red, green and orange Carpenter's wheel on the left a red, green and cheddar Ocean Waves on the right.  Here is the quilt on the right with the cheddar orange.  


Ocean Waves, Mennonite. PA 1880s.
On exhibit at the MFA, Boston
in the "Quilts and Color" exhibit


Cheddar was a popular color in the early 1800s before aniline dyes became available.  One of the articles I read about the color said that at the time, it was considered a "neutral" color.  Wow.  Some neutral!!   The dye was made from Lead Antimony powder so the dyeing could be done at home.  However, both the lead and antimony are heavy metal which are poisonous.  So the process of dyeing fabrics cheddar color was potentially dangerous, something I'm not sure they appreciated much at the time.


Cheddar yellow seems to have made a come back in the past several years. Bonnie Hunter has a Bow Tie Pattern  which has a Cheddar yellow background and the fabric companies are making yellow orange solids which they have named "Cheddar".  Both Moda and Kona have a version.   Kona's cheddar is a much softer color, and it's the one I prefer.  Neither of them is really the color of cheddar cheese, though my brother did hunt down a cheese from Wisconsin that is a much deeper color than anything I found at my local cheese shop here in Boston!  (Sometimes it takes a team effort to make an interesting blog post…Thanks, Bill)!


"Goldenrod" 


Wisconsin Cheddar found in Michigan Cheese Shop


I decided to make a couple blocks with the colors used in the two quilts in the show at the MFA. One block has orange as bad the background and one has the Cheddar Moda Bella Cotton.  (I have a couple yards of the Kona Cheddar so I'm saving that for a larger project).
And I also made a block with a grey print since grey is frequently used as a background color quilts being made now.

The pattern is a variation of Mill Wheel which I found in the book, 500 Quilt Blocks, by Lynne Goldsworthy and Carrie Green.

Cheddar background


Orange Background


Modern Grey Print background

I got a good chuckle when I was sewing the block with the cheddar background.  Something about it was just so familiar.  Then I realized the yellow orange and green were the colors of the Crayola Crayon boxes of my childhood.  Color bringing back memories!

Vote on in the poll (see top of side bar on the right) and let me know which of these three backgrounds is your favorite!  I let you which was the most popular color combination next Monday! 

UPDATE: Sorry folks.  Blogger Polling crashed last week.  Google is working on a fix, but at the moment, the poll feature it isn't working.  Thanks if you voted.  We can try again in an up-coming post. 


Designing notes: Jumbled Spools Pattern WIP

by Judy Tucker


I recently got this great Kona Cotton "New Bright Palette" jelly roll.   I really like this combination of colors.

Kona Cotton "New Bright Palette"


I haven't seen a design for a jelly roll that I am really want to make, so I started thinking about what else I could do with 2.5 inch wide strips.   This set of fabrics reminded me of the thread cabinet in a fabric store.  How about a modern spool quilt?

A quick Google possible patterns brought up the great piece on Craftsy's blog:  Spool Quilt Patterns.
What a fun collection of modern spool quilts.  But none of them were quite what I wanted. 

So I decided to make a maquette (a sample), a design technique I learned about in Weeks Ringle's fabulous Craftsy course Designing Modern Quilts.  (I highly recommend this course.  Weeks is a brilliant teacher and she has a lot to share about use of color and design in Modern Quilting).

Here is my first maquette.  It's all right.  But is it a spool?   If I worked in a cotton mill in the 1800s and used large wooden spools,  I would say yes.  But it's not the 1800s anymore.  So I think it looks like a bit of a mystery.


Adding an extra step makes the design recognizable as a spool.  Something my mom would have had in her sewing basket, but definitely a spool.  


The block is off kilter on purpose. I want the quilt to look like a jumble of spools.  Most Spool Quilts are super tidy looking.  I'm looking for something closer to the end of a busy day of sewing!

I grabbed the brown and tan from my scrap bag to make the maquettes. I was looking for a grey but didn't find any in the 2.5 inch scrap collection. I'm still trying to decide if I'm going to use a greys for the spool or a collection of tans.

Will keep you posted on my progress!

Dog Toy: Night TIme Flat Cuddly Polar Bear

by Judy Tucker


Night Time Flat Cuddly Polar Bear Dog Toy


Five years ago, when Taffy was an 8 week old puppy, I put a flat Polar Bear cuddle toy in her crate at night so she would have something to lie on that would feel soft and snuggly.   I had a back up Pink Pig but she never needed the second toy.

So when my niece and her family adopted a Golden Doodle puppy a year ago, I sent her the Pink Pig. 
Apparently Zoe has loved it to bits and they were hoping for a replacement. 

Sadly, the dog toy world had moved on.  Now the flat cuddle toys have multiple squeakers sewed into squares in their tummies.  Not quiet for sleeping and lots of dogs will rip apart a toy containing a squeaker.  The small round plastic squeakers are a choking hazard so a toy with 12 of them is potentially bad news and big vet bill.

I have access to a couple independent pet stores which stock unique toys.  Neither had any toy remotely like Pink Pig or the original Polar Bear.  Nor have I seen anything on-line for years.

I picked up a couple toys today but they weren't really what I wanted.  Then driving home from the pet store I realized I'd had the solution at home all along.  I could make just what I wanted with some berber fleece I had purchased to make dog mats (and haven't yet!) and left over polyester batting.  The toy would be soft, flat, cuddly, squeaker-free and (hopefully) not interesting enough to rip apart.  And replaceable!


I drew out a half a bear on paper from a grocery bag which I had folded in half.  I added a 1/4 inch seam line.   I cut out 2 bears from the berber fleece and one from a scrap of polyester quilt batting.


Then I embroidered eyes and nose on one of the cut berber fleece pieces.


I layered the fleece right sides together and added the batting on top of the wrong side of the top bear piece.  Then I sewed all 3 pieces together with an overlocking stitch, leaving a few inches open on one side of the abdomen so I could turn it to the right side when I was done.  The bottom layer slipped a bit so I had go back and re-sew couple places where the stitching hadn't caught all 3 layers.  I think I could avoid that then next time by making the over-lock stitch a bit wider.   I could have used the serger to assemble this toy but the sewing machine was set up and ready to sew and the serger wasn't!

I used quilting thread and decorative stitches to add a mouth, ear details and claws.  Then I sewed lines across the abdomen in several places to discourage the dog from shredding the bear and will keep the layers together. 

From start to finish this project took me about an hour and a quarter. 

Taffy gave it her stamp of approval.  I hope Zoe likes it too!


Tula Pink Fox Field reprise: A baby quilt from the left-over fabric from the "Fox Tails" quilt kit

by Judy Tucker


Baby Quilt from Tula Pink Fox Field fabric

The kit I got from Craftsy for the Tula Pink Mystery Quilt, "Fox Tails",  came with 3 sets of 2.5 inch strips, 1.26 yards of cream print, and about 1/4 yard of 3 additional fabrics.  They were very generous with the strip sets.   I had enough to make setting triangle in place of the cream print triangles in the pattern and I still had some full strips and a big collection of short pieces left over.

This fabric is so unique that I just couldn't put the left-over fabric in my scrap bag.  I started making blocks and ended up with 26…one more than I needed for this 40 x 41 inch baby quilt.   Here is the completed top. I have enough of the backing from my Fox Tails quilt to back this piece too! Sweet.  I'm looking forward doing the quilting on this.  It's small enough to move around easily so it's a good chance to try out some new designs.

But this isn't the end of my adventures with the Fox Field fabric collection.   I still have almost a yard of the cream print fabric, a block made from twenty-five 2.5 inch squares, a four patch, thirty 2.5 inch squares, and parts of four 2.5 inch strips!   I can see one more, very modern quilt with lots of negative space, yet to come!

3 quilts from one kit. Now that's incredible!


Hexagons! WIP

by Judy Tucker


If you had ever asked me about quilt patterns I thought I'd never use, one would be hexagons and the other would be crazy quilting.  My mom always told me to never say "never."

I'm still holding out on crazy quilting but this week I started making hexagons.  I have a friend who quilts who hasn't been feeling well.   I thought that hexagons might be just the thing for her to work on if she was feeling she needed to do something handy.  It's easy to make one, some… or none.  All good.

So I fussy cut some dogs from Riley Blakes Design "Puppy Park" fabric.


  and some 2.5 inch squares from the SeaBreeze inspired Fat quarter bundle from JAQs Fabrics.
(Their bundles are 10% off until May 26, 2014, if you want one too)!


I'd never made a hexagon block so I thought I should do a couple to put in the bag as examples which I did.  But then I was hooked...

I have stash of left over 2.5 inch squares from an assortment of projects.  I pulled out a selection of yellow greens, yellows and greys. One hexagon has lead to another.

I had jettisoned some solid dark teal Kona from a project so that was sitting on my table. It looks like the perfect background for my hexagons.  After trolling the internet for ideas, I decided to make 12 inch finished squares with a varied configuration of hexagons in each block.  I'm going to appliqué them on by machine.

Here are a couple of blocks I have laid out to think about.


The hexagons remind of organic chemistry class.  I keep thinking I ought to be making molecule diagrams with them!!

I'm using card stock 1 inch hexagon templates which which are free for the printing from
Incompetech.   The 1 inch hexagons were just the right size for my 2.5 inch squares of fabric.

Here is the back side of several hexagons.


I have to say, they are a lot of fun to sew.  This project is probably going to be a WIP (work in progress) for a while. But then, that's the beauty of hexagons.

EQ 7 Jump Start Quilt Along: Block 2

by Judy Tucker


This week we are making the second block in the EQ 7 Jump Start Quilt Along.  This block is called  Eccentric Star.

The lesson this week is about using fabrics and colors available in the program, on-line and by scanning in designing a block.  It's great if you can get the fabric on-line but if not, it's fun to be able to scan the fabric you have in-hand that you think you might want to use.  Or maybe it turns out that a particular fabric isn't you want--Scan once, Cut never!!

Jenny provides information about Resolution, pixel size,  and using Descreen (or Magazine) so the weave of the fabric doesn't interfere with the scan.  Files are saved as JPG files.
Full details on how to do this are on the post for EQ7 Jump Start Quilt Along: Block 2.

Each month EQ offers a free download of a set of current fabrics which you can find on Electric Quilt's (EQ) website in the Fabrics of the Month feature.

I had fun moving the colors and a fabric, a lot like my dark teal, which I found in the EQ Fabric Library, around on the worktable.  I finally decided to add another Kona solid in a slightly different blue.  I wanted the star to shine in the block rather than the rays.

Here is my finished block.  I am using the 9 inch block which is a good size for my fussy cut center block.


And Block 1 and 2 together.


Pyramid String quilt

by Judy Tucker


I just finished my Pyramid String quilt.  This quilt was getting something amazing from (almost) nothing.


I keep a bag of strings (strips of left over fabric) between 3/4 inches and 2 inches wide.  From time to time I will piece them on 2 side-by-side pages of an old book.  (Sometimes it takes a bit of tape to keep the 2 pages together.  That's OK because the paper is torn away after the pages are covered with fabric strips).


I had save up a stack of pages which were primarily yellows and blues with some orange accents.  I had a pyramid ruler (two, actually as it turned out!) and this seemed like a great way to try it out.

2 brands of 60 degree triangle (pyramid) rulers.
 Re. the purple smiley face:
I put stickers on my rulers when I take them to sew in a group setting so that I know which is mine!

I cut the sheet of string into two 4 inch strips.  (If the sheet had more than 8 inches, I saved the remaining strips and they went into a border strip).  I cut the pyramids out of the 4 inch strips.

2 pyramids: I didn't take the photos while I was cutting the  pieces so these are not consecutive cuts.

Then I cut out pyramids from white cotton for the alternating pyramids.
When the quilt was assembled, I cut sides straight, leaving half pyramids down each side.

I used my walking foot and quilted just out of the ditch in a diamond pattern.  I also marked out some larger pyramids, made of multiple blocks, of varying sizes and did some half inch wide diagonal quilting in those pyramids.  Sometimes I filled the whole space with quilting.  Other times I just put in 3-4 lines of quilting.

There is a free motion chain of daisies around 3 sides of the inner border and a wavy double line of quilting in the outer border.   The free motion quilting is a foil to the sharp edges of the pyramids.

The binding is a collection of left over binding from other projects with a couple strips added to make it long enough.  This really is a quilt of left over bits!!

Here is the back.  You'll see there is a tiny strip of the left over bits on this side too.


I've used up my stack of sewn strings.  But the string bag keeps collecting more pieces so I'll need to make some more soon!

EQ 7 Jump Start Sew Along, Block 1: Greek Cross

by Judy Tucker


Electric Quilt (EQ) is hosting a Sew Along on its blog, "Behind the Mouse" called EQ7 Jump Start Sew Along.  This Quilt Along provides basic instruction on the use their quilt designing program EQ7.  The Quilt Along is free, no registration is required, but you do need the EQ 7 program to participate.

Jenny, the instructor for the course, has chosen 4 quilt blocks for the participants to work with.
The first block is the Greek Cross.


The other blocks are Eccentric Star, Rolling Stone and Twin Star.  All the blocks share a central square,    4 corner blocks and 4 middle blocks.

The course has an accompanying YouTube video and printed instructions. You can use just one or both.  I had an easier time following the instructions with the video. Well, actually I was watching the video on my iPad and working out the steps on my computer, so I didn't need to toggle back and forth.
I found the written information helpful for reference when thinking about the blocks.

This course assumes you are starting from scratch with the EQ7 program, so it's great for a novice user.
I expect the designing will become more complex as the Quilt Along progresses.

Today is link up day.  I was so excited when I saw Jenny's post from today.  She showed 6 different ways the components of this block can be put together. I wasn't sure I was going to make the block, but when I saw all the options I made a dive for the stash and started cutting!

Here are some of the options.  I picked a variant for my block because it looked more nocturnal for the Rabbit who is sprinkling Sleeping Dust from the Crescent Moon!

Here are some of the other variations I laid out before I sewed the block together.  You'll see this becomes the Churn Dash block and another one that looks like saltwater taffy in its wax paper wrapper.


There is a link up to post the block every other week and a prize for one lucky person.

I'm looking forward to the next lesson which will be posted Monday, May 19, 2014.

Another Completed New Year's Day Wonky Star Quilt

by Judy Tucker


Another of my friends  New Year's Day Wonky Star Quilt Along quilt is done.   Kace W.  brought her completed quilt to Show at Tell at our Proper Bostonian Quilt Guild meeting last night.

Kace said she was really challenged by the varied intensity of the colors in the charm pack she was given . But she worked it out.  The finish quilt is a beauty!!

Quilt Front

Quilt back--note the 2 strips of left over fabric on each side of the central panel . Nice!!
I particularly like what Kace did with the quilting  The stars are treated as flowers and each as a stem and leaves going to it.  What a great idea!

Kace recently discovered Leah Day's Free motion Quilting patterns.  Continuing her flower motif, she used several of Leah's flower patterns for fill in the negative spaces.  Kace's quilted flowers are beautiful!!
Here's a link to some of Leah's center fill designs.


The wonky triangles in her pieced border are so much fun, and they echo the wonky star points.  
She also put in a tiny green phlange separating her border from the binding. 

Kace…Congratulations on this beautiful quilt!!  Well done!


Tula Pink's Fox Field Craftsy Mystery Quilt Completed!

by Judy Tucker


I finished up the binding, completing my Craftsy Tula Pink Fox Field Mystery Quilt today.  I'm delighted with how it turned out. 


I had a lot of fun doing the quilting.  I followed the diamonds with some straight out-of-the-ditch quilting using my walking foot.  The seams on some of the inner diamonds didn't follow from block to block.  So in those places, I just quilted each side of the diamond, starting and stopping at the seam lines. 

I used free motion quilting in the centers of each block.  Some fabric designs have hidden rabbits, fox, horses and birds.  I couldn't resist having the mammals leave their footprints in some of the center diamonds.  Sorry birds, not your quilt this time!


Horse shoe imprint

Rabbit tracks

Fox footprint
A rabbit was centered in one of the blocks so I highlighted it with a special flower.   The remaining blocks all have a double daisy in the center diamond with meandering in the first strip around each diamond.

Flower showcasing rabbit in center diamond


Double diasy in center block


I had put aside a set of pink and grey strips but in the end I felt they were too much a mix of light and dark to be a good binding.  So I used a grey on grey zig-zag from my stash--a quiet margin on a bright quilt.

This was great fun!  

Happy Nurses' Week and Congrats to the New Nurse Graduates!

by Judy Tucker


Happy Nurses' Week to all you quilting nurses out there!  I know there are a lot of us!  Keep up the great work!

During the years I was a nurse practitioner in pediatrics, I had the great pleasure to work along side a number of excellent medical assistants who were making their way through nursing school part-time.
They had long hours on the job, long hours in class and clinical, and families to care for too. It takes amazing dedication to earn your nursing degree by that route!

So, a special congratulations goes to Stephanie, who has just earned her Bachelor of Science in Nursing!  Well done, and well deserved!!


I thought about giving Stephanie a quilt to mark this milestone, but I know she'll hang it on the wall.  So I decided to make her something especially for the wall!

I considered running over the my local quilt shop which has some fabric with a nursing motif.  But as I thought about it, using my bag of strings left over from other projects to make a block seemed like a great idea.

Over of course of our careers, we care for patients of all kinds of stripes--different colors, ethnicities, cultures, beliefs, live-styles and ages.  Only by seeing the whole person, not just the diagnosis or problem list, can a nurse really truly care for his or her patient.   I hope this small piece will remind  Stephanie to think about all these factors with each of patients she cares for.

I drew the letters for the BSN, Bachelor of Science in Nursing,  (all that doodling in junior high finally paid off!) and appliquéd them to the block. It's not quilted…just a block in a frame.

Photo Album of Today's Quilters and their Quilts on the MFAs Facebook Page

by Judy Tucker


The Museum of Fine Arts, Boston, has posted a photo album of today's quilters, including their quilts, on their Facebook page this morning.  This "Happy Huesday" post is part of their current "Spring into Color" theme.  The  photos of quilts being made today relates to their "Quilts and Color: the Pilgrim/Roy Collection" exhibit of quilts.  The quilts on exhibit were mostly made during the 1800s and early 1900s.


Here is a link to my photo the the MFA's Facebook page.

And here's the link to the complete MFA's FB "Happy Huesday" quilter's photo album.    Three of my friends, Janet, Ginny and Amy are in the photo album.  Check it out!

You can add a photo of your own too!  Join the fun.  We want to see what YOU are doing!


Dog training apron

by Judy Tucker


Necessity in the mother of invention, or so they say.  With the warm weather finally here, I find that my lighter weight pants don't always have enough pockets for all the things I need to carry while training my 3 dogs.  I could add a bait bag for treats, but that only partially solves my problem. So I decided to make myself a dog training apron today.  I wanted to be able to slide my hands into the pockets sideways for quick access.  I decided it might be great to add a compartment for my mobile phone too.

Dog training apron (mobile phone centrally, peaking out of its pocket)


Selfie with Dog Training apron on!

I checked around my stash and found a remnant of ticking fabric which was just the right weight.  The green fabric is quilting weight cotton and has a tiny white polka dot. It was a remnant too.  The Labrador retriever fabric was also in my stash--that extra pocket was a last minute addition.

I started by making a tube of fabric from  a piece of ticking and an piece of the green cotton of the same size.  I left the two ends of the tube open so I could add the apron ties at the end.

Tube with both ends still open.

Then I cut another piece of ticking the same size as the first one.  I used the 60 degree marking on my quilting ruler to cut both ends of the rectangle at an angle.  Then I cut a piece of green cotton the same size.  I sewed them, right sides together, leaving a couple inches at the bottom so I could turn it inside out.  Then I sewed the open edge closed.

Large central pocket

The mobile phone pocket is in the center of the large pocket.   I sewed hook and loop strips to the back of the large pocket and front of the apron panel to keep the phone from falling out if I lean over too far.


Hook and loop closure tape on the back side of the large pocket


I added a small pocket to the center of the large pocket so I can carry more than one type of dog treat or poop bags (responsible dog people always have a few on board}.

I  next sewed the large pocket to the back of the apron and added two lines of stitching just lateral to the small pocket with the dog fabric to create the pocket for my phone. 

Finally I made two ties from the ticking fabric and sewed them into place.

Success!  The slanted pocket keeps a small bag of treats open and upright, the little pocket works well, and the mobile phone pocket is perfect.  

Now, off to train the dogs!

Color Study 4: Complimentary Colors

by Judy Tucker


I was going to stop my color study series at 3 because once again I have a stack of UFOs to finish and some other projects in the works.   But at lunch today, while flipping through the book,  Fat Quarterly Shape Workshop for Quilters (see the side bar for more information about this book), I saw there was a pattern for an appliqué  orange peel block.  There is an orange peel quilt in the "Optical Illusions" section of the "Quilts and Color" exhibit at the MFA, Boston.  A 12 inch square?  I could do that!

Orange peel block, with grape hyacinths and lattice fencing  12 inches square

The quilt at the MFA is periwinkle blue and red orange, complimentary colors.  I chose another pair of complimentary colors:  yellow green and magenta. I also modified the block from the book which had the peels running from corner to corner with half peels in the outer edges of the corners.

This block pops, but I don't think I see an optical illusion here.  (Not sure about it in the museum quilt either)!

I used my walking foot to echo quilt the orange peel design.  I was surprised how much I enjoyed doing that circular quilting and am very pleased at how this little piece turned out.

Color Study 3: Gradations

by Judy Tucker


Here is my third color study inspired by the ""Quilts and Color" currently at the Museum of Fine Arts, Boston.

Study of Color Gradation:  14 inch square, hand quilted

This is a study in color gradation, which creates depth.  All the strips came out of my scrap bag…now that's a good project!  It's 14 inch square.

There are 3 sets of strips in each layer of the gradation, light, medium and dark in the same color.  (The Sunshine and Shadows quilt in the MFA exhibit placed the gradations the opposite way--dark to light).

I think that if I had gone from yellow to orange to green the block would have had more depth but it would have been less interesting.  The Sunshine and Shadows quilt at the MFA mixed it up like this and I wanted to see what happened when I tried it.

While I use dark and lights for contrast in my quilts, but I've never used them in a series like this. I do like what the gradation does and I know I'll be using it again in my quilts.


Color Study 2: Purple to Blue

by Judy Tucker


Color Study: Purple to Blue with Compliments.  A  table runner, 17.5 x 40.5 inches

This color study was a real challenge.  Purple isn't my favorite color and I really struggled even defining my purples.  I went to a local store with a large collection of Kona cottons and found what I thought was the perfect spectrum of blue to purples fabrics.  Until I got home and laid them out…

What is purple?  What is violet blue?   What is real blue?   The only one I was confident about was red-violet/magenta.

I'm not sure the color in the photo is all that clear either.  But here are my red-violet, purple, blue violet selections and blue selections.


For this project I used 2 sets of analogous colors:
     Purple, blue-violet and blue
     Yellow-green, yellow and yellow-orange
Two of the colors are transitional colors.  (They are called transitional because they are made by mixing 2  primary colors).
     Purple--a combination of red and blue
     Green--a combination of yellow and blue

The yellow is the compliment of purple and yellow-orange the compliment of blue-violet.   I picked the green rather than orange for the block because I liked the effect better.
I then added some orange accents because that is the compliment of the blue.  I also chose orange thread for quilting.

Still unsure about what real purple is, I raided my stash and found 2 another purples so there are 3 purples in the project.  I think in the end, the purple in my border is the best purple of the three.

The first set of pinwheels I made combined blue and purple (middle block on the right above).  I didn't like them that much. They seemed harsh to me.  I'd jumped a step on the color wheel from purple to blue, bypassing the blue-violet.  So then I made several more blocks with blue-violet and blue, which I found more pleasing (top and bottom block on the left).  I put both pairings in the table runner for comparison.  This is a color study so I thought it would be good to include both pairings!

Blue with blue-violet (left),  Blue with purple (right)

I also found that the purple color seems to change depending on which other color I paired with it.  More than once I picked out a block which I thought had a purple I didn't want to use in the table runner, only to find that when I put the "wrong" purple right next to the "right" one they were the same!

I think one of my issues with purple (i.e., why I don't like it that much) is because it absorbs so much light.  Sewing the purple was like sewing black. I found it hard to see my stitches or where I was going.  I much prefer lights and brights!

Here's something else I noticed.  Standing up close to my computer monitor the colors in the wall hanging look washed out.  When I stepped back, the intensity and color was much truer to life.

I really like the completed table runner.  It's vivid!!

Here is the flip side:


This color study was a lot of fun and I learned a lot doing it.
I have an idea for a small project (just one block I think) using color gradations.  I'll keep you posted!


Book report: Minimal Quiltmaking by Gwen Marston

by Judy Tucker


When I ordered Gwen Marston's book  Minimal Quiltmaking pre-publication from Amazon.com in February I really didn't know what I was getting.  I really liked the "Winter Birch" quilt on the cover and knew this was going to a book about contemporary quilts.  I'm always interested in reading anything about Modern Quilting.  (FYI:  This book has the fiercest copyright statement I have seen.  No part of the book may be reproduced and there isn't a "look inside" feature at Amazon.com.  You'll need to click the links to get an idea about what is in the book).

Little did I know when I placed the order how apropos its arrival last week would be. This is a book about color and quilts!  Just what I have been thinking about a lot lately.

Gwen asked 22 quilters around the country to contribute quilts to the book and she includes dozens of her own quilts as well.  Some of the quilts were created by the women especially for the book.  Several of the quilters said in the comments about their quilt that when Gwen asked for a minimal quilt, they that to think about what that really meant.  But they had fun rising to the challenge.

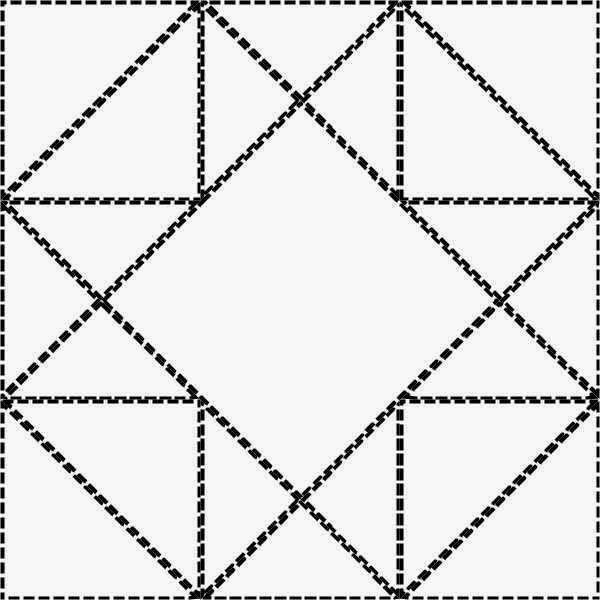
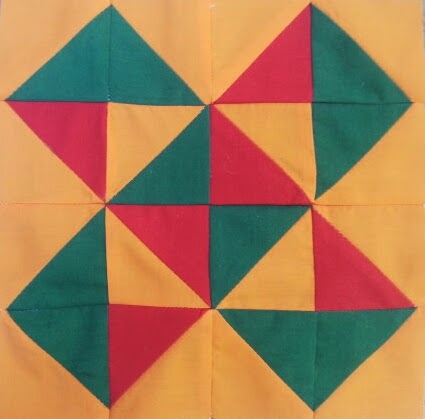
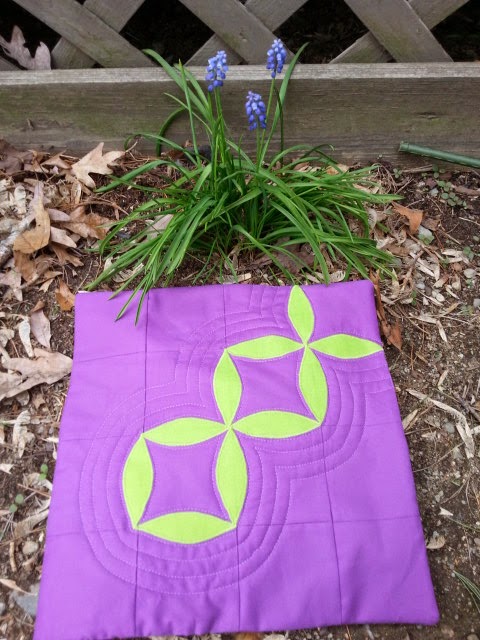
The book is divided into chapters with different types of minimal quilts--they include "minimal quilts"(solids, mostly bright colors), "hard-edge quilts" (fabric cut with a ruler with sharp edges, no wonkiness), quilts with "minimal colors" (studies in pastels/neutrals), and "minimal quilts inspired by art."

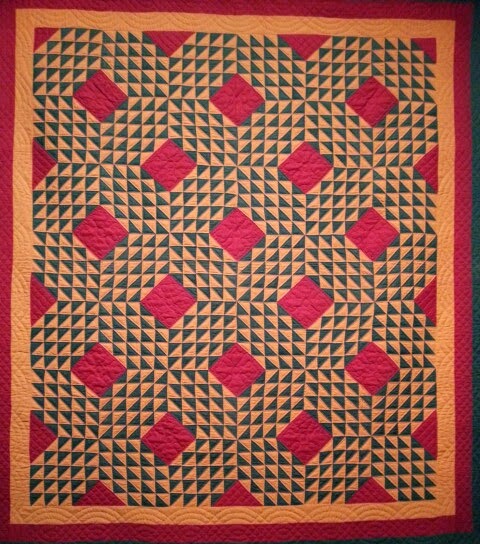
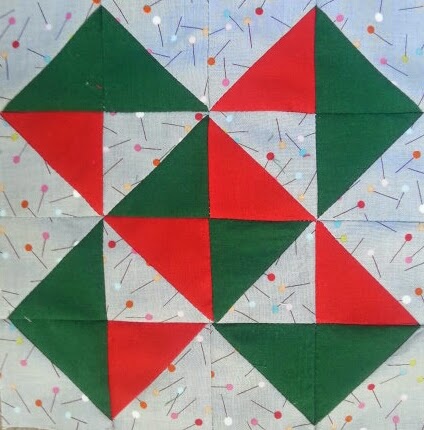
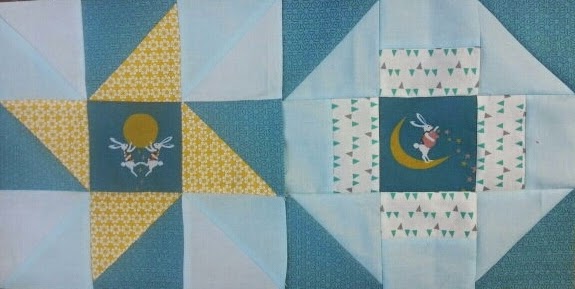
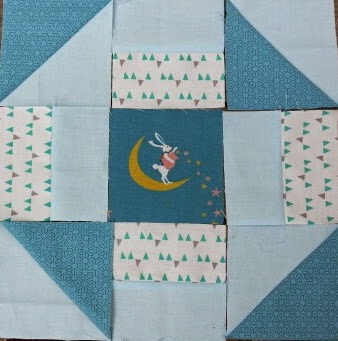
I bought the book based on the image of the Winter Beech tree on the cover.  I think only 3 of the quilts in the book actually have a concrete image and even for one of those, you'd have to read the label to know what it is (a lily pad).

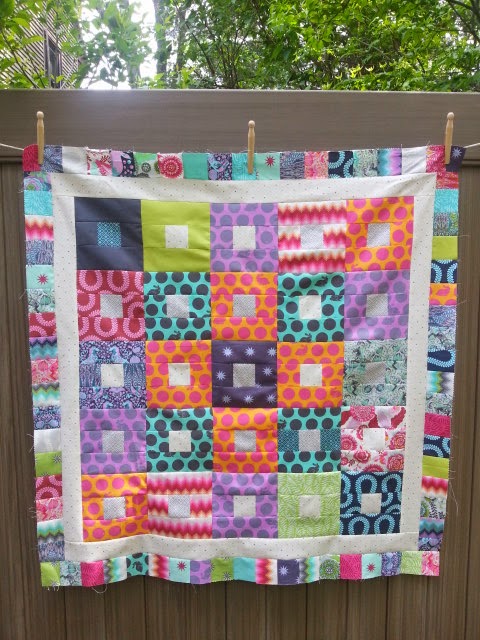
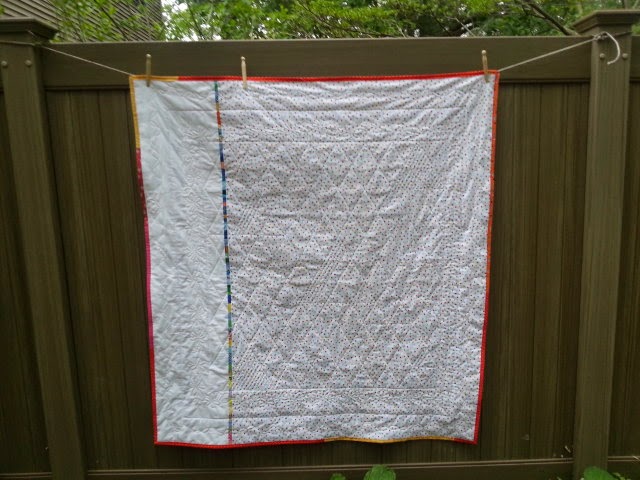
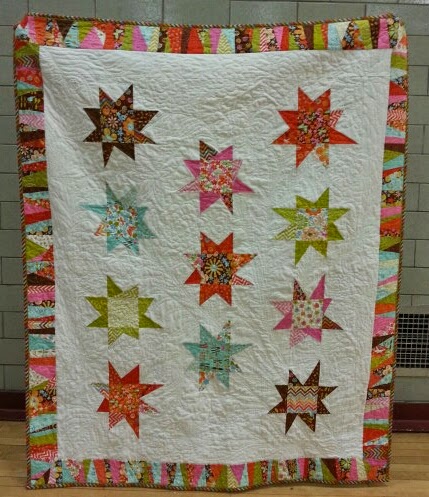
The rest of the quilts are really color studies: improvised designs with lots of pieced strips and blocks of color.

It was fun to see the quilts influenced by modern artists.  Here are just 3 of the artists who's work is reflected in the quilts.

I hadn't realized before that quilts that aim for "transparency" were inspired by tissue paper work done by 
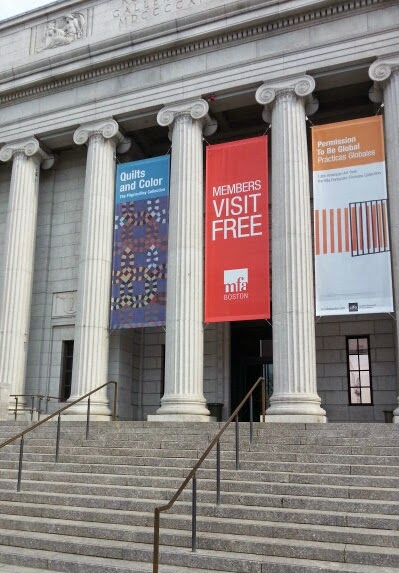
Josef Albers.   It seems like a lot of quilters, and quilt collectors, have really been influenced by Albers.  Gerald Roy, a student of Albers, talked a lot about his work in the recent lecture I heard at the Museum of Fine Arts, Boston.

The author has made several quilts influenced by the work of  Piet Modrian.  (I'm just old enough to remember the dresses in the 1960s which were also based on his artwork)!

Paul Klee is another artist whose art influenced the quilters featured in this book. His art is a lot of fun and you can easily see why a quilter would drawn to his work.

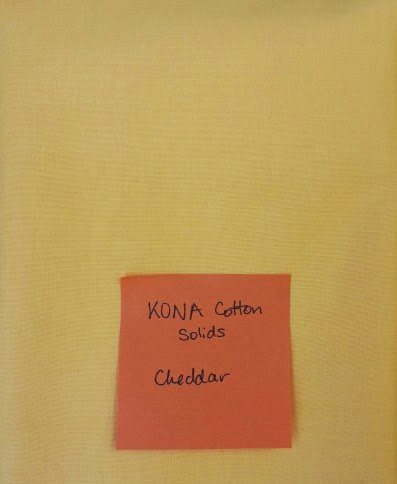
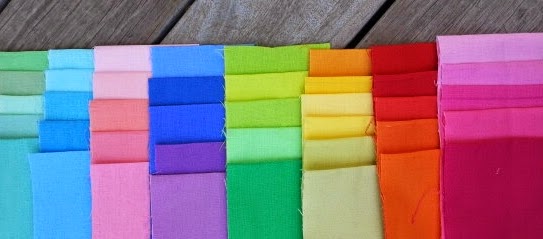
Many of the quilts in the book were made using Kona cottons because of the wide color options available.  Cherrywood fabrics and some linen are also used.

I was able to find two of the quilts in the book made by Lynn Harris (TheLittleRedHen) on the Internet:
"Zinnias"
And a pattern for Daisy Chain.  This is one of the few quilts in the book which has an identifiable subject and isn't totally abstract.

Here are two blogs written by contributing quilters.
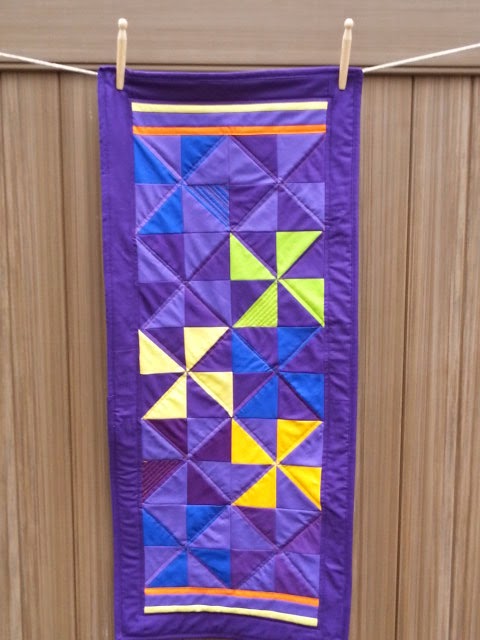
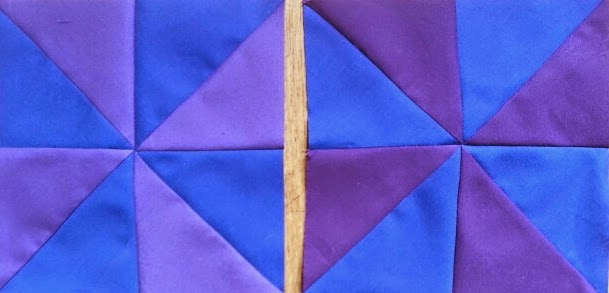
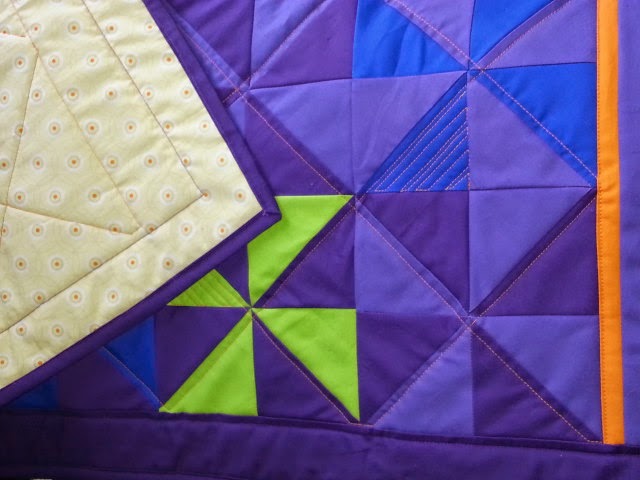
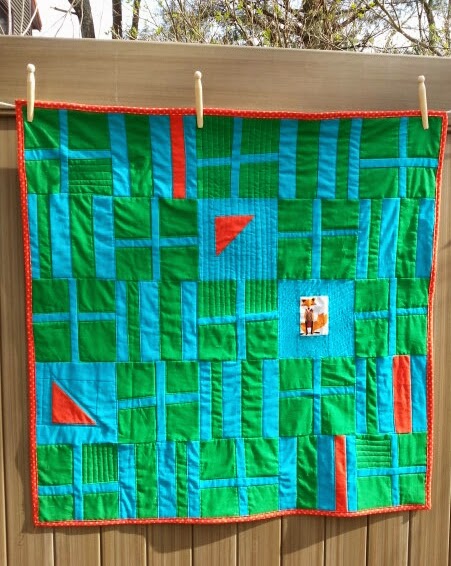
Over the fence designs, Pam J. Beal
Kristin Shields Folk Art  (scroll to the bottom of the page and click on Gwen Marston and Liberating Quilting

If you are interested in the Modern Quilting and the use of color and line, you'll appreciate having this book in your library.  And on your coffee table!


Color Study 1: Crosses and Losses variation completed

by Judy Tucker


I was able to quilt and bind my color study quilt, Crosses and Losses variation today.  I'm really pleased with the way it turned out.

I know that yesterday I wrote that I was thinking this quilt was going to be saved to give to a baby at some point,  but scratch that thought!  I really like it!  I'm going to keep it and put it in the rotation of small quilts which I keep on display in my front hall.  This quilt is such fun to look at!