Hanging a Quilt Show

by Judy Tucker


The Proper Bostonian Quilters Guild has a mini quilt show, The Modern Quilt,  at the West Roxbury branch of the Boston Public Library.  The show opens at 6 PM this evening and closes at 3 PM on Saturday, November 15, 2014.  Click the link above for a flier for the show.

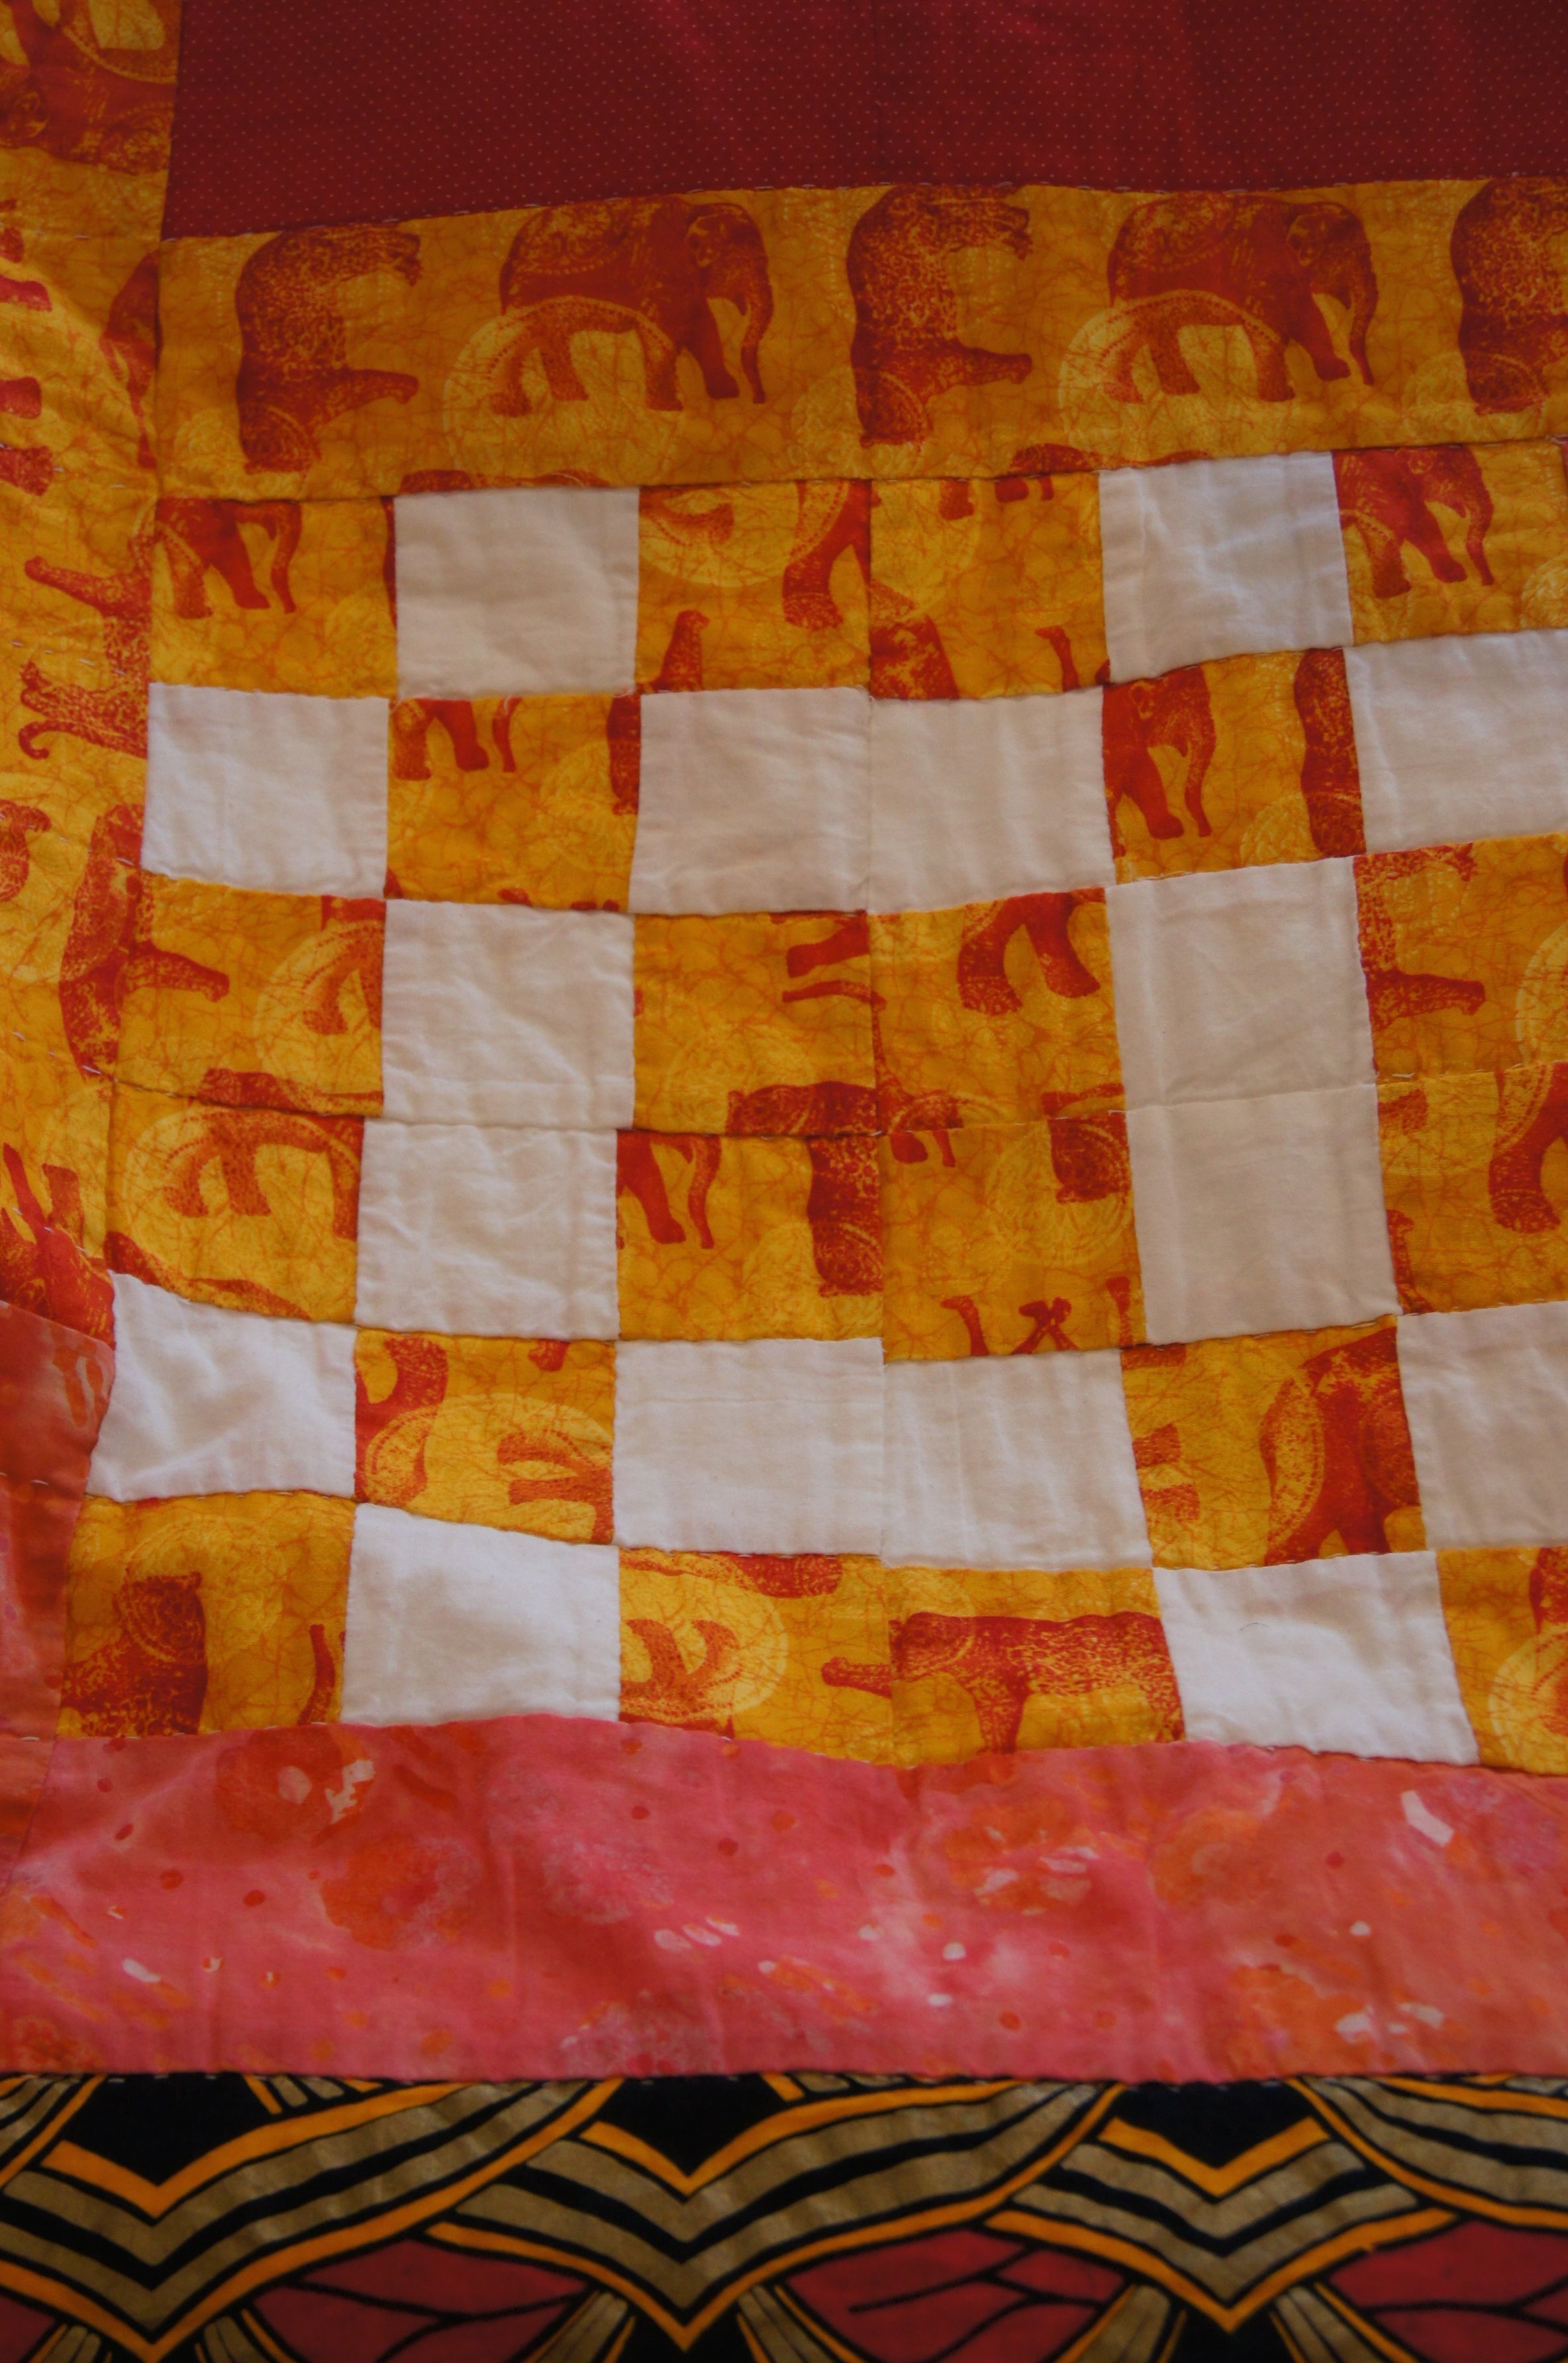
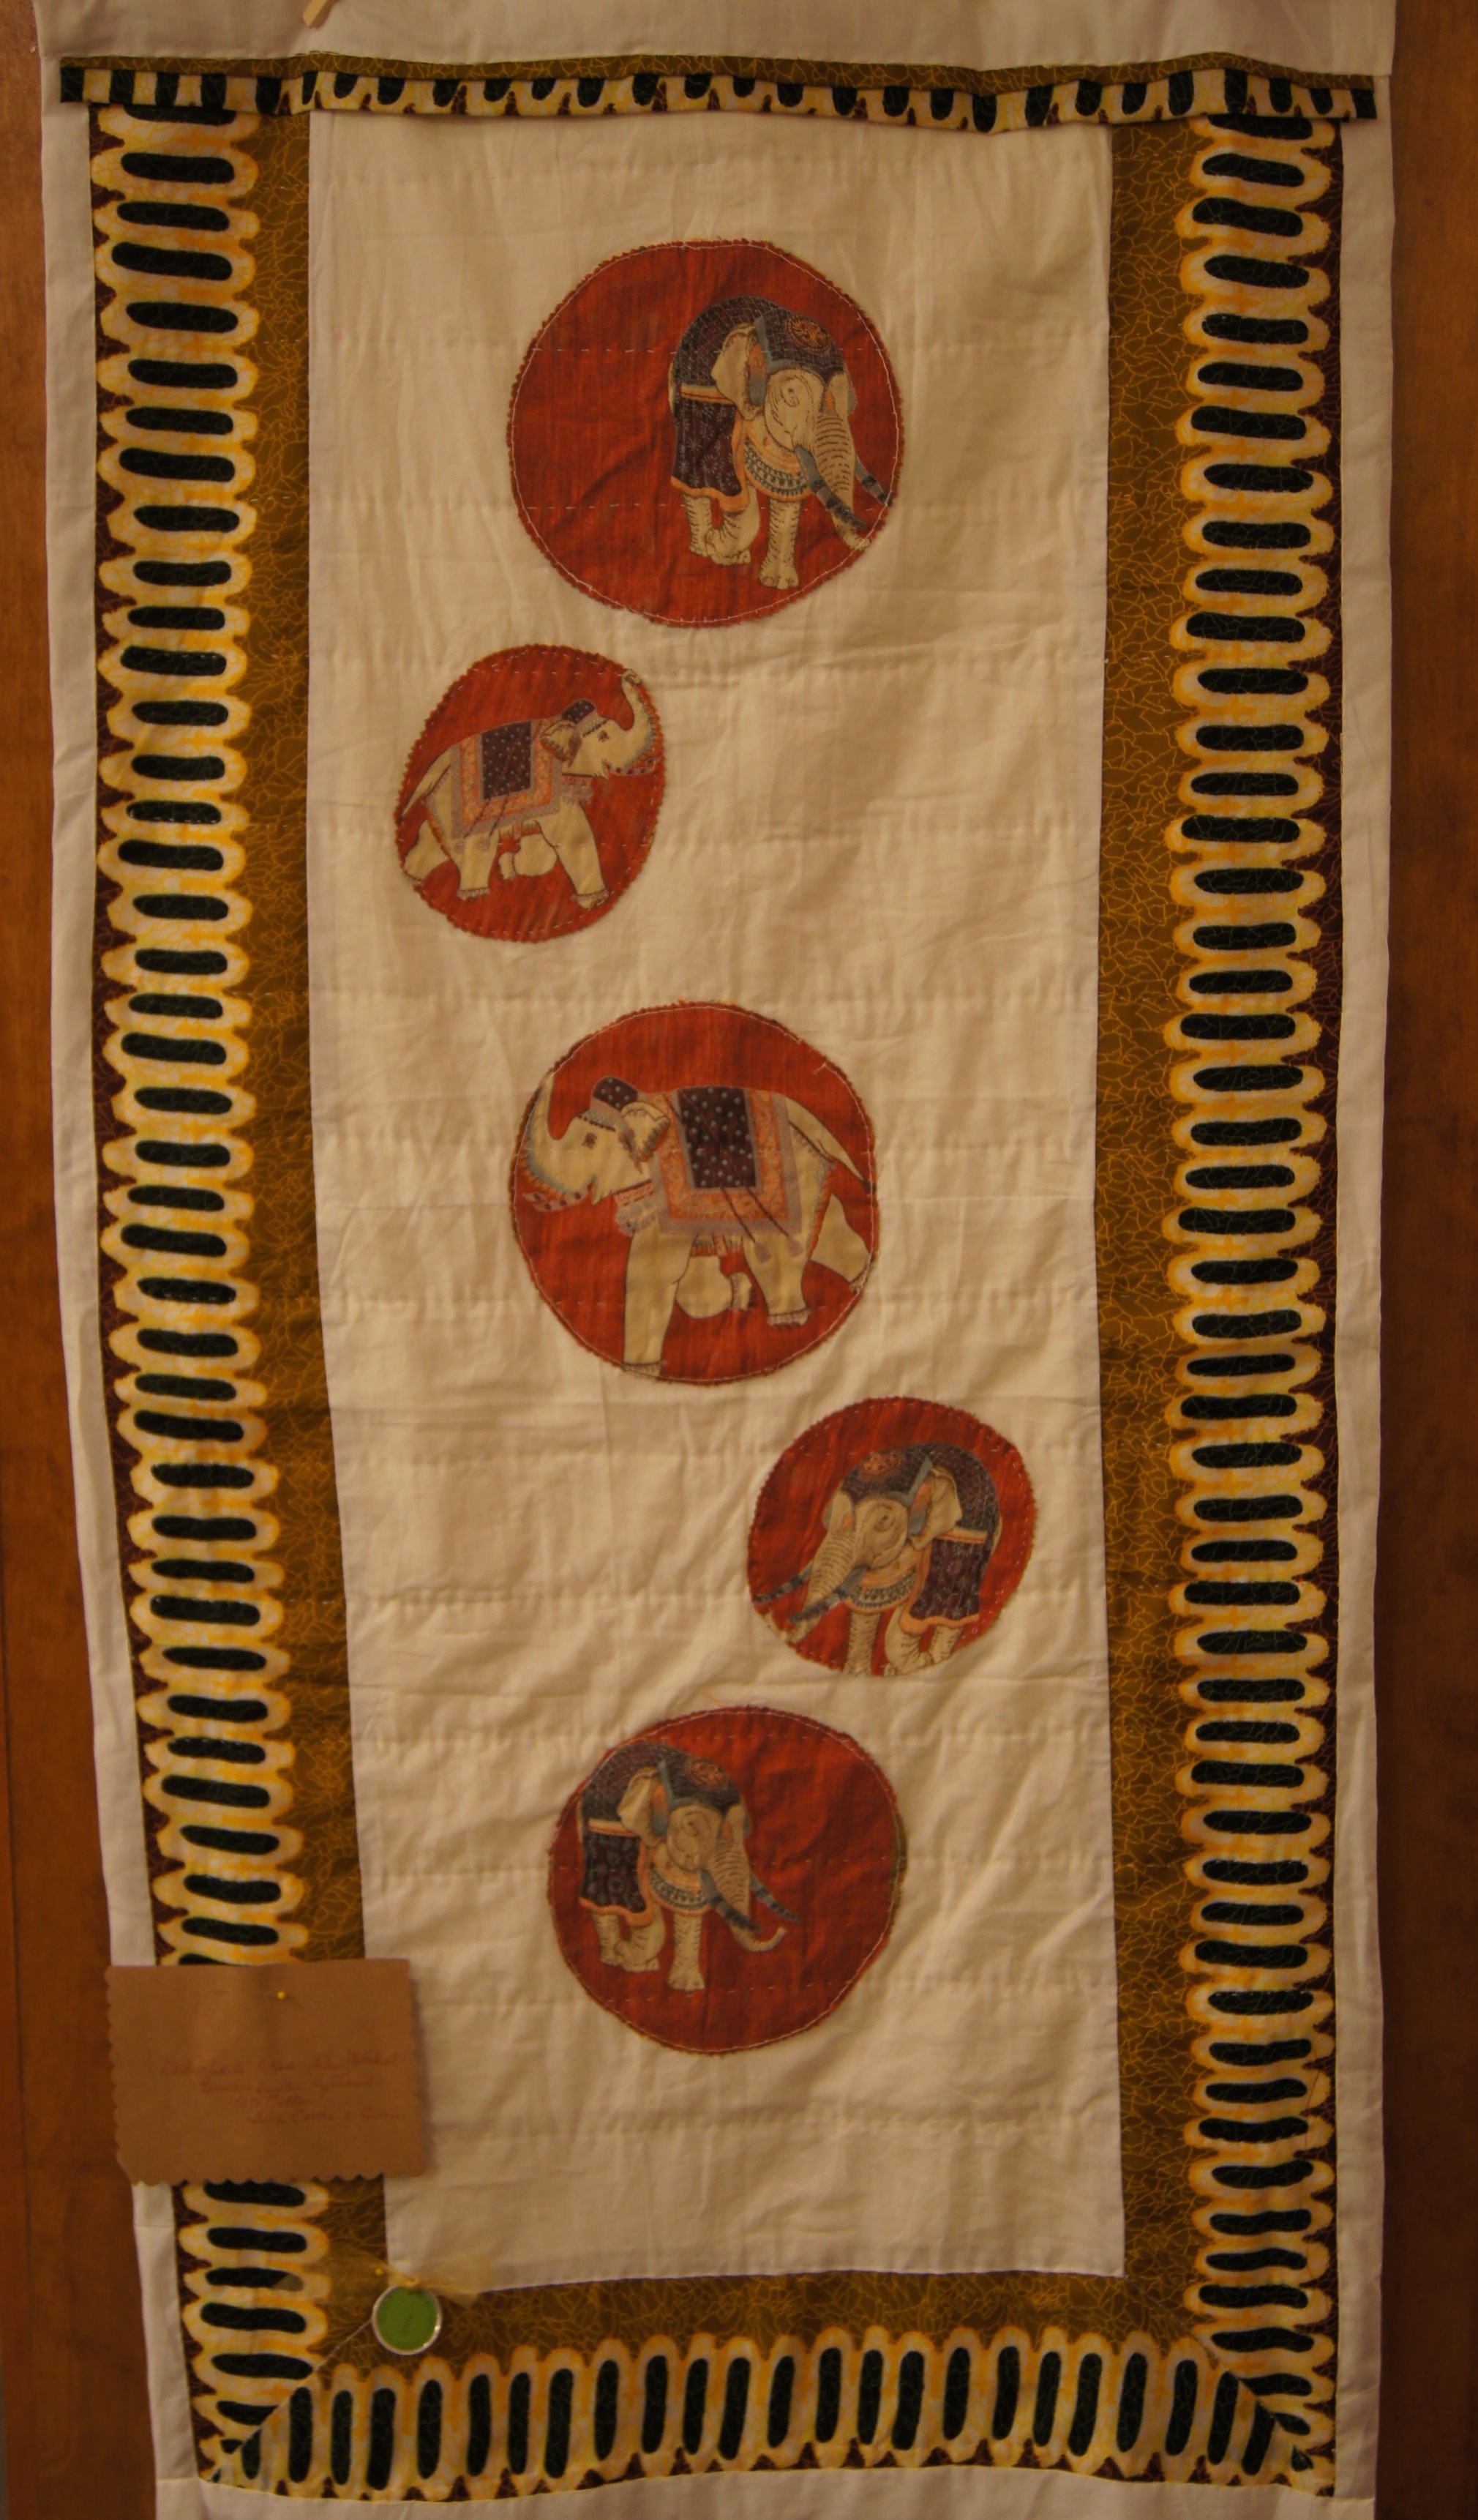
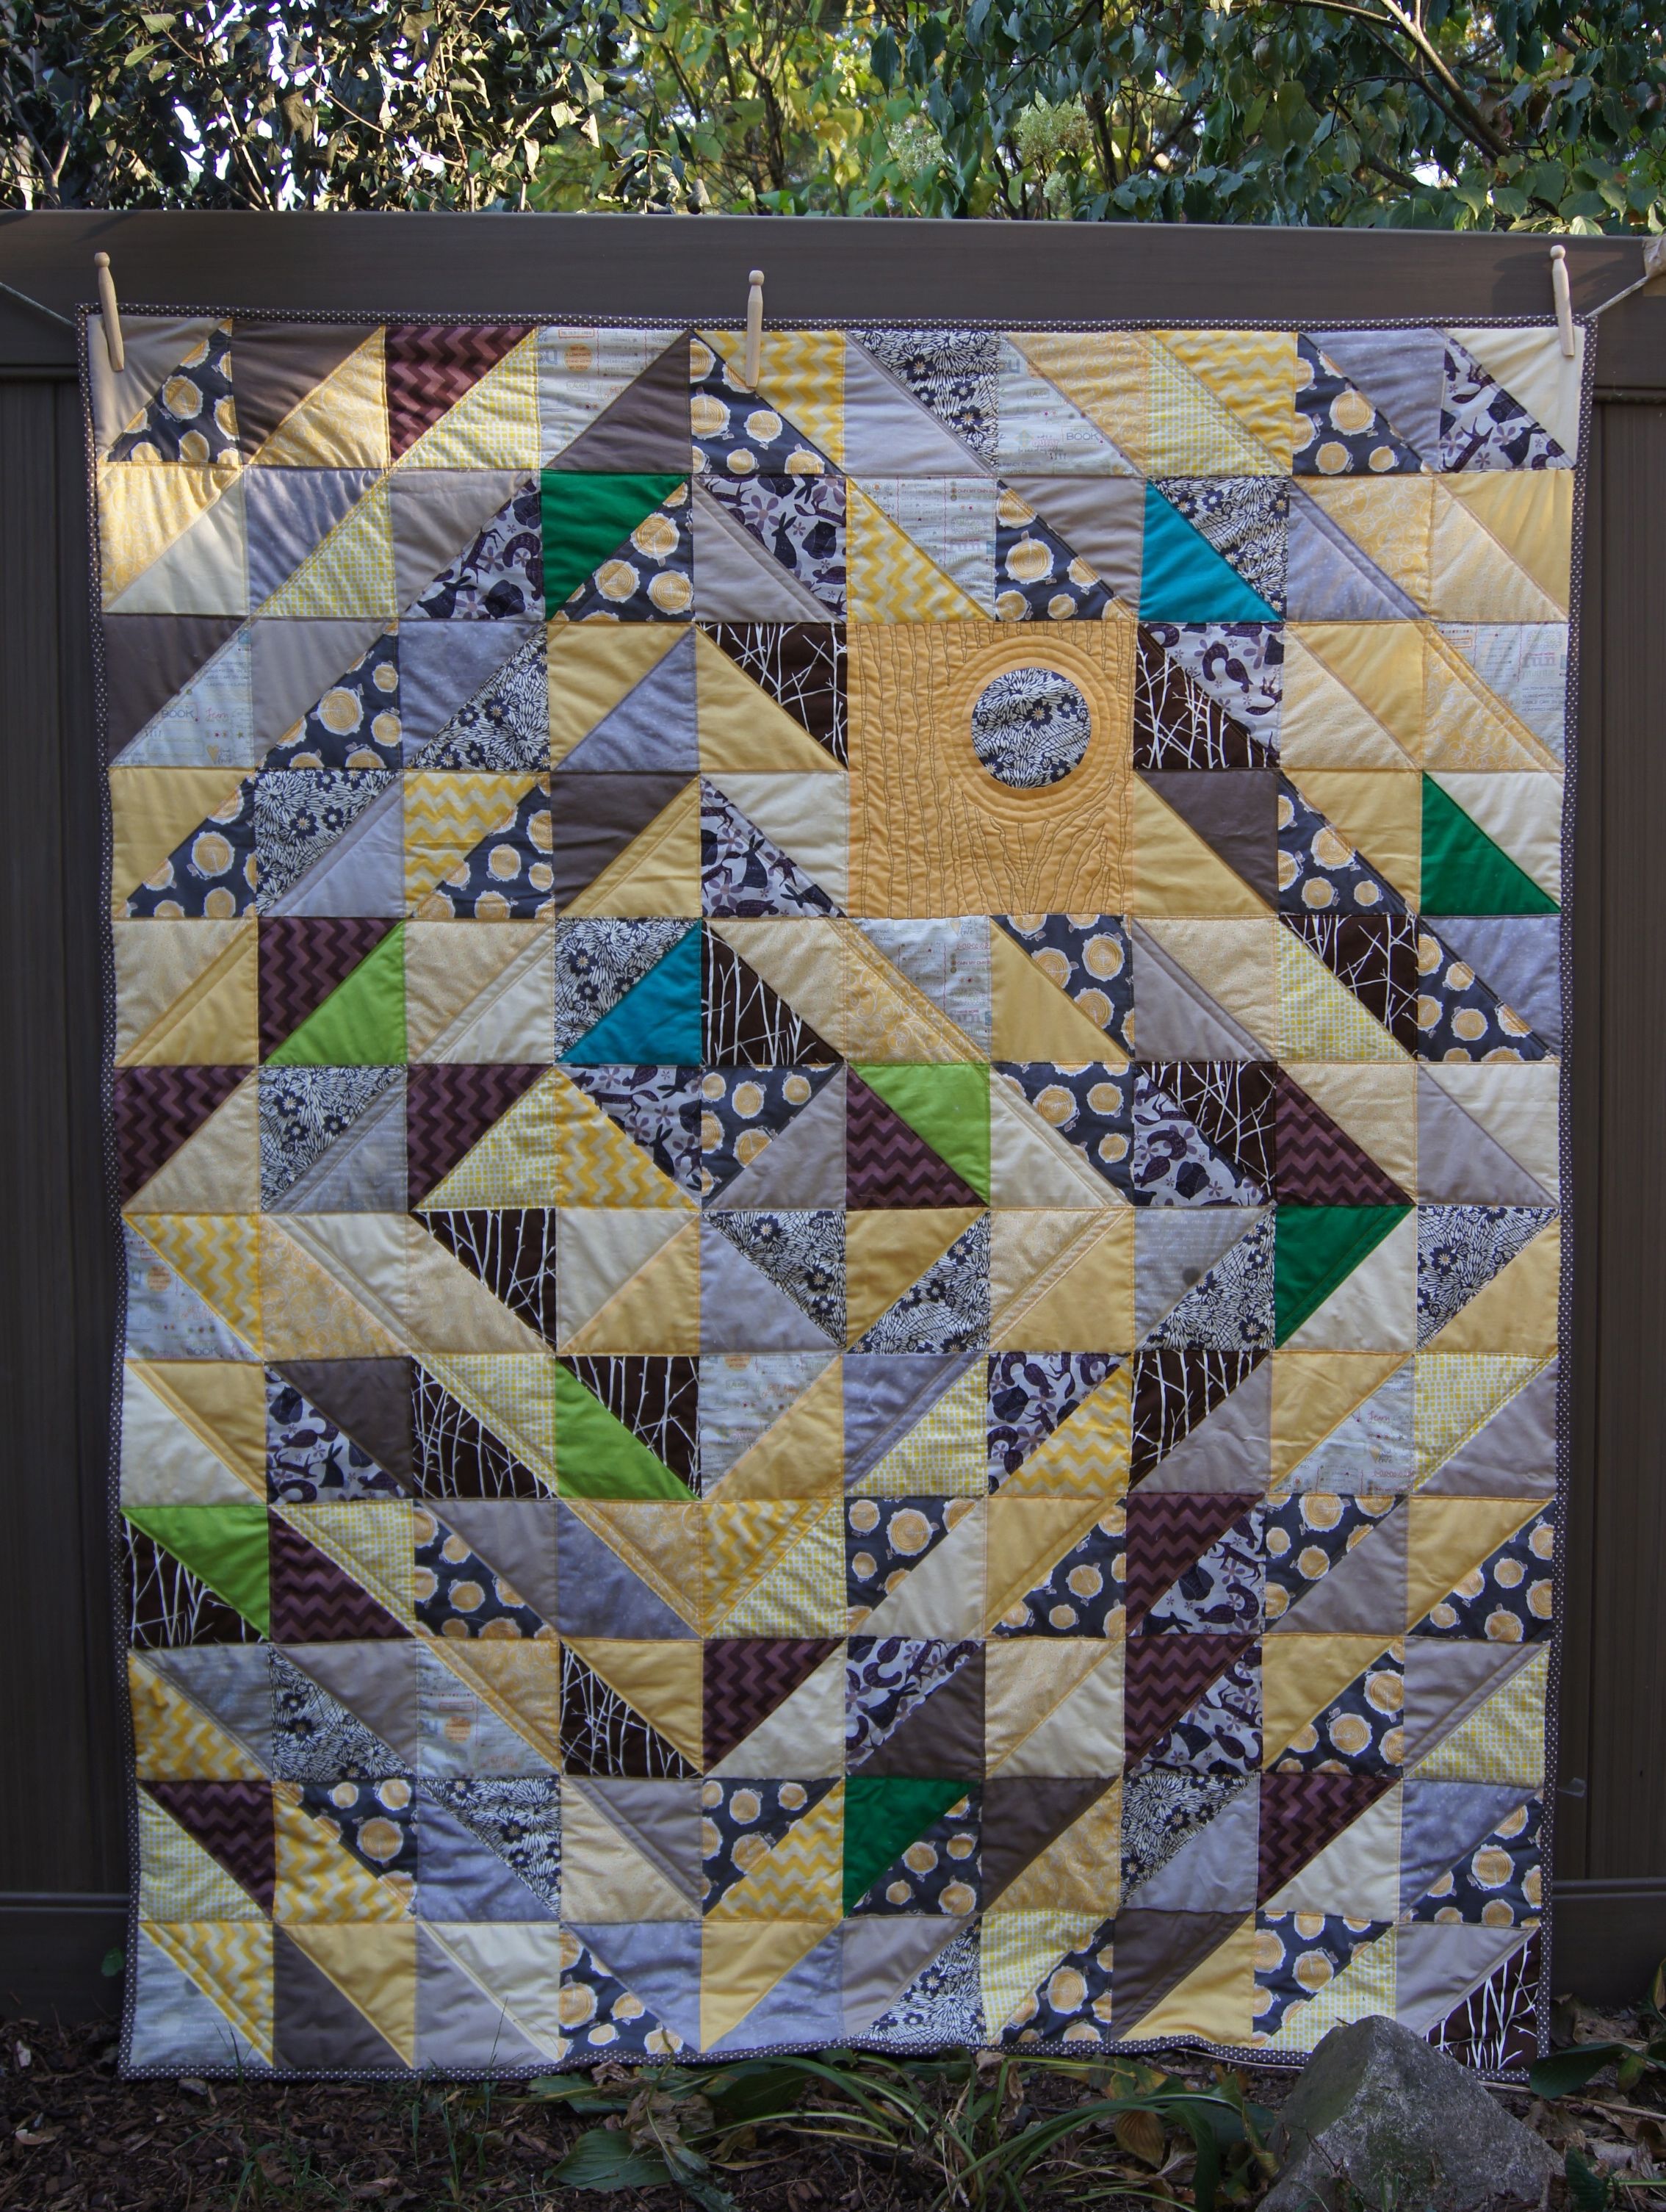
This show features the quilts made by the members of the guild for the 2014 summer challenge. Quilts had to have a Modern Aesthetic, and quilts under 24 x 24 inches were required to incorporate a fat 1/16th of the Pantone color Radiant Orchid (Cerise if you speak Kona cotton). 

The show is free.  If you are local, I hope you'll stop by and see our quilts.

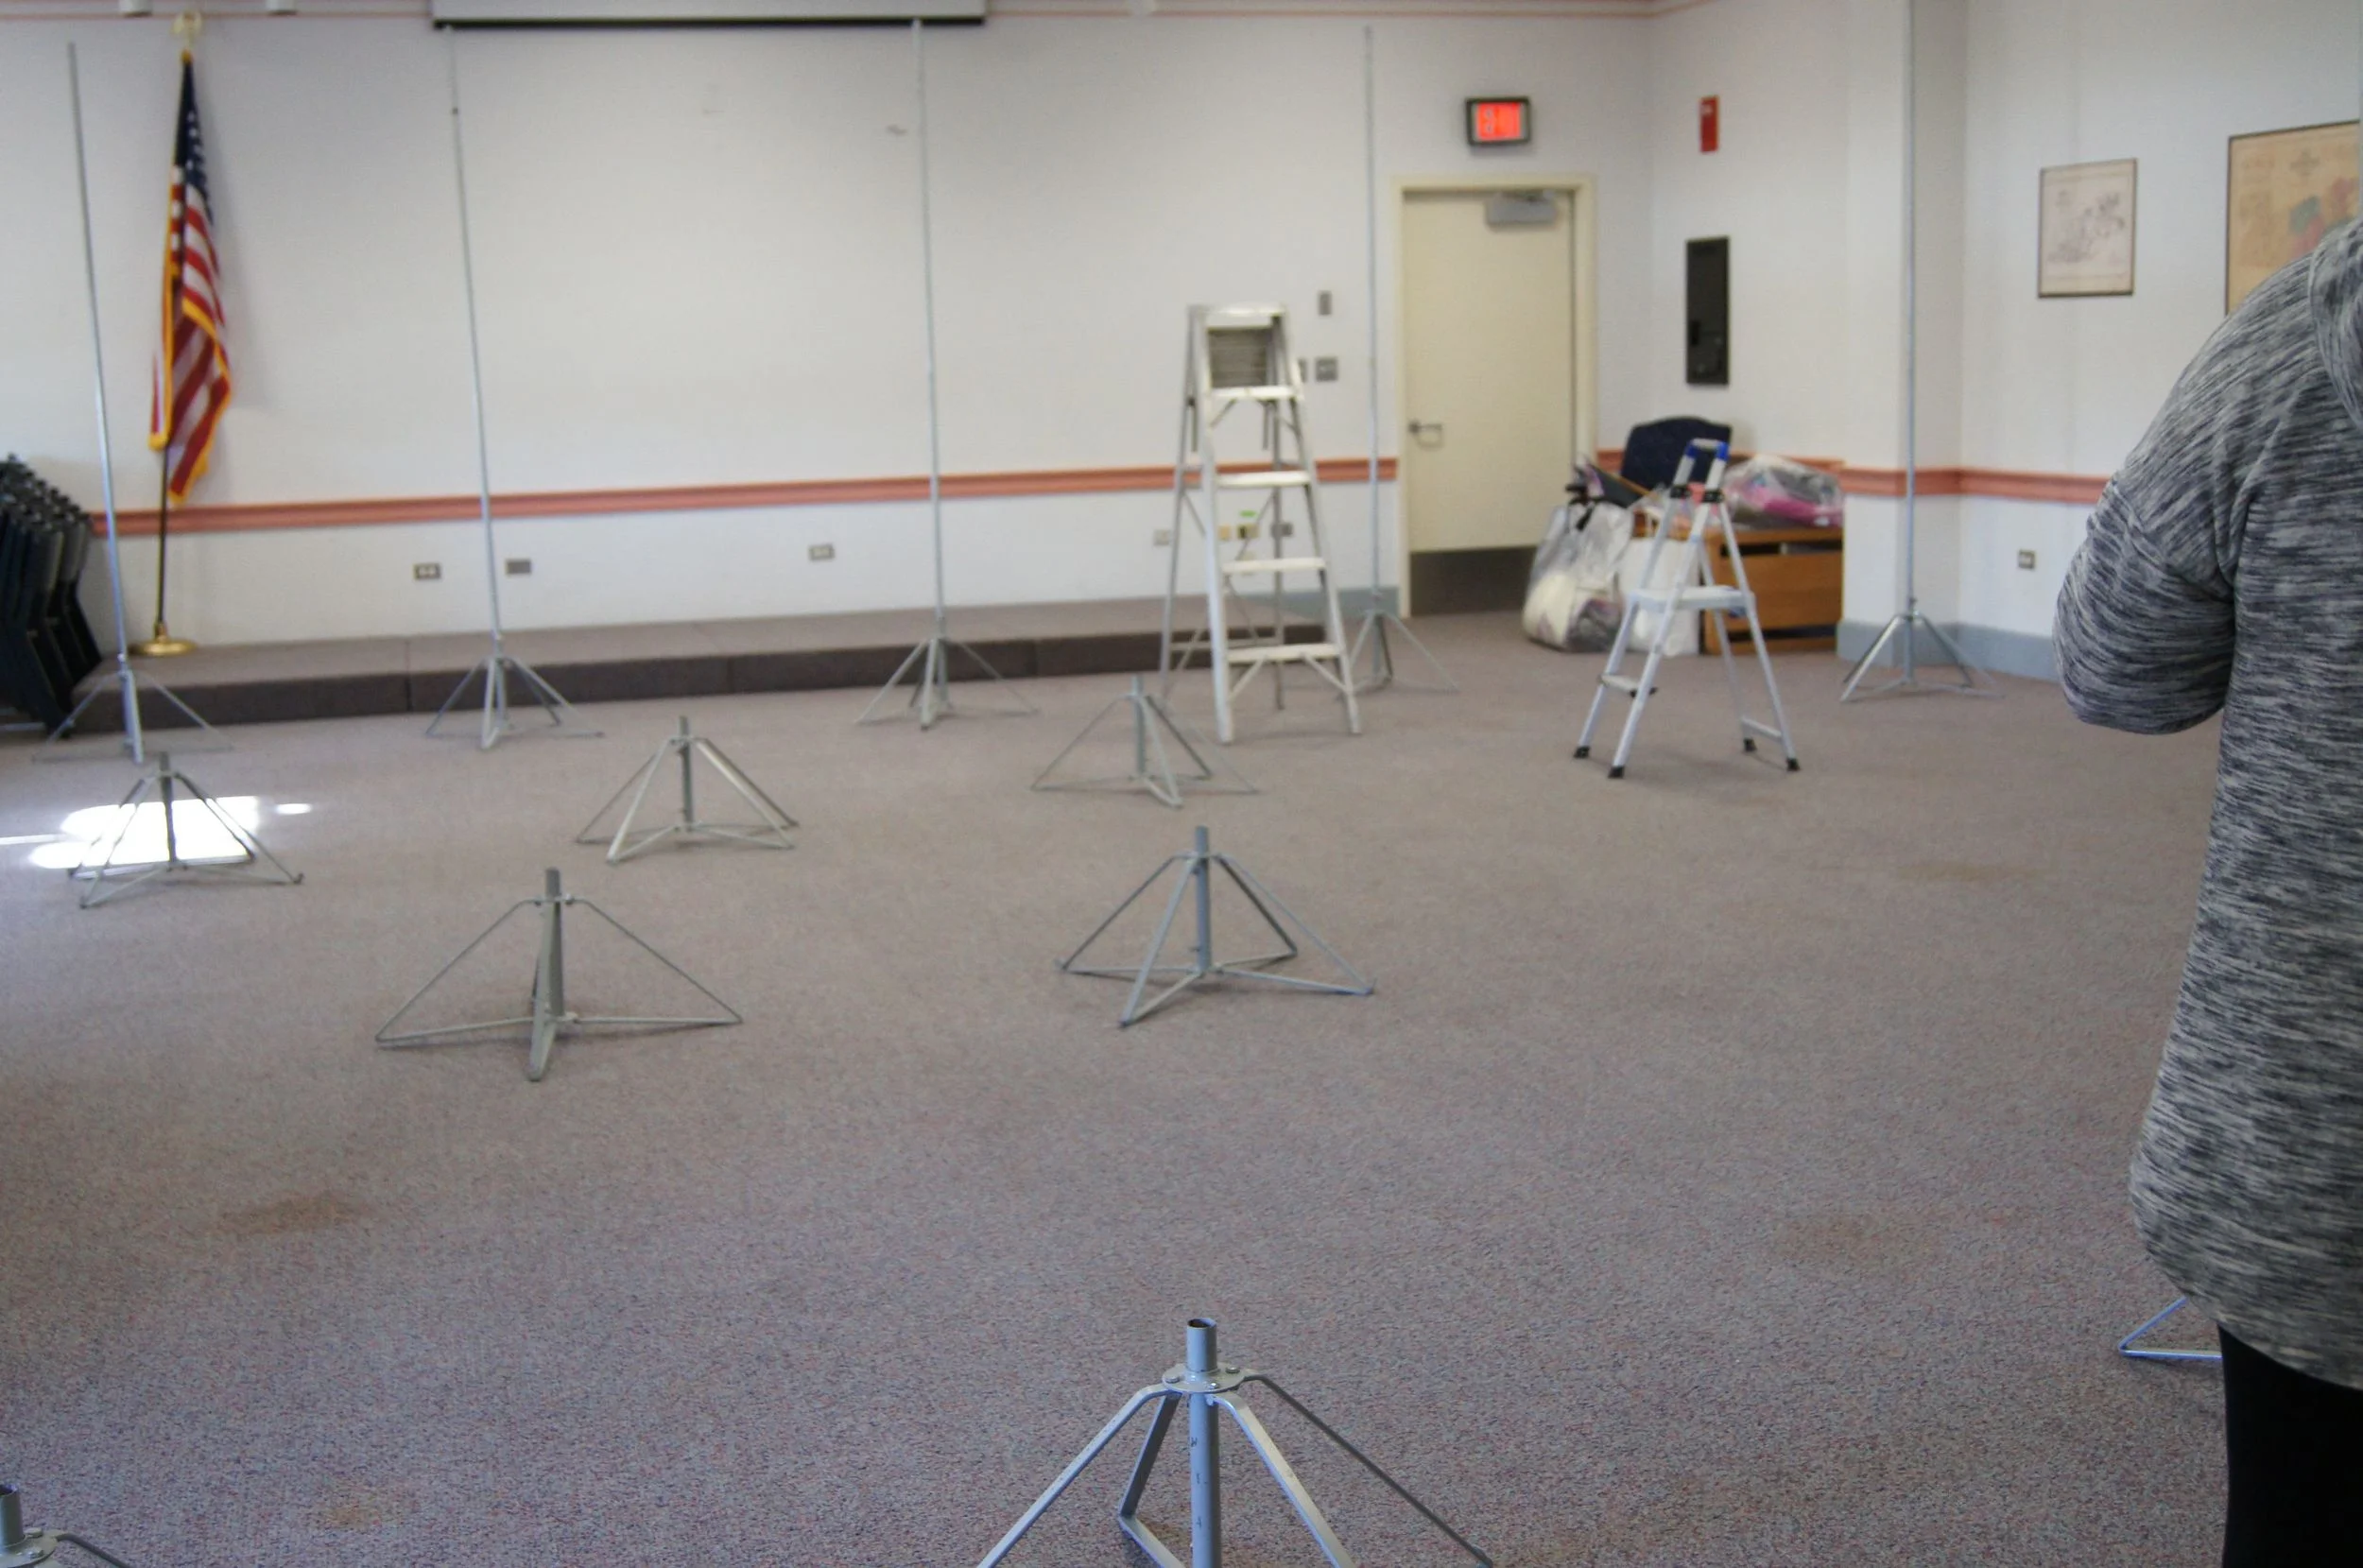
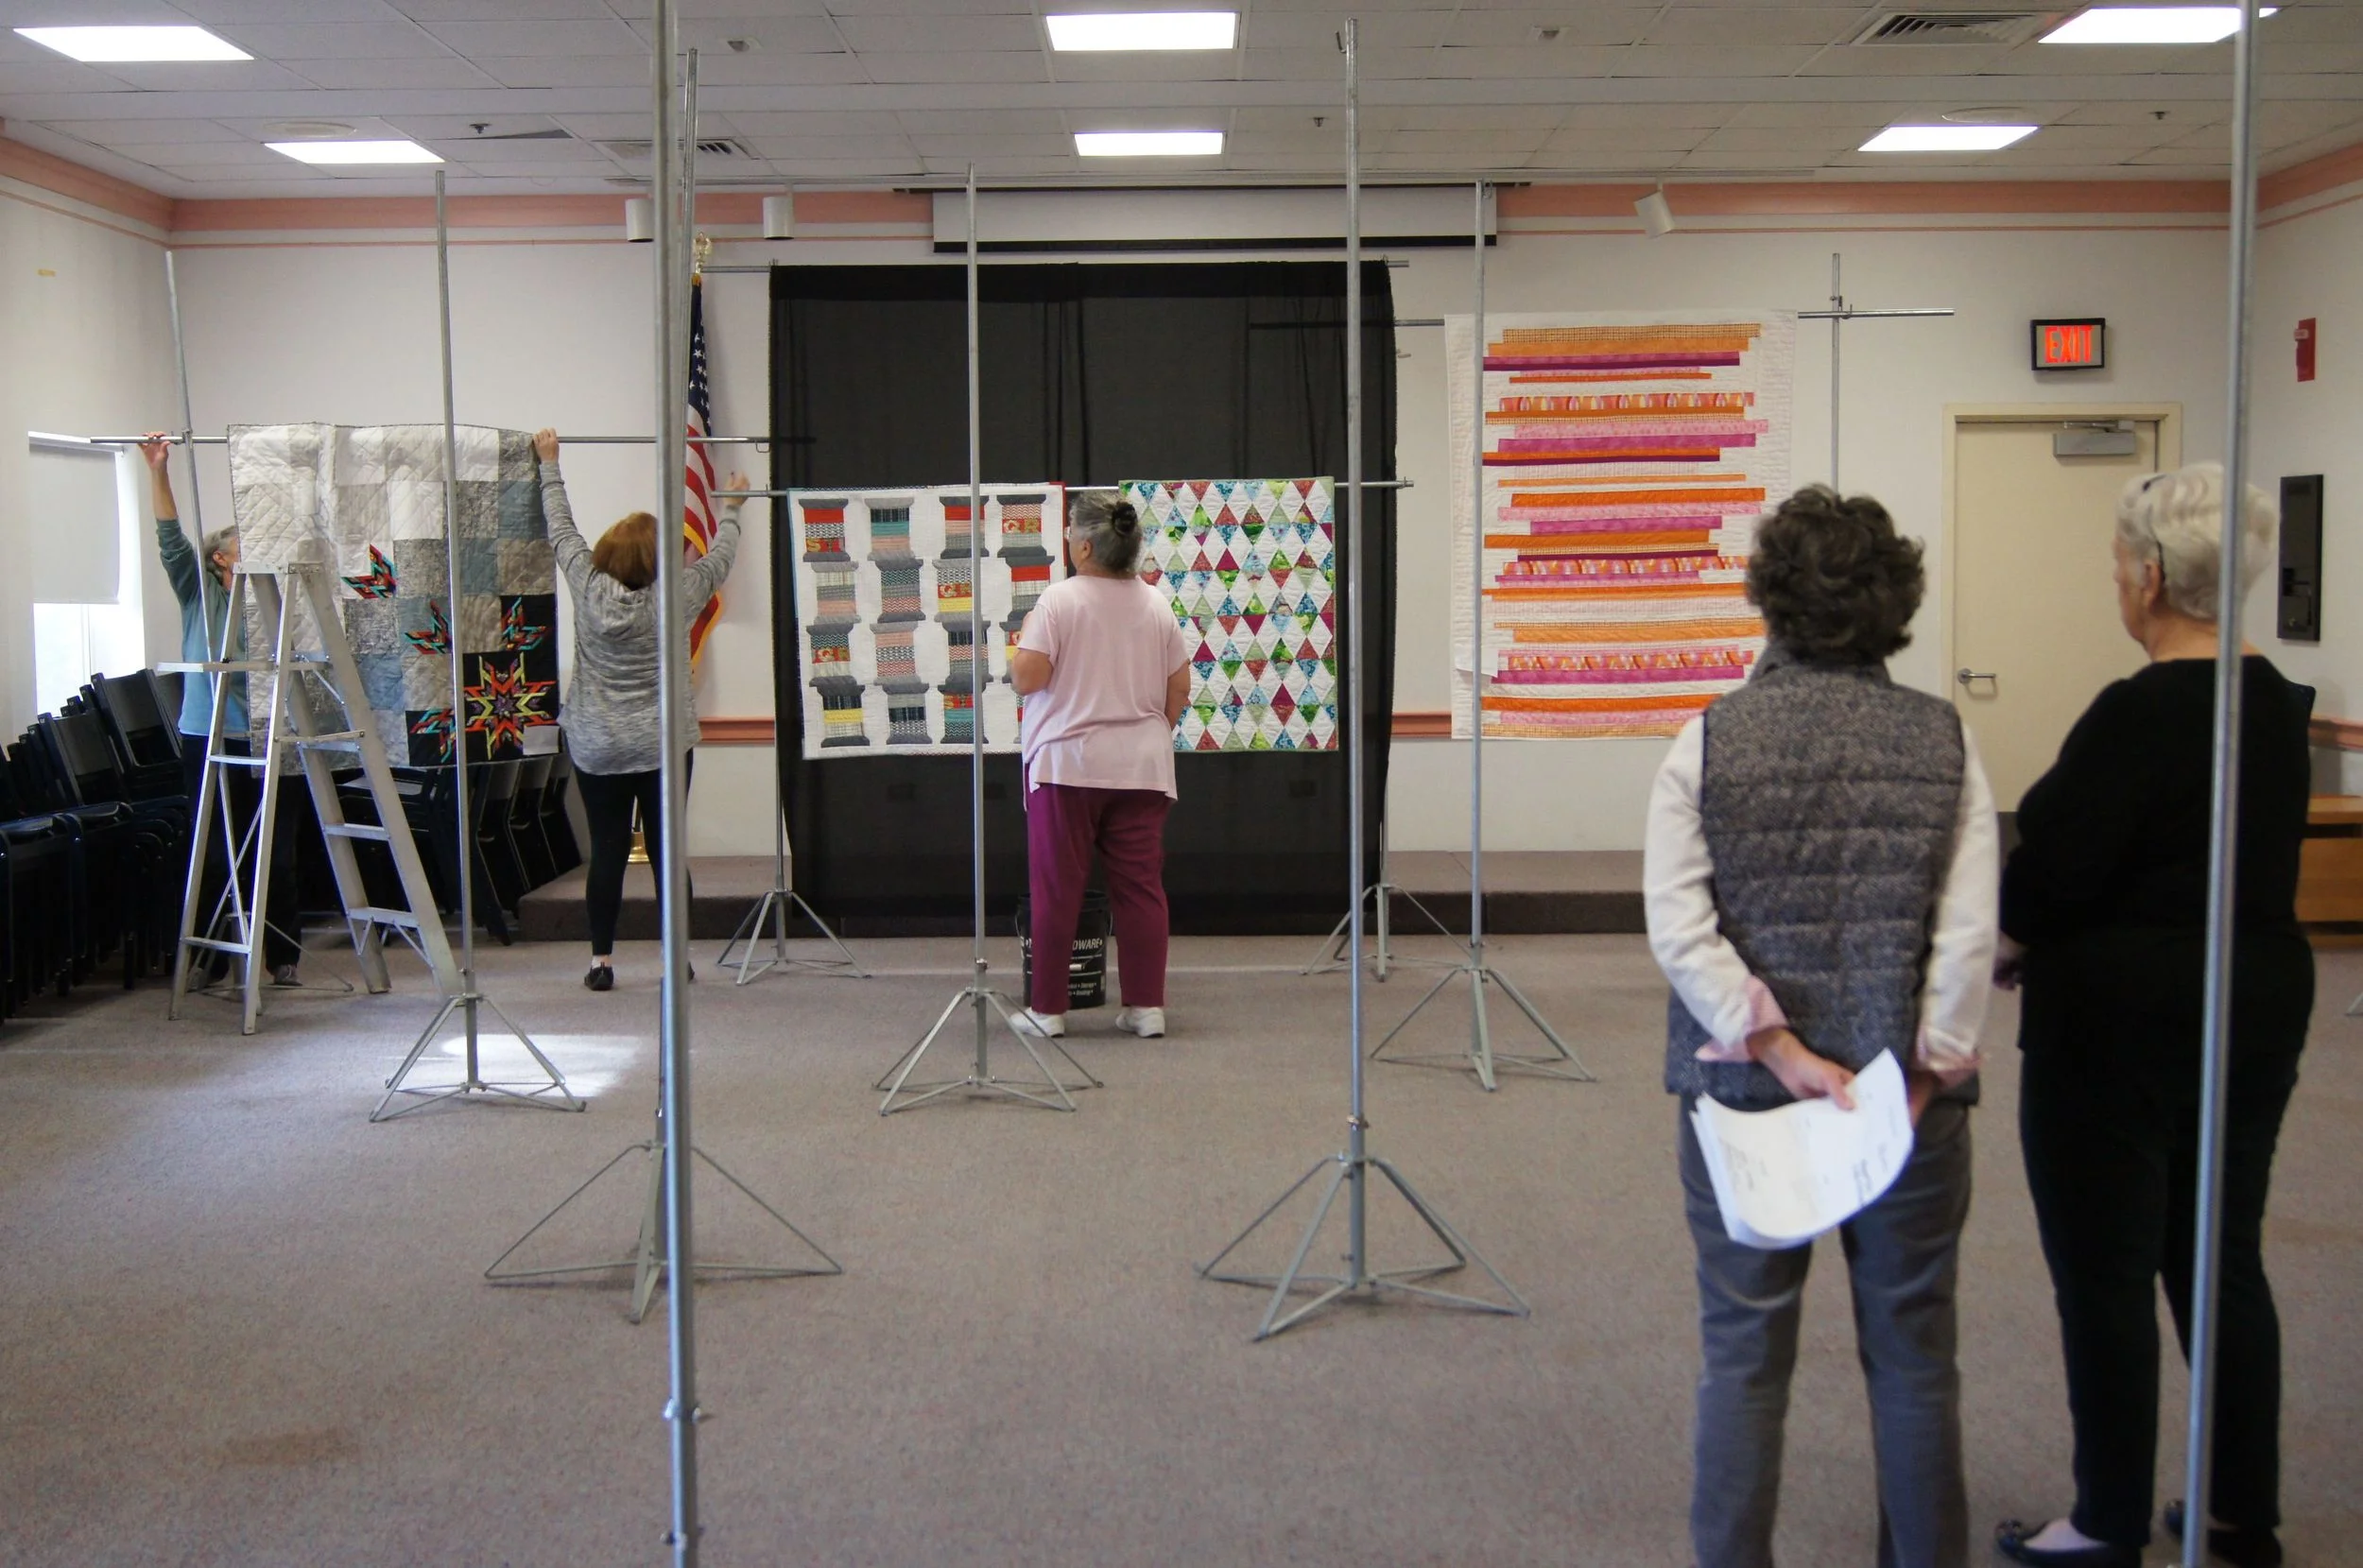
Here is a time lapse sequence of the show being hung this afternoon.  Jeannette, who is a brilliant show manager, always makes a paper show diagram using photos of the quilts being hung.   The photos make it very clear where in the show each quilt is to hang. This particular show is being managed by Susan.  She used Jeanette's photo page layout today. It's a great system!

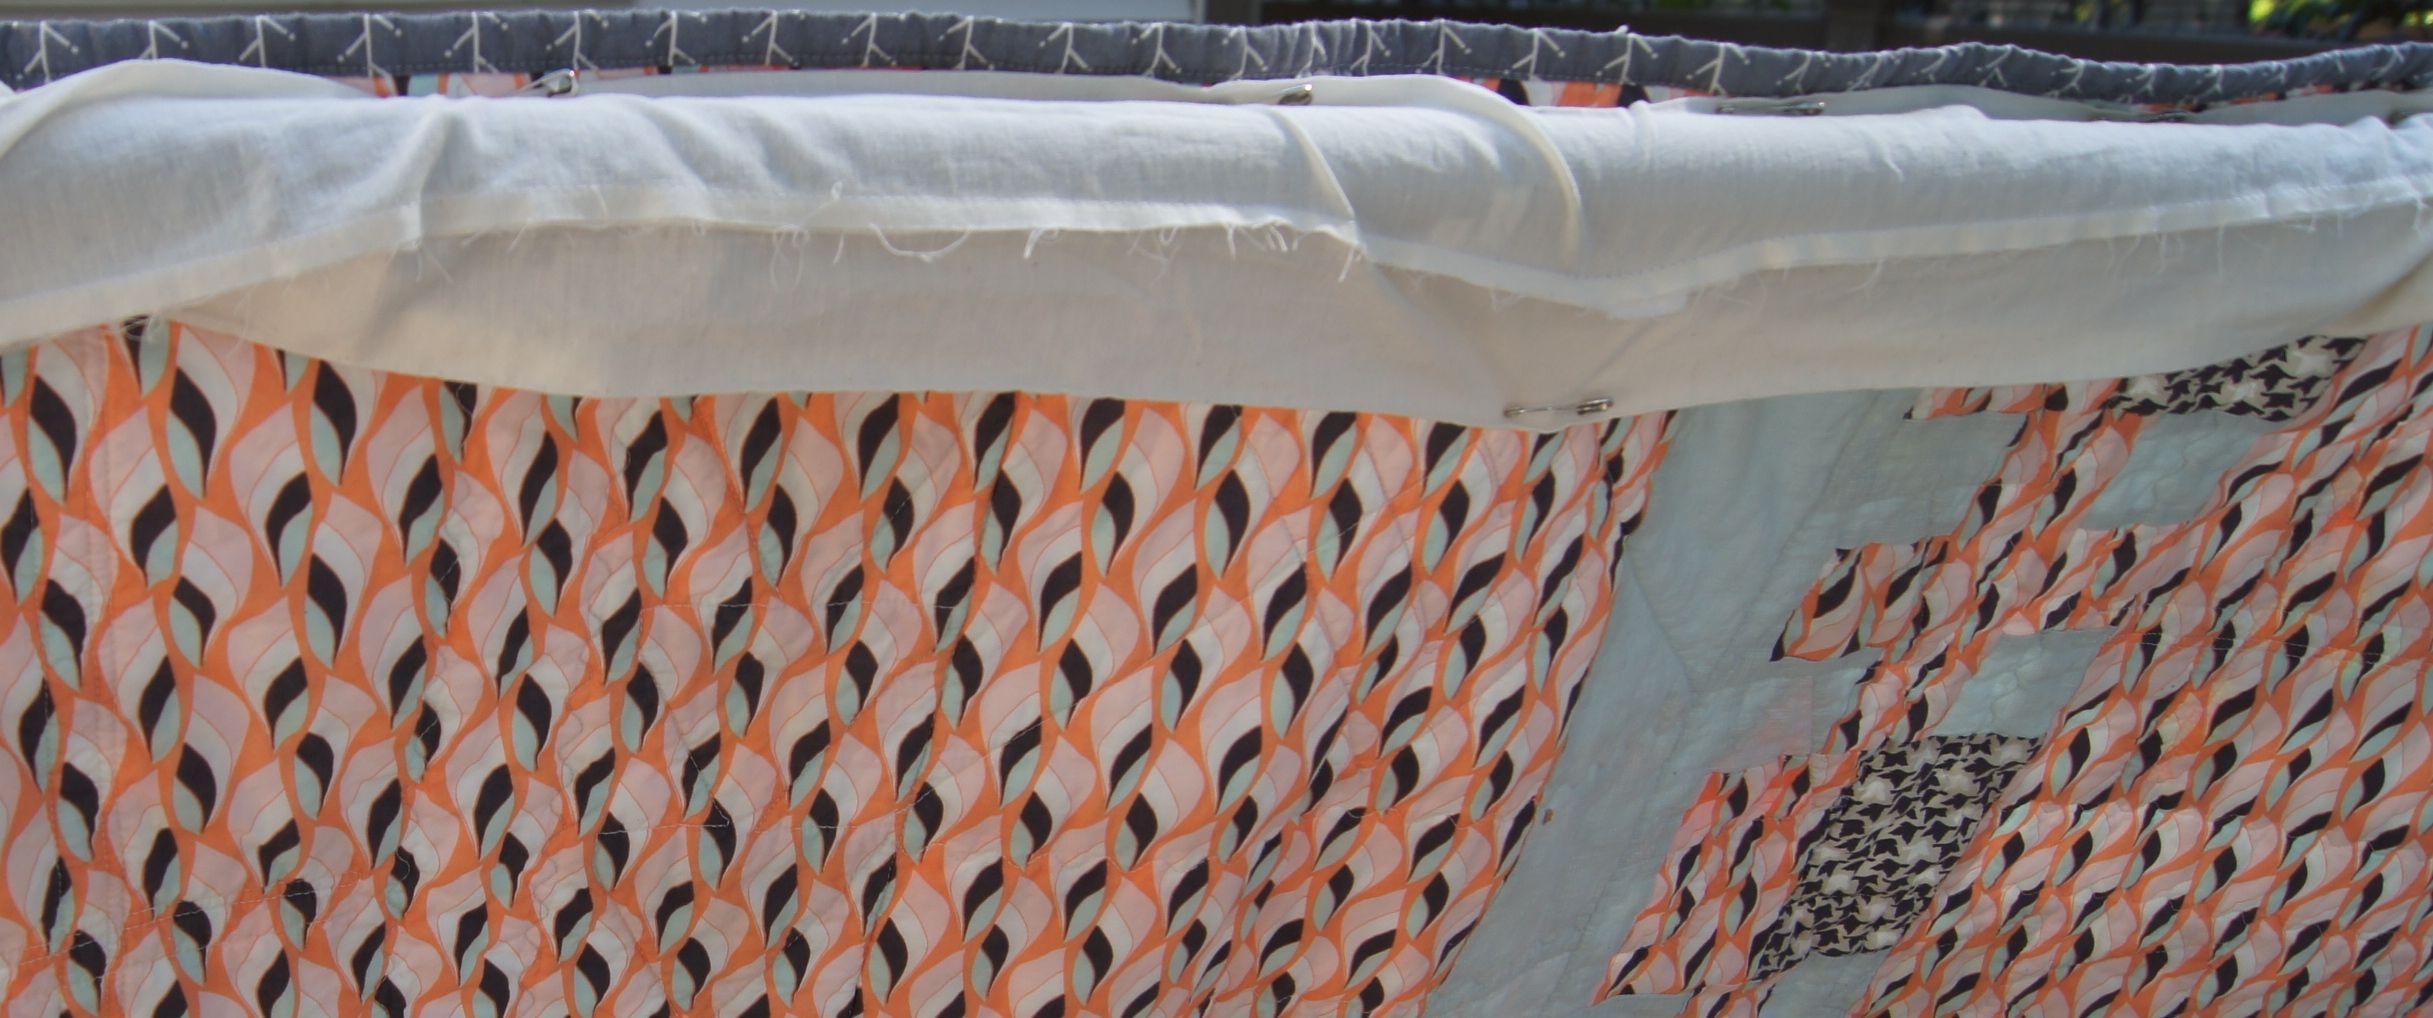
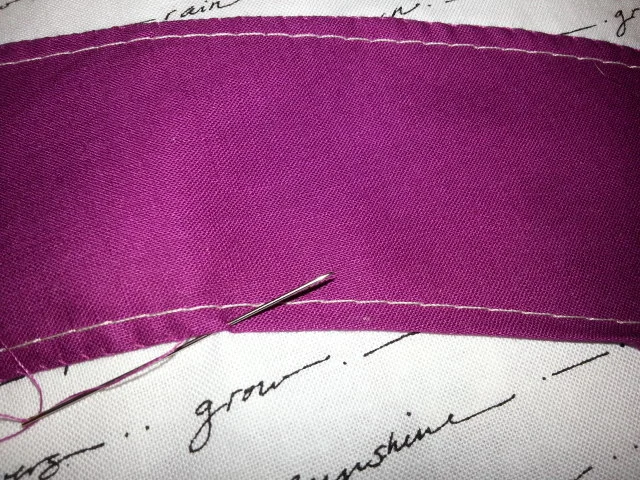
Take home message from the team that hangs the quilts for a show:   Make sure the  quilt you are entering has a sleeve sewn on it that extends along the entire top edge of the quilt. And make sure it meets the requirement for width.  If the show's manager asks for a 4 inch sleeve, it needs to be 4 inches wide.  Really!

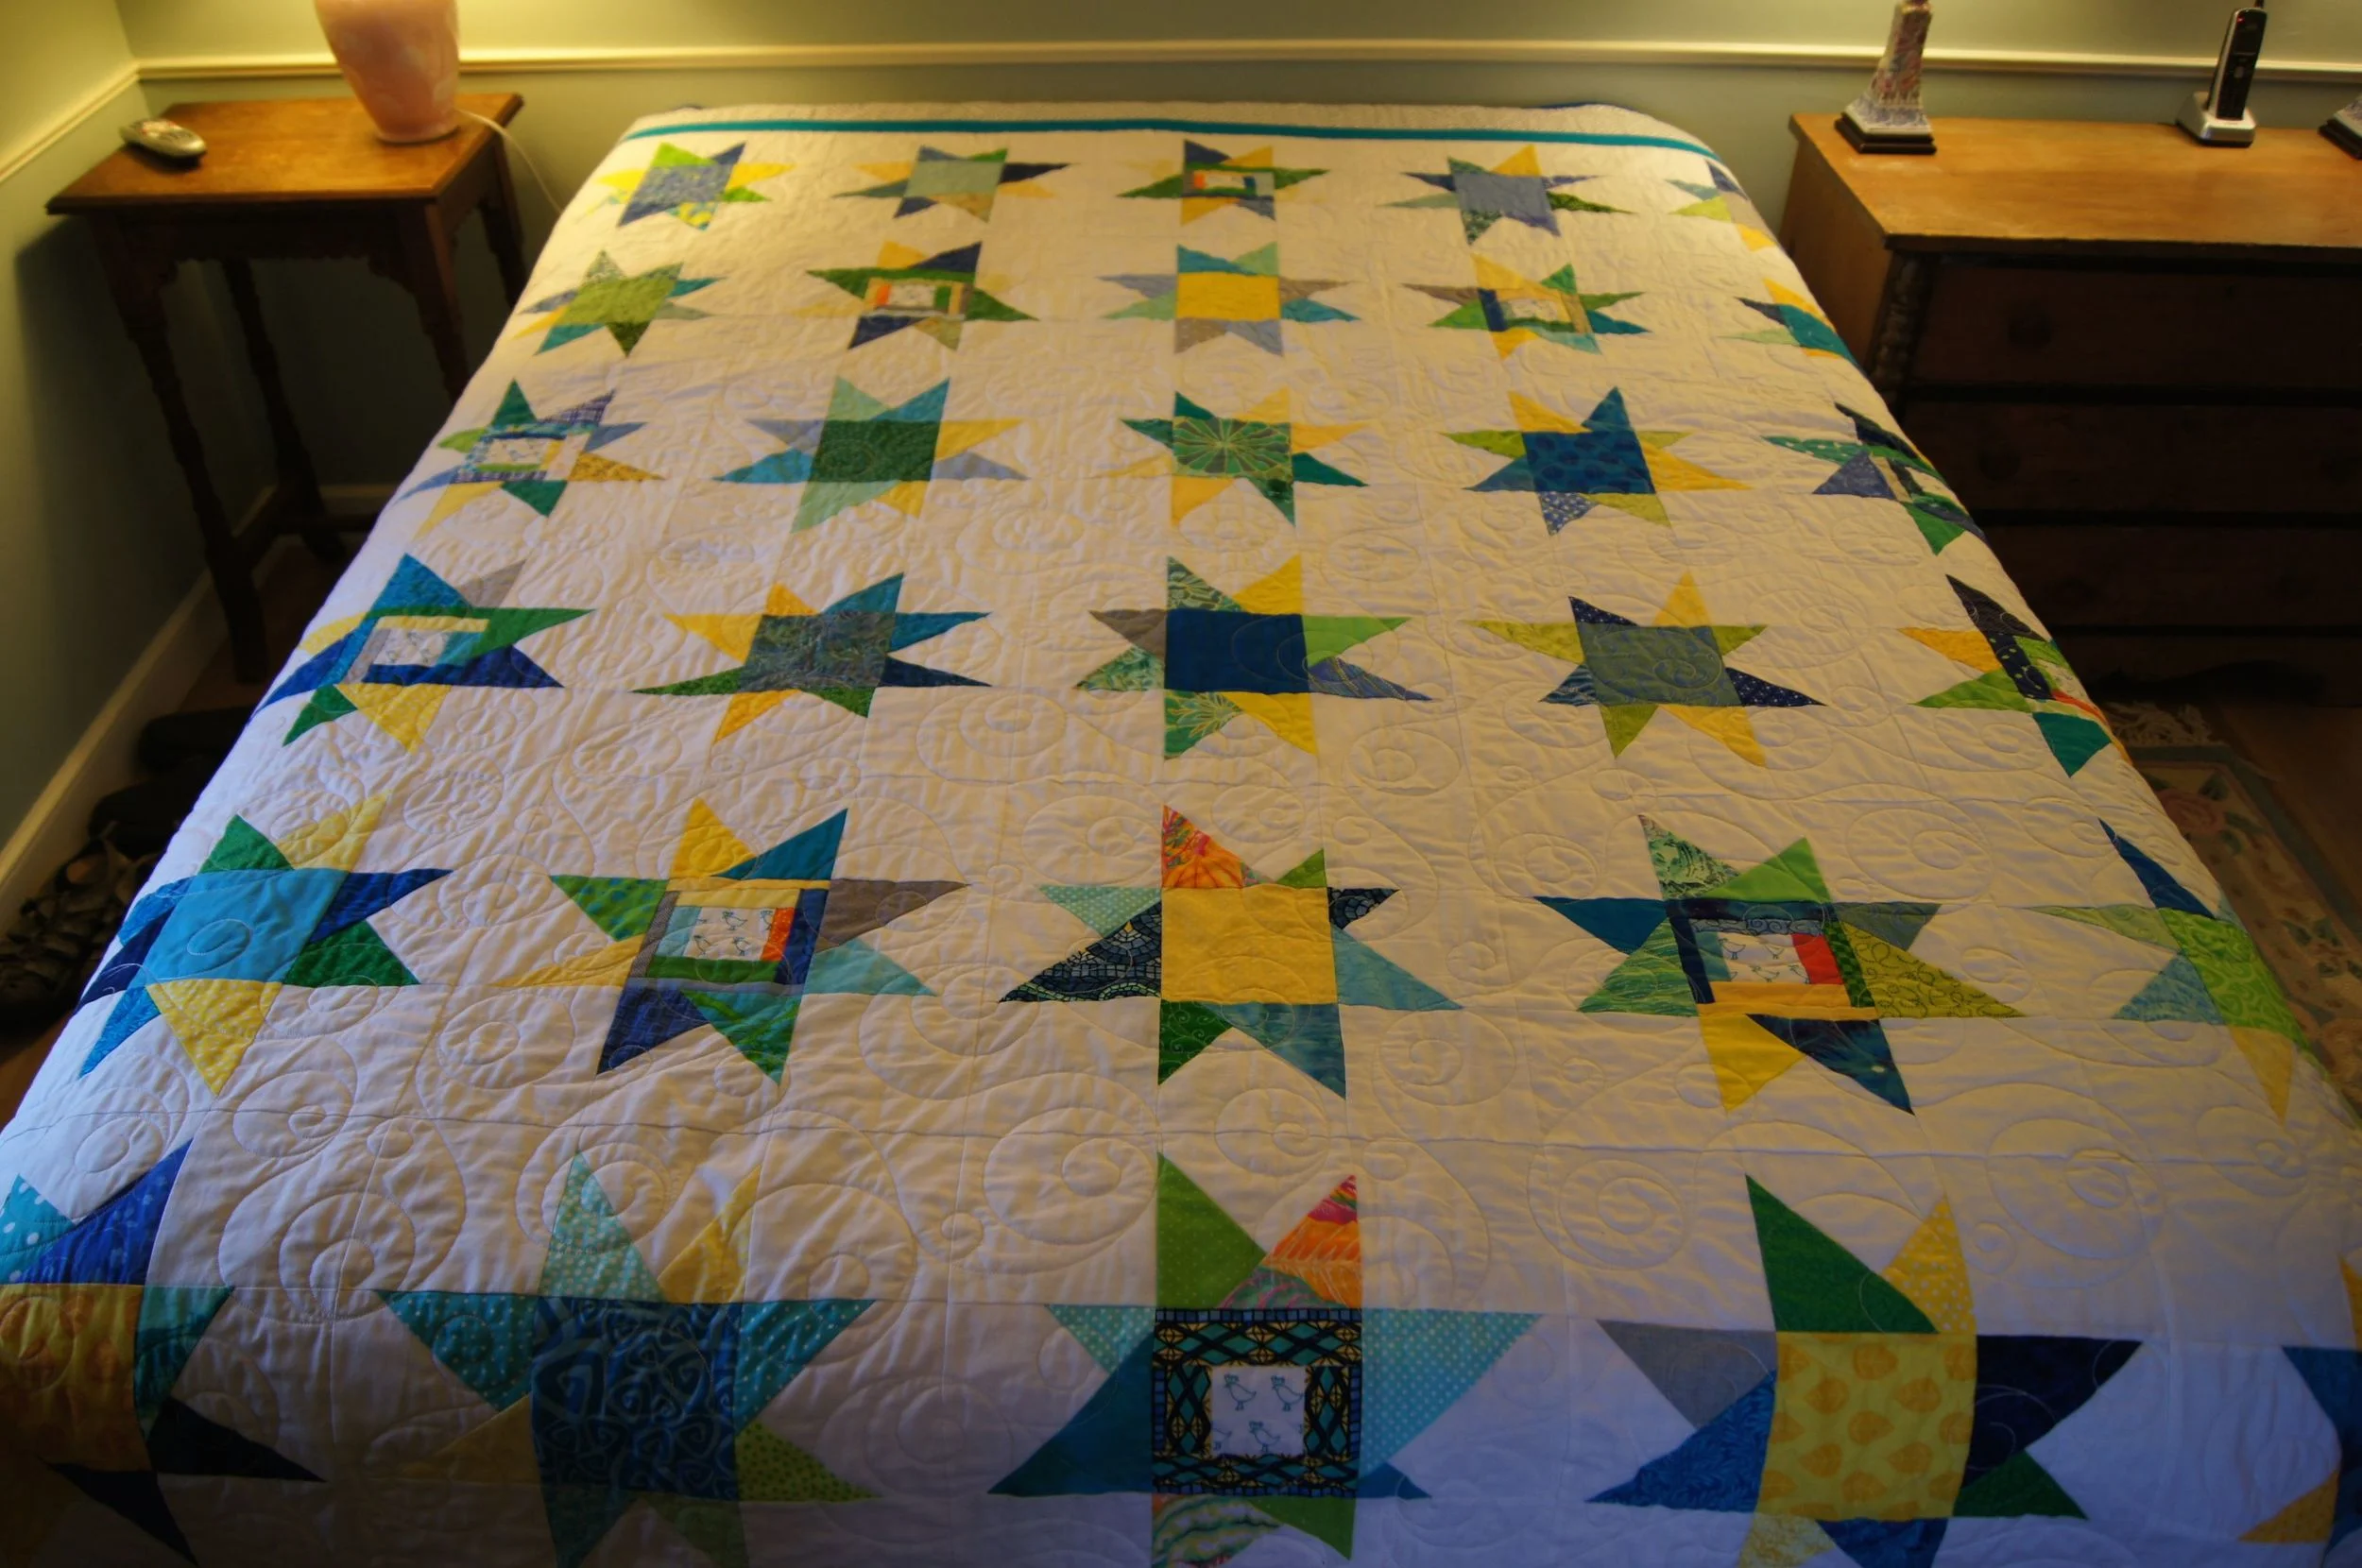
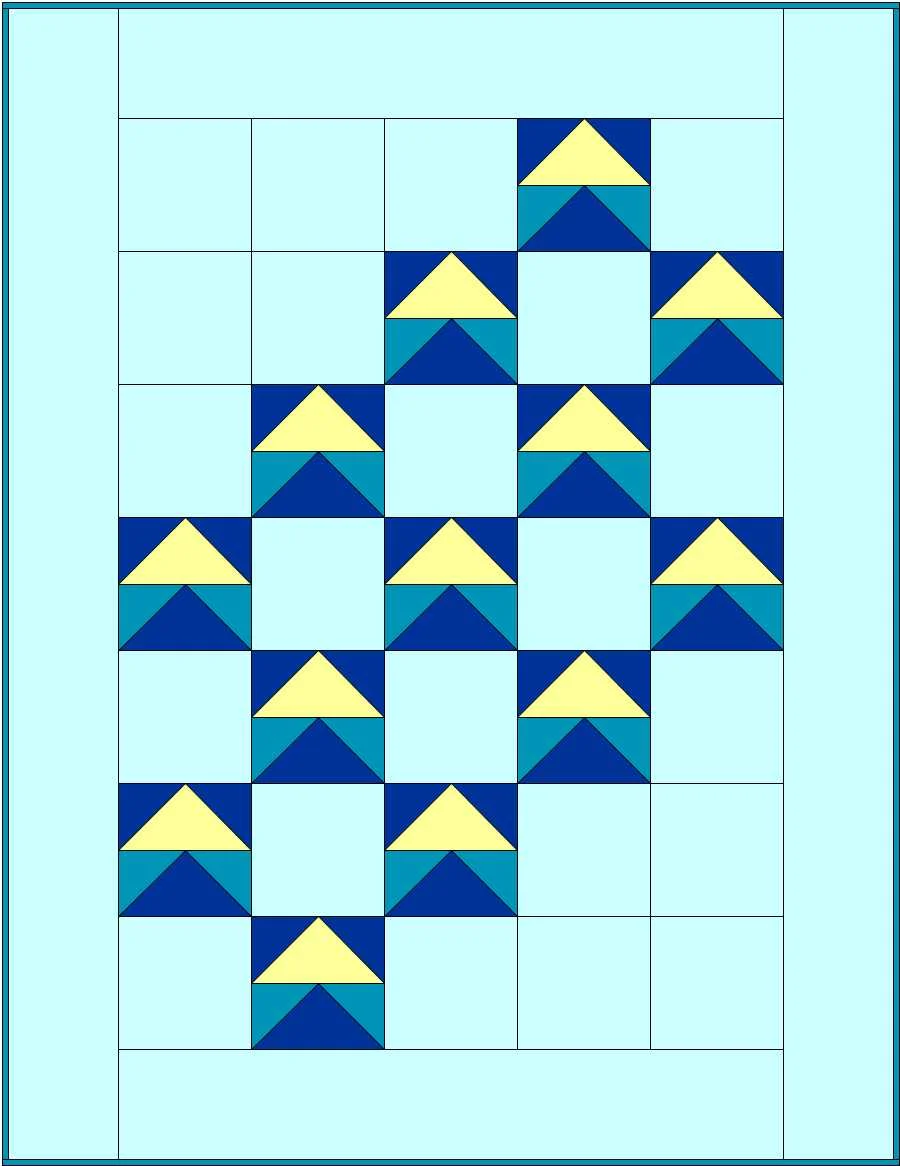
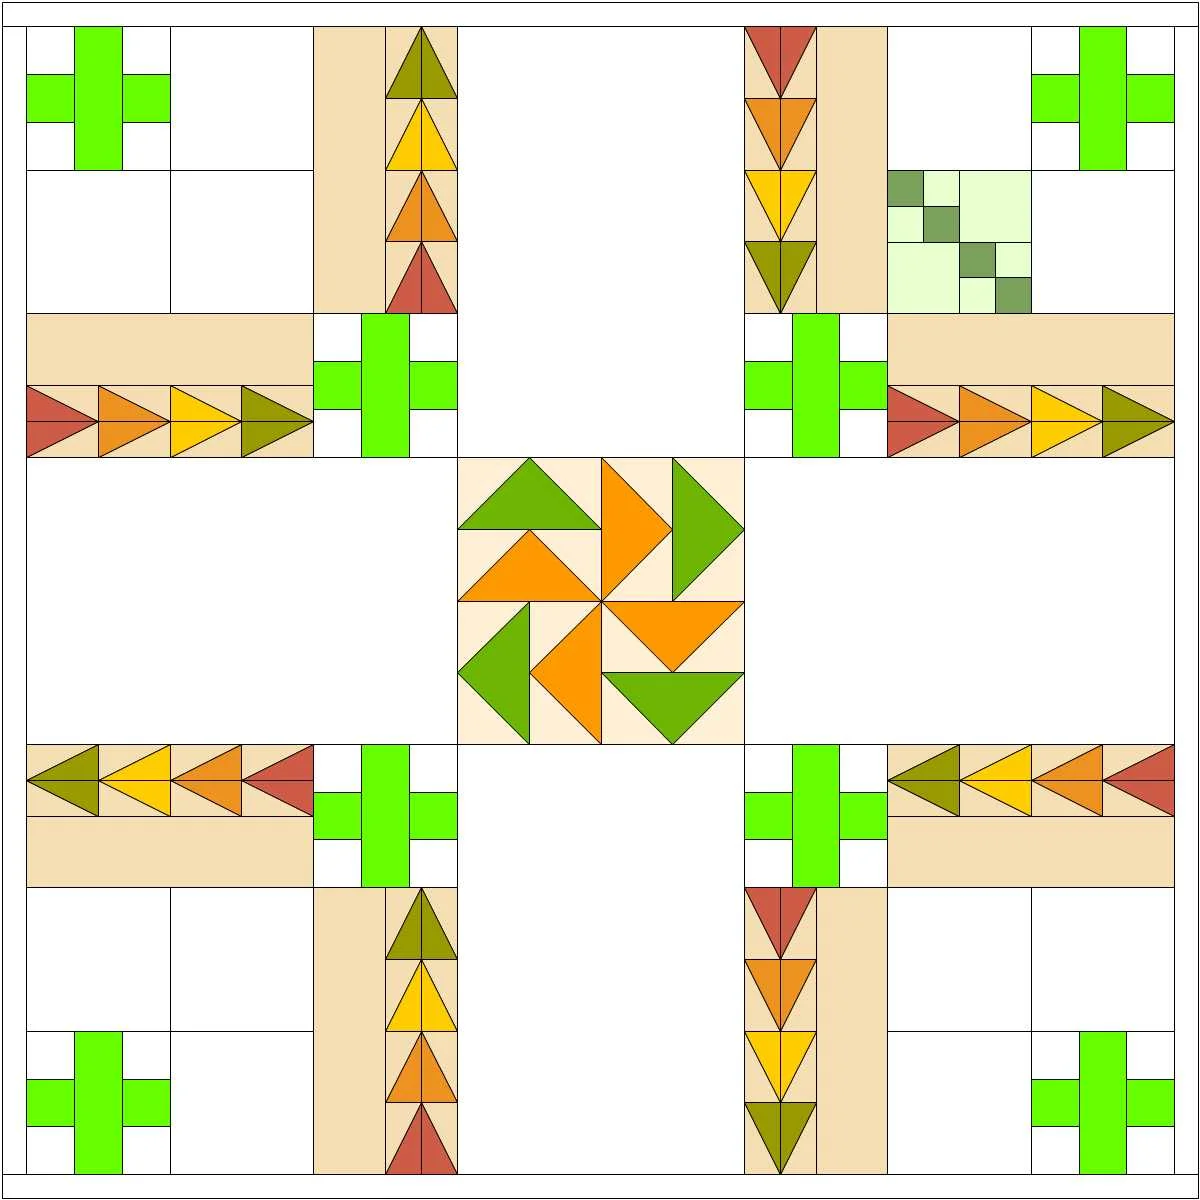
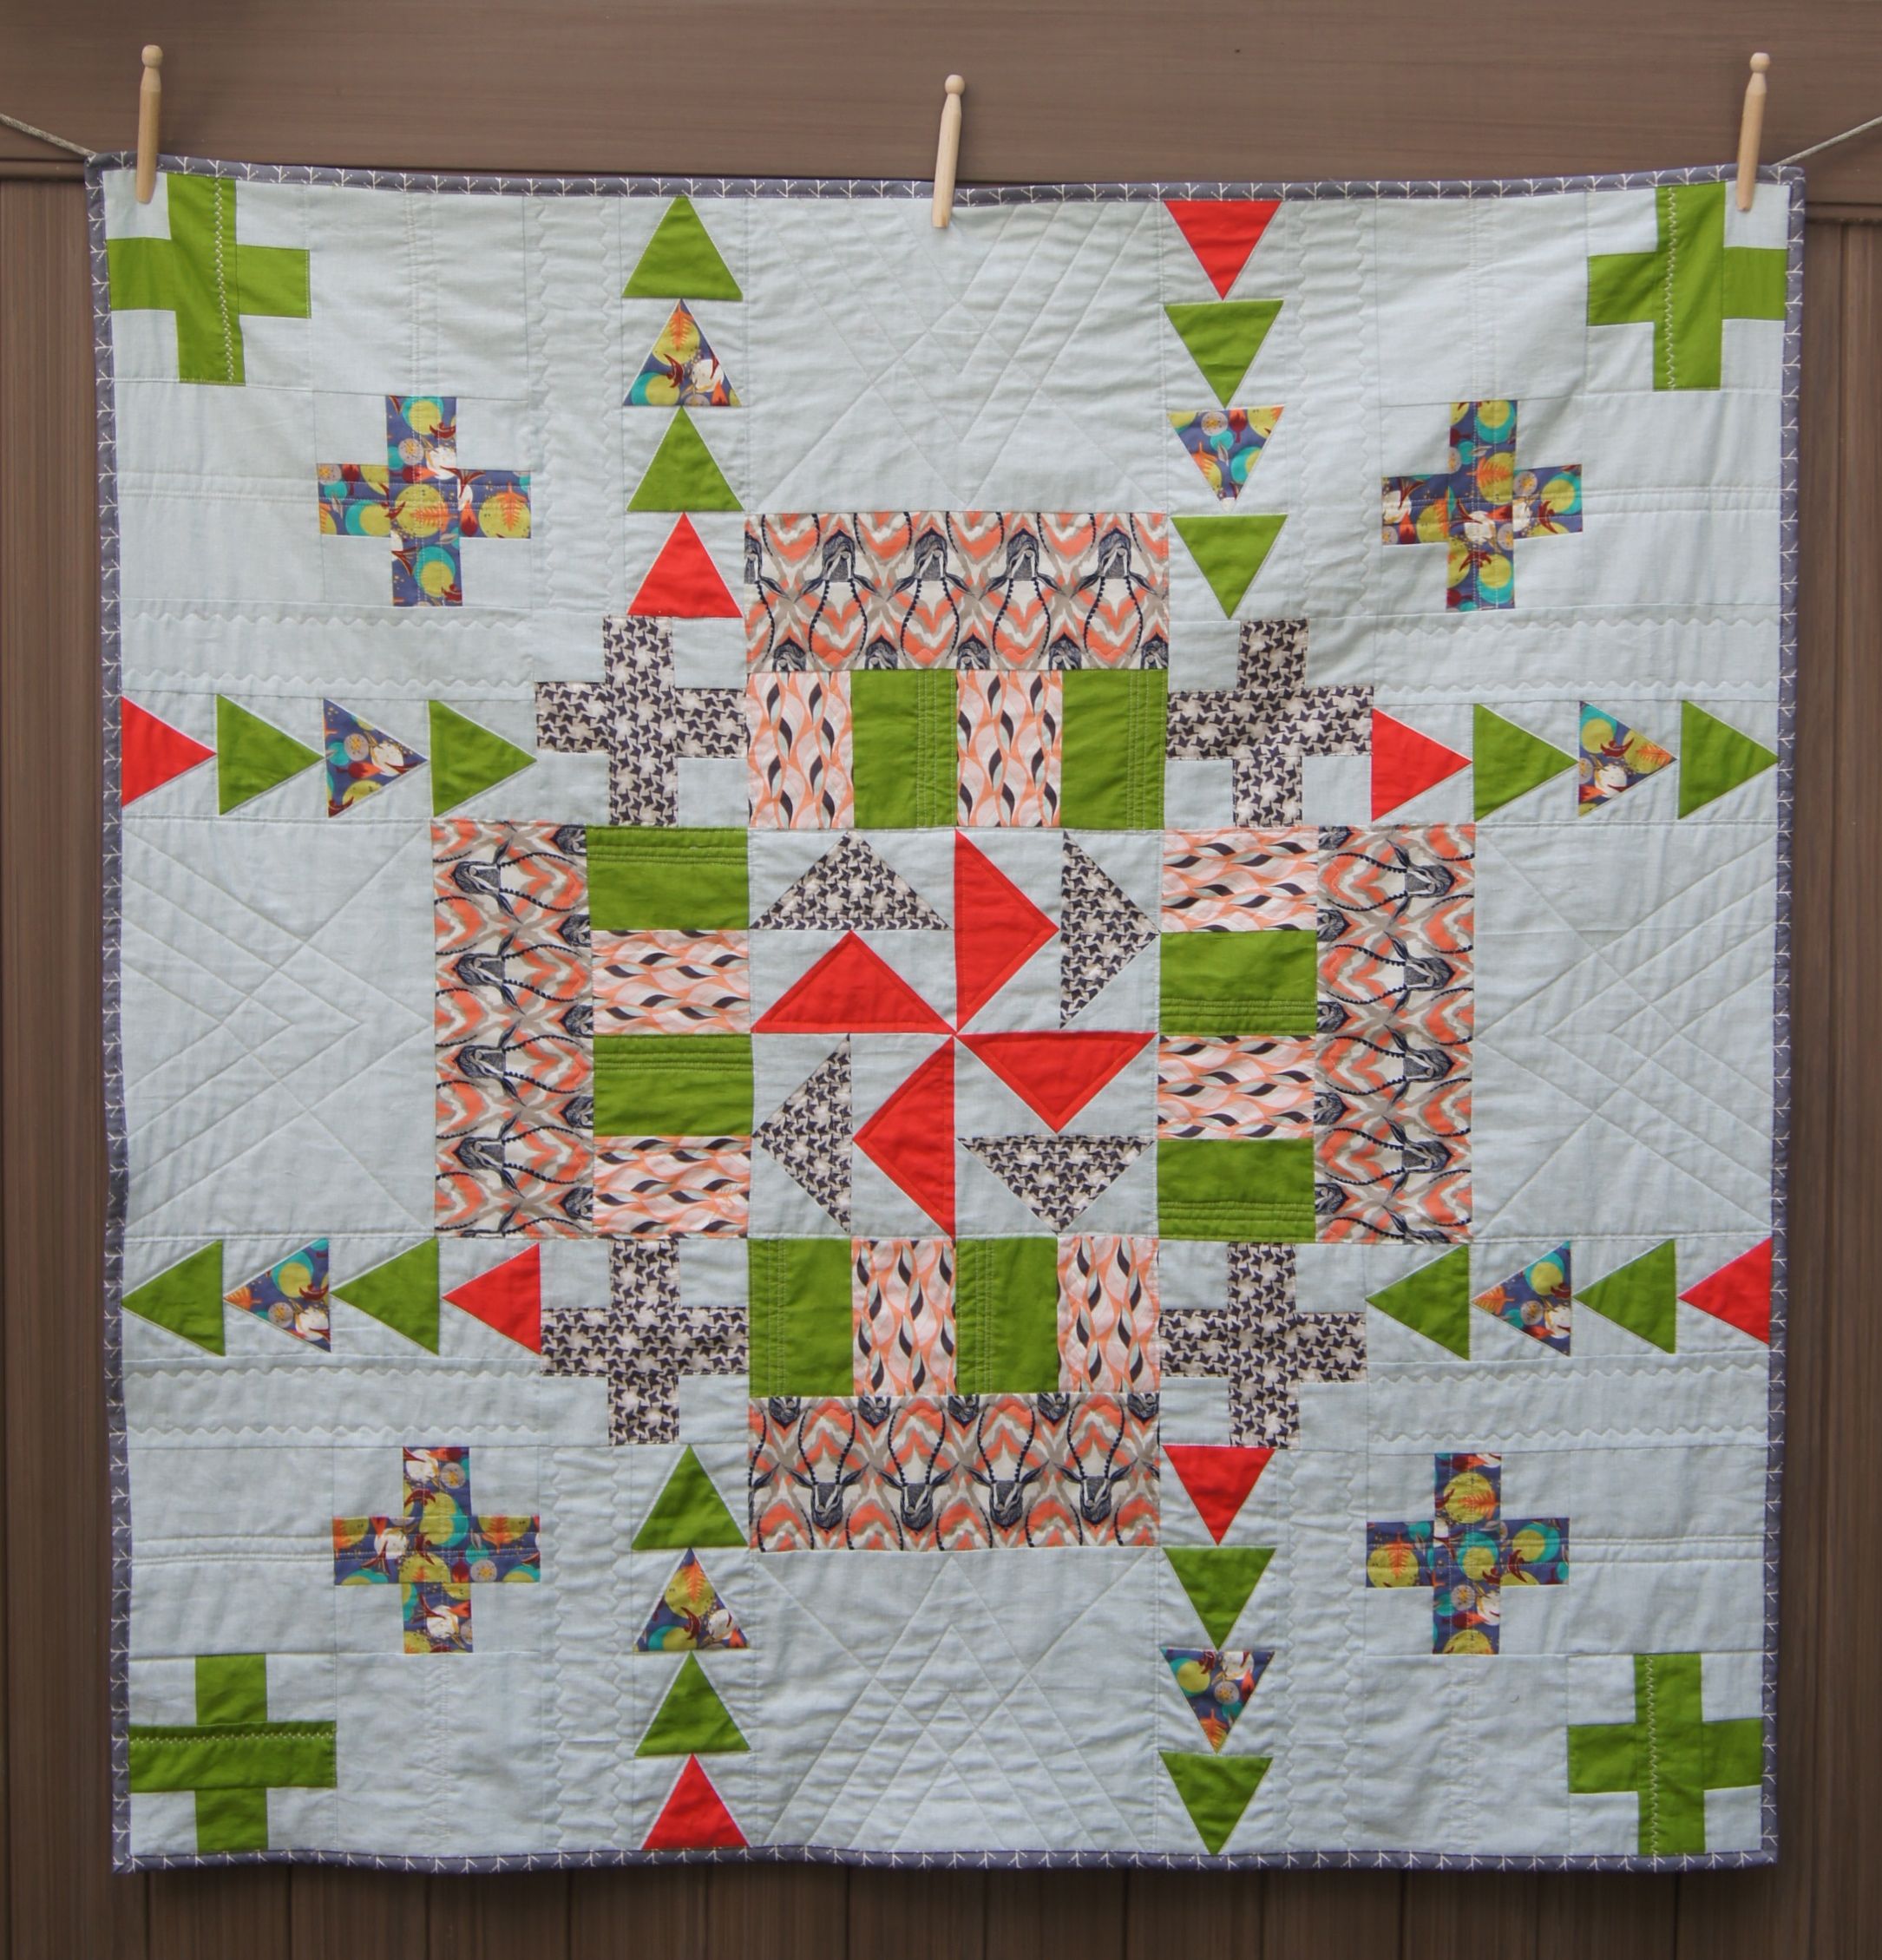
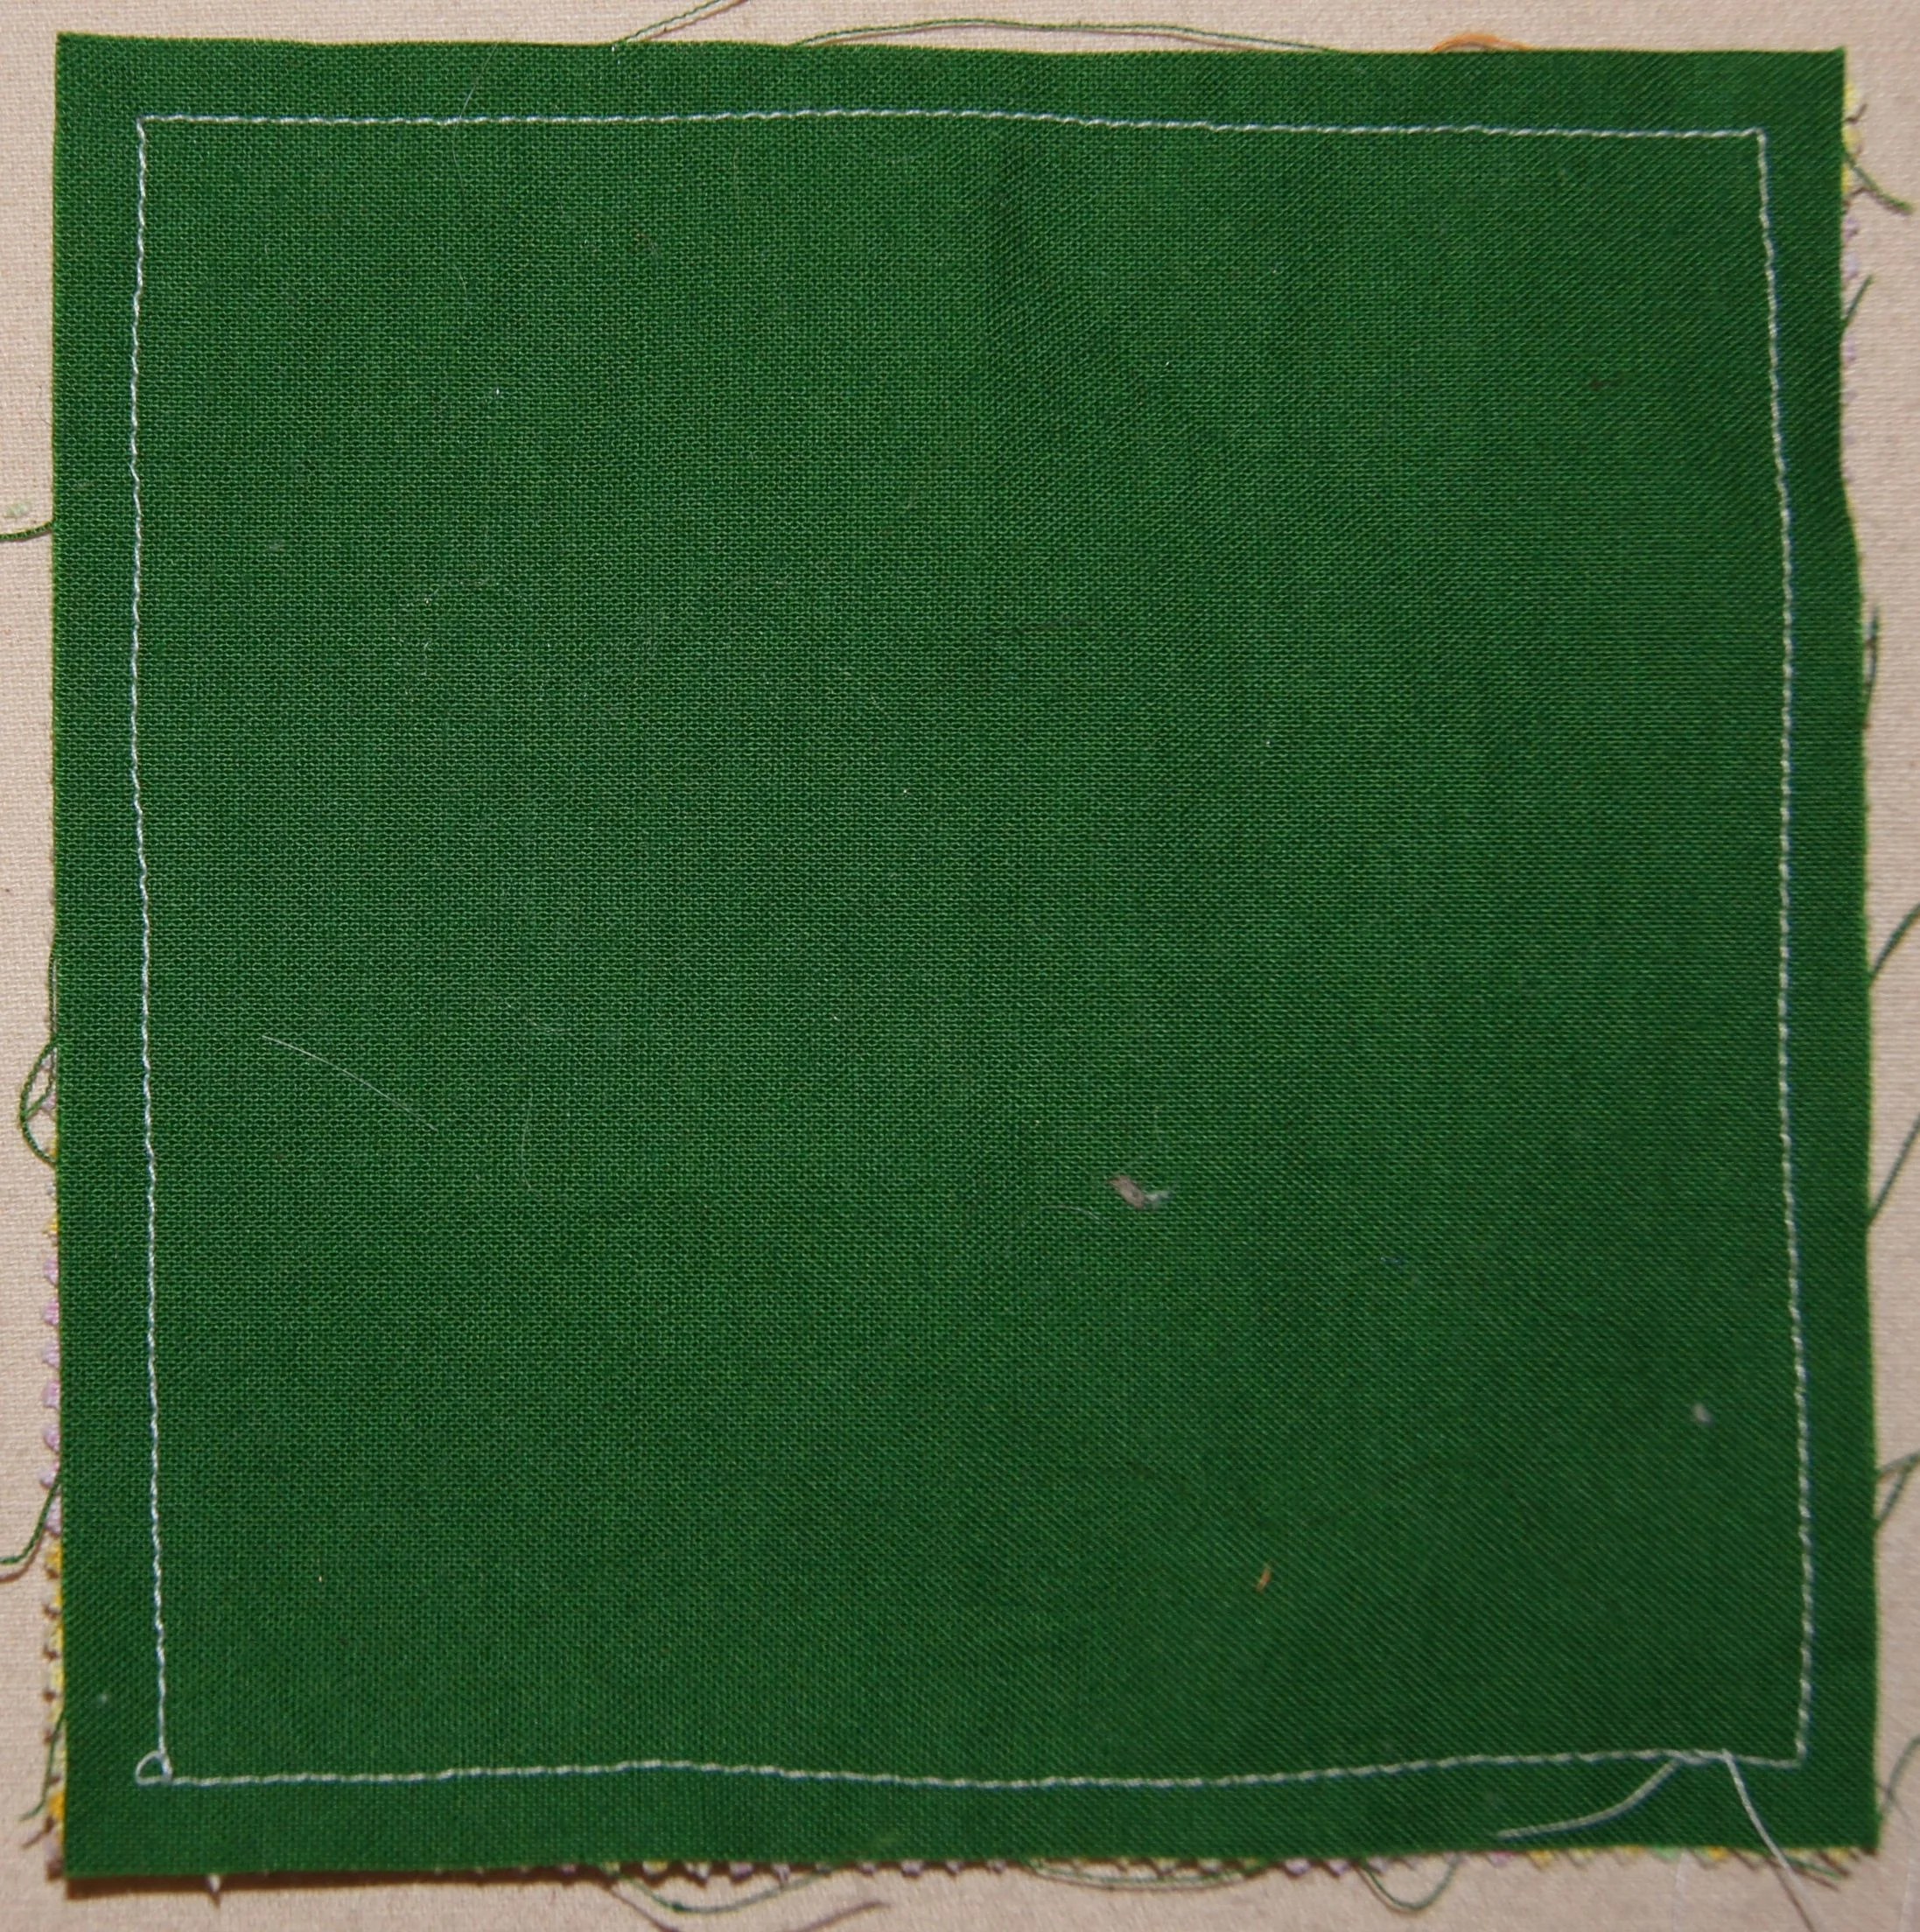
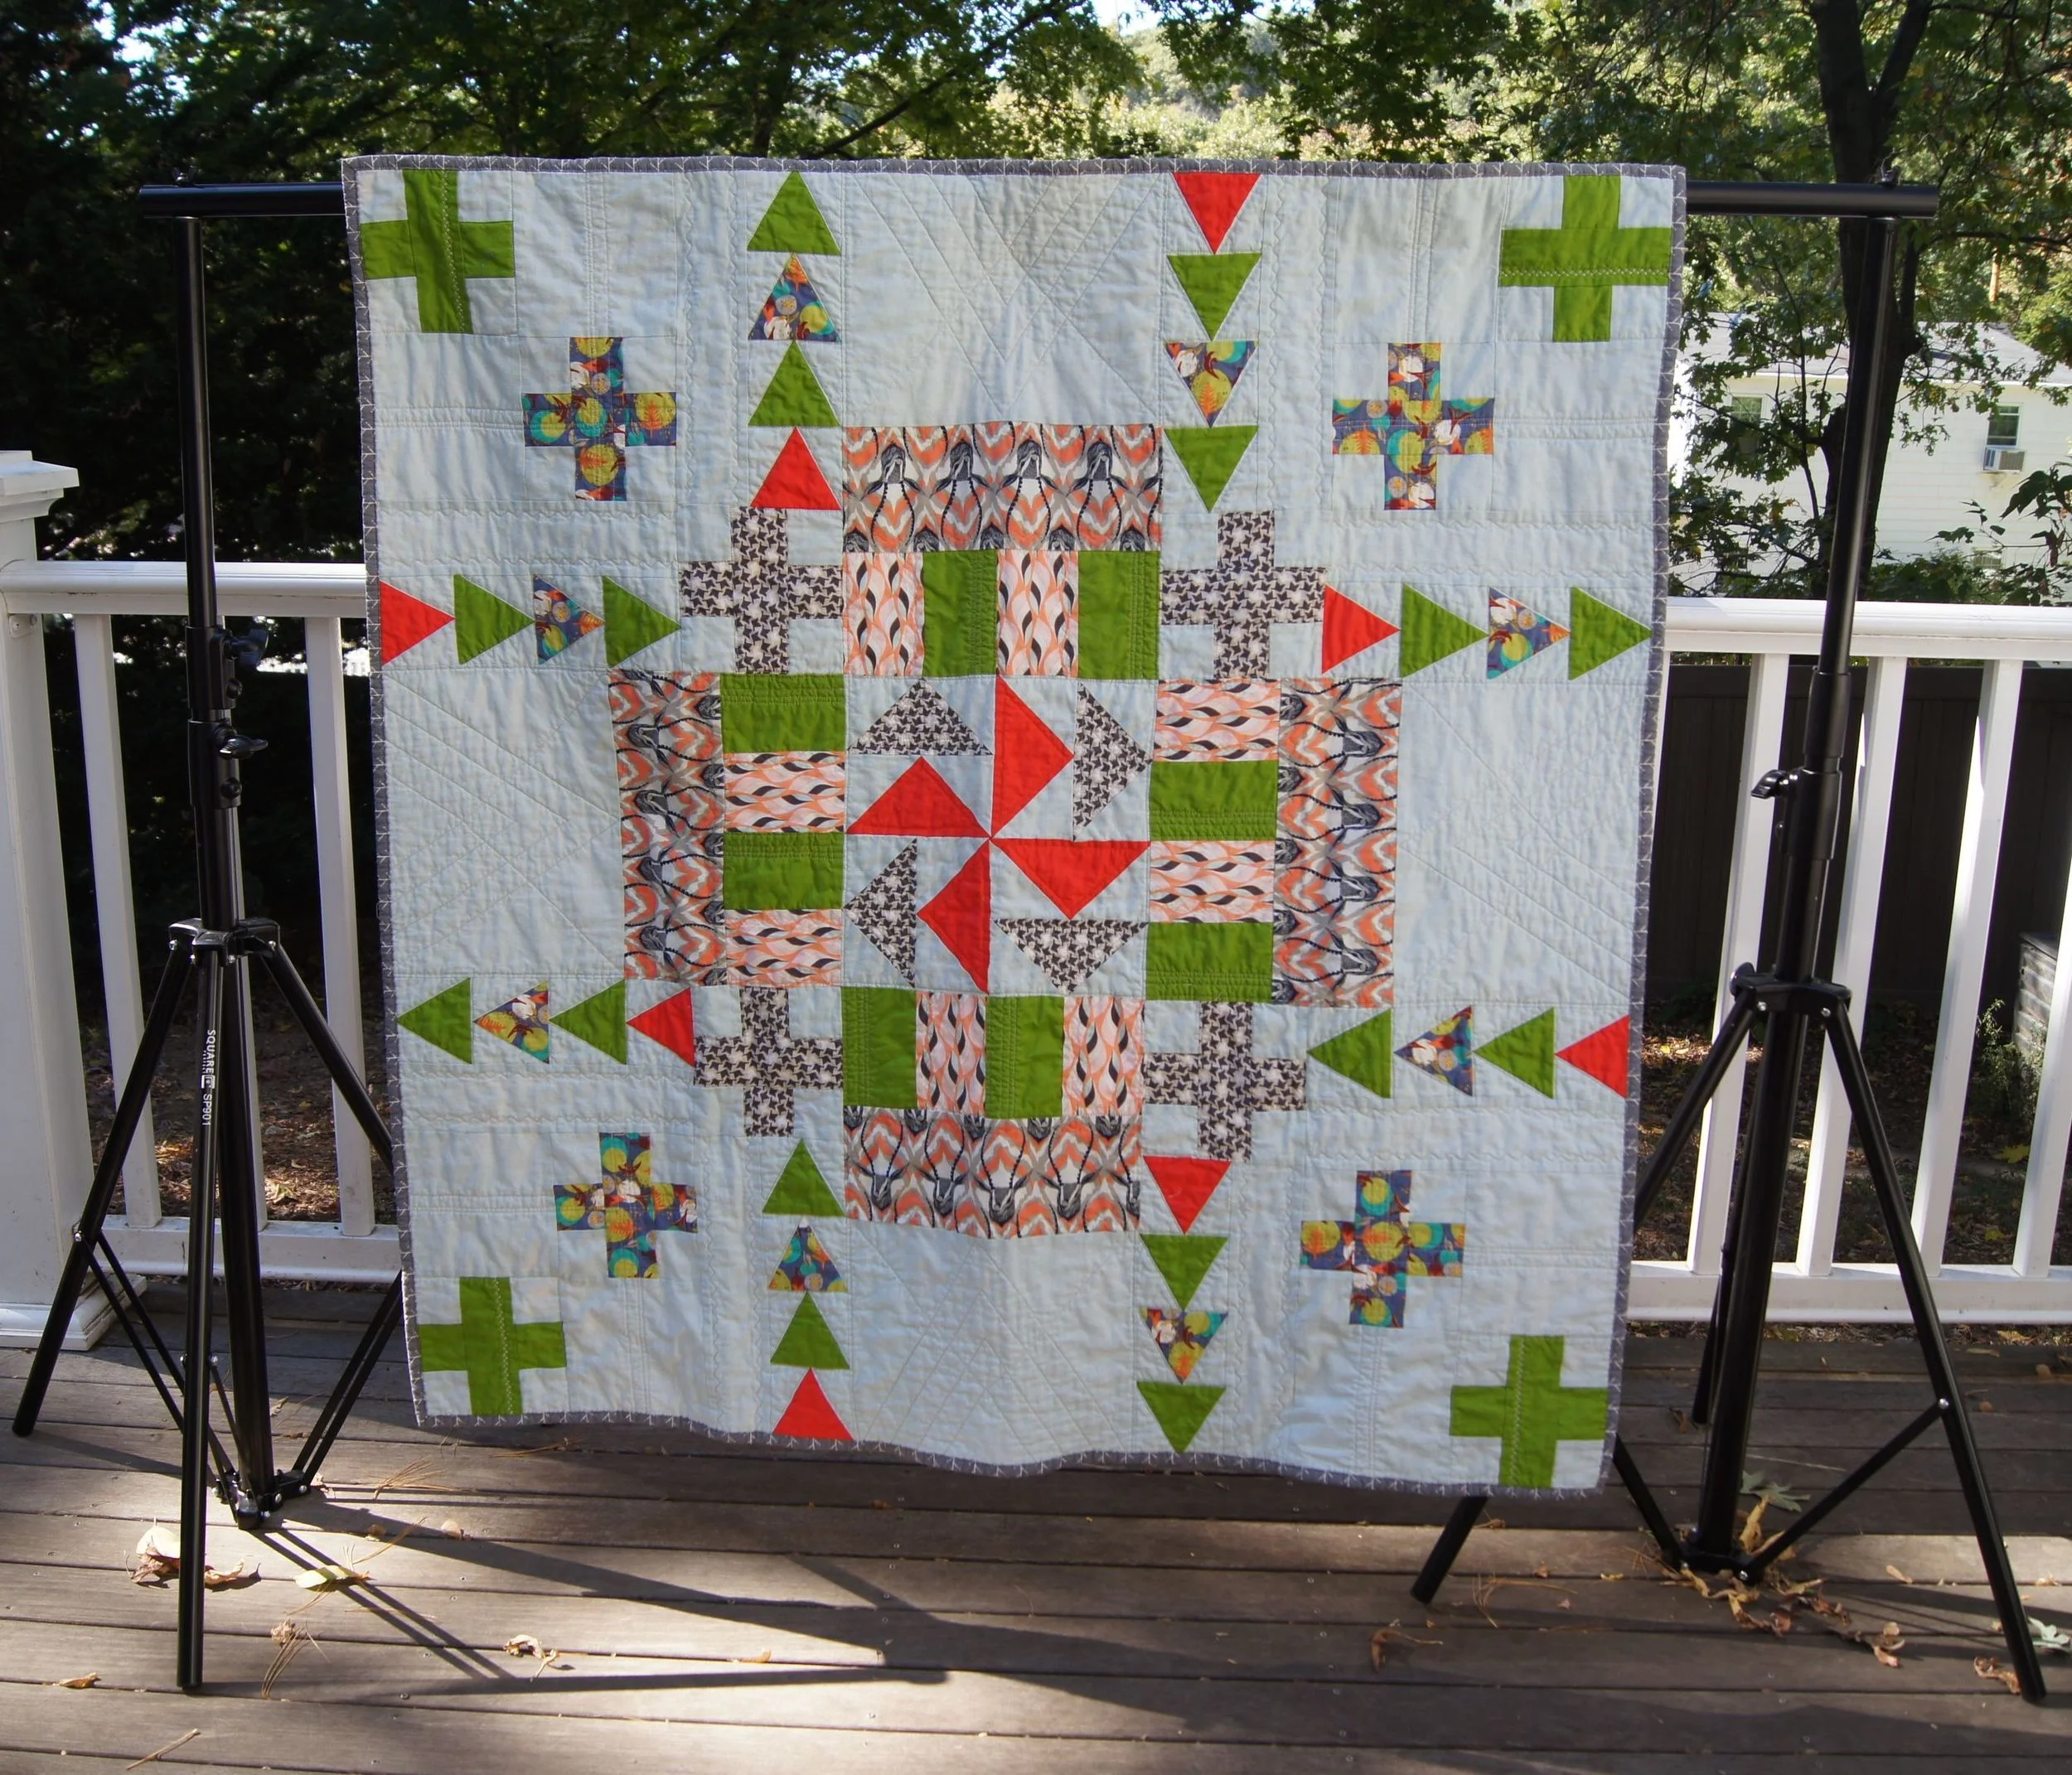
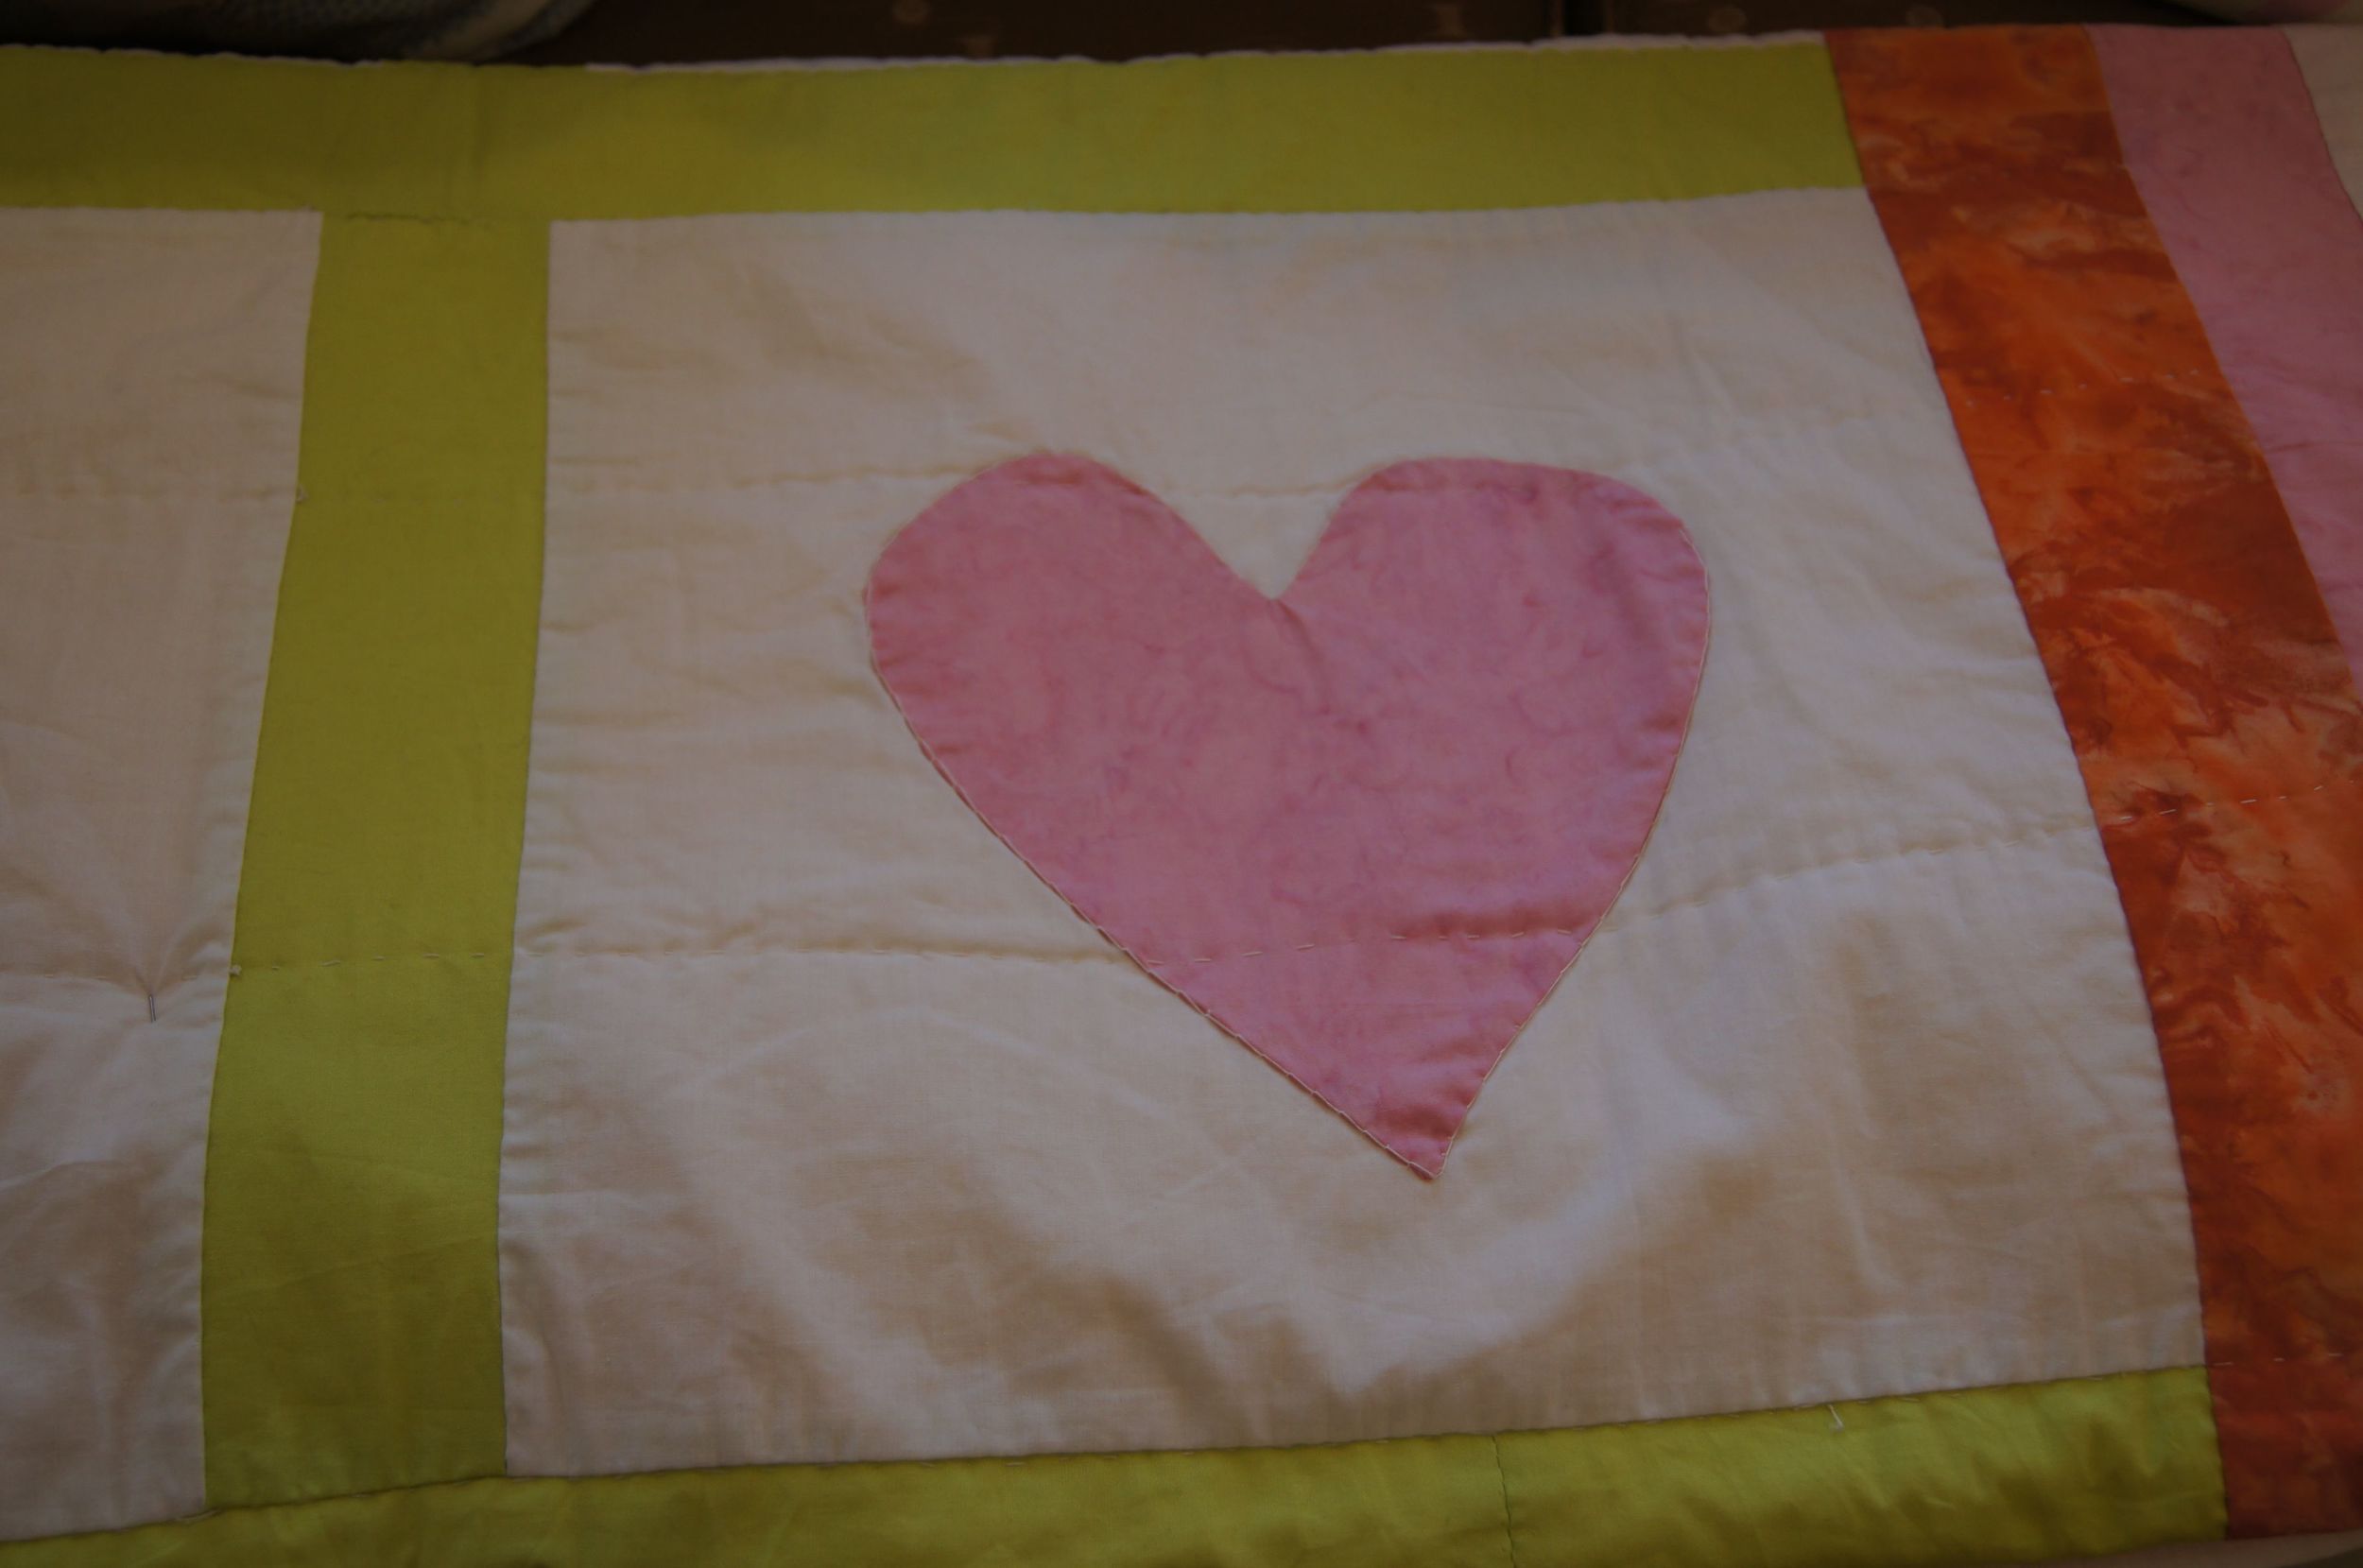
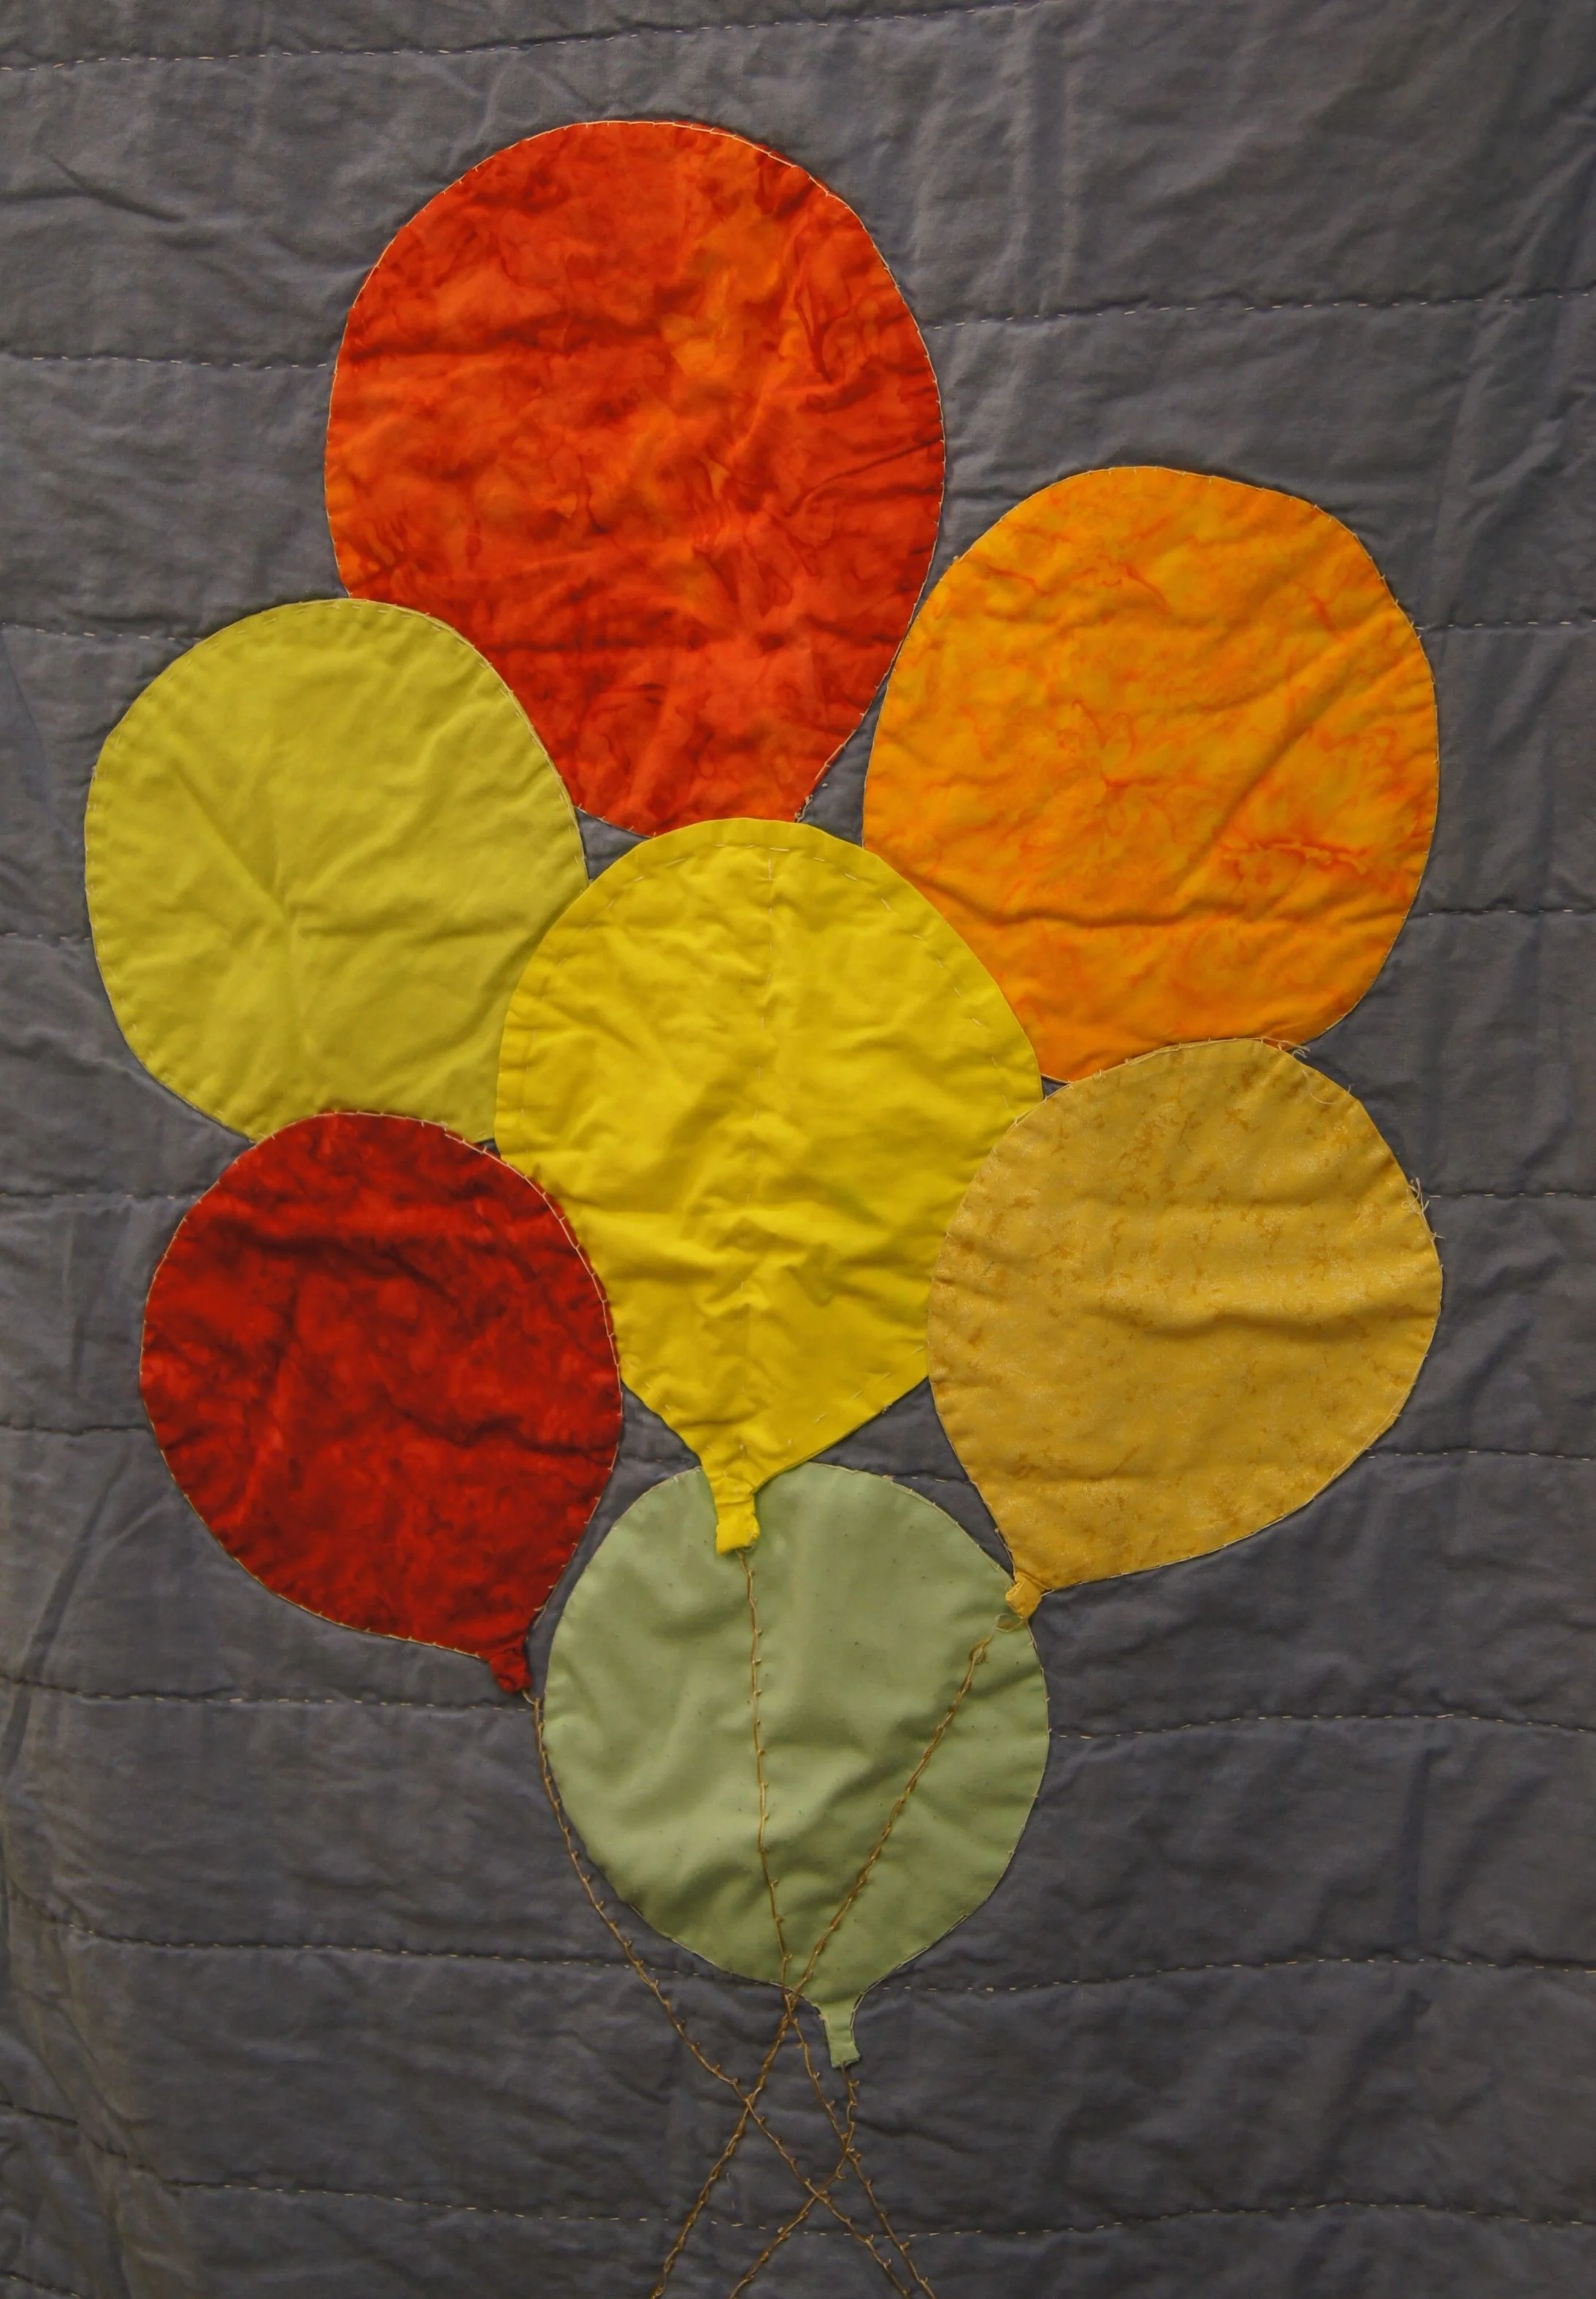
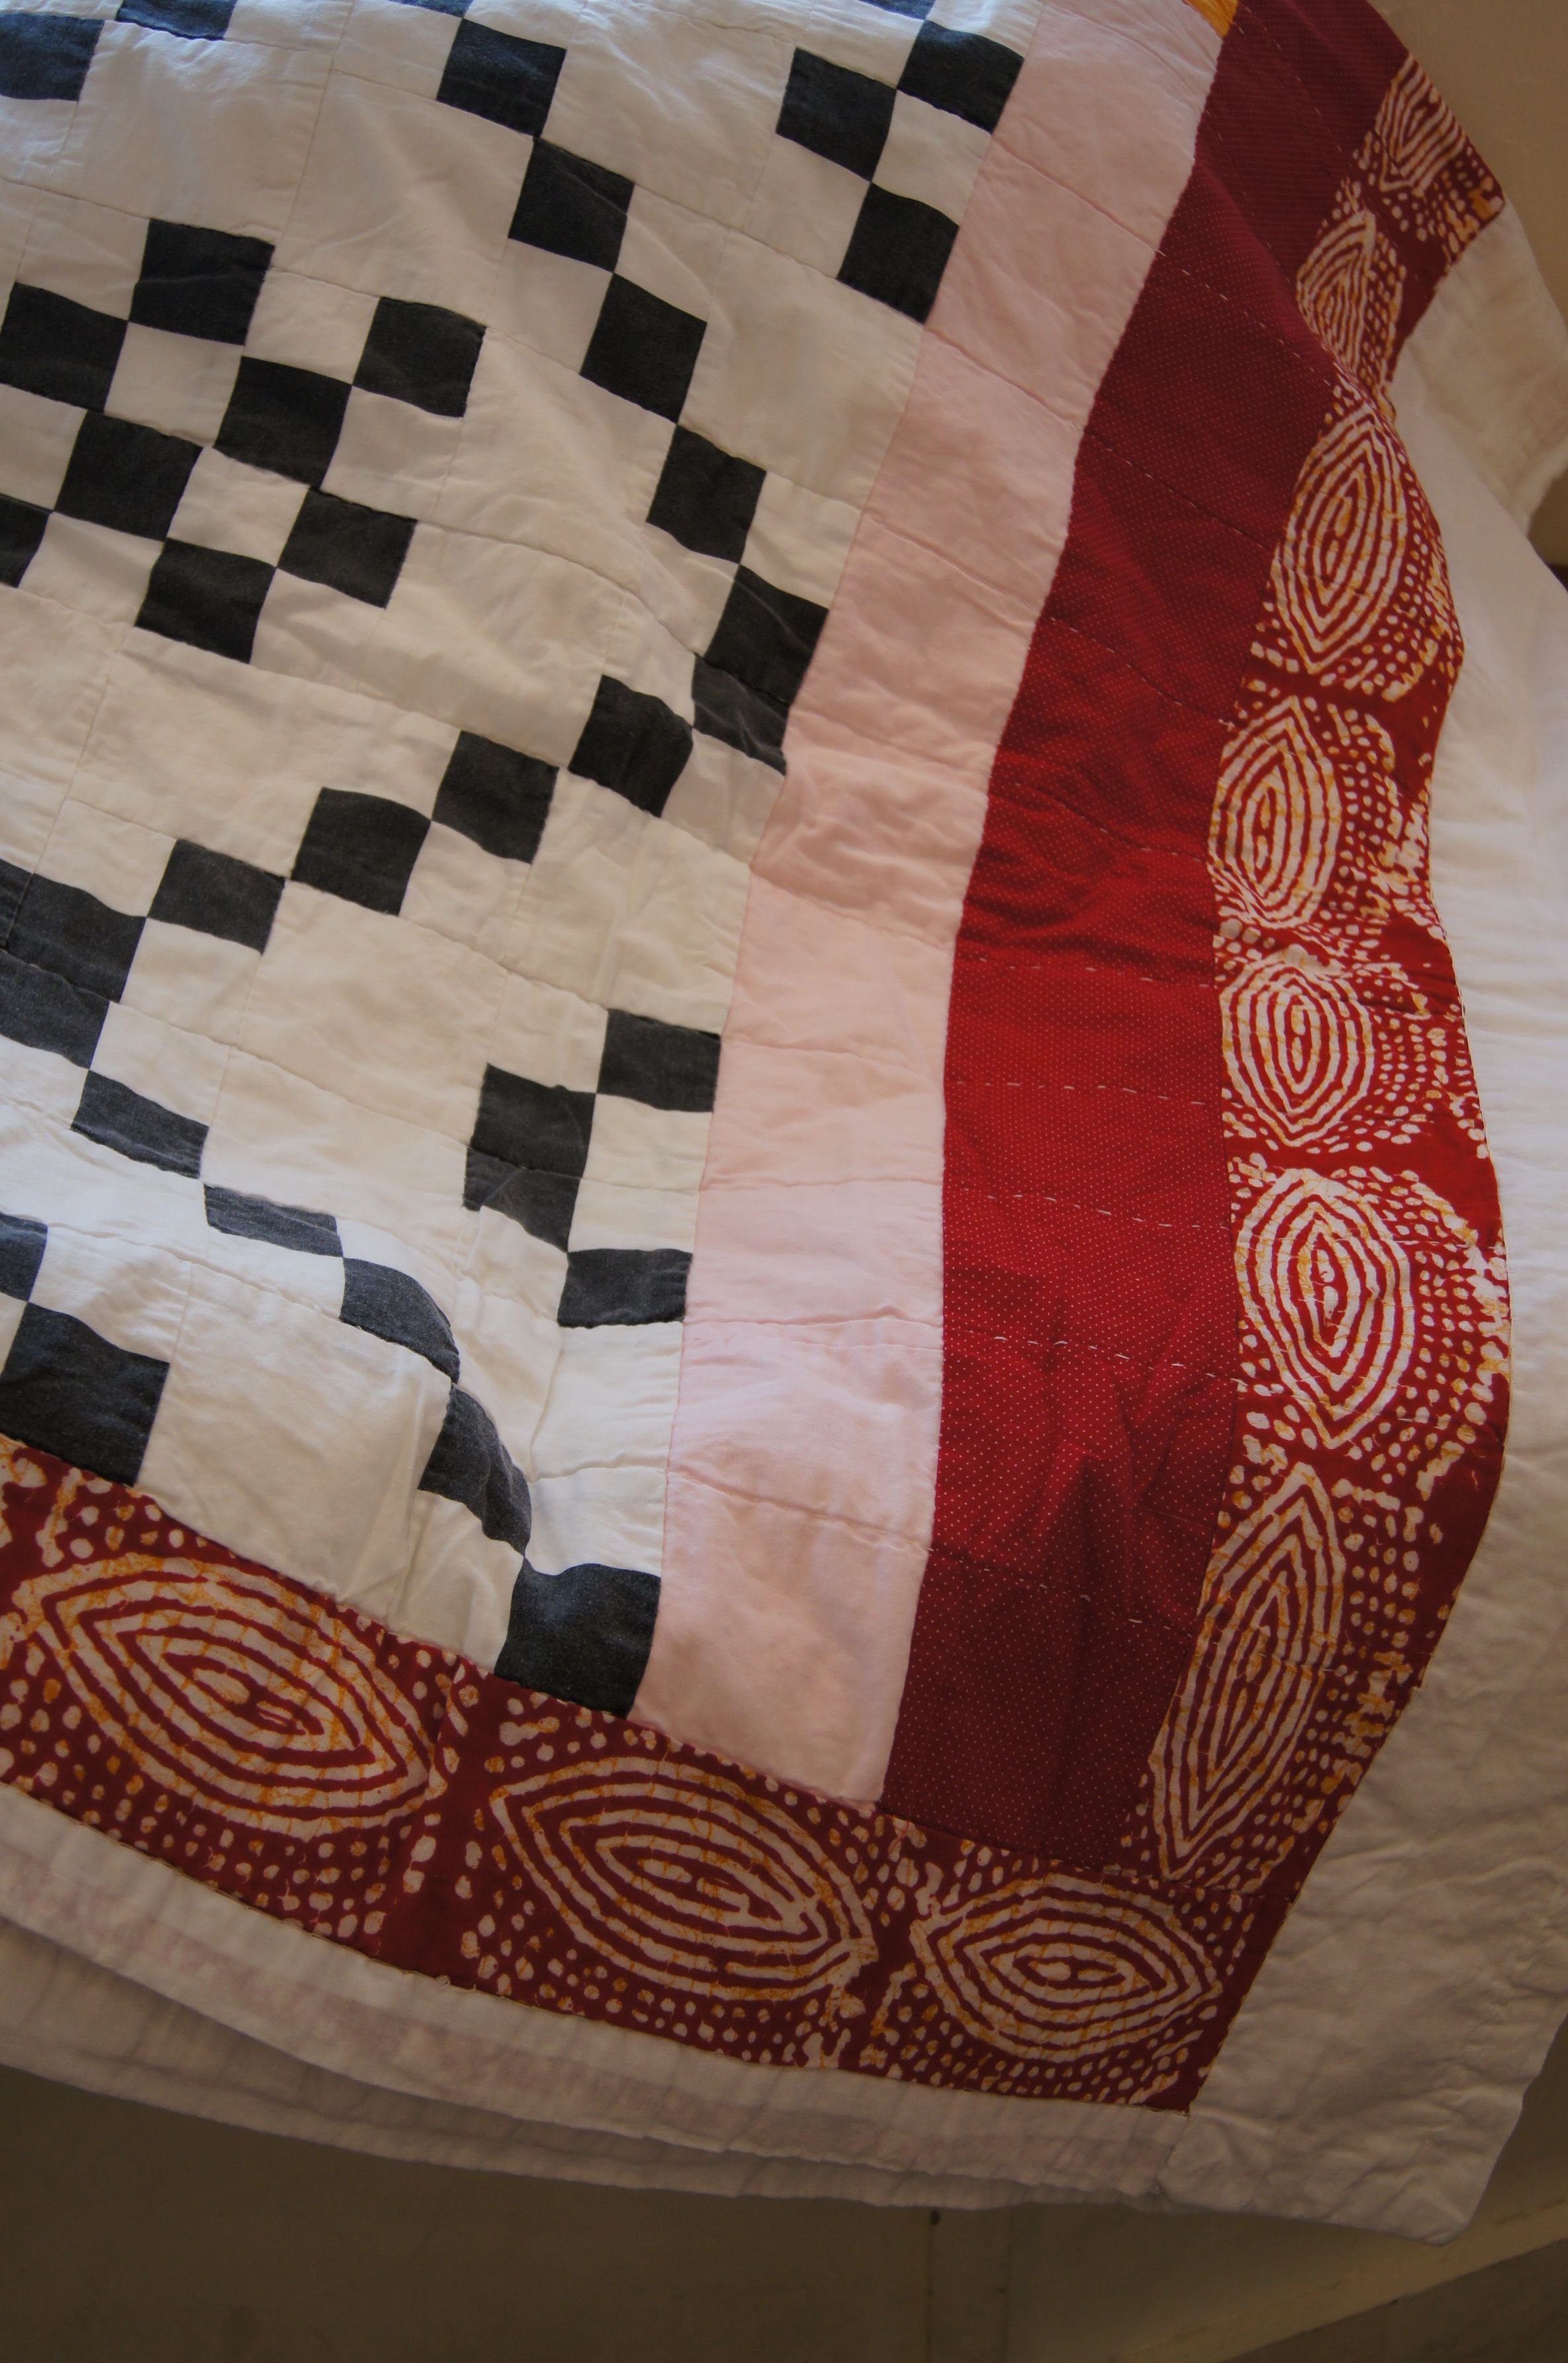
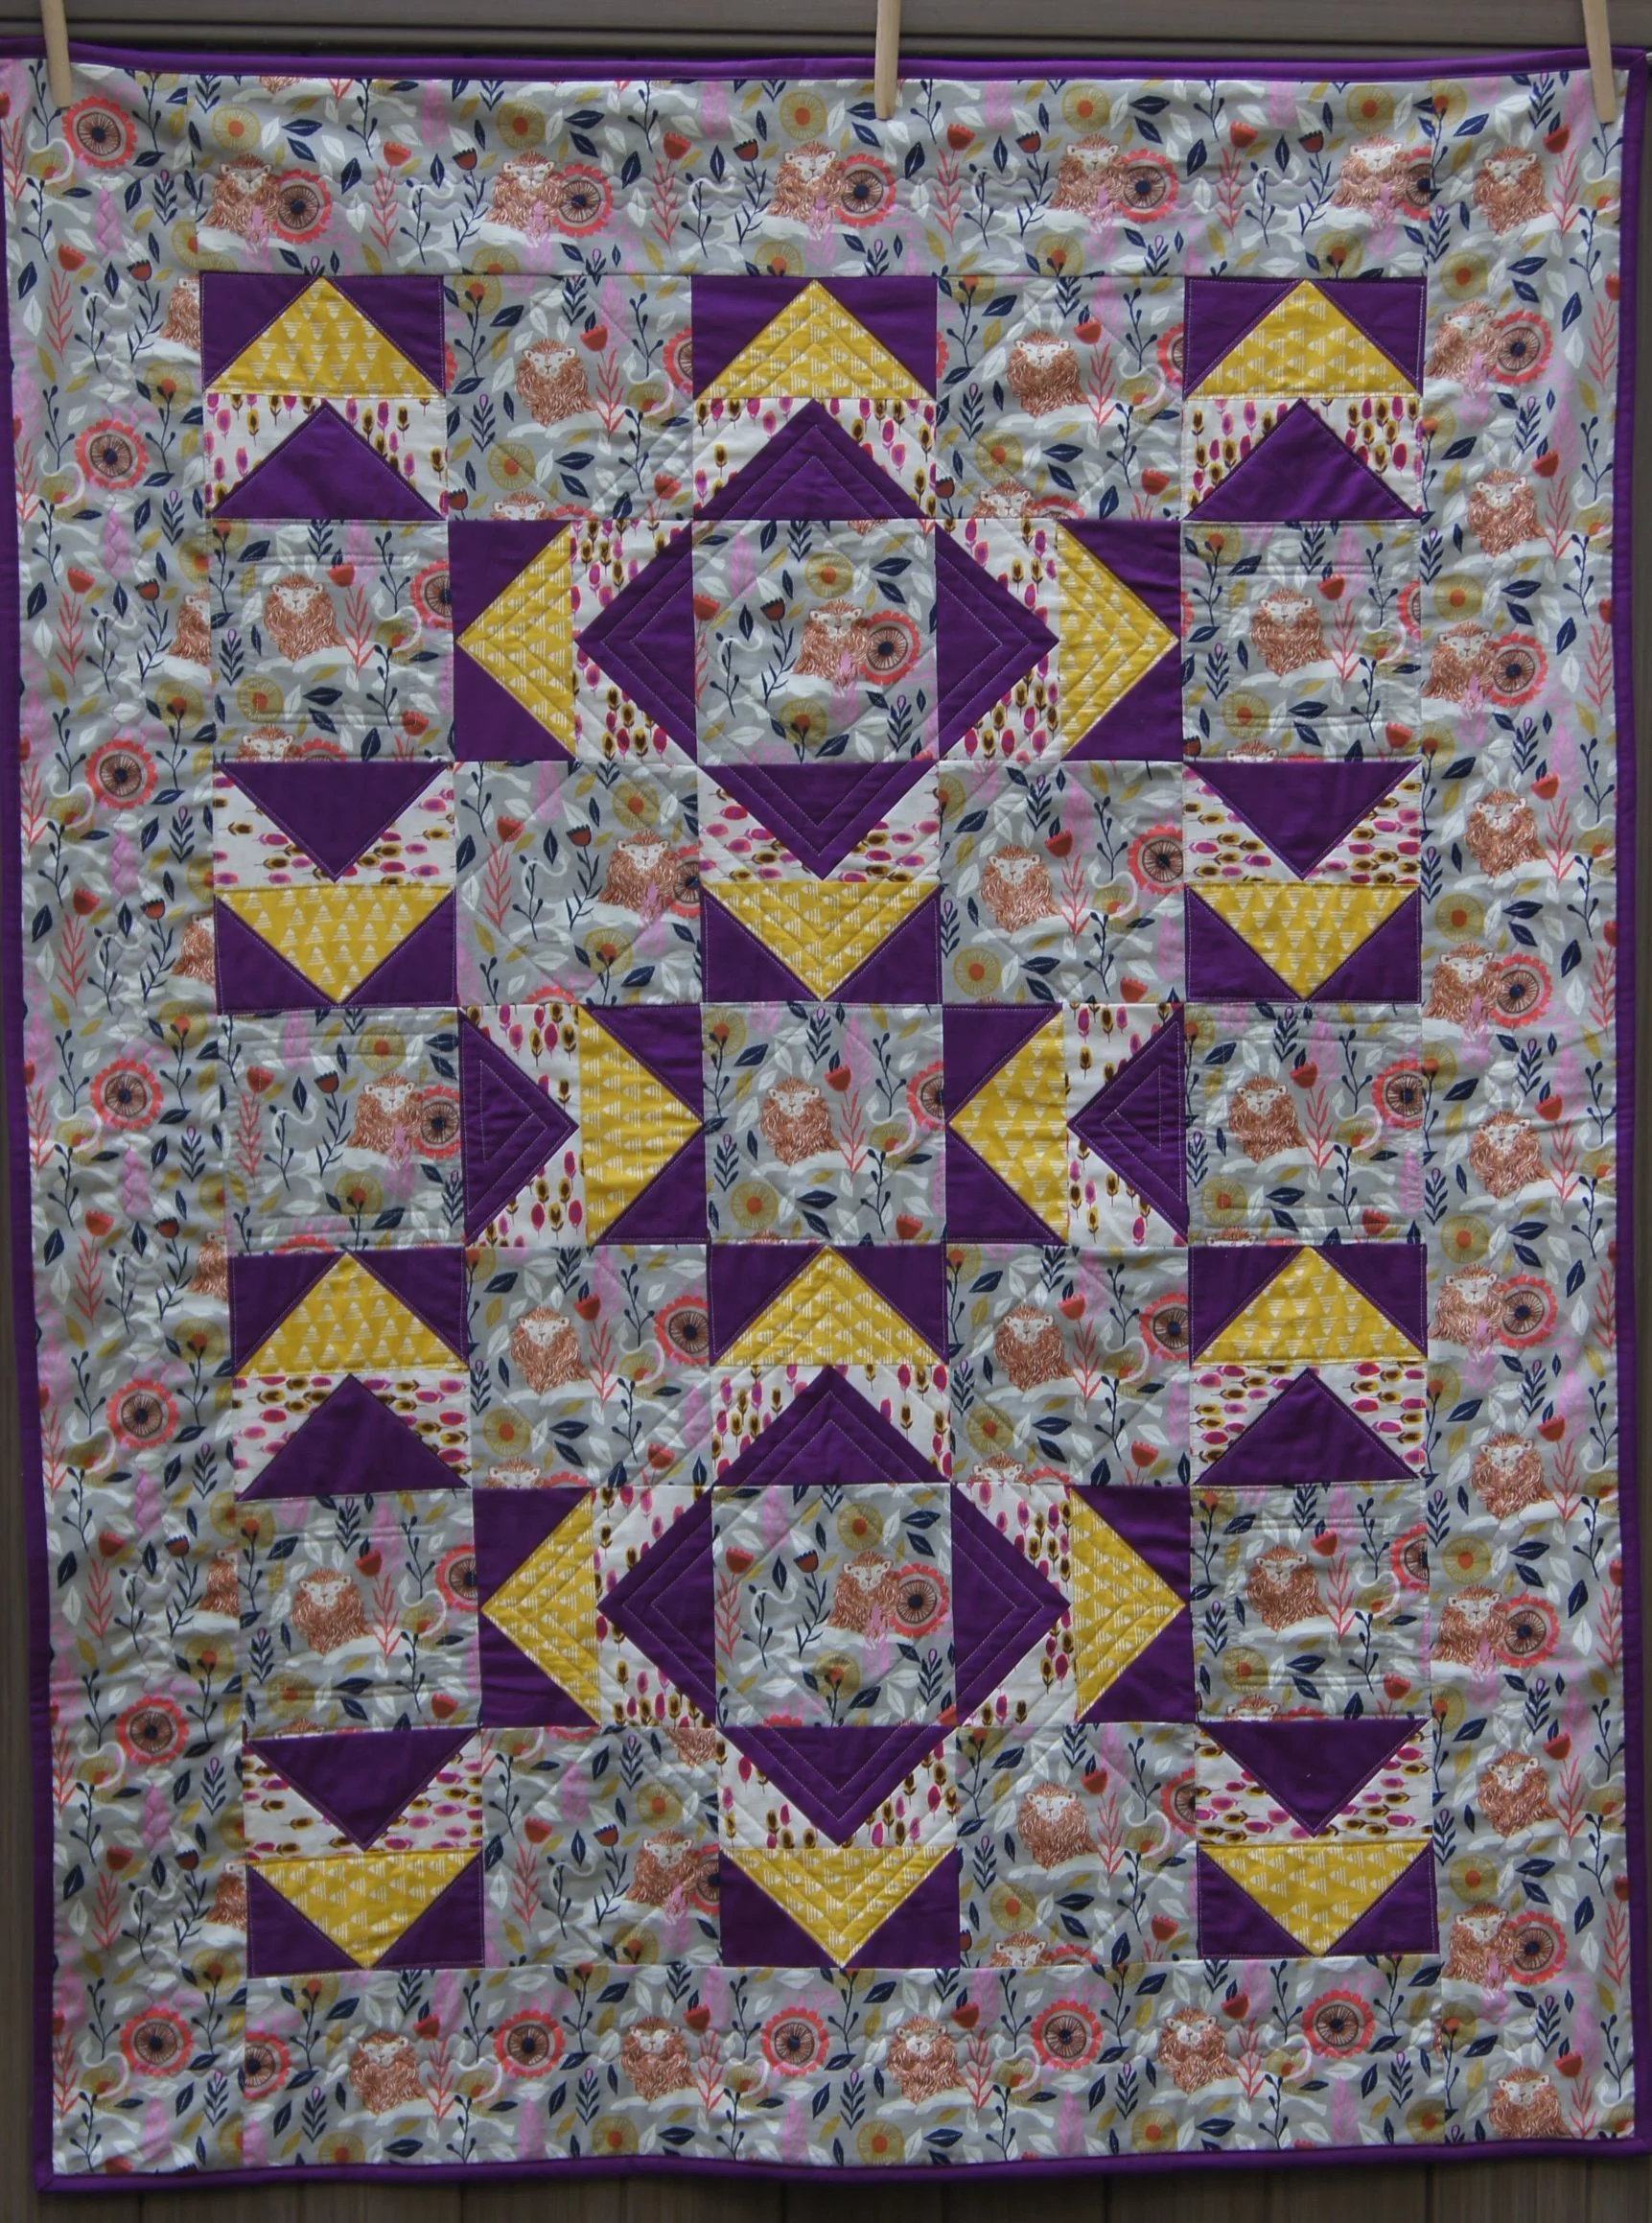
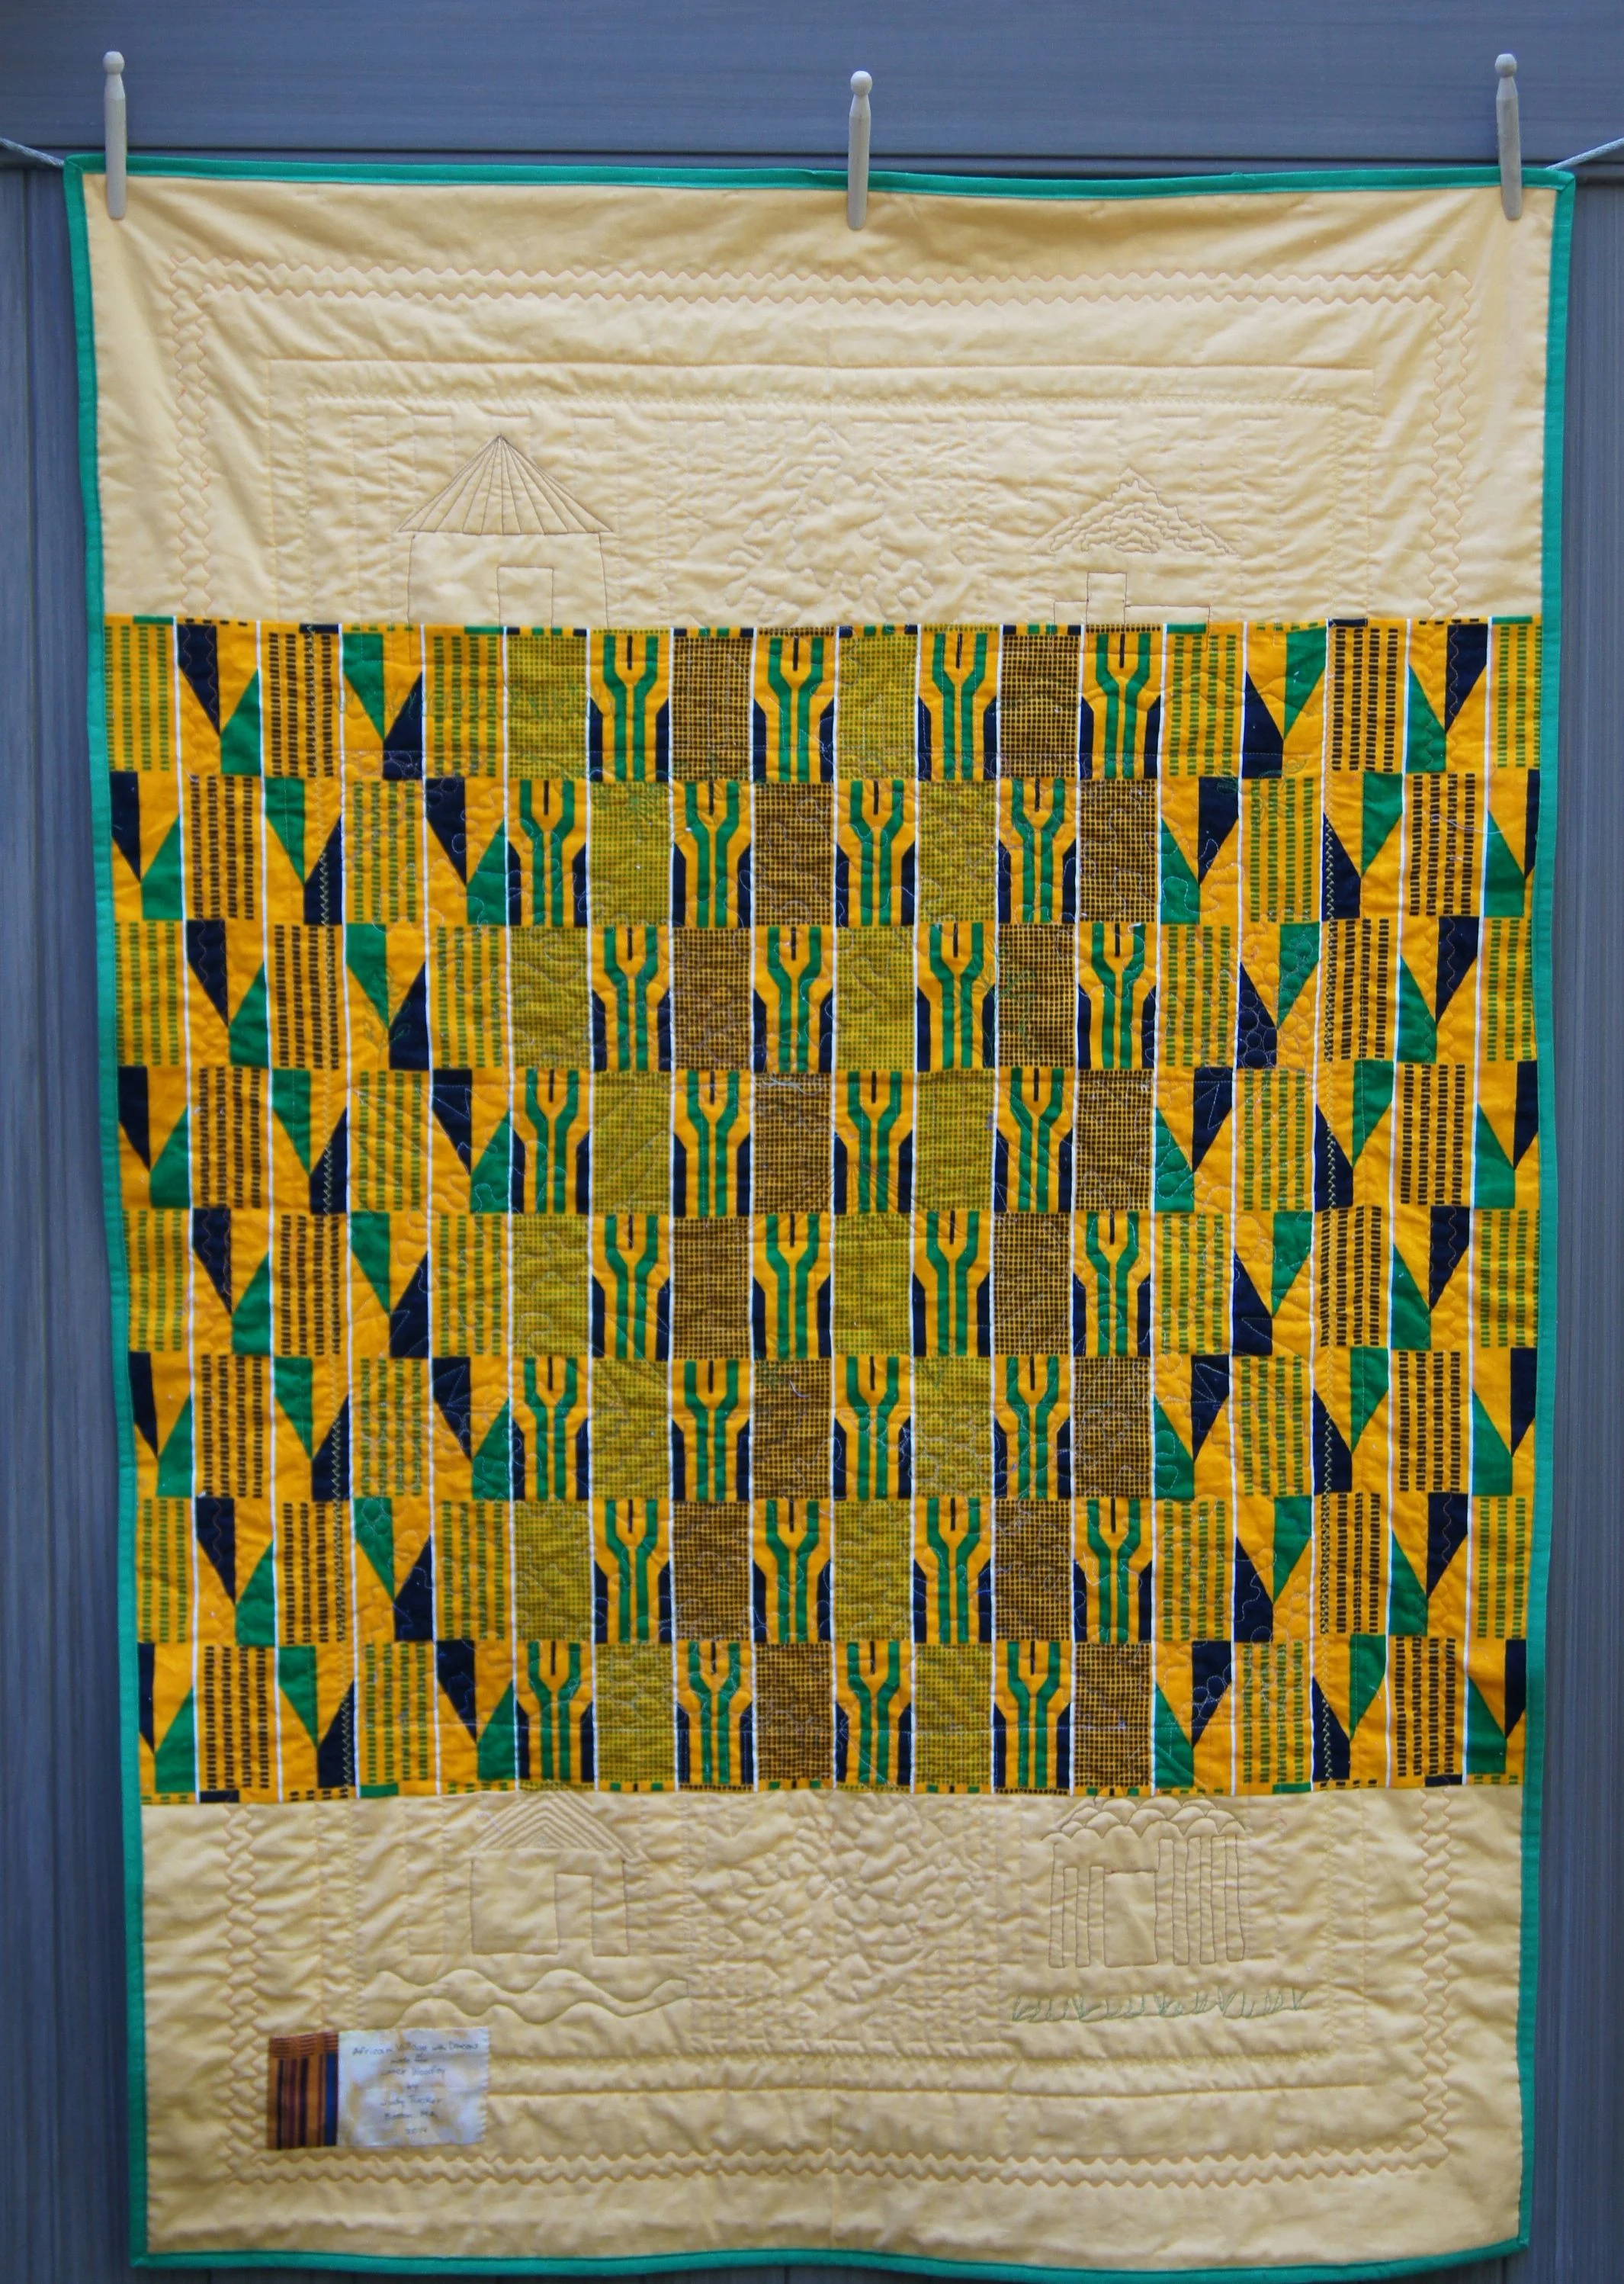
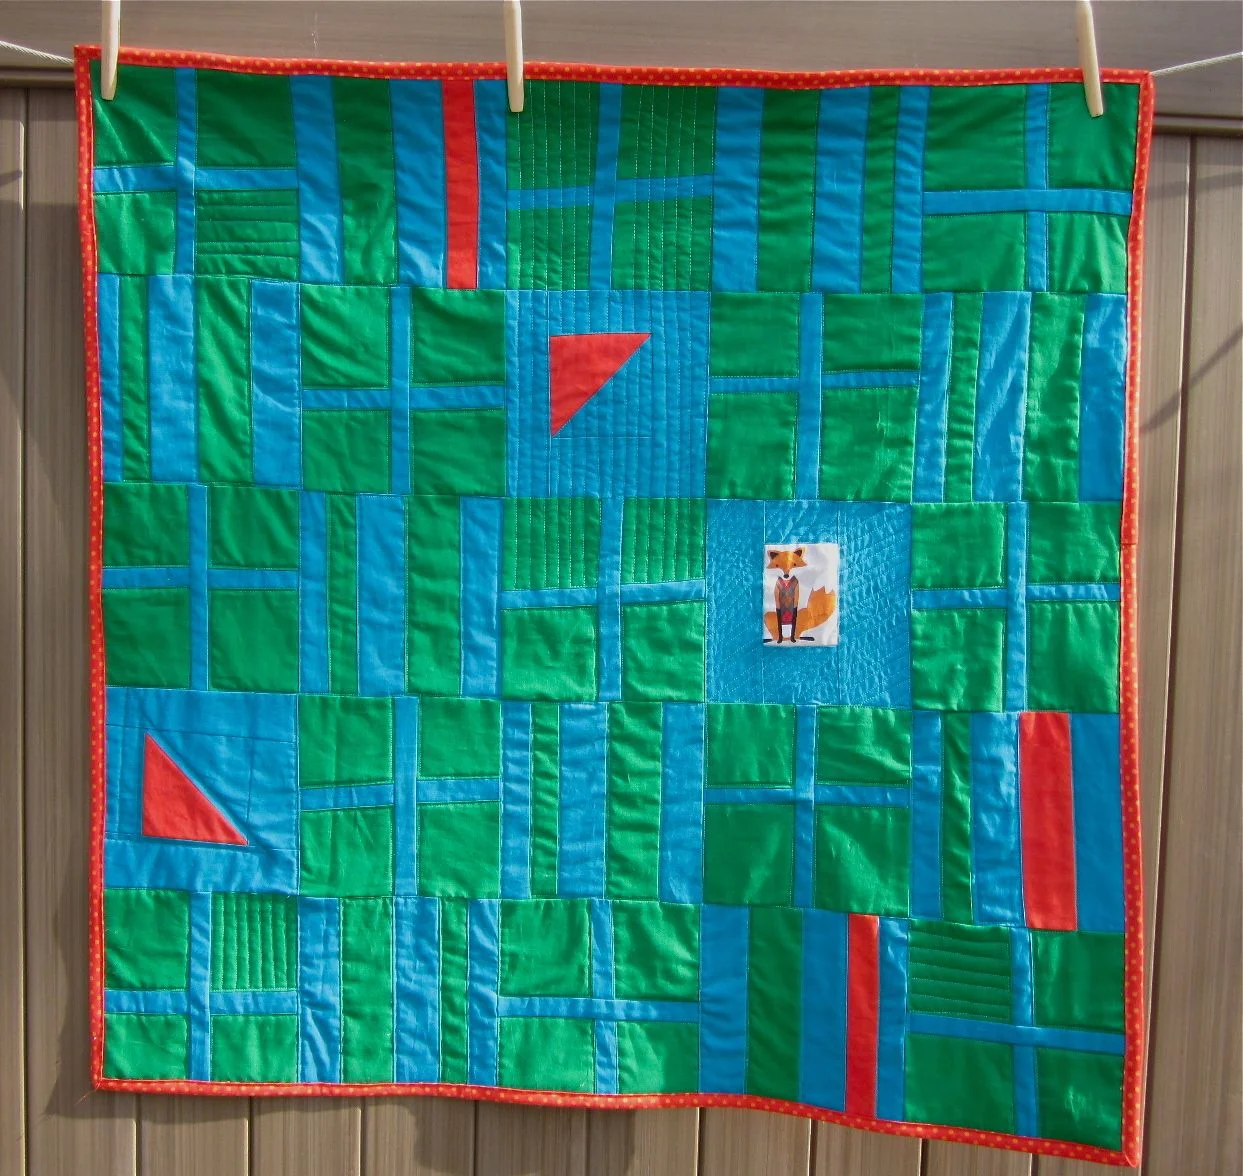
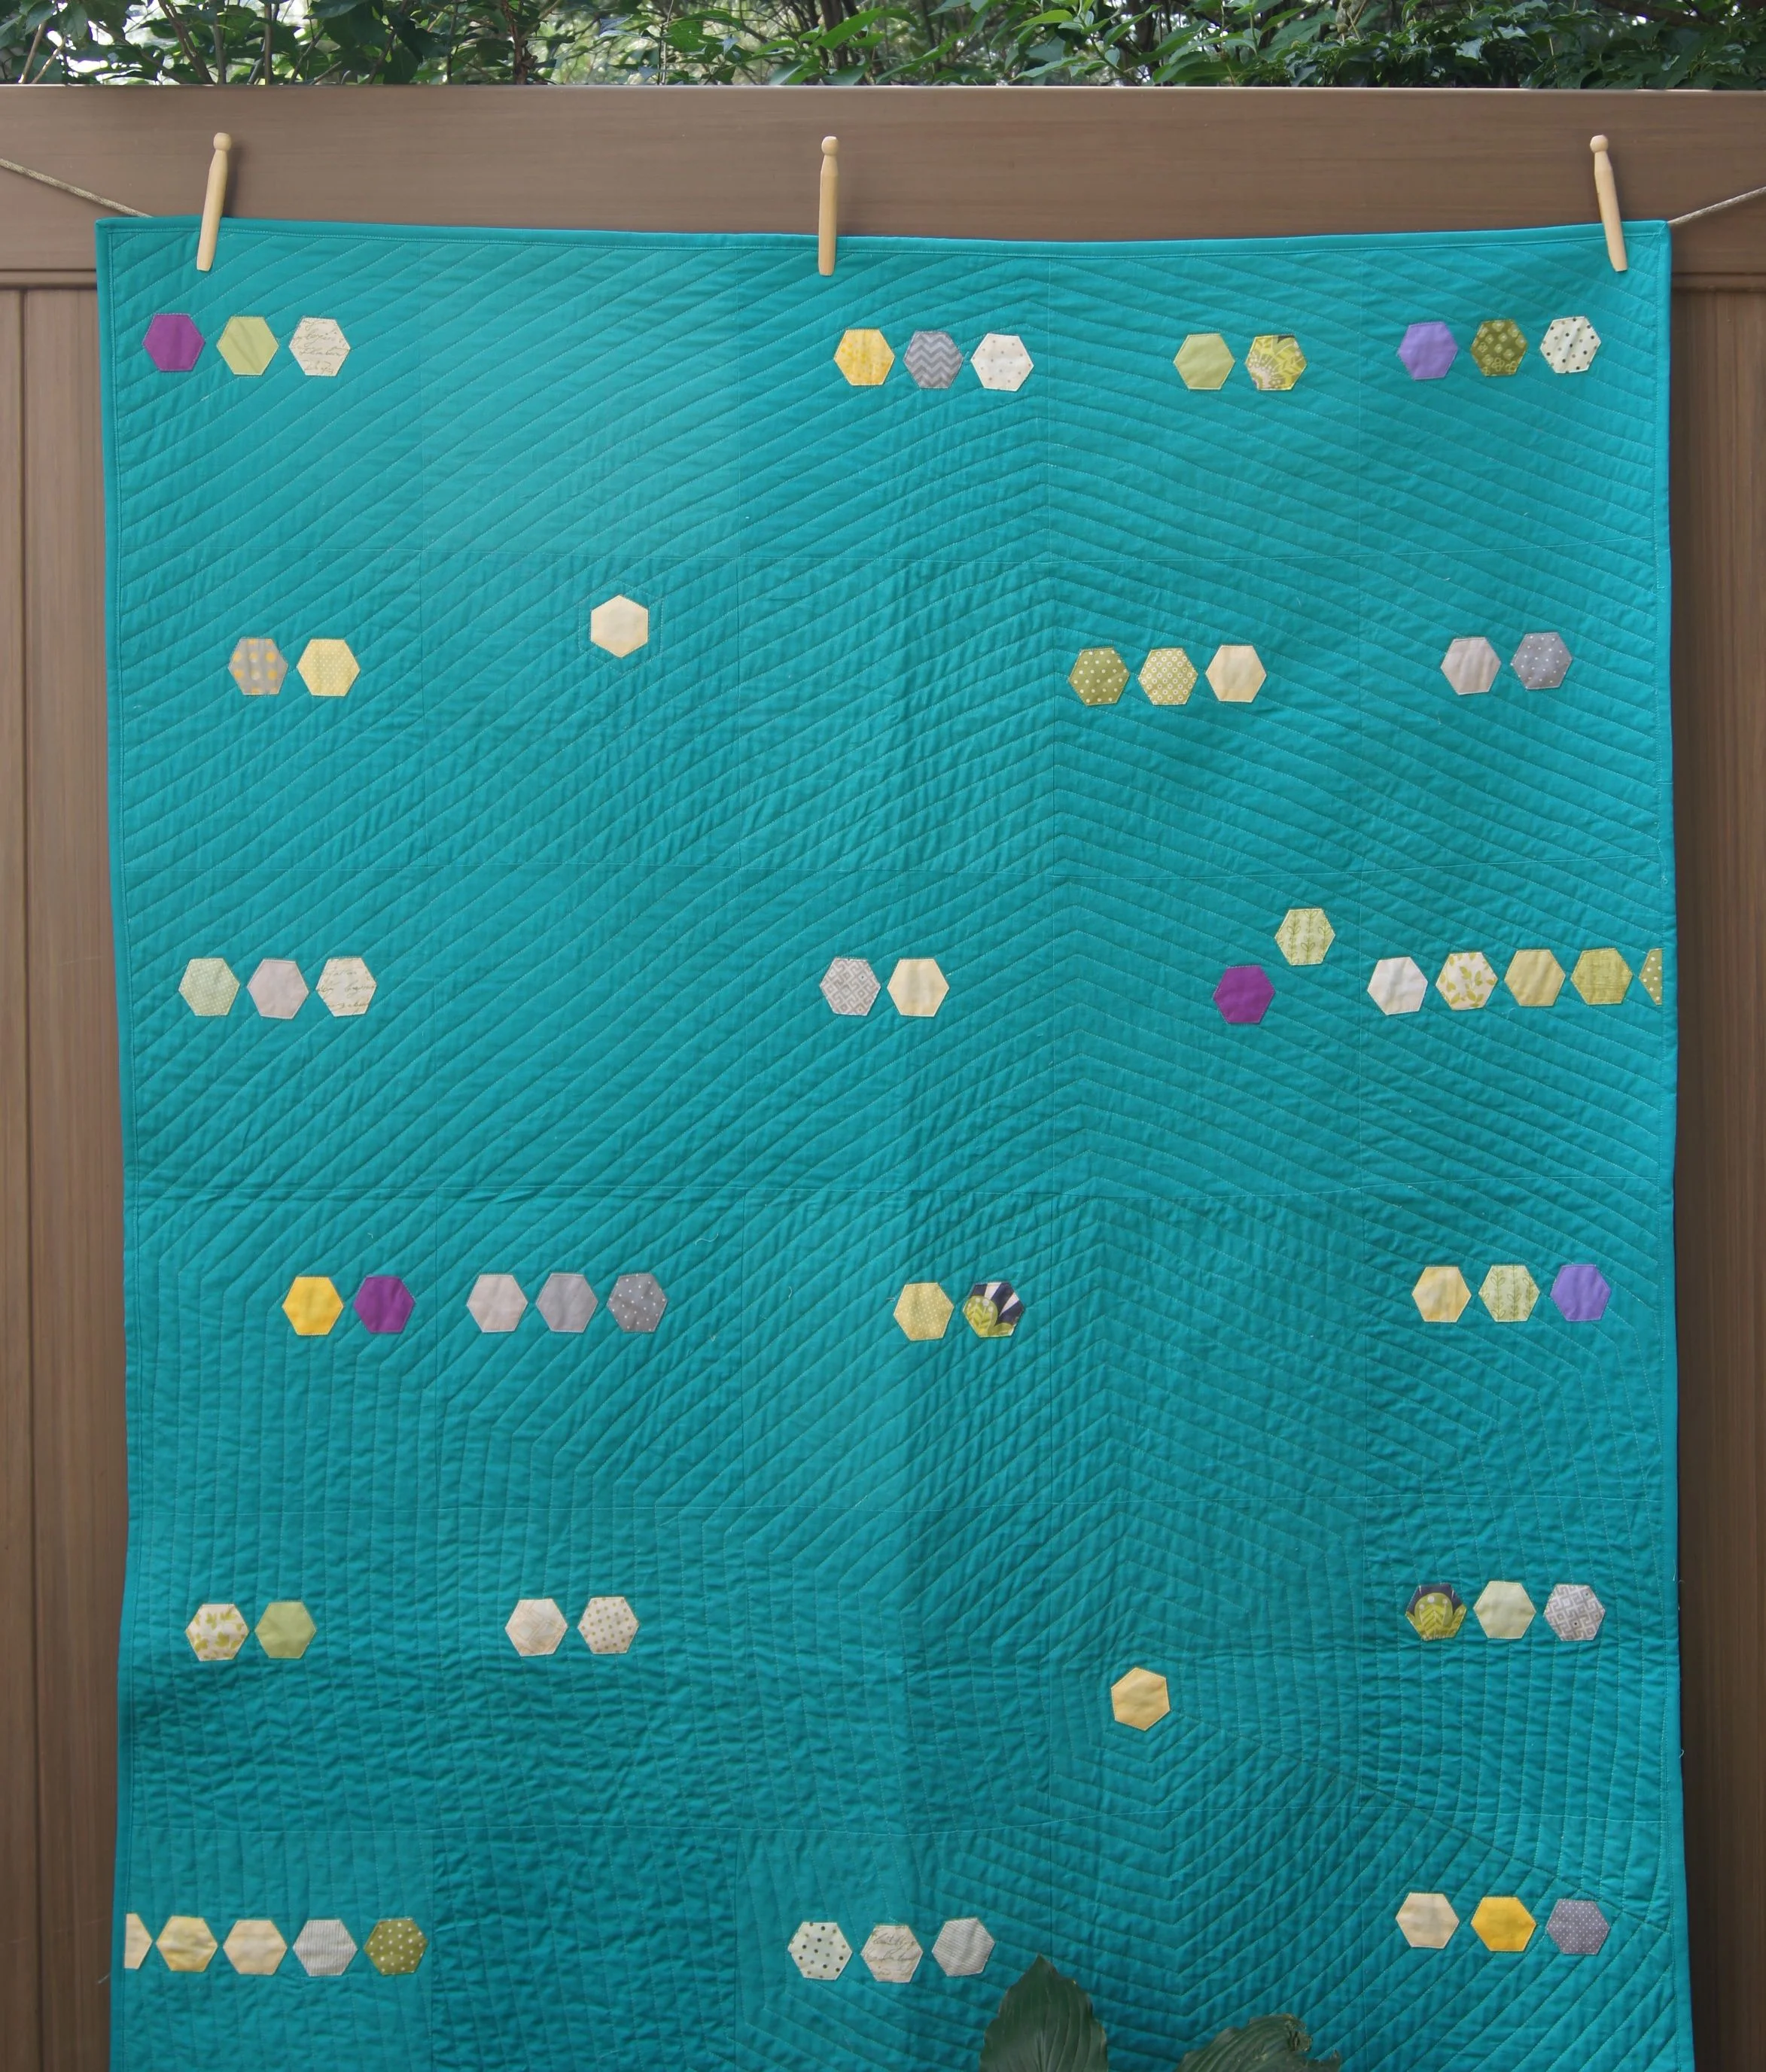
Here is one of the quilts in the show.  The pattern, "Flying Birds" is my design.  The quilt was made by Janet Hanley.   I've previously posted this pattern as a smaller baby quilt.  Here it is a generous lap quilt.  It's much easier to see the motion in this larger quilt.

Thanks, Janet, for permission to post your beautiful creation!


Orphan Blocks repurposed in Toddler Nap Quilts

by Judy Tucker


If you've pieced a lot of quilts, you probably have a collection of "orphan blocks" from quilts you've made. Sometimes I loose count of the blocks and make a few extras, sometimes I cut more than I need and sometimes I put a quilt together as I go and I find I just didn't need all the blocks I'd sewn.  For whatever reason, when the quilt is completed, there are a few block left over.  

Often I incorporate extra blocks into the quilt's back. But sometimes the blocks can't be used in the quilt and those I save in a bin of orphan blocks.  I have used them to mend quilts when the dog ate a quilt while chewing on a dog toy (oops)!  I was very grateful to have a spare for repair!  But mostly my orphan blocks just sit in the bin.

This fall the Proper Bostonian Quilt Guild has committed to making 40 nap quilts for a preschool.  That prompted me to see how I might makes some quilt tops from my scrap collections...including my orphan block bin. Two tops are done and one more is in process. 

I've been really interested in Medallion quilts recently.  Medallion quilts are constructed around a central motif.  It is a great way to feature a beautiful block in the center of a quilt--a basket of appliquéd flowers or large star are two options often seen in Medallion quilts. (Check out Connie Griner's amazing collection of  Medallion Quilt pins on her Pinterest site).   Modern quilters are also using the concept of the Medallion quilts and that's what prompted me to experiment with constructing quilts around a central block.  Except for one I designed in EQ7  (Electric Quilt 7), my Medallion style quilts have been improv pieced. 

For the napping quilts I have used an extremely simplified variation.  The quilt top above has a panel which was donated to the guild. I trimmed the panel down to the piece I wanted to use. The yellow and white 4 patch blocks with the "bricks" next to them are the orphan blocks in the quilt.  I was able to use 6 of them.  Place end-to-end the strip was too long but since they were really scraps I had no problem cutting it down to fit!  I also have a stack of precut bricks of scrap fabrics than measure 3 x 6.5 inches.   I used these bricks to build a border around the central panel.  

In the pink quilt top, the center is made of 6 orphan blocks pieced together.  All of the borders around the central blocks are strips left over from other projects with the exception of the last outer border of pink polka dots which came from yardage in my stash.

These two quilt tops had medallion quilts as the inspiration but because they only have one type of block around the center feature, I don't think they really true medallion quilts. The bottom one is actually more like a single large log cabin block.  

I've never made a true, spectacular medallion quilt, but have recently made a couple other small experimental quilts which I'll share in my next post. 


Making Half Square Triangles

by Judy Tucker


Half Square triangles compose diamond blocks for a Christmas quilt

Half Square triangles compose diamond blocks for a Christmas quilt

A year ago at our Proper Bostonian Quilt Guild Show a lady at the Bits 'n Pieces booth demonstrated an interesting way to make half square triangles (abbreviated HST).  She explained that you put 2 squares of fabric right sides together and sew a 1/4 inch seam around all 4 sides of the squares.  Then cut the squares on the diagonal twice.  Press open the 4 sections and there are 4 HSTs!   

That looked like so much fun so I purchased a stack of 5 inch charm squares.  It was really easy to zip around the 4 sides of each pair of squares and then cut it apart.  4 HSTs in a snap.

But there is a catch.  All 4 sides of HSTs made this way are on the bias of the fabric.  So that means they can stretch and warp if the blocks aren't handled carefully.  (And even if they are)!  If you look at the finished blocks above you can see there is a bit of laxity which is most apparent in the light blocks.

Even though it is so easy to make the HST by this method, I probably will stick to the more traditional way to make HSTs.  You can read about other technique I use to make HSTs in my post on July 7, 2014. 

The method I discussed in July only makes 2 HSTs at a time but the sides of the finished square are on the straight of the grain of the fabric so the blocks are much more stable and not as prone to stretching.

I'm glad I tried the "sew around the square" method of HSTs.  It's fun to try out new techniques.  And you never know if you'll like a new method for piecing a block until you use it!


Flying Geese Rulers: A review of 3 options

by Judy Tucker


FlyingGeeseRulers.jpg

I've recently been working on several projects which have flying geese blocks.  Two of the projects are for a class and I intentionally used half square triangles and quarter square triangles cut from squares to make the flying geese.  So you don't need a special tool to make flying geese blocks, but sometimes it's great to have one.

You might want to use a Flying Geese Ruler if you are using scraps and don't have a large enough square of fabric to cut the pieces but you do have a strip of fabric which would work if you were using the specialty ruler. Or perhaps you are allergic to anything cutting which requires a measuring 7/8 inch, in which case, you are always going to reach for ruler to make your flying geese blocks!

Shown above are 3 flying geese rulers which I've used.  They all work well so I'm not going to recommend any particular ruler.  Each of the rulers specifies the width of fabric strip you need to cut to make a specific size finished flying geese block.  1/4 inch seam allowances are automatically included with all 3 rulers so you don't need to use any math to make the correct size block.  The 3 rulers do have minor differences and you may find there is one which you'd prefer.

Fons & Porter Omnigrid Flying Geese Ruler

Fons & Porter Omnigrid Flying Geese Ruler

I've had the Fons & Porter Omnigrid Flying Geese Ruler the longest. It's a good straightforward tool.  The quarter square triangles for the body of the goose are cut using the black lines and the wings are cut using the yellow lines.  All the lines are printed on the same surface of the lucite.  The tool is marked with to show the flat edge of the strip of fabric to you will be cutting but the tool itself isn't blunt. Using the marking does eliminate the dog ears on the finished block if you align the marking on the tool with the fabric strip. This tool is marked for flying geese from 1 x 2 inches to 4 x 8 inches. 

The Fons & Porter Flying Geese Ruler comes with a full color booklet with a tutorial in English on one side and in Spanish on the flip side.  It also includes a pattern for the Dutchman's Puzzle block.

Marti Michell's Flying Geese Ruler

Marti Michell's Flying Geese Ruler

Marti Michell's Flying Geese Ruler uses black lines to cut the quarter square triangles for the goose body and dark purple lines to cut the half square triangles for the goose wings.  I don't see a lot of difference between the purple and black lines. However, since you are turning the ruler to cut each unit, I don't find that to be a problem.   Markings are all on one side of the piece of lucite.

This ruler is marked to cut Flying Geese Units from 2 1/2 x 5 inches to 4 1/2 x 9 inches.  All if the corners of the ruler are blunted so you can line up the flat top edge of the ruler with the edge of the fabric you are cutting.  I like that feature.  There are 2 flat edges on the long side of the ruler enabling you to make a block which is totally dog-ear free.  I have to say, I didn't enjoy cutting that extra tip off with my rotary cutter. It just felt like it was an awkward angle.  But if you want to avoid dog ears, this is the tool for you!

I did like the soft rubber piece holding on the instruction booklet.  It slides easily on and off the ruler so it's a great way to keep the instructions attached to the tool. The instruction booklet had clear 2 color diagrams and instructions on chain piecing the blocks.  It also has diagrams of 3 quilt blocks which can be made using this tool:   Dutchman's Puzzle, Evening Star and Rambler. 

EZ Quilting Flying Geese Ruler by Kimberly Einmo/ Simplicity Creative Group

EZ Quilting Flying Geese Ruler by Kimberly Einmo/ Simplicity Creative Group

The EZ Quilting Flying Geese Ruler has magenta lines to cut the quarter square triangles for the goose body on "Side A".  The aqua lines to cut the half square triangles for the wings are on the flip side of the lucite, "Side B". I found these markings to be easy to see when I was using dark fabrics. 

This ruler is marked for flying geese units from 1 1/2 x 3 inches to 6 x 12 inches.  There is a flat edge on 2 sides of the ruler which align with the top of of the strip of the fabric you are cutting. You will have dog ears on the lower edges of your finished block but not along the top of the block. 

The flier with this tool has concise cutting instructions in English, French and Spanish. There are  diagrams showing how to cut and construct the block but no text/tutorial to go with the diagrams. The booklet does include a chart showing the width of strip needed for each size of flying geese unit.  This information is also printed on the ruler. 

So, which tool to pick?

  • If you are a beginner and want step by step instructions, or if you want to make really little flying geese blocks, the Fons & Porter tool is great.
  • If you don't want to trim dog ears on your finished blocks, the Marti Michell tool is for you.
  • If you know how to make flying geese blocks and want to make large flying geese blocks or if you are working with really dark fabrics, the EZ Quilting Flying Geese is your best choice. 

So these tools have some differences, but in the end, all 3 make great flying geese blocks. The choice is yours!  Buy what you can find and/or like best.  You really can't go wrong.

Here is a completed block made with each ruler.  None have been trimmed or squared up yet.


African Village Quilt with Dancers using Diamond blocks

by Judy Tucker


AfricanVillagequiltwithdancers.jpg

I've completed my African Village Quilt with all diamond blocks.  The dancers in the diamond blocks, the bodies of the houses and the borders are all African Fabrics, or African designed fabrics made in Holland.  The border fabric is mud cloth made in Gambia. It is soft and gauzy. It worked well in the borders but the wax fabrics are easier to use for piecing since they have less give. Because the African fabrics were all so different, I washed them before I used them. The wax fabrics were really waxy prior to washing but soft afterwards.  I found these fabrics at the Etsy shop, Tambo Collection.  They had a great selection of fabrics and the prices are reasonable.

Here is the back of the quilt.  The central fabric is Kente cloth made in made in Holland. The tops and bottom strips are Kona Cotton "Cheddar"!

I really like the motion in the Kente Cloth print.  It's great designing. 

In the live and learn department:

If you compare the photo of the quilt above with the pattern diagram below, you'll see that the quilt has 2 layers of "lawn" below the huts while there is only 1 in the pattern.  When I printed the PDFs paper piecing files, I didn't change the print specifications to 100% which is necessary to get an accurate pattern.  I had 1 inch markers on the patterns but didn't check them since they were my own patterns.  I would have caught my error if I had put a ruler on the inch marker.  The pattern on file is accurate but the printing wasn't.  My hut blocks came out 8 inch finished instead of the needed 9 inch.  When I was sewing the huts, they didn't seem any different than the huts on the first quilt I made. But they were slightly smaller.  When I tried to sew the blocks together, they didn't match.  I decided was easier to add to the hut blocks to make them larger rather than re-making the diamond blocks smaller.   

All the paper pieced patterns I've used from other designers have always specified printing at 100% which I've done. And I checked the 1 inch mark too.  I've always wondered if it really matters.  And the answer is:  YES, it does!  When I went back and printed one of the hut patterns with the print setting at 100% and the block measured a perfect 9 inch finished.   Lesson learned. 

African Village with Diamonds Quilt Design

African Village with Diamonds Quilt Design


Around the World Blog Hop

by Judy Tucker


It's Monday!  I'm taking today to join in the Around the World Blog Hop.  I was tagged by Amy Friend, DuringQuietTime, designer of amazing paper pieced quilt blocks and also beautiful quilts, to add a post to the "Around the World Blog Hop."  

I, in turn, am tagging Maer Soukaros to add a post next Monday.  She's a New England resident, a quilt designer, and a member of our local quilt guild, Proper Bostonian Quilters.  Her amazing "Fault in my Star" quilt won a prize in our Summer Challenge!  Congrats Maer!  It's a beautiful quilt!  (Maer was modest and didn't mention that she'd won a prize when she wrote about the quilt in her blog last week)!  She blogs at Thehard-rockquilter.blogspot.com.  Can't wait to see her post next week!

1. What I've been working on:

I'm spending September finishing up projects that I started over the summer.  I have a stack of 6 quilts waiting to be quilted.  The most challenging one is the sampler quilt from the Flickr Vintage Quilt Revival Quilt Along.  Each block will have a unique quilting pattern.  It's exciting to think about, but it's going to take of lot of time to quilt.  Making the blocks of this quilt improved my piecing skills.  The book, Vintage Quilt Revival, has blocks that start easy and gain complexity.  It was fun, and challenging, to make all the blocks.

Vintage Quilt Revival Sampler

Vintage Quilt Revival Sampler


I've been working all summer on learning to quilt in a circular pattern. I finally got it!  Scroll back to my last post to see my latest project, The Bulls' Eye Quilt. 

Last weekend I took a break from quilting to make a bird from Abby Glassenberg's book, The Artful Bird. Abby blogs at WhileSheNaps

Here are 3 photos of my bird-making adventure:  

Left to right:  

  • The unstuffed body
  • Adding a left over wool batting for stuffing
  • The final bird standing on the book.  There is another photo of my bird on Instagram @sleepingdogquilts.

2. How does my work differ from others in its genre:

I've been quilting since my college years.  Until recently, I usually made a quilt for a specific person or for a specific use, such as a baby quilt.  At the end of last year, I retired after 30 years in pediatric nursing. I decided that I wanted to spend my suddenly "free" time learning more about quilting.  I have the freedom now to make quilts just as explorations.  They don't have to always work out.  Everything is a great experience and I'm learning new things all the time.  I've spent a lot of time thinking about color since I saw the "Quilts and Color" exhibit at Boston's Museum of Fine Arts earlier this year.  Here are some of my exploration quilts.  

     Right to left:  

  • A low volume strip baby quilt depicting sky, forest and sea
  • A quilt with complementary colors that create vibration when viewed together
  • A quilt with a casade of colors but not in the organized by the color wheel.


3. What do I create these quilts?

      Because it's fun!  And because I love art you can use (or wear)!.  I sometimes wonder where I'll find my next idea….and then suddenly I have a stack of new projects that all what to be made NOW!   

4.  How does my creative process work?

     I get my ideas and inspiration from lots of sources. The quilt exhibit at the MFA noted above started an exploration of color that lasted for months…and lead to the creation of an assortment of small projects. Sometimes I see fabric which gives me an idea for a design.  Sometimes I see a quilt in a book that I want to make, or that quilt may be the jumping off point for the creation of an original design.  Less often I'll see something in my neighborhood which will inspire me to create a quilt.  

     You don't want to see my workspace(s). Or maybe you do!!  It's messy!  I call it "creative chaos".  I often buy fabric in sets--not typically all from a fabric line or designer, but things that I like together.  I let these stacks of fabric pile up.  When I walk past them, I think about how I'm going to use them.  In sight is in mind.  Put the fabrics in the bins of my stash and it's out of sight, out of mind unless it is something particularly spectacular that I am saving for a later date!

Here are 3 quilts and why they came to be:

Left to right:

  • Modern Hexagon Quilt--I wanted to try some English Paper piecing so I made a stack of hexagons. I knew I didn't want to make a traditional Grandma's garden. But some Modern quilts using hexagons in lines or cascades I'd seen on the Modern Quilt Guild site were intriguing.  So I designed this Modern Hexagon quilt.  It could be titled "Grandma's Garden Deconstructed"!
  • Jumbled Spool Quilt--I'd seen lots of spool quilts in books and on-line.  The spools were always lined up perfectly. Mine never are!  So I created my Jumbles Spools Quilt using a design roll of Bright Kona Cottons.  
  • Portholes Quilt--I designed the Portholes quilt to practice quilting circles. My quilted circles didn't come out as planned but learning to quilt perfect circles has been a process for me, and this was a step along the way. I learned to make the reverse circles used for the sun and "portholes" from a Craftsy Class "Inset Circles and Applique by Machine" taught by Cheryl Arkison.  I find Cheryl's books to be a great source of inspiration too!


It's fun to see what everyone has been writing in their posts on this Around the World Blog Hop!  Follow the chain backwards or look for posts on Google. Happy travels!


Bulls-Eye, a Carolyn Friedlander Pattern: Part 1

by Judy Tucker


Bulls Eue Quilt, a Carolyn Friedlander Pattern from Savor Each Stitch.  45 x 45 inches

Bulls Eue Quilt, a Carolyn Friedlander Pattern from Savor Each Stitch.  45 x 45 inches

Here's my second second quilt made for the Proper Bostonian Quilt Guild's Summer Challenge.  (See my last post for the Summer Challenge Criteria).  There's a lot going on with this quilt so I'm going to blog about it today and in my post next Wednesday.

This lap size quilt didn't need to have the Pantone Color Radiant Orchid in it.  It just needed to have 3-5 characteristics of Modern Quilt and be between 36 x 36 inches and 72 x 72 inches in size (not necessarily square).

I've made several quilts this summer that meet this criteria for this challenge, so I wasn't really thinking about making a lap quilt especially for the Summer Challenge.  But one day, I was walking the dog and saw this coleus plant in a neighbor's front yard. 

Quilt Bulls Eye Inspiration Coleus cropped.jpg

I was struck by the very pale sea foam green of the leaves accented by a deep green on the margin of the leaves and the Radiant Orchard accents in the leaves.  I had fabrics matching all those colors in my stash so I decided to make a quilt using them. 

I decided to use Carolyn Freidlander's Bulls-Eye pattern from her book Savor Each Stitch.  I used to do a lot of  hand appliqué when I first started quilting.  I was in my 20s and I spent a lot of time in laundromats.  The clothes spun and I appliquéd!  With a few exceptions, i stopped doing hand appliqué when I finally got a washing machine!  

Doing hand appliqué on this project totally changed the velocity of quilting for me.  It was nice to slow down, like life in the summer, doing this hand work.  Carolyn has a chapter on Techniques at the end of her book.  She suggested basting 1/4 inch in from the edge of the appliqué piece and then needle turning a 1/8 inch seam and overcasting that edge.  Since I was going to be appliquéing large quarter circles, the basting seemed like a perfect idea. I decided machine baste that 1/4 inch line on the longest stitch length was the way to go.  It worked beautifully.

It tacked down the quarter circle piece and it gave a hard edge which helped to turn under the raw edge of the appliqué piece.  I did the turning with my fingers and finger pressed them.

Detail of appliqué: White thread is the machine basting, the raw edge is turned under and the edge is being slip stitches

Detail of appliqué: White thread is the machine basting, the raw edge is turned under and the edge is being slip stitches

Carolyn said you could use the center circles in the quilt or omit them.  I chose to omit them.  But the scraps were so enticing that I sewed them together to make 3 circles which I appliquéd  to the finished top. I like the way the eye is drawn to these accent circles. 

The finished quilt meets the Modern Quilt Characteristics criteria--asymmetry in design, texture in quilting, negative space, lack of an outer border, use of bright solid colors, minimalism in design, and grid work. 

Part 2: In the post on Wednesday, I'll discuss the quilting on this quilt.