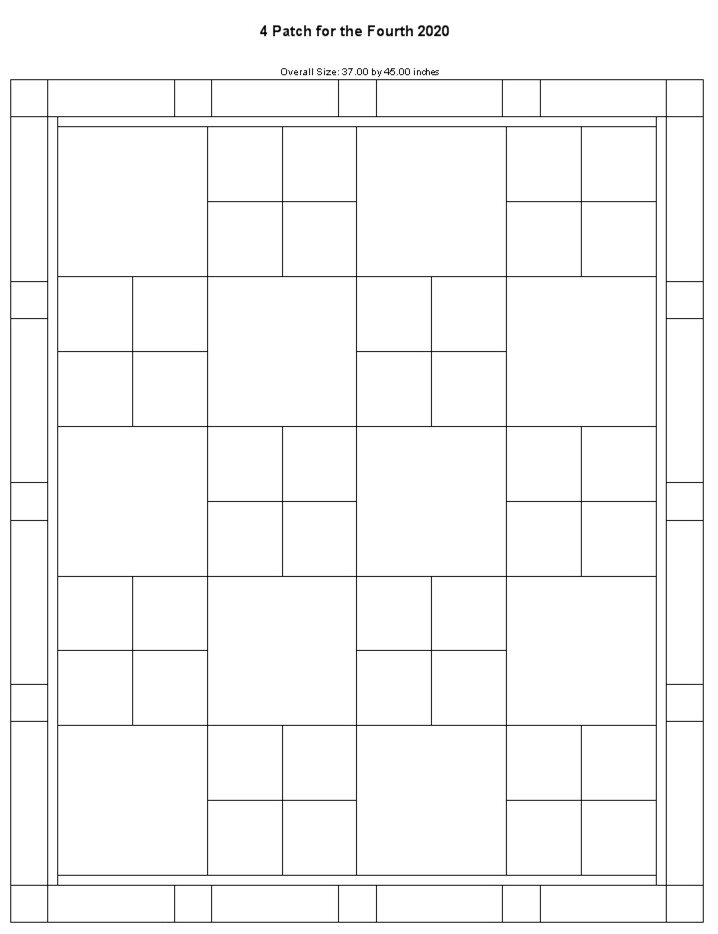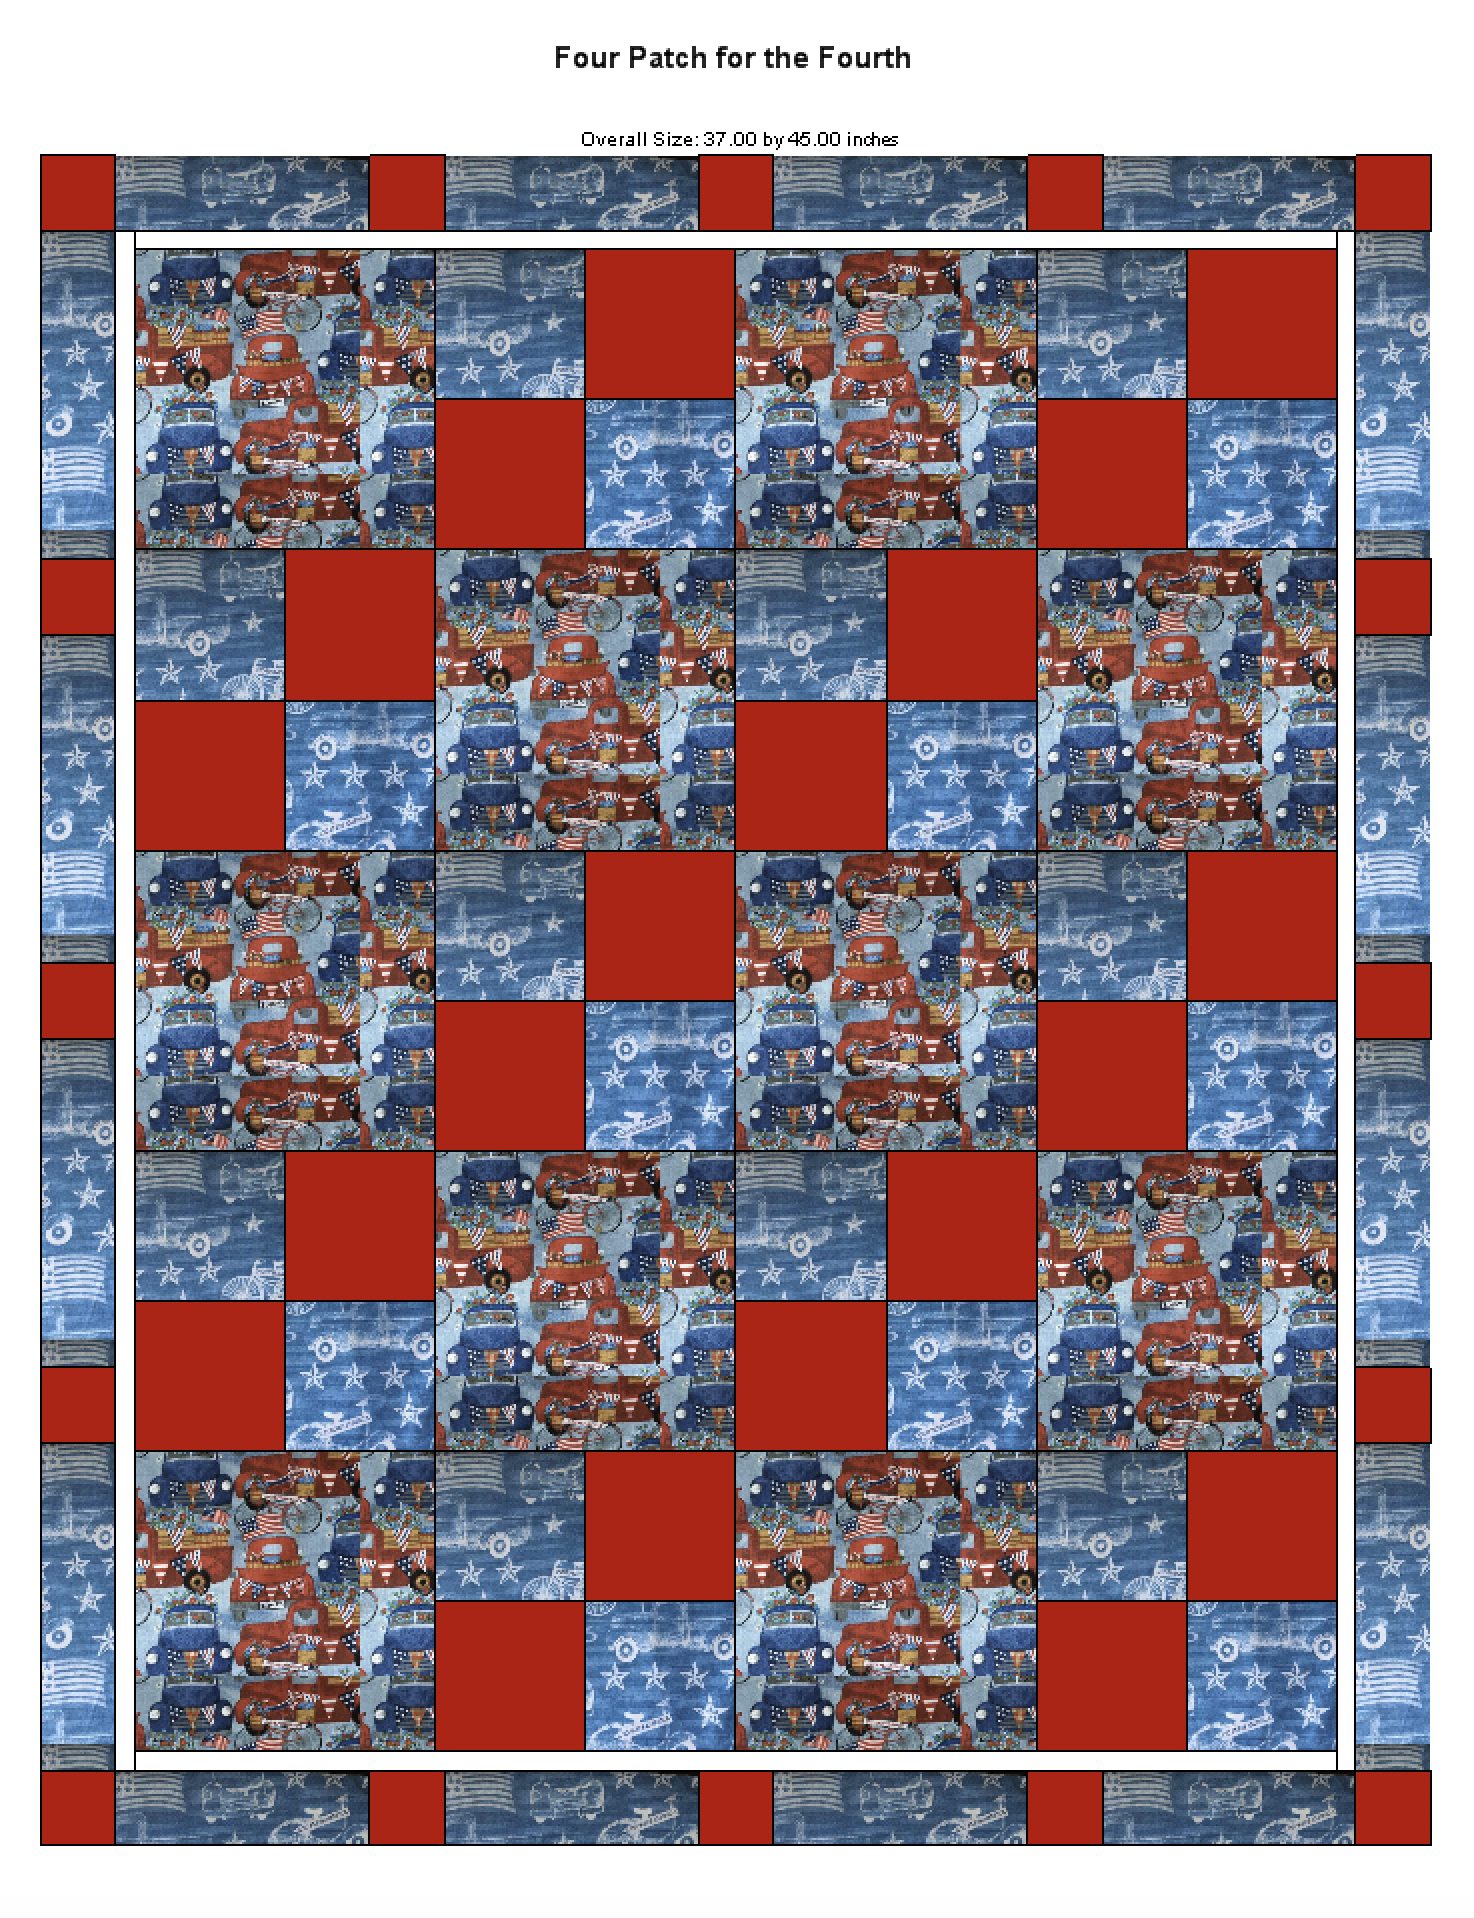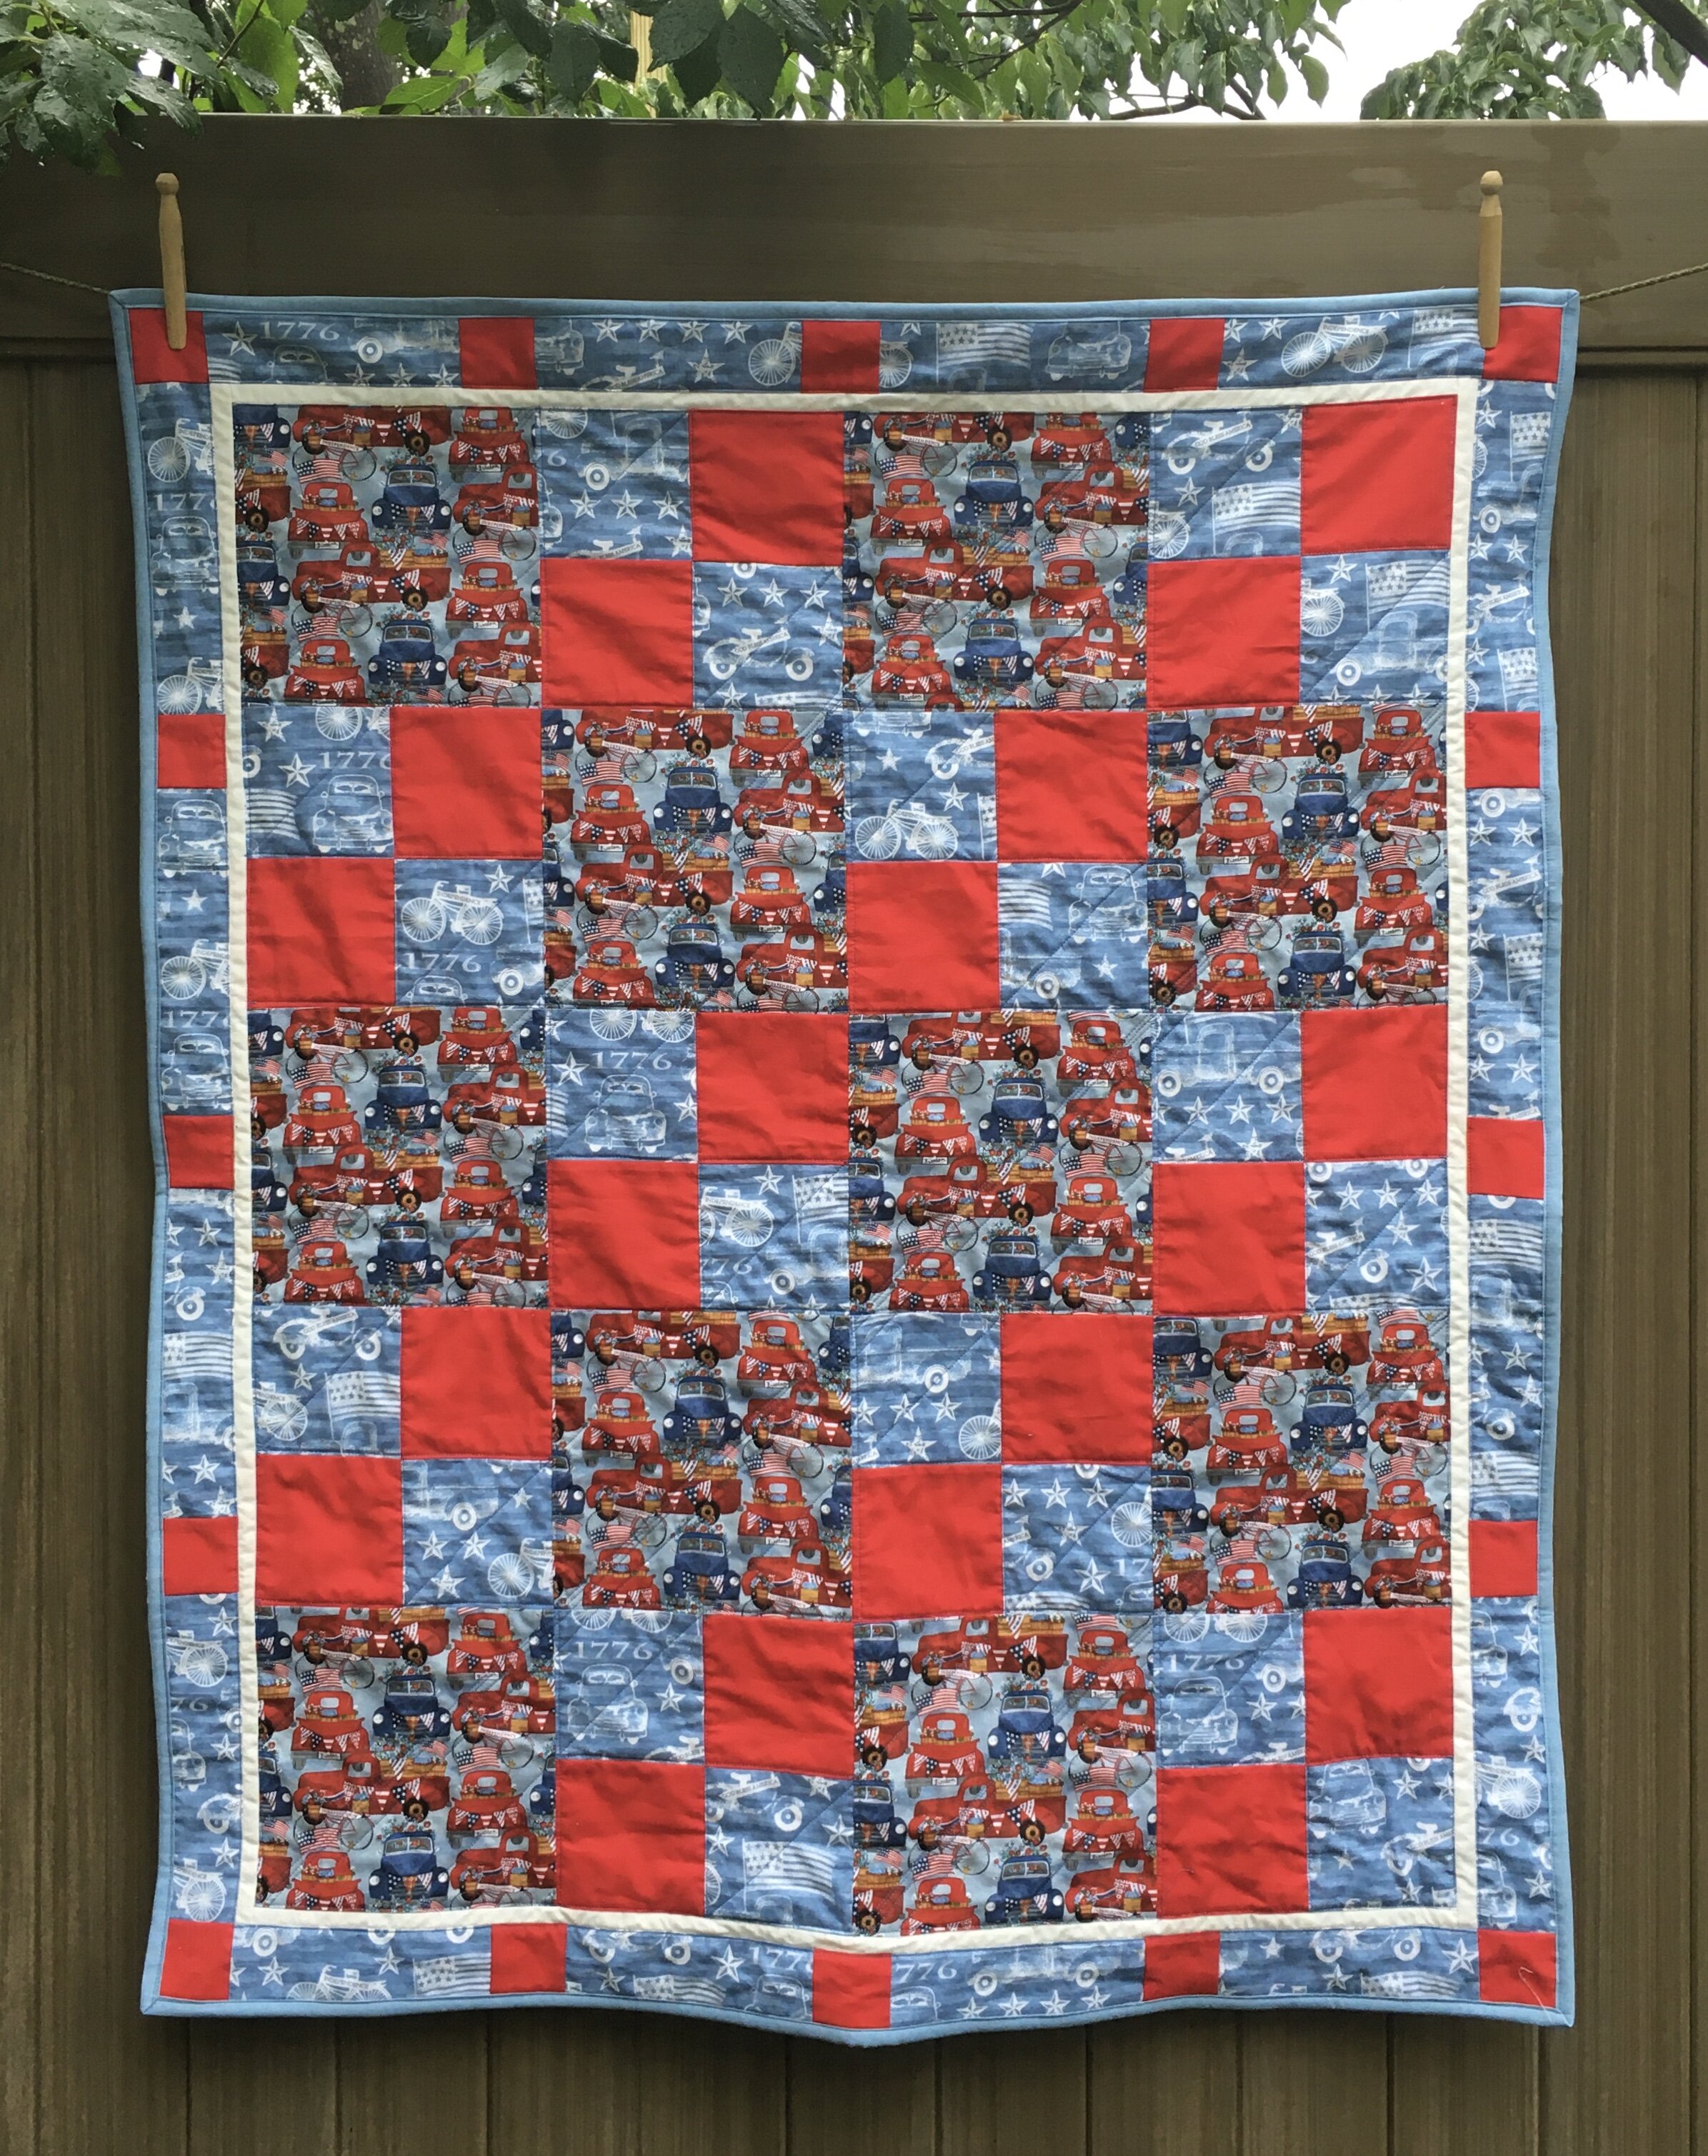
“Four Patch for the Fourth!” Lap quilt 37 x 44 inches
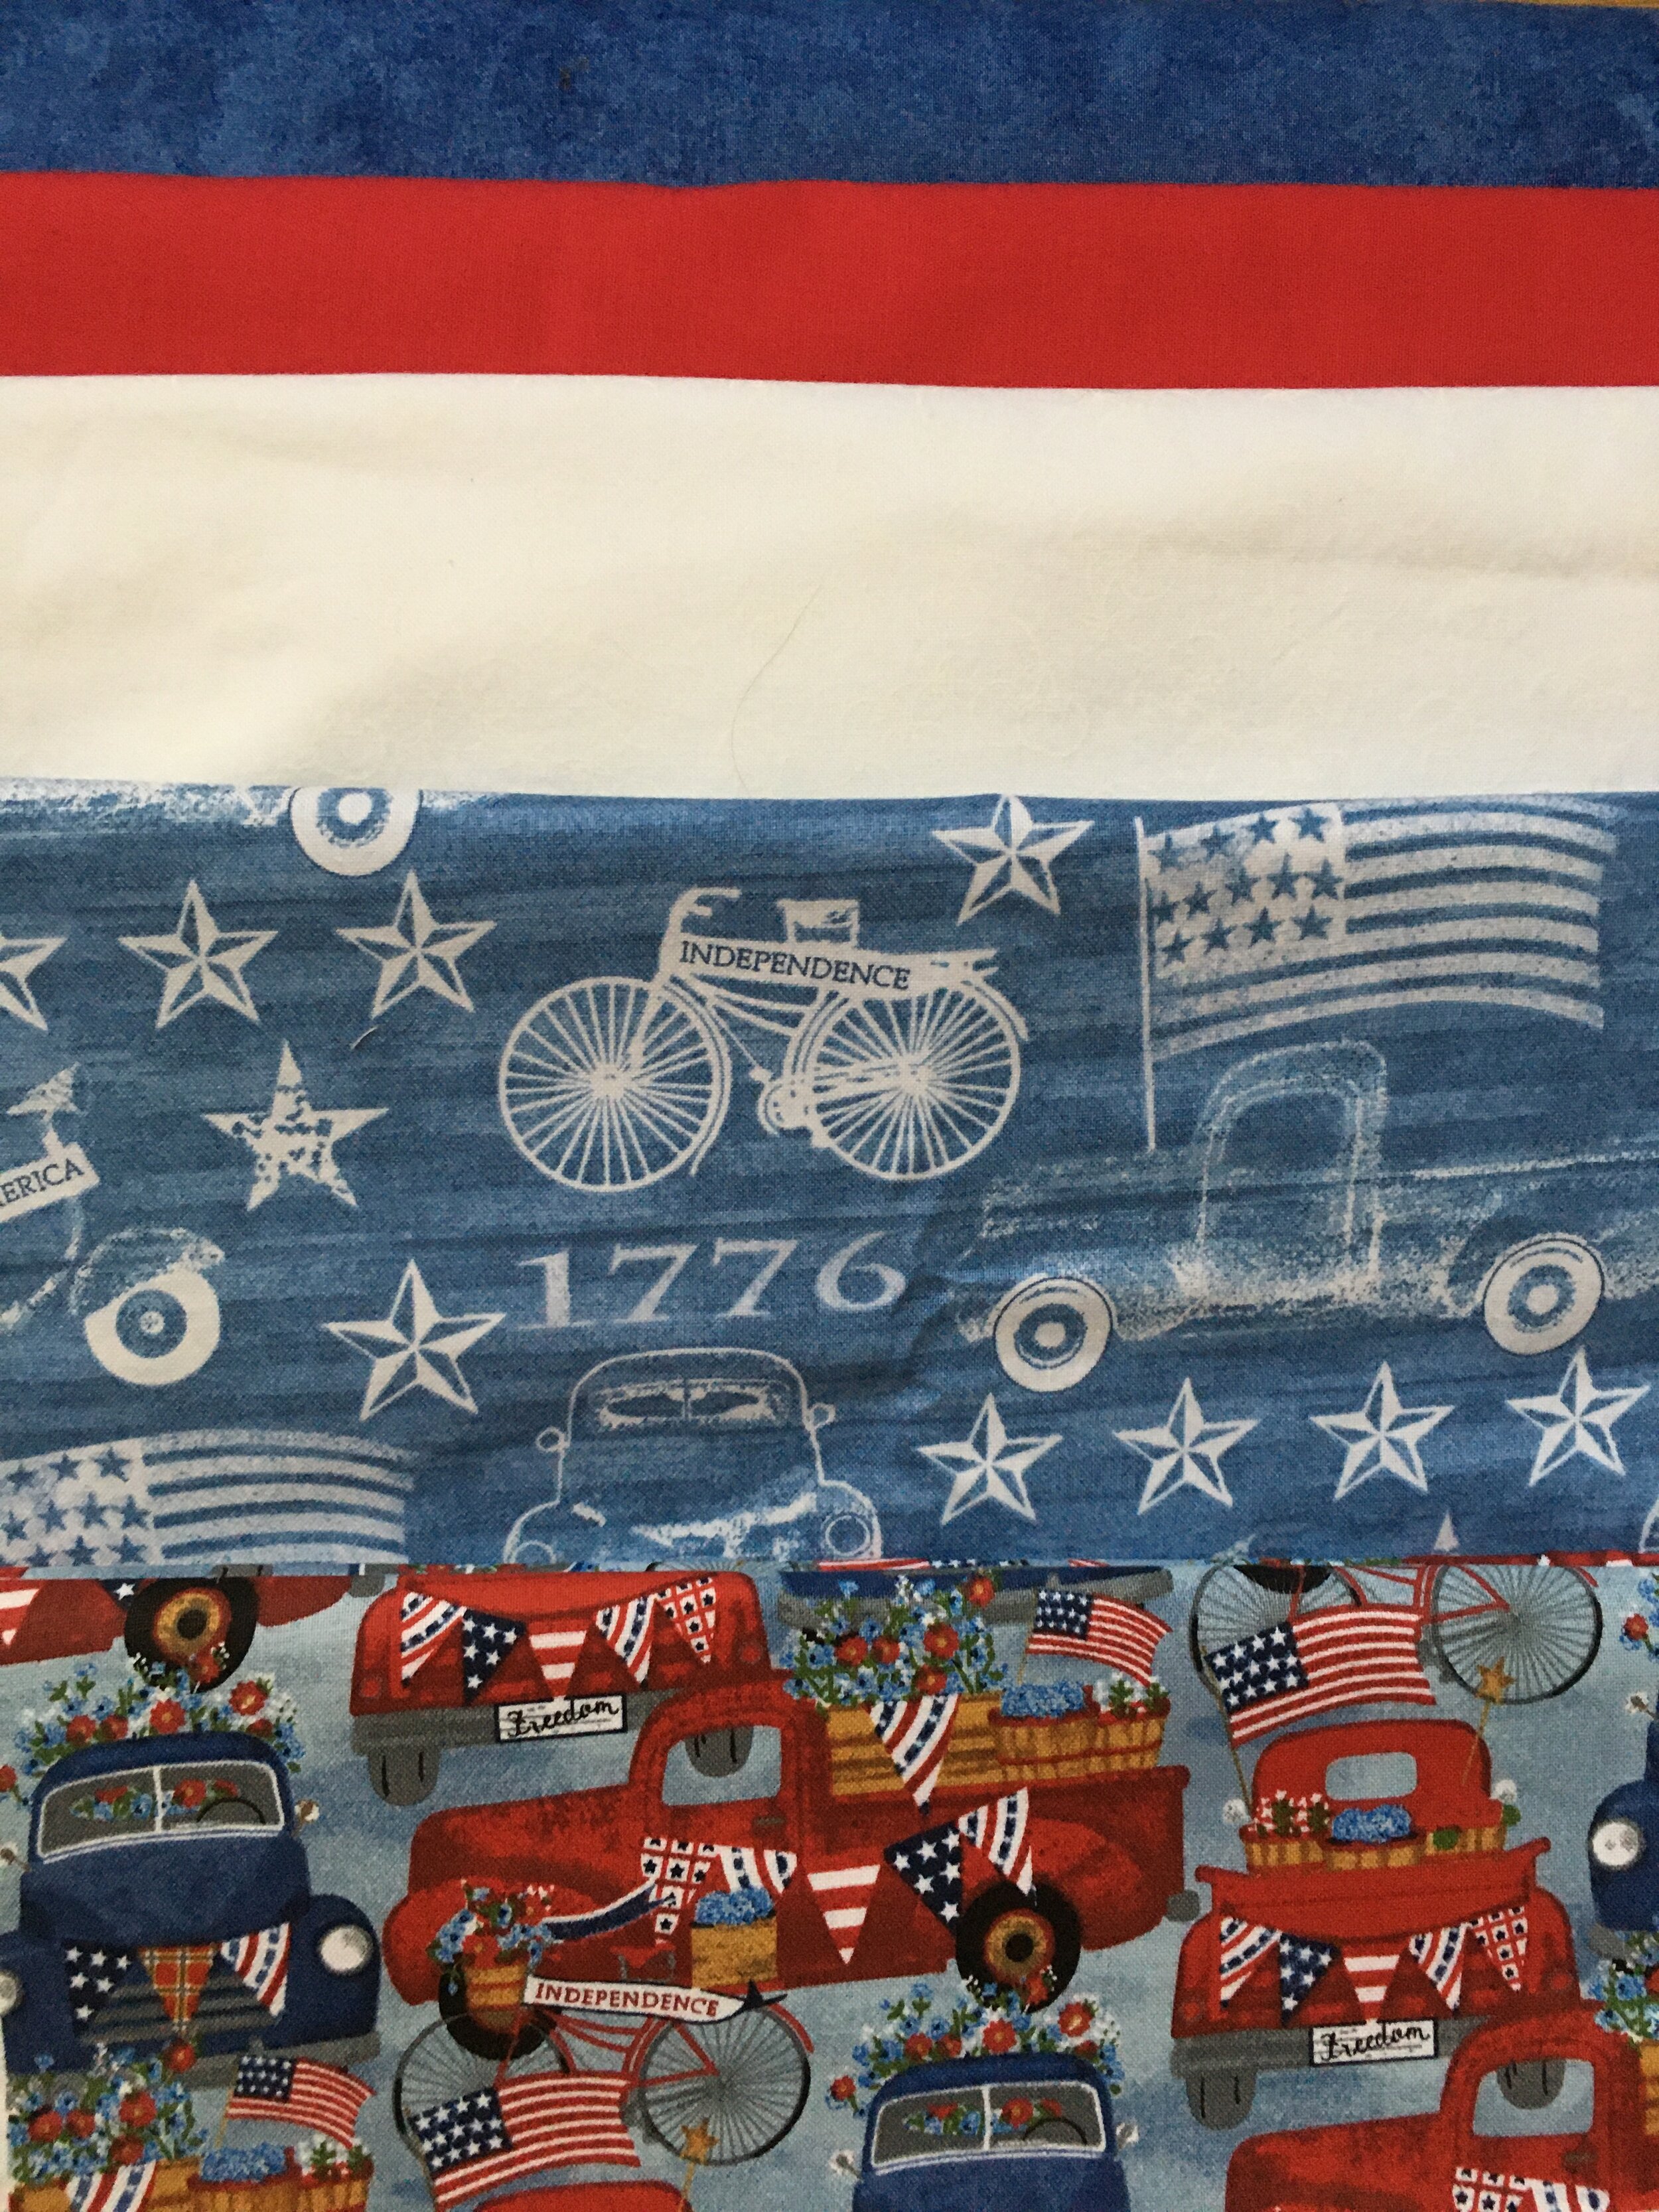
The quilt which I started cutting out in my post last week is done in time for the Fourth of July! This is my design, a simple four patch block quilt that I call “Four Patch for the Fourth.” It’s a small quilt…just big enough for two little children to sit on together.
It’s a easy quilt and sews up quickly.
I love blocks that have 4 sections such as this four patch block or pinwheel blocks. In order to have the seams on the back of the block lie as flat as possible, the seams and be “spun”. The top seam can be gently opened up so that one side of the seam can be pressed upward and the other side pressed downward. The result is a tiny four patch on the back of the block. I think of these tiny central blocks as a hidden quilt in a quilt!
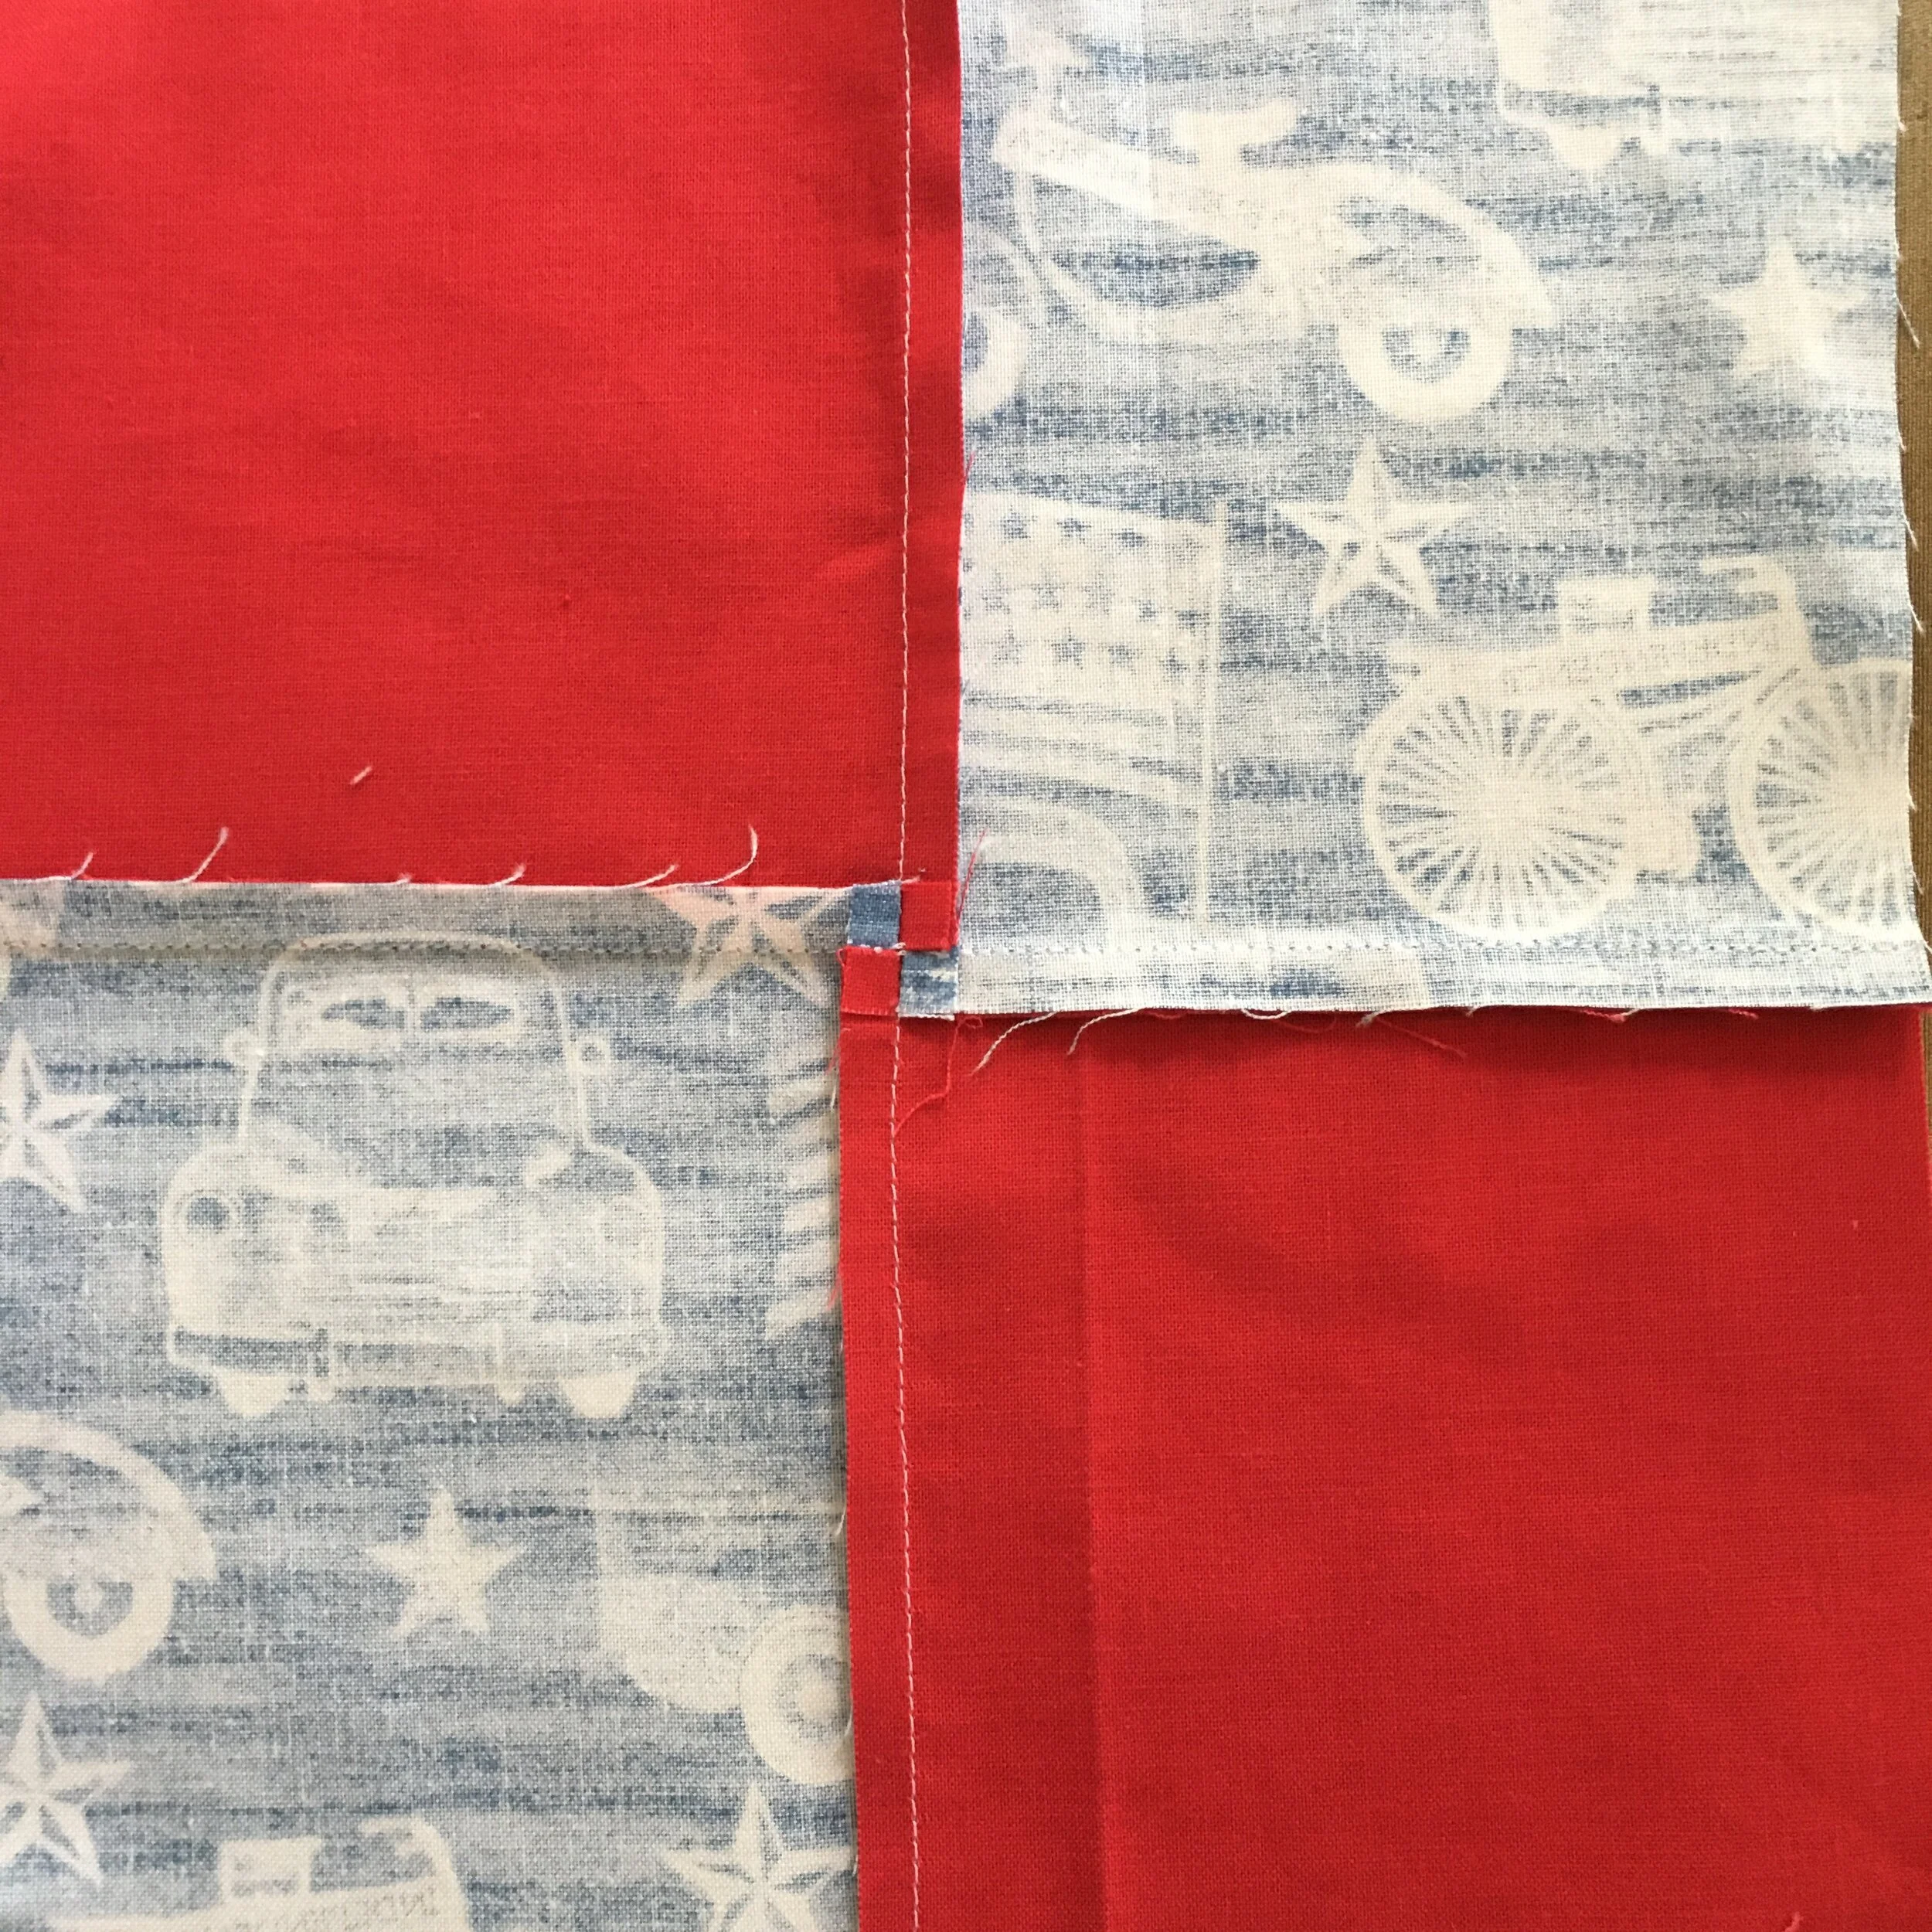
The back of a 4 patch block with the seams “spun”. Note how each of the four seams is pressed toward a different patch, so the seams look like the vanes in a windmill.
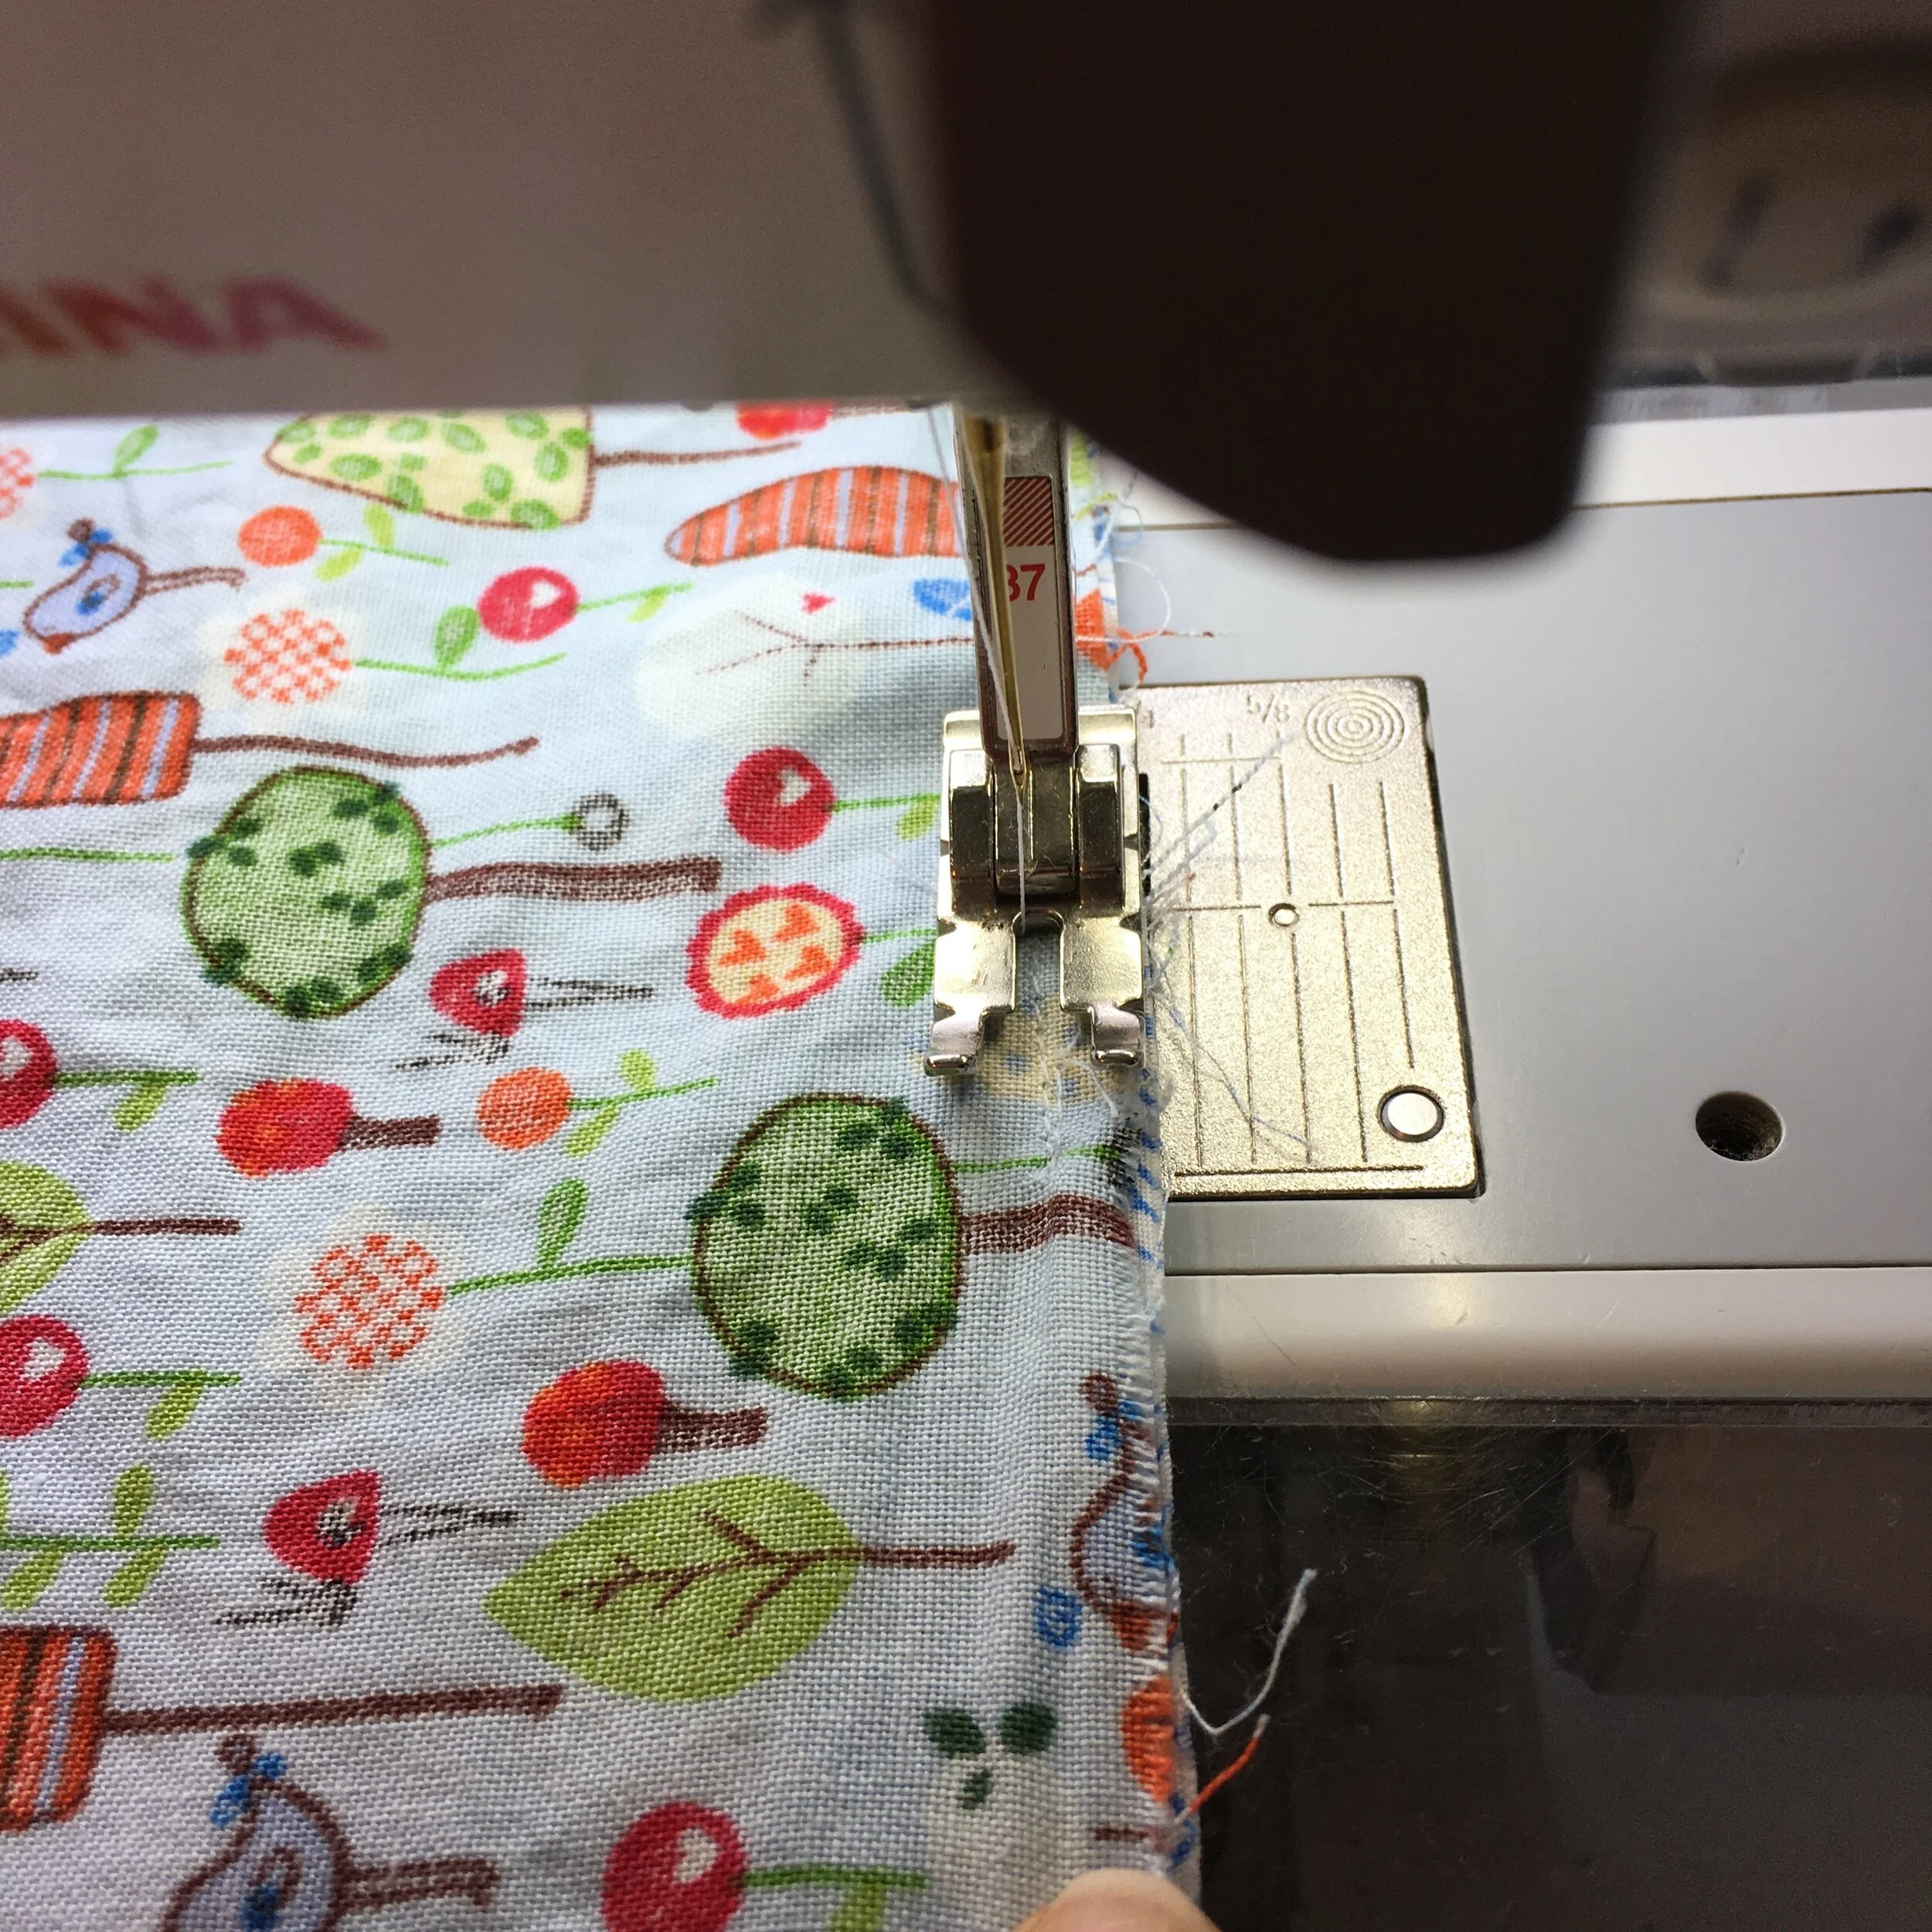
All the quilting in this quilt was done with a walking foot. Each of the square blocks as been quilted and there is diagonal quilting across the large blocks to anchor them.
It’s easy to keep a long diagonal course of quilting straight by marking it using painter’s tape. Lay down the tape, quilt the line just beside the tape, not ON the tape. Then remove the tape. Do not leave the tape on the quilt for a long time. I find I can tape 2 diagonal lines at a time. But if I tape more than 2 diagonals, the tape tends to lift off the quilt as I’m stitching. Once the long diagonal line is quilted, additional lines of quilting can be added following the initial diagonal line with the edge of the walking foot. Remove the tape before addition parallel lines of stitching. The tape could be left in place but it’s easier to quilt additional lines without the tape on the quilt.
Don’t use masking tape which may leave glue residue on the fabric.

This quilt looks great on the back of a rocking chair too. I like summer quilts that are on the small size. It’s just too hot in the summer to have a big lap quilt.
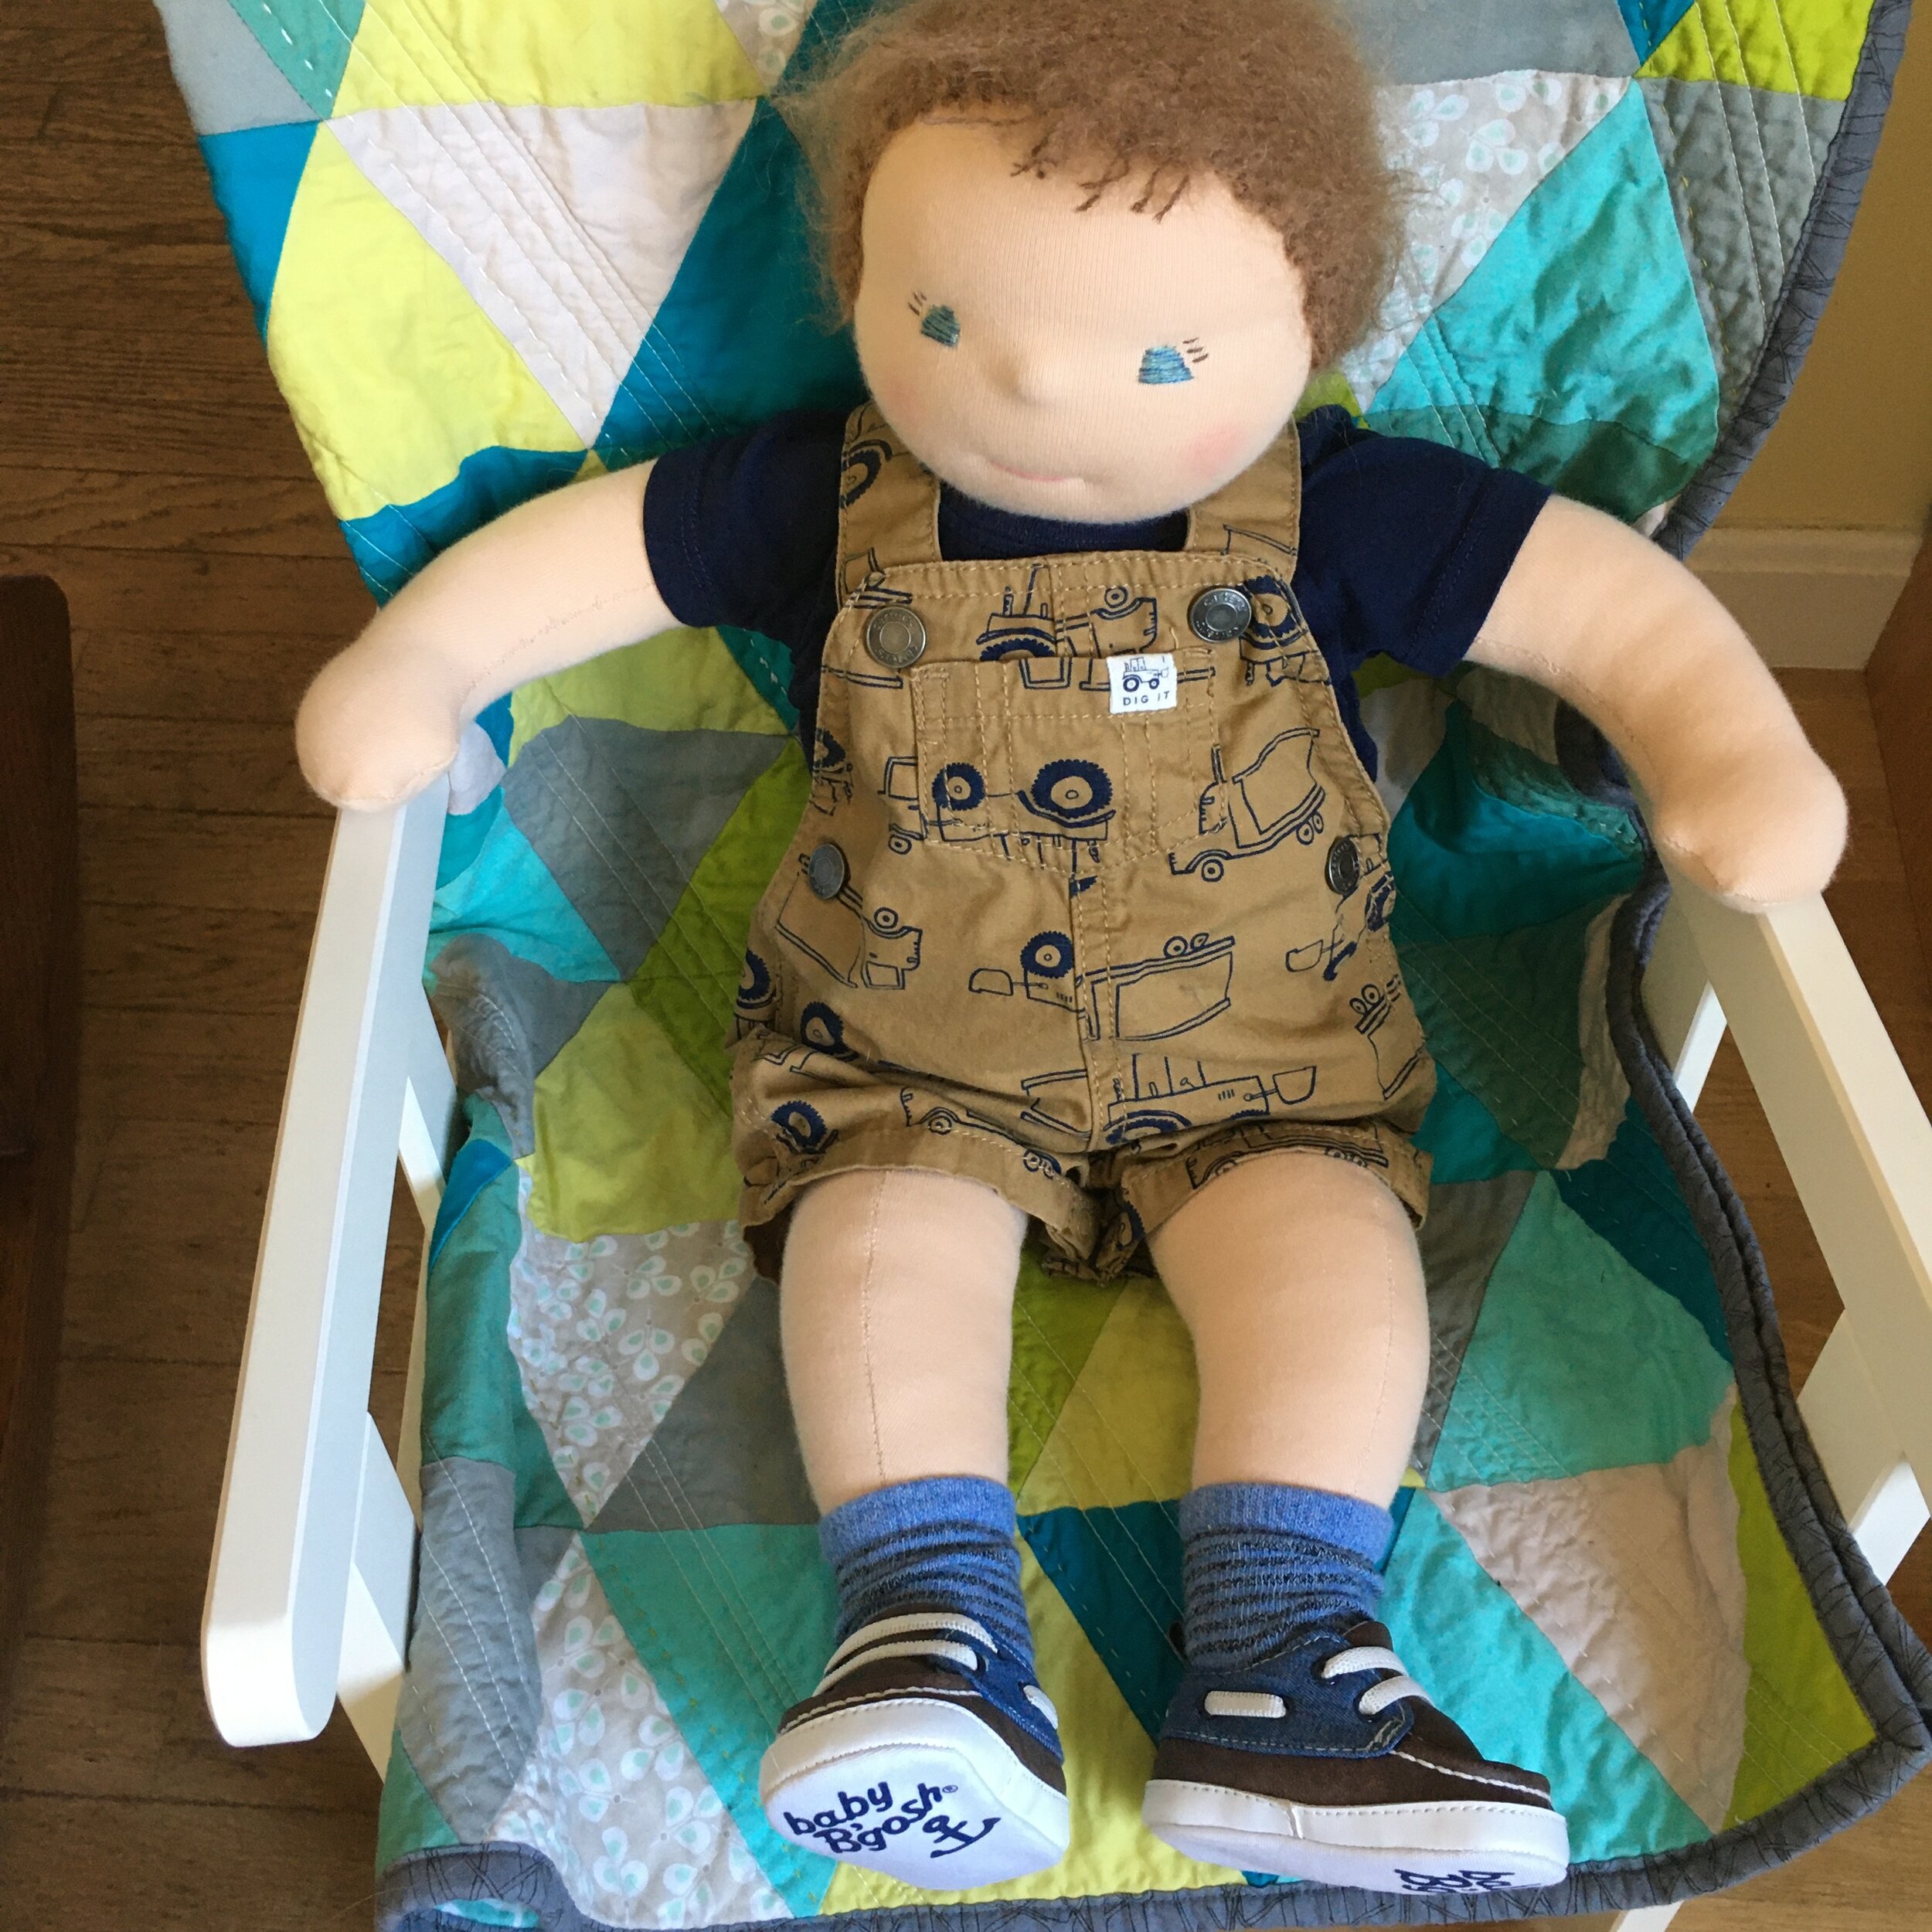
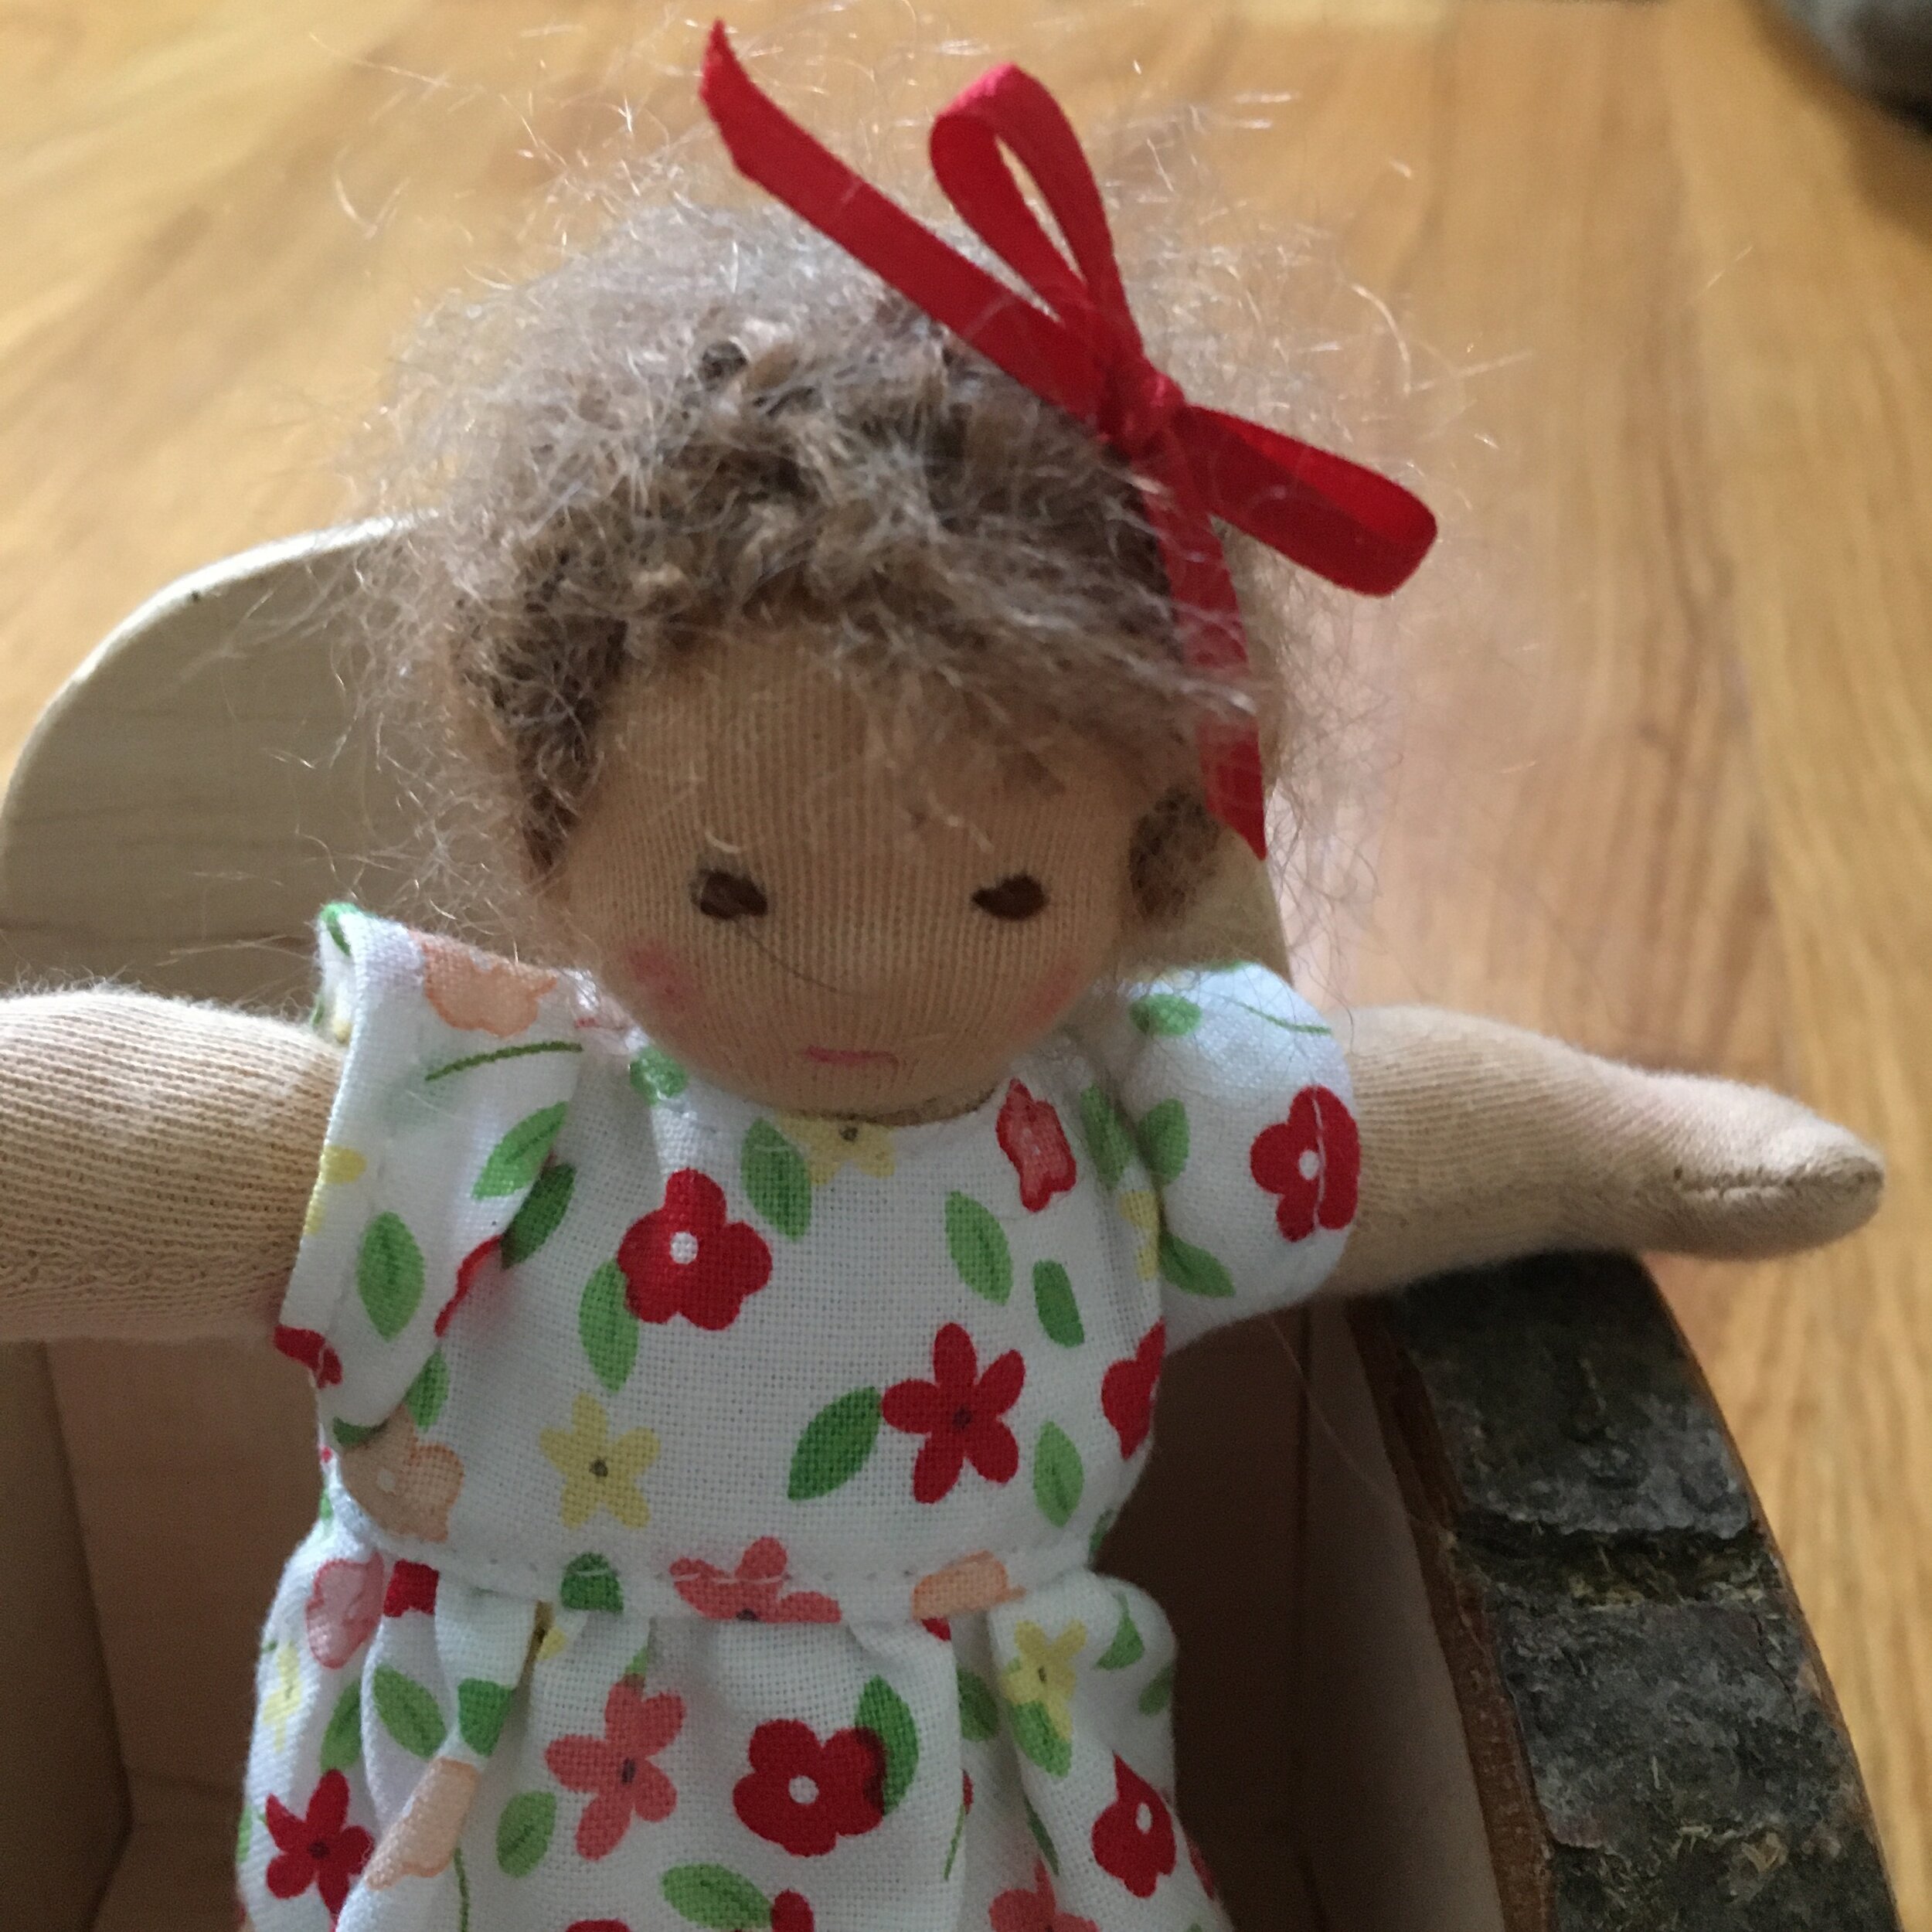
Here’s my Fourth of July quilt with Douglas, a classic Waldorf type doll which I made.
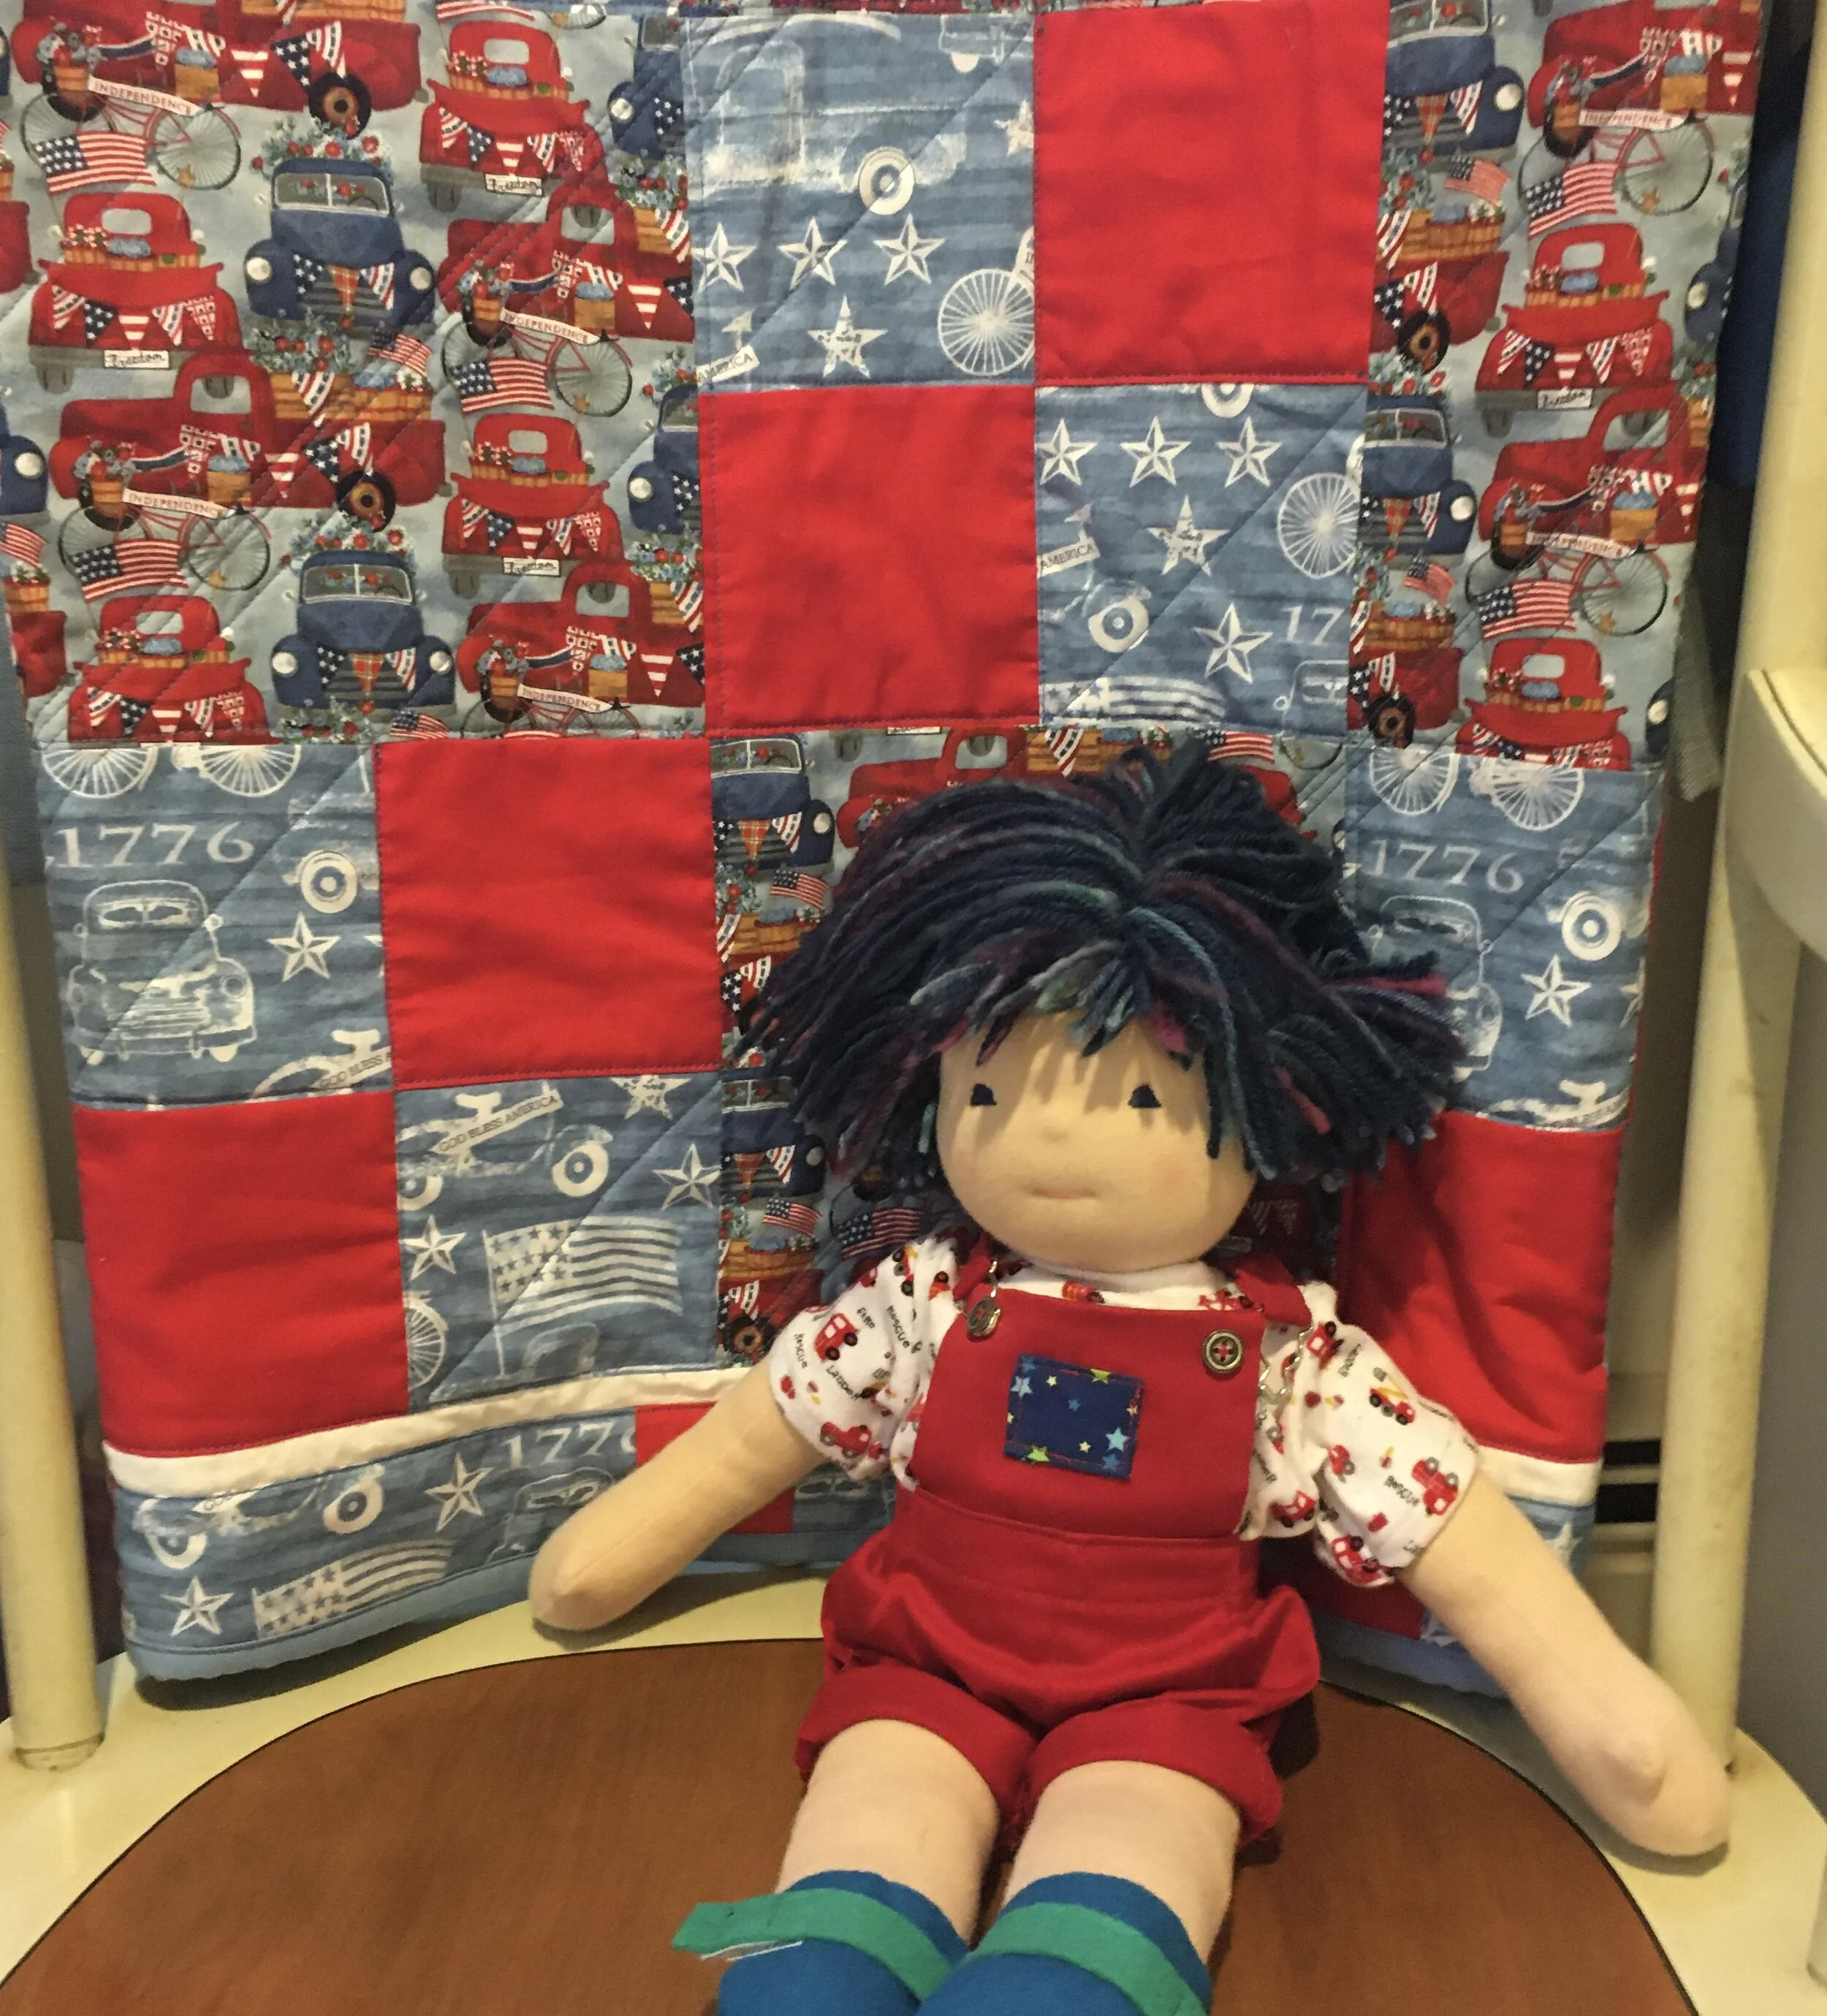
Ready for Staying at Home on July 4th, 2020.
Have a safe, happy, and healthy weekend!