Search
  • Information
    • About
    • Contact
    • Privacy Policy
  • Blog
  • Subscribe
  • Tutorials
    • Tutorials
    • Doll Clothes: Photos and some Patterns
  • Suggested Reading
  • Quilts: My Original Designs
  • Gallery: Color Studies
  • Gallery: Quilts I've Made
  • Doll Making Blog Posts
  • Recent blog posts
  • Quilts Based on The Improv Handbook for Modern Quilters
Close
Menu
Search
Close
  • Information
    • About
    • Contact
    • Privacy Policy
  • Blog
  • Subscribe
  • Tutorials
    • Tutorials
    • Doll Clothes: Photos and some Patterns
  • Suggested Reading
  • Quilts: My Original Designs
  • Gallery: Color Studies
  • Gallery: Quilts I've Made
  • Doll Making Blog Posts
  • Recent blog posts
  • Quilts Based on The Improv Handbook for Modern Quilters
Menu

Sleeping Dog Quilts

SLEEPING DOG QUILTS

September 24, 2020

Jointed 9 inch Waldorf Doll

by Judy Tucker


9 inch jointed Waldorf type doll

9 inch jointed Waldorf type doll

9 inch jointed Waldorf type doll

9 inch jointed Waldorf type doll

Having made the jointed Dragon Baby, I decided to try making a jointed Waldorf type doll. I used the pattern for “Minnie” in Karin Neuschütz’s great book, “Sewing Dolls.”

I used internal plastic safety joints for the Dragon baby. This pattern called for leather or fabric “buttons”. The “buttons” are used on the outside of the joint to help fix the heavy duty thread that joins the joints to the doll’s body. I had some very thick wool felt that was almost the same color as the doll’s skin so that what I used.

Here’s the wool felt “button” I used for the shoulder joints

Here’s the wool felt “button” I used for the shoulder joints

The doll in the book looks like a toddler. My doll is much leaner, definitely a school age child.

And I tried another “first” with this doll. I “pinched” the her knees and elbows to give a more defined looking joint.

JointedWaldofDollUndressed.jpg
Yay!! Look at me! I can put my arms up!

Yay!! Look at me! I can put my arms up!

i’m glad I tried out this pattern. It didn’t turn out to look like the doll in the book, but that’s just fine. I like this doll just as much.


TAGS: Waldorf type doll, Jointed Waldorf Type Doll


September 17, 2020

"Kaleidoscope" Three Yard Pattern by Fabric Café®

by Judy Tucker


Fabric Café’s® “Kaleidoscope” 3 yard quilt.  44 x 56 inches.  Hanging on a neighbor’s fence in front of their sunflowers!

Fabric Café’s® “Kaleidoscope” 3 yard quilt. 44 x 56 inches. Hanging on a neighbor’s fence in front of their sunflowers!

Fabric Café’s® “Kaleidoscope” 3 yard quilt.  44 x 56 inches.  Hanging on a neighbor’s fence in front of their sunflowers!

Fabric Café’s® “Kaleidoscope” 3 yard quilt. 44 x 56 inches. Hanging on a neighbor’s fence in front of their sunflowers!

Last week I shared a quilt I entered into Bits ‘n PIeces Quilt Shop’s Three Yard Customer Quilt Challenge. Here is my 2nd entry. (Head over to Bits ‘n PIeces Facebook page to see all the quilts in the competition, and vote on your favorite).

This bright cheerful fabric line called “Sunny Fields” was just released by Clothworks. It was designed by Sue Zipkin. It was one of those fabrics…when I saw all those sunflowers on one of Bits ‘n Pieces Facebook unboxing videos I went right to the computer and purchased it!

The pattern is a three yard pattern by Fabric Café® called. “Kaleidoscope”. This is really a classic quilt pattern.

But there was a challenge with this fabric. The butterflies flutter in many directions but the flowers all are directional, standing tall on the fabric. But this is diagonal pattern. What to do? Try to get the flowers upright or just let them be jumbled?

"SunnyFields"in"Kaleidoscope". jpg

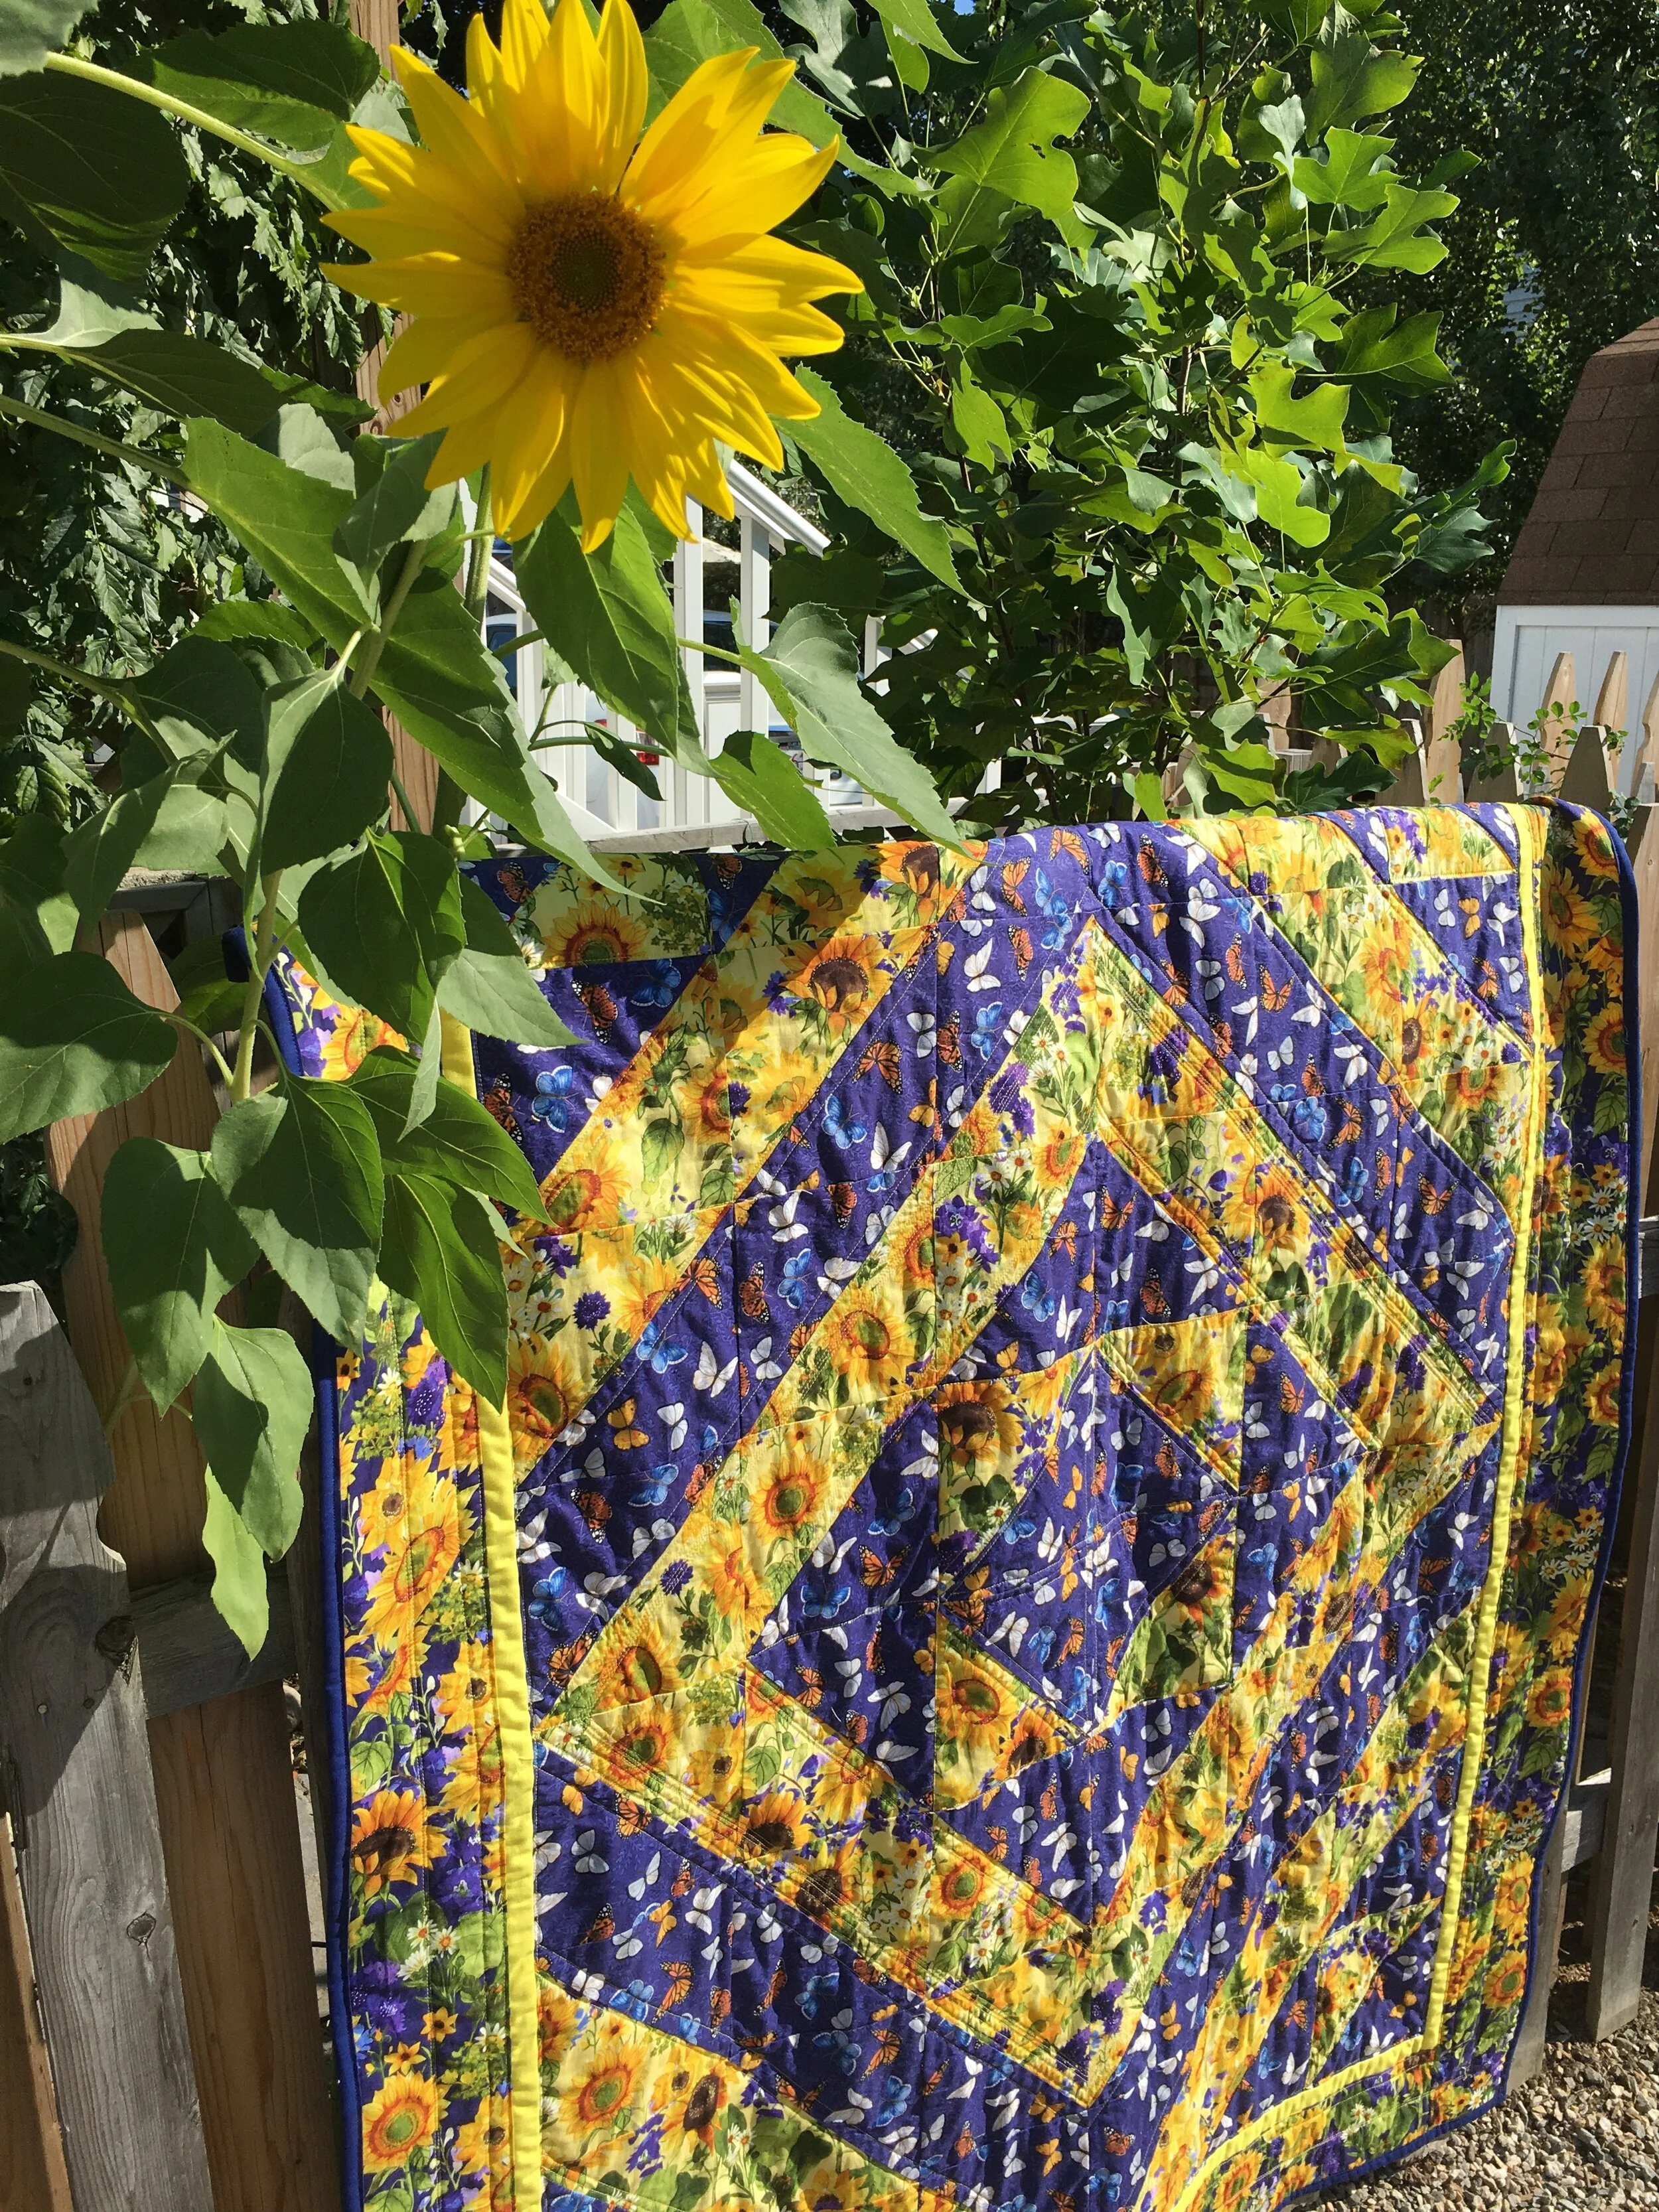
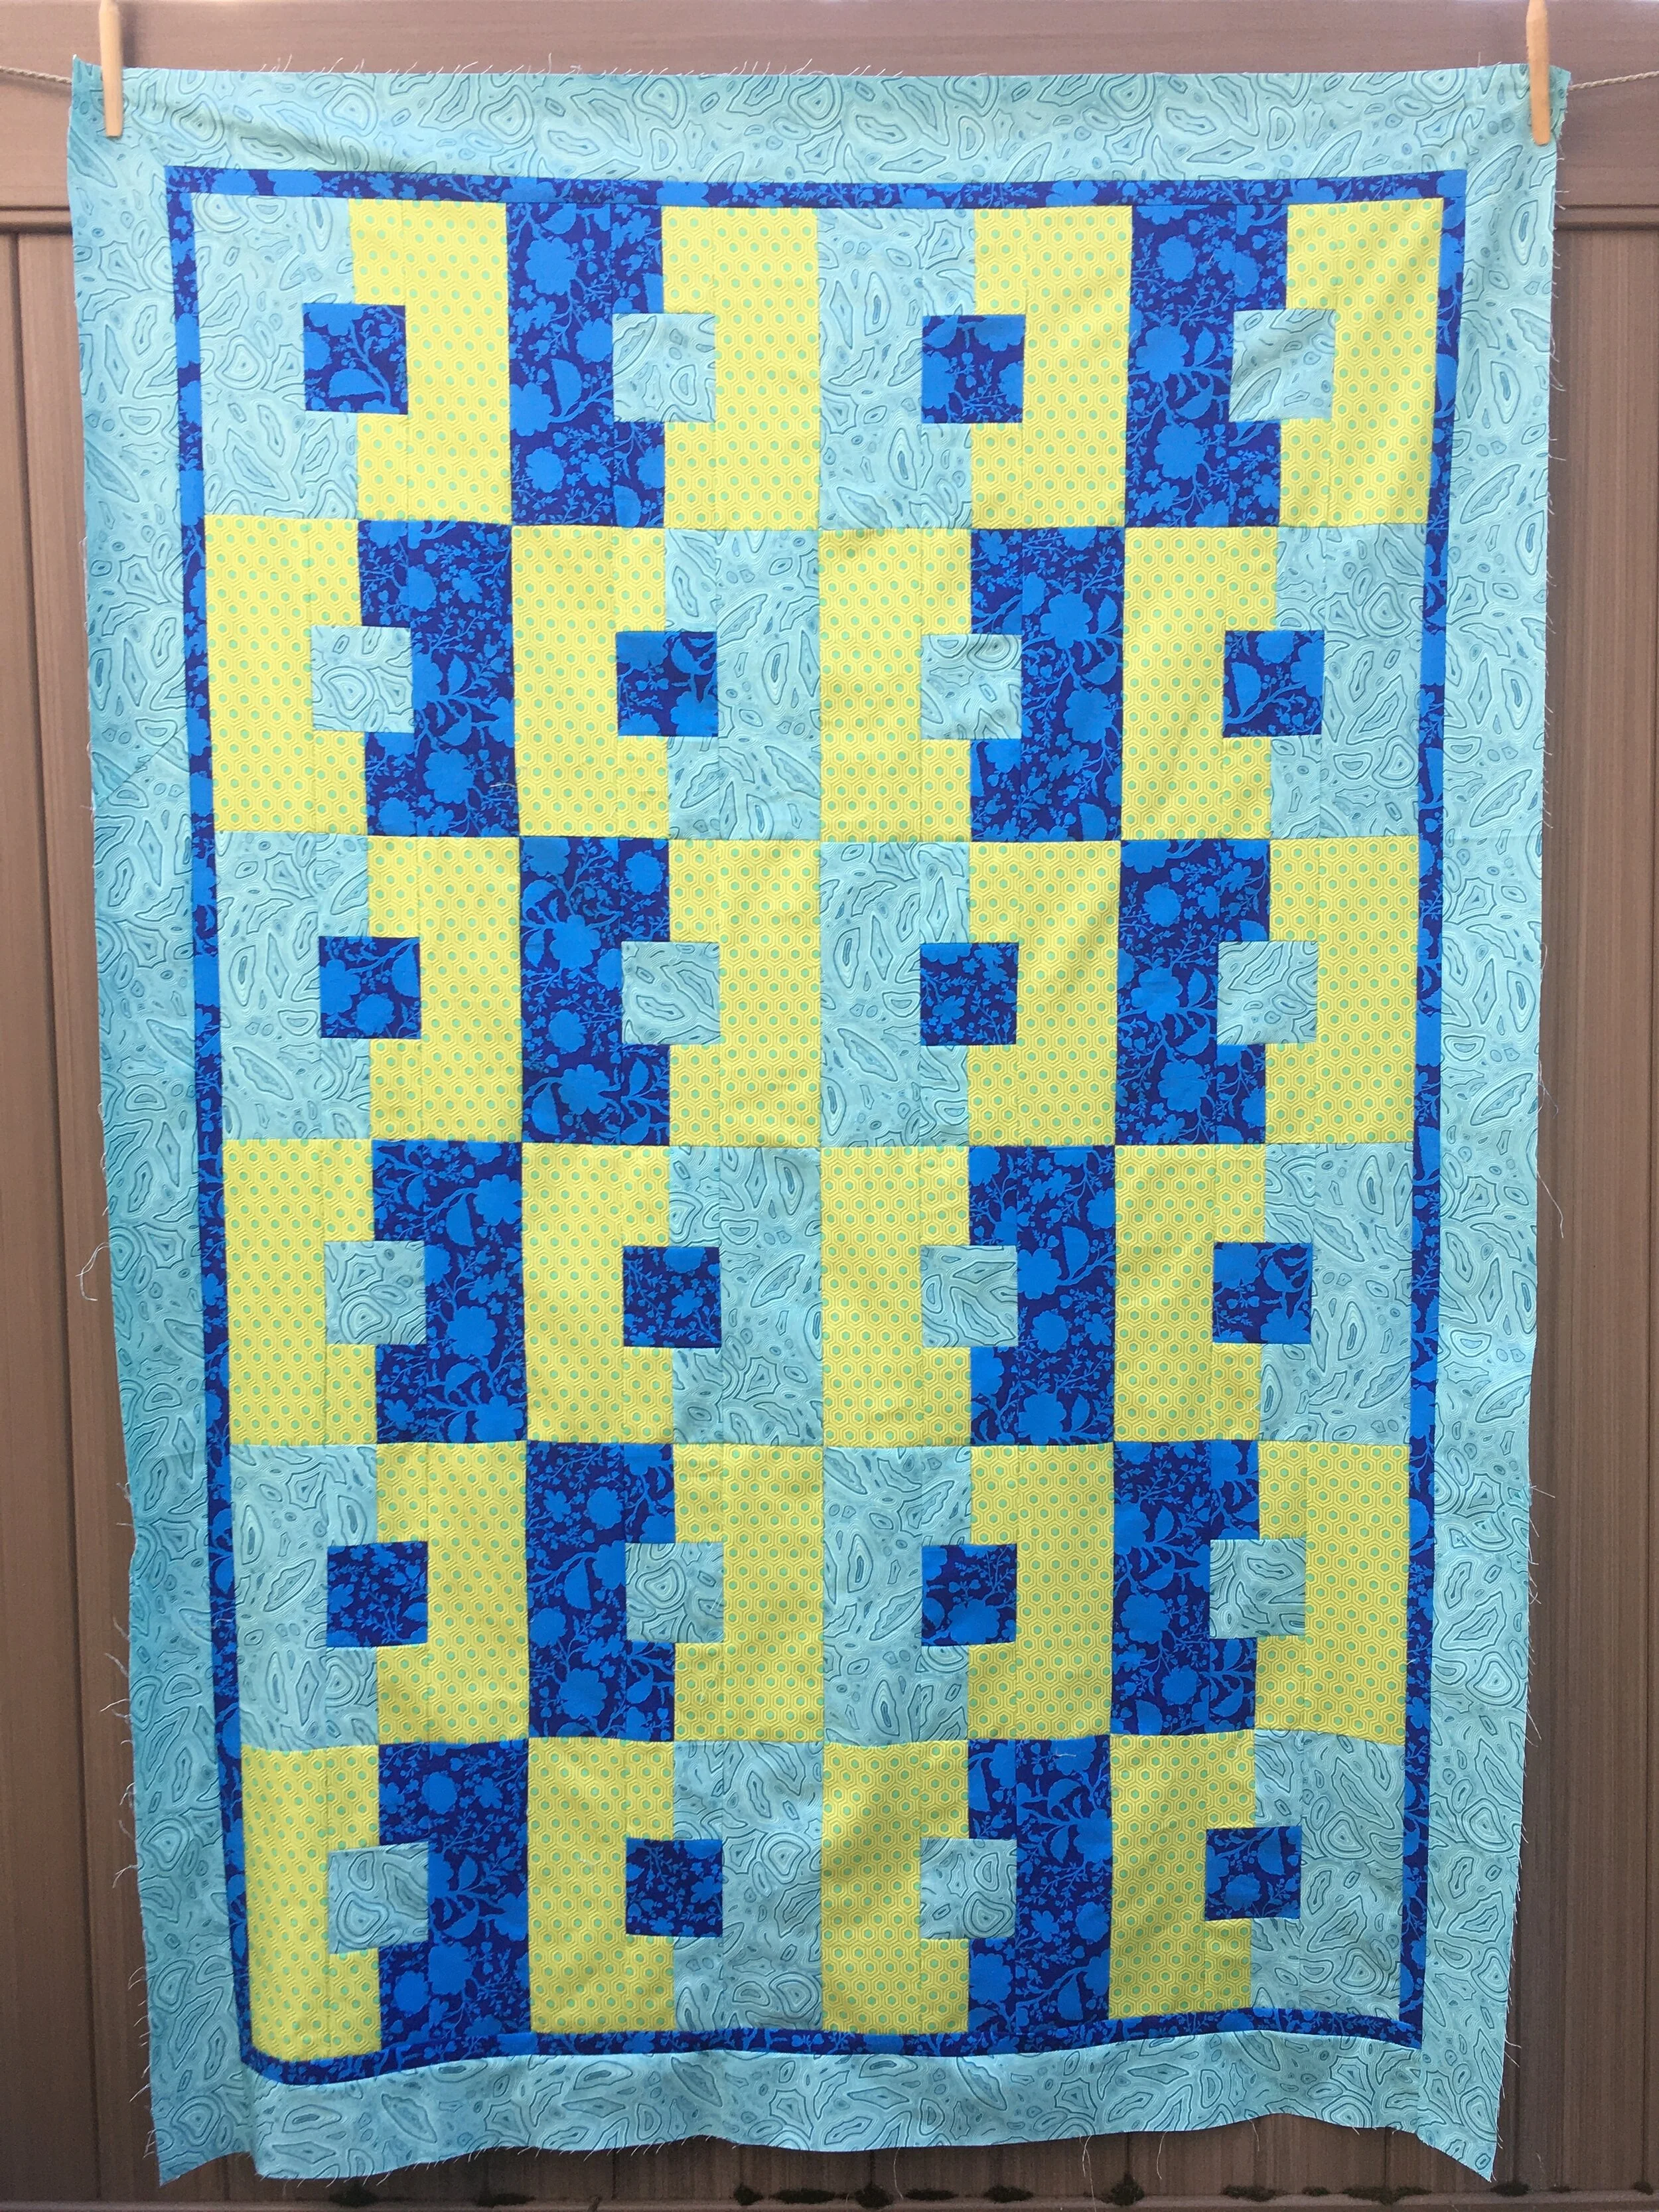
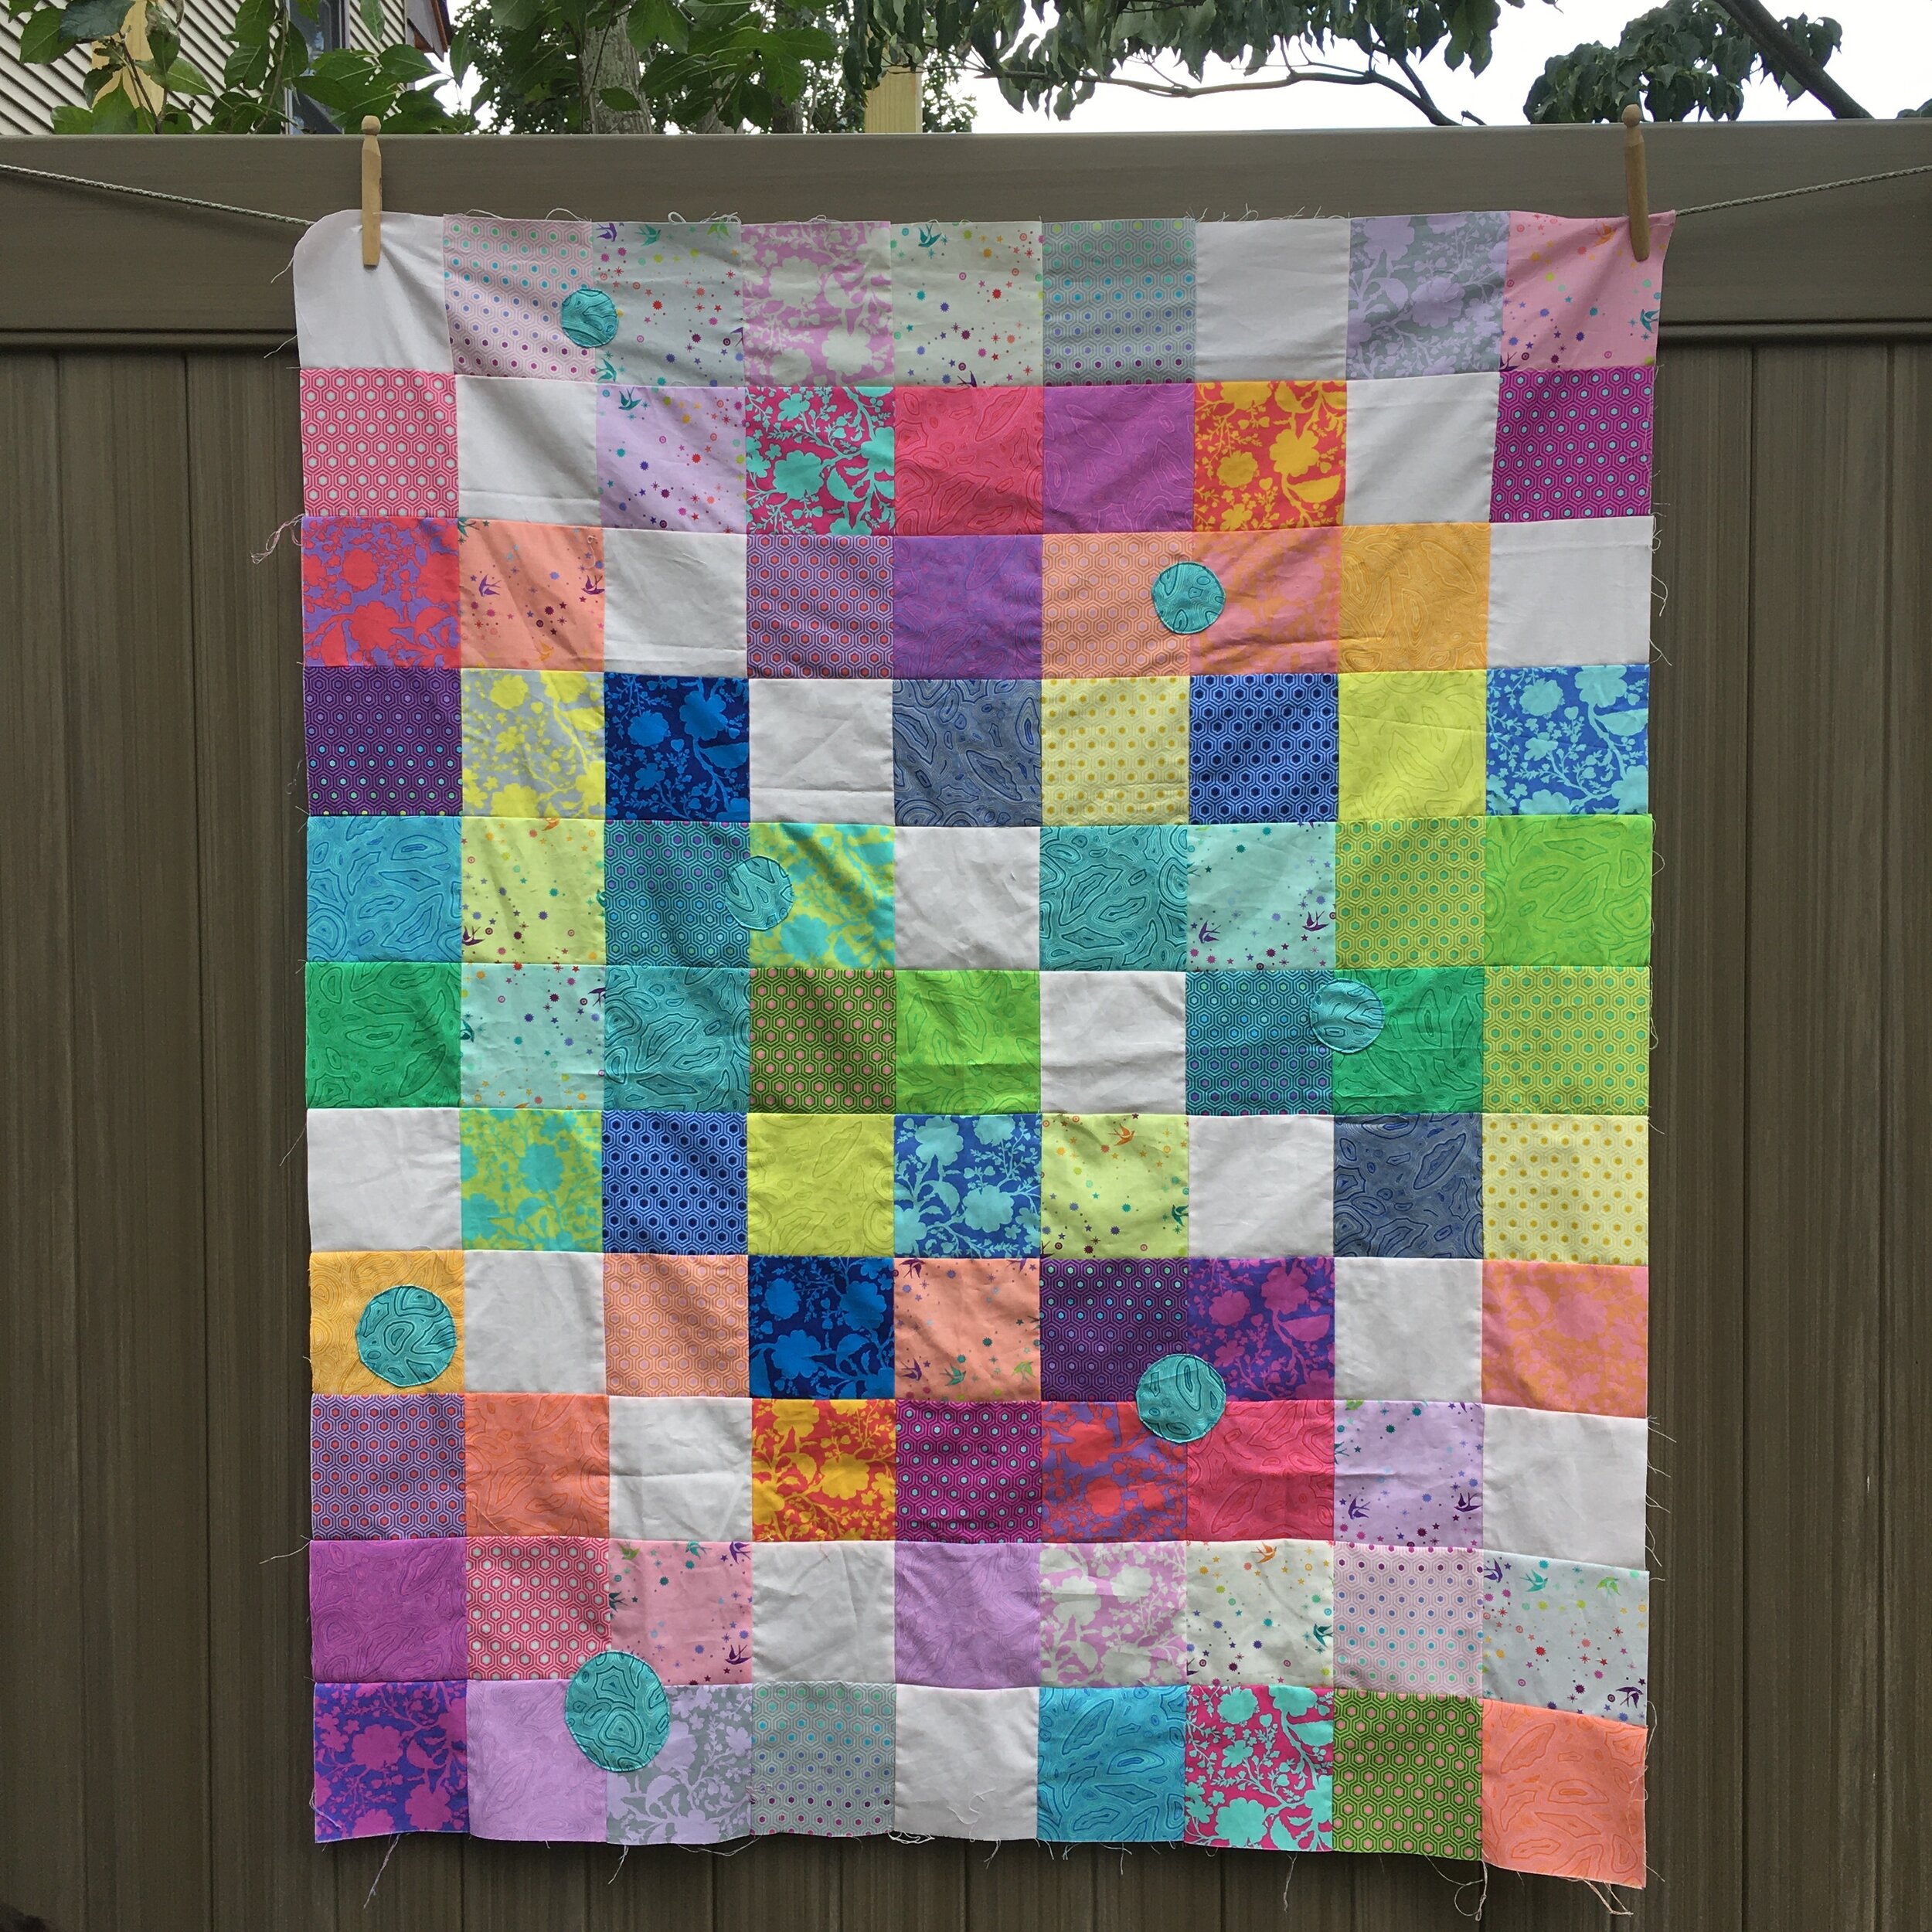
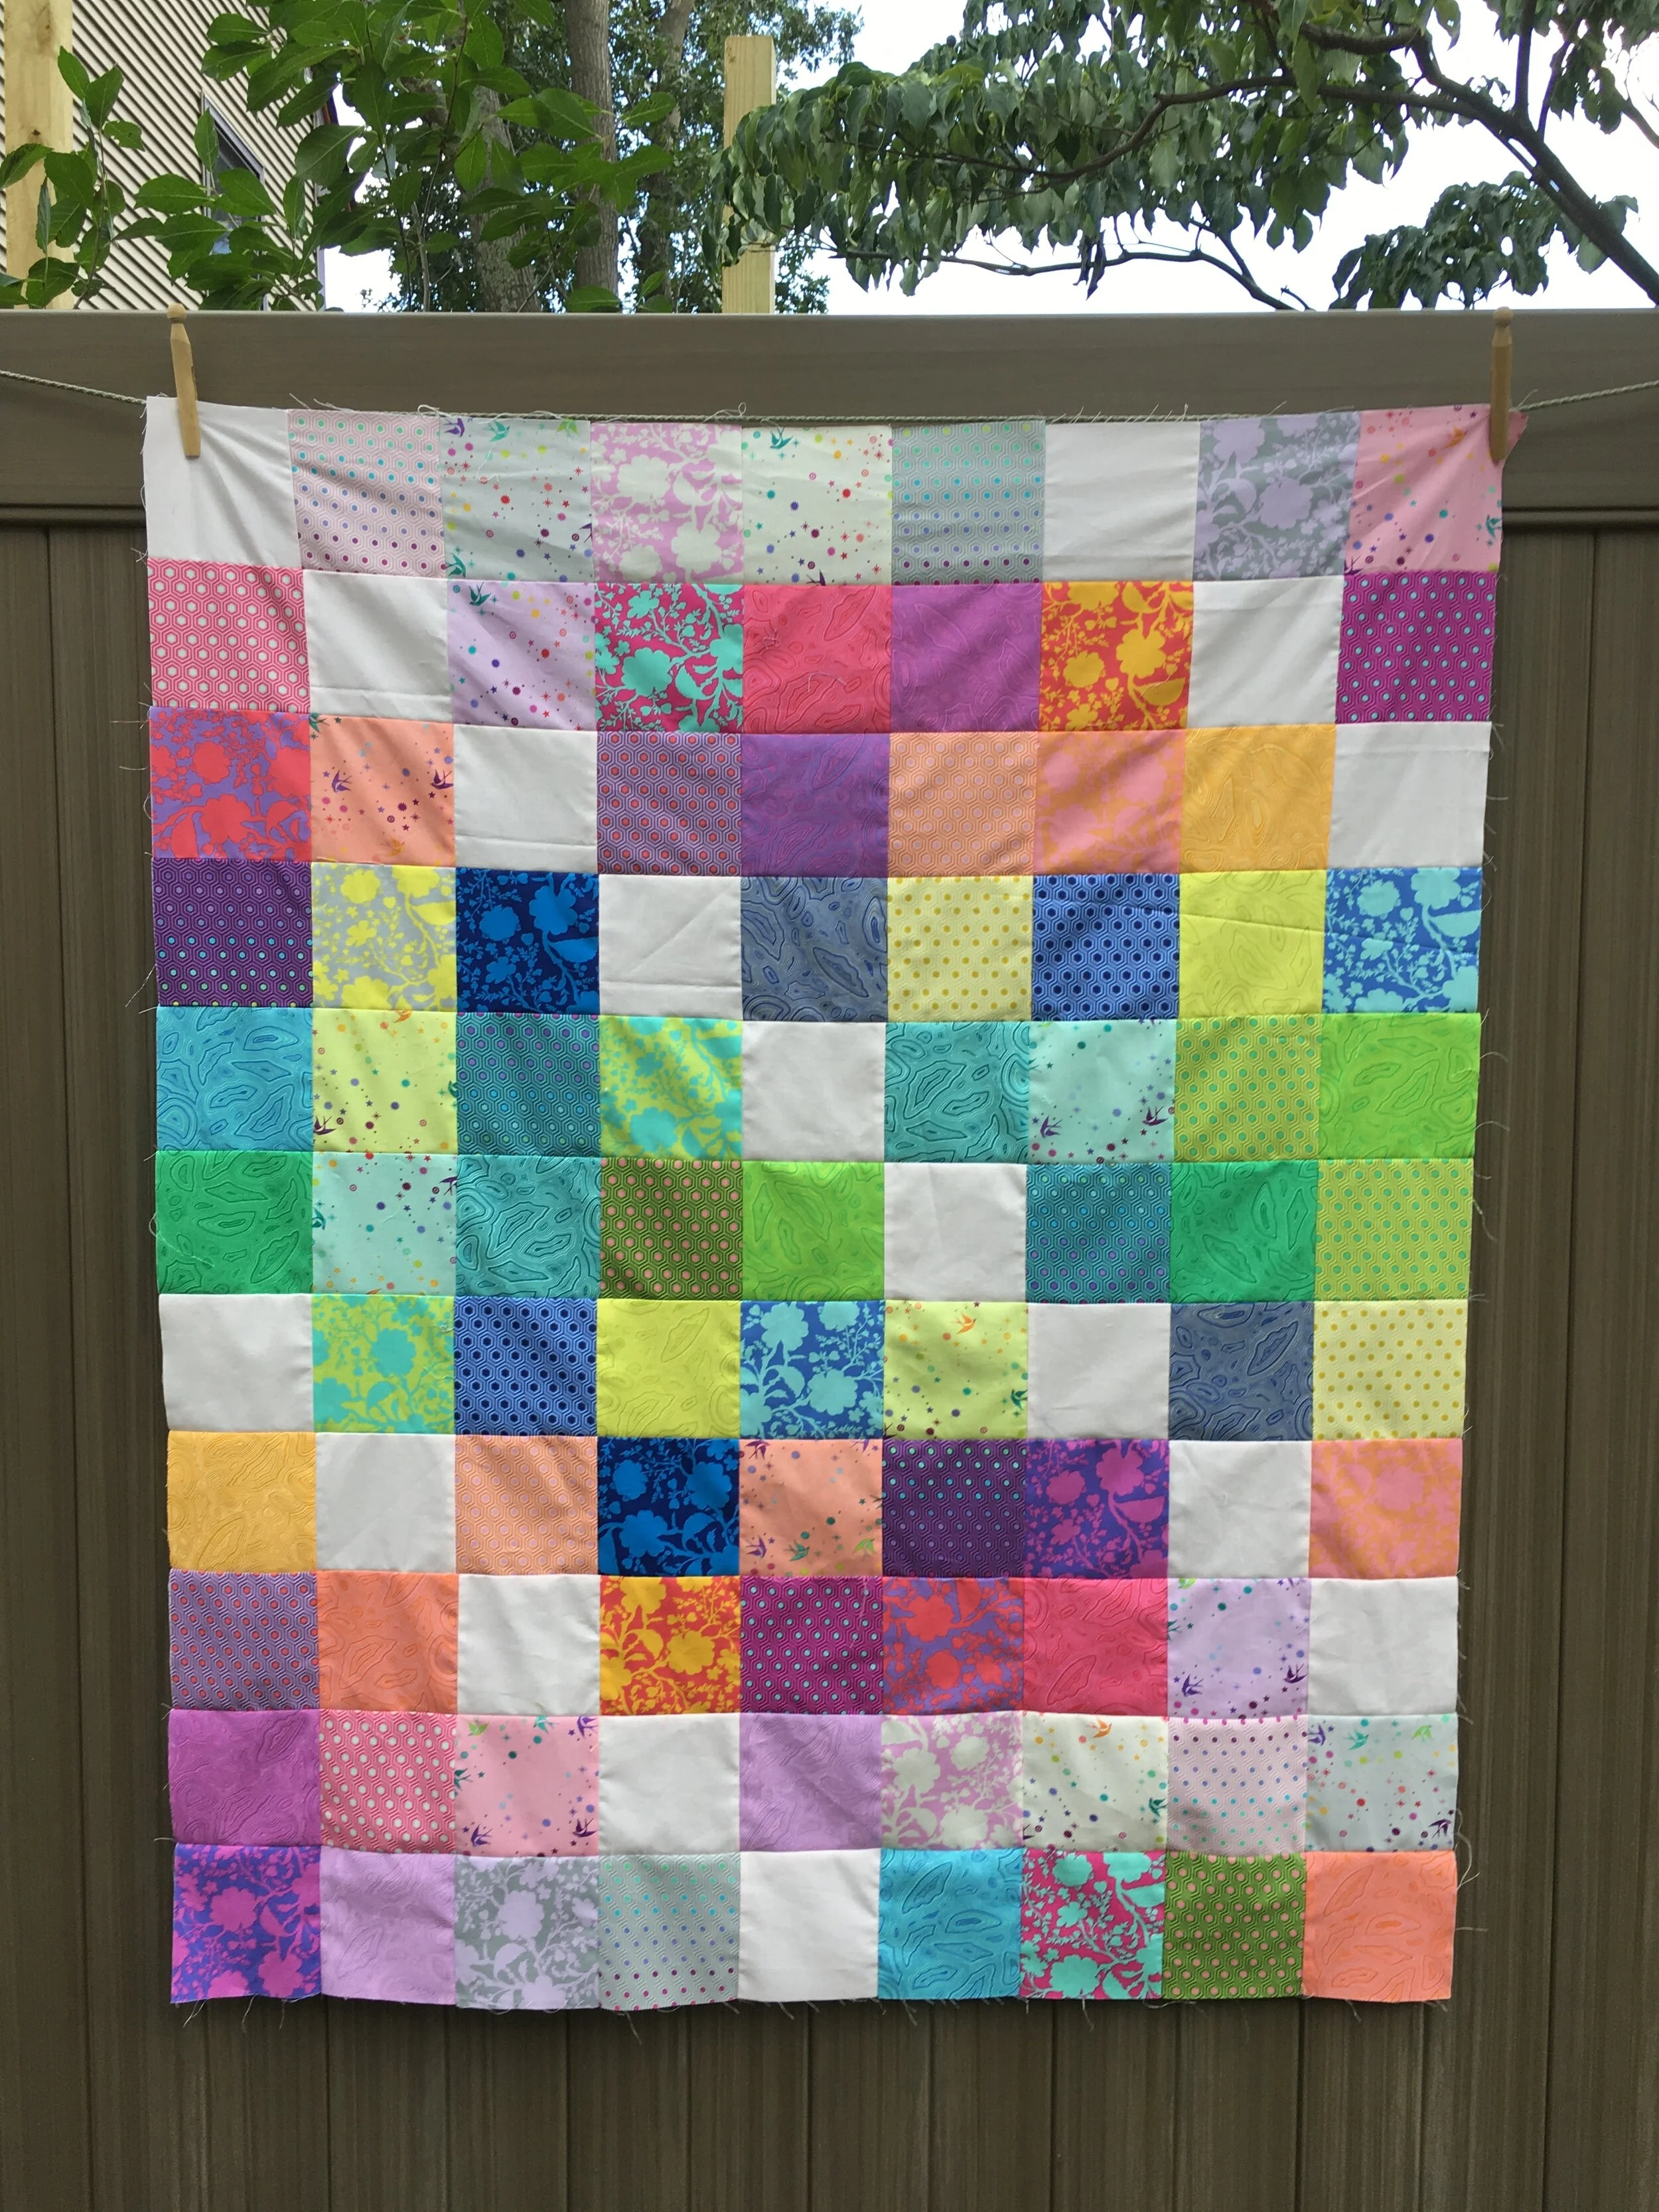
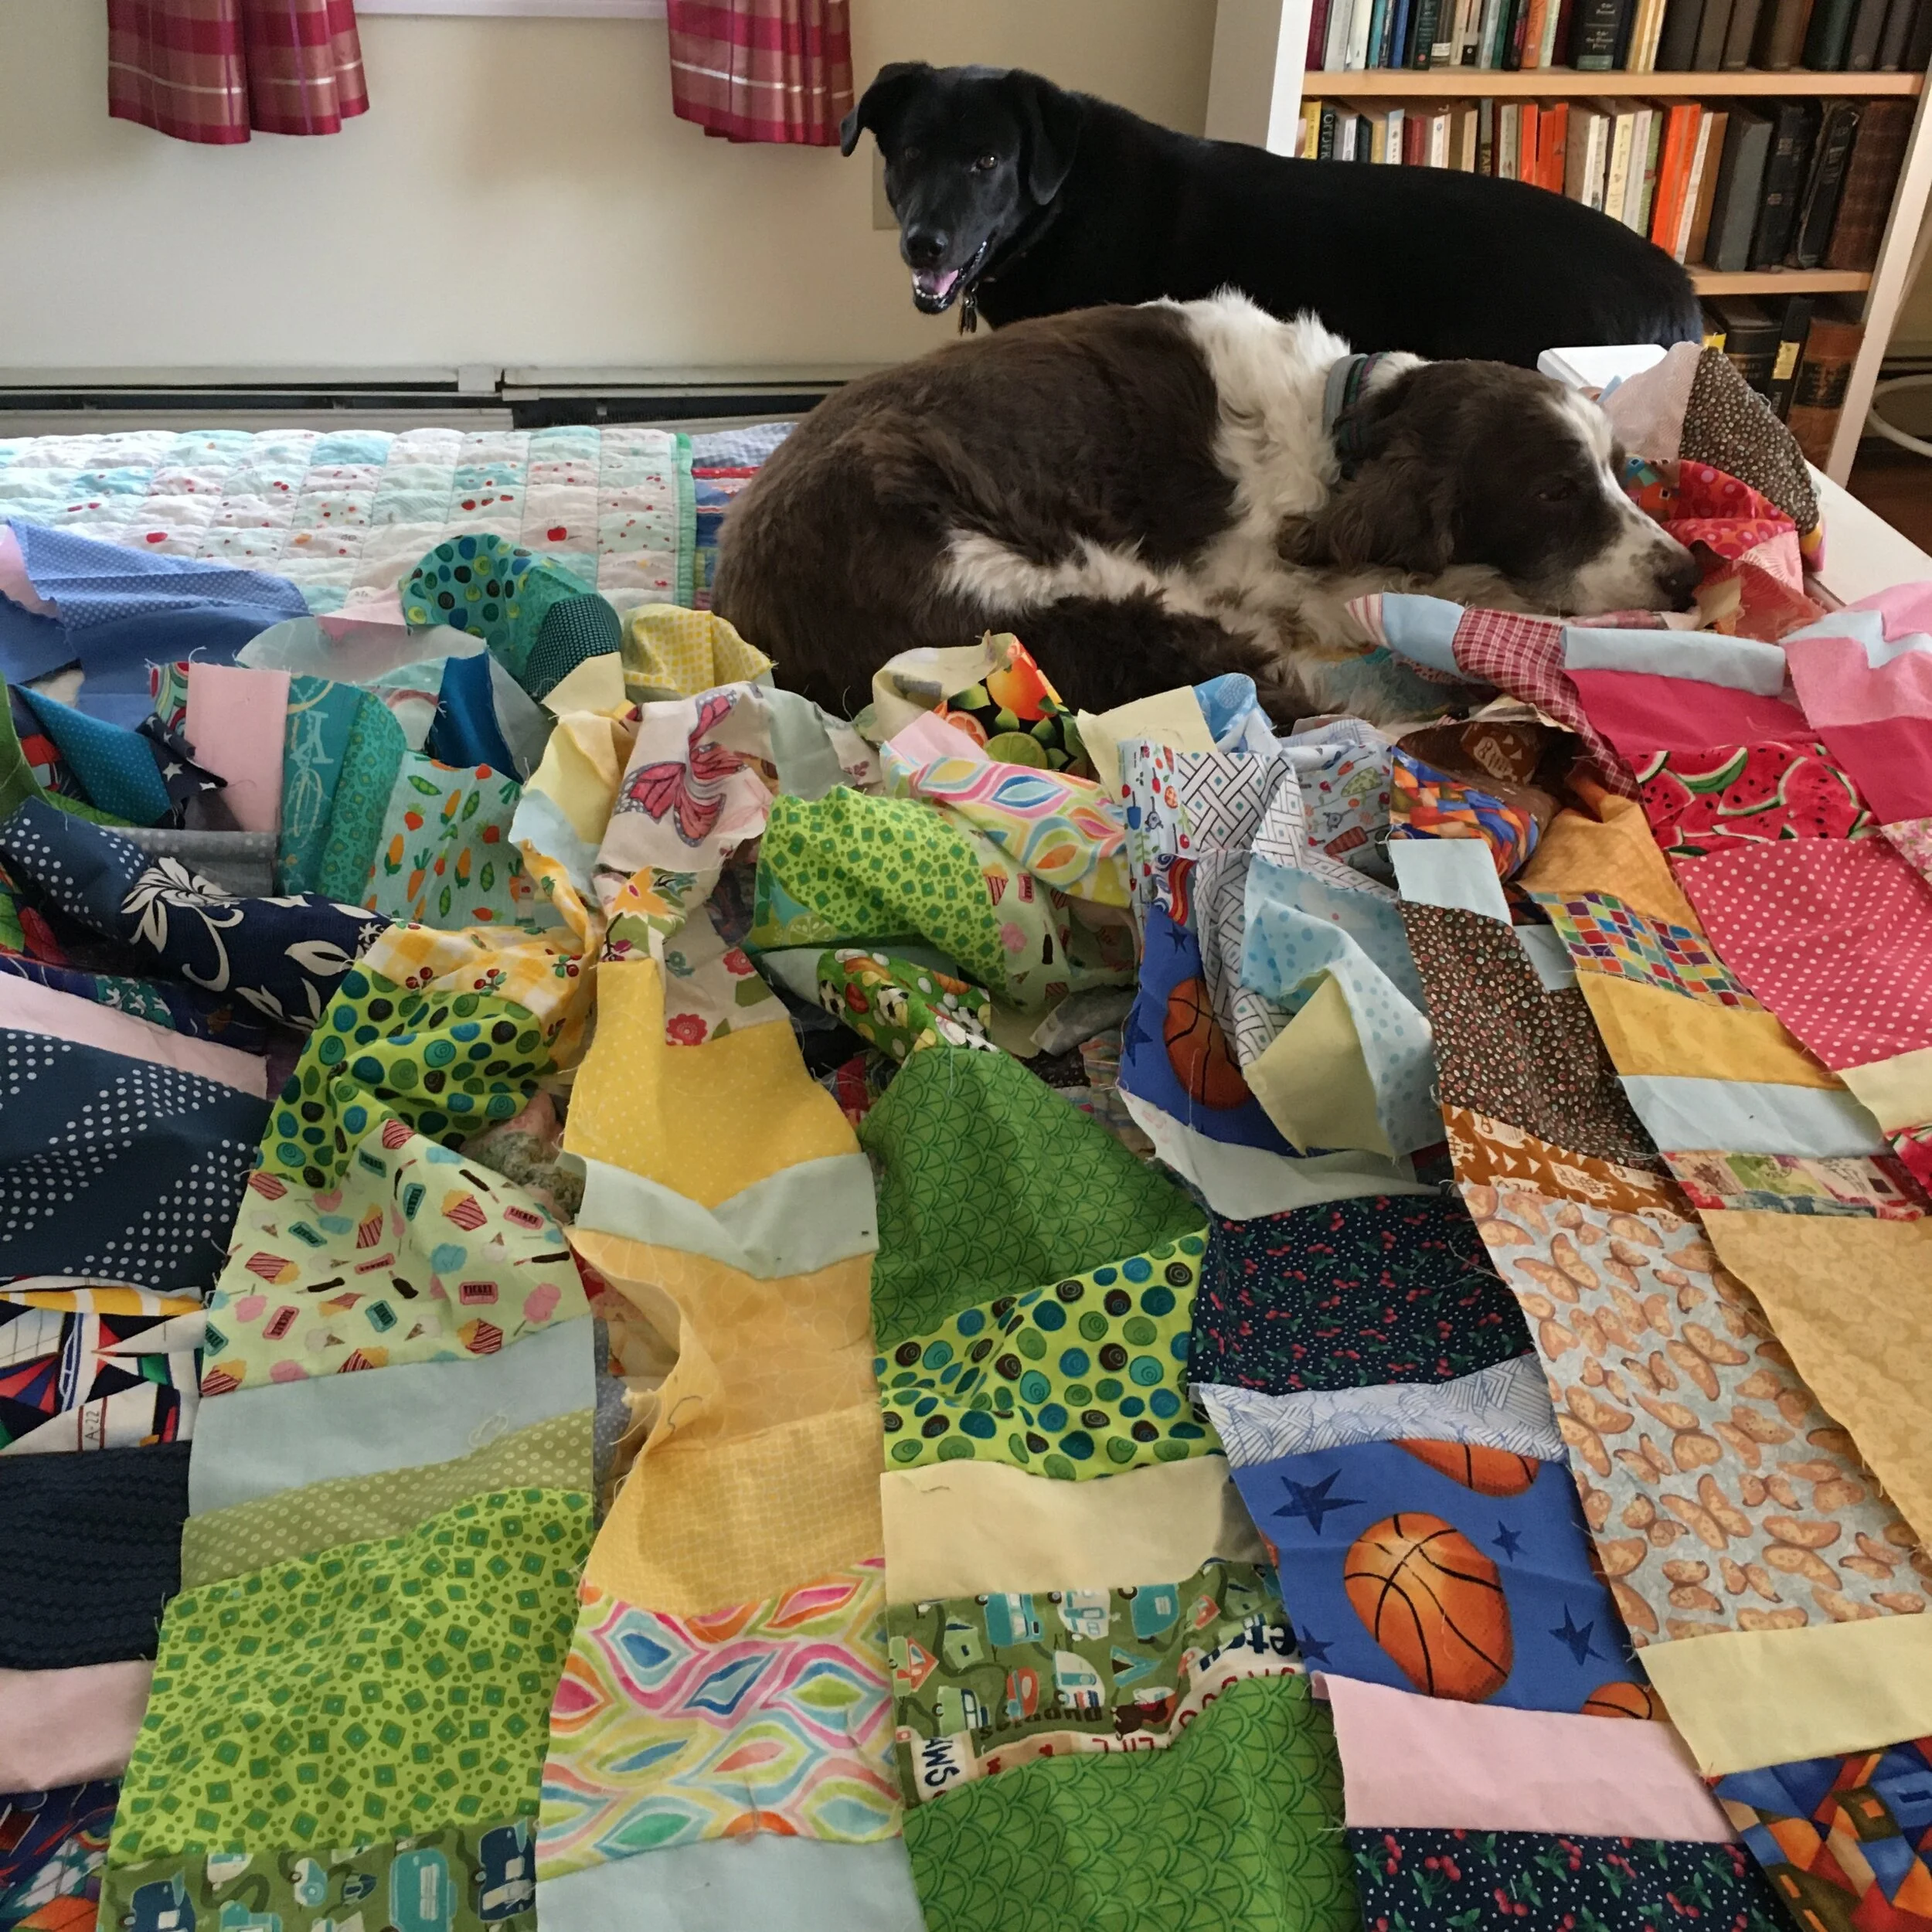
I thought about it while I was walking the dogs. It came to me that there was a way to get the flowers all going in the same direction.

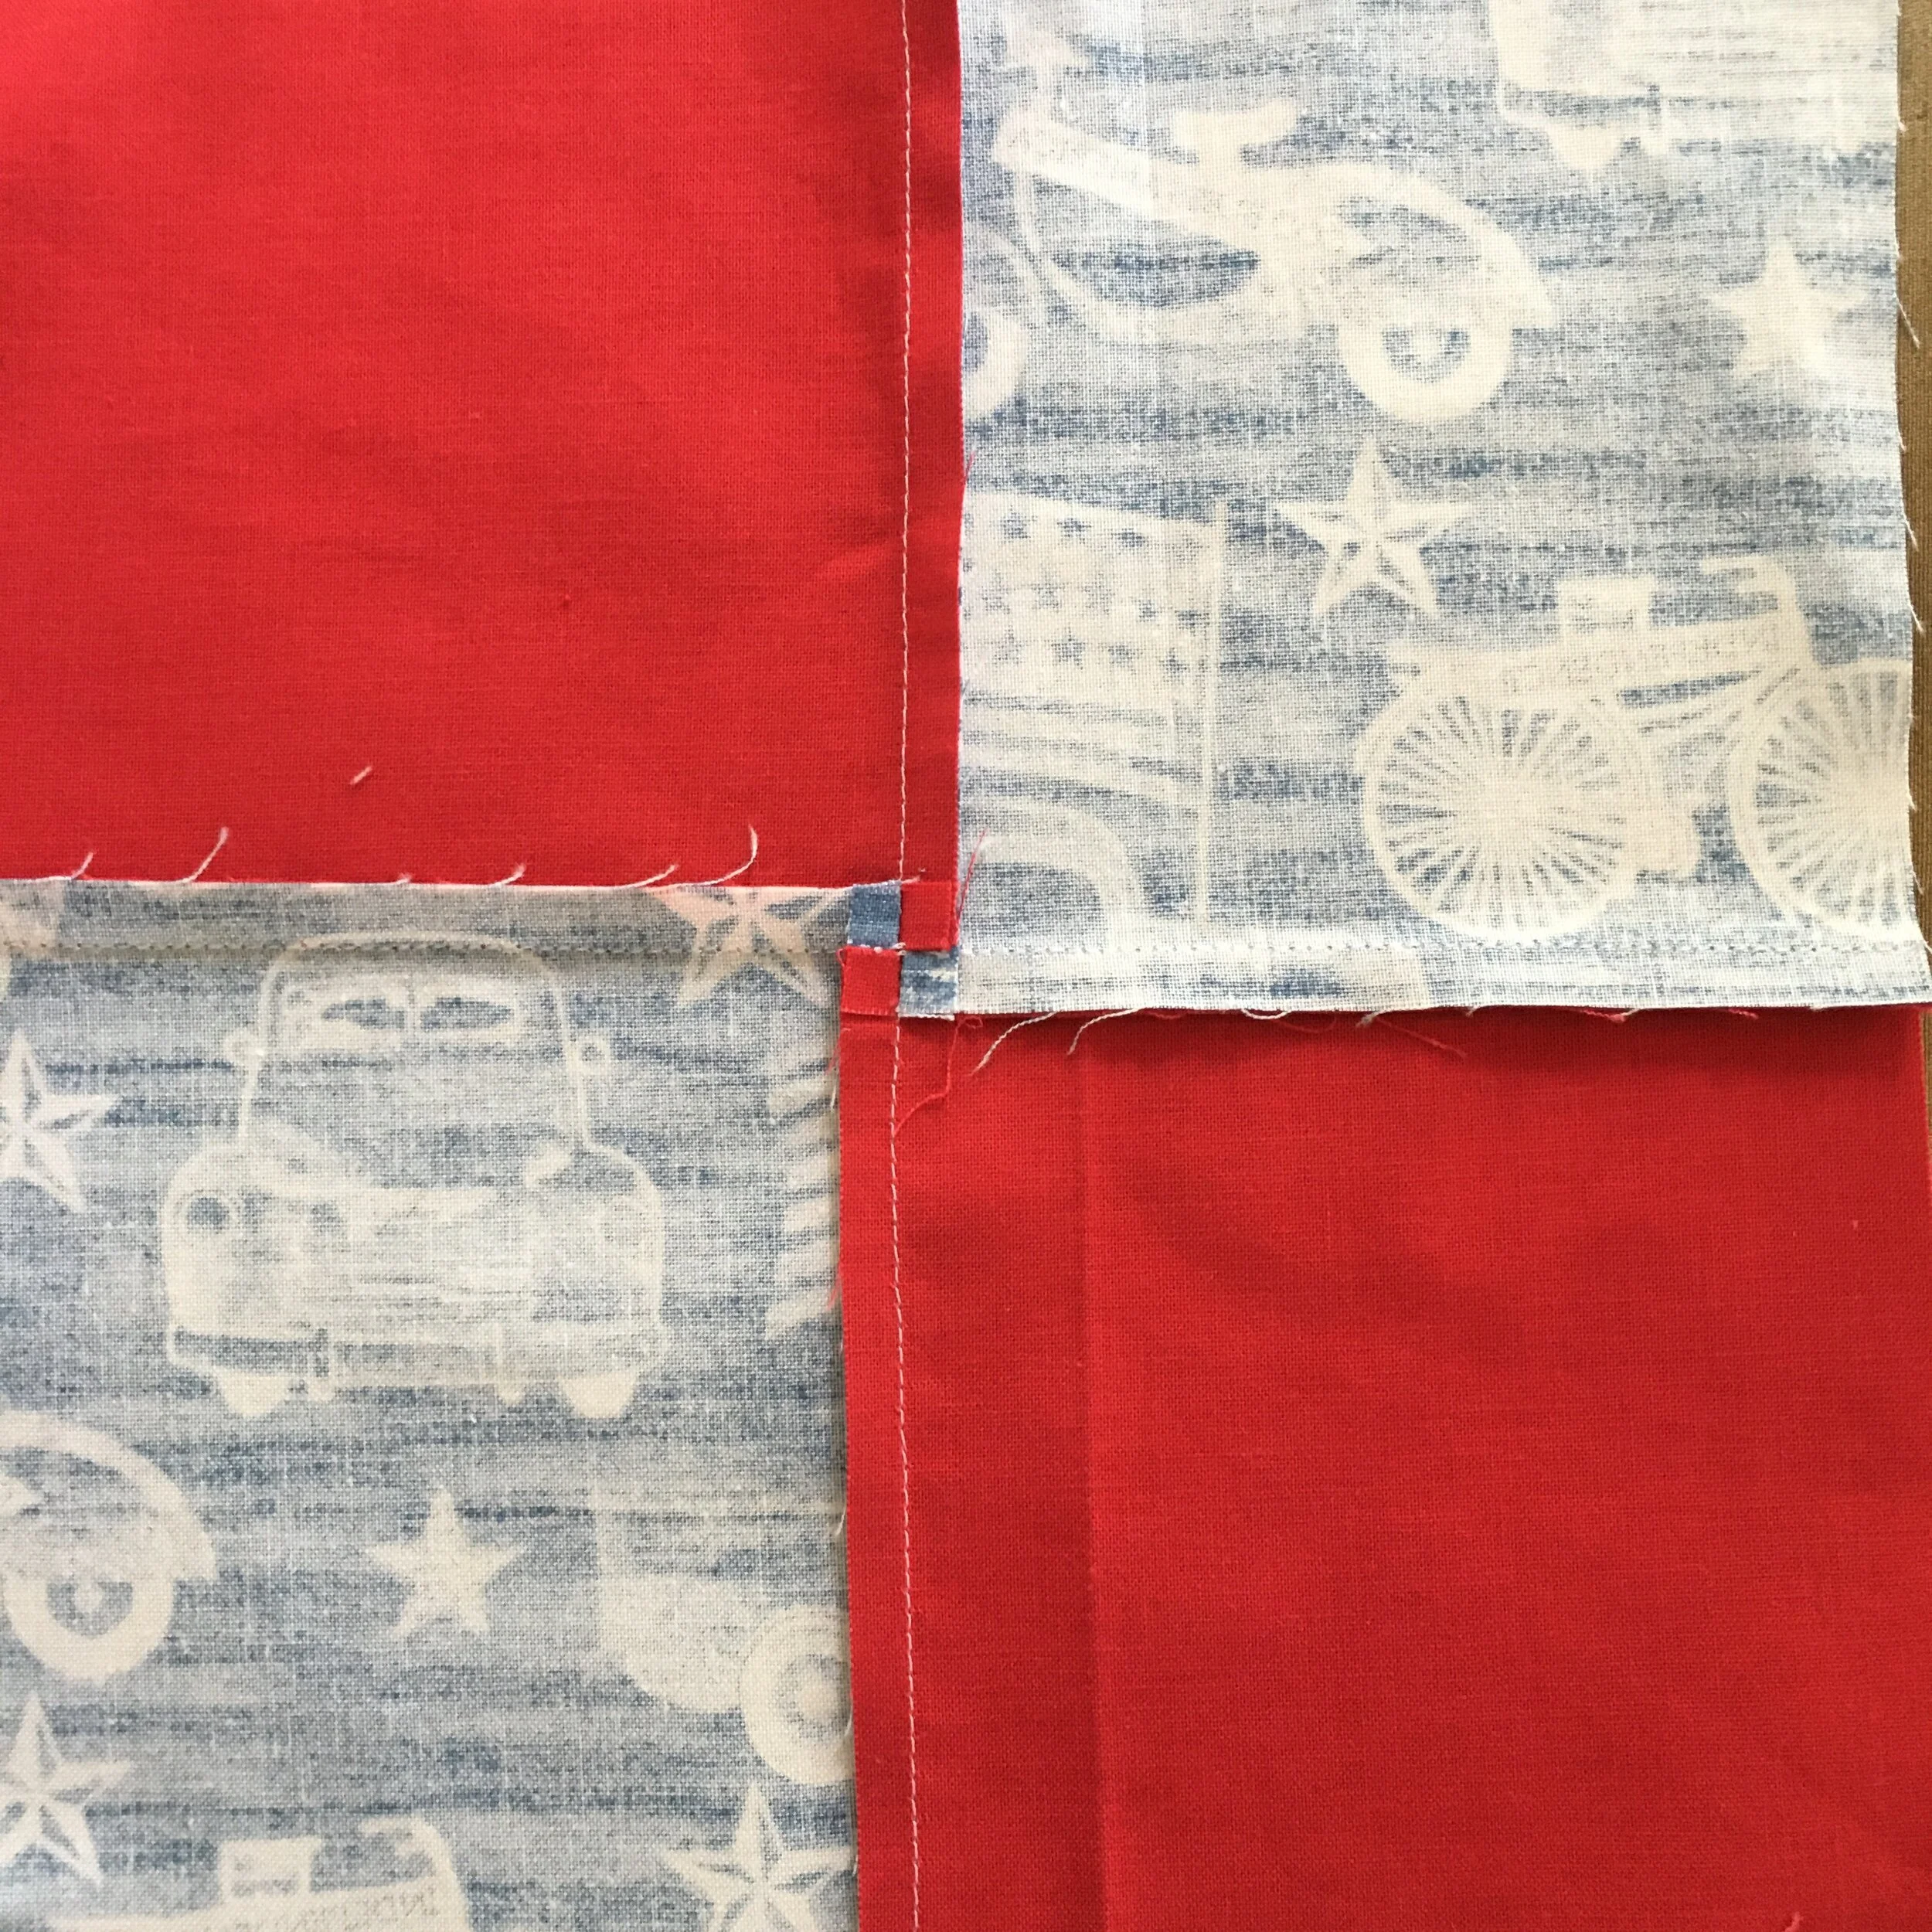
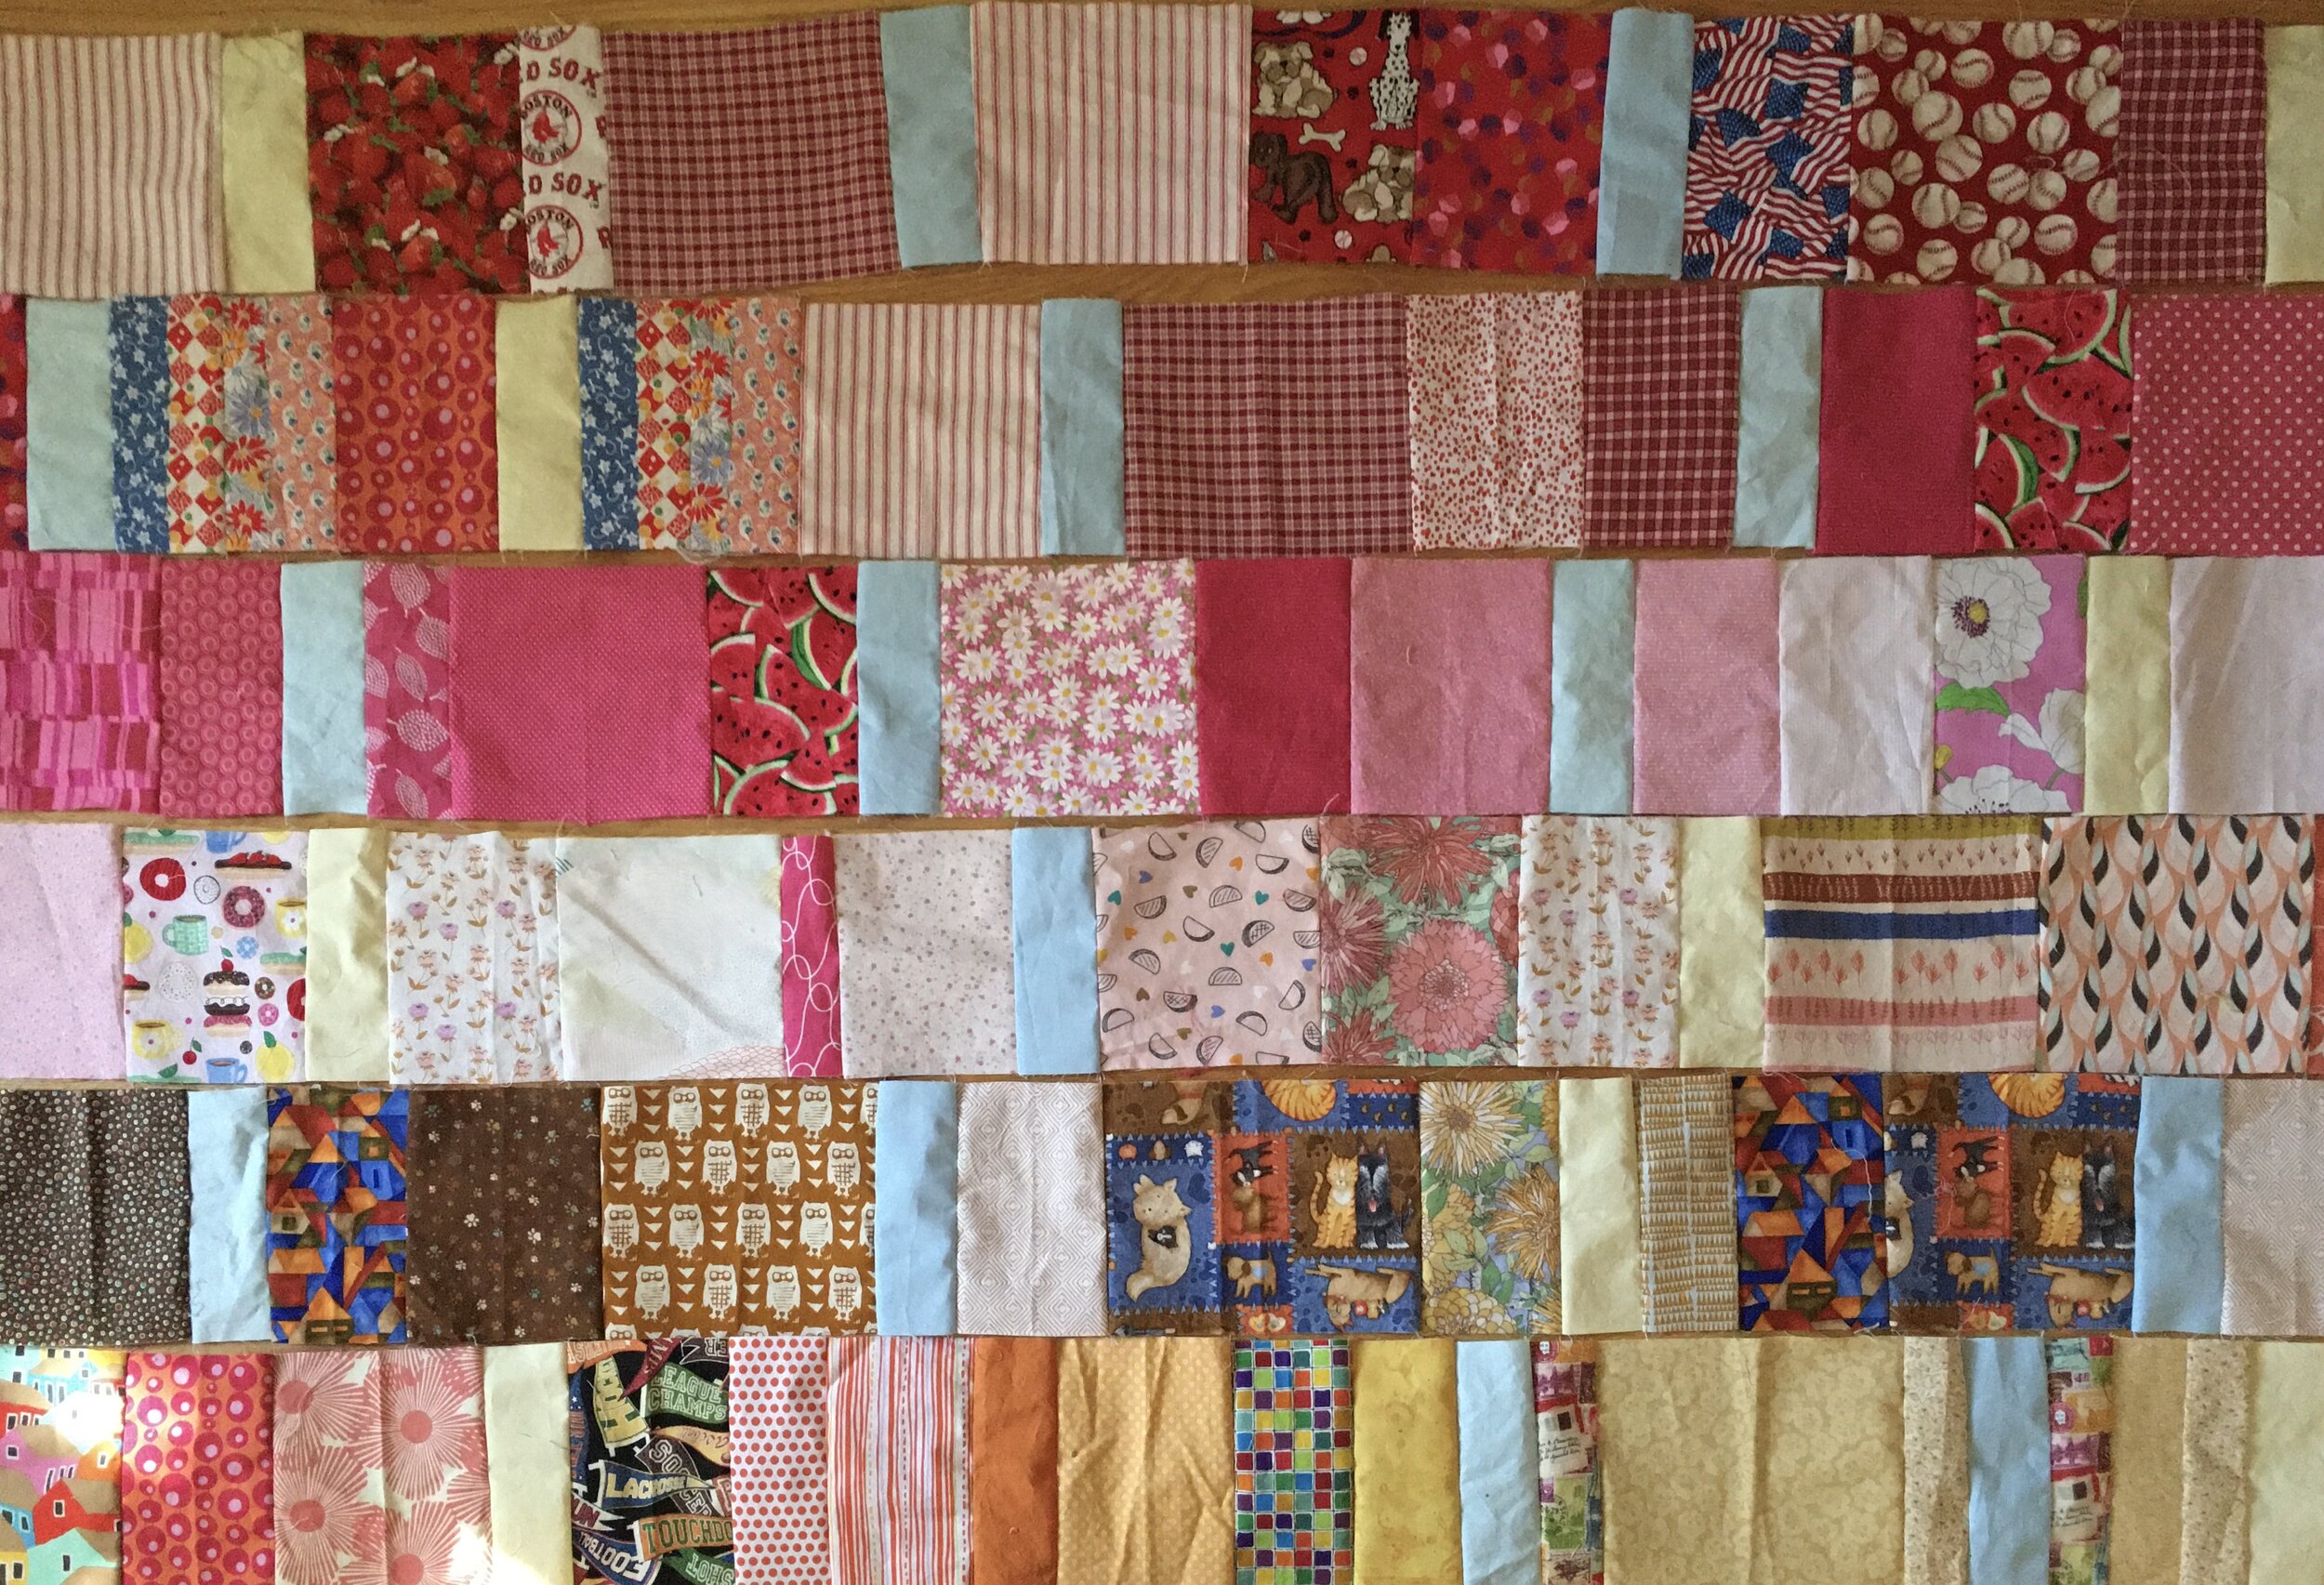
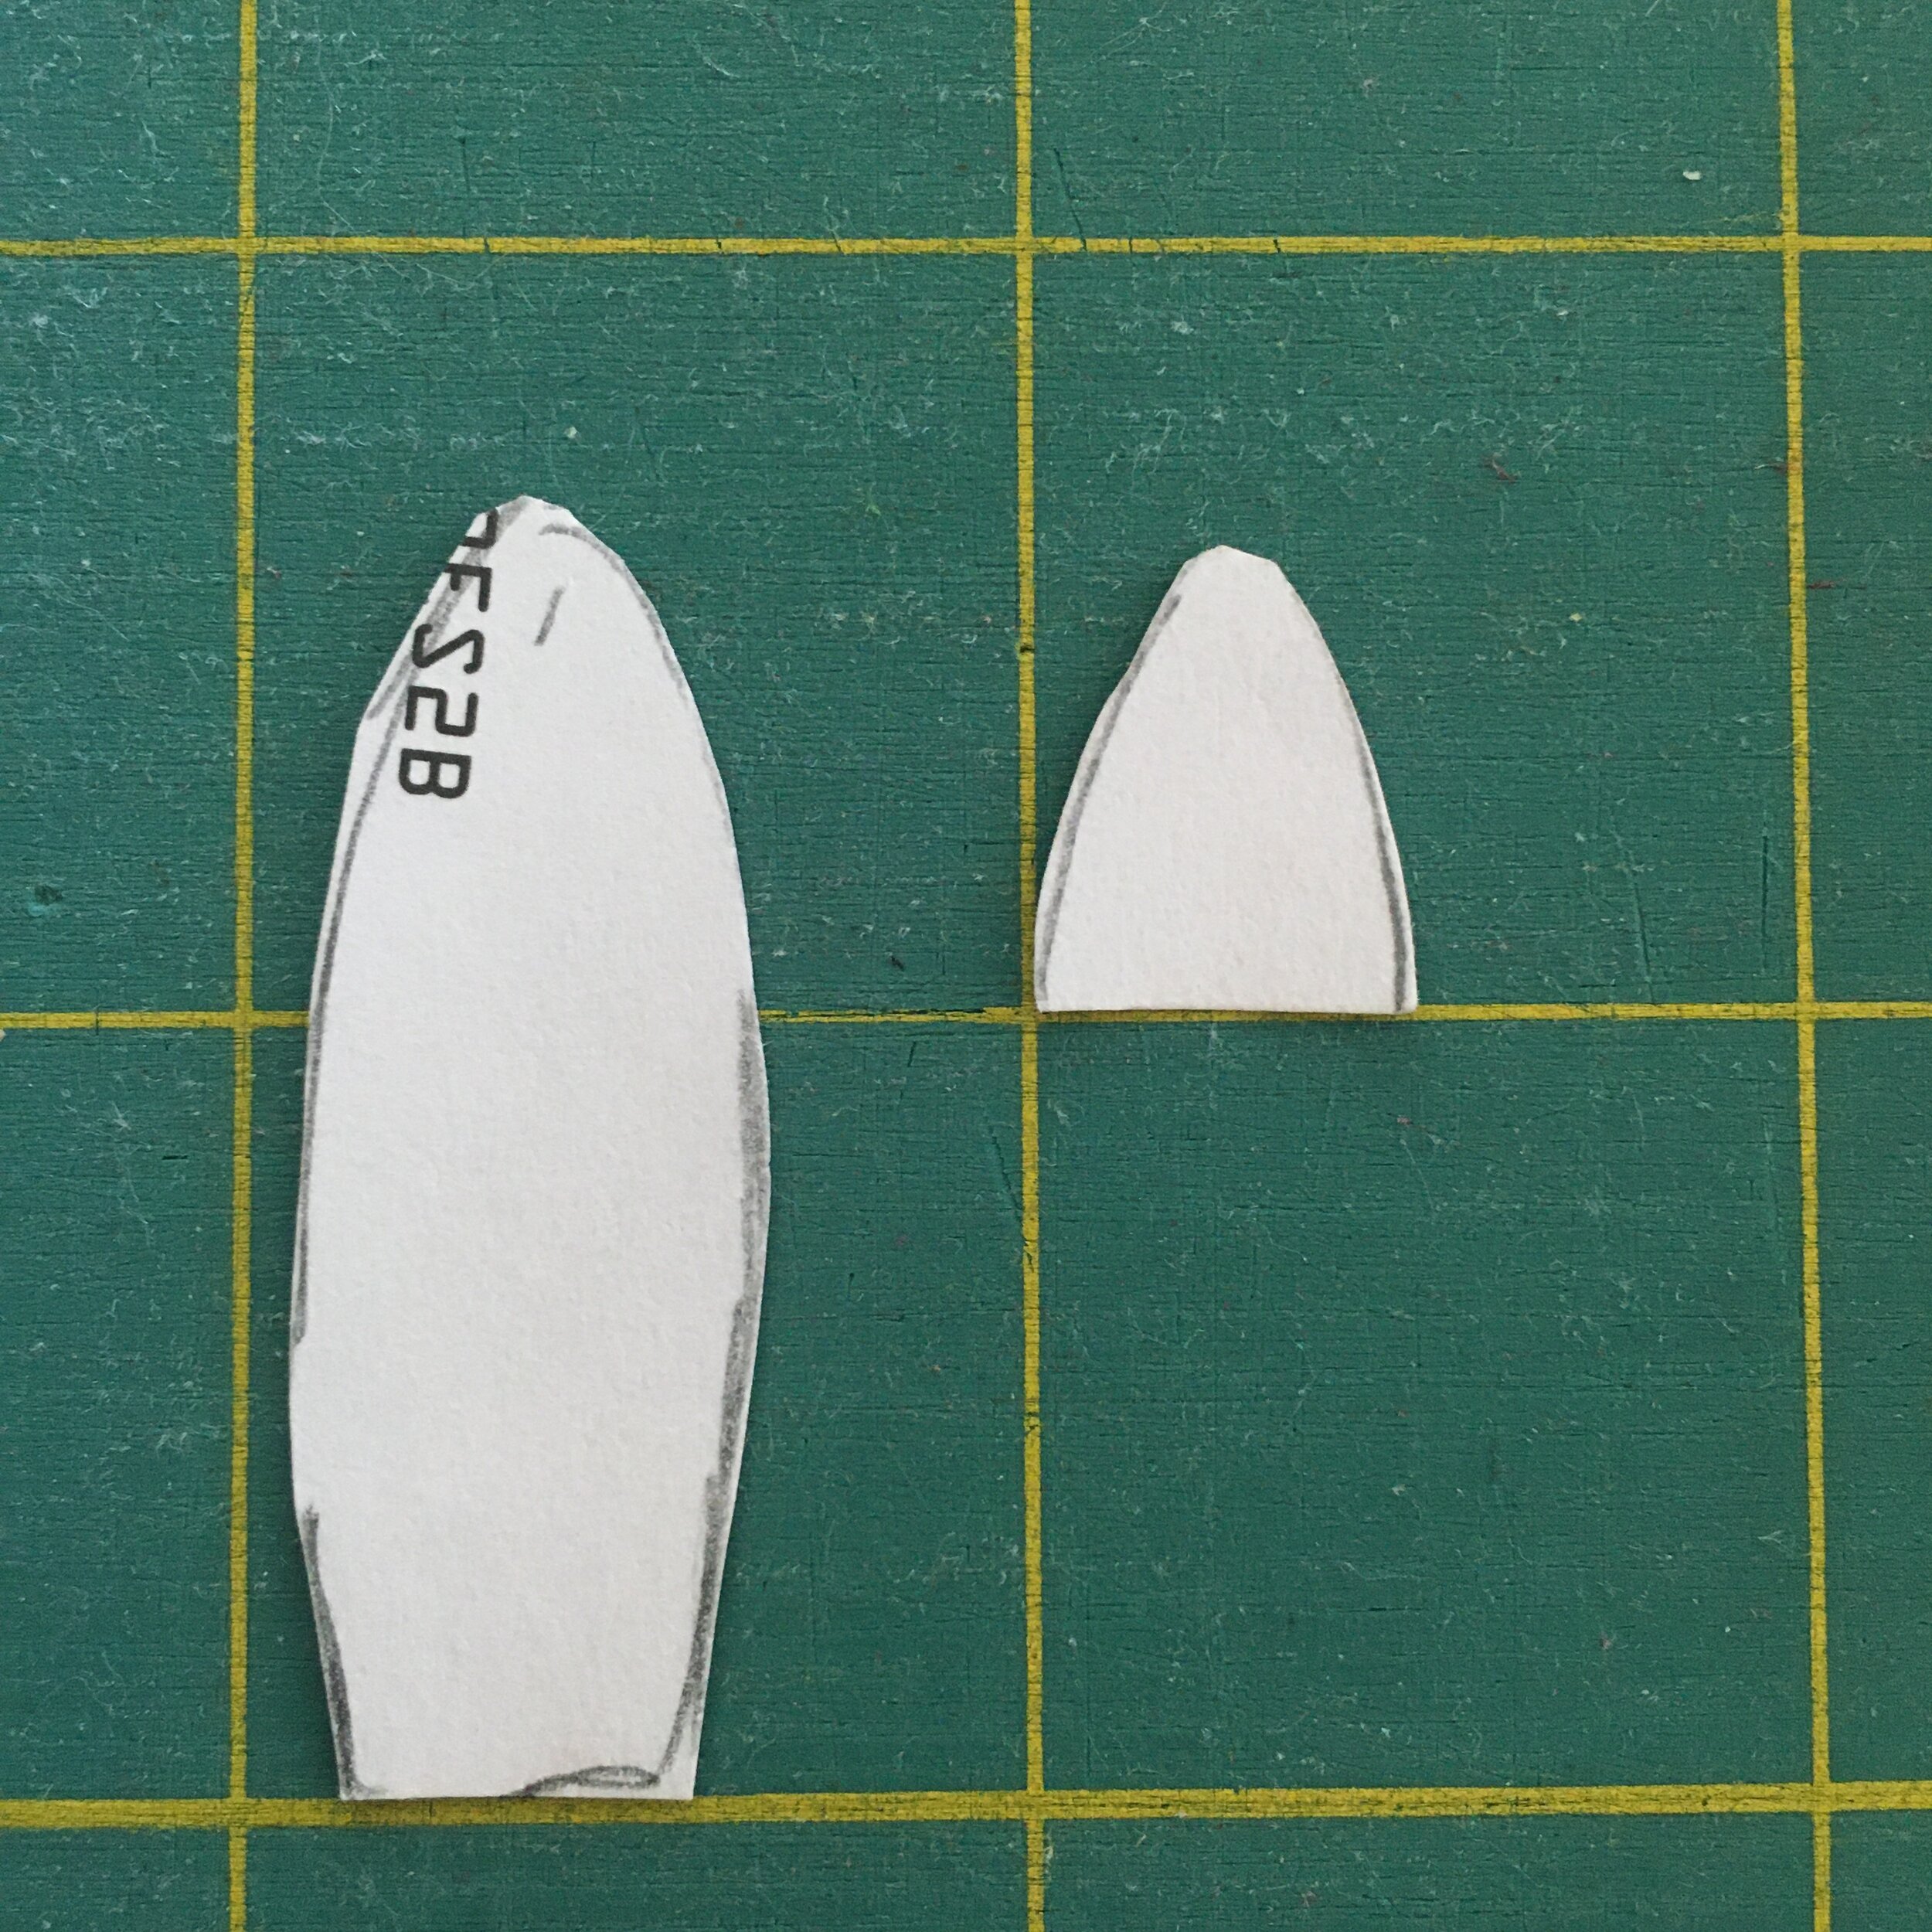
One way that half square triangles are constructed is by placing two squares of fabric, right sides together. Then a line is drawn on the lighter fabric from one corner to the opposite corner, diagonally. A seam is stitched 1/4 inch on each side of the center line. Then the block is cut along the center line, yielding two half square triangle blocks.

Here’s what I did. With the flowers standing upright in each square, I drew the center diagonal line from the lower left corner to the upper right corner on 1/4 quarter of the square blocks, and then from lower right corner to upper left corner on another 1/4 of the squares.

THEN I flipped the remaining half of the blocks upside down so that the flower stems were at the top of each block. Then I drew my center lines the same way as above.

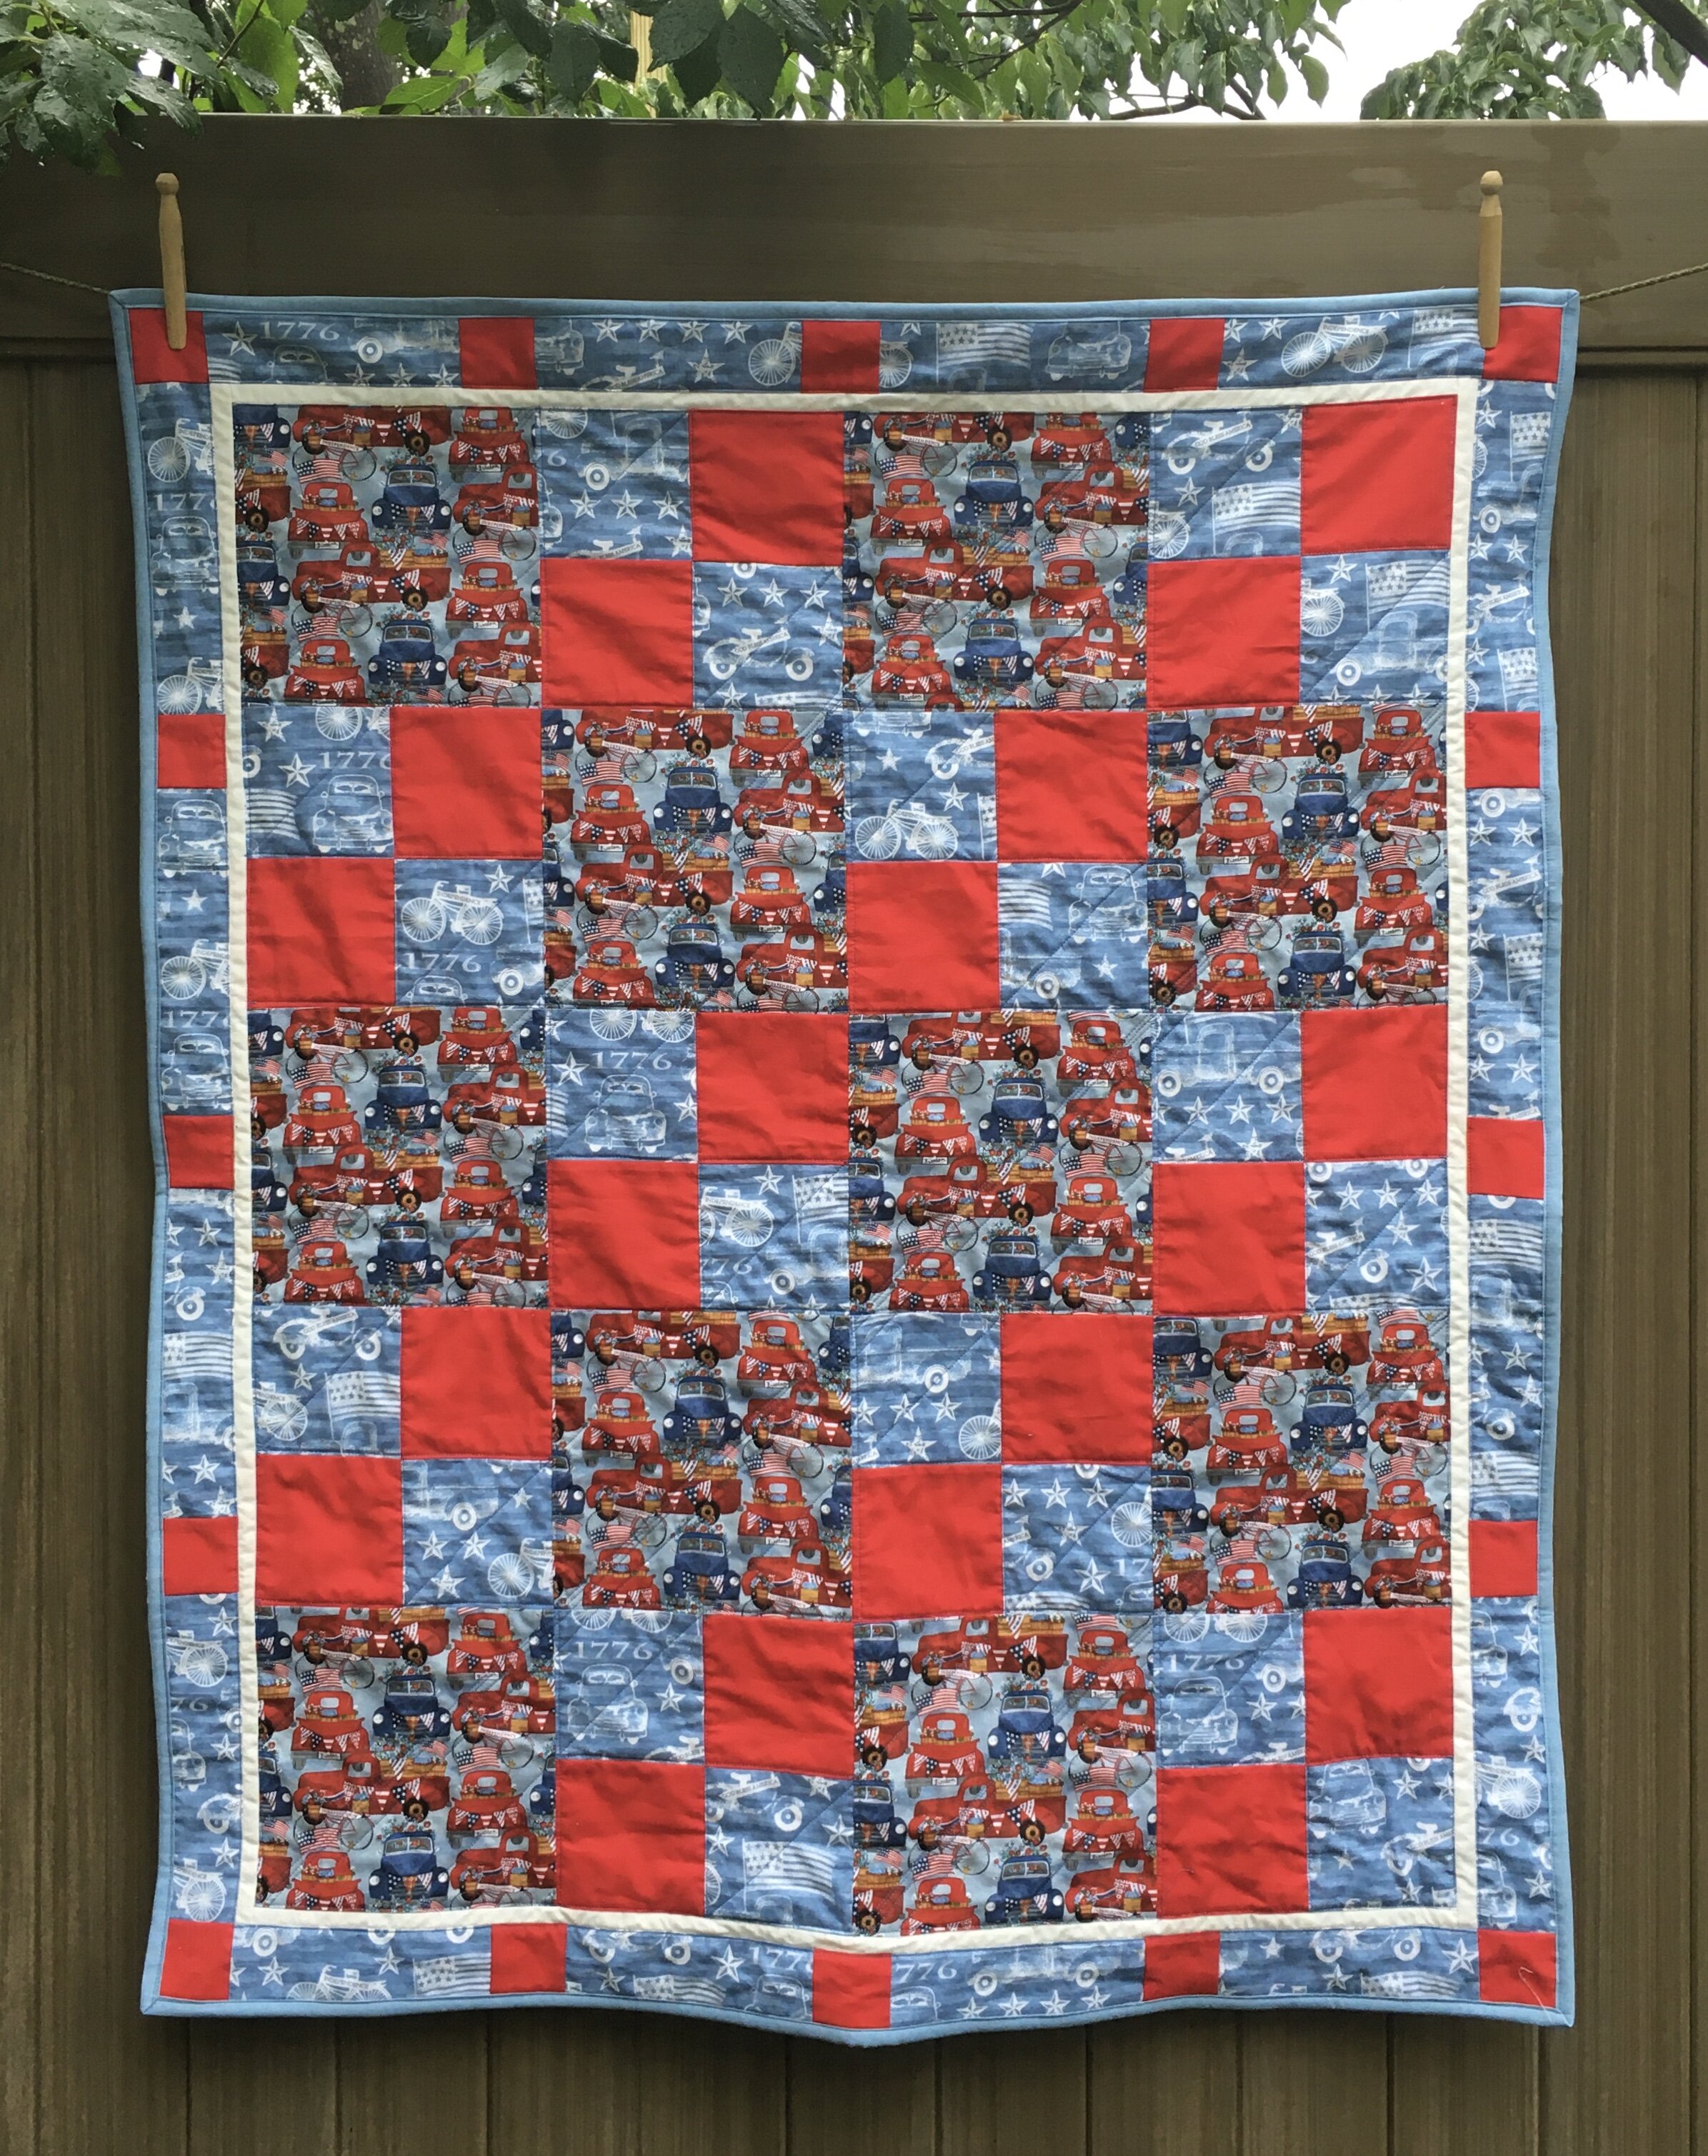
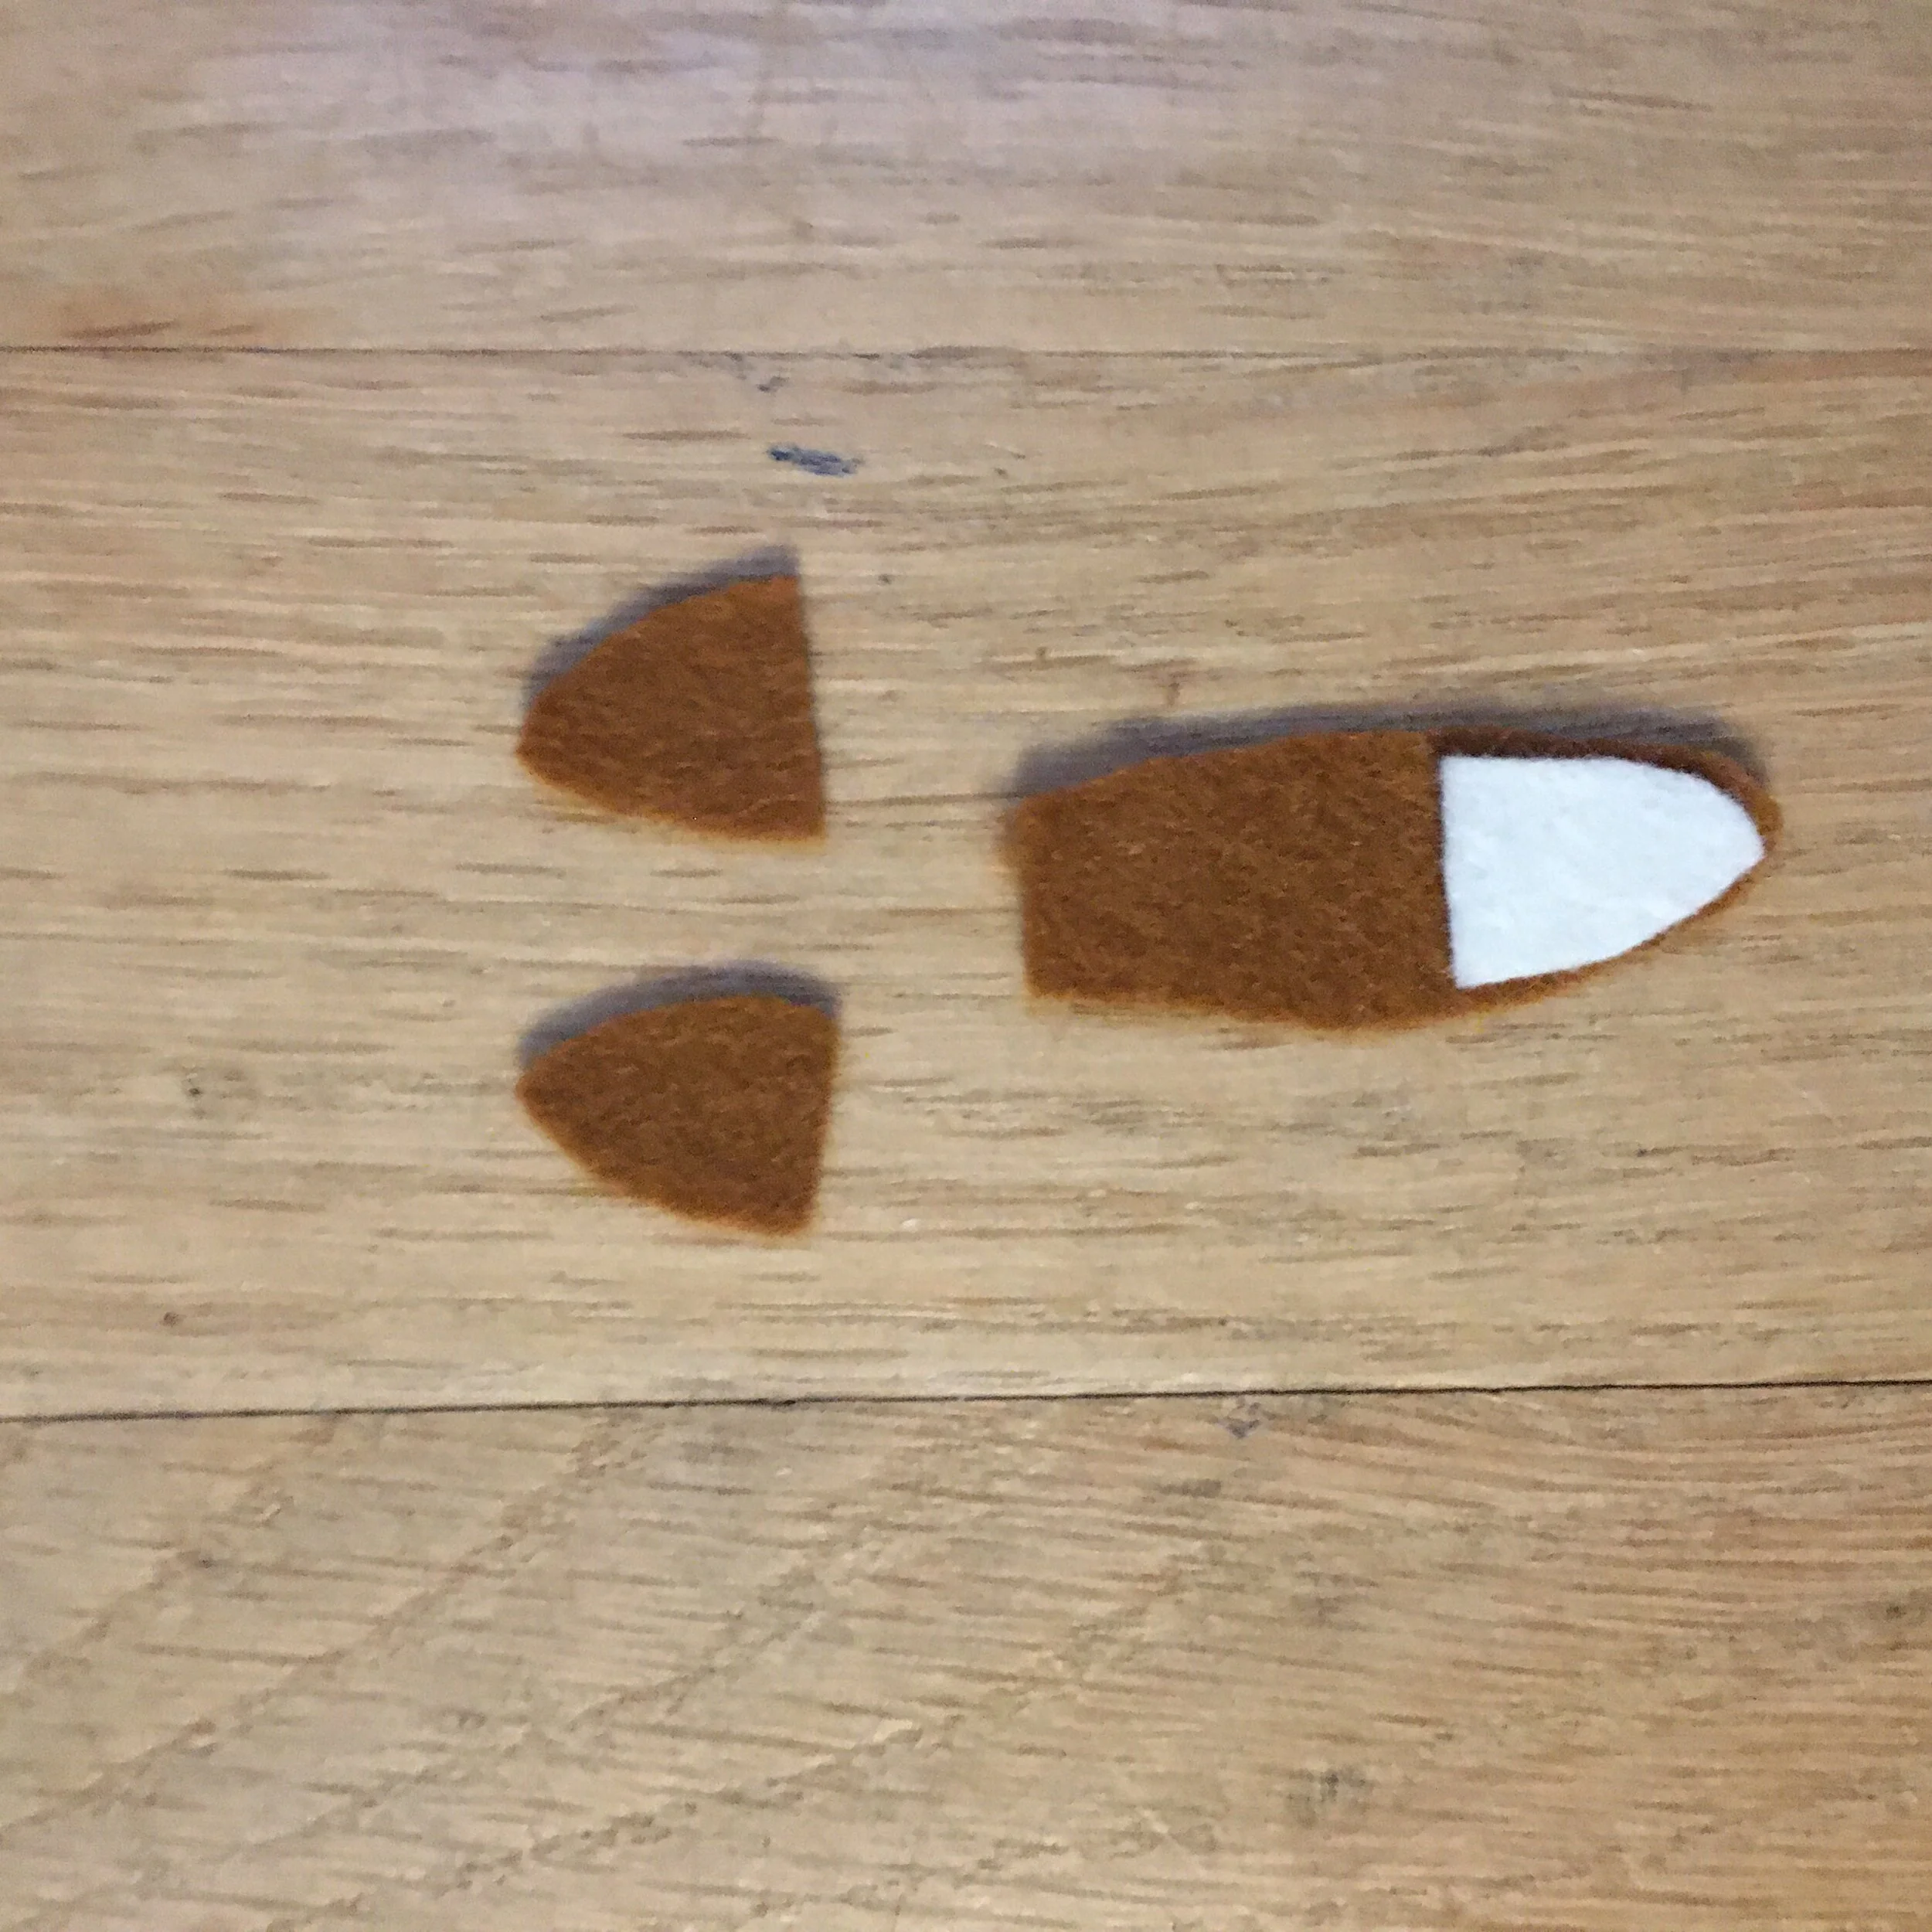
And it worked. All the flowers were facing upright. I sorted the blocks into the four groups and that made assembling the quilt easy. Each block was either dark upper quadrant left, dark upper quadrant right, dark lower quadrant left or dark lower quadrant right.

However, I did make an error sewing my strips together. Instead of sewing block to block across the strip, I sewed them in pairs. I accidentally flipped one of the pairs upside down in one row. The pattern was correct, but in those two blocks, the flowers are upside down. Oops!!

The quilt was fully assembled and I was sandwiching the layers of the quilt when I saw what had happened. I thought about taking it all apart, but then decided that since with this busy floral fabric, it just wasn’t that noticeable. And left as is, it’s a teachable moment. See if you can find the upside flowers! (I’m not telling)!!

If I were making this quilt again, I would probably tone it down! (It is busy, busy, busy!! But fun)! There is a lovely light green fabric with dark green dots in the “Sunny Fields” line. I would use that with one of the sunflower fabrics in the half square triangles and use the butterflies as the border.

But I do like this quilt as is. It’s the quilt you’ll want to grab if you need to stay AWAKE! Not the one you should choose for a nap!
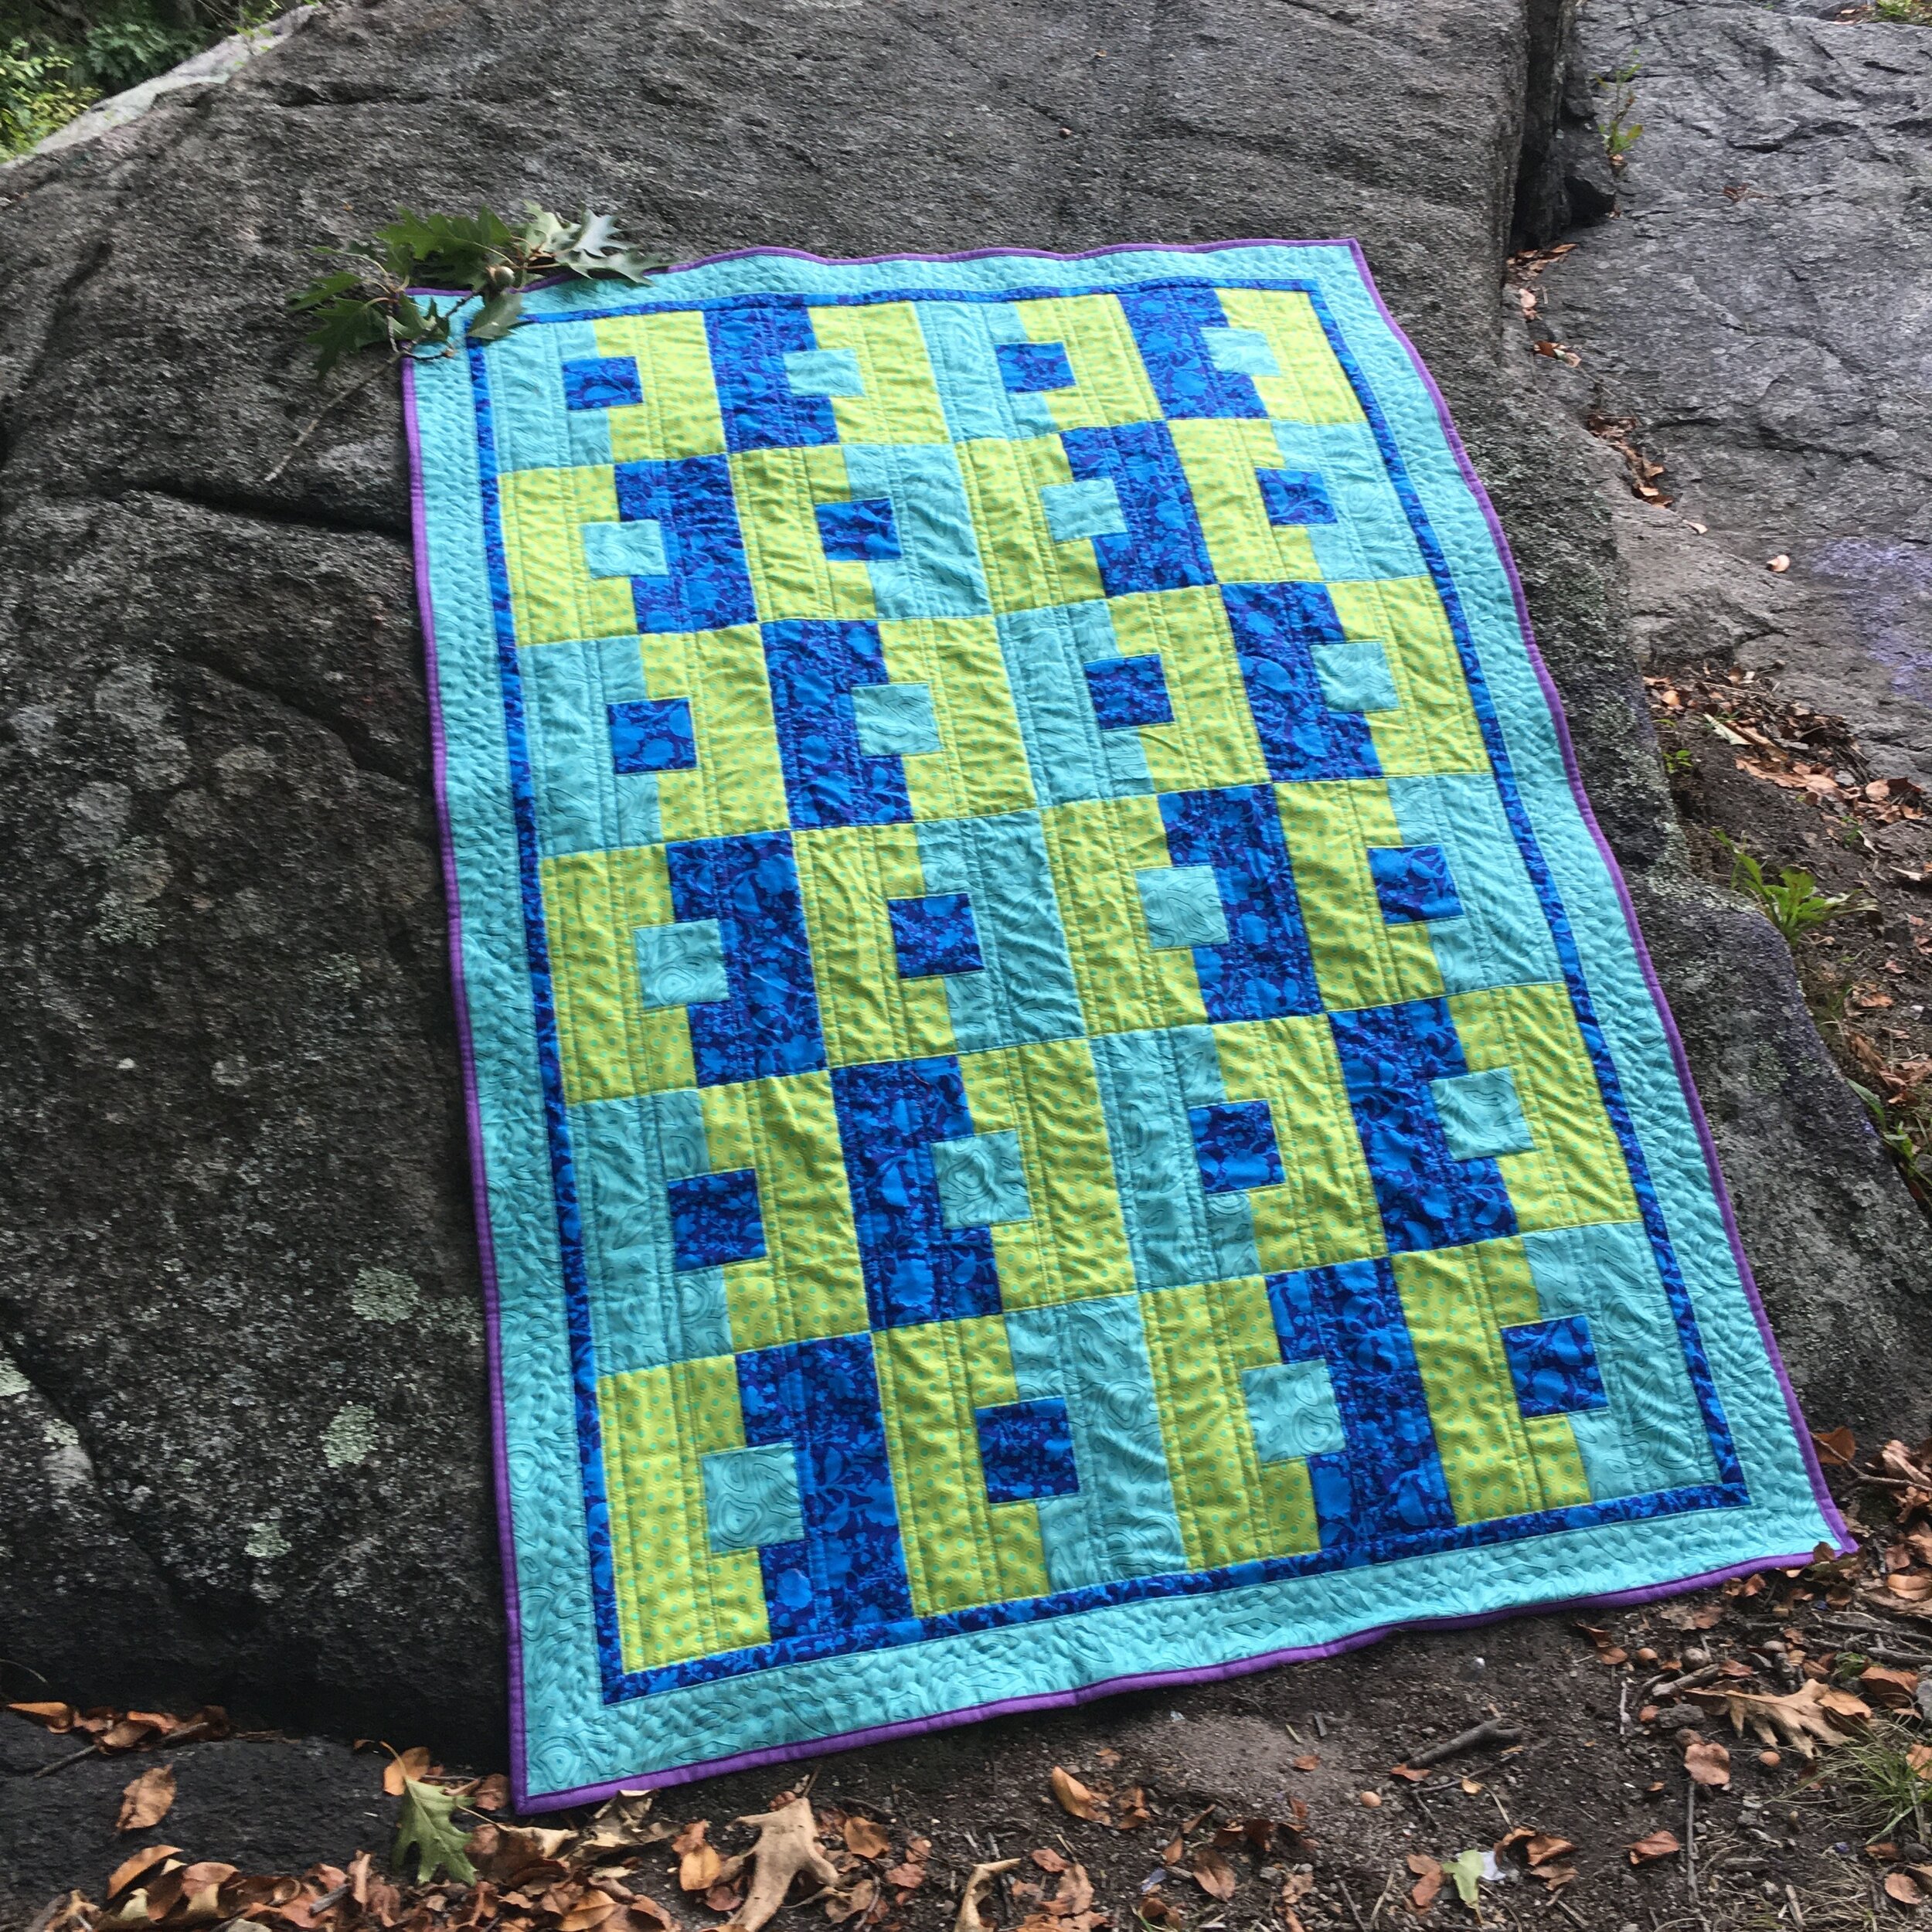
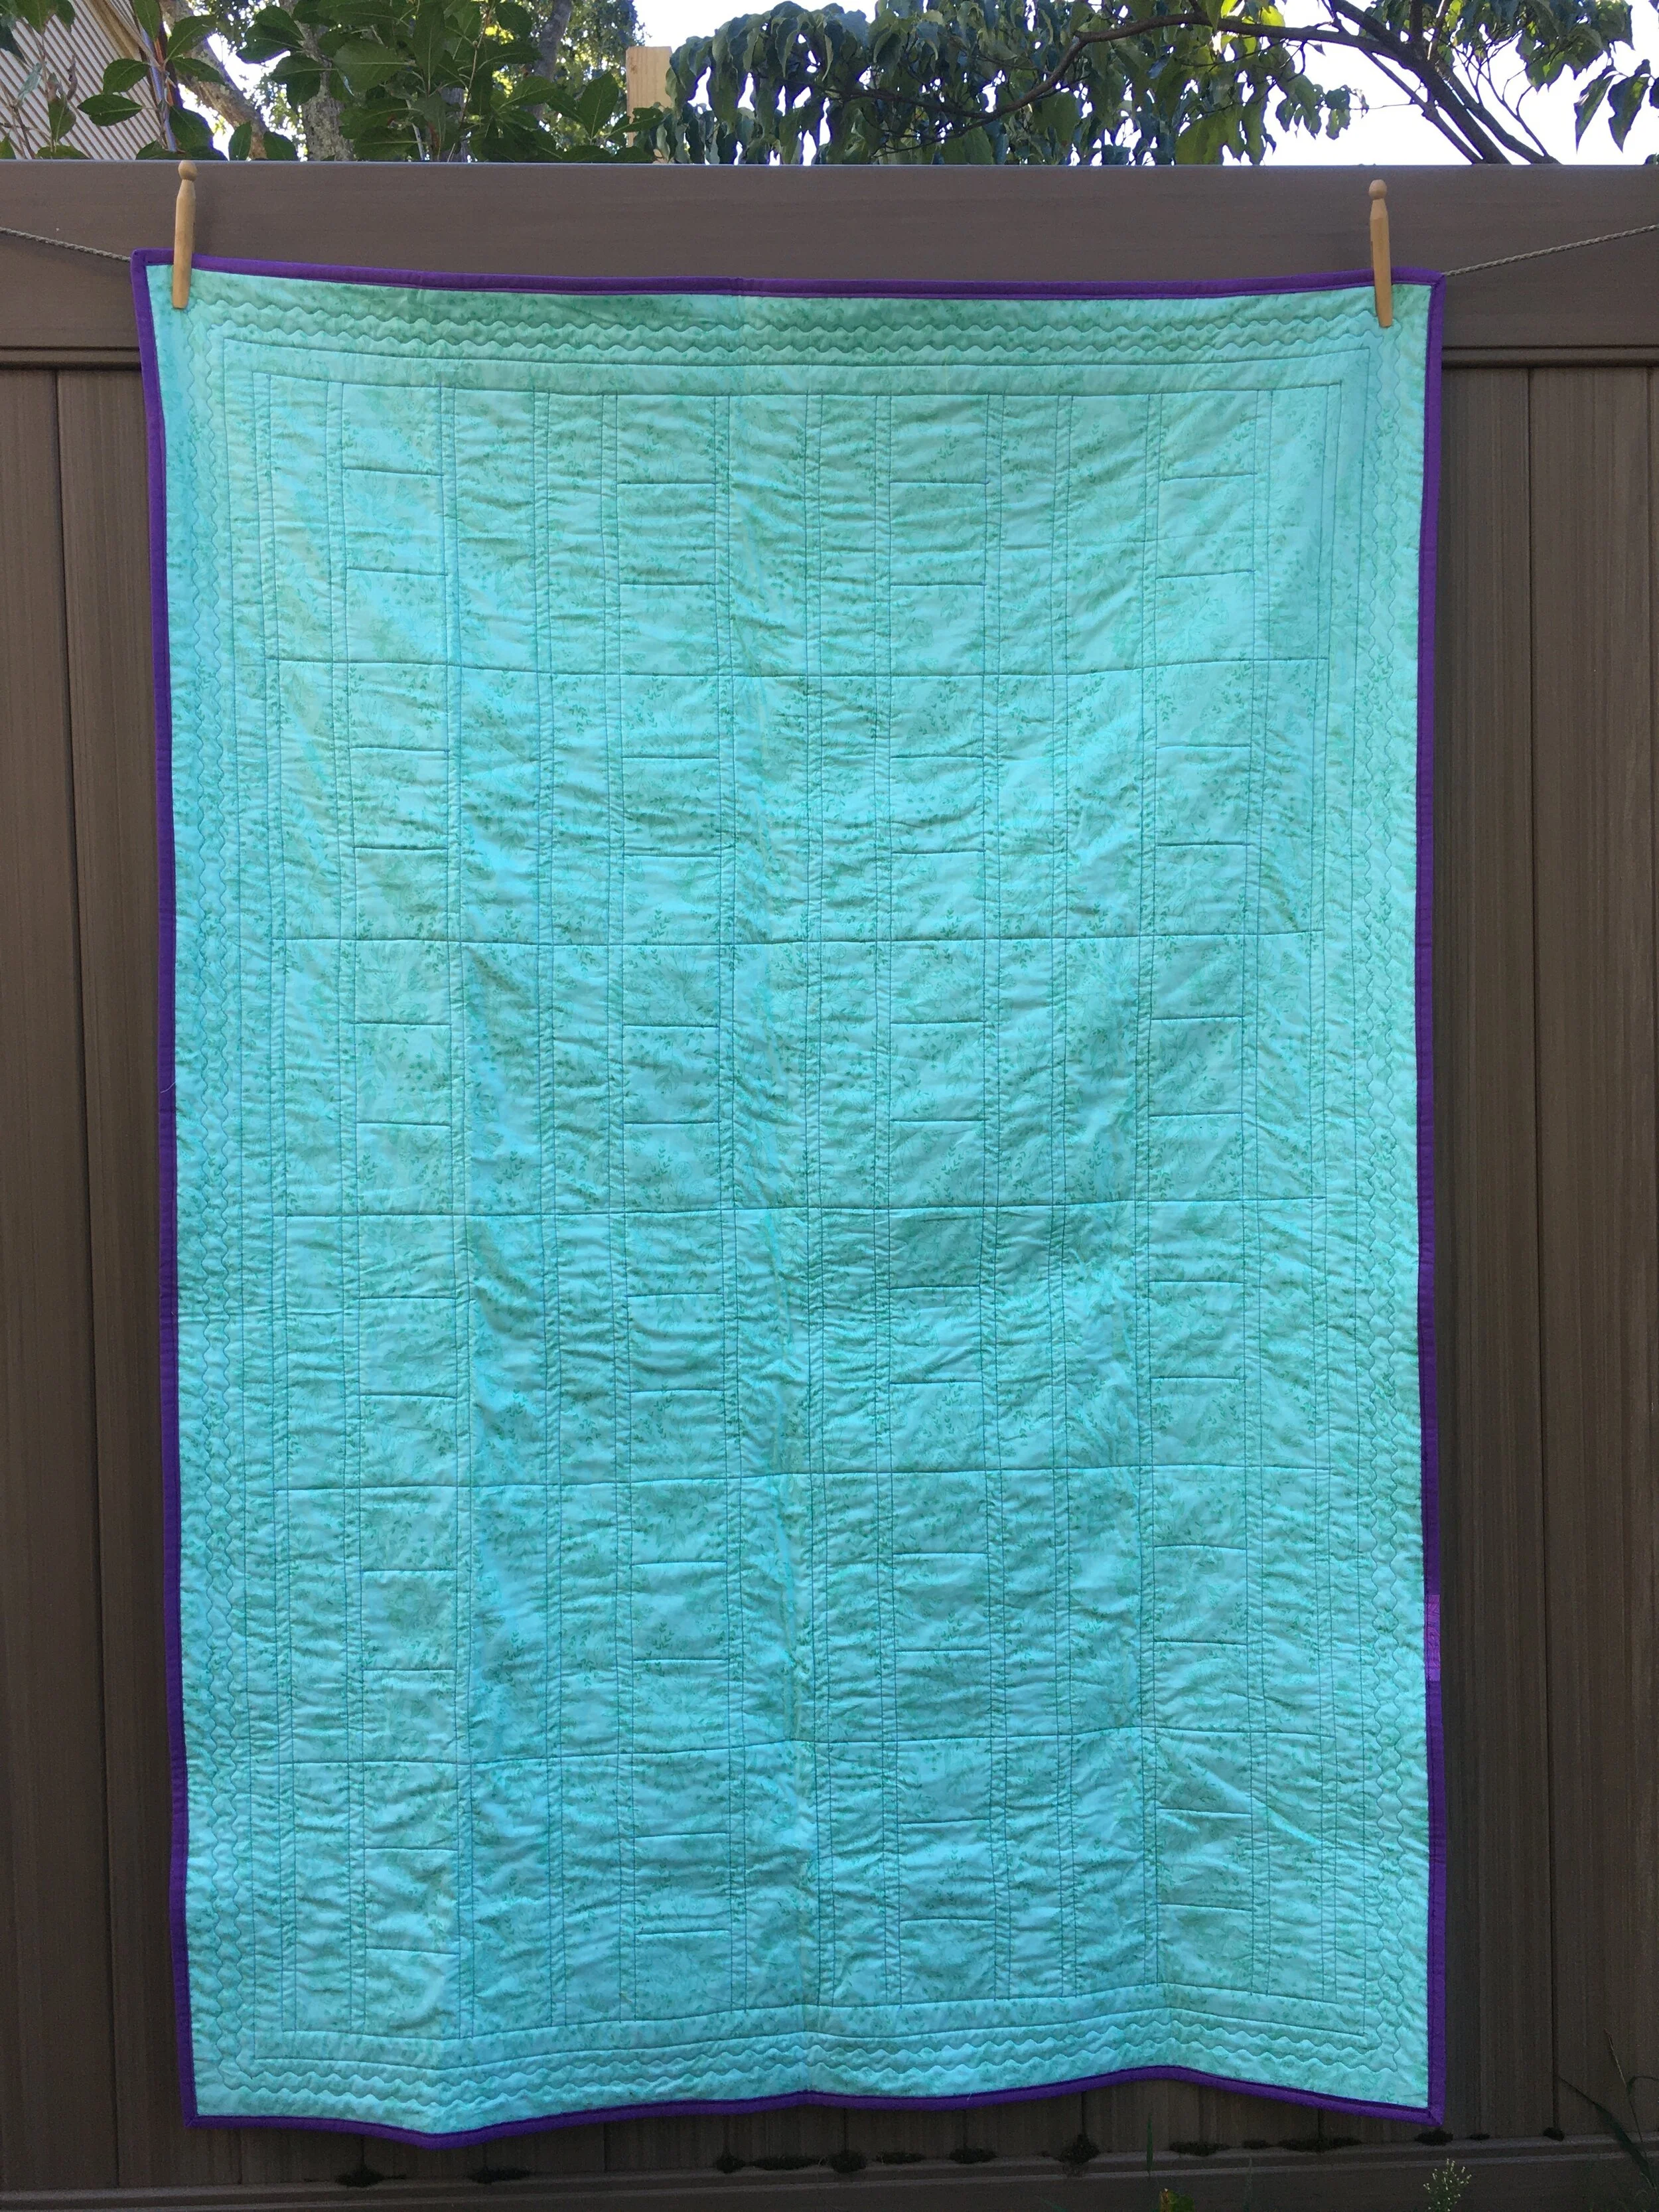
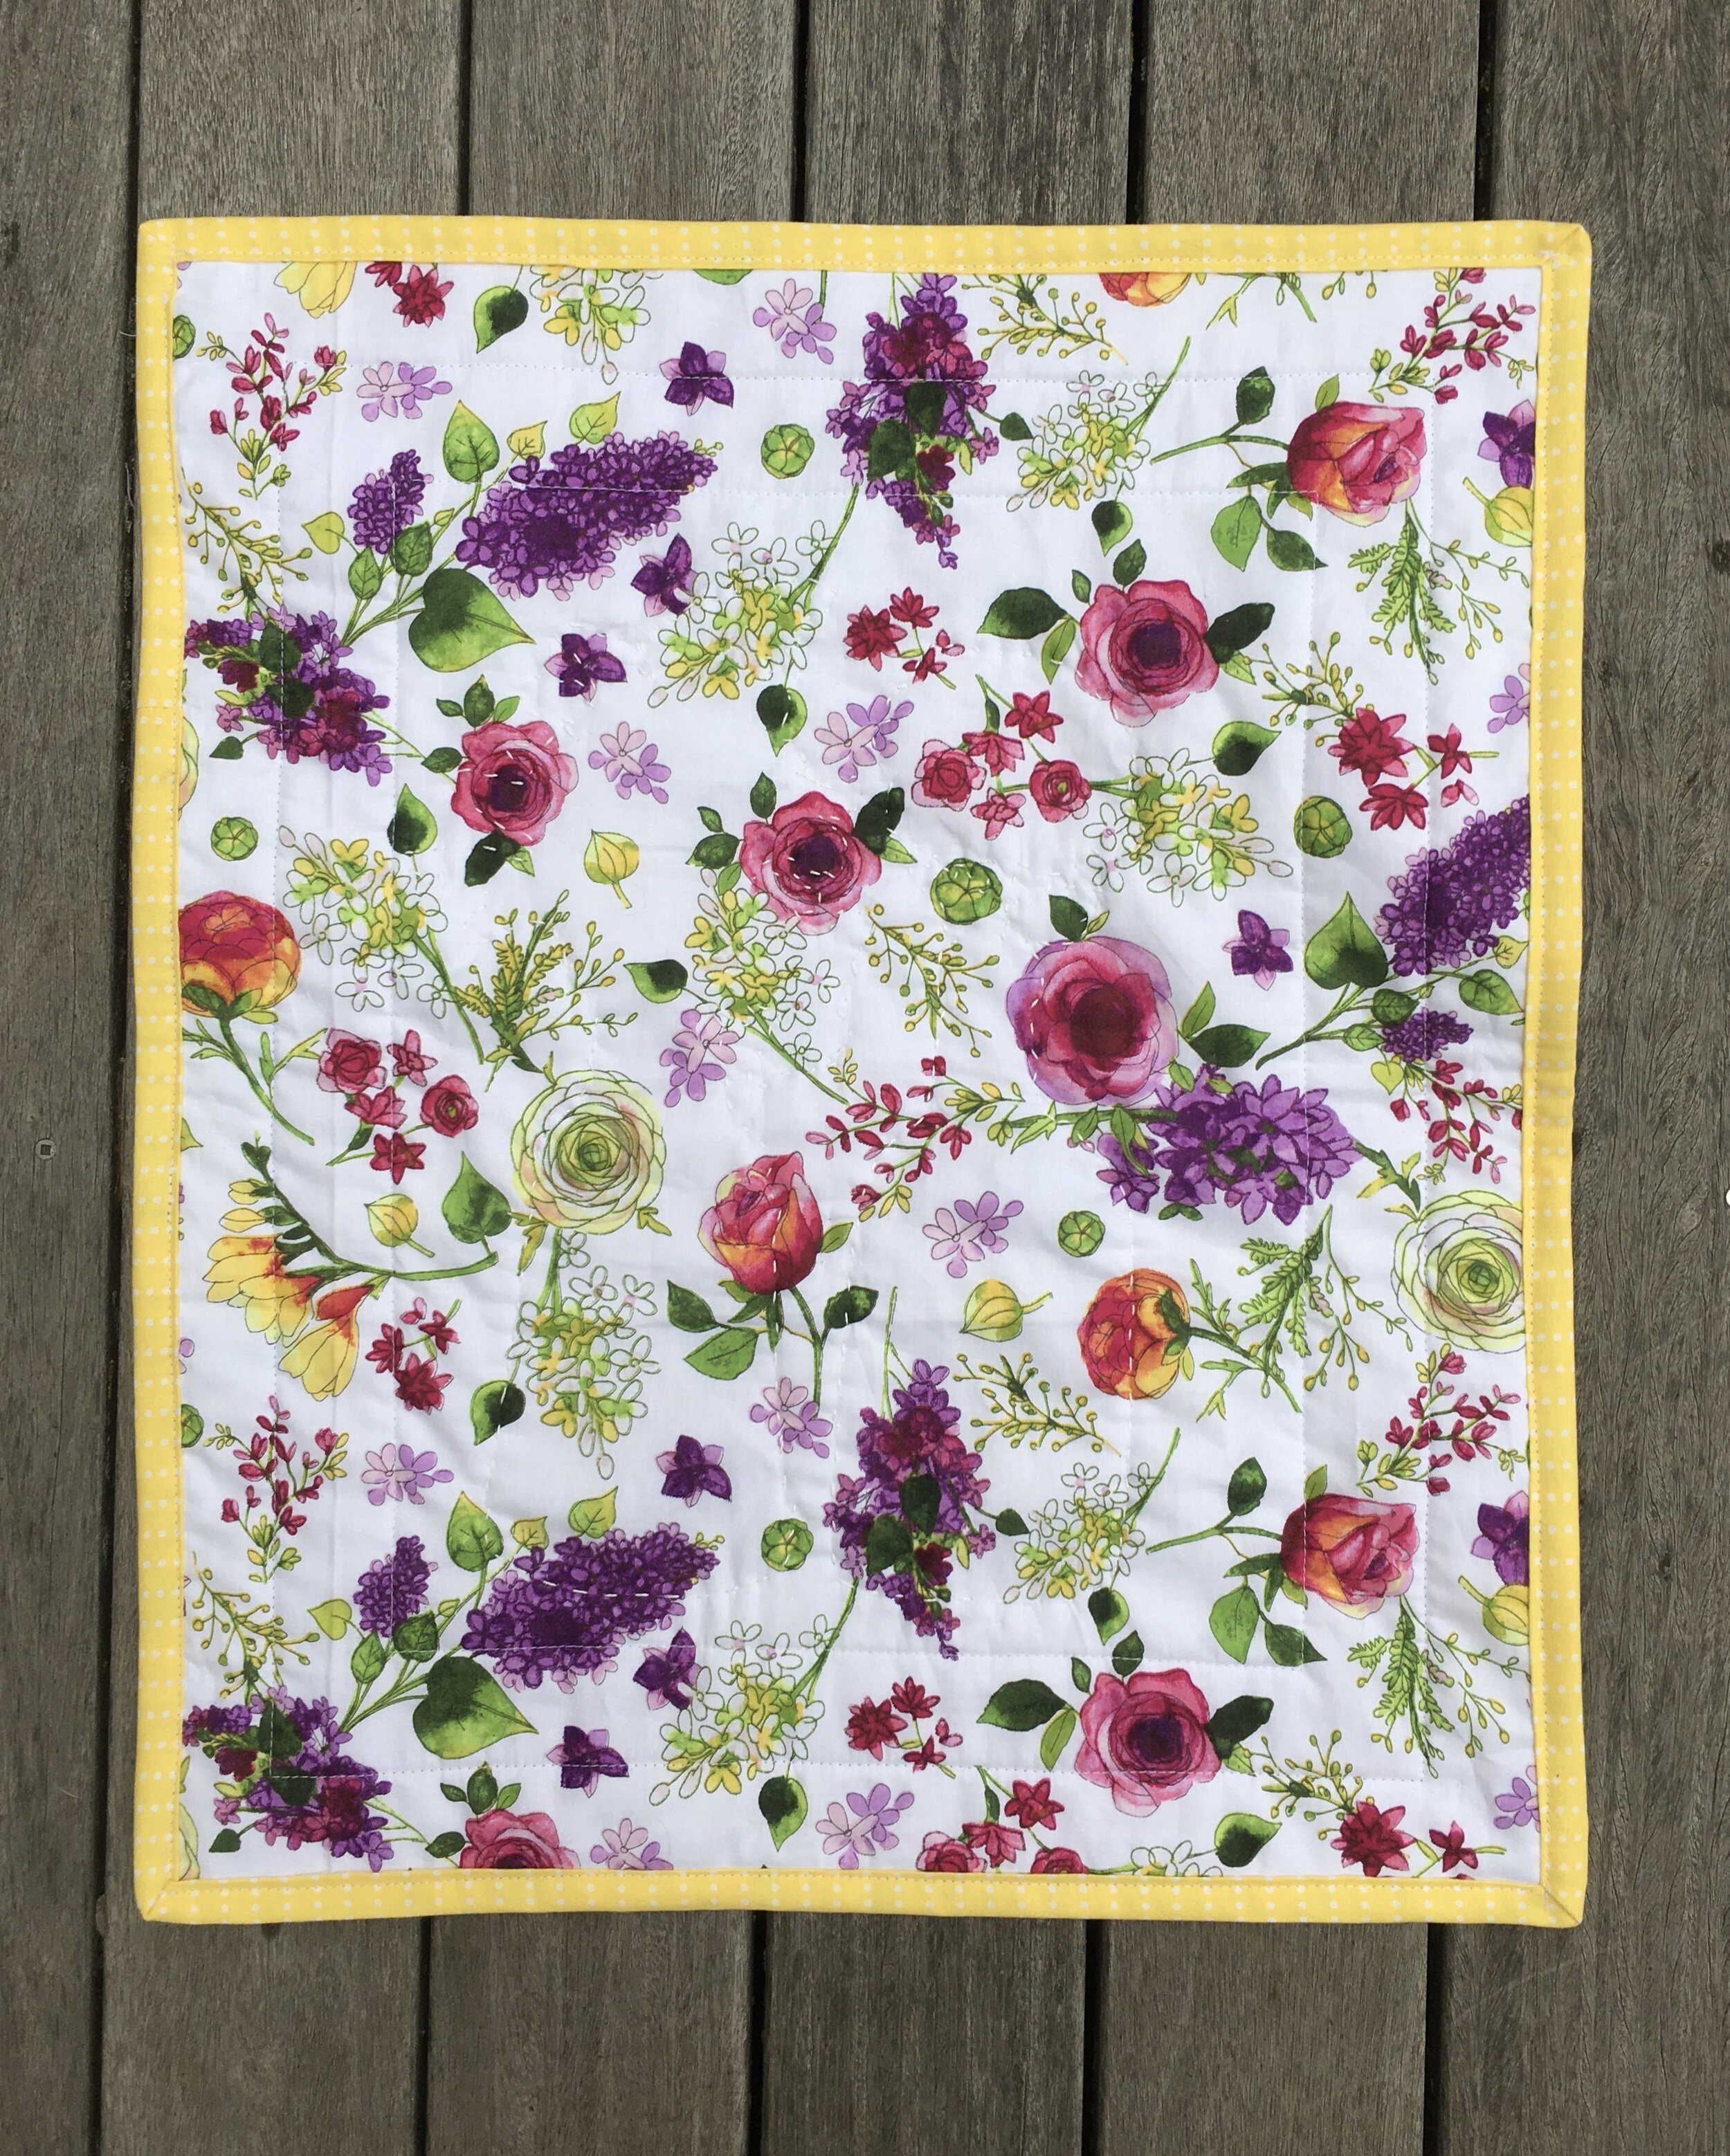
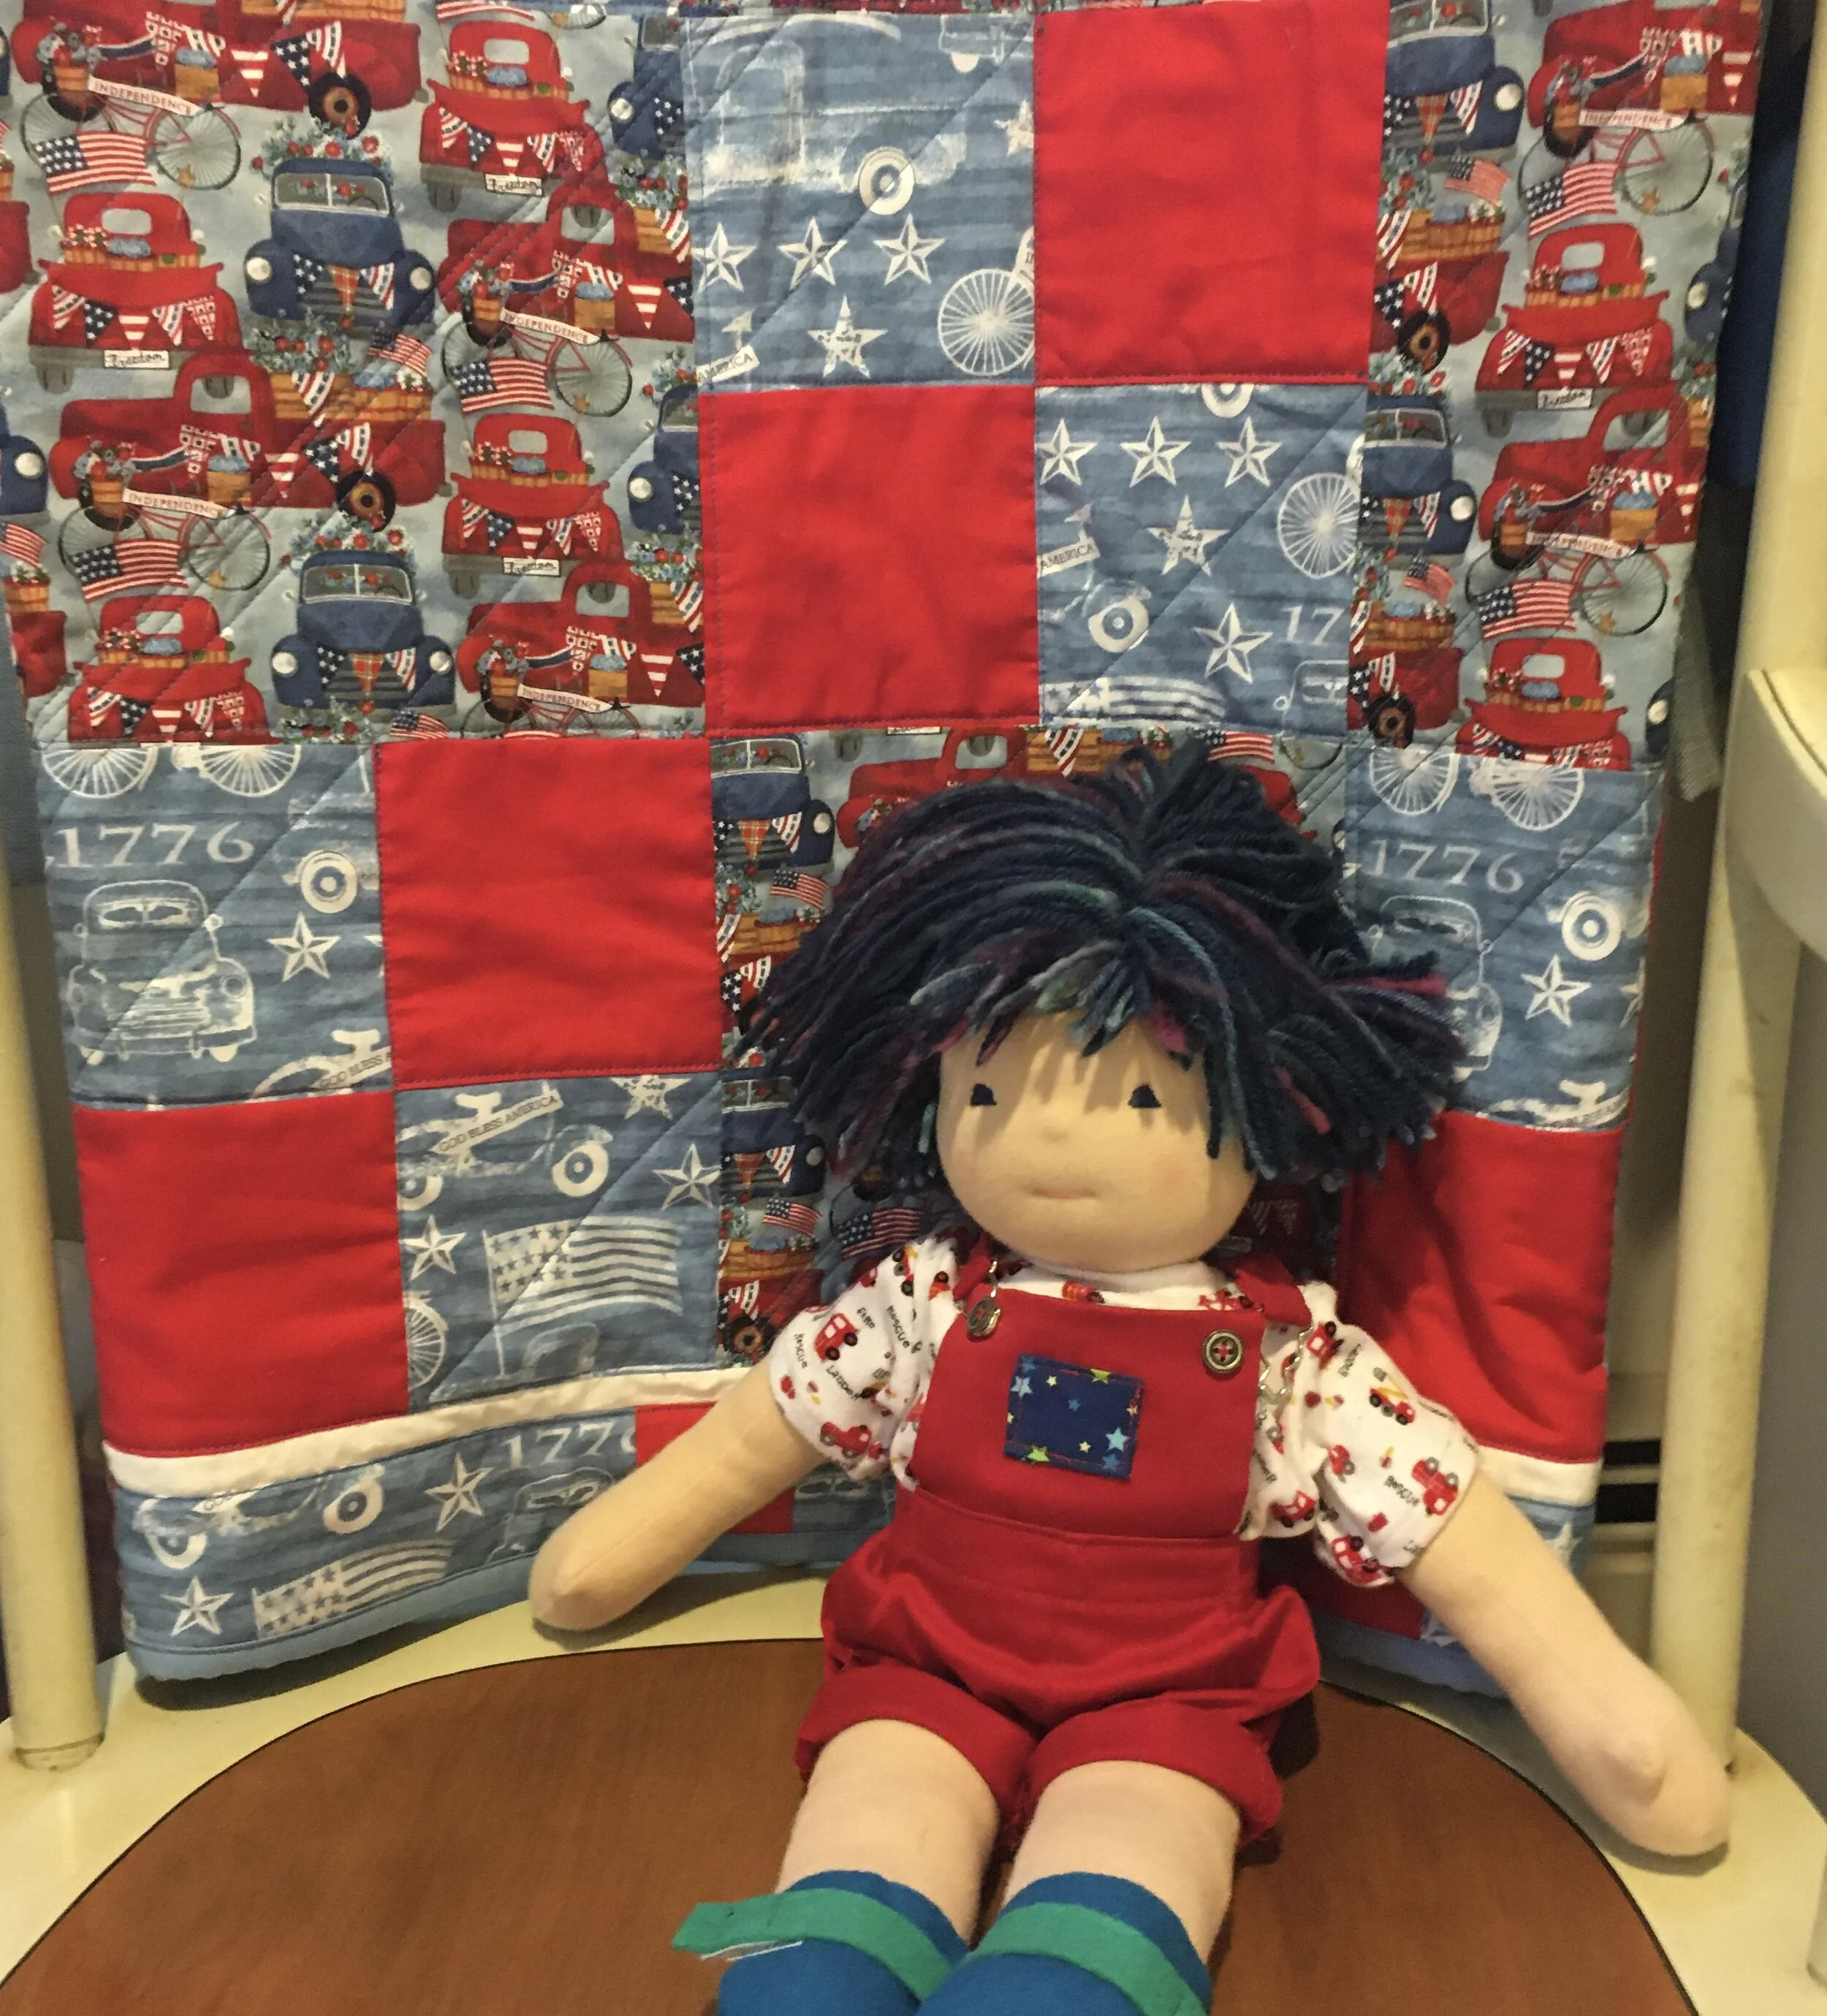
Here’s the back.

Back of the quilt.

Back of the quilt.

TAGS: Fabric Café® "Kaleidoscope" pattern, Half Square Triangle quilt, Sewing half square triangles with a directional fabric


September 10, 2020

"Tula's True Colors" 3 yard Fabric Café® "Attraction" Quilt is Complete

by Judy Tucker


“Tula’s True Colors” made with the Fabric Café® 3 yard quilt pattern “Attraction”,  41 1/2 x 59 inches

“Tula’s True Colors” made with the Fabric Café® 3 yard quilt pattern “Attraction”, 41 1/2 x 59 inches

“Tula’s True Colors” made with the Fabric Café® 3 yard quilt pattern “Attraction”,  41 1/2 x 59 inches

“Tula’s True Colors” made with the Fabric Café® 3 yard quilt pattern “Attraction”, 41 1/2 x 59 inches

The aqua fabric in “Tula’s True Colors” by Free Spirit has a design that looks like a mineral that has been in cross section. In fact this fabric design is called “Mineral”. So I took my quilt over the local conservation land to take a photo of it on some big rocks left behind at some point by a glacier.

This pattern is “Attraction”, one of Fabric Café’s® three yard patterns. All of the fabrics on the front of the quilt, except the binding, are from Tula Pink’s “Tula’s True Colors” printed by Free Spirit.

Here is the back. I found it in my stash after I decided that the fabric which I had ordered just wasn’t right for this quilt. Go figure! The backing fabric is called “Nature Walk”, designed by Tamara Kate for Michael Miller Fabrics. It has rabbits, squirrels, butterflies and mushrooms in a diamond grid. It makes a perfect back for this quilt. (This is an old fabric line, mostly out of stock, but you might find a bit our there if you search).

Backof"Tula'sTureColors"FabricCaféquilt.jpg

The quilting was all done on my domestic machine with a walking foot. It is such a linear quilt pattern that I just followed its lead and did straight line quilting, just beside the ditch.

I’ve entered this quilt in Bits ‘n Pieces Quilt Shop’s Customer 3 Yard Quilt Challenge. All the quilt will go up on their FaceBook page after September 12th. You’ll be able to see all the entries and vote on your favorites. Go check it out this weekend—it’ll be fun!

TAGS: Quilt Using "Tula's True Colors" by Free Spirit, Fabric Café quilt pattern "Attraction", Three Yard Quilt Pattern


September 3, 2020

Peg Butterflies

by Judy Tucker


Peg Doll Butterflies

Peg Doll Butterflies

Peg Doll Butterflies

Peg Doll Butterflies

I was wondering what to do with the little wood peg bunting baby or bee pegs which I purchased from A Child's Dream a while back. Bees were the obvious choice but because I planned to make a mobile, I wanted something else. Butterflies!! That’s the perfect solution.

First I painted by body of each butterfly with a different color. The heads are all painted grey. After the paint dried, the wooden peg is sealed with bees wax polish.

The butterfly wings are cut out of wool felt to match (or coordinate with) the body of each butterfly.

Here are the two pattern pieces to make the top and bottom butterfly wings. Print the pattern at 100% and check the box on your printed pattern to make sure the 1 inch box measures 1 inch.

This is what the pattern looks like. If you don’t have a printer, you can draw your own wings based on this picture.

PegButterflyWIngsPattern.jpg

To assemble the butterflies, cut a piece of perle cotton thread (or heavy thread) about 18 inches long. Tie a knot in the thread 3 inches from one end. You will need these 3 inches later to tie the thread around the neck of your butterfly.

Match up the two pattern pieces so that the bottom wings are UNDER the top wings, aligning the flat edge with the upper notch of the top butter fly wings.

Using your thread, sew the two sets of wings together, starting at the upper notch on the top set of butterfly wings. You can use a simple straight stitch or any embroidery stitch you want to use. I did both straight stitches and French knots.

TopsOfPEgButterflyWings.jpg

When you have sewn the wings together, run your needle through the bottom layer to felt and bring the needle back up to the top layer, next to your first stitch.

Tie the thread, around the butterfly’s neck, using the loose 3 inches of thread. Make sure you have a tight knot. The take the long thread, still threaded on the needle, back under the butterfly wings and come up in the middle of the top set of wings. You will use this thread to hang up your butterfly. Tie a knot in the far end of the thread you will use to hang up your butterfly. That will keep it from unraveling.

Trim off the excess piece of thread under the butterfly’s neck.

Well done! Have fun with your new butterflies!

In the garden with the marigolds

In the garden with the marigolds

SAFETY NOTE: No NOT give these peg doll butterflies to a child under age 3 years. They are a choking hazard.

Notice: This blog is not monetized: I do not use affiliate links. When there are links in a post, they are to give credit to another creative person, because I like or have used a product, or to help the reader easily find supplies for a project.

TAGS: Peg Doll Butterflies, Peg Dolls, Wooden Peg Dolls


August 27, 2020

Using "Tula's True Colors" in Fabric Café's® Pattern "Attraction"

by Judy Tucker


Quilt Top using Fabric Cafe’s  “Attraction”  Pattern

Quilt Top using Fabric Cafe’s “Attraction” Pattern

Quilt Top using Fabric Cafe’s  “Attraction”  Pattern

Quilt Top using Fabric Cafe’s “Attraction” Pattern

Last week I showed you a quilt using all the fabric’s in Tula Pink’s new line “Tula’s True Colors” by Free Spirit. For this quilt pattern, “Attraction” from Fabric Café, I chose 1 yard of 3 different fabrics in Tula’s line. (All of Fabric Cafe’s quilt patterns use just 3 one yard cuts).

I picked a blue, an aqua and a yellow green. These are analogous colors on the color wheel—they are positioned right next to each other. It’s a guarantee that the colors will all play well together!

This is a great pattern and it sews up super fast. I found I had a free hour one morning and that was all I needed to cut out the fabric. Then it just took an afternoon to put it together.

I like how the small squares seem to dance across the design.

i think it would look just as great using the hot colors in “Tula’s True Colors”. And I’d love to see this quilt with 2 analogous colors on the color wheel, and one complimentary color from the opposite side of the color wheel. I think that would make a spectacular quilt!

TAGS: Fabric Café quilt pattern "Attraction", Quilt Using "Tula's True Colors" by Free Spirit, 3 yard quilt pattern, Quick Quilt, Easy quilt


August 20, 2020

"Tula's True Colors" 5 Inch Charm Square Simple Quilt Top

by Judy Tucker


Small Lap Quilt top

Small Lap Quilt top

Small Lap Quilt top

Small Lap Quilt top

Tula Pink’s new line by Free Spirit, “Tula’s True Colors” was recently released. When Bits ‘n Pieces, a favorite quilt shop in Pelham, NH, showed the fabrics at one in one of their regular unboxing videos, I ordered 2 packs of 5 inch charm squares. (Charm Packs: A stack of 5 inch, or sometimes 10 inch, squares of every color in a fabric line).

I was up for an simple experiment. I decided to see what happened if I put one stack of charm squares right side up and the other upside down and just sew them together as I picked the fabrics up from each stack. I did add a 5 inch square of a very pale Kona® cotton after 5 blocks of the charm pack. The diagonal lines look white, but they really are pink.

The stacks met in the greens! I did swap around a few blocks so that I didn’t get identical squares next to each other. I had fun sewing up this simple quilt, but when I got done and looked at it, my reaction was—-Hum.

Here’s the quilt right after the sewed all the squares together.

Tula'sTrueColorsCharmQuiltPriortoAddingCircles. jpg

It just wasn’t cohesive. I was hoping the plain diagonals would give the random blocks some definition, but the light color didn’t do that. Considering how bright most of Tula’s fabrics are, i’m not sure what color would have worked better.

So I thought about it for a week. The “Fairy Dust” design in this line has tiny circles, concentric circles and stars. (If you look back at last week’s post, The Sleepy Dragon Baby© is lying on this fabric in the top photo). I decided to pick up one of those elements and using that to create some appliques. So I added 7 circles of varying sizes from fabric I had left over from another quilt I’d just made using “Tula’s True Colors.”

This project reminded why I usually don’t enjoy using every color in a fabric line. But the circles definitely make the quilt more interesting.

I think quilting this piece has to potential to add more interest to this quilt.

Next week I’ll show you a quilt I made from this fabric line where I made very deliberate decisions about my choice of fabrics.

TAGS: Charm square quilt, "Tula's True Colors" 5 inch charm square quilt


August 13, 2020

Stuffed Dragon: Made Using NimblePhish Creations "Sleepy Dragon Baby©" Pattern

by Judy Tucker


“The Sleepy Dragon Baby©”

“The Sleepy Dragon Baby©”

“The Sleepy Dragon Baby©”

“The Sleepy Dragon Baby©”

I follow a Facebook Group called Waldorf Adoption whose members sell previously owned Waldorf dolls and occasionally other handmade stuffies.

A couple weeks ago a NimblePhish Sleepy Dragon Baby© appeared. I’d never heard of NimblePhish Creations so I started searching. It didn’t take too long for the pattern to pop up. The Sleepy Baby Dragon© PDF pattern is for sale on Etsy in the NimbleFish shop. It was published October, 2012, so it’s been available for quite a while.

The pattern looked like fun. First of all, this is a really cute baby dragon. And I don’t believe I’ve ever made a jointed doll or stuffed animal. So here was an opportunity to learn a new skill! Into the cart went the dragon pattern!

The pattern suggested velour lined back with fusible fleece or just plain fleece. I had cotton velour in my stash so that’s what I used.

In hind sight, cotton velour probably wasn’t the best option for a stuffed animal with small limbs which needed to be turned inside out after sewing. The cotton velour really took a beating on the arms. If this had been another animal, I would have been upset, but the friction created a scale-like effect which is perfect for a dragon! So, no trauma, but any future dragon will be made of fleece or another polyester napped fabric.

Scale-like damage to the cotton velour from turning the dragon’s arm right side out.

Scale-like damage to the cotton velour from turning the dragon’s arm right side out.

Other than that, this project went swimmingly. The instructions and photos in the pattern were great. And it showed how to assemble the dragon using the plastic locking joints which turned out to be really easy. I did change a few things when I made this dragon.

  • I enlarged his diaper a bit so that comes up higher on his tummy

  • In keeping with Waldorf toys, he is stuffed with wool rather than polybeads and polyfill

  • His torso weighted with about 1 cup of glass beads which are secured in a small sack I sewed

  • This dragon is awake, and not a bit sleepy!

It is really fun to have a stuffed animal which can be posed in lots of different positions!

IMG_3747.jpg
IMG_3745 3.JPG
IMG_3750.JPG
IMG_3748.JPG

He is such a character! Here he is, holding his tail and sucking his thumb while his binky is in a safe place on his horn bud! Silly boy!

Dragon Contentment!

Dragon Contentment!

He may be my first, but I’m pretty sure he won’t be my last dragon! This pattern is definitely worth purchasing if you are interested in making your own Sleepy Dragon Baby©!

FYI: he is posing in the top pictures on the new Tula Pink’s TRUE COLORS© Fairy Dust-Whisper by Free Spirit. It's the perfect backdrop for a baby dragon!

In the last photo he is on a fabric I designed which is available in my Spoonflower shop. You may access that using the link, or at anytime from the Shop top at the top of the page.

Notice: This blog is not monetized: I do not use affiliate links. When there are links in a post, they are to give credit to another creative person, because I like or have used a product, or to help the reader easily find supplies for a project.

TAGS: NimblePhish Creations Sleepy Dragon Baby©, Stuffed dragon pattern, Stuffy Dragon, Waldorf Dragon, Waldorf toy, Stuffed Dragon


August 6, 2020

"Virtual Beach 2020" Quilt

by Judy Tucker


“Virtual Beach 2020” Quilt 36 x 47 1/2 inches

“Virtual Beach 2020” Quilt 36 x 47 1/2 inches

“Virtual Beach 2020” Quilt 36 x 47 1/2 inches

“Virtual Beach 2020” Quilt 36 x 47 1/2 inches

Just what this summer with COVID-19 needs: a “Virtual Beach 2020” quilt! It’s almost as nice as the real thing. Though sadly, not clam shack or ice-cream shop in sight!

I love how this summer quilt came out. I cut out the motifs from the “Surf’s Up” panel, designed by Julie Dobson Miner for Northcott. I didn’t use all the blocks in the panel…just my favorite 12.

I framed four of the panel blocks with a hand-dyed red fabric from my stash and the other blocks with one of the Kona® Cotton reds. The tiny blue scallop print is from Clothworks line “By The Seashore”. The scallop shells are tiny, just 3/4 inches wide.

The fabric with the wheeling gulls a the summer sky on the back of the quilt is from the Northcott line “Swept Away”. It was designed by Deborah Edwards and Melanie Samra. It’s the perfect back for a beach quilt.

IMG_3563.JPG

This little quilt is just the right size to throw over that back of a chair or use as a wall hanging.

In this summer of mostly-sheltering-in-place, it just makes me happy!

TAGS: "Virtual Beach 2020" Quilt, Quilt from a Panel, "Surf's Up" Panel from Northcott in a quilt


July 30, 2020

"Virtual Beach 2020"

by Judy Tucker


“Surf’s Up” Panel

“Surf’s Up” Panel

“Surf’s Up” Panel

“Surf’s Up” Panel

I think it’s official. This is going to be my summer of the quilt panel! I usually don’t like panels, but this year I seem to have purchased quite a few of them.

This is the panel from “Surf’s Up” designed by Julie Dobson Miner for Northcott. I bought it as a package with 4 fat quarters from the same line.

I thought for a long time about how to make a quilt using the 4 fat quarters but I just couldn’t figure out how to use them. So one of the light fat quarters turned into a shirt for a young friend’s boy doll. It was really cute, with a sand castle on the front of the shirt. I wish I had a photo of it but the doll shirt has already gone off as a part of a birthday present.

The other fat quarters in the set will probably become face masks.

The plan is to cut up the panel. The little blocks will make a sweet little summer quilt.

TAGS: Quilt panel, "Surf's Up" panel for Northcott


July 23, 2020

"Radiance" Flowers in Glass Bottles--More Table Runners/Wall Hangings/Table Toppers

by Judy Tucker


Table runner or Wall Hanging.  15 x 18 inches

Table runner or Wall Hanging. 15 x 18 inches

Table runner or Wall Hanging.  15 x 18 inches

Table runner or Wall Hanging. 15 x 18 inches

I’ve now cut up all the floral arrangements from the panel in the “Radiance” fabric line by Clothworks.

Last week I shared a table runner with an outer border of one inch “postage stamp” blocks. This week I’ve made a several more pieces with simpler borders. I think the simpler borders also do a great job of complimenting the flowers.

In the piece above, I used 1 1/2 inch wide purple strips for the inner border and 2 “ wide strips for the outer leafy border.
I like the back of the piece as much as the front! Dual duty!

Reverse side of the yellow floral arrangements

Reverse side of the yellow floral arrangements

In the piece below, I cut two sets of pink and purple strips at 1 1/4 inches.

Two sets of narrow pink and purple strips make the border of this part of the panel. 14 1/2 x 16 inches

Two sets of narrow pink and purple strips make the border of this part of the panel. 14 1/2 x 16 inches

This is the table topper that’s on my dining room table now. It’s a simpler version of the table runner in last week’s post.

A single border of 1 inch postage stamp blocks.  16 1/2 x 14 1/2 inches

A single border of 1 inch postage stamp blocks. 16 1/2 x 14 1/2 inches

It was so much fun think about lots of difference ways I could finish the blocks I cut out a single “Radiance” panel!

TAGS: "Radiance" by Sue Zipkin for Clothworks.com, "Radiance" Panel by Clothworks Tablerunner, Table runner, Wall Hanging, Table Toppers


July 16, 2020

"Radiance" Flowers in Glass Bottles Table Runner

by Judy Tucker


“Radiance” Table Runner  31 x 20 inches

“Radiance” Table Runner 31 x 20 inches

“Radiance” Table Runner  31 x 20 inches

“Radiance” Table Runner 31 x 20 inches

The panel from the panel from the “Radiance” fabric line by Sue Zipkin, printed by Clothworks.com, can be cut up into multiple smaller sections. This table runner is the largest grouping of bottles from the bottom third of the panel.

"Radiance"byClothworksPanel.jpg

Here’s a picture of the full panel, taken from the Clothwork’s link above.

I added a green strip inner border which I cut at 1 inch wide and the middle yellow border which I cut at 1 1/2 half inches wide.

The checkerboard border is composed of “postage stamp” blocks which finish at 1 inch square. This is a great way to use up a collection of tiny 1 1/2 inch square cut from scraps.

My border was mostly cut from scraps and a bit of yardage. Rather than cutting tiny patches, I cut three 1 1/2 inch wide strips which I sewed together. I then cut the strips into 1 1/2 inch wide blocks which I sewed end-to-end. It was a lot quicker than sewing tiny individual squares.

The beauty of those tiny 1 inch border blocks, is that it was very easy to fit the border to the panel. All I had to do was to cut the pieces so that when the the panel section and the two plain borders were sewn together, they finished at an even full inch. Then it was guaranteed to match up with my border of 1 inch squares.

Here are some strips prior to sewing them together.

BorderStrips.jpg

The backing of the table runner has one of the large purple print from the “Radiance” line. (See my previous post).

I quilted the borders by machine with the walking foot then did big stitch quilting by and around each of the bottle flower arrangements. I used #8 perle cotton to do the big stitch quilting. It slightly raises each of the bottles above the flat surface of the table runner.

It’s possible to make up to 5 wall hangings or table runners from each “Radiance” panel. That’s pretty amazing!


TAGS: "Radiance" Panel by Clothworks Tablerunner, Table runner, Postage stamp blocks


July 9, 2020

Flowers in Glass Bottles: "Radiance" by Clothworks

by Judy Tucker


Part of the panel from the “Radiance” line by Sue Zipkin, printed by Clothworks.com.

Part of the panel from the “Radiance” line by Sue Zipkin, printed by Clothworks.com.

Part of the panel from the “Radiance” line by Sue Zipkin, printed by Clothworks.com.

Part of the panel from the “Radiance” line by Sue Zipkin, printed by Clothworks.com.

It’s unusual for me to blog about a fabric line which is new. Typically my fabric cools in my stash for a long time before I get around to making anything. Or I’m buying last year’s fabric lines from a discount fabric store. But I was immediately taken when I saw this panel. It is part of the fabric line “Radiance” designed by Sue Zipkin and printed by Clothworks.com. I had a “How to Have Flowers on the Table” all year round moment!

There’s a back story here., which should illuminate my immediate affinity to this panel. Back in the day, B.D. (before dogs) , I had an exuberant little flower bed on the side of my house. There was a slate path that meandered though it. There were mostly perennials in that bed, but I also had annuals growing other places in my yard. Every week in the summer, I would pick a bouquet and put it in a recycled single serve apple juice bottle. I just loved the simplicity of the flowers in the simple clear bottle. Here’s a photo of one of my arrangements.

Flowers from my garden in a recycled glass apple juice bottle.

Flowers from my garden in a recycled glass apple juice bottle.

Now you know why I love this fabric!

The other slightly shocking bit is that this fabric line has a lot of purple in it. Purple is definitely not my thing! But it makes sense in this fabric line. Other than the panel, the other fabric in this line that I really love is the leaf design with a faintly blue background. Here are the four fabrics in the line which I purchased for my project(s). The large print floral fabrics will be backings.

4 fabrics from the “Radiance” line by Clothworks.com

4 fabrics from the “Radiance” line by Clothworks.com

I plan to cut up the 36 x 42 inch panel into smaller sections. I’m thinking about making a table runner with a scrappy border. My already scant purple fabric bin is really looking almost empty due to using what purple fabric I did have for face masks. (I may not be fond of purple but lots of other folks are)! But a generous quilting friend brought over her purple bin and shared some of her great fabric collection with me. Sweet!

We’ll see what happens! But one thing for sure, I’ll soon be able to enjoy July flowers in February!

TAGS: "Radiance" by Sue Zipkin for Clothworks.com, "Radiance" fabric line by Clothworks.com, Flower arrangements in glass bottles, FLower arrangements in recycled glass bottles


July 2, 2020

Four Patch Quilt: "Four Patch for the Fourth"

by Judy Tucker


“Four Patch for the Fourth!” Lap quilt 37 x 44 inches

“Four Patch for the Fourth!” Lap quilt 37 x 44 inches

“Four Patch for the Fourth!” Lap quilt 37 x 44 inches

“Four Patch for the Fourth!” Lap quilt 37 x 44 inches

The quilt which I started cutting out in my post last week is done in time for the Fourth of July! This is my design, a simple four patch block quilt that I call “Four Patch for the Fourth.” It’s a small quilt…just big enough for two little children to sit on together.

It’s a easy quilt and sews up quickly.

I love blocks that have 4 sections such as this four patch block or pinwheel blocks. In order to have the seams on the back of the block lie as flat as possible, the seams and be “spun”. The top seam can be gently opened up so that one side of the seam can be pressed upward and the other side pressed downward. The result is a tiny four patch on the back of the block. I think of these tiny central blocks as a hidden quilt in a quilt!

The back of a 4 patch block with the seams “spun”.  Note how each of the four seams is pressed toward a different patch, so the seams look like the vanes in a windmill.

The back of a 4 patch block with the seams “spun”. Note how each of the four seams is pressed toward a different patch, so the seams look like the vanes in a windmill.

All the quilting in this quilt was done with a walking foot. Each of the square blocks as been quilted and there is diagonal quilting across the large blocks to anchor them.

It’s easy to keep a long diagonal course of quilting straight by marking it using painter’s tape. Lay down the tape, quilt the line just beside the tape, not ON the tape. Then remove the tape. Do not leave the tape on the quilt for a long time. I find I can tape 2 diagonal lines at a time. But if I tape more than 2 diagonals, the tape tends to lift off the quilt as I’m stitching. Once the long diagonal line is quilted, additional lines of quilting can be added following the initial diagonal line with the edge of the walking foot. Remove the tape before addition parallel lines of stitching. The tape could be left in place but it’s easier to quilt additional lines without the tape on the quilt.

Don’t use masking tape which may leave glue residue on the fabric.

MarkingWithPaintersTape.jpg

This quilt looks great on the back of a rocking chair too. I like summer quilts that are on the small size. It’s just too hot in the summer to have a big lap quilt.

Here’s my Fourth of July quilt with Douglas, a classic Waldorf type doll which I made.

Ready for Staying at Home on July 4th, 2020.

Ready for Staying at Home on July 4th, 2020.

Have a safe, happy, and healthy weekend!

TAGS: Four Patch quilt, "Four Patch for the Fourth" quilt, Easy quilt, Quick Quilt, Four of July Quilt, Lap Quilt, Marking quilts for long diagonal quilting lines, Diagonal quilting tips


June 25, 2020

Four Patch Quilt for Fourth of July

by Judy Tucker


Fabrics for my “Four Patch for the Fourth” Quilt

Fabrics for my “Four Patch for the Fourth” Quilt

Fabrics for my “Four Patch for the Fourth” Quilt

Fabrics for my “Four Patch for the Fourth” Quilt

“Can she do it???”

I got this collection of fabrics in the mail from Bits ‘n Pieces Quilt Shop in New Hampshire yesterday. The two focus fabrics and a different red fabric were one of their weekly “3 yard picks” that they showcase on their Sunday Facebook Live at 1 PM EDT.

So I have 10 days from today to get a quilt made for the Fourth of July holiday to make this 37 x 45 inch quilt.

The two feature fabrics were designed by Beth Albert for a line called “American Spirit” printed by 3 Wishes Fabric ™. The dark blue tonal is for the back of the quilt is “Shadow Play” by Maywood studio. Then there is a one of the Kona® cotton reds from my stash and a white on white with a cherry design which has been in my stash for years.

Here’s a mock up of the quilt I designed in Electric Quilt 8. First as a line drawing, and then as a mock up with the focus fabrics shown.

A66D5DFC-28A7-4675-B43B-2D4CC0220717_1_201_a.jpeg
8AB55AA6-F832-47F6-B826-2BE7FA54674A.png

If you want to make this four patch quilt, here is the information you need to cut the pieces. This isn’t a pattern but this does give the information needed to make this quilt.

The four patch blocks are cut as 4 1/2 inch squares and the large feature fabric blocks are cut as 8 1/2 inch squares. The completed blocks will finish at 8 inches square. The tiny white outer border is cut at 1 inch and finishes at 1/2 inch. The outer border is 2 inches wide. The red border blocks are cut at 2 1/2 inches square. The top and bottom blue border strips are cut at 7 1/4 x 21/2 inches and the blue side border strips are cut at 9 1/4 x 2 1/2 inches.

“It should go together quickly" she said. We’ll see whether or not that’s really true!

TAGS: Four Patch quilt, "Four Patch for the Fourth" quilt, Independence Day quilt, Quick Quilt, Lap Quilt


June 18, 2020

Peg Dolls: Badger

by Judy Tucker


BadgerPegDoll.jpg
BadgerPegDoll.jpg

Summer is almost here and I’ve been thinking about Kenneth Grahame”s book Wind in the Willows—the original version with drawings by Ernest Shepherd. (He illustrated the original Winnie the Pooh too). I do really like Mole and Ratty. Toad, who is a free wheeling character (often literally!!), has always made me very anxious. But I think my favorite character is Badger. He is the calm and sensible one.

So I decided to make a badger peg doll.

I used the standard 2 3/8 inch boy peg. Here’s how you can make your own badger.

  • Draw the badger’s face on the peg with a pencil. I used the badger in this photo as my model.

Badger by PBarlowArt, royalty free for commercial use photo from www.Pixabay.com

Badger by PBarlowArt, royalty free for commercial use photo from www.Pixabay.com

B24AEE38-8657-47A0-AF15-EE06B8837882.jpeg
217A8AE9-551A-45CC-91B0-C6A8792485A7.jpeg
B9704A2E-0C63-40AD-B4B0-CBEC076E9274.jpeg
  • Using non-toxic watercolor paints, paint the body of the peg and the back of the head. I used a brown watercolor paint and then when it dried, painted over the brown with grey.

  • Paint the badger face with opaque acrylic paint. Paint the white stripe and cheeks first. Then the back stripes and nose

  • Allow all the paint to dry. Then seal it with beeswax polish.

  • Paint tiny brown eyes. Use a fine marker to add black pupils.

  • Cut ears from wool felt. Cut a small black semi-circle and a slightly larger white semi-circle. Glue the two pieces together with craft glue.

  • The finished ears in the photo were too large for badger ears. I cut a little bit off the flat side of the ears so there weren’t too tall.

  • Glue the ears on the peg doll with craft glue that will dry clear. Be generous with the glue. If you expect the peg to get a lot of play by a young child, it might be better to paint ears on the peg head instead.

Here are the front and back of the Badger Peg Dolls

Here are the front and back of the Badger Peg Dolls

The fox peg doll was happy to welcome badger to our forest. Me too!

TAGS: Badger peg doll, Peg Dolls, How to make a badger peg doll, forest animals peg dolls


June 11, 2020

Face Mask Scrap Quilt: "Post-Cuts" quilt top is done

by Judy Tucker


“Post-Cuts” Queen Size Quilt Top

“Post-Cuts” Queen Size Quilt Top

“Post-Cuts” Queen Size Quilt Top

“Post-Cuts” Queen Size Quilt Top

Here’s the completed quilt top which I made from scraps from making face masks and added pastel marker bars. I’ve named it “Post-Cuts”, sort of play on the quilter’s friend, pre-cut fabrics.

I decided to place the colors in a spectrum-like order. I started with red. And the bottom of the quilt there are navy blocks, white background blocks, purples and finally black background blocks. I did this deliberately so that my favorite colors are at the top and center of the quilt and my least favorite colors will end up tucked behind the foot board!

This quilt is a generous queen size—88 x 98 inches. I have quilted queen size quilts on my domestic machine, but this time I think I’m going to send it off to a long arm quilter. This one is just a wee bit big for me.

There is lots of information on how to make this quilt in my last 3 posts if you want to make a similar scrap quilt. The scraps don’t have to be from making face masks. They just need to all have the same height.

I expect it will be a while before this quilt is quilted. But I will share a picture when it is finally all done.

TAGS: Using Face Mask Scraps to make a quilt, Face Mask Scraps Quilt, "Post-cuts" scraps from making face masks, scrap quilts


June 4, 2020

Assembling a Quilt with Long Strips

by Judy Tucker


Measuring a strip of Blocks. The last block has been folded over, ready to be trimmed off.  (Notice that tape measure has moved a bit. That’s why it is a good idea to use tape makers which will stay put).

Measuring a strip of Blocks. The last block has been folded over, ready to be trimmed off. (Notice that tape measure has moved a bit. That’s why it is a good idea to use tape makers which will stay put).

The “Post-Cuts” quilt blocks have all been sewn together. There were actually enough scraps left from the face masks I’ve sewn to make a queen size quilt!

This quilt is assembled in strips of blocks. The strips measure 88 inches long. All the blocks are 6 inches wide.

There was a time when I would have just sewn all these long strips of blocks together and tried to trim the finished quilt top. Let’s just say that is a disaster. I did that to myself more than once! It’s almost impossible to square up a quilt top sewn from strips of random lengths.

However, take the time to measure each long strip and cut to the desired length and the result will be a perfect quilt. It takes a few minutes but it is so worth the effort.

I marked my floor with two pieces of Washi tape, 88 inches apart. Painters tape works well too. Then I laid down each of the quilt strips and trimmed them to be exactly 88 inches.

Once the strips are trimmed, it is important to pin the strips together before sewing. Put two strips right sides together. Pin the pair of strips at each of the ends first. Then ease the two long strips together, pinning every 5-6 inches. I don’t usually pin anything when I make quilts, but it is very important to pin long strips to prevent one of the layers from traveling during sewing and coming out uneven at the end of the row.

Sew pairs of long strips together. Then sew pairs of paired strips. Continue until the quilt top is done. the quilt comes together quickly in the end.

Checking to see if there were enough strips to for the length needed for a bed quilt.  Not even assembled yet, and the dogs already approve!

Checking to see if there were enough strips to for the length needed for a bed quilt. Not even assembled yet, and the dogs already approve!


TAGS: Quilt Assembly Tips, Assembling a qulit with long narrow strips, "Post-cuts" scraps from making face masks, Sewing strips of a quilt together, Measuring quilt strips


May 28, 2020

Mask Scraps Quilt: "Post-Cuts"

by Judy Tucker


Strips of Face mask “post-cuts’

Strips of Face mask “post-cuts’

Strips of Face mask “post-cuts’

Strips of Face mask “post-cuts’

In my last post, I talked about some options I was mulling over for making a quilt using the 6” tall left over scraps from making rectangular face masks.

Here’s what I decided.

  • The scraps are sorted by colors.

  • Three scraps are sewn together and then a 2 1/2 x 6 inch pastel divider strip. It’s very easy to sew this combination. Two scraps are stitched together in a pair, then one scrap and divider strip in a pair. These pairs are then sewn together to keep the colors organized.

9884D237-52BF-4644-9FE0-237D4332AED7_1_201_a.jpeg
8AB4B011-F846-4318-A8FA-34867F688C4C_1_201_a.jpeg

I think I prefer the two light blue separator strips. They show up better. But the separator strips are scraps too, so I’m using up what I have. I think I will end up needing to a light blue green strip too.

I’m sewing the sections so that they will be wide enough to make a queen size quilt. But if I don’t have enough scraps to make the quilt long enough, I’ll re-cut the strips. I believe I definitely will have enough to make at least a twin size quilt.

And yes, this is one of those quilts that the dogs will be welcome to sleep on! Nothing precious about this one. It’s just a fun collection off fabrics that are “old friends’and come with lots of happy memories of many previous projects.

TAGS: "Post-cuts" scraps from making face masks, scrap quilts, Using Face Mask Scraps to make a quilt


May 21, 2020

How to Use Scraps Left Over From Making Masks to Make a Quilt

by Judy Tucker


6 inch wide scraps from making face masks

6 inch wide scraps from making face masks

6 inch wide scraps from making face masks

6 inch wide scraps from making face masks

I haven’t done any quilting since the beginning of the Stay-at-Home order for COVID-19. But I have been churning out lots of face masks for volunteers of one of the local food pantries to use. I’ve dug deep into my stash of fabrics and have used a wide variety of fabric colors and patterns.

Some of the rectangular masks have been cut from scraps but others have been cut from yardage. Either way, I often end up with a 6 inch tall strip of left-over fabric.

The symmetry of these scraps makes me want to sew a quilt from them. They are sort of like pre-cuts—but not. I’ve taken to calling them my “post-cuts”!

I haven’t decided what to do yet. So I’m more or less thinking out loud in this post. My current plan is to cut standard 6 inch x 2 1/2 inch strips of one solid color to use as a spacer between the prints. Here are some of the ideas I’ve been kicking around.

  • Should the spacers come after 2 or 3 prints are sewn together? Or even less often in a row?

  • Should the post-cuts be randomly pulled from the bag to create a completely scrappy quilt?

  • Should I separate the post-cuts by their colors?

  • Should they be grouped by their design—florals, dogs, sports, geometrics?

  • What color should the spacer strips be? I’ve pulled out a light yellow. But pink or aqua would be good too. Or should I use a collection of different pastels? Whichever color(s) I choose, the spacer fabric needs to come out of my big stash of solids. Just making do with what I have on hand.

There are so many different ways this scrap quilt could be assembled.

No decisions yet! But I am having fun contemplating all the options!

Who else is making a quilt from mask scraps? Or even just thinking about it?

TAGS: Making a quilt from face mask scraps, "Post-cuts" scraps from making face masks, scrap quilts


May 14, 2020

Peg Dolls: Foxes

by Judy Tucker


Fox Triplets

Fox Triplets

Fox Triplets

Fox Triplets

Fox peg dolls. I’ve been thinking about making fox peg dolls. And here they are! These are standard boy pegs, 2 3/8 inches tall.

How to make your own fox

  • Paint the peg with orange or reddish brown non-toxic watercolor paint. Leave a triangle on the lower 1/4 of the face and an oval on the chest. Allow the paint to dry.

  • Paint the lower face and the chest of the fox with non-toxic opaque white acrylic paint. Allow the pain to dry. Paint the tops of the legs. This can also be done after the legs are painted.

  • Paint the legs with olive green or dark brown non-toxic watercolor paint. Allow to dry. Paint the feet with black paint. Add the opaque white paint if that wasn’t done in the previous step. Allow to dry

  • Seal with beeswax polish. Allow to dry for several hours or overnight. Polish with a soft, dry cloth.

  • Using a watercolor brush pen, add eyes and nose.

  • Cut two triangles of matching orange or reddish brown wool felt for the ears. Attach with craft glue. (The grid behind the scrap paper pattern templates below is 1 inch square).

  • Cut an oblong tail from the same felt as the ears. Cut small cream or white triangles and glue to the tip of the tail. If you drew a template for the ears, it can be used for the white on the tail too. Glue the tail to back of the peg, with the flat edge of the tail at the aligned with the bottom edge of the peg.

E80AEC6B-B2F2-44B4-AB46-4C7B463C7435.jpeg
5F3CC8B9-1326-44D3-AEB5-9CDBFEA2C8B5.jpeg
24CF19F4-914D-4E97-BE33-BF1C78221999.jpeg

Have fun with your new fox friends!

NOTE: Due to their small size and tiny parts, these fox pegs are not appropriate for children under age 3 years.


TAGS: Fox Peg Dolls, Peg Dolls, Make a Fox Peg Doll


  • Newer
  • Older

Powered by Squarespace 7