Search
  • Information
    • About
    • Contact
    • Privacy Policy
  • Blog
  • Subscribe
  • Tutorials
    • Tutorials
    • Doll Clothes: Photos and some Patterns
  • Suggested Reading
  • Quilts: My Original Designs
  • Gallery: Color Studies
  • Gallery: Quilts I've Made
  • Doll Making Blog Posts
  • Recent blog posts
  • Quilts Based on The Improv Handbook for Modern Quilters
Close
Menu
Search
Close
  • Information
    • About
    • Contact
    • Privacy Policy
  • Blog
  • Subscribe
  • Tutorials
    • Tutorials
    • Doll Clothes: Photos and some Patterns
  • Suggested Reading
  • Quilts: My Original Designs
  • Gallery: Color Studies
  • Gallery: Quilts I've Made
  • Doll Making Blog Posts
  • Recent blog posts
  • Quilts Based on The Improv Handbook for Modern Quilters
Menu

Sleeping Dog Quilts

SLEEPING DOG QUILTS

September 2, 2021

Free Motion Quilting a Christmas Tree: A tutorial

by Judy Tucker in Tutorial


Free-motion quilted Christmas tree on a 5 inch square

Free-motion quilted Christmas tree on a 5 inch square

Free-motion quilted Christmas tree on a 5 inch square

Free-motion quilted Christmas tree on a 5 inch square

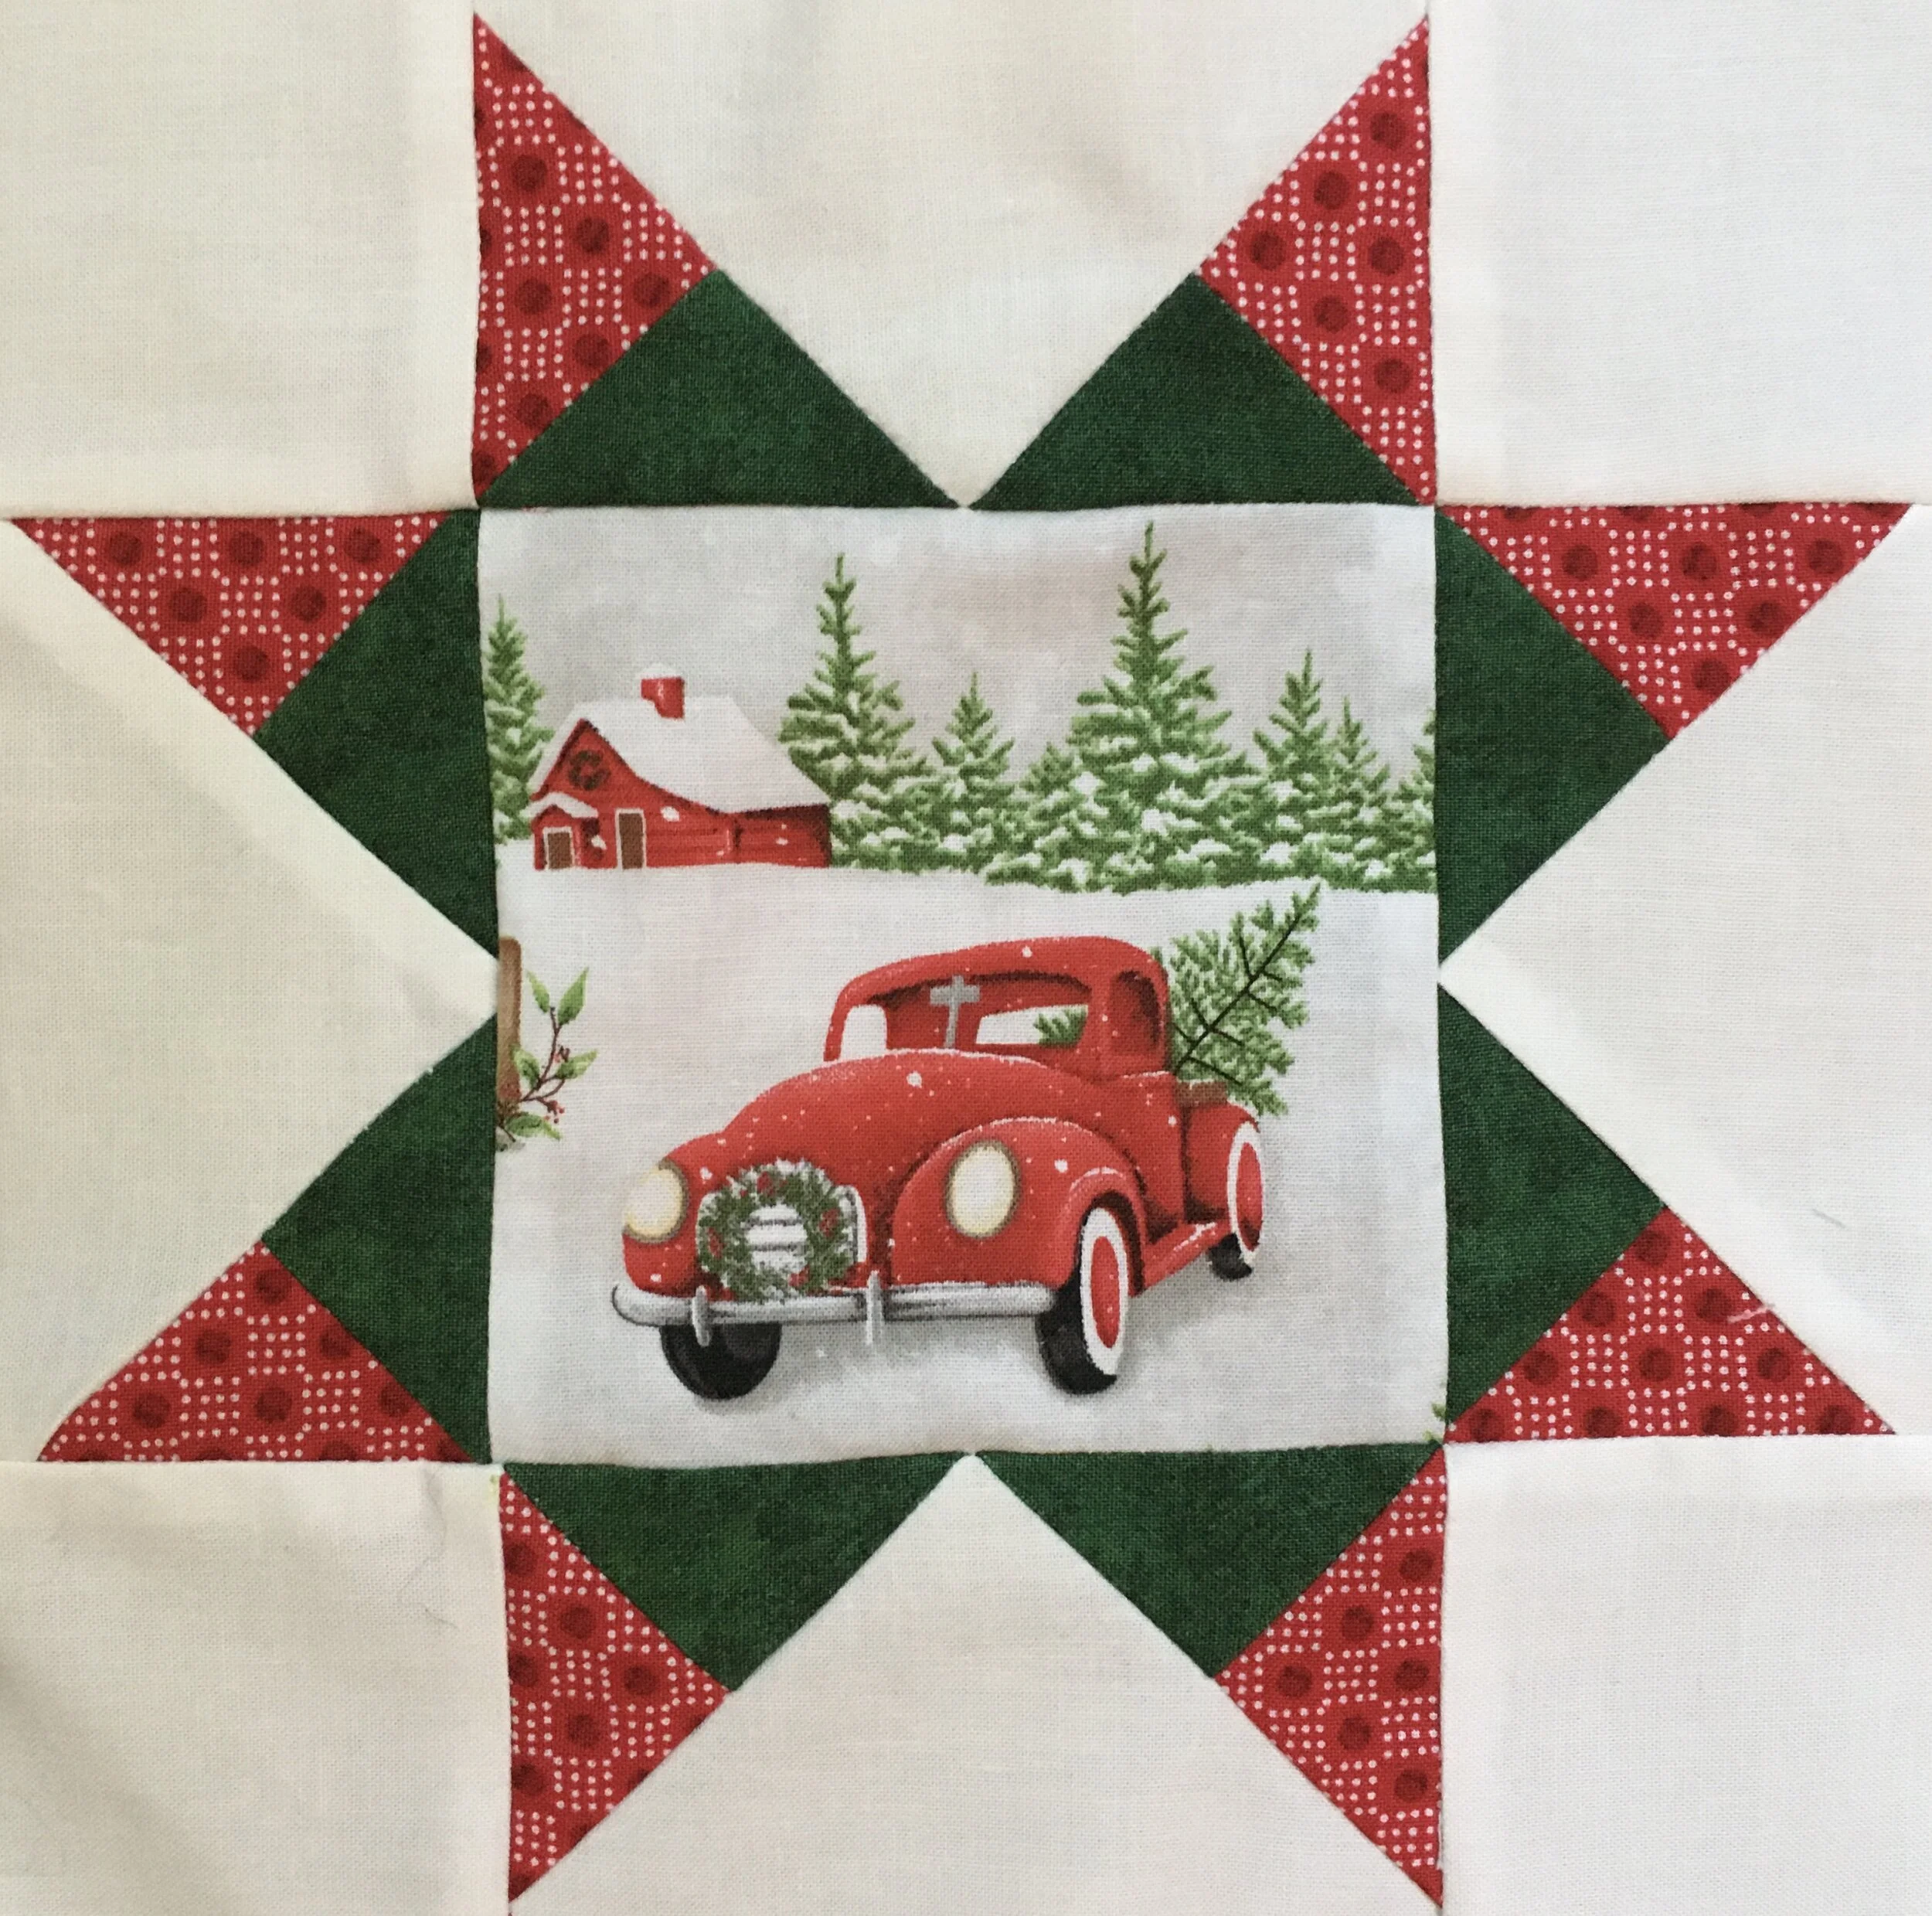
I just finished quilting a Christmas quilt. Half of the blocks were pieced 8 point stars while the alternate blocks were 8 inch squares. That’s a lot of negative space in a quilt. For days I thought about how I was going to quilt this quilt. Finally one morning I had a thought. Christmas trees and quilted feathers are essentially the same. Except instead of gradated curves, the Christmas trees have gradated, boughs. I’m not confident about quilting feathers but the tree has straight lines and sharp angles and that seems a lot easier. At least to me!

I quilted all my Christmas trees freehand, so each tree, though similar, is unique. However, by marking the block being quilted, trees can be free motion stitched to be almost identical.

How to Free-Motion Quilt a Christmas Tree

  • If you want to mark the points of the tree with dots, draw a template of a tree and cut it out. Place it on the block and mark the bough points and top of the tree with a chalk pencil or other marker which will erase. (See point dots on diagram below).

  • Start with tree stand, at the point that will be the middle of the top of the stand. Stitch out a rectangle (or any other shape you like), ending at the top center where the stitching started.

  • Stitch straight up to the top of the tree to create the trunk. Stop. It is important to stop at all the points. That insures a sharp corner. The point is more likely to look blunted or have a slight curve if you carry on stitching without a brief stop.

  • Stitch down to the level of the first bough. I stitch the left side first, but you may fee more comfortable stitching the right side first. Whichever direction feels comfortable is the way you should go!

  • Stitch straight inward toward the trunk but stop before you get there. How wide a gap you leave is up to you, and will depend on the size of your tree.

  • Continue stitching all the boughs on that side. At the bottom, stitch straight across to the opposite side and stop.

  • Stitch up the tree to add the boughs on the second side. This may feel a bit more difficult because it is harder to see where you are headed. Take your time. Stop as needed and peak ahead to make sure you are on the right track.

  • Stop at the top of the tree. You can end there, as I did in my diagram, or stitch a straight line down the tree to create a solid trunk. Either way is fine—it’s your design choice. Or, if you are stitching multiple trees on a quilt, you can stitch off the tip of the tree and loop or meander your way to the next tree.

  • You’ll do your best work if you can relax and have fun doing free motion quilting Christmas trees!

  • TIP: It helps to practice free-motion by drawing the designs multiple times until you feel comfortable and have created some motor-memory in your hands. Because you quilt with your hands, not your fingers, hold your drawing tool in a fist, rather than using it as a pencil. It really helps to do that. You can draw on paper but I love using a child’s erasable doodle pad. See below.

  • See my post on free motion quilting from October 24, 2019 to read about how to set up your work space and sewing machine to do free motion quilting. To see more posts with examples of my free motion quilting, type Free Motion into the search bar at the top of the page.

IMG_6336.JPG
IMG_6333.JPG

I didn’t see this exact Fisher-Price® doodle pad when I looked for it, but there are lots of other options available from a number of toy manufacturers.

Notice: This blog is not monetized: I do not use affiliate links. When there are links in a post, they are to give credit to another creative person, because I like or have used a product, or to help the reader easily find supplies for a project.

TAGS: Free Motion Quilting a Christmas Tree--a tutorial, Free Motion Quilting a Christmas Tree, Fee motion quilting tutorial


August 26, 2021

Using the "Plant Dye Zine" by Rebecca Desnos

by Judy Tucker


Flower and Leaf Pounding on fabric

Flower and Leaf Pounding on fabric

Flower and Leaf Pounding on fabric

Flower and Leaf Pounding on fabric

In my previous 3 posts I shared my adventures in natural dyeing using a book written by Rebecca Desnos. When I ordered that book, I saw she also had edited a zine named, Plant Dye Zine, so I purchased that too. In addition to Rebecca there are 7 other contributors who wrote chapters on their own techniques. The zine includes chapters on botanical inks and paints, printing with plant materials, growing a dye garden and dyeing with plants, and pressing flowers just to name a few of the topics.

Natural fabric dyeing is a very slow process. It takes days to weeks. So I was intrigued by the tutorial “Flower & Leaf Pounding” by Samorn Sanixay. This is a quick and easy process which involves the use of a flat head hammer and is a great activity to do with children. (There are multiple warnings in this zine to make sure that you know your plants and aren’t using anything poisonous)!

I used parsley leaves, marigolds leaves and a “weed” which I think is probably a wild daisy or aster. I used the gold and red leaves to do the pounding on the left and the plain orange marigold leaves to do the pounding on the right. I put a tiny daisy in the center of each cluster of marigold petals. I also used some wild geranium petals but they were too pale pink and all I got was a “ghost” which is just barely visible on the fabric.

As instructed, I folded the fabric in half before pounding, which should give mirror images. I didn’t get good results with my fabric doing that, so I used a piece of cardboard from pad of paper and re-pounded the petals which worked much better.

E830D0E4-C6D5-4C66-B7D1-5C75EC0671F5.jpeg
8594FD01-65C1-40BB-9214-A4A74C64F96A_1_201_a.jpeg

I liked the flower arrangement on the right and the parsley leaves best on the left.

You can just set the color by ironing the fabric after letting it rest for 24 hours. Samorn also suggests boiling or steaming. I decided to try the boiling method which she said sometimes deepens the green colors. Sadly, that was not the case with my parsley and marigolds. Here’s what happened.

IMG_6321.JPG
IMG_6322.JPG

The image on the left is the fabric boiled and dried. The image on the right is after the boiled fabric has been ironed.

The parsley faded and turned light olive green. The red in the marigold leaves on the left flower is mostly lost and the oranges have faded to yellow. However, I still like the flower on the right side.

I did use a piece fabric that had been soaked in soy milk as a mordant that I use for dyeing fabric with plants. The fabrics used in the tutorial hadn’t been pre-treated so my treated fabric probably did effect my results. Nevertheless, I had fun and all is not lost. It was just a scrape of fabric. Right now I don’t think any of the flowers blooming in my garden are good candidates for pounding but I will definitely try this technique again when I have some other flowers in bloom. And next time I’ll just heat set the color with an iron!

I do have to say, this flower and leaf pounding is really a lot of fun!

TAGS: Flower and Leaf Pounding to created a design on fabric, Using "Plant Dye ZIne" published by Rebecca Desnos, Using flowers and plants to create designs on fabric


August 19, 2021

Natural Fabric Dyeing--the Adventure Continues

by Judy Tucker


Avocado Pit dyeing in a jar at room temperature for 8 days

Avocado Pit dyeing in a jar at room temperature for 8 days

Avocado Pit dyeing in a jar at room temperature for 8 days

Avocado Pit dyeing in a jar at room temperature for 8 days

The adventure of dyeing with natural dyes using Rebecca Desnos’s book Botanical Colour at your Fingertips continues!

Above is my last, and slowest, avocado pit dyeing. It was done without using any heat. I folded the fabric and put it in a mason jar with the lid on, using the remaining neutral dye from my avocado mash. It sat on my kitchen counter for 8 days. At that point I was thinking that it was starting that the it was all just starting to smell like a tad funky. Not wanting a fermented or moldy fabric, I pulled it out and hung it dry in the shade on my porch railing.

I really like this piece of fabric. I used Cover Wonder Clips instead of clothespins to secure the folds. They actually have a tighter grip so I got clear white squares which I love.

So that’s it for the avocado pit dye.

I have a very large patch of peppermint in my front garden. It’s in bloom at this moment and is pollinator heaven! So I picked a bunch of peppermint, flowers and all, and boiled up a new dye bath. I used one strip of fabric which had the soy milk mordant. And a strip which I had pre-soaked with 1 part white vinegar and 4 parts water. Here’s what happened.

IMG_6312.JPG
IMG_6208.jpg

The strip at the top, with the soy milk mordant picked up a lot of dye from the peppermint and turned a deep olive green. The fabric treated with the vinegar is a soft light green. Both fabrics were boiled together in the same dye bath.

It’s really interesting to see how the soy milk mordant really does bind so much more dye. Though I happen to really like the very pale green fabric better!

For my last natural dyeing experiment, I used yarrow, also growing in my front garden. When it first blossoms, the flowers are magenta, but then they fade to white. You can just see a trace of pink left in this cluster. As with the peppermint, I dyed both fabric treated with the soy milk mordant and the vinegar dip. Here’s what happened.

IMG_6315.jpg
IMG_6325.jpg

The fabric dipped in the vinegar solution at the top on the right barely picked up any dye from the yarrow. it is a very pale yellow with a hint of tan. The fabric with the soy mordant, at the bottom, picked up lots of dye and is lovely light green/tan color.

Here is a photo of the fabrics dyed with both the peppermint and the yarrow. They create a beautiful set of gradated fabrics in the yellow/green/olive/tan family.

Notice: This blog is not monetized: I do not use affiliate links. When there are links in a post, they are to give credit to another creative person, because I like or have used a product, or to help the reader easily find supplies for a project.

Top to bottom: Peppermint on fabric dipped in 1:5 vinegar solutionPeppermint on fabric with a soy milk mordantYarrow on fabric dipped in 1:5 vinegar solutionYarrow on fabric with a soy milk mordant

Top to bottom:

Peppermint on fabric dipped in 1:5 vinegar solution

Peppermint on fabric with a soy milk mordant

Yarrow on fabric dipped in 1:5 vinegar solution

Yarrow on fabric with a soy milk mordant

My neighbor just told me that I can harvest as much as I want from his sage “forest”! So stay tuned! But it will be a while. I need to treat some more fabric and then make the dye.

But in my next post I’ll tell you about a great zine which Rebecca edited and published.

TAGS: Natural dyeing, Natural dyeing with yarrow, Natural dyeing with peppermint, Natural dyeing with avocado pits, Natural Dyeing using the book "Botanical Colour at Your Fingertips" by Rebecca Desnos


August 12, 2021

Doing Natural Fabric Dyeing using the book "Botanical Colour at your Fingertips"

by Judy Tucker


Kona® cotton dyed with avocado pits. Top was first extraction with lemon juice added (acid), middle was the second extraction without any additives, bottom was second extraction, second used with baking soda added (alkali).

Kona® cotton dyed with avocado pits. Top was first extraction with lemon juice added (acid), middle was the second extraction without any additives, bottom was second extraction, second used with baking soda added (alkali).

Kona® cotton dyed with avocado pits. Top was first extraction with lemon juice added (acid), middle was the second extraction without any additives, bottom was second extraction, second used with baking soda added (alkali).

Kona® cotton dyed with avocado pits. Top was first extraction with lemon juice added (acid), middle was the second extraction without any additives, bottom was second extraction, second used with baking soda added (alkali).

In my post last week, I started a review of Rebecca Desnos’s lovely book, Botanical Colour at your Fingertips. Rather than tell you all about the contents of the book, I thought I’d show you what I’ve done using Rebecca’s excellent instructions.

I do love pink, and when I read that avocado skins and pits create peach and pink dyes, that is were I decided to start. The avocado pits give a deeper color, and they are definitely easier to store, so my pink dye is derived from avocado pits.

So let’s get the dye pot on the stove to start the extractions from the avocado pits!

409ACAB2-AD21-4928-BE6B-65A9B9E45969.jpeg
1ADF7D71-CED1-4F78-8DAA-2DDF9DDFB661.jpeg

i have to say I was less than overwhelmed with the results I got from the first extraction from the avocado pits. The colors do get more vivid with a second extraction, but part of the problem I didn’t get a lot of color is that I folded a fat quarter of my fabric in too many layers, making it difficult for the dye to penetrate. You can see below that the color really only dyed the edges of the folds and the two bits of fabric that were the outside folds.

Avocado pit dye, first extraction, folded fabric

Avocado pit dye, first extraction, folded fabric

I also tried creating an ombré by dipping one end of some folded fabric in the dye pot and leaving the other just inside the rim at the top of the pot. It looks like he Kona® cotton didn’t wick very well. So my ombré is barely visible in the final fabric. There is almost a hard line that shows which part of the fabric was submersed in the dye.

90835403-CEAB-44AB-A015-8D15029F8087.jpeg
DAE62FFC-4F15-4DC6-9F6E-0A33EE4A3D52_1_201_a.jpeg

I added some lemon juice to the first extraction to make the dye pot more acidic, and that created the lovely light brown dye. (See above top).

The color was a deeper pink with the second time I boiled the avocado pulp. (See middle fabric at top). I also use a smaller pieces of fabric with in the second dye lot which helped too.

Finally i decided to add baking soda to the dye bath to see what an alkali dye would do. One unexpected side effect of that is that the dye nearly boiled over a couple times. it really frothed up and tried to climb out of the pot! So I had to watch it closely and keep the pot on a very low simmer. It looked like the color was going to be deeper and more purple. I does have a light purple cast (bottom fabric at top) but it definitely isn’t deeper.

So that’s it so far with my adventures with natural dyeing with avocado pits. I did put the avocado pit pulp in the freeze and maybe someday I’ll see what happens with extracting a third dye pot lot with the mash.

In my next post, I’ll show you what I’ve done with plants from the garden.

TAGS: Natural dyeing, Natural Dyeing using the book "Botanical Colour at your Fingertips", Making pink dye from avocado pits, Natural dyeing with avocado pits


August 5, 2021

Book Review: "Botanical Colour at your Fingertips"

by Judy Tucker


IMG_6189.JPG
IMG_6189.JPG

If you ever wanted to try to do some natural dyeing using plants from the woods, your garden, or your kitchen, Rebecca Desnos’s 2016 book Botanical Colour at your Fingertips is a great place to start.

In the past, I’ve done dyeing with synthetic dyes, but I’ve never tried dyeing anything with natural dyes. But when I saw that green avocados create peach and pink dyes, that I just had to try!

This book goes takes you through the process of natural dyeing, step-by-step, covering each step in its own chapter. The instructions are clear, thorough, and beautifully illustrated. This book really does teach you how to do everything in the entire process from collecting plant matter to fixing the dyed items.

Natural dyeing is really fun, but be forewarned—this is a s-l-o-w process. Especially the first time you dye something. It will take 3-4 weeks before you will have fabric or yarn dyed and ready for use. So, definitely not a quick project to do in a weekend or with impatient children.

Rather than talking more about the book’s contents, I thought I’d show you about my experience doing natural dyeing using this book.

My task was collecting the items I needed to do the dyeing. All of the kitchen wear/utensils used for dyeing should be reserved JUST FOR DYEING. You can NOT dye and cook with the equipment. Rebecca recommends using an aluminum pot because the aluminum acts as a mordant for the dye. But she also discusses how other types of pots can create interesting effects with the plant dyes.

I don’t use any aluminum pots or pans in my kitchen so I couldn’t just re-purpose some thing I had. But I had a hunch I might find just what I needed at a local thrift shop. The first store only had stainless steel pots, but at the second, larger one, I had a choice of aluminum pots. Pick one with a lid, since you will need to cover the pot when you are boiling things. (I didn’t realize I’d need a lid, so I got a pot without one. That was easily solved with an inexpensive glass lid, but that was an extra expense I could have avoided if I’d picked a pot that still had its lid)! I fished around in my spoon drawer for a less-loved wooden spoon and found a wooden spatula that I never used. I wrote CRAFT ONLY on it with a marker, to be sure it wouldn’t need up back in the kitchen drawer. I had all the other items needed in my house.

Rebecca recommends using soy milk as a mordant to help bind the plant dyes to the fabric. You can use soy milk from your local market, but I have dried soybeans I keep on hand for making soy milk, so I made up a 2 quart batch. For fabric I used Kona® cotton that is prepared for dyeing. I expect I could have just used this prepared fabric as is, but I pre-washed it as recommended and then treated it with the soy milk. I needs to be dipped several times, so look for a couple sunny days in a row to do that! I thought the soy milk treated fabric might start to go off or spoil after a few weeks, but I’ve had some for a at least 6 weeks now and it still smells sweet!

Here is a yard of fabric, soaking in my homemade soy milk in my amazing aluminum pot, and then drying over my deck railing in between dips. The treated fabric needs to rest at least a week before it you can dye it.

AFCD5B1F-23E2-47FF-B955-6C4A8FAEF1BF.jpeg
422E7E0B-849D-412F-91EF-DE10DE67BAE8.jpeg

So, this is the perfect place for me to stop writing, and for you to rush off and purchase a copy of the book! (I might also need to eat a few more avocados)!

In my next post I’ll show you the fabric I have dyed so far.

Notice: This blog is not monetized: I do not use affiliate links. When there are links in a post, they are to give credit to another creative person, because I like or have used a product, or to help the reader easily find supplies for a project.

TAGS: Natural dyeing, Using "Botanical Colour at your Fingertips" by Rebecca Desnos, Dyeing with plants


July 29, 2021

Sewing the "Salty the Seahorse" Pattern by RicRacSews

by Judy Tucker


“Salty” pattern by Jodie Carleton, RicRacSews

“Salty” pattern by Jodie Carleton, RicRacSews

“Salty” pattern by Jodie Carleton, RicRacSews

“Salty” pattern by Jodie Carleton, RicRacSews

Here are two different “Salty” Seahorses for the pattern by Jodie Carleton, RicRacSews on Etsy.

This fun pattern makes a stuffed seahorse which is 9 1/2 to 10 inches tall. I used batik fabric for the body and crest of the seahorse on the left, and regular quilting cotton for the seahorse on the right.

I added medium weight Pellon® fusible interfacing to one side of the pieces I cut for the mane and the fins. i fused the interfacing to the fabric and then cut out the pattern pieces. I thought it might be fun to add some body to the fabrics in the mane and fins. I’m happy I did it, but it did make it harder to turn the fins right side out when the plain piece of fabric and the fused piece were sewn together. I think I might use lightweight interfacing if I make the pattern again.

Medium weigh Pellon® fusible interfacing fused onto the fabric prior to cutting the pattern pieces

Medium weigh Pellon® fusible interfacing fused onto the fabric prior to cutting the pattern pieces

While not a difficult pattern, the curves in the pattern are tricky, so I’d recommend this pattern for someone who has some solid sewing machine skills.

Jodie has a super cute version make with fabric she created from 2 1/2 inch squares…perfect for a quilter with a stash of squares for one of those 2 1/2 inch pre-cut packs.

“Salty” is a fun summer sewing project! I’m planning to gift the the seahorsewith a children’s book about ocean animals.

TAGS: Sewing "Salty" the Seahorse Pattern by RicRacSews, Seahorse Stuffed animal from pattern


July 22, 2021

Felt Beach Playscape Mat for Peg Dolls

by Judy Tucker


Felt Play Mat 12 x 11 1/2 inches

Felt Play Mat 12 x 11 1/2 inches

Felt Play Mat 12 x 11 1/2 inches

Felt Play Mat 12 x 11 1/2 inches

This is an easy Waldorf-inspired craft project for an afternoon. It’s a felt playscape for quiet play time using wooden peg dolls and other props.

I used wool felt for the playscape. I cut the pieces freehand. I wanted some tidal pools, some rocks, sandy beach, and sand dunes with beach grass. I sewed the pieces together and used a decorative stitch that is a built-in option on my Janome sewing machine to create the waves at the shoreline. The sea creatures are buttons, as are the flowers in the dunes. This is going to a school age child, so the loose pieces aren’t an issue. But you should sew them down for a young child.

For safety reasons, button decorations should not be used if the child is under age three. However, you can cut out felt flowers and fish, dolphins, whales, and starfish and sew them onto the mat for a toddler play. (See the meadow link below).

The sandcastle is a cut out shape and two of the pieces are glued together with craft glue. The tower on the left is free standing. The castle is not attached to the mat so it can be moved around during play.

My mermaid peg dolls were off swimming in the deep blue sea when I took this photo. But the fairy peg dolls said they were distant relatives of the mermaids and were happy to step in for the photo shoot!

To see some other felt playscape ideas, see my posts on making a meadow and a lunar landscape.

TAGS: DIY Felt Playscape for Peg Dolls, Waldorf Inspired Felt Playscape


July 15, 2021

Simple Printmaking on an Open Press Project Printing Press

by Judy Tucker


3 Prints, Left to right: Color Pencil on print, Watercolors on Print, Uncolored print

3 Prints, Left to right: Color Pencil on print, Watercolors on Print, Uncolored print

3 Prints, Left to right: Color Pencil on print, Watercolors on Print, Uncolored print

3 Prints, Left to right: Color Pencil on print, Watercolors on Print, Uncolored print

Way back before COVID-19, I joined a Kickstarter Campaign to get a tiny Open Press Project printing press from Germany. The plastic parts of these little printing presses are printed with a 3D printer. It is possible to 3D print the entire press , but they decided to use some metal components in the final product. (Here’s a link if you have access to a 3D printer and want to print your own Open Press Printer).

I have done screen printing and mono-prints but I have no prior experience with printing with a printing press. So I’m a complete novice. But with the E-book that comes with the press, this is totally doable.

So far, I’ve made prints from inking actual leaves with acrylic paint and a brayer.

Print using a leaf

Print using a leaf

I’ve also made etchings using the silver side of cut up TetraPak® shelf-stable food containers like juice boxes. A 3D dry point needle came with the press but I purchased an etching pen. Below are a series of photos showing my process for making a etching.

Top Row Left: A new piece from a TetraPak®, with an etched design in the piece below it.

Top Row Right: A close-up of the etching.

Second Row Left: I like using the Speedball printmaking paper. It’s readily available online in the US, not very expensive, and a great weight for making note cards. I have used mulberry paper but while it does make nice prints, it’s more expensive, definitely trickier to use, and much thinner weight. I’ve had good results using Akua® Intaglio® printing inks. (I’ve used both carbon black and a Prussian blue.

Second Row Right: After trying a variety of ways to apply the ink, I’ve settled on using a cotton swab. My etchings are very simple drawings and the cotton swab makes it possible to just apply a small amount of ink over the etched areas.

Third Row Left: My favorite item for wiping excess ink off the etching is pages of old telephone books! I’m sure newspaper would work too since printed phone books are no longer an common commodity!

Third Row Right: I put a piece of trimmed-to-size copy paper on the printer’s platen. Then the etching. On top of the etching a place piece of printing paper which I have soaked for a few minutes in a tray of clear water. On top of the printing paper, I put another piece of copy paper, and finally the sheet of felt which came with the press. Now, all ready to print!

Bottom Row Left: The sandwiched print and paper is cranked through the printing press.

Bottom Row Right: And here, on the far side of the press, the etching on the left and the print on the right.

E79616C9-D694-493D-994E-AC54410C08DD_1_201_a.jpeg
39CF7B56-D589-4275-B83C-20111072D5EE_1_201_a.jpeg
EB361BD3-9EF5-4930-A85A-F0D222025FBC_1_201_a.jpeg
D6879A2F-40F8-4ED7-9063-F699DF11D31E.jpeg
8359CDB8-D479-4F84-871E-54D24CE367F2.jpeg
BA9E4EDA-A10E-4B5D-84F8-4C0100C4DBC6.jpeg
8FE6E369-88E3-42F0-809F-EF716756ED0D.jpeg
6D12F427-8752-493D-B143-54E4F0D76CDF.jpeg

This is a tiny press. 2 3/4 inches is about as wide as your printing paper can be. But that’s also one of the joys of this press. I can sit down and do a TetraPak® etching in an afternoon, and a couple hours later have a stack of prints that are drying. The prints do need to be put under a stack of books or other weights overnight so that they don’t curl as they dry completely. But I love how fast I can make prints with this press! I’m so glad found out about this KickStarter project and signed up!

Check out what other folks have printed on Instagram #openpressproject.

The Kickstarter Campaign is over, but if you’d like your own little 3D printed printing press, you can purchase one from the OpenPressProject. I highly recommend them!

Notice: This blog is not monetized: I do not use affiliate links. When there are links in a post, they are to give credit to another creative person, because I like or have used a product, or to help the reader easily find supplies for a project.


July 8, 2021

Sewing Mirror image Patches on a Star Block

by Judy Tucker


IMG_6066.jpg
IMG_6066.jpg

I purchased a Christmas fabric collection on sale last winter so a few weeks ago I decided to just get a head start on my Christmas sewing and designed a new quilt!

This block design is from the Electric Quilt 8 Block Library which is included with the computer program. The block is called “Aunt Addie’s Album”. (I wonder if she collected truck drawings)! I chose this block for the large central patch which is great for fussing cutting a fabric. The way I set up this block, it will finish at 8 inches square. The central patch is a generous 4 inches square, an ample size for featuring a special fabric.

The star points are seemingly simple half square triangles. True, they aren’t hard to sew, but you need to be careful. The pair of points on each side of the star are actually mirror image blocks. It’d be tempting to just to chain sew all the red and green squares together. But you if you haven’t planned ahead, you won’t have the mirror image pairs that you need.

What worked for me was setting up the 4 pairs needed for a single block. I put down the 8 green patches next to each other and then put the red patches in position next to them. This assured I would have mirrored pairs. Then I chain pieced all the right hand sets and then the left hand sets.

Doing that, I had just what I needed to sew the quilt block and I knew I had exactly the correct number of patches.

OK. This is project is actually “secret sewing” for a Christmas present. So that’s it for now. But I definitely will post the final quilt before the end of 2021!

TAGS: Blocks with mirror image patches, Sewing mirror image patches, "Aunt Addie's Album" block from EQ8, Star Block


July 1, 2021

"Off Course": The "Regatta" Mystery Quilt Takes a Different Tack

by Judy Tucker


“Off Course” 53 1/2 x 70 inches

“Off Course” 53 1/2 x 70 inches

“Off Course” 53 1/2 x 70 inches

“Off Course” 53 1/2 x 70 inches

The sails in my guild quilt project caught a different breeze and I deliberately veered off in a different direction from the pattern, “Regatta”, a Mystery Quilt Pattern by Merry Meyhem in several steps. “Off Course” by choice!

I’d been sailing against the wind from the beginning due to having a directional fabric as one of the light blue backgrounds. It has seagulls flying in it and the way I cut them, the seagulls would have been flying vertically had I followed the pattern. I flipped the direction the half square triangle sails were facing which solved that problem. It did complicate sewing the blocks together because the blocks in each strips were the mirror image of the pattern.

I”d also taken a guess about the border on the final layout when I was purchasing my fabric. I took a risk and purchased the royal blue instead of sticking with the light blues in the quilt’s background. So I knew from the start that my border was going to be different. It’s actually completely different from the borders in the pattern.

My border, with boats sailing across it, made my finished quilt is a bit smaller than the quilt in the pattern. And I needed it to be smaller. I had one piece of batting left from a roll, and it was just big enough for the quilt I made, which saved me from needing to by a new batting.

Here’s the back. This is “Sea Breeze” from Hoffman Fabrics “Shoreline Stories” collection. The fabric is a standard 42-44” width so I used the left over light blues from the quilt’s background to just squeak out a back that was wide enough.

Back of “Off Course”

Back of “Off Course”

I love this quilt. But if you are looking for a sneak peak to see what the finished “Regatta” Mystery Quilt looks like, this is NOT it! I used most of the pattern’s instructions, but the actual finished mystery quilt is a definitely a different day at the yacht club!

I think a certain Springer Spaniel is chuckling about all of this!

I think a certain Springer Spaniel is chuckling about all of this!

To see more about this Mystery Quilt which has been a project our quilt guild has been working on all year, check out my February 11, 2021 post. If you are working on this mystery quilt, or are interested in purchasing it, I hope you have fun making it. It’s not difficult at all…if your follow Merry Mayhem’s direction and don’t veer off course like I did. ( Don’t by fabrics with a directional prints for your background! Half square triangles just don’t play well with directional fabrics).

TAGS: Mystery Quilt, "Off Course" Quilt, Half Square Triangle quilt, Sailboat quilt, Guild Quilt Project


June 24, 2021

"My Village" Quilt-in-a-Box Completed Quilt

by Judy Tucker


“My Village” Quilt-in-a-Box,   41 1/2 x 57 inches

“My Village” Quilt-in-a-Box, 41 1/2 x 57 inches

“My Village” Quilt-in-a-Box,   41 1/2 x 57 inches

“My Village” Quilt-in-a-Box, 41 1/2 x 57 inches

Finally my Quilt-in-Box guild project quilt is complete! Our guild started this project in 2019 but due to the COVID-19 pandemic, the blocks weren’t all done until last fall. There is information about this project in my posts from November 5, 2020 and November 12, 2020.

This quilt has both free-motion quilting and straight line quilting. Some blocks have both, while others just have one type of quilting. Here are some of the blocks to show the details.

There is a fair breeze in the ship’s sails and rolling waves in the water. I added portholes too.

61ABE397-E8F3-47B9-AE22-13EFE03FA280_1_201_a.jpeg

The house in the center of this log cabin block is in a leafy neighborhood and there are puffy fair weather clouds overhead. The foxes are napping in the nearby wood and the otters are playing in the eddies in the stream.

0F6FA191-9AFC-47C1-B037-428700D79C20.jpeg

There are fires lit in both hearths in this home. The roof has scalloped shingles on the roof and rough-hewn timber cladding. I added a 6 panel window to the door to make sure there is lots of light inside!

BED76A66-5A4E-4221-95B4-224C2BC49A50.jpeg

There is straight line grid work in the Whimsical Whirlwind block with free-motion quilting in the negative space.

The quilt backing is a French fabric with a design which is in keeping with all the tiny woodland animals in the fabrics of this quilt.

0A3782D0-ACF0-4925-B156-2CA1EABD11C1.jpeg

I designed the fabric with the little houses which is in many of the blocks. It is called “Little Houses” available at Spoonflower.com. Here are the links to “Little Houses” with the white background and and blue background.

This was a great quilt guild project, one which I’d be happy to do again! Many thanks to all the members who made blocks for my quilt!

TAGS: Quilt-in-a-Box, Guild Quilt Project, Free motion Quilting, Picture blocks in a Quilt


June 17, 2021

Peg Dolls: Summer Solstice Fairies

by Judy Tucker


Summer Solstice Fairy Ring

Summer Solstice Fairy Ring

Summer Solstice Fairy Ring

Summer Solstice Fairy Ring

The summer solstice and fairies just go together in my mind. Maybe it is Puck in Shakespeare’s “Midsummer Night’s Dream”, or maybe it’s ingrained in our psyche from centuries of folklore. At any rate, the summer solstice is here, and I have designed a peg doll fairy for the occasion!

E436C78D-4634-4443-BF41-7F113B672C0F.jpeg

I looked at fairy illustrations online but nothing really clicked and I don’t really like copying other folks’ ideas. So I took the dogs out for their afternoon constitutional, and found just want I needed on my next door neighbor’s sidewalk! Maple whirligigs (seeds).

Maple whirligig inspired fairy wings!

Maple whirligig inspired fairy wings!

I thought about gluing the whirligig onto the wooden peg doll, but the seed pods rapidly dry out and would crumble if touched. So I placed one whirligig upside down and put the small right side up and overlaid them. The pair makes perfect fairy wings!

IMG_5970.jpg

I used my Tombow dual pen art brush markers to decorate the fairy wings. If the marker is held still on the wing, the wool felt absorbs the color. That worked much better than trying to actively draw with the pen on the felt.

I made tiny, small and medium size peg dolls for these fairies. The hand dyed merino yarn, color is “Prism”, came from Alive with Purpose which supports mental health in Minnesota. This yarn has a very short color repeat. I wasn’t sure how I would use it when I bought it, but it’s perfect for peg doll hair!

I made a bundle of loops and stitched the bundle on the sewing machine, making several passes to be sure to capture all the strands of yarn. Then I clipped the loops open to make straight hair. I trimmed the peg dolls locks once the hair was glued on the doll’s head.

Bundles of yarn hair, stitched together on the sewing machine, and the loops clipped open to create a wig.

Bundles of yarn hair, stitched together on the sewing machine, and the loops clipped open to create a wig.

The wooden pegs are painted with non-toxic watercolors and sealed with beeswax polish. Then the faces are added using the same markers I used to decorate the wings.

AB28D627-BF21-4A18-B58F-19266848C662.jpeg
BECC0538-63EB-4077-8AF6-A3991DE901F5.jpeg
1A4CAD7E-655B-473D-8ADB-8232AB21F4C7_1_201_a.jpeg

Wait! Who’s this in the fork of the tree? I do believe it’s Puck!

Mischievous Puck!  Putting in an appearance at the last minute!

Mischievous Puck! Putting in an appearance at the last minute!

Bella Luna toys has posted a Summer Peg Doll tutorial by Margaret Bloom on their blog if you’d like to see some other summer fairies and learn more about creating your own summer fairies.

I learned from Bella Luna’s blog post and Margaret Bloom’s Instagram feed* @webloomhere, that June 24th is International Fairy Day. Who knew??

*Margaret Bloom’s IG post was what inspired me to create my own Summer Solstice Fairies. : ) Thanks for the idea!

Notice: This blog is not monetized: I do not use affiliate links. When there are links in a post, they are to give credit to another creative person, because I like or have used a product, or to help the reader easily find supplies for a project.

TAGS: Peg Dolls Summer Solstice Fairies, Peg Dolls, Peg Doll yarn wig


June 10, 2021

Book Review: "Weaving the Rainbow" by George Ella Lyon, illustrated by Stephanie Anderson

by Judy Tucker


DC73658D-A4D0-4472-8F3D-F91AD6249D4E.jpeg

“Weaving the Rainbow” written by George Ella Lyon, illustrated by Stephanie Anderson, and published by Atheneum in 2004 isn’t a new book, but I just discovered it and so wanted to share it. A beautiful children’s book retains its value, no matter when it was published. This book really connected with my fiber art inclinations--both my making Waldorf dolls with their wool hair and my occasional knitting projects.

It’s a great story written for early readers, but also a wonderful read-aloud picture book. It’s a story about a woman who raises a flock of sheep, sheers them herself, and then spins the wool and colors the yarn with natural dyes. Finally she takes her hand-dyed wool and weaves a piece showing the rainbow colors of her pastures and the white sheep grazing on the the grass.

Stephanie Anderson’s fabulous watercolor paintings really make this book sing. I especially love the pictures with the lambs and sheep. You can see some of her sheep on the book’s cover above, but there some I love even more in the story. I also really liked the paintings showing the farmer spinning and dyeing her wool.

If you have (or know) a child who knits, weaves or has Waldorf dolls, this book would be an awesome gift!

95139585-B97F-415F-8584-27FF22D457C8.jpeg

TAGS: Book Review, Picture book about spinning, Picture book about natural dyeing wool and weaving, Book review of "Weaving the Rainbow"


June 3, 2021

Tula Pink's "Lil' Stinker" in my "Dodging the Skunk" quilt

by Judy Tucker


“Dodging the Skunk, Or Skunks and Wild Roses” Lap Quilt  48 1/2 x 57 inches

“Dodging the Skunk, Or Skunks and Wild Roses” Lap Quilt 48 1/2 x 57 inches

“Dodging the Skunk, Or Skunks and Wild Roses” Lap Quilt  48 1/2 x 57 inches

“Dodging the Skunk, Or Skunks and Wild Roses” Lap Quilt 48 1/2 x 57 inches

Whew! I hustled and got my quilt, “Dodging the Skunk” OR “Skunks and Wild Roses” lap quilt done this past weekend. It was a perfect weekend for finishing up quilts…so cold here, that it broke the old record for the low temperature set back in 1917!

There is straight line quilting along the grid lines created by the big blocks. And free motion quilting inside both the skunk blocks and the chaining alternate blocks.

I wasn’t sure how I was going to quilt all that negative space in the alternate blocks, but when I started out on the first one, I realized I could quilt in a circle around the block without needing to stop. I was so delighted to see I had created a wreath of floppy wild roses. What could be better for a skunk quilt??

FloppyWildRoseWreath.jpg

The skunks are outlined in their blocks, and there are swirls quilted around the skunks. Think whatever you will about that!!

SwirlsAroundTheSkunk.jpg

For more info about my quilt pattern, look back at my last post.

I wasn’t sure if I was really going to like this skunky quilt. But now, because of the free motion quilting, I think it’s one of my favorites!

TAGS: Using Tula Pink's "Lil' Stinker" skunk in a quilt design, "Dodging the Skunk!" quilt, Free Motion quilting a flower design, Free motion Quilting


May 27, 2021

Tula Pink's "Lil' Stinker" in my Design "Dodging the Skunk"

by Judy Tucker


EEFE9157-3002-4635-9B7E-05CE5A2989A0.png

Here it is! I’ve come up with a design to use my half yard of Tula Pink’s “Lil’ Stinker” in her Line Work Collection from Free Spirit fabrics, and a fat quarter bundle of her Pom Poms and Tent Stripes.

I wanted a chain for the alternating blocks and this one is fun, especially when I switch the direction of the chain every two rows to create a zig-zag.

The orange color I added is the complement of the turquoise and aqua and is also on the color wheel next to the red orange that Tula Pink favors. The dulled yellow green isn’t my favorite, but it was in my stack of fat quarters so I decided to be brave and use it.

The skunk fussy cut easily at 6 inches square. I tried cutting them at 6 !/2 inches but it meant wasting a lot of fabric and I only had a half yard. 6 inches lets me use almost all the skunks in the fabric. The finished blocks will be 8 inch square. The small squares cut at 2 1/2 inches which is great.

I really wanted another color as my background but white just seemed to play best. If I’d had just the right aqua, I think that would have worked too. But the skunks are printed on a white-white so the white background is really perfect.

I’m looking forward to seeing this quilt come together!

TAGS: Using Tula Pink's "Lil' Stinker" skunk in a quilt design, "Dodging the Skunk!" quilt design, Quilt Design


May 20, 2021

Quilt Project featuring Tula Pink's fabric "Lil' Stinker"

by Judy Tucker


Tula Pink”s “Tent Stripe” and “Lil’ Stinker” by Free Spirit Fabrics

Tula Pink”s “Tent Stripe” and “Lil’ Stinker” by Free Spirit Fabrics

Tula Pink”s “Tent Stripe” and “Lil’ Stinker” by Free Spirit Fabrics

Tula Pink”s “Tent Stripe” and “Lil’ Stinker” by Free Spirit Fabrics

What??? Skunk fabric? Only a dog owner, who’d lived through a number of unfortunate dog-skunk encounters, would even think about making a quilt feature skunks! And only a dog owner would design one! Yes, Tula Pink does have dogs which occasionally photo bomb her Tuesday Tula Talking videos on Facebook.

So far I have 20 skunk blocks cut out of Tula’s “Lil’ Stinker” from her Linework collection from Free Spirit Fabrics and a stack of her cool colors Tent Strip and Pom Pom fat quarters to use in some creative way. Still pondering that one. I know I want to frame the skunk blocks. But I haven’t figured out what I am going to do for the alternate blocks between the skunks.

I’m itching to get started on this project, so I need to decide soon!

Not to worry—I won’t be gifting you this quilt! I’m pretty certain that even some dog lovers wouldn’t want a quilt made with this fabric! Especially those who have had a dog with particularly unfortunate encounter. Been there, done those late night hydrogen peroxide/baking soda/Dawn dish soap baths. Not fun!


May 13, 2021

Sneak Peak at Mary Mayhem's Mystery Quilt "Regatta" Blocks

by Judy Tucker


5974A6F2-9160-4717-BCA4-367E2E5BA723_1_105_c.jpeg

Back in my post on February 11, 2021 I told you that our guild purchased a license from Mary Mayhem so that we could all make her mystery quilt pattern “Regatta.” I know I told you that you wouldn’t see anything until the quilt was done, but it’s happy and colorful, I just couldn’t resist posting a sneak peak.

Shown above are 3 identical strips from one step of the quilt. I sure they won’t be sewn together the way they are in the photo but it does give you an idea about how my various blue backgrounds and my stack of colorful 5 inch squares are coming together.

If you are making this quilt yourself and wondering why my blocks don’t look like yours, it because my sails are facing in the opposite direction. I needed to do that so at the seagulls aren’t flying vertically! Note to self: directional fabrics don’t play well in half square triangle blocks!

My guess is that our guild’s release of the next step in mid-May will be the “big reveal” of the finished quilt pattern. So I’m hoping it won’t be too long before I’ll be able to show the finished quilt.


May 6, 2021

Court House Steps Complementary Tints Color Study Quilt

by Judy Tucker


IMG_0162.JPG
IMG_0162.JPG

Court House Step Complementary Tints Quilt. 40.5 x 48.5 inches (Photo bombed by Waldorf doll Molly Mae)!

Here’s my Court House Steps color study quilt from my previous post.

I’ve done a number of quilts this year which I have quilted by echoing the blocks. It’s easy enough to quilt around the blocks on a small quilt with a walking foot, but I decided to do free motion quilting on this one.

I thought about putting a spiral or a loopy daisy flower in the green center block, both free-motion quilting designs I do a lot. But what else would work well? I took two books by Angela Walters off my shelf to see what inspiration I could find.

I found the four-petal leaf motif in Shape by Shape: Free-motion Quilting with Angela Walters in the chapter on Squares (and Rectangles). It’s Square 7 in the book. I don’t do well with free-motion straight lines and this design requires the quilter to “travel” along the edge of the block to get to the second side of the X. There is nothing precious about this quilt, so I decided to go for it! My traveling lines did improve as I quilted more of the blocks, but none of them are perfect. But you know what? This leaf design has a really organic feel and I like the the fact that all the quilting in that central block is slightly irregular. And I love that you can tell it was sewn by a person and wasn’t a computer driven design.

IMG_0163.jpg

Still puzzled about how to quilt the bars around the central square I took a look at another of Angela Walter’s books, Free-Motion Quilting with Angela Walters. i haven’t looked at the book in years (published 2012) so I was pleasantly surprised to see a has a chapter on quilting Square-in-a-Square and Log Cabin quilts. And most of the log cabin quilts in the chapter have Court House Steps blocks. Perfect! She offered a number of suggestions but then I noticed one quilt with a bar that had a lazy cruved line with an occasional loop. I like loopy lines. And with swirls in Tula Pink’s “Measure Twice” fabric in my border, that struck the right cord. Angela only had an occasional loop in her quilted curve so mine is different because it is mostly loops!

Angela is well known for quilting every square inch in a quilt, but I like to leave open areas to let the quilt puff up a bit after it has been washed. So quilted all the hot pink bars and left the light pin bars open. There is straight line walking foot quilting around each of the Court House Step blocks, so everything really is tacked down adequately!

This was fun. And Molly Mae says she likes it!


TAGS: Courthouse Steps log cabin quilt, Complementary colors--almost!, Free Motion quilting a court house steps quilt


April 29, 2021

Color Study: Complemetary Tints in a Courthouse Steps Quilt Top

by Judy Tucker


Complementary Tints Courthouse Steps Quilt Top

Complementary Tints Courthouse Steps Quilt Top

Complementary Tints Courthouse Steps Quilt Top

Complementary Tints Courthouse Steps Quilt Top

As promised in my last post, here’s what I did with that Courthouse Steps Pattern that wasn’t right for the fox fabric. However, this design is perfect for a color study!

It’s been a long time since my series of 4 color studies. (Click to see the first color study. The next 3 follow with a gap of one post right after the first). But it’s been on my mind to do another color study and I have had this stack of two pinks and the light slightly yellow green in my do-to-queue since last summer.

Red and green are complimentary colors—exactly opposite each other on the color wheel. Pink and light green are tints of red and green so they are compliments. A tint is a hue (color) that has had white added to it. Complimentary colors tend to be visually a bit eye-popping, and this quilt is definitely that!

Fortunately, Tula Pink was thinking along the same color lines when she designed the “Measure Twice” fabric for Free Spirit Fabrics which is my outer border. It’s also the backing for this quilt. Her fabric really helps to make sense of my color choices.

So how does that light baby blue inner border fit into this color scheme? It doesn’t! I auditioned the green and the hot pink as the inner border, but neither made me happy. The light blue fabric was sitting in a stack nearby and I just picked it up, tried it out, and loved it! In this vibrant quilt, that light blue border is the only place the eye can rest! So that’s why I added to the quilt.

The fox and gnome fabrics from my last post are stewing on a back burner. I haven’t figured out how best to use them! They will reappear eventually!

TAGS: Color Study, Tints, Complementary colors--almost!, Courthouse Steps log cabin quilt


April 22, 2021

Using Electric Quilt 8 to Look at Fabrics in a Quilt Design

by Judy Tucker


Fox in the Forest? — I think not!

Fox in the Forest? — I think not!

Fox in the Forest? — I think not!

Fox in the Forest? — I think not!

This new quilt for new quilt I’m planning is totally outside my comfort zone! It’s orange and it has large loud flowers! I don’t know what got into me. I clearly fell down the proverbial rabbit hole looking a fabrics online!

Here are the 3 fabrics I chose: Left to Right

  • “Magic Forest” by Sarah Watts, Cotton + Steel, a division of RJR Fabrics

  • “Front Yard” from Home Sweet Gnome line by Sarah Watts, Cotton + Steel, a division of RJR Fabrics

  • “Enchanted” Kaffe Fassett Collective for Free Spirit Fabrics

IMG_5504.jpg
A75837C4-055B-452F-B664-FD3295F34CAA_1_201_a.jpeg
EDD7B33A-4D67-4ED0-AD12-D0ABD98ABD18.jpeg

I designed the quilt at top in Electric Quilt 8, using a Courthouse Steps version of a Log Cabin block. It’s such a traditional block, that I really can’t say that I actually did any designing.

The most challenging part of the design was importing the fabrics into EQ8. I hadn’t imported any fabrics for a long time and so I was basically starting from scratch. First I imported my fabric photos into the Image Worktable of the project I was working on. The photos come in HUGE— at the width of yardage. So each fabric photo needs to be “scaled” to match the actual fabric design using the icon in the Edit Options Box. Finally the fabric can be added to the fabric library for the quilt worktable you are working on by using the “Add as fabric” icon in the Worktable Tools Box located just below the Edit Options Box (NOT just clicking the add to sketchbook icon in the left margin). Once I understood the process and the sequence, it was easy to do. But it took me a while to figure out how to do that.

Inputting the fabric was definitely worth doing. The fabrics lined up next to each other look like they play very well together. in real life, they look like thy are light/medium/dark and should have ample contrast. But once I added the fabrics to my quilt design, I’m really not seeing that contrast. The quilt just look muddy. This is clearly not the right pattern for these three fabrics.

Here’s what the quilt design looked like with using colors/fabrics build into EQ8. This design really dances using fabrics with better contrast.

OppositeCourthouseStepsQuiltDesign.jpg

The good news is, I do have another fabric collection that will work with this courthouse steps pattern.

As to the fox/flower/gnome fabrics, I need to add some more colors to that set to give more contrast. I’m currently thinking it might be a good improv quilt….maybe with some portholes. Time will tell.

While I’m mulling that over, I’m going to go cut out the other fabric I’m using for this pattern.

TAGS: Courthouse Steps log cabin quilt, Fox fabric, Gnome fabric, Designing a Quilt using Electric Quilt 8


  • Newer
  • Older

Powered by Squarespace 7